Window trim removal Author:
Jordan Sarette
» Tools:
1. Flathead screwdriver (6-8in or so)
2. Phillips head screwdriver (6-8in or so)
3. Needle nose pliers
4. Socket set, various
» Procedure:
This entire process is pretty simple overall. If you exercise
care and restraint you will be able to remove the trim without
damaging it. If you are forceful, and try to just tear it off you
will bend it beyond repair. The trim is a very soft aluminum. It
bends and cracks easily. This write-up is focused on 2 door e30's
(both pop-out and fixed rear side windows) and offers no direct
information on 4 door e30's although most of it can be applied with
some common sense.
Trim diagram: (click to enlarge)
1.) First thing you are going to want to do is make sure
the car is clean and dry. Go ahead and take care of that before you
start.
Removed both side mirrors from the car. Inside the car on the
other side of the mirrors you will either have blank sill plates, or
tweeter pods. Both pry off. Be careful not to damage the plastic
tabs that hold them in.
Disconnect the mirror from the door harness. Its a small 4 pin
black connector. Should be in plain sight once the sail
panel/tweeter pod is removed.
Loosen and remove both 8mm bolts that hold the mirror to the
vehicle. Hold the mirror while you do this so it doesn't fall to the
ground and damage the paint. Feed the connector through the hole and
set the mirror aside. Repeat for the other side of the vehicle.
2.) Now focus on the b-pillar area inside the car (the G
area) At the top of the b-pillar is a small coat hook. This sucker
is completely useless, and a bitch to remove. Loosen and remove the
Phillips screw. Grab a hold of the hood and pull it out. Rest
assured it does remove in this manner, its just stubborn.
Remove the cover on the seat belt pivot to reveal the 17mm bolt.
Loosen and remove the 17mm bolt. Lay the seat belt down on the
floor.
Remove the small quarter sized plug on the b-pillar. Look inside
and you will see a 8mm nut. If you look inside the coat hanger hole
you will see the same 8mm nut. Loosen and remove them both. Be
careful not to drop them. At this point it is helpful to have an
assistant outside the car to hold the window so it does not fall
onto the ground. While nice, it is not entirely necessary if your
car is parked on level ground. Gravity should work to keep it in
place.
If you have pop-out rear side glass remove the black cover of the
pivot latch on the c-pillar. Loosen and remove the 2 Phillips
screws. The window is now free to remove.
if you have fixed rear side glass use a small flathead to slowly
work the inner gasket free of the body. This is hard to describe,
but you should understand if you look/poke at it.
3.) Now its time to start removing the actual trim.
Start by sliding B towards the front of the car, until it is all
the way onto A.
Pry up A down by where the side mirror would be. Us a flathead
and cloth if your fingers aren't working for you. Pry it all the way
up the a-pillar and lift it off the rain gutter on the roof.
Trim C is actually attached to the painted vent cover on the
c-pillar. They must be removed as one. Pull on the painted cover and
rock it back and forth. You WILL destroy the clips that hold the
cover to the body. Be prepared to replace them.
The part number for these clips is: 51 13 1 870 459 (you will
need 6 total)
Estimated cost each is: $0.95 USD
Now separate C from the painted part it is attached to. It is
held on by several black clips. Its VERY hard to remove them without
destroying them. Remove the foam on the back side to reveal the clip
base. Drill or cut out the base of each clip until they release. I
*think* 5 will be required per side. Make your own observation on
this and order accordingly.
The part number for these clips is: 51 13 1 884 467
Estimated cost each is: $0.55 USD
Trim E is one of the easiest to remove. Use a flathead and a
cloth to pry it straight up off the door. Once it is off remove any
clips that stayed on the door and place them back on part E. Remove
the rubber window seal from trim E.
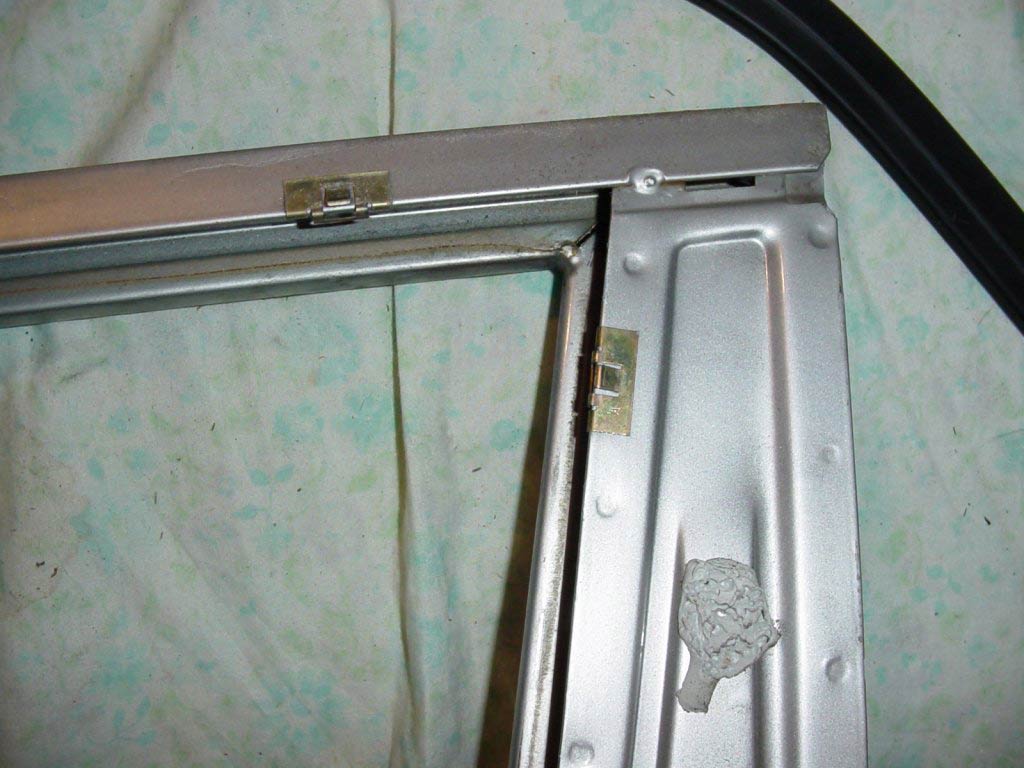
Trim D is a bit less intuitive. The clips are hidden. Roll the
window down and remove the fuzzy inner window gasket (the channel
the window slides in) Look inside the void created where the fuzzy
inner gasket was. You will see many small clips. Each one with have
a rectangular tab sticking out. Push the tab away from the trim with
a flathead and it will release the trim. Repeat as many times as
needed until the trim comes off.

You are bound to break several of
these clips. I know I did. I stole some spares off a junkyard car,
but if you want to order new ones...
The part number for these clips is: 51 32 1 874 017
Estimated cost each is: ?
Trim F is held on with the same clips as trim D. They are also
located in the void where the fuzzy inner gasket was. Use the same
technique to remove them.
Repeat all the above for the opposite side. One would assume you
are taking it off to paint them. So go find a write-up for that ;)