Tucking the E30 84-88 Aluminum Bumpers Author:
Josh Anderson
» Tools::
-
10mm allen wrench (88-on shorter bumpers)
-
19mm socket (84-88 longer bumpers)
-
1 big piece of cardboard (broken down fridge or large appliance
box)
-
10mm socket
-
Socket wrench
-
Power drill and several small size bits
-
2 small screws (1/2 to 1 inch long should do – optional)
-
Bench mounted vice
-
1 can of PB Blaster (available at most hardware stores)
-
Clothes you don’t mind getting dirty
-
Protective goggles
» Procedure::
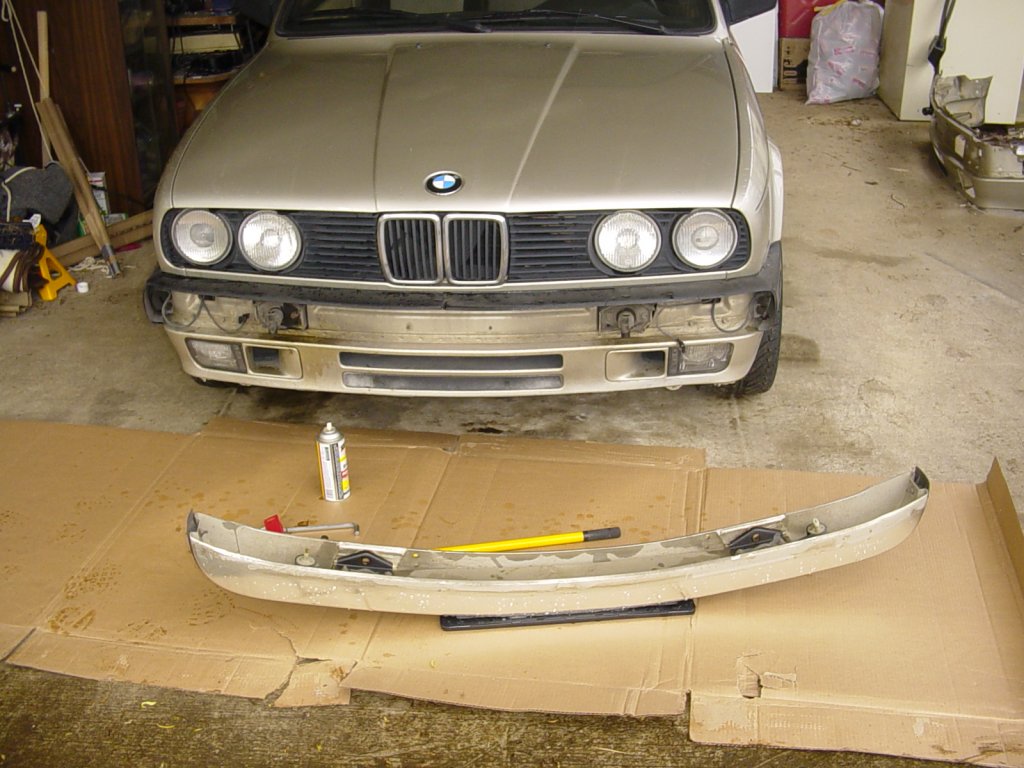
If you have an 84-88 BMW E30, chances are good you have the big
US-Spec aluminum bumpers, affectionately referred to as “diving
boards”. Now while we would almost all like to have the later style
plastic bumpers, sometimes it just isn’t possible. They are
expensive, and if you have an 84-87 body, the rear bumper requires a
lot of modification to fit. But there is hope! In about an hour, you
can push in or “tuck” your aluminum bumpers.
The method described here was done on a 1988 E30 with the
shorter-style aluminum bumpers, but it should be pretty much the
same procedure on and diving board equipped car. This method will
also involve removing the front bumper from the car, which makes
things much easier. Most people will tell you that you can do it
with them on the car, but you risk spraying oil all over your car,
and in order to compress the shocks, you would have to drive your
car up against a wall and push them in. While you will be doing this
for the rear bumper, who wants to do it twice?
A big thanks to Jordan Sarette, who did most of the work during this
procedure!
After finding a dry spot with plenty of room to move around and make
a mess, prepare your tools and materials.
1. Get on your back under the front bumper of the car. Look straight
up, and there will be a hole on the underside of the metal part of
the bumper about six inches in from each side. In these holes, are
the 2 large bolts that hold the bumper on the car. These are most
likely going to be stuck on pretty well, having never been touched
in 12 years. Get your can of PB Blaster, and spray them down, being
sure to coat the entire head of the bolt where it meets the hole.
You probably want to let this stuff sit for at least a few hours. We
left it overnight.
2.
Get your 10mm allen wrench or 19mm socket, and remove the two large
bolts. Make sure when you do the second one that you are not under
the bumper! When the bumper is loose, pull it out just a little bit
until you see the wires connecting to the turn signals. Disconnect
these, and set the bumper aside. Now you can get to the shocks
clearly. They are located directly below your hi-beams.
3. Get your 10mm socket and a socket wrench and undo the two bolts
on each side of the bumper shocks. After undoing these bolts, the
shocks will simply pull right out from the front valence.
4. Secure the shock in the vice, and get your drill. You will be
drilling a small hole through each of the shocks. Put your piece of
cardboard down on the ground under your workbench, and cover
anything you don’t want getting soaked in oil.
You
will most likely need the protective goggles at this point. Most
bumper shocks are filled with oil, and when you drill your holes
through them, the oil will spray out quite forcefully. Luckily, my
front shocks were filled with some kind of oily foam that just flew
everywhere. Have extra drill bits handy, we broke a couple in the
process of drilling. Keep at it, they take a little work to get
through.
5.
After drilling the holes to release the pressure in the shocks,
place the shock in the vice lengthwise. Then start turning the clamp
SLOWLY, to compress the shock. Oil may continue to spray out, so be
careful. Continue to compress the shock until the part where the
bolt goes through is all the way down against the top of the flange.
After compressing the shocks, they should look like this. The one on
the top is the compressed shock.
OPTIONAL STEP:
After compressing the shocks, put them back in the vice widthwise
and drill one hole all the way into the shock, not all the through.
Put a screw slightly bigger than the drilled hole in the hole, and
tighten down. This is to keep the shock from extending back out.
This is optional because it takes a fairly good amount of force to
compress them, and they probably won’t come back out.
6. After you have compressed the shocks, get your 10mm socket and
wrench and put the shocks back into the front of the car. The shock
flanges have room in their spaces to move up and down about ¼ of an
inch, so be sure that the shocks sit at the same height on each
side, or else your bumper will sit crooked. Replace the 10mm bolts
and tighten them down good and hard.
7. Have someone hold the bumper for you while you reconnect the turn
signal wires. Make sure they are seated all the way, then place the
bumper back on the car, making sure that the holes on the underside
of the bumper line up with the holes for the bolts on the front of
the shocks. Replace the bolts and tighten them down good and hard.
You are done with the front bumper!
8. Now on to the rear bumper. This one is very easy. Grab your
drill, goggles, and cardboard. Place the cardboard on the ground
under the car, get on your back under the bumper, and look straight
up. You should be able to see the shocks clearly on each side. Make
sure your goggles are on good and tight, and drill those suckers!
Once again, BE CAREFUL!
9. To compress the rear bumper, bring a friend and go find yourself
a big, solid brick wall, like the back of a Safeway or something.
Back your car straight up to wall, and have your friend guide you to
about 6 inches from the wall. Put the car in reverse, and give it a
little gas. Don’t romp your car into the wall, just enough so you
bump up against it. Have your friend get out of the way, because
more oil is going to spray out of the shocks. Once you feel the
bumper is pushed in all the way, get out and take a look to see that
the rear is even on each end, and you’re done!