
Originally posted by mitchlevy7
View Post
-
Can you explain the process you used? I have to remove the cams from my s52 this weekend, and I am super paranoid about breaking them. -
Originally posted by nyChris View Post
yea sure. the first time i did it i had the supervision of a BMW tech. but now ive done it like 5 times. i do it at TDC, theres always going to be one pair of valves open on both sides. At TDC its usually cylinder 3 or 4. Once all the timing chain stuff is off, start from the middle. then, go diagonal to the ends. ONLY DO A QUARTER TURN AT A TIME. from the ends, go back to the middle diagonally and do the ones you havent done. work your way to the other side. Keep doing this slowly, quarter turns only. some will become finger loose, but dont turn them more then a quarter turn. Once it starts to lift, pay attention to how much gap there is between the cap and the cam tray, try to keep them about equal. The goal is to just gradually lift the whole cam. Be careful about dropping the nuts and taking the nuts off at the last turn when there is tension on them, sometimes they will pop off. Installation is the reverse of removal. i believe the torque spec is 19ft lbs. Make sure you clean all mating surfaces. The caps are labeled too.
I ALWAYS try to keep track of the lifters and cam trays. I have 24 bags with labeled with E or I 1-12. In german, intake starts with an E and exhaust starts with an A. This makes it a little confusing because you would think E is exhaust. Especially when theres some mileage on the cams it helps to use the same lifters and trays.
Another trick i learned, if the engine is on the stand, you can put all the lifters in the tray, and tilt the motor so that when you flip the tray over, all the lifters wont fall out, otherwise, its a pain to get all the lifters lined up, as they can only be inserted through the bottom of the tray.
OR get on the waiting list for the 1600 dollar tool from germany that holds the cam down.
Comment
-
I wish! That tool would make things a hell of a lot easier. I've read a a few DIYs, but I haven't seen that method of loosening the bolts mentioned before. I think I like your approach best.Originally posted by mitchlevy7 View PostComment
-
Finally have some progress AND pictures. Went into work and didn't have any cars to work on, so I worked on this project.
First I painted the block and cleared it.
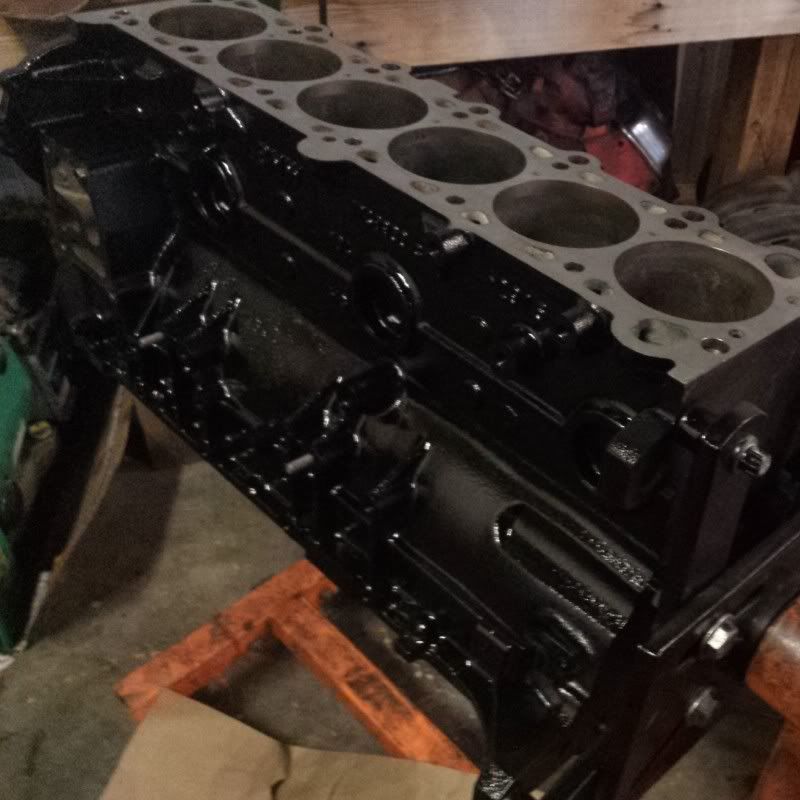
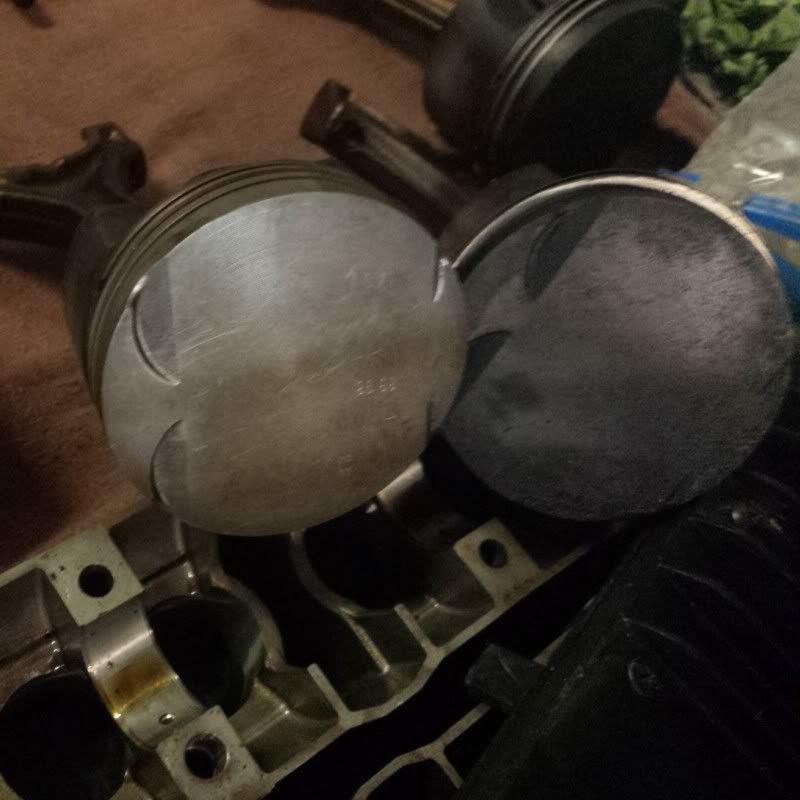
Then I chased all the threads on the block including the the ones for the headstuds. Then i cleaned all the pistons in the parts washer and then got all the carbon off the tops. They were pretty dirty.
Then I honed the cylinders and they came out great. I checked the gap on the piston rings and they were all good. I installed those. The pistons are ready to go in. I was able to clean the block really well before I left and wrap it so it is all ready to build next time I have a chance to work on it. I have all the old bolts ready to plastigage it, and all new rod and main bearing bolts for assembly
I'm very excited to put this thing together. I need to order stuff, but I have been focused on finishing up the semester and not had work. Gonna get the rest of the things I need for the engine, and the fuel pump and a few other things. Also going to start taking my harness apart to wire it into the P8 pro and switching the C101 to my new harness.
Goal is starting it up mid january. Were gonna break in the engine and clutch on the dyno =]Comment
-
Your off to a good start. I would recommend spraying all of the headgasket layers and mating surfaces with copper spray.Need a Turbo manifold? We have them in stock- Click here---> http://rapidspoolindustries.com/
____________________________
E-mail Panayiotisx2@gmail.com
Dyno vid http://www.youtube.com/watch?v=C7aM7..._order&list=ULComment
-

Progress!!!
I almost finished the rotating assembaly. I fucked up using the ring compressor on cylinder 3 and broke the middle ring. Ordered a new set which will be here tomorrow morning (yay worldpac)
Also rebuilding my rx7 calipers today and hopefully ill start on the head so I can get it on tomorrow.
Sent from my SAMSUNG-SGH-I337 using TapatalkComment
-
More progress and news from yesterday. When taking apart the second rx7 caliper for rebuilt the bolts were rusted in and they broke. Too much of the bolt broke in it to drill out. Fortunatley, my coworkers hookup is getting me a reman one for 50 bucks.
Piston rings were replaced and piston 3 was installed. Happy to see a full rotating assembly.
Finished the valve seals and cleaning the valves. The valve keepers are such a pain in the ass. Fortunatley, I got a system going with a magnetic pick.

Dirty vs clean. Used a bench grinder with wire wheel. Also cleaned the combustion areas real well.
When I took out the old headers a bunch of the exhaust studs came out too. So I spent my last few hours removing the old ones and installing all new ones. Im a little more then halfway but the shop closed early for new years.
Goals for the end of the week:
Order the last few parts for the motor
Install arps, headgasket and head
Start cleaning up the bay and get the car movable (idk what I was thinking but it only has 1 tie rod hooked up, other one is just sitting)
Take more pictures.
Oh. And I talked to my old boss sunday and I may have scored a dream internship for next summer. Cant say any more right now.
Sent from my SAMSUNG-SGH-I337 using TapatalkComment
-
More progress. Started the day finishing up the exhaust studs.

Originally I was going to get the oil pump kit with the wire from rallyroad, but why do that when I can tack it myself. I accidentally tacked the nut to the sproket, but then did the nut to the shaft.

Installed the oil pump, chain, baffle thing, and timing cover. I had the timing cover tight and then had to take it off becuase it bound the chain between it and the oil pump. Finally, I installed the arps. I loctited them in as I hope ill never have to take them out. Installed the mls gasket with copper spray. I forgot how much damn torque 85ft lbs is.

Sent from my SAMSUNG-SGH-I337 using TapatalkComment
-
Awesome, man, looking good! Any further word on the internship?‘Tis by the grace of God that my cars run!Originally posted by LJ851
Siobhan's Build Thread - UPDATED!Originally posted by unloadedak

Comment
-
Did you end up keeping the alloy block or going with the iron one?Comment
-
All this is on the iron block. I still have the alloy block. Trying to sell it though.
Ill have to follow up with someone on the internship before I can really say much about it until I know I have it.
Sent from my SAMSUNG-SGH-I337 using TapatalkComment
-
Why did you end up going with the iron block over the alloy one?
Jonesing for updates!‘Tis by the grace of God that my cars run!Originally posted by LJ851
Siobhan's Build Thread - UPDATED!Originally posted by unloadedak
Comment
-
I went iron becuase the aluminum doesnt hold headstuds as well. Also they have steel liners in them. I havent read any turbo builds with with the alloy block, so I wanted to stick with a more tried and true setup.
Also, I got a full iron block m52 for $280 and the rebuild didnt need any major parts. I was able to start dissasebling that while using my alloy block to get around.
Sent from my SAMSUNG-SGH-I337 using TapatalkComment
-
didnt go in yesterday because i felt sick. i blame it on the weather.
BUT TODAY it was really hard to get motivated. I was tired and the shop was 40 degrees even with the heat on.
My wiper motor in the car kept blowing fuses. Even with a new fuse the motor started smoking with the wipers free. I had an extra laying around so i installed it. WHAT A BITCH! couldnt test it because the car isnt together but it looked to be in much better shape. I hope to never have to do that with the motor in.
My throttle body was REALLY rusty, well the steel parts were. I took off most of the linkage that I could, wire wheeled the rust off, painted it and reinstalled it. I also changed the throttle body gasket and the intake manifold gaskets. Feels good putting in new gaskets. Old ones looked good, but I know the more I cover my bases now, the less likely ill have to spend weeks investigating leaks later.
I started putting the cams in. I let the lifters soak in oil to clean em up a bit and made sure the cam tray was clean. Keep in mind I had 24 bags, each with one lifter. I wanted to make sure they go in the same spot because they were used.
I also cleaned and painted the harmonic balancer, installed it and torqued to spec.
I got to lifter 5 intake and it didnt fit in the cam tray. I thought all the e36 lifters were the same but i guess there not. So, I had to take the intake cam off my old motor and what do you know, there was one lifter that was too small. I switched them, no harm done. However, if you have ever installed cams on these motors, its a bitch. quarter turn at a time, 16 nuts.... I had to remove one cam, reinstall it, then install 2 cams.
PROTIP- if your installing or removing the cam tray while the motor is on a stand, tilt the motor almost sideways, and you can install the cam tray without any lifters falling out.
I am currently working on the C101 side of my harness. I cut the c101 off my already adapted harness so it should be too bad. Next I gotta finish my conversion to the DTA ecu in excel and start changing up the harness.Comment
-
Keep up the good work, man! Closer and closer!‘Tis by the grace of God that my cars run!Originally posted by LJ851
Siobhan's Build Thread - UPDATED!Originally posted by unloadedak
Comment


Comment