Announcement

Collapse
No announcement yet.

Front to rear battery conversion.

Collapse
X
 
  • Filter
  • Time
  • Show
Clear All
new posts

    Front to rear battery conversion.

    I'm doing a m30 and to free up some space I want to move the battery from the front battery tray to the rear. My question is what all do I need? I think it's just a long cable to get power from the battery to front of car and then a ground cable am I right?

    Thanks-


    1989 325is l 1984 euro 320i l 1970 2002 Racecar
    1991 318i 4dr slick top


    Euro spec 320i/Alpina B6 3.5 project(the never ending saga)
    Vintage race car revival (2002 content)
    Mtech 2 turbo restoration
    Brilliantrot slick top "build"

    #2
    Yep. Best/cheap way (or so I hear) is to get a cable from a 6cyl car at a junkyard. Buying 12ish feet of 00 gauge wire from a store will be expensive as FUCK.

    Comment


      #3
      Originally posted by jalopi View Post
      Yep. Best/cheap way (or so I hear) is to get a cable from a 6cyl car at a junkyard. Buying 12ish feet of 00 gauge wire from a store will be expensive as FUCK.

      Would the e36 cables work?


      1989 325is l 1984 euro 320i l 1970 2002 Racecar
      1991 318i 4dr slick top


      Euro spec 320i/Alpina B6 3.5 project(the never ending saga)
      Vintage race car revival (2002 content)
      Mtech 2 turbo restoration
      Brilliantrot slick top "build"

      Comment


        #4
        Hmm... well, they're probably OK, maybe a little too short or a little too long. Regardless, I'm sure you'll be able to figure it out

        Comment


          #5
          Put in the WTB section. I remember selling a kit on here from a wrecked parts car for ~$40 shipped.

          Comment


            #6
            Eric (Cabriolet on the boards) has done the front battery (from his Mtech II vert) to the rear location. He used a standard coupe or sedan battery cable that goes from the rear to the front location. One of the things he mentioned is that the standard e30 cables were about a foot and a half too short and he had to use one of those large crimp splices to connect the extra wire (4 gauge , maybe 2 gauge wire) to make it all the way up front.


            When asked what was a better alternative he told me that the battery wiring from an e34 or e38 (ferget which one) is longer and will make the run with no issues.

            That is what you need to rip out of a donor vehicle. PM him and I am sure he will point you in the right direction. Please post up here which vehicle it is so that I can "refresh" my memory of this cause I will be doing the same conversion at some point.

            Comment


              #7
              E34 batteries are under the rear seat, E39's have them in the right rear corner of the trunk

              Closing SOON!
              "LAST CHANCE FOR G.A.S." DEAL IS ON NOW

              Luke AT germanaudiospecialties DOT com or text 425-761-6450, or for quickest answers, call me at the shop 360-669-0398

              Thanks for 10 years of fun!

              Comment


                #8
                I did this to my 85. Just grab the parts off a donor car in a junk yard. My cable was $6.95 which in copper alone is worth about $30.
                Si vis pacem, para bellum.

                New Hawtness: 1995 540i/6 Claptrap
                Defunct too: Cirrusblau m30 Project
                Defunct (sold): Alta Vista

                79 Bronco SHTF Build

                Comment


                  #9
                  All you really need that makes things easy is the battery tray from a car with the rear battery. The mount is there in the boot already if you have a series II car, the cables and stuff you can do yourself if you don't end up grabbing them from a donor car.

                  You don't need to run 2 cables the full length of the car. If anything, actually running both a positive and a negative that distance will introduce more voltage drop, so you'll end up with lower battery output than if you didn't run two cables.

                  I always end up making my own cables, I ran mine down the RHD side as there is enough space in the loom and sill here for what looks like where the battery cables would have run if it was placed in the boot.

                  I used about 5M (16 feet?) of 2B&S cable (which is 2AWG over there), which has a constant load rating of over 250amps. 0 or 00 is way overkill, 2B&S is probably too big too to be honest, 3B&S would still provide over 200 amps continuous, but it was cheap enough to go a little oversized (less than $10 per metre). The current ratings on cable usually has a continuous and a peak rating, so the continuous rating far exceeds anything you are going to run through the car's electrical system, even if you hold the starter cranking for a number of minutes.

                  If you want to avoid using a terminal block somewhere in the engine bay, easiest way is to attach one end of the positive cable to the big terminal on the starter and use the terminal as a big distribution block.

                  There are 3 positive sources you need to connect to get everything working properly.
                  1. Runs from the fuse box. Supplies everything external.
                  2. Runs from the battery
                  3. Runs from the alternator to provide charge.

                  If connect all 3 of these cables to the starter terminal (there is enough room), you'll have all your positive sources accounted for. I honestly cannot remember if I had to make a new cable up for the alternator (it's dark outside so I can't check, but its easy enough anyway, it only needs to output at maximum the 80-100 amps an alternator is going to output), but I know I could reuse the fuse box one as it originally ran across to the other side of the engine bay and heaps of length. I just cut the original terminal off the end and crimped on a new larger ring to fit over the battery terminal.

                  With the positives accounted for, you can leave the earth point in the engine bay as standard and just remove the negative battery terminal. Anything connected to the negative terminal can just be ground on the same post on the strut tower.

                  With the positive cable run to the back of the car, all you need to do is run the negative battery terminal to a good ground in the boot (trunk) area. I never have any problems using shock mount area for this, especially if you use a reinforcement plate. Just use a wire or flap wheel on a grinder to make sure the metal surface is nice and fresh, free from body sealer or paint. Provides a good ground source, but honestly, anywhere offering a nice solid point in the chassis is good enough.

                  I just ran both cables up and over the rear inner guard (fender) so you can place all the covers back in place. The negative terminal can then pop out at the top past the boot (trunk) hinge near the shock mount. From memory the cable was 1.2m, so 4 feet would give you more than enough length to play with. The positive cable can pop out at the same place and run down the back side of the guard as the original cable looks to have run through a small hole in the bottom right corner of the sheet metal in the boot (trunk). It pops through and runs out under the seat near where the fuel filler tube is, runs under the tube and down the sill where there is enough space for it to tuck under the sill with the loom and run all the way to the front of the firewall and out the hole for the AC lines. You can pretty much pass it through anywhere, but I just ran it through here and along the engine bay where the rest of the loom already runs.

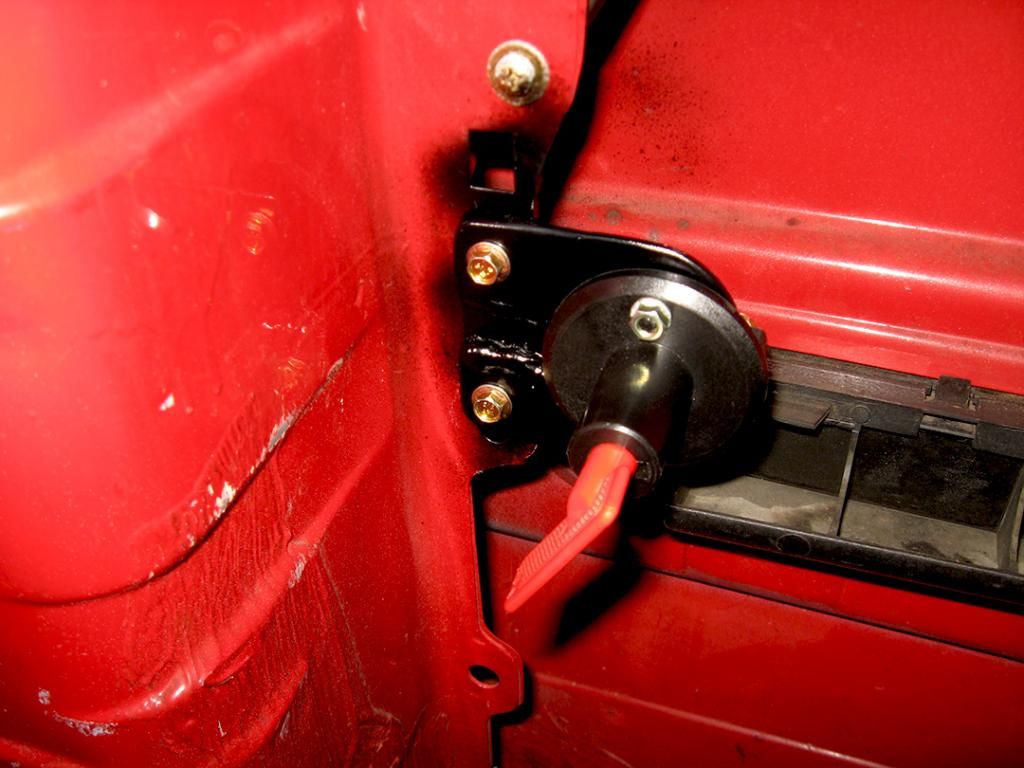
                  Only thing I added with mine is an isolation switch as it's required for track use here. I'll have to look for the rest of the photos and edit the post. Something weird going on with photos being out of series.

                  Easy to make your own new cables. I guess it's different here as we don't have so many cars available at wrecking yards/recyclers. Would end up cheaper to make my own cables than to buy them from a bmw wrecker.

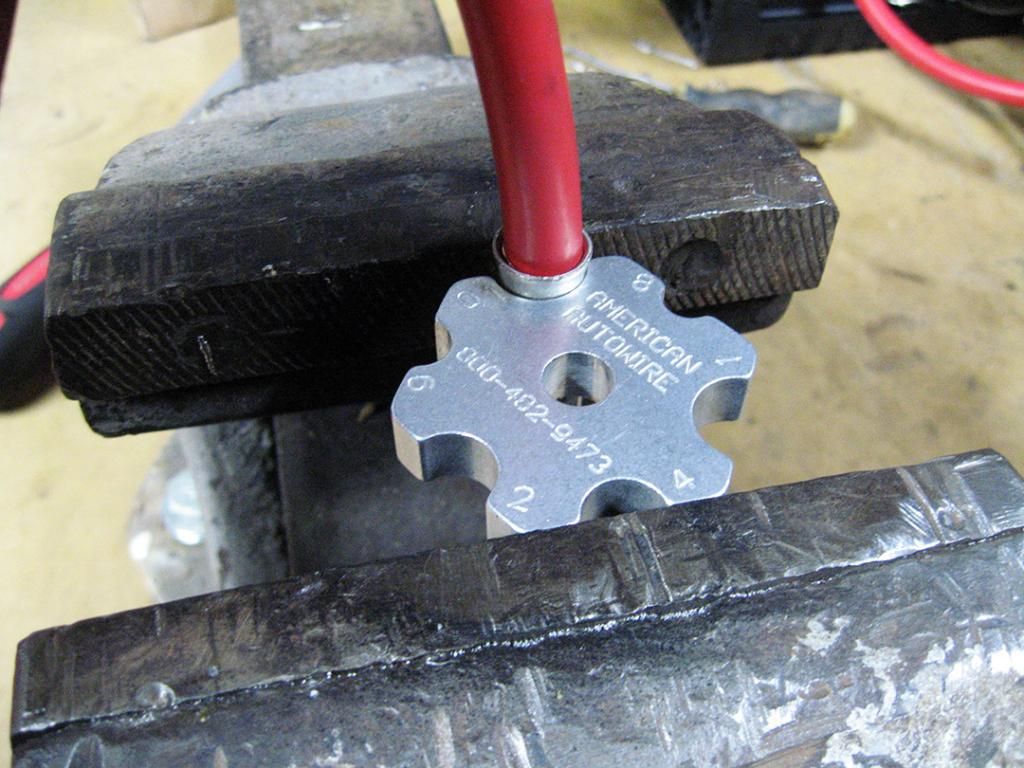
                  Strip the insulation and place the cable inside the crimping tool in the vice (note, see second photo below before crimping). The tool is awesome and super cheap way of crimping the big cable lugs. Less than 1/10th the cost of a pair of bit ratchet crimping pliers, with the end result (especially if you do them properly with solder) is every bit as good.


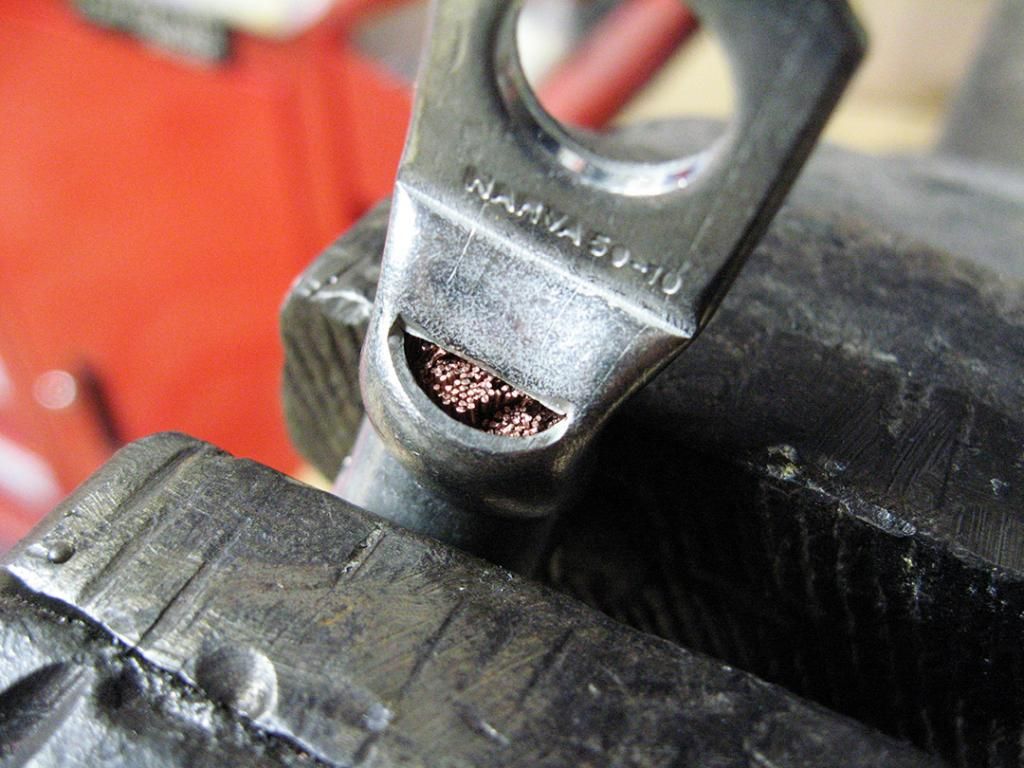
                  Just make sure that the strands of the cable reach the end of the cable lugs. If not you need to strip more insulation back so they reach the end.


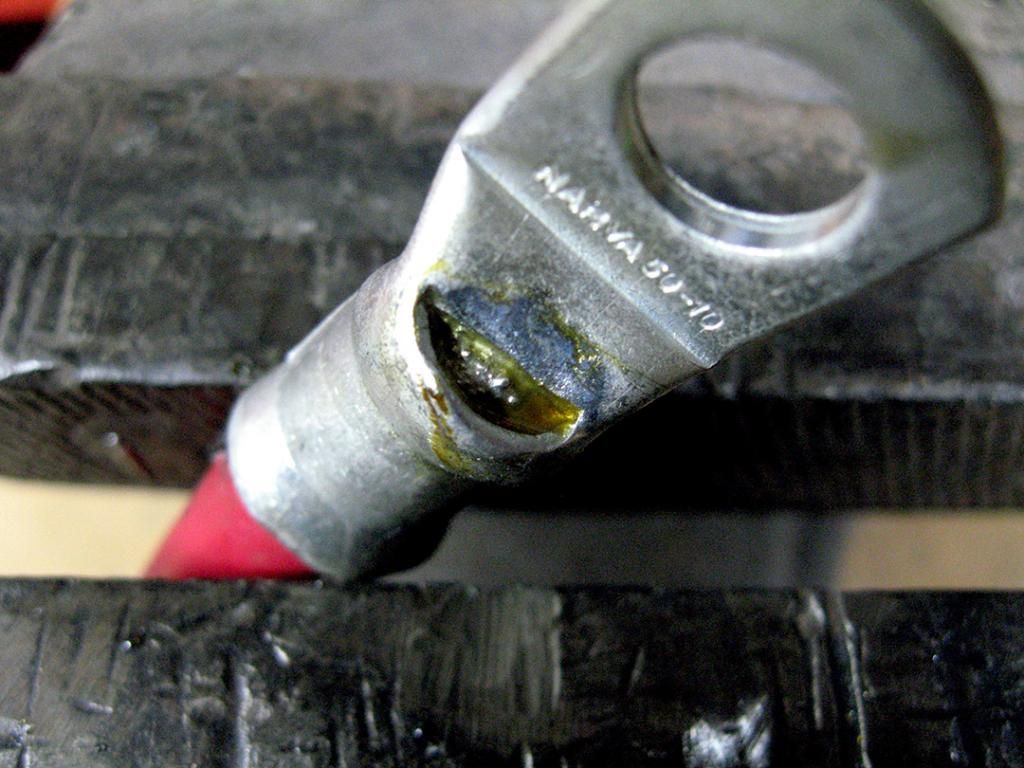
                  I use a blow torch and some high tin solder for the next step. Simple case of mounting the lug in the vice and heating around the end (away from the cable) with the torch. When you get it hot enough, just feed the solder down through the hole in the lug and into the cable.


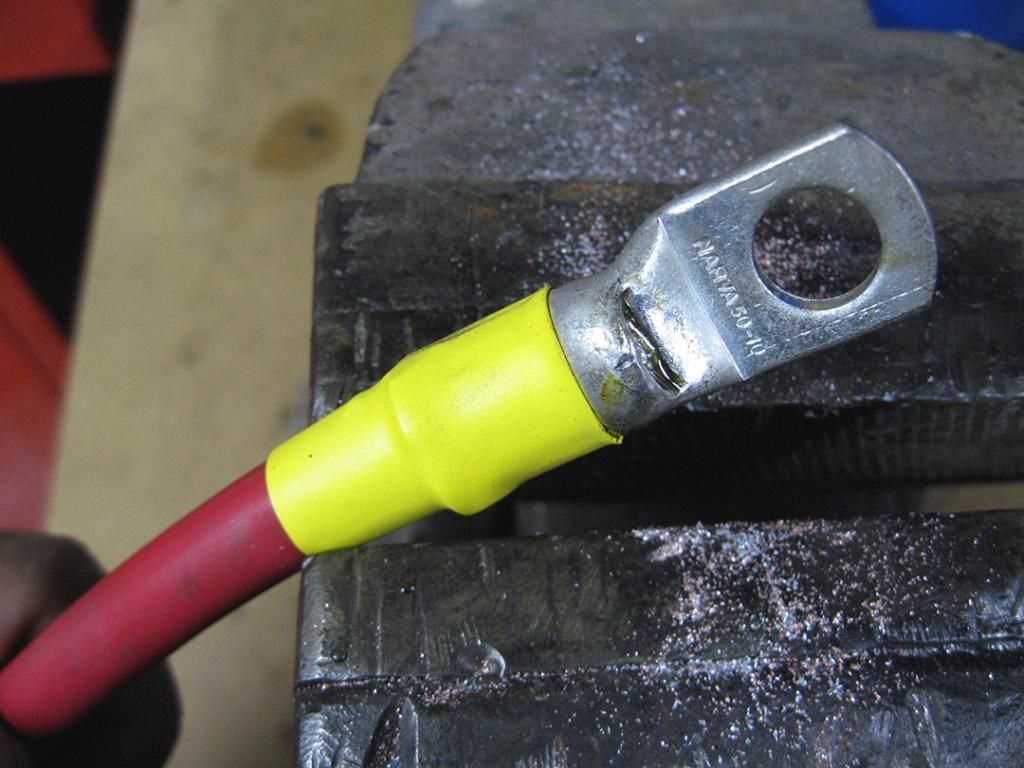
                  Next step is just to cover the crimped end with some heat shrink to insulate and seal it in and make it all nice and neat.


                  Here is where I positioned the isolation switch. High up above the battery in the boot.


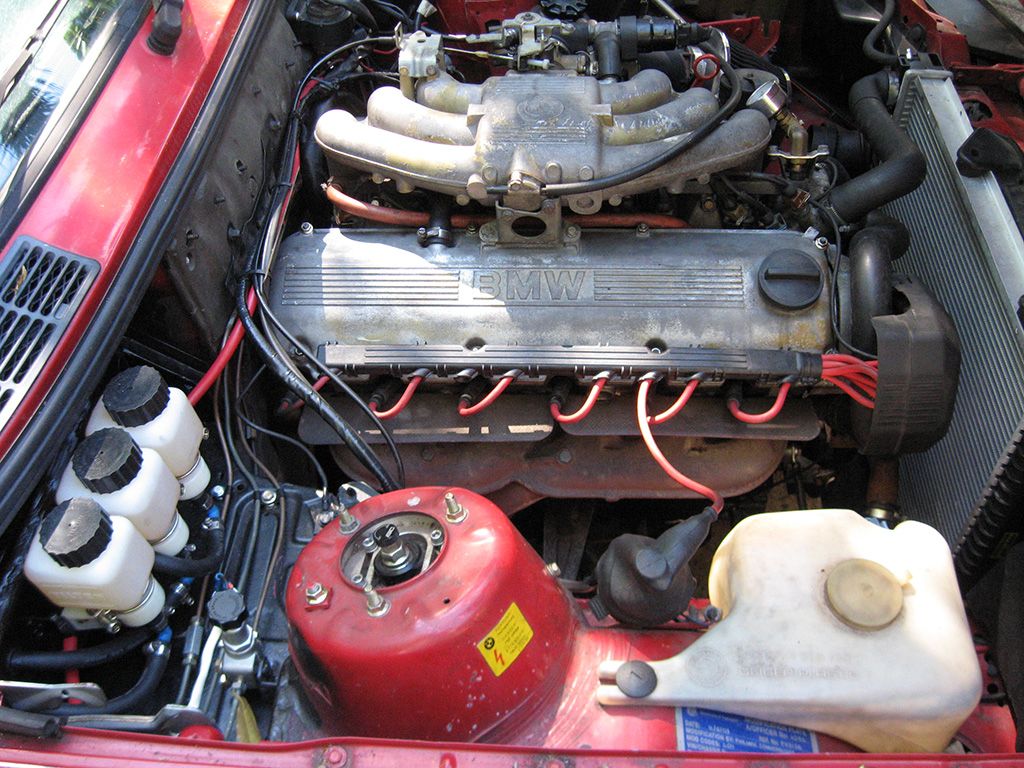
                  You can see where I ran the cable inside the engine bay here.


                  Ill search for the photos of running the cable along the sill and the negative cable setup I used in the boot. If you check the cable for voltage drop, should be 0.02v or less.
                  Last edited by Madhatter; 05-10-2014, 02:05 AM.
                  Just a little project im working on
                  - http://www.lse30.com -

                  Comment


                    #10
                    Alright thanks for the info guys


                    1989 325is l 1984 euro 320i l 1970 2002 Racecar
                    1991 318i 4dr slick top


                    Euro spec 320i/Alpina B6 3.5 project(the never ending saga)
                    Vintage race car revival (2002 content)
                    Mtech 2 turbo restoration
                    Brilliantrot slick top "build"

                    Comment

                    Working...
                    X