Announcement

Collapse
No announcement yet.

While You're In There... CA BAR Certified S52 OBD2 Swap

Collapse
X
 
  • Filter
  • Time
  • Show
Clear All
new posts

    #16
    I thought Pixar was East bay right behind Ikea? My sister worked there for a few years.
    My buddy (mr2peak) and I are both North Bay guys. He has a m50 swapped early model black car, and I have a raty old '84 325e I want to do an m50 swap in some time soon.
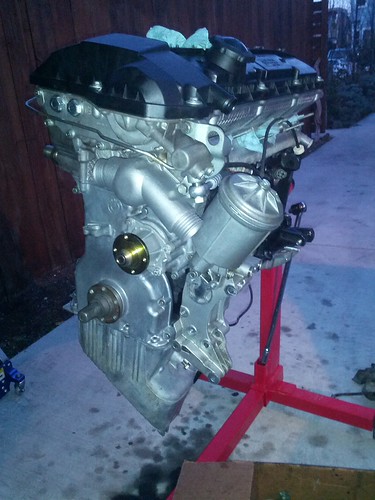
    Youl love the s52. So much fun!
    sigpic
    "The bitterness of poor quality remains long after the sweetness of low price is forgotten."

    Comment


      #17
      It is! I'm like a mile away from there.

      Do you guys go to any bay area meets?
      Might be going to the 02 swap next month (I don't own an 02 but would love to one day).
      I'd love to see some other swap cars for ideas and inspiration.
      Project
      Feedback

      Comment


        #18
        Jeez time flies.
        Got crazy with work and next thing I know months have gone by without any updates!

        Just now getting back into the the project.
        Got the motor torn down last weekend so I could finally get a good look at the cylinder walls.

        Luckily they all look fine!


        This cylinder contained a bunch of shavings from a timesert installation done after the motor was pulled. One of the 2 reasons for pulling the head.

        Should I be concerned that the piston and valves in that cylinder look a bit steam cleaned? There doesn't seem to be any evidence of a cylinder head gasket failure. Oil looked clean when I drained it as did the coolant passages.

        With the relatively low mileage and good condition of all the bores I'm going to draw the line at rebuilding the head. Was seriously considering going all out and replacing all the bearings etc. but the project is already way over budget (aren't they all!) and I'm getting anxious to get the car back on the road.

        Here's a pic of the combustion chamber where the spark plug broke. It's hard to see but you can tell where the metal bit bounced around a bit. No idea how it managed to not scratch the bore!


        Also grabbed a couple of the last pieces needed to start putting all together, namely the clutch and e34 oil pan. The clutch looks in great condition, was considering replacing the disk but may just run it as is.


        And lastly a pic of the torn down motor. Just about ready for cleaning masking and paint.


        Next up is taking the head to rebello racing for a head check and three angle valve job.
        Project
        Feedback

        Comment


          #19
          Took a closer look at the bottom end and noticed one of the pistons had made contact with something hard:


          There's goes my plan of rebuilding the head only!

          Block on the way to the shop.


          Presto chango, good as new.


          Purty decked block and deck plate honed bores.


          Rebuilt head.


          Had the shop weld up the ccv tube to my e34 dipstick tube.


          And install my VAC pan baffle to keep the oil in its place.


          According to the shop the piston was fine (no damaged ring lands or anything else vital) and the bores were all in spec.
          Block was disassembled, hot tanked, resurfaced .003" and deck plate honed. Pistons/rods cleaned, dissasembled and checked. The shop reassembled the block with NPR rings, glyco main bearings and KS rod bearings and painted it black.

          The previous owner had timeserted some spark plug threads when they lost a spark plug. Based on advice from the shop I found another used head as apparently 24v heads can crack around the spark plug when material is removed.
          Found an m52 head with the extra coolant sensor hole and had it sent to the shop.
          They rebuilt it using the lightest supertech springs with steel retainers and Reinz valve seals. Three angle valve job and a bit of bowl work to hopefully add a few hp. Everything else was good and in spec, so I reused the valves and lifters. Eventually going to be camming this beast and the springs give me enough lift to let me run sunbelts in the future.

          At 127k everything was within spec but still nice to know everything's been rebuilt from the ground up.

          Now I'm just waiting for Achilles motorsport to send me back my rebuilt oil pump and iwis racing chains plus a few small parts.
          Project
          Feedback

          Comment


            #20
            i love builds like this. great progress.
            BUILDTHREAD
            WTB LIST

            Comment


              #21
              Doing this right, man. Way to go! I went through the same internal debate as you with my S52 rebuild. Eventually did an entire rebuild with new rings, bearings, seals, etc. Metric Mechanic did the head work on mine...wonder what you paid compared to what I paid for the work...I bet you came out better!!

              Can't wait to see more!
              Originally posted by LJ851
              kingston is the play by play announcer for this thread.
              ‘Tis by the grace of God that my cars run!

              Originally posted by unloadedak
              #teamross
              Siobhan's Build Thread - UPDATED!

              Comment


                #22
                serious project bro, keep up the great work!

                Comment


                  #23
                  Thanks guys!

                  Kingston, I'm interested as well to compare machine shop costs. I'll shoot you a pm when I get a chance to dig up the receipt.

                  It's honestly been tough waiting and waiting to build up funds and collect parts when my cars been down for the better part of the year. The project was originally going to be a quick swap with no rebuild, but that blown spark plug was the first step into the rabbit hole.

                  Didn't have a whole bunch of time this weekend as I had to replace the driveshaft on the 535i. Not a hard job but the car was originally from Indiana I think and the exhaust is rusted into a single gigantic heavy piece of metal. Fun!

                  Also waiting on a few parts. In the meantime I threw on my newly rebuilt oil pump and iwis racing chain.


                  Project
                  Feedback

                  Comment


                    #24
                    sub'd... as I am in this same process. Had to have my (what I thought was) budget S52 completely rebuilt at Terry Tinney's in Livermore. Getting ready to have the head done now. I'll pm you later with questions. Great thread here, keep it up
                    1988 325 non-letter Seta "Bronzit"
                    1991 325ic "Laguna Green" (Sold)
                    1993 325i "Laguna Green/Silver" (Sold)
                    1998 528i "Artic Silver" m-sport(totalled by drunk driver)
                    2000 528i Titansilber/gray m-sport
                    2000 528i Titansilber/black m-sport(sold)
                    2001 525i Anthracite m-sport(sold)
                    2013 750i Black/Black m-sport "Beast"

                    Comment


                      #25
                      I'm also having deja vu lololol. Good luck.

                      Comment


                        #26
                        Made some progress over the last couple weekends.

                        Timing chain and guide rails.


                        Timing cover. That bolt is on there good, had someone hold the engine stand while I put all my weight on a breaker bar leveraged with another breaker bar. I'll give it another go once the engine is installed.


                        Oil pan.


                        Torquing up the head.


                        Replaced the check valve and installed the head.


                        2 chainz


                        Rebuilt vanos unit with beisan systems seal and rattle repair kit. Good amount of preload without having to remove any material!


                        Vanos installed.


                        Got a lot done but ran out of steam when I realized the timing is off by a tooth on the crankshaft.

                        Ordering a vanos gasket and ready for 24v timing lesson round two.

                        Next up stewart water pump, painting the ugly ass engine mount arms and s54 oil filter housing.

                        Woohoo! The pieces are finally all coming together!
                        Project
                        Feedback

                        Comment


                          #27
                          Made a small amount of progress over the weekend.

                          Sexy stewart water pump.


                          Retimed vanos, Installed pump, al thermostat housing, s54 oil filter housing, valve cover, coolant nipple and some other odds and ends.


                          Stopped for the day when I saw this :hitler:


                          Anyone have an extra obd2 valve cover?
                          Project
                          Feedback

                          Comment


                            #28
                            A chronically ill girlfriend and being in the midst of a large and expensive project at work has kept me very busy over the last few months.
                            Here's what I've managed to accomplish over the limited weekend time I've had to work on the project:

                            Made a stupid mistake while working late at night and dropped a stubborn detent bearing sleeve into the trans 
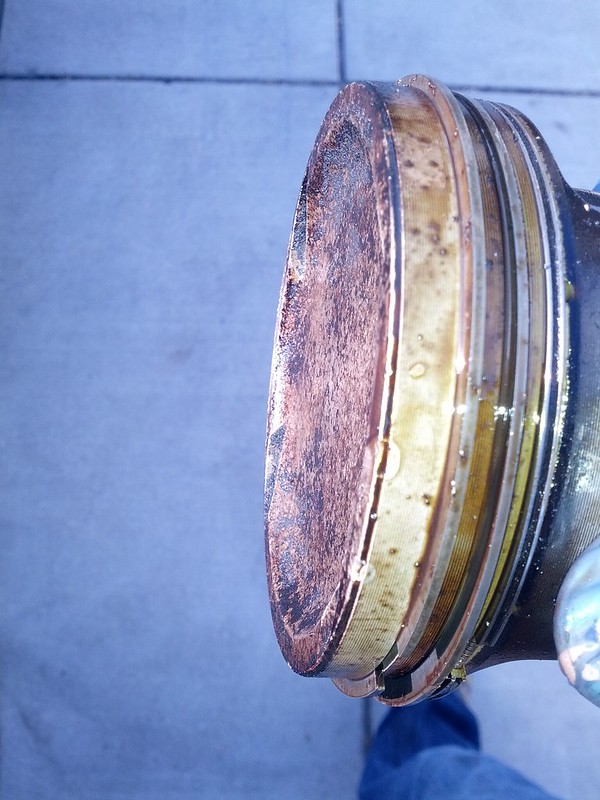
Spent several hours with a borescope and piece of wire trying to remove it which only made it harder to get to in the end. For future reference... when removing the old detent bearing sleeves, peel away one side at a time. Peeling both sides at once will make the sleeve very very stuck and you will end up kicking yourself repeatedly.
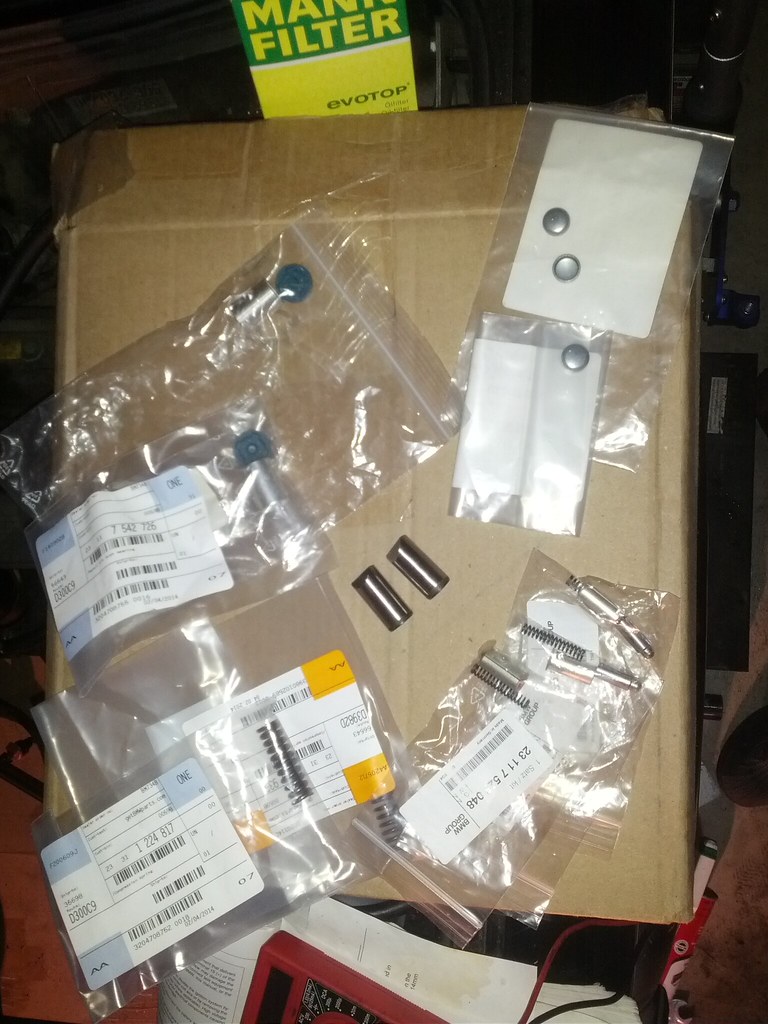
                            Gave up and purchased another zf320 trans from a local yard with 157k (iirc) on it. No shaft play and shifts pretty nice. Installed detent pins properly this time. Forgot to take before and after pics but the trans cleaned up really nice. It was covered in cosmoline and grease.


                            Next I tackled cleaning the engine bay. My original plan was to go thorough and get rid of all the cosmoline but my priorities have changed big time since I started the project. After spending an hour or so scrubbing the stuff with a toothbrush and degreaser I realized I just don't have the time to do a proper job. The car has been in pieces for over a year now and I just need to get it back together at this point. This is more a 'go' than 'show' car anyway.
                            Doesn't look great but at least all the nasty old grease is gone.


                            Afterwards I installed my IE poly steering guibo. The rivets on the knuckle were a major pita to get off but managed to get it all back together within an hour or so. I also clearanced the the firewall a bit more where the steering shaft comes out as it was just slightly rubbing. The design makes installing/removing the steering rack worlds easier. Just split the two halves and it all comes right apart. Which is a good thing as I'll get into later...


                            Once the engine bay was ready, I focused on finishing the motor prep.
                            Ordered some parts from bimmerworld including this nifty oil distribution block for my podi.ca gauge pod. Also picked up condor engine mounts, rogue trans mounts and some other goodies.


                            Here's a shot of the motor after replacing the pilot bearing and attaching the wire harness and clutch/flywheel.


                            Finally this last weekend I made some real progress.
                            Finished refreshing the transmission with new silicon carbide shift fork pin, shift fork, tob and spring.
                            Next mounted up the trans and starter with all new hardware.
                            Then after several hours and much cursing got the motor in!!!


                            Unfortunately realized my steering rack was leaking badly while under the motor getting everything lined up. I had actually made a note of this before embarking on the project and totally forgot about it. fortunately I have a nifty poly guibo which should make getting it out (again) a snap

                            It was a pain in the ass getting the engine mounts lined up. Fortunately my friend came by to help out, there's no way in hell I could have done it alone.


                            Next up:
                            Install remanufactured steering rack.
                            Repaint and install 735i booster and purchase a new master.
                            Replace valve cover (again) after it cracked during motor installation. Watch those blower motor cover studs people!
                            Find and install shift rod and carrier. Somehow I ended up with a getrag 250 setup, was told it was from an m3.
                            Fun with wiring.
                            Figure out what do about the fan.
                            Oil cooler lines.
                            Lastly exhaust.

                            Whew, almost there...
                            Project
                            Feedback

                            Comment


                              #29
                              Great documentation!

                              Comment


                                #30
                                nice!

                                Comment

                                Working...
                                X