
Wanted to share an install with all you 'Vert fans, but this is also applicable to all E30s.
In fact, this is how we do E30, E28, E24, E21..shortly here, an E10 too.
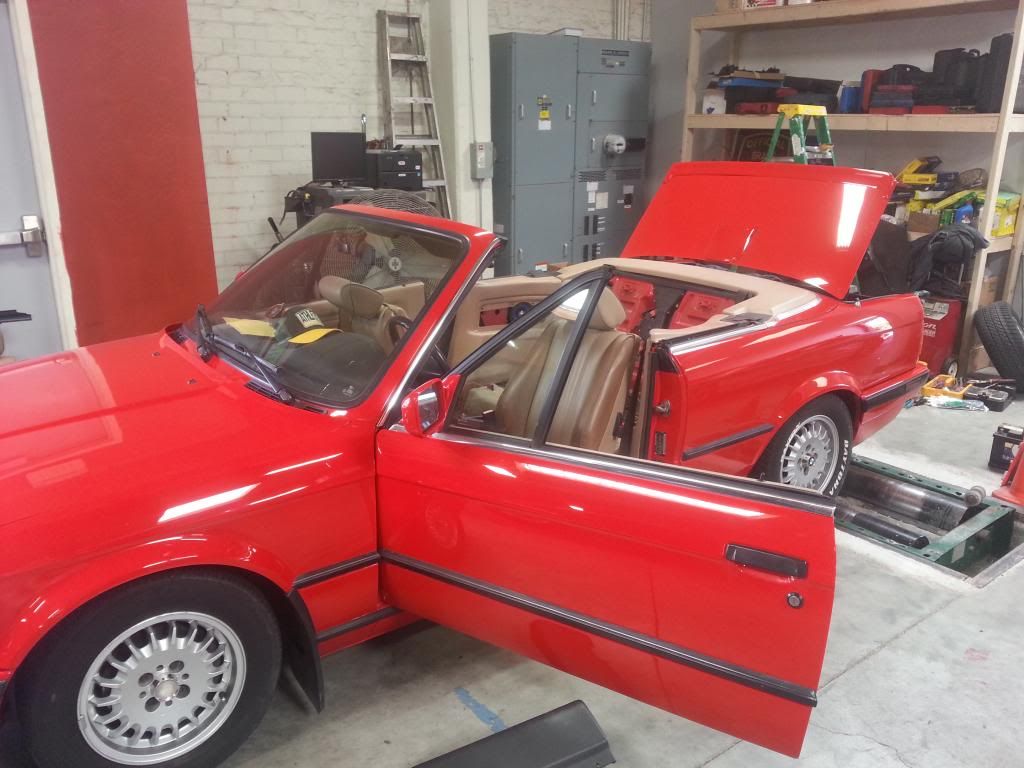
The car is a very clean fresh-from-the-paint-booth beauty, shown here under construction:
Many thinks to our client, Haris for his excellent hosting and trusting us with his car.
So, first thing we did was tear apart the car. This means the left side of the dash, the rear seats, side panels, trim panels and kick panels. Basically everything but the seats, center console and glovebox.
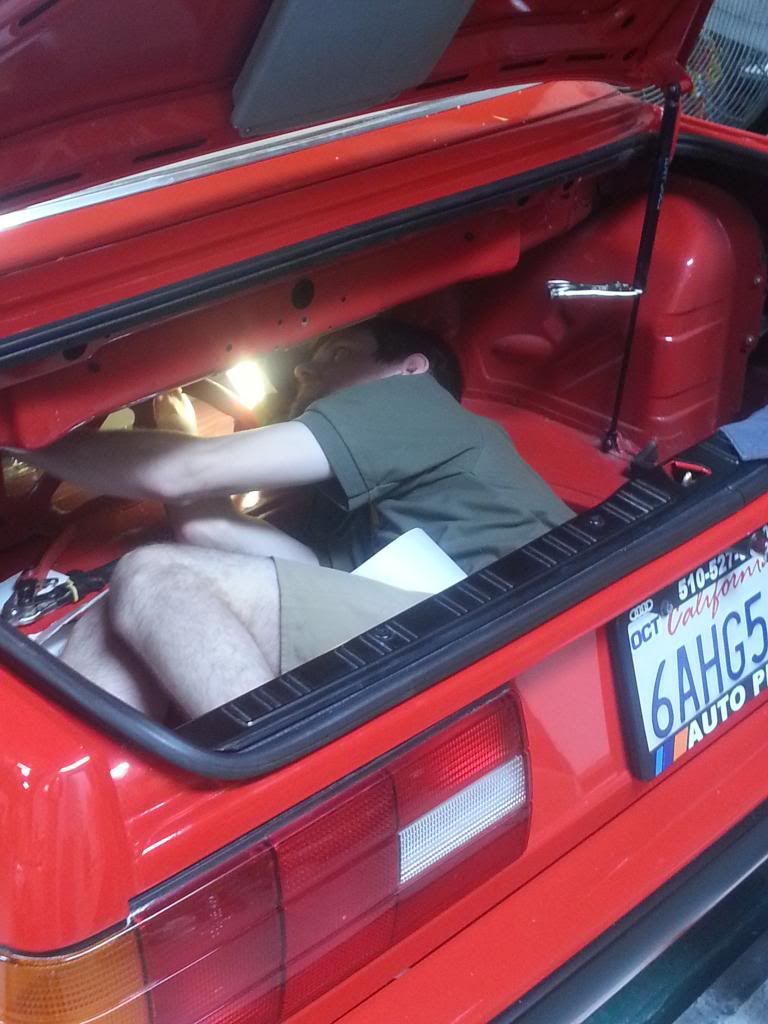
Of course, this also means stripping the trunk and performing a whole bunch of work inside the space between the trunk and the back seat. If you have not read the install tutorial on our E3028 boxes, it is both incredibly difficult and vitally important to the performance of the system, so getting into the job is crucial. Here is Justin doing work:
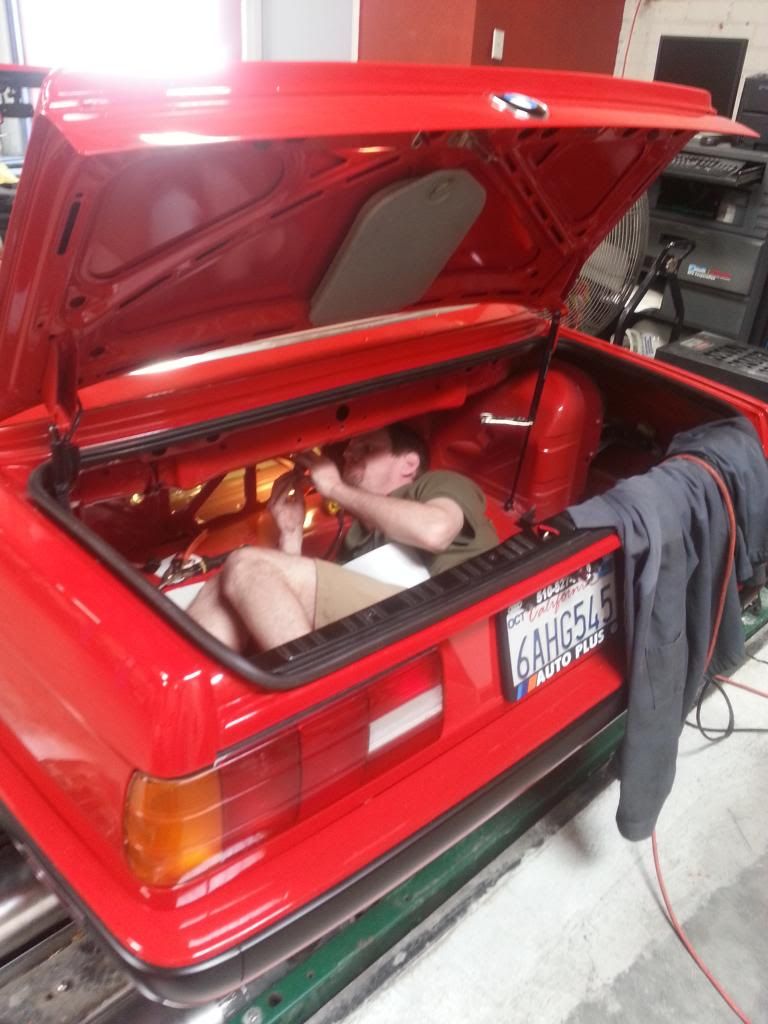
You can see all of the cutting in the trunk has been done, the port tube holes are also cut and the ports test fitted. This process is critical to performance, as is proper mounting of the subwoofer enclosure.
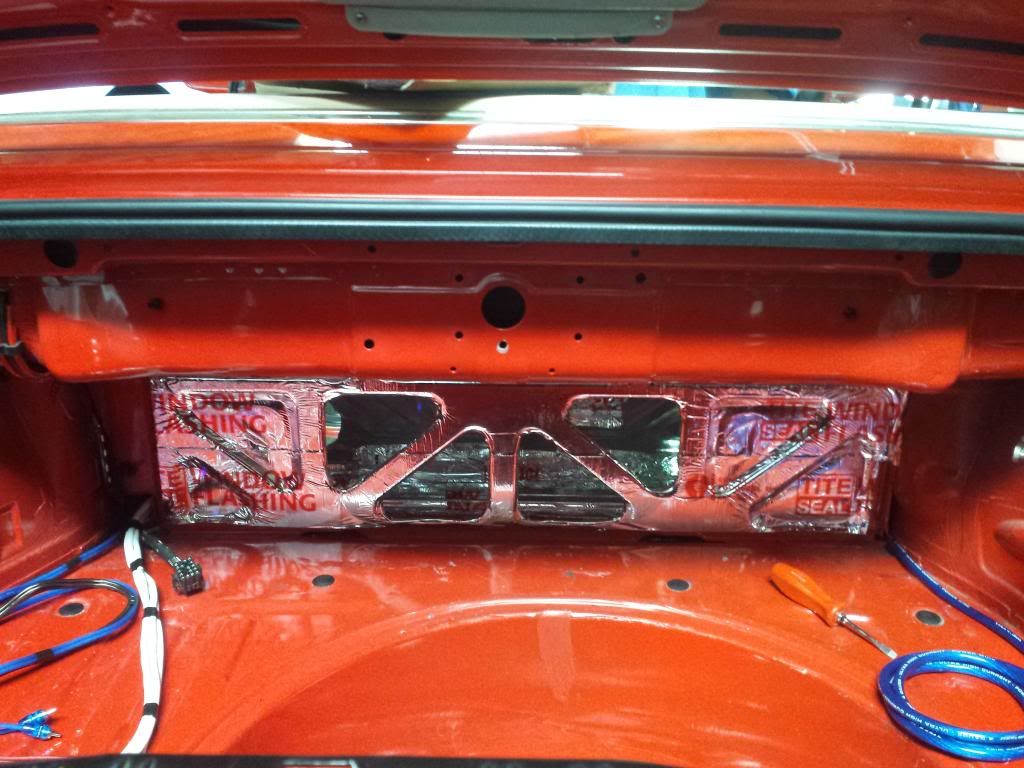
Basically, what is happening here is the cavity is being used as a tuned part of the speaker enclosure, that is why it is so crucial to get it right:
If you have skills and patience, when you are done running wires, cutting holes and applying the sound deadning material, your trunk will look like this:
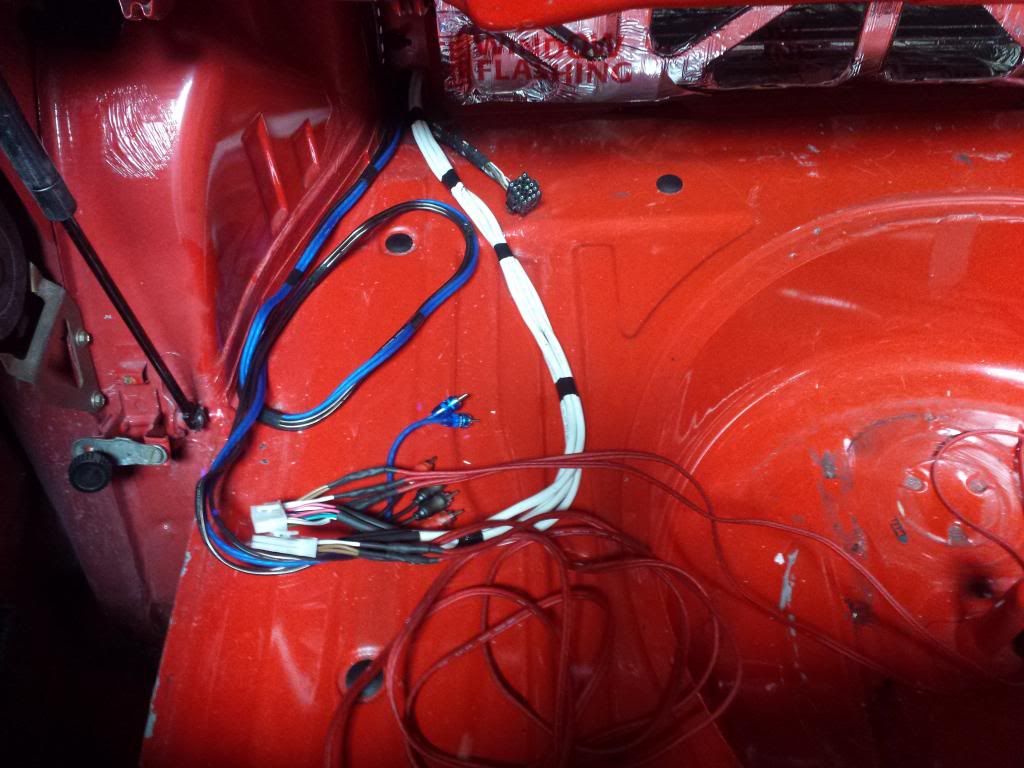
Those of you with a sharp eye will detect a bundle of 4 white cables on the left...well, that is our speaker wiring for this project.
Let me introduce the German Audio Specialties 8 Channel Passive Crossover Network, shown by the lovely and charming Amber Alvarez.
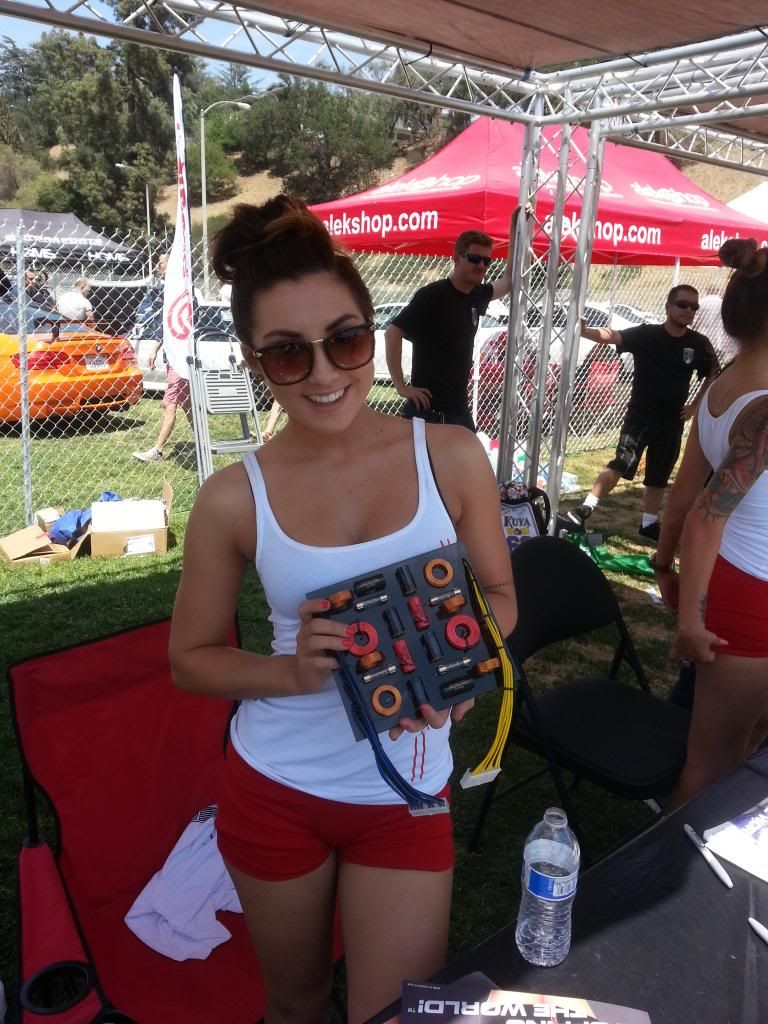
She really is a charming girl, I hope she has a great career.
What we have done is develop a crossover network intended to use all new wiring, which we supply as part of the kit. The wiring is actually intended for "in wall" use, and is a CL2 rated 16ga 4 conductor high quality wire.
Since all of the filtering of the signal for each speaker is done in the trunk, running all new wire is a necessity. We used the stock wire routes as we do in all BMW installs. Here are some progress examples.
RCAs and Speaker Wires (normally would have sub level control cable too, but not on this install):
Note the three pair of RCAs
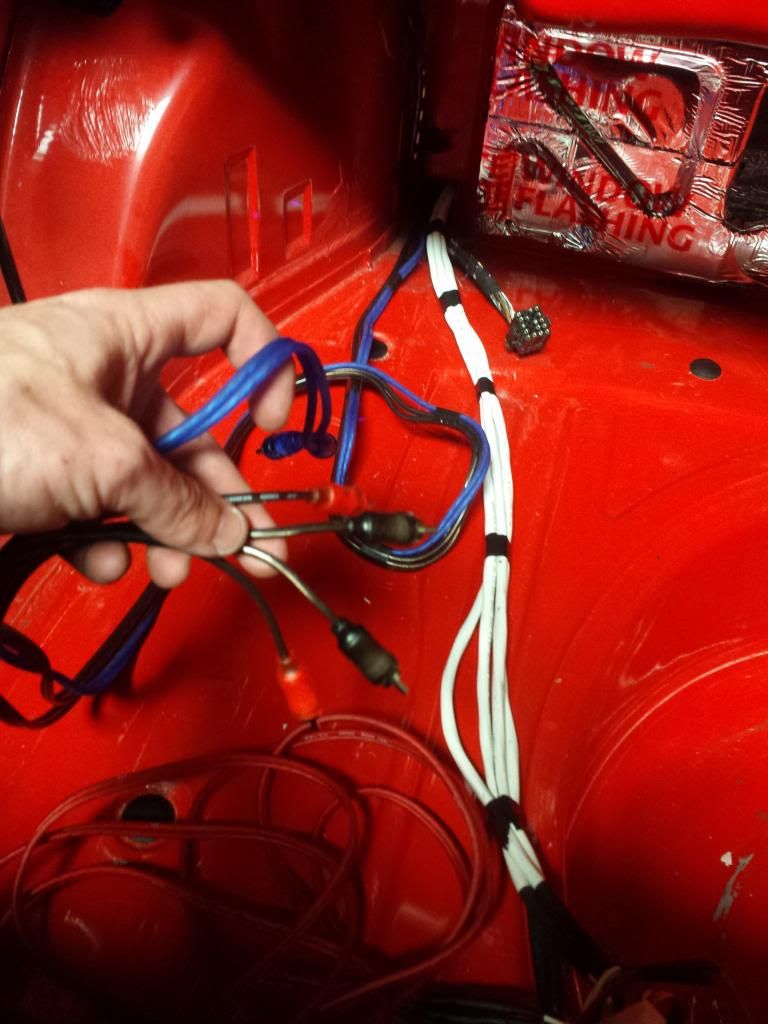
and the speaker plugs from the GAS crossover harness:
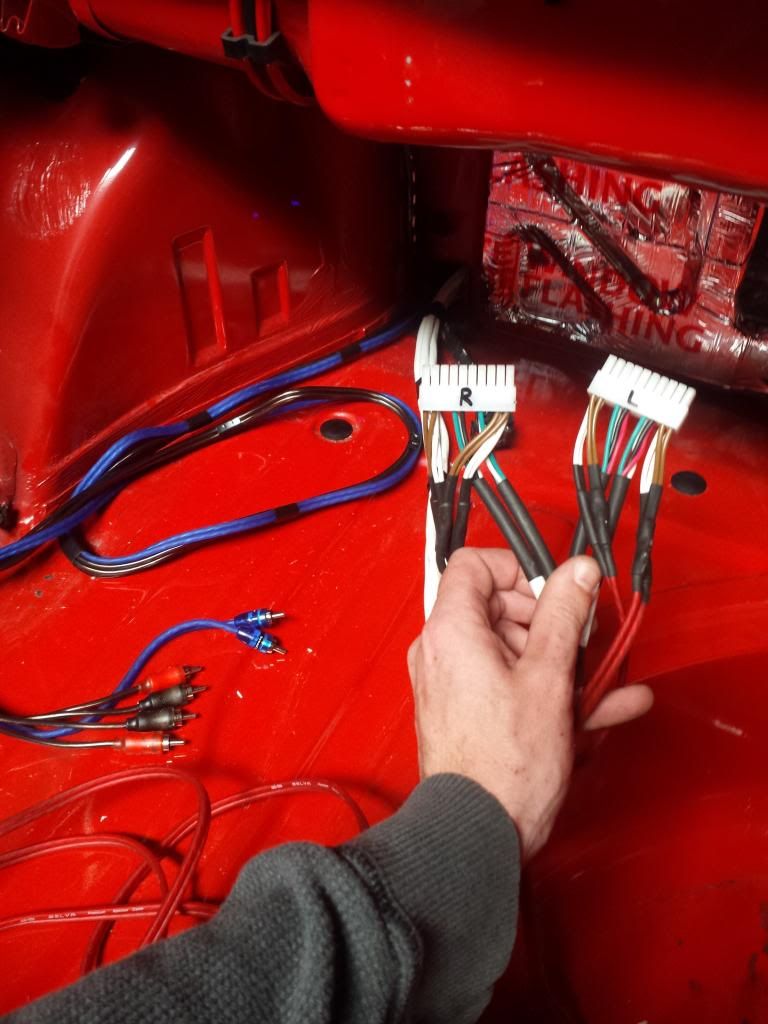
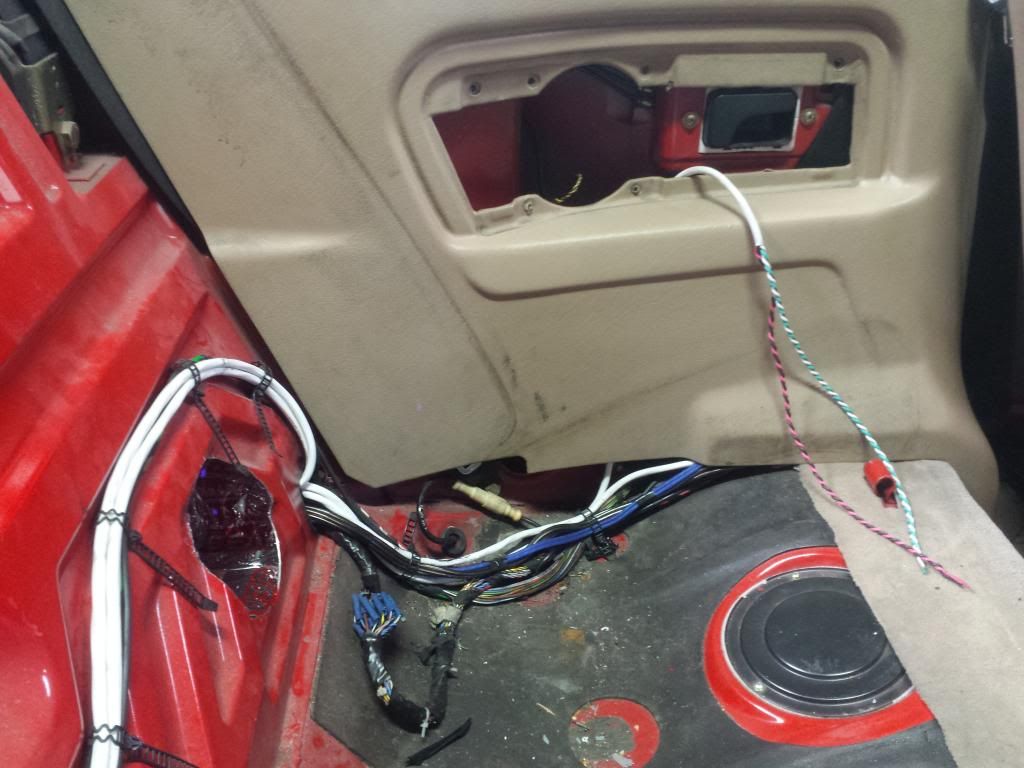
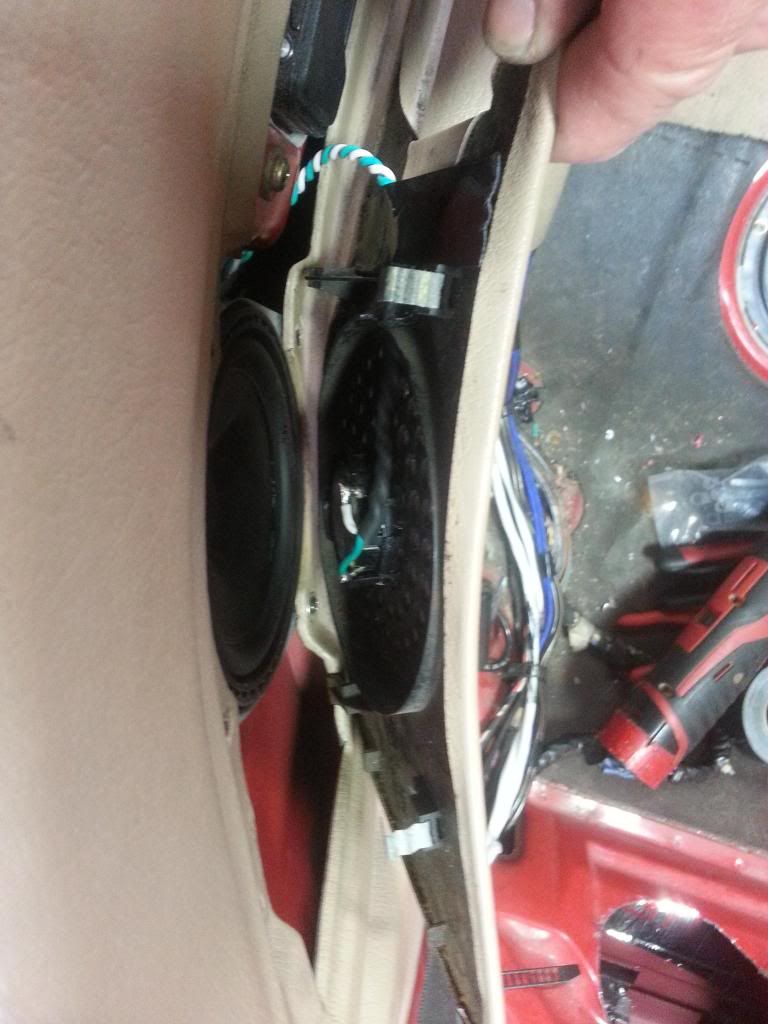
inside the car, they should be all tidy too:

Note length of speaker wire from stock location:

Tidy RCA routing prevents damage and is always noise free. Of course, the stock grommets are always installed properly, this one just had not been done at this point:
One thing we always seem to forget to take pictures of is the wire routing from the front of the car. We basically take the time to take apart the stock wire retainers and use the wire channels as provided by BMW. Its tedious and doesn't show much, but just do a tidy job and run them right with the factory wire.
Yes, that means pulling up that stupid plastic wire protector and routing them just like BMW does. Don't be lazy, do a good job...and take some pics!
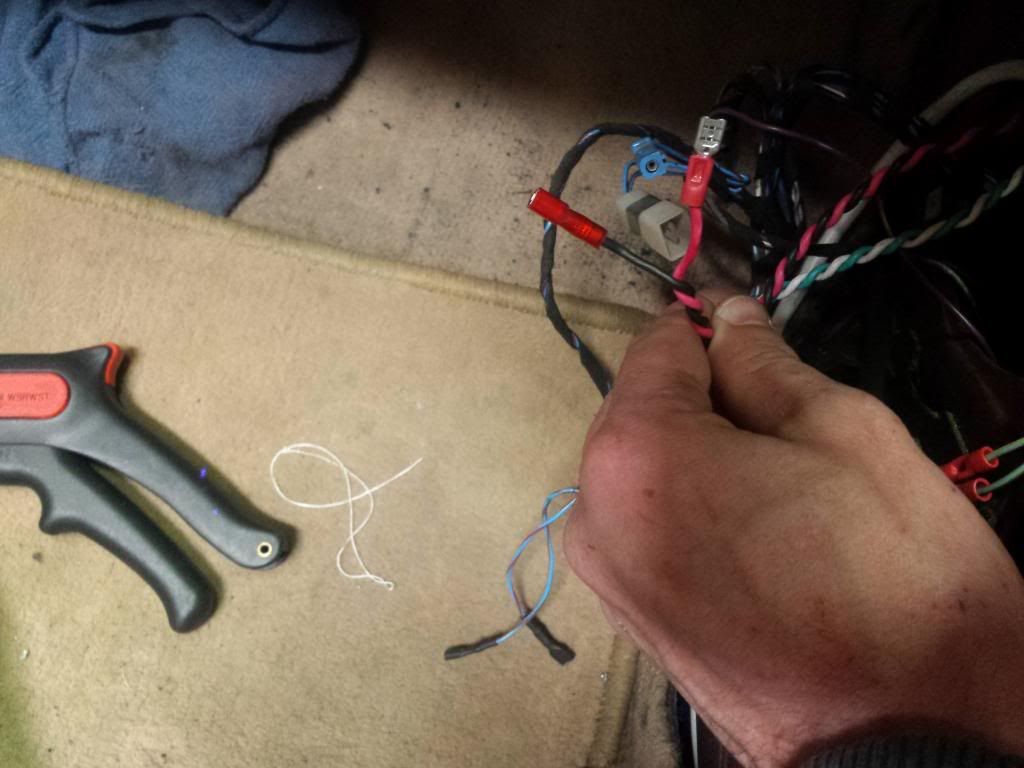
Since we also forgot to take pictures of the wire before being stripped, it has a heavy white insulation intended for protection. Each "corner" of the car gets its wire routed, then stripped and twisted. We will be posting a video on how to do it, but is it very simple: carefully cut the insulation jacket back about a foot, separate the wires, cut the thread (supposed to be used to take the jacket off, I dunno) and twist the wires into 2 pairs consisting of Red and Black plus White and Green, as shown.
Crimp the supplied terminals to the red and black pair. Use a 1/8" for the Black and a 3/16" for the Red:
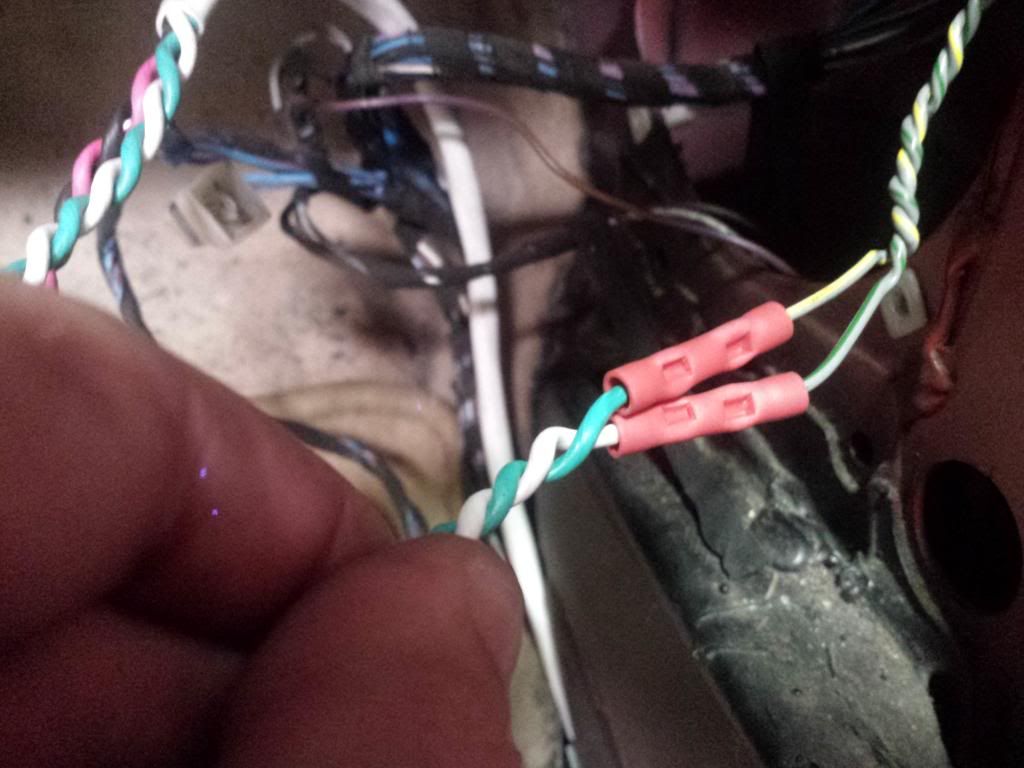
Next, connect the factory tweeter wire to the new wire you just installed.
Currently we are discussing changing our standard wiring to match the BMW color code, but for now the Green goes to the Gray/Yellow and the White connects to Gray/Green. Check your wiring diagram to make sure, you will be able to tell from the plugs which is correct.
Use small butt connectors here:
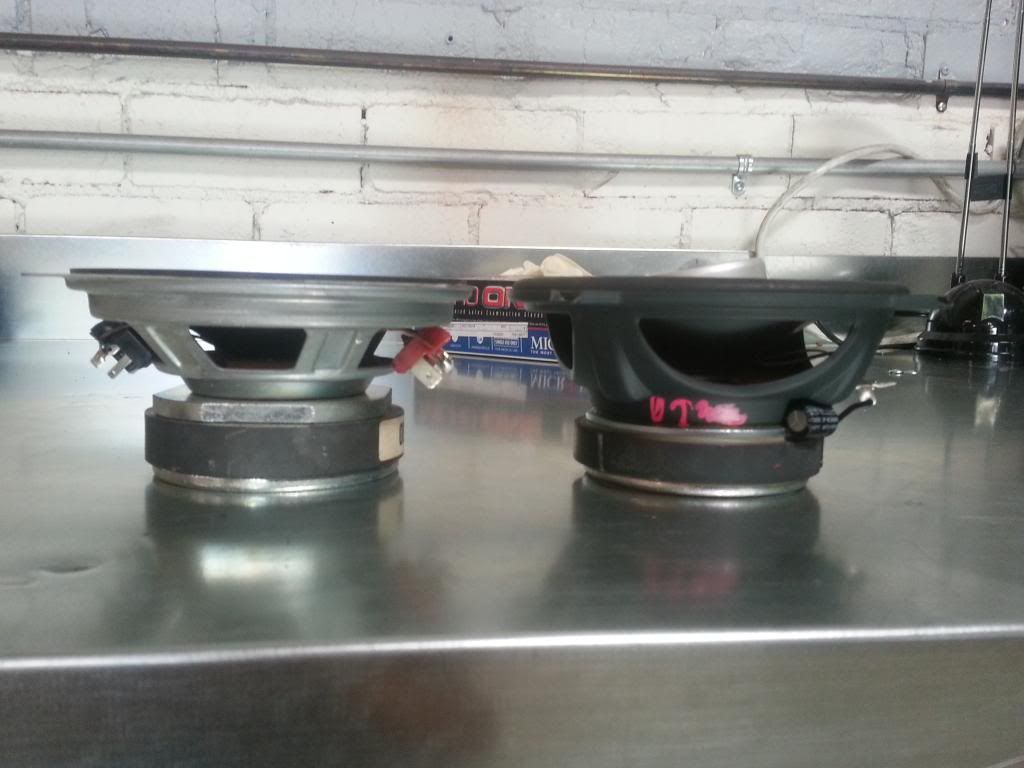
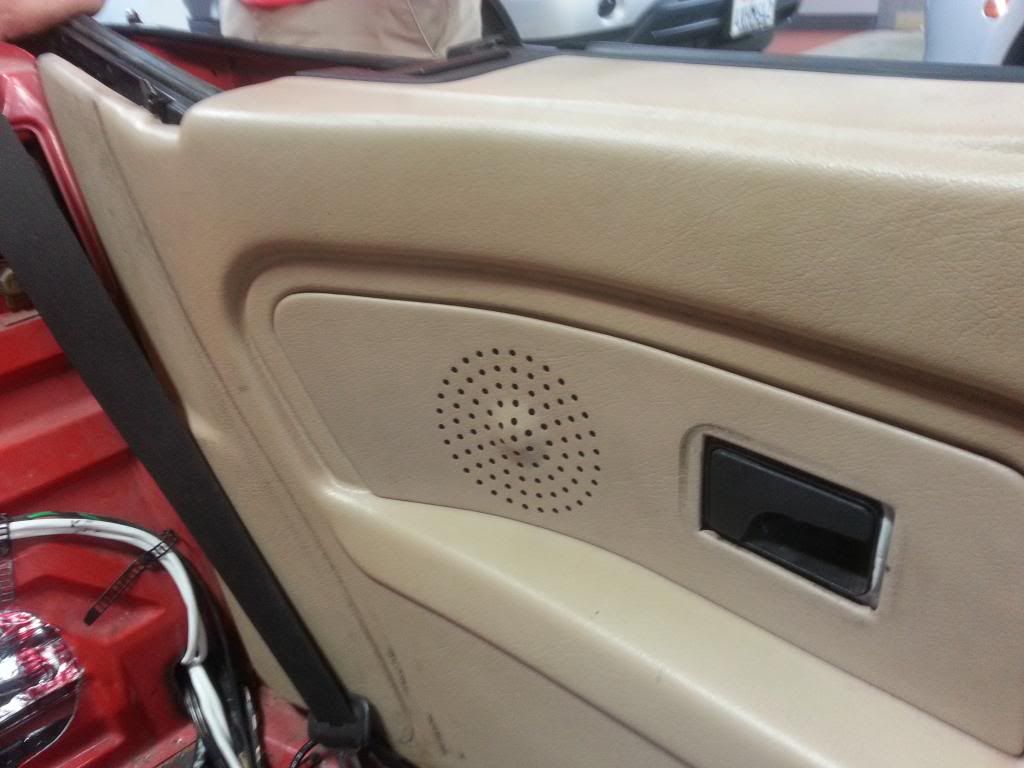
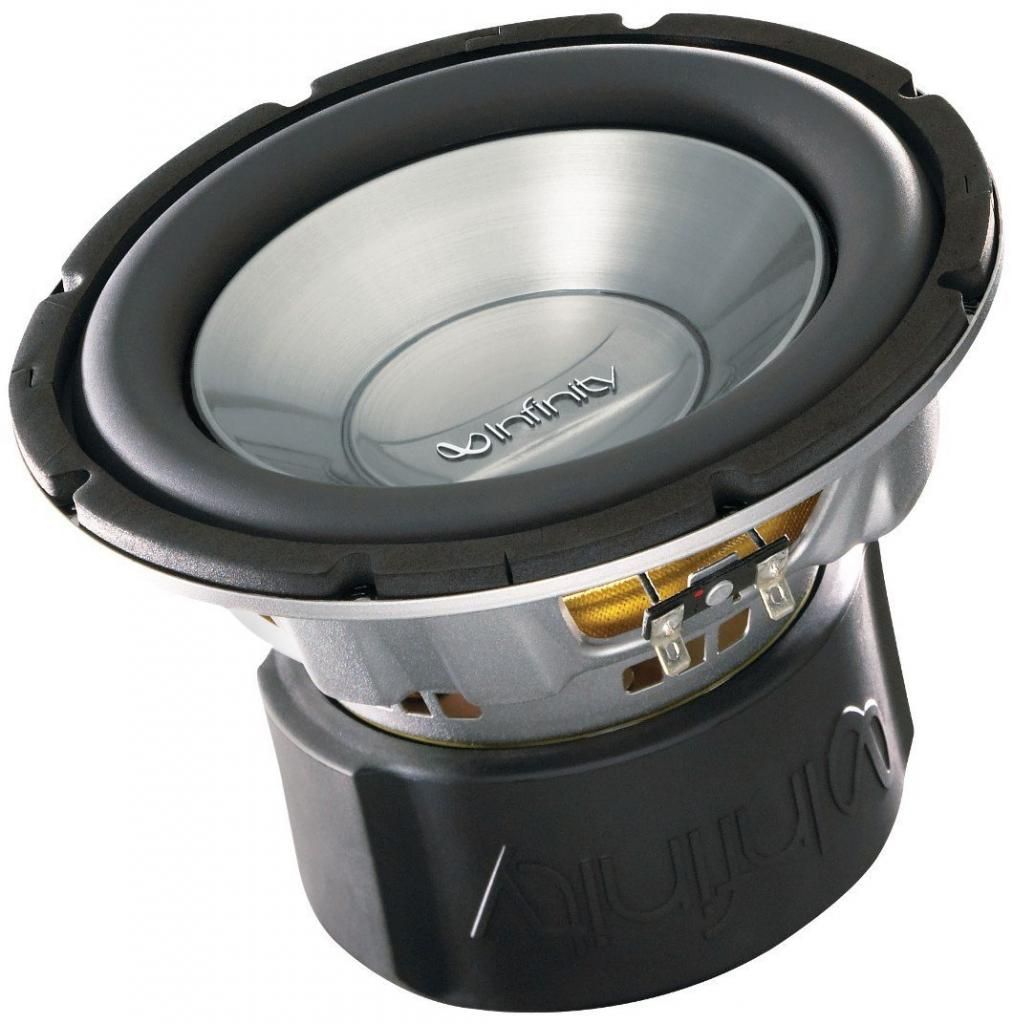
That is all of the front speaker wiring. The front midbass driver we used is from the E34 chassis. They are a perfect fit, of course, as they are OE, and quite "burly". They are physically larger than the Infinity Reference, and due to their being engineered to work in the tiny cavity of a BMW rather than the door panel of a chevy truck, they have a far better bottom end than any aftermarket speaker regardless of price. I have installed everything from Diamonds to Infinity to el-cheap-o walmart junk to top end Focals, Quarts, GTi Series JBL and Morel, these have a better bottom end than any of them. Here is an E34 midbass driver next to an Infinity Reference:
Basically, this is about as good as it gets if using the stock location is the goal. They are top notch and can still be had brand-new.
Now, lets talk about tweeters. Believe it or not, the ideal tweeter for this application is the stock late model E34 tweeter. Blending it to the E34 midrange was a perfect match, the performance is amazing.
In an effort to produce the cleanest midrange we could we wanted to use a 12db/oct low-pass filter on the midrange. BMW uses a 6db/oct filter at 4Khz on its Premuim Sound package, we found that exact same crossover point was perfect (and use it in our "Local" crossover with a different tweeter) but that we had a little more "presence" when we used a 12db/oct low pass at 5Khz. In effect, this raises the midrange about 3db at 4500Hz, making a minor difference in the frequency response, but quite a jump in sound quality, but you pay the price with less overall efficiency. We had to find a less efficient tweeter with a smooth response that fit in the E30 housing, so the late E34 tweeter is it.
Just so we are clear, the late E34 tweeter is a very good quality neodymium magnet 1" Silk soft dome. It is well damped, has great power handling and a very smooth top end.
I am not going to get into much more of this, but if anyone has tech questions feel free to post them. Yes, I know this isn't what everyone else says, but I have installed all of those and I was always dissatisfied with the end results. This was designed, tuned and built for this exact car and I find it very satisfying to listen to.
So, the midbass in the front fit and look just like stock. Tie up your stock speaker wires (you will not need them on this install) and put the midbass driver in (remember to use three screws!) and now the tweeters.
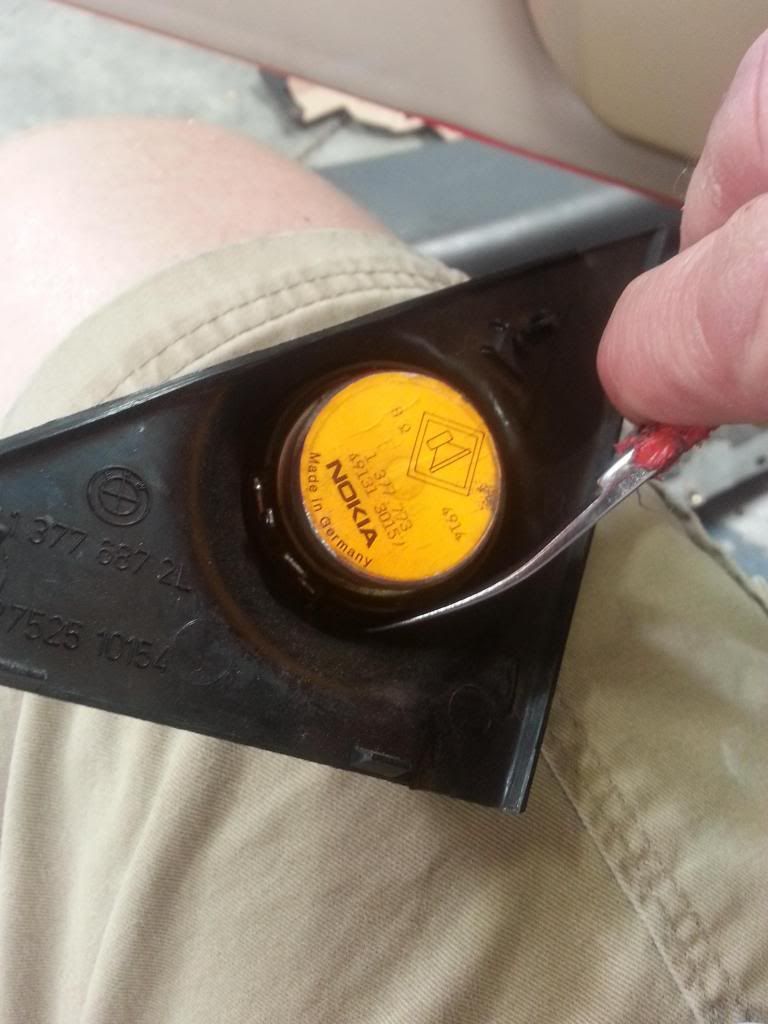
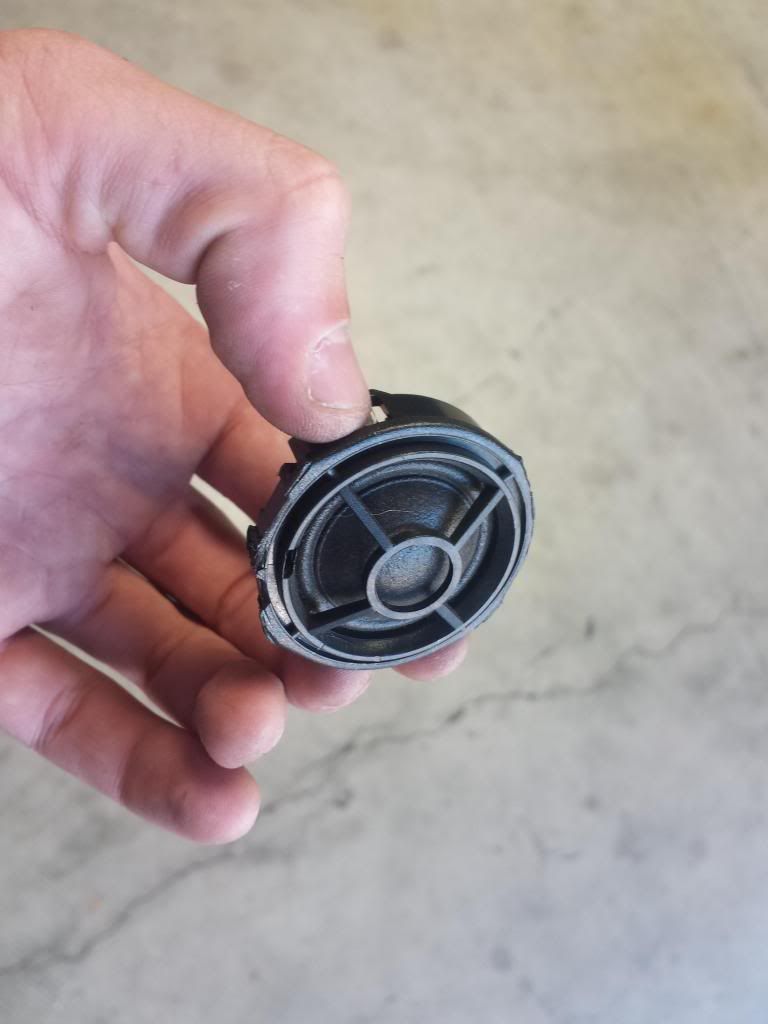
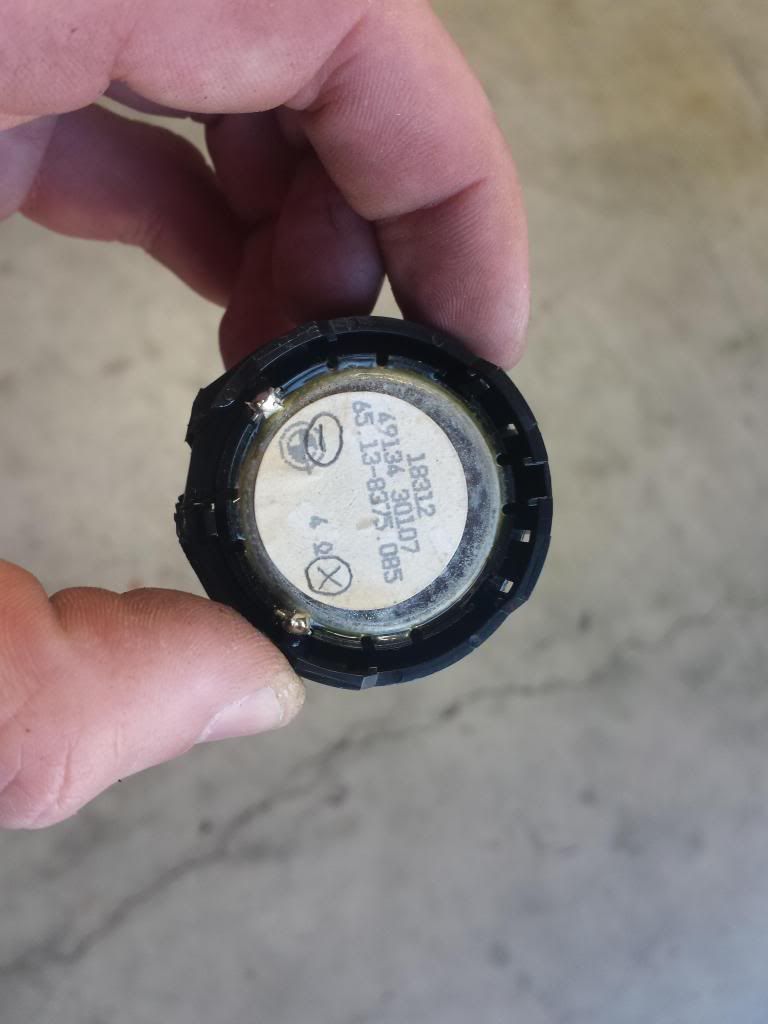
When you pop off the tweeter, you should see the orange sticker. I used a small "spoon" tool to pop the tweeter out including its outer casing, like this:
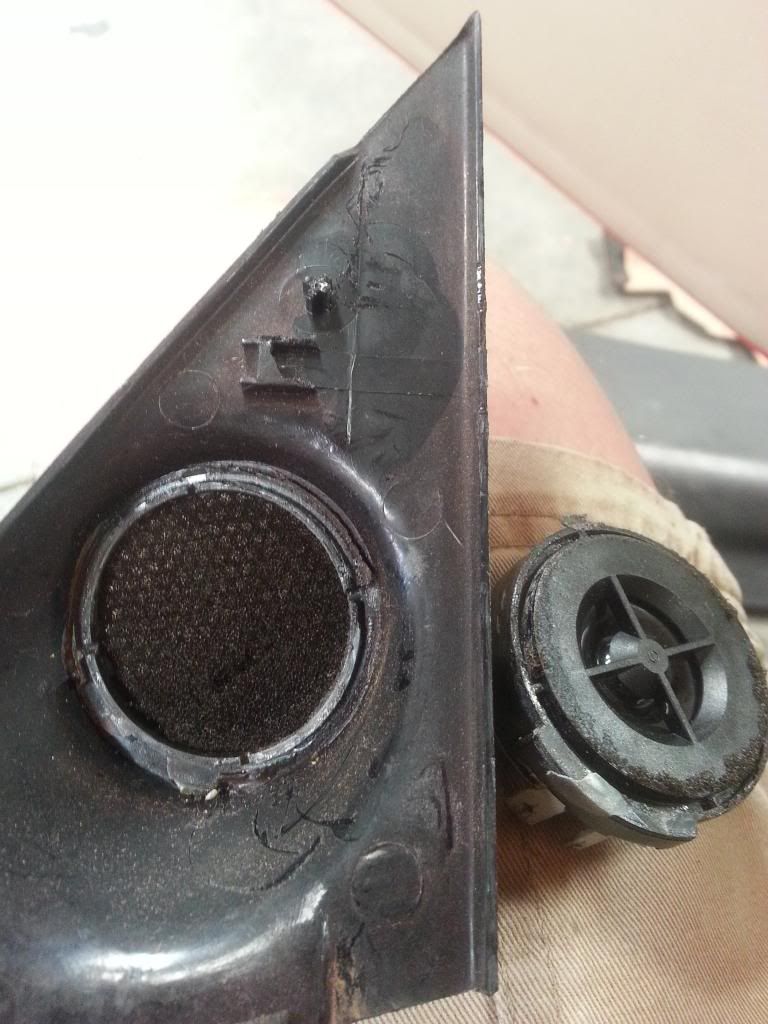
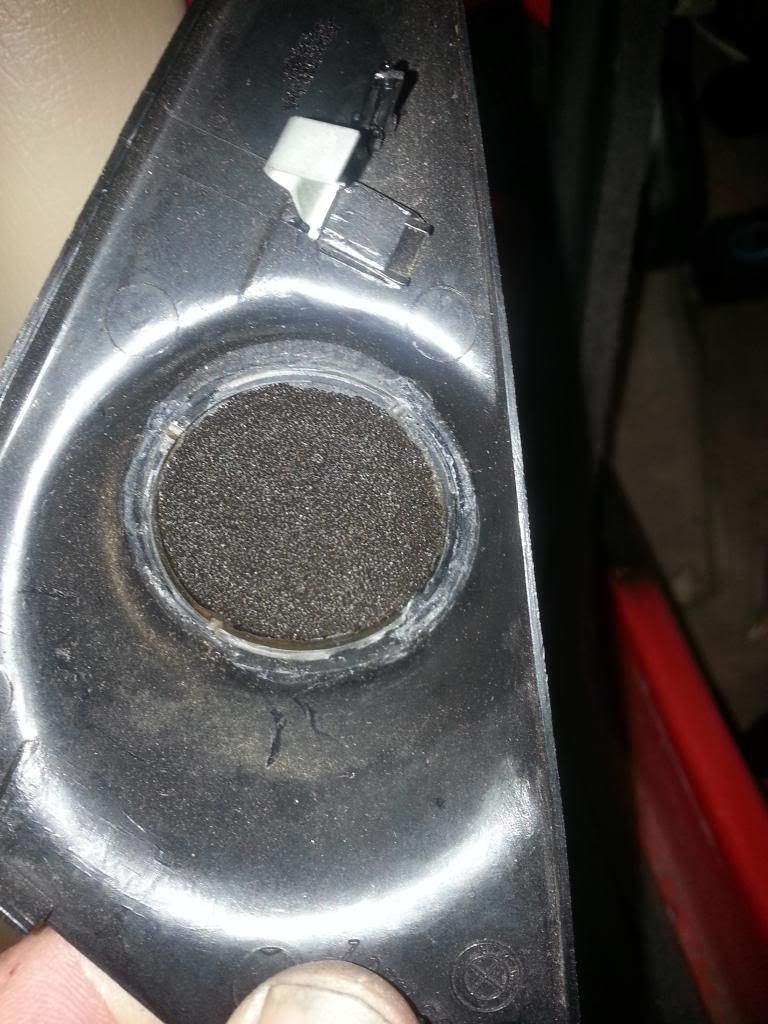
If you don't have good condition foam, the sound will be roughly 3db brighter from about 6Khz and up. if you find yourself turning up the treble you may wish to remove it, but generally I recommend keeping it.
Glue the E34 tweeter in using a high-grade crazy glue or silicone, whatever is good and re-install the sail panel as stock. Installing the front tweeters is the easiest part of the whole job, 20 minutes max.
Since the fronts are now complete, lets move to the rear.
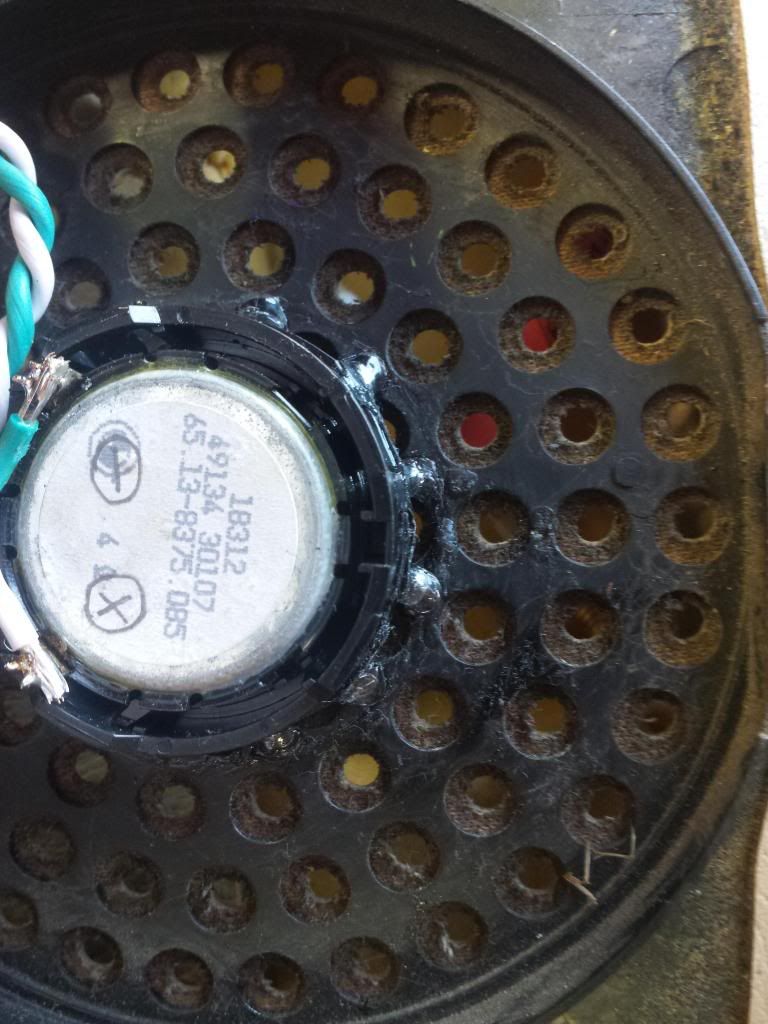
The rear midranges are also the E34 speaker. Simply connect the red and black wires and you are done, just as the fronts.
However, installing tweeeters in the rear is a different story.
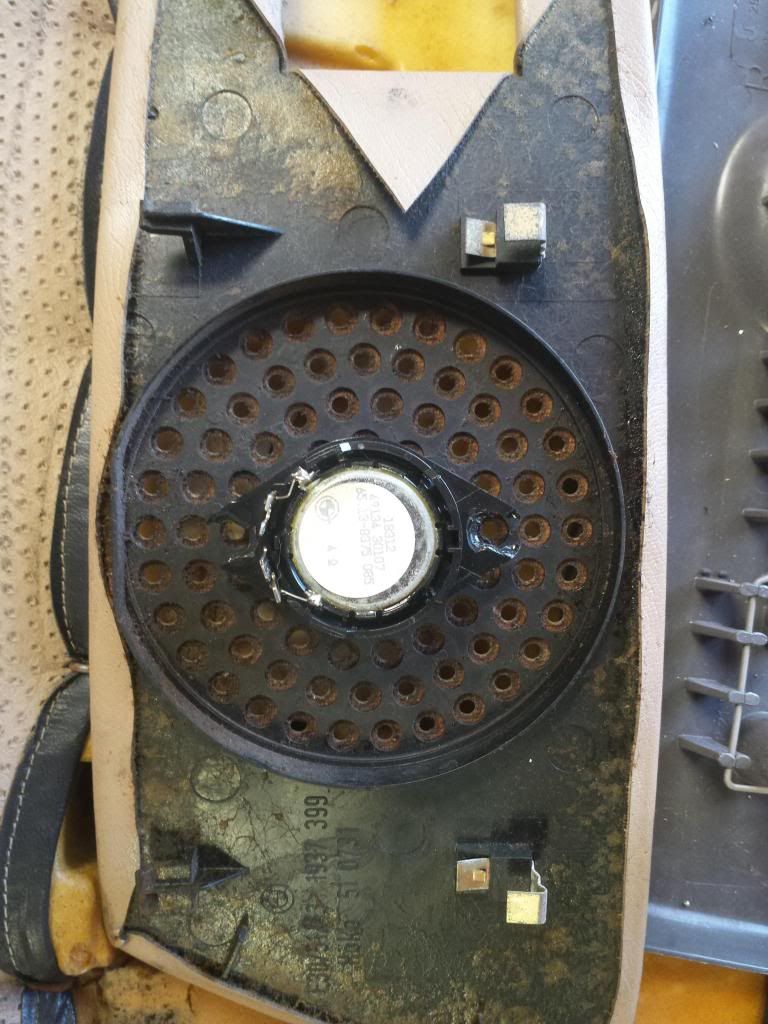
What we did was use the stock rear E34 housing. The one shown here has a broken tab, sorry about that, but no matter, we cut the tabs off anyway.
The principle is this: First, solder wires on the tweeter, cut a hole in the plastic frame, glue the tweeter in, drill a hole (we did a notch, oops) to run the wires through, connect the wires and boom, you are done. Install as normal, except for tucking the wires in.
Justin used Snap On flush cut for this part, they worked well
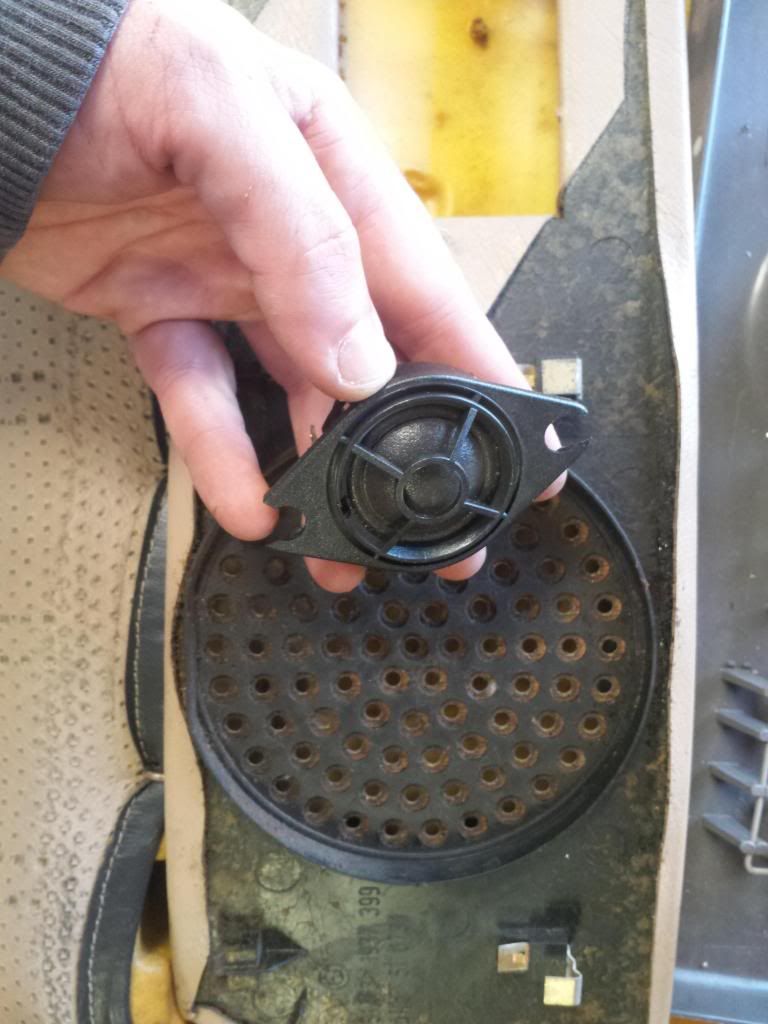
We used a front tweeter to make sure it fit, then glued the rears in using a high grade crazy glue. Here is a shot of the several dots of crazy glue holding in the rear tweeters:
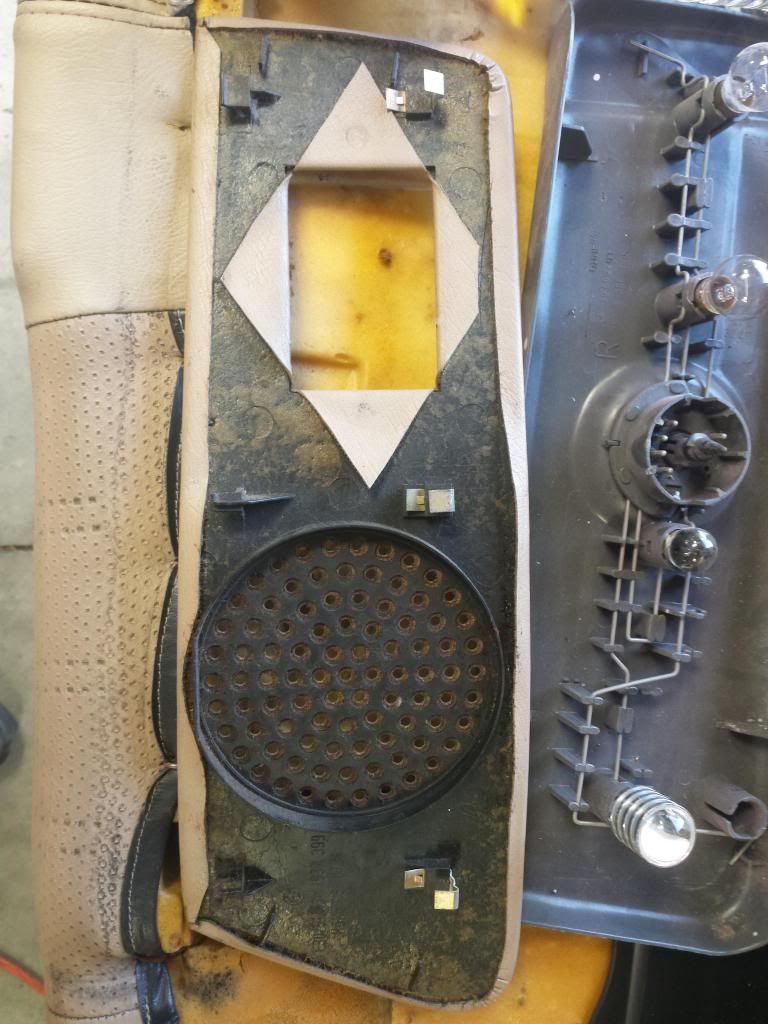
Rear tweeters almost done, the housing creates a slight bump on the side panel grille:
Here is the left rear going together, it is a tight fit, but it clears. Some black shrink tubing was added to the green and white wires to not be seen through the grille.
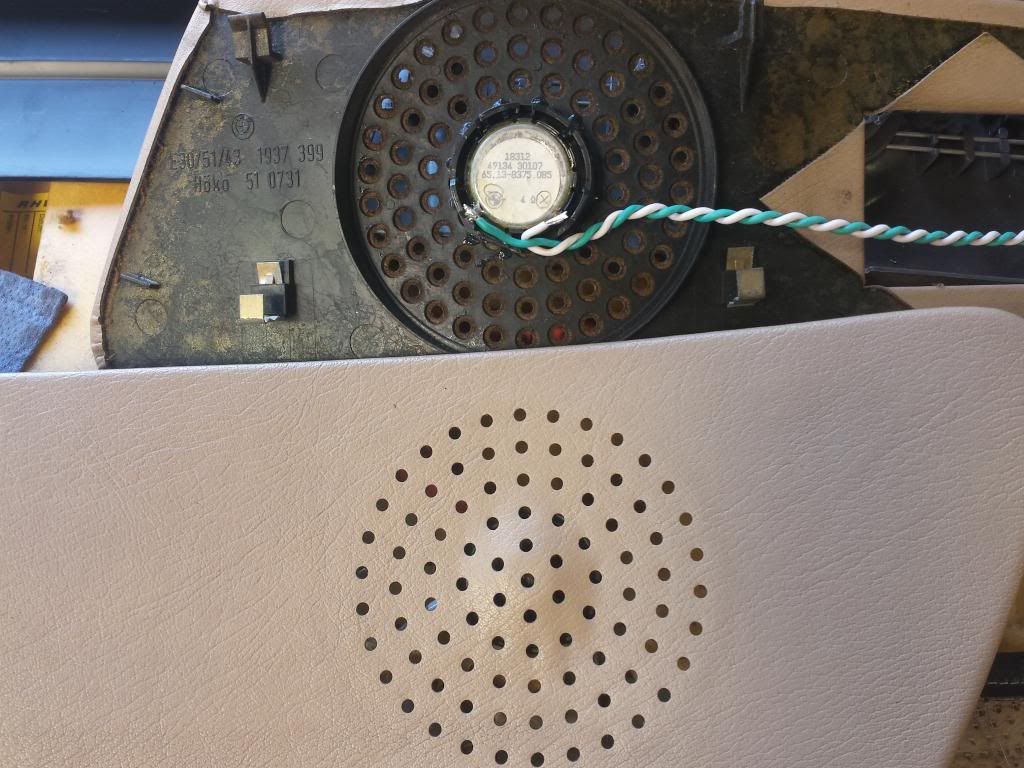
As you can see, the look is not quite stock, but very clean and simple.
Of course, the sound from the tweeters is slightly affected, but as the stock system has no tweeters in the back at all, this is a huge improvement.
Now, back to the trunk.
We installed a pair of Infinity Reference 860W woofers in our "V2" vert box.

Its a fairly simple thing to install a pair of woofers in a box, we did not get pictures, sorry...but once we put this into the trunk and bolted it down, it was time to assemble things.
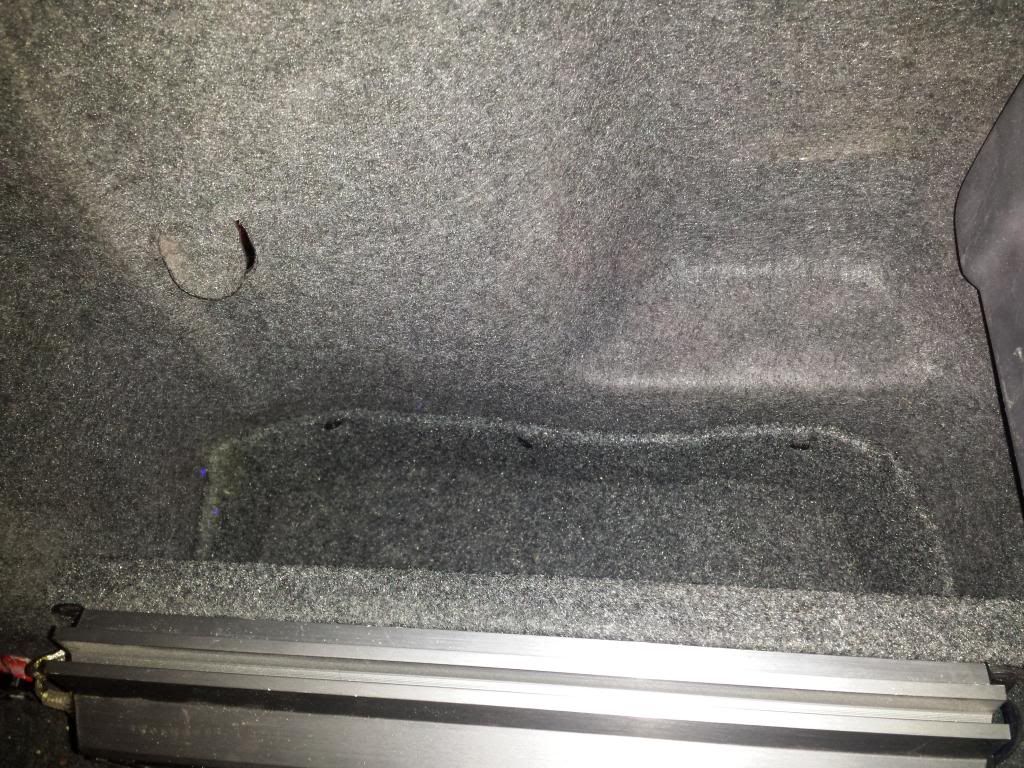
So, for those that have not caught on, this is a really unusual design. it is extremely critical to screw the box in place. There is a 1/2" thick layer of closed cell foam under the upholstery. If you have done a thorough job of cutting the ports and the rear wall, the face of the box seals quite effectively against the bulkhead.
If you do a thorough job of sealing the inside of that compartment including the top, both sides and all potential air leaks (we use a flashlight, it really helps) are closed up, you can put the trunk liner back together and bolt the box in using the supplied 2" drywall screws. Make sure to get all 4 screws tightly through the bulkhead into the box.
If your box is not screwed down, you are screwing yourself!
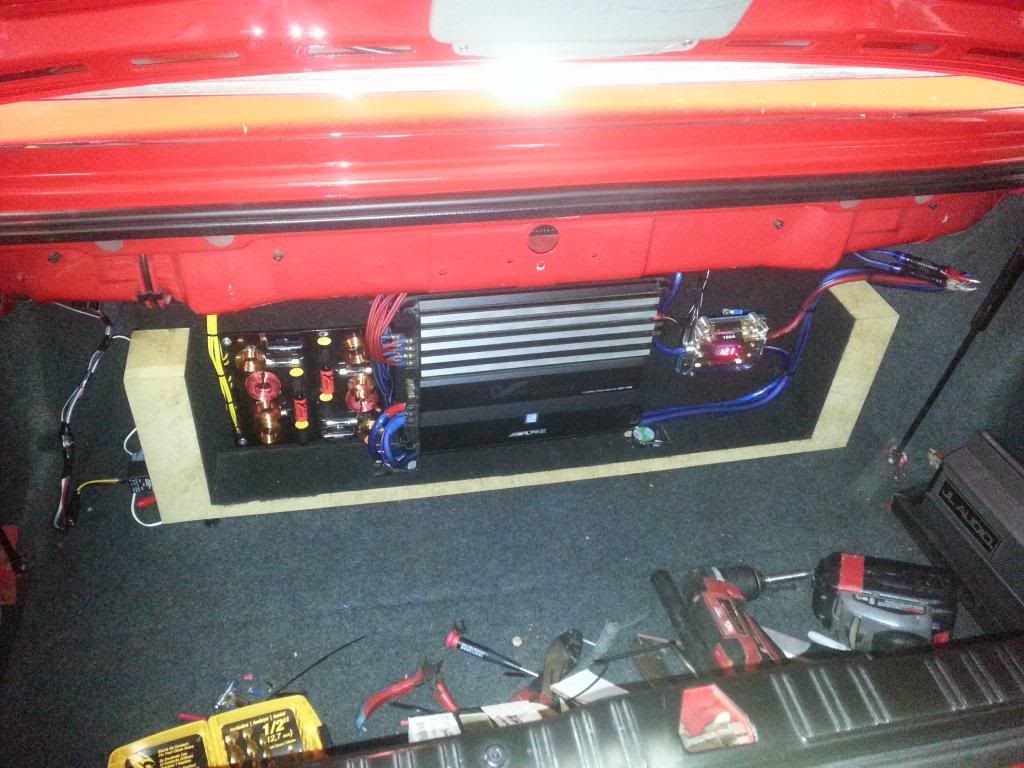
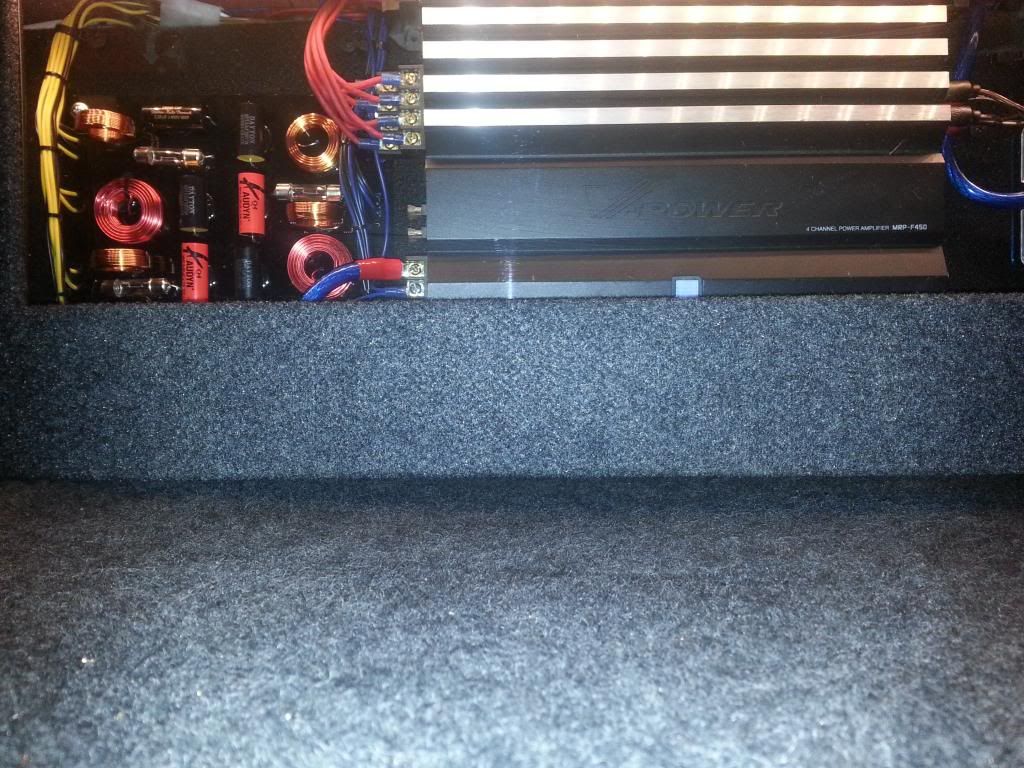
So now, we will get the amp rack, crossover and amplifiers installed.
We are using an Alpine 4 channel to power the interior speakers through our crossover and a JL 1000.1 to power the subs. We ran a single 4GA to a distribution block. Unfortunately, we did not have enough black wire, so we used blue wire and appropriate boots:
Let me tell you right now, there is no need to use a separate amp for bass. We used this pair because Haris already had them, so we were looking to conserve money. Looking back, I wish we had convinced him to use a standard 5 channel! An Alpine PDX5 or an Infinity Kappa5 would be a much better choice IMO.
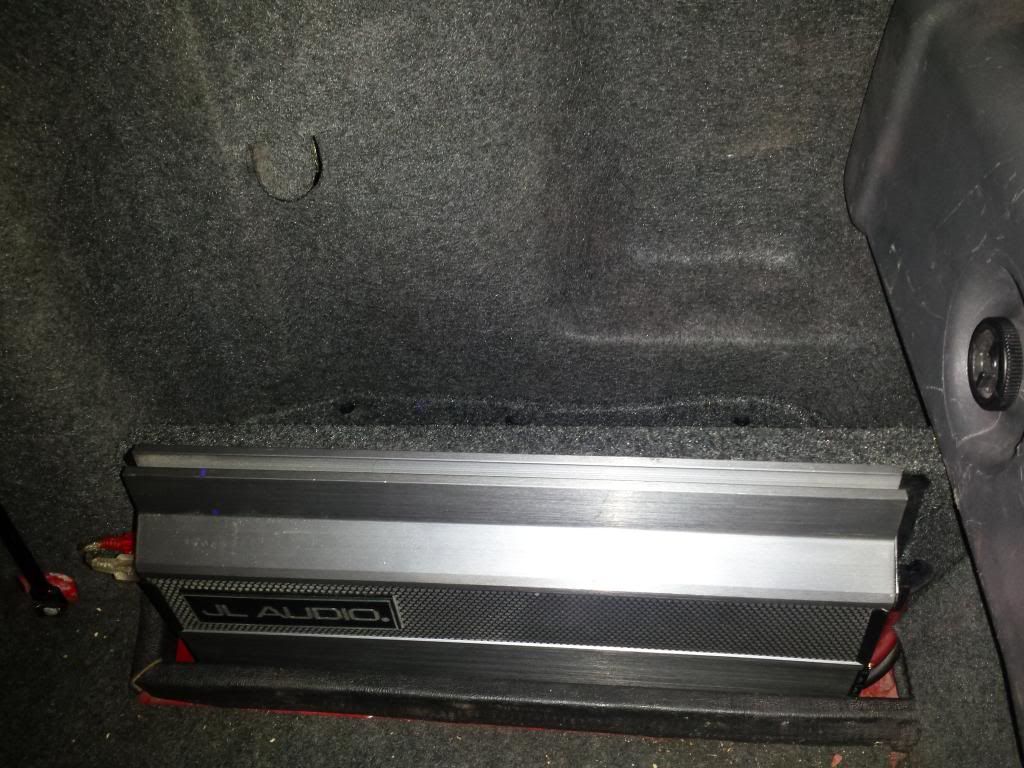
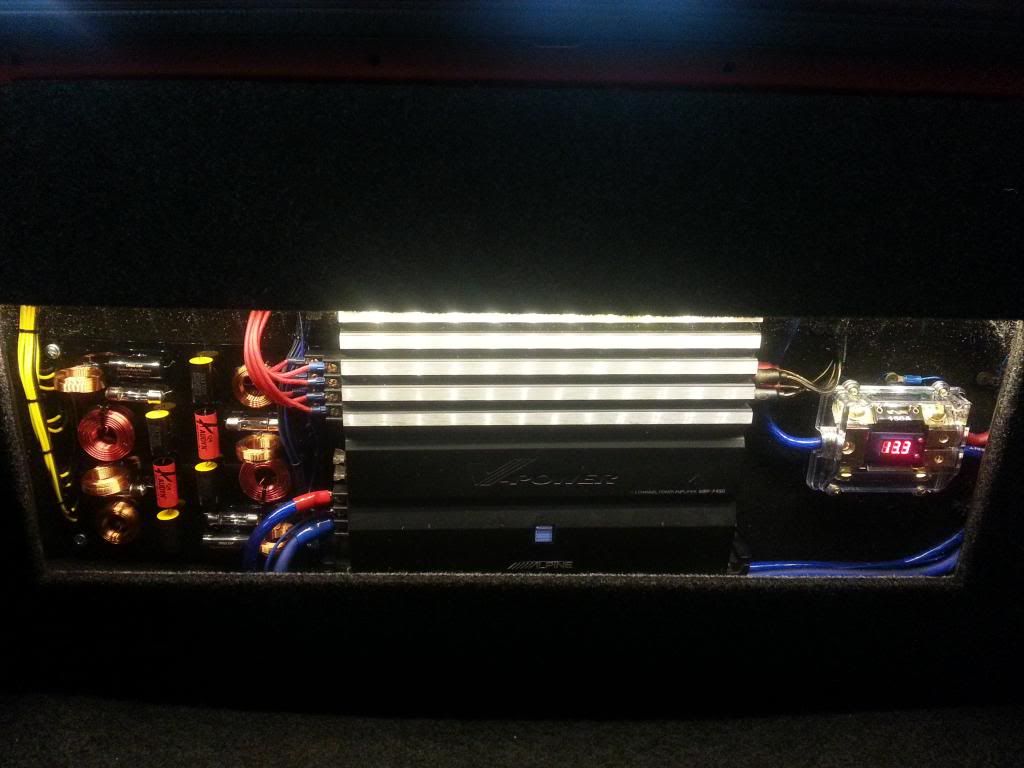
So, the last phase of the install is the face of the amp rack, and building a mount for the JL. Essentially, building this mount took us an entire day, that is another reason we would highly recommend using a 5 channel.
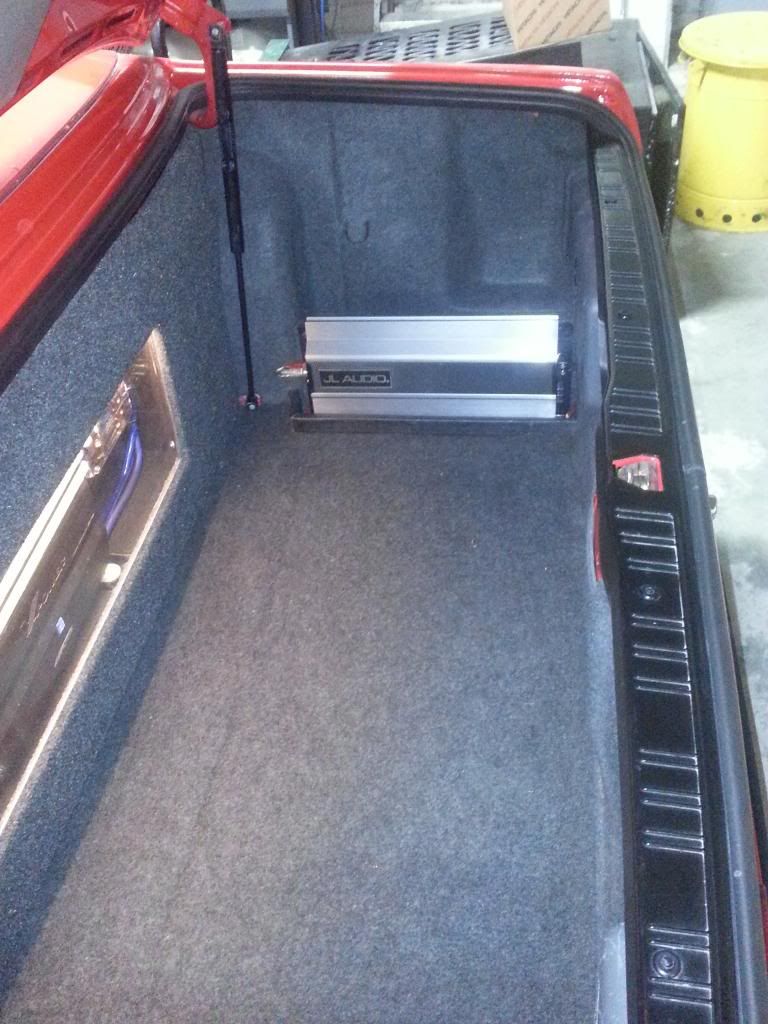
As you can see here, the amp is mounted to an upholstered MDF panel. It is quite sturdy!
We used some scrap material and some thick posterboard to make a curved panel, just for looks. The long-term plan is to have a second battery here, then something nicer could be made.
So, the face of the amp rack is the last thing to do. By this time we had been in this car for 3 solid days and were beat, so we didn't take a lot of pictures...but it sure came out pretty!

In fact, this is how we do E30, E28, E24, E21..shortly here, an E10 too.
The car is a very clean fresh-from-the-paint-booth beauty, shown here under construction:
Many thinks to our client, Haris for his excellent hosting and trusting us with his car.
So, first thing we did was tear apart the car. This means the left side of the dash, the rear seats, side panels, trim panels and kick panels. Basically everything but the seats, center console and glovebox.
Of course, this also means stripping the trunk and performing a whole bunch of work inside the space between the trunk and the back seat. If you have not read the install tutorial on our E3028 boxes, it is both incredibly difficult and vitally important to the performance of the system, so getting into the job is crucial. Here is Justin doing work:
You can see all of the cutting in the trunk has been done, the port tube holes are also cut and the ports test fitted. This process is critical to performance, as is proper mounting of the subwoofer enclosure.
Basically, what is happening here is the cavity is being used as a tuned part of the speaker enclosure, that is why it is so crucial to get it right:
If you have skills and patience, when you are done running wires, cutting holes and applying the sound deadning material, your trunk will look like this:
Those of you with a sharp eye will detect a bundle of 4 white cables on the left...well, that is our speaker wiring for this project.
Let me introduce the German Audio Specialties 8 Channel Passive Crossover Network, shown by the lovely and charming Amber Alvarez.
She really is a charming girl, I hope she has a great career.
What we have done is develop a crossover network intended to use all new wiring, which we supply as part of the kit. The wiring is actually intended for "in wall" use, and is a CL2 rated 16ga 4 conductor high quality wire.
Since all of the filtering of the signal for each speaker is done in the trunk, running all new wire is a necessity. We used the stock wire routes as we do in all BMW installs. Here are some progress examples.
RCAs and Speaker Wires (normally would have sub level control cable too, but not on this install):
Note the three pair of RCAs
and the speaker plugs from the GAS crossover harness:
inside the car, they should be all tidy too:
Note length of speaker wire from stock location:
Tidy RCA routing prevents damage and is always noise free. Of course, the stock grommets are always installed properly, this one just had not been done at this point:
One thing we always seem to forget to take pictures of is the wire routing from the front of the car. We basically take the time to take apart the stock wire retainers and use the wire channels as provided by BMW. Its tedious and doesn't show much, but just do a tidy job and run them right with the factory wire.
Yes, that means pulling up that stupid plastic wire protector and routing them just like BMW does. Don't be lazy, do a good job...and take some pics!
Since we also forgot to take pictures of the wire before being stripped, it has a heavy white insulation intended for protection. Each "corner" of the car gets its wire routed, then stripped and twisted. We will be posting a video on how to do it, but is it very simple: carefully cut the insulation jacket back about a foot, separate the wires, cut the thread (supposed to be used to take the jacket off, I dunno) and twist the wires into 2 pairs consisting of Red and Black plus White and Green, as shown.
Crimp the supplied terminals to the red and black pair. Use a 1/8" for the Black and a 3/16" for the Red:
Next, connect the factory tweeter wire to the new wire you just installed.
Currently we are discussing changing our standard wiring to match the BMW color code, but for now the Green goes to the Gray/Yellow and the White connects to Gray/Green. Check your wiring diagram to make sure, you will be able to tell from the plugs which is correct.
Use small butt connectors here:
That is all of the front speaker wiring. The front midbass driver we used is from the E34 chassis. They are a perfect fit, of course, as they are OE, and quite "burly". They are physically larger than the Infinity Reference, and due to their being engineered to work in the tiny cavity of a BMW rather than the door panel of a chevy truck, they have a far better bottom end than any aftermarket speaker regardless of price. I have installed everything from Diamonds to Infinity to el-cheap-o walmart junk to top end Focals, Quarts, GTi Series JBL and Morel, these have a better bottom end than any of them. Here is an E34 midbass driver next to an Infinity Reference:
Basically, this is about as good as it gets if using the stock location is the goal. They are top notch and can still be had brand-new.
Now, lets talk about tweeters. Believe it or not, the ideal tweeter for this application is the stock late model E34 tweeter. Blending it to the E34 midrange was a perfect match, the performance is amazing.
In an effort to produce the cleanest midrange we could we wanted to use a 12db/oct low-pass filter on the midrange. BMW uses a 6db/oct filter at 4Khz on its Premuim Sound package, we found that exact same crossover point was perfect (and use it in our "Local" crossover with a different tweeter) but that we had a little more "presence" when we used a 12db/oct low pass at 5Khz. In effect, this raises the midrange about 3db at 4500Hz, making a minor difference in the frequency response, but quite a jump in sound quality, but you pay the price with less overall efficiency. We had to find a less efficient tweeter with a smooth response that fit in the E30 housing, so the late E34 tweeter is it.
Just so we are clear, the late E34 tweeter is a very good quality neodymium magnet 1" Silk soft dome. It is well damped, has great power handling and a very smooth top end.
I am not going to get into much more of this, but if anyone has tech questions feel free to post them. Yes, I know this isn't what everyone else says, but I have installed all of those and I was always dissatisfied with the end results. This was designed, tuned and built for this exact car and I find it very satisfying to listen to.
So, the midbass in the front fit and look just like stock. Tie up your stock speaker wires (you will not need them on this install) and put the midbass driver in (remember to use three screws!) and now the tweeters.
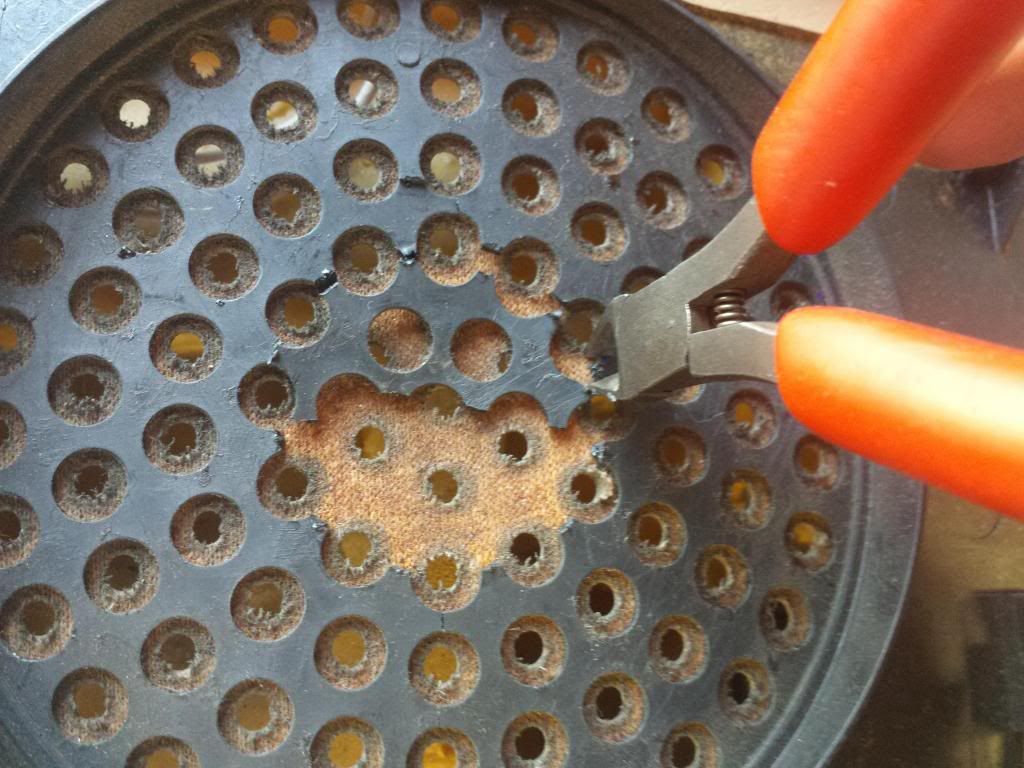
When you pop off the tweeter, you should see the orange sticker. I used a small "spoon" tool to pop the tweeter out including its outer casing, like this:
If you don't have good condition foam, the sound will be roughly 3db brighter from about 6Khz and up. if you find yourself turning up the treble you may wish to remove it, but generally I recommend keeping it.
Glue the E34 tweeter in using a high-grade crazy glue or silicone, whatever is good and re-install the sail panel as stock. Installing the front tweeters is the easiest part of the whole job, 20 minutes max.
Since the fronts are now complete, lets move to the rear.
The rear midranges are also the E34 speaker. Simply connect the red and black wires and you are done, just as the fronts.
However, installing tweeeters in the rear is a different story.
What we did was use the stock rear E34 housing. The one shown here has a broken tab, sorry about that, but no matter, we cut the tabs off anyway.
The principle is this: First, solder wires on the tweeter, cut a hole in the plastic frame, glue the tweeter in, drill a hole (we did a notch, oops) to run the wires through, connect the wires and boom, you are done. Install as normal, except for tucking the wires in.
Justin used Snap On flush cut for this part, they worked well
We used a front tweeter to make sure it fit, then glued the rears in using a high grade crazy glue. Here is a shot of the several dots of crazy glue holding in the rear tweeters:
Rear tweeters almost done, the housing creates a slight bump on the side panel grille:
Here is the left rear going together, it is a tight fit, but it clears. Some black shrink tubing was added to the green and white wires to not be seen through the grille.
As you can see, the look is not quite stock, but very clean and simple.
Of course, the sound from the tweeters is slightly affected, but as the stock system has no tweeters in the back at all, this is a huge improvement.
Now, back to the trunk.
We installed a pair of Infinity Reference 860W woofers in our "V2" vert box.
Its a fairly simple thing to install a pair of woofers in a box, we did not get pictures, sorry...but once we put this into the trunk and bolted it down, it was time to assemble things.
So, for those that have not caught on, this is a really unusual design. it is extremely critical to screw the box in place. There is a 1/2" thick layer of closed cell foam under the upholstery. If you have done a thorough job of cutting the ports and the rear wall, the face of the box seals quite effectively against the bulkhead.
If you do a thorough job of sealing the inside of that compartment including the top, both sides and all potential air leaks (we use a flashlight, it really helps) are closed up, you can put the trunk liner back together and bolt the box in using the supplied 2" drywall screws. Make sure to get all 4 screws tightly through the bulkhead into the box.
If your box is not screwed down, you are screwing yourself!
So now, we will get the amp rack, crossover and amplifiers installed.
We are using an Alpine 4 channel to power the interior speakers through our crossover and a JL 1000.1 to power the subs. We ran a single 4GA to a distribution block. Unfortunately, we did not have enough black wire, so we used blue wire and appropriate boots:
Let me tell you right now, there is no need to use a separate amp for bass. We used this pair because Haris already had them, so we were looking to conserve money. Looking back, I wish we had convinced him to use a standard 5 channel! An Alpine PDX5 or an Infinity Kappa5 would be a much better choice IMO.
So, the last phase of the install is the face of the amp rack, and building a mount for the JL. Essentially, building this mount took us an entire day, that is another reason we would highly recommend using a 5 channel.
As you can see here, the amp is mounted to an upholstered MDF panel. It is quite sturdy!
We used some scrap material and some thick posterboard to make a curved panel, just for looks. The long-term plan is to have a second battery here, then something nicer could be made.
So, the face of the amp rack is the last thing to do. By this time we had been in this car for 3 solid days and were beat, so we didn't take a lot of pictures...but it sure came out pretty!


Comment