
Tragedy has struck, luckily not E30-related. My daily is likely totaled, I was rear-ended pretty hard and pushed into a Suburban in my F30. This will be a very unfortunate distraction, I now have to search all over again for a 4-door rear-drive late-model manual BMW.... Maybe I'll just get a beater E30 in the mean time.
-
-
That tragedy is behind me now. I didn't buy another E30 because for something worthy of daily-driving they're just too expensive and then I'd feel bad dailying it. For a couple grand more I got a lot more car, in the form of a 2006 330i 6MT sport/premium/cold/nav with a little over 110k miles and a great service history. Kind of an end-of-era BMW, the last top-spec (non-M) 3-series with an NA motor. I can dig that. I'm loving the way it drives compared to the F30, and the N52 is a gem if not the most powerful thing. Plus I feel more comfortable being out of warranty in something that's been well documented in its common repairs. I can take my time refreshing it, and in the mean time it needs nothing.
Back to the E30.
The brake pedal assembly is done. I must have been doing it wrong before, because when I unbolted the booster and double checked the fork position, I had room to thread it further onto the booster rod. I was able to get it to a position where the pin fit and everything seems to be in a good spot, so I put it all back together hopefully for good.
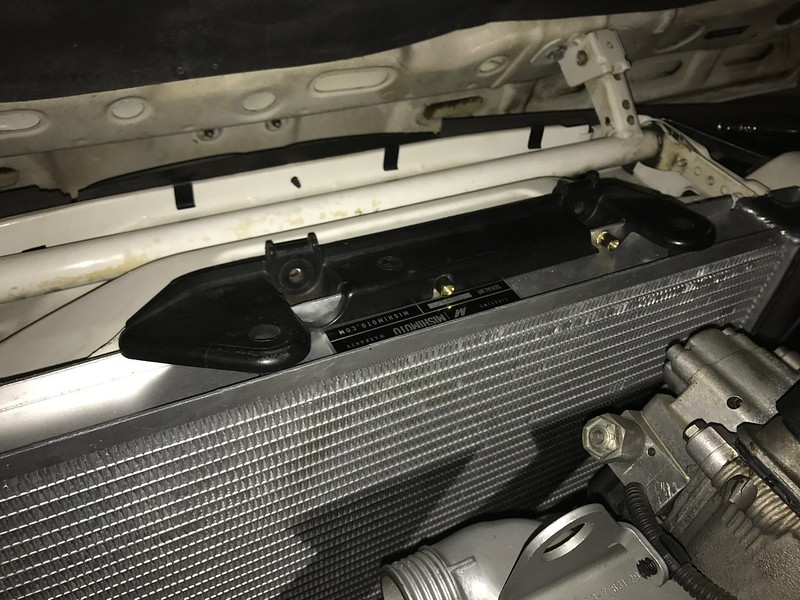
I swapped out the M42 left side radiator mount (left) for the M20 version (right):
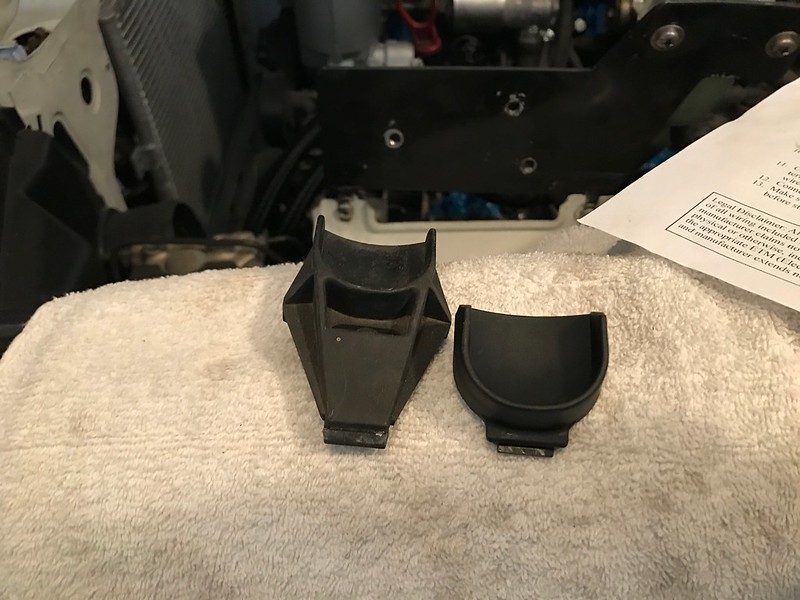
Half the clip on the bottom of the new mount already broke, but it'll do for now and I'll get a replacement asap.
Here's how the radiator looks in the bay:

Moving on to the throttle pedal, I'm having a slight fitment issue:

The above photo shows the E46 pedal base bolted down at the factory throttle stop. In most swap write-ups this installation is described as bolt-on using that attachment point and then epoxy adhere the lower female end adjacent to the factory male chassis clip. It seems that I need to use a longer bolt and just not tighten it down flush.
Here's how the base looks when put in the position where I think it should be adhered:
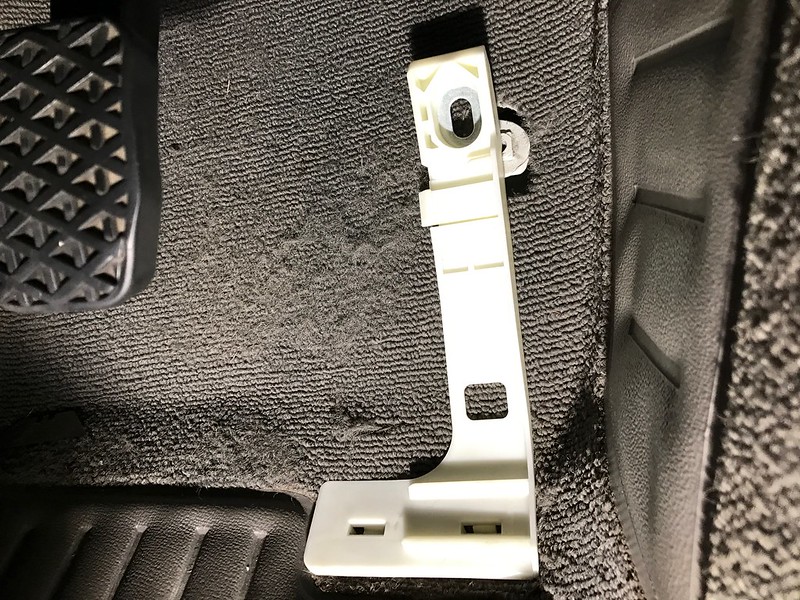
Better, but again it seems I'll also have to angle the E46 base and have a bit of a gap between its female clip and the E30 male chassis clip. That should make sense if you've ever removed an E30 pedal. I've posted this quandary to the S54 swap forum and maybe I'm missing something, but I really don't want to have to fabricate anything for this.
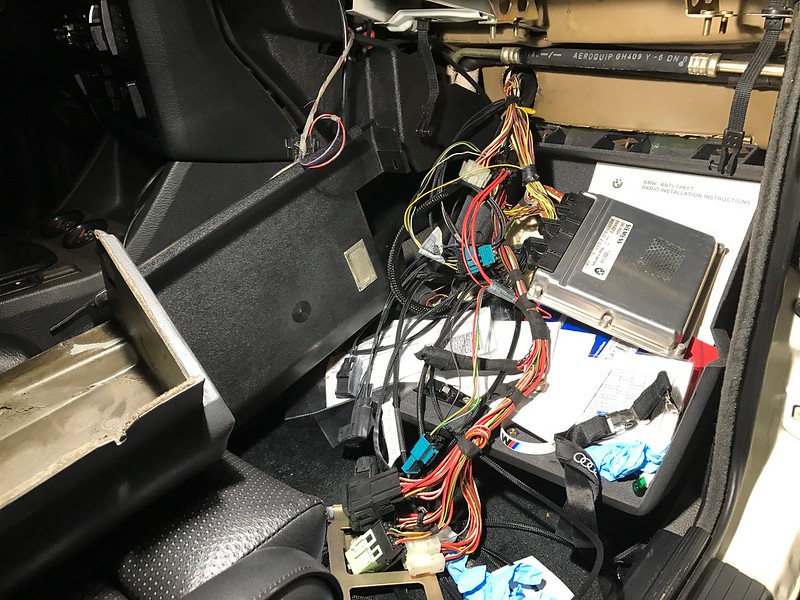
I'm feeling more comfortable with the wiring harness and adapter now, and I've fed it all into the cabin:
When I removed the rubber sheathing from the O2 sensor harness, oddly enough I found 2 cut wires. Not sure if that was intentional or what, but I repaired them with solder and heat shrink and it should be good to go now.
The DME is a different shape than those of E30/E36, so it doesn't exactly fit into the M42 DME bracket with ease. If I have a chance at bolting it up there somehow, I think it'll have to be with the connectors facing the engine bay. I may still want to install the R134a expansion valve before the glovebox is all buttoned up, and I have yet to route the pedal and sport mode buttons. But the only thing to do before hooking up the battery for a turnkey test is attaching the constant 12v sources and ground wires where they need to be.
Oh and I did get the oil cooler fitted briefly, to see how I want to run the lines. I flushed some 5w-30 through it first, and then went to prime it with TWS 10w-60, only to discover that one of my M22/AN10 adapters is leaking. Hopefully Orme Bros. can ship a replacement quickly.Comment
-
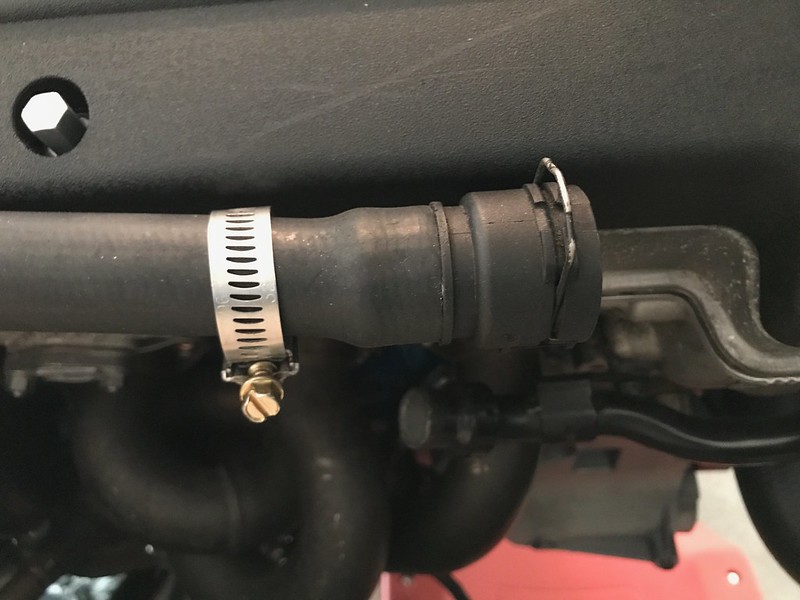
Here's a photo of the heater core flow path for reference. Back of the cylinder head out to bottom pipe, out from heater core top pipe to spider hose which in the S54 case is the black metal tube.
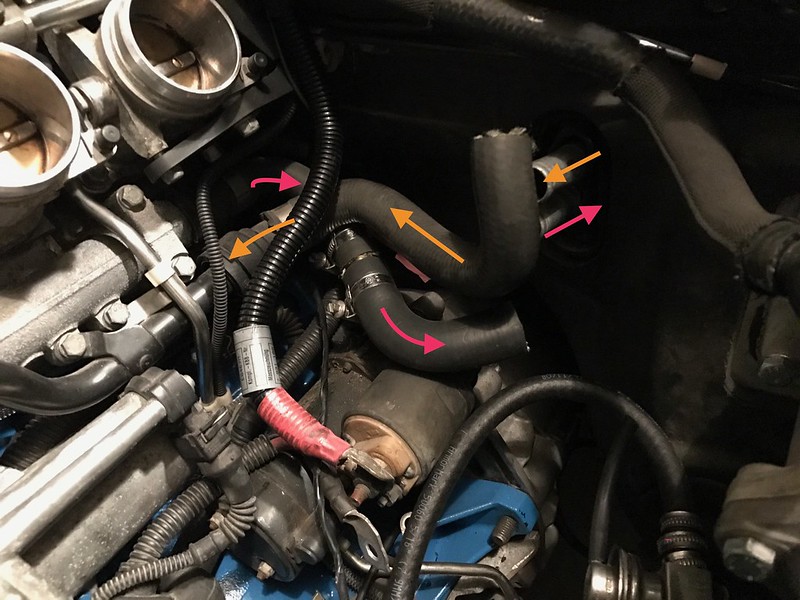
I couldn't get the top hose on the pipe without kinking it, so I needed to use another brass connector here and extend the line with an agle. I picked up a right angle hose and cleaned it all up, but the intake manifold wouldn't go all the way on. It's possible to reach under and feel that there's just a little interference to the top hose as well as the battery cable where it connects to the starter, so some bending of that and the core pipes is in order. I wound up pointing the lower hose towards the right side of the car a little, while I was at it, and looping the upper hose under the lower for better clearance. I got the intake manifold on for the first time, just need some hose clamps and the heater plumbing is done.
The M42 harness cover fit with the cuts I had made for the S50, but the bracket underneath had to be clearanced a bit.
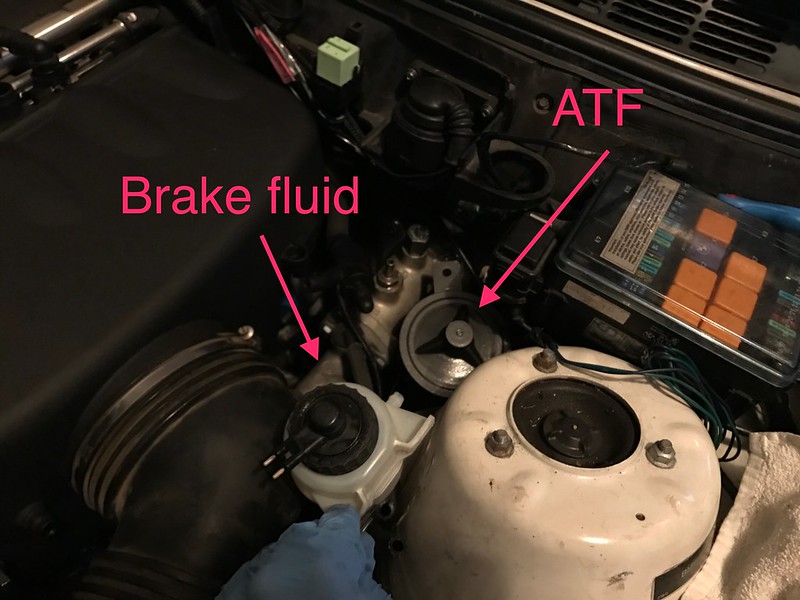
The brake fluid reservoir clearly has to be relocated to make room for the intake elbow, but I think I can still use that mounting plate and just put the res closer to the strut tower.
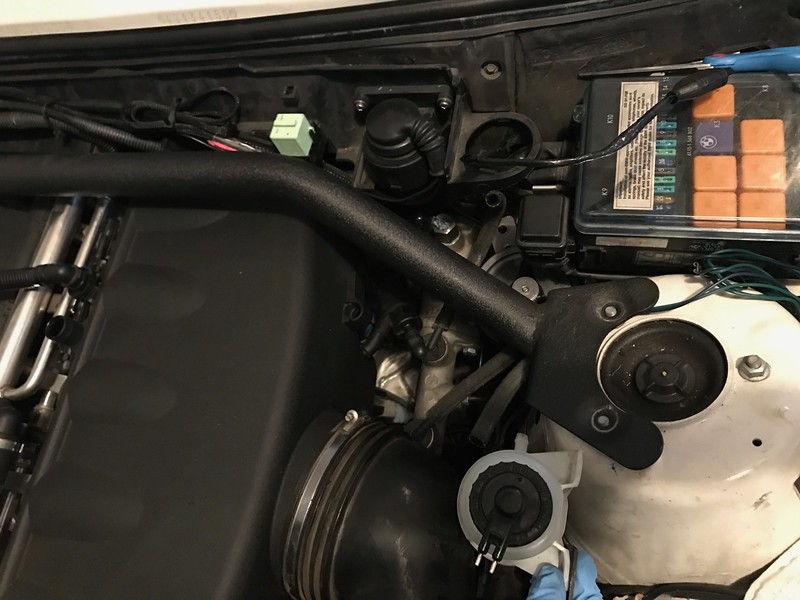
As for the big tall E23 power steering fluid reservoir, that thing won't fit really anywhere around the intake, so I tried and was able to snake it behind the strut tower next to the booster.
I'm hoping I can use the bracket I have on the frame rail that held the S50 atf canister to mount the E23 accumulator, or maybe the motor mount arm. I have to figure this out and then measure for the hoses to be made to new lengths.Comment
-
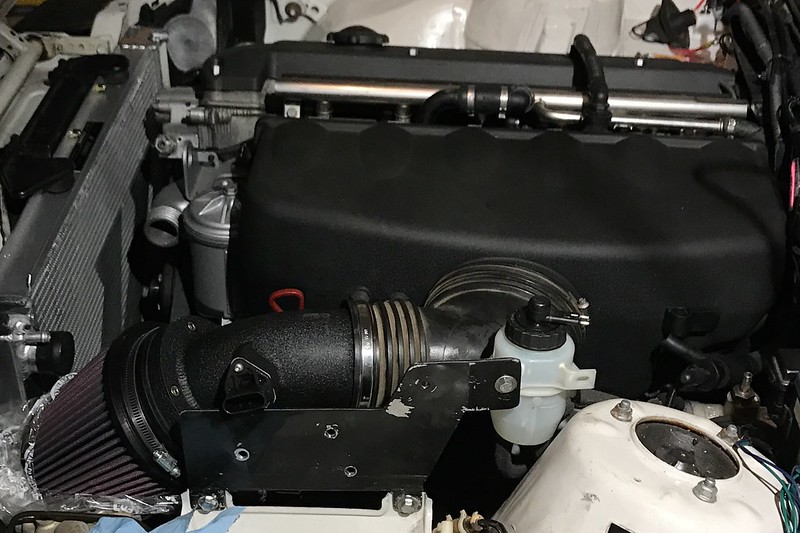
I pulled out the K&N Typhoon intake and assembled it to check the fitment. I'm glad I grabbed the upper portion of the M3 air box because this intake re-uses the air straightening screen and a rubber hose gasket for connecting to the elbow, in addition to the MAF sensor.
Hopefully I'll eventually make some form of a heat shield for this, maybe using the one that is included from K&N. My former cruise bracket is kind of in the way now so I'll get that cut, but I can get it all to sit well enough as-is. I really need to clean the intake elbow.
Another perspective, playing with my fisheye (on iPhone 7)

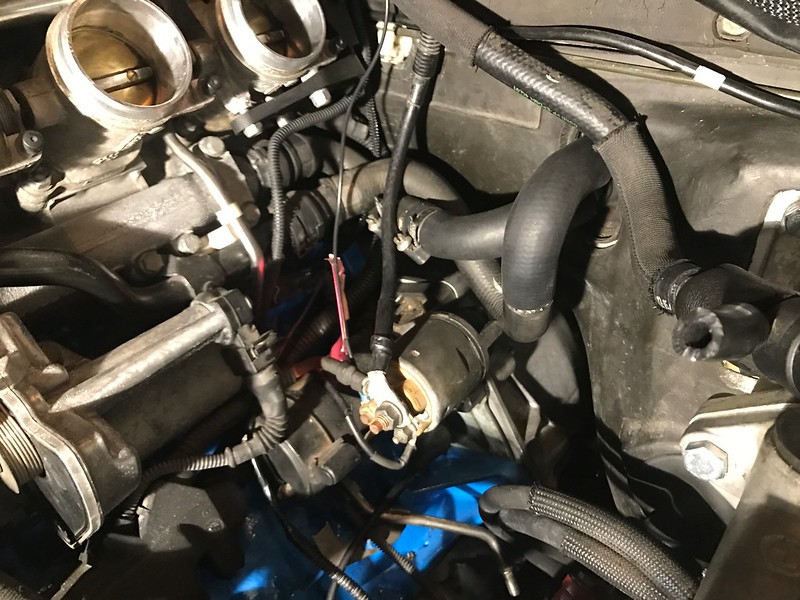
The motor now cranks, but I'm straightening out the fuel supply. Turns out my wiring to the pump was reversed, looking back I'm not sure why I put red to black and vice-versa... so I pulled the pump and re-pinned its connector.
When testing for flow I found that the hoses were also not correct going into the FPR. I was using the logic of "middle hose is supply, bottom is return" but for whatever reason this isn't the case. When in doubt, just follow the hardline from the fuel filter, which is really not difficult to do.
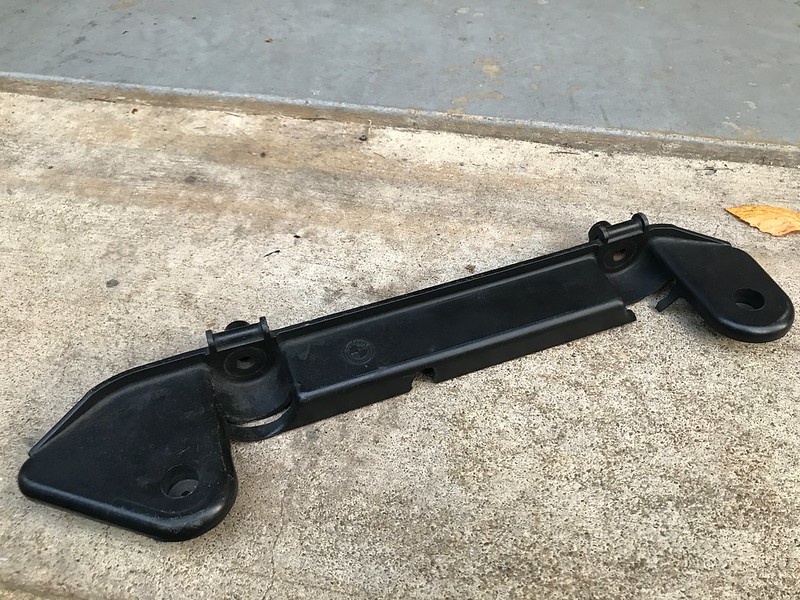
I have a new approach for the pedal bracket mounting problem - rather than moving the base which involves welding, I'm going to move the clip relative to the bracket. My bracket arrived broken - these things are very fragile! - so I removed the clip portion of it using the dremel with cutoff wheel, and my plan is to install it, then epoxy the bracket to it rather than epoxying to the floor.

The arrangement should end up something like this:
Given how fragile these things are I'm not sure I would recommend doing this without buying 2 of the brackets. Theoretically, it could be possible to remove the clip portion and preserve the rest of the bracket, but again, they're really fragile brittle plastic.Last edited by butters; 06-02-2017, 09:46 AM.Comment
-
I finally found a good local hydraulic shop that was willing to work with my old hoses, the trouble is they're only open 8-4:30 M-F so I need to leave work early in order to get there. They modified my pressure hoses for a very reasonable cost, and after going back for an adjustment of the power steering supply hose I think I'm happy with how they all look and install.
For now, the accumulator (bomb) is zip-tied to the former reservoir bracket. The only piece missing is a 1/2" to 3/8" hose union to step up from the rack output to the reservoir, so the 1/2" hose is not in its final spot. Here's how it all looks.... I should really make that booster supply hose all black somehow.

And I made some annotations for clarity, though it still looks a bit messy:
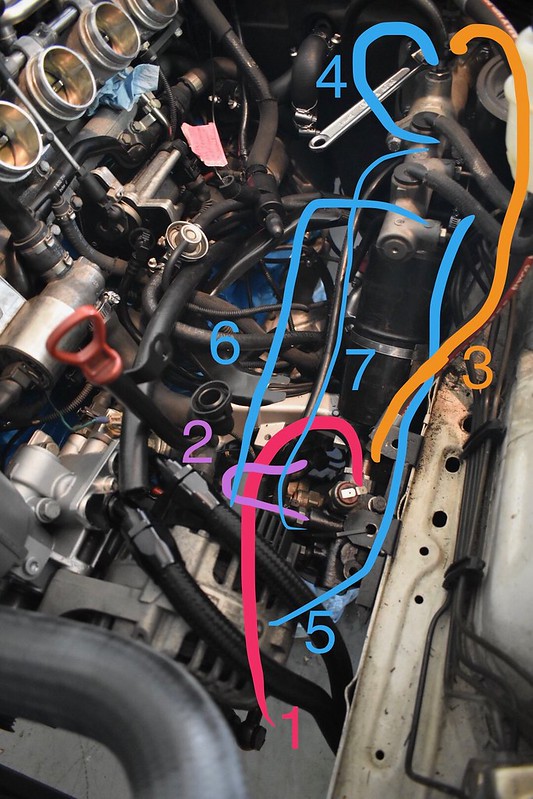
1 - pressure output, pump to accumulator
2 - pressure output, accumulator to rack
3 - pressure output, accumulator to booster
4 - return, booster to reservoir
5 - return, reservoir to pump
6 - return, rack to reservoir (1/2" hose not in final position)
7 - return, accumulator to reservoir
The shop is ordering in that stepped hose union for me, then I can tighten down the fittings, fill it, and install the intake manifold to really get this thing started.Comment
-
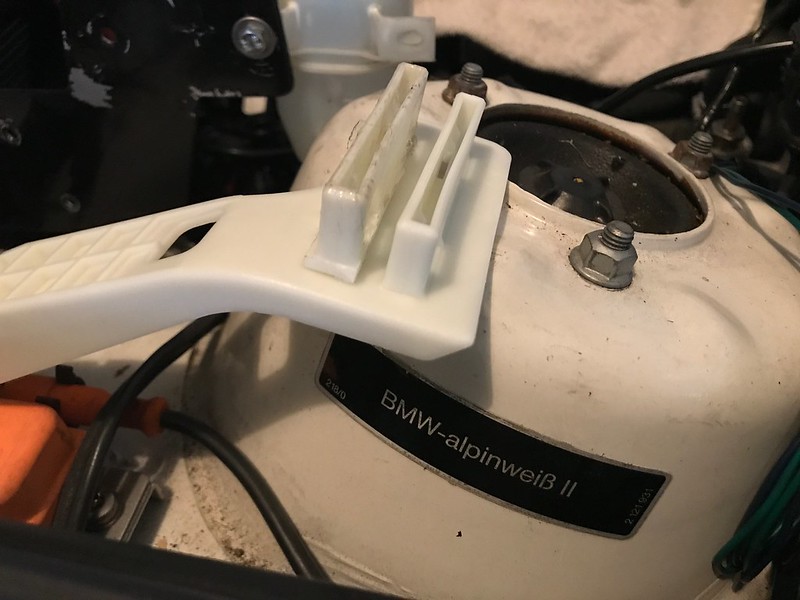
My solution for plumbing the expansion tank is to use the connector from the E46, but swap out the hose. This requires cutting off the clamp, which is just a solid metal band.

Here's what the connector looks like underneath:
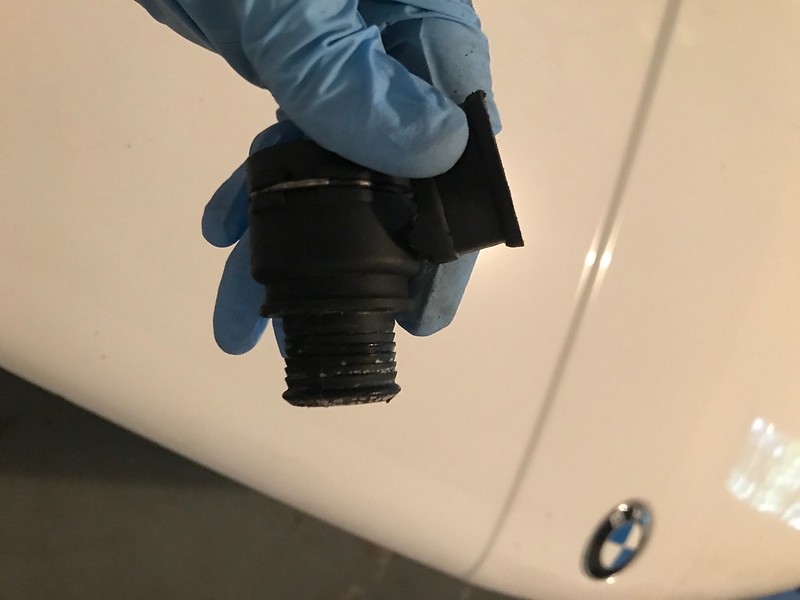
I then cut a 1-inch coolant hose to length and squeezed it on, securing with a hose clamp:
The S54 coolant cap doesn't work with the E30 M3 expansion tank (my mistake for making the assumption) so I have a 1.4-bar E30/E28 M cap on its way to me. Unfortunately it's that old basic metal cap, not a big fan of the look but it was only a few dollars.
My power steering/brakes system is tightened up and filled with DexIII ATF from the dealership. I installed the intake manifold and what I believe to be all the vacuum connections, and at this point it seems I'm not getting spark.
It cranks, and the throttles move, and I'm pretty sure I can smell some faint gas after trying to turn it over, but it won't even try to fire up. I have to check all my electrical connections and break out the multimeter. I tried connecting it to ISTA/Rheingold but the DME wasn't found. I can't draw a conclusion from that yet, it's been a couple months since I used it on my E90.Last edited by butters; 06-08-2017, 07:17 PM.Comment
-
She lives! I wasn't getting power to the ignition harness, turned out to be a bad connection at its power supply connector.
(How the heck do I embed this video?)
What a relief. Still need to bleed coolant, brakes, and power steering, not to mention installing the fan and reassembling the interior.
I started doing the brakes but got no flow out of the right rear caliper, hoping I won't need to bleed the ABS. I could tell that the hydroboost accumulator is still pretty functional, it took something like a dozen pumps before the assist was gone, which is great.Comment
-
Great work! Looks like a huge undertaking. Enjoying reading about the solutions for all of the problems, it will be a huge help to future swappers.Comment
-
Thanks! That's kind of what I'm hoping; there's a lot more information out there on getting the E36 motors to work in the E30.Originally posted by Raxe View Post
Last night I did the initial bleeding of the hydraulic system (steering & brake booster) and then pressure-bled the brakes and clutch. No issues there, standard procedure.
I pumped the brake pedal several times for each corner, to help with the bleed of the master cylinder and to exhaust the hydraulic accumulator. This pulls all the fluid from the accumulator for an accurate measure of the system volume via the reservoir.
Final step is to top off the reservoir up to the mesh screen - my guess is that the accumulator will retain a little under half the volume of the reservoir. If these steps aren't followed in order, the reservoir may overflow should the accumulator be drawn upon after engine-off. Lots of info on mye28.com and other online E23 discussions.Comment
-
Nice! Glad to see you got it started!
Originally posted by whysimonComment
-
Thanks! Yea it's a relief to be over that hump.Originally posted by FredK View Post
Next order of business is the radiator fan. I crossed my fingers hoping my 16" low profile SPAL would fit, but sadly it does not. There's interference at the crank pulley and the hub of the water pump pulley, so I'll have to downsize.
I think I could run two small fans but as I considered it, it also looks like I could offset to the left side of the car and go with a medium profile fan to get as much cfm as the 16" low profile. Granted it will be less surface area, but hopefully the larger rad will offset compared to my experience with the M42 rad.
Rather than guess and return the 14" if it's too small, I found drawings of the fans online (a1electronics is the name of the retailer) and printed them off to as close as I could get to 1:1 scale. Ignore the optical illusion, both fans have identical overall thickness and edge thicknesses.
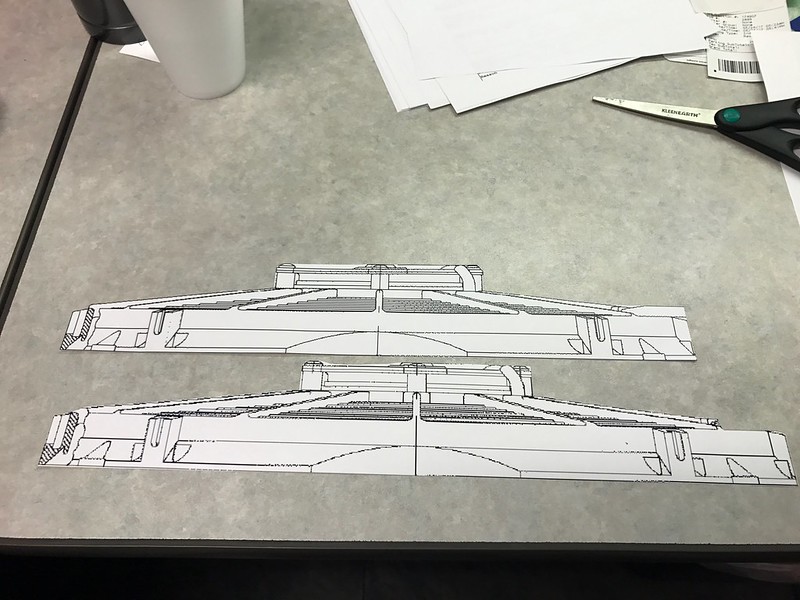
The 14" actually looks like it will work, mounted as low as possible. The hub of the medium profile is about an extra inch, but it's in an area with plenty of room.
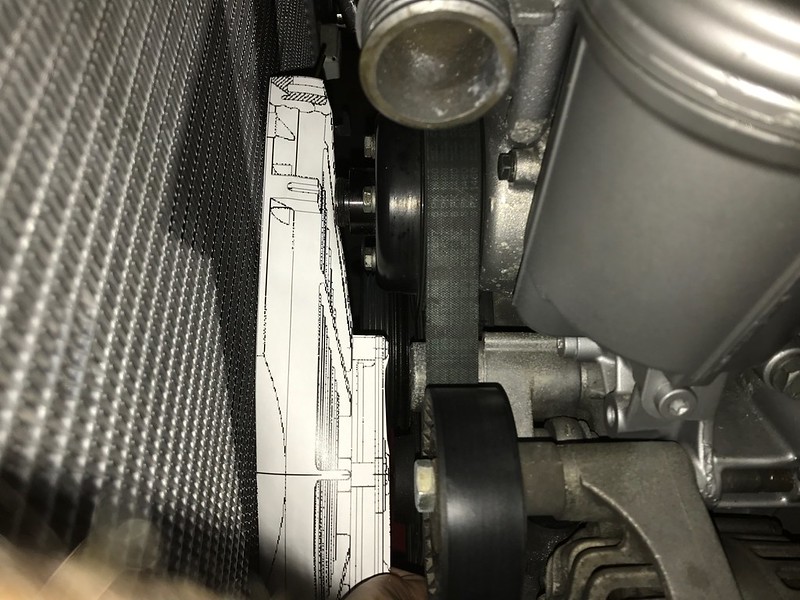
So I'll give that a shot.
Maximum clearance is a must here, and I have the usual problem where the E30 radiator bracket doesn't pull the radiator against the core support. So I broke out the dremel and got to work.
I suppose I can cut the foam knobs so they fit back in place for appearances.Comment
-
They there butters. You can cut off the water pump nut and gain more room.Comment
-
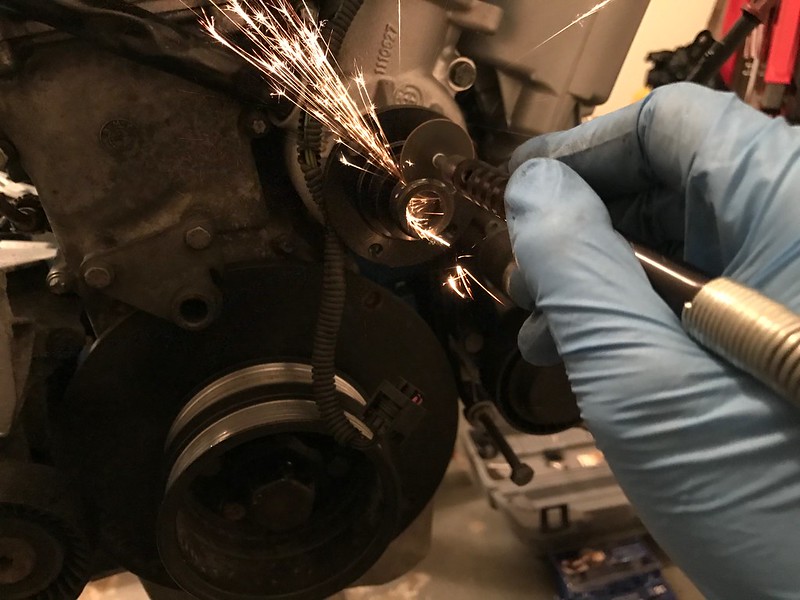
I cut back the threads for the clutch fan, to the point where the shaft becomes solid. I didn't go further because I'm only equipped with a dremel. But in any case, the primary interference is with the hub of the pulley itself. I will check again since you mentioned it though.Originally posted by iwantspeed View Post
Comment
-
Loving the execution of this so quick after pointing it out.Comment
-
Ha, I wish I was that quick! I meant to point out that I had cut that end off before installing the motor. It does work and add clearance, but the crank pulley gets in the way of the 16" diameter fan.Originally posted by iwantspeed View PostComment


Comment