
no text at all. Stealth style. Screw the next owners!
-
"We praise or find fault, depending on which of the two provides more opportunity for our powers of judgement to shine." -
Cool project!
You could do your labelling by getting the text engraved into the face of the hazard switch, then fill it with white paint and buff it. It's pretty standard practice. My brother's business has a couple of machines for doing it. It's very accurate, and pretty cheap to do. Unfortunately we're in Australia, otherwise we'd do it for you. Could easily match the fonts used throughout the E30 too. You could probably find someone locally...trophy store etc...but you need someone interested in doing it.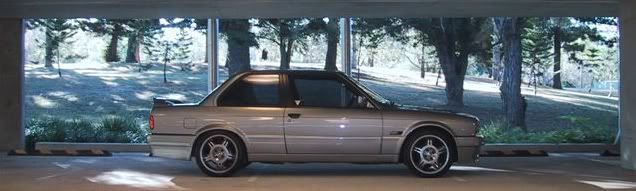
Comment
-
nothing at all or a sticker depicting a rectangle marking the left and right limits.
actually, all i would care for is the circuit board since thats the worst of the trouble to building this stuff. The rest, most anyone can handle. :)Comment
-
i'd love an a/f gauge but i would want some writing for the michael knight factor and would need it to be priced no more than $60 shipped. Those vw gausges are sick. I'm going to have to order me some.Your signature picture has been removed since it contained the Photobucket "upgrade your account" image.
www.gecoils.com
My euro 316 project Transaction FeedbackComment
-
Sub muther f'n scribed
Comment
-
Stickers would probably be best, you could hook up with Jon on that one to make symbols for whatever the buttons purpose is. NAWZ button anyone?
If its air/fuel mixture that'd be different.Reminiscing...Comment
-
Woah, I want something like that.Comment
-
WOOOSH....time for an update.
I've had a ton of people ask me about making one for a boost gauge. I'm holding off on that. I think converting the stock Econ-o-meter/MPG gauge that we all already have would make a much better location for a boost-o-meter. (I'm not the only one who has dreamed this up)
Plus - if you have a turbo, you most likely have Mega squirt - so it's a dead gauge anyways..
I have an extra cluster sitting 2 feet away, stay tuned.
BTW - keep in mind - this is just a mock up.
So, time to make some circuit boards...And yes, I'm going to die at a young age, exposing myself to chemicals as I do.

Since the LED bar graph has to be at a right angle to the main board, I'll need to make a tiny tiny board (did I say tiny?) - I'm getting really good at making micro sided parts.

Here is the two together - the main board is all done. I'm not 100% happy with the placement of the components - but that is what a one-off is for. I'll tweak it a bit more. Plus, I'll be using much smaller capacitors, that will make a big difference. I just used what I had on hand. All parts will be custom ordered.

This picture is deceiving...this is SMALL...Don't believe me? Go grab a quarter. I'll wait...

Yep, it fits

Just chillin' in it's new home - it will need to be centered of course!!!

Cute little threesome, no?

The LED display is resting in the "button" - not it's final position.

Next up: Modifying the button, and installing it into the case.
BTW - if anyone has any spare sensors let me know - specifically I'll need to source a boost sensor, oil temp, and oil pressure - please PM me.Last edited by george graves; 12-19-2007, 02:48 AM.Originally posted by Matt-BComment
-
Wow, very interested. I've got locations for A/F, oil pressure and boost, but I'd still like an oil-temp gauge somewhere.
'88 325is
VP UT of Austin Autoholics
BMWCCA 380364Comment
-
tagging for updates.Originally posted by payney8
Comment
-
I'm now wanting to see what the finished product looks like.....sigpicComment
-
This is definitely worth subscribing to! Nice work so far, kudos on the skills man.
"BMW Style 32 Poster-Child"
HTTP://WWW.CLAVINZERO.COM/e30-5-lug
**(My Guide to E36 M3/Z3 1.9L 5-lug Swap)**
Comment
-
Didn't get as much done as I wanted to - it's COLD here.
Time to start dealing with the thick and dark button. The factory uses a little 5 watt bulb to light up the button - that is actually a lot of light. I'll need to make the button a little more LED friendly. With that and picking the right LED's, Ill have a good match.
Stock thickness is 0.04" - Pull out the calculator, and I'm shooting for about 0.015" thick - BTW that micrometer is older than you or your BMW...

Time to bust out the sand paper - I'm going to thin this thing down - very carefully.

Sand, sand, sand...

Good news? - I'm getting a ton more light in, exactly what I wanted.

Bad news? I've got a button all scratched up. No problem, I can fix that.

Kick it up to 1500....

Getting there...this is taking longer to do that I care for...

The factory button has a "textured" surface to it. I could stop at this point and replicate that surface by hitting it with some polyurethane, or automotive clear coat. Using a technique I'll call "spraying it up dry" - basically hold the can too far away from the part so that the paint dries a bit in the air. The result is a "dry" textured look, not wet.
But I kinda wanted to *bling* it out a tiny bit...

I'm sure this pic needs a caption of it's own...

Yea, that looks like the biz...

Don't judge the brightness by this pic. You don't even what to know what I am using for a camera....To the naked eye, it looks great. I think it will be bright enough for daytime and dark enough for night time. It's very close to your SI light in the cluster in brightness.

Time to epoxy. I could have used silicone, but thinning out the button this much, you could accidentally damage it if you were in a panic and pushed on it thinking it was the hazard. This stiffens it all back up.

Yep - that is what I call stealthy!!!

Next up:
- figure out how to solidly mount it in the case (I think I have a plan)
- install it in the car
- Modify the circuit for the following:
Voltage
Boost
Wideband Air Fuel
Oil Pressure
Oil TempLast edited by george graves; 12-22-2007, 09:39 AM.Originally posted by Matt-BComment
-
Nice work gg...Originally posted by Simon S
Comment
-
Thanks super....
I'll give you guys a bonus question...an insight into my next mod
What factory part is this circuit board from?

Bet you can't guess....And Joe Funk is not allowed to answer...Last edited by george graves; 12-22-2007, 03:30 AM.Originally posted by Matt-BComment
Comment