
Searched lazily, and didn't see much posted. So I thought I'd post up what I did on mine and at the same time boost my local NC community through r3v.
Early e30 Spoiler Install

This DIY can be used on numerous front spoilers: eS/iS Hella, BBS, Racing Dynamics, and etc.
Parts Needed

Minus the spoiler and rebar, hardware will run you under $5 at Lowes or Home Depot.
Tools Needed
Let’s begin.
1. Modifying Rebar
2. Preparing Spoiler
Note: measure five time, drill once for every step of the way.
3. Preparing e30
Note: there are only so many times you can drill your bumpers and enlarge the holes until it becomes a pain in the ass. Measuring is a lot easier then drilling, do it enough time to be absolutely certain that you won’t have to be drilling more than once. Best installs are clean installs.
4. Installation
More pics will come.
FAQ
Will be added here.
Thanks, Art.

Early e30 Spoiler Install
This DIY can be used on numerous front spoilers: eS/iS Hella, BBS, Racing Dynamics, and etc.
Parts Needed
- Spoiler and spoiler reinforcement bar (rebar)
- Three (3) M6x20 and two (2) M6x35 bolts. Do not forget to get five (5) nuts and a box of ten (10) large washers.
- Two (2) 3/8”carriage bolts ½” threaded length, two (2) nuts, and two (2) washers.
Minus the spoiler and rebar, hardware will run you under $5 at Lowes or Home Depot.
Tools Needed
- Hammer (and you thought this was civilized) and piece of soft wood.
- Socket and wrench set. Socket u-joint is a huge plus.
- Drill, drill bit set, and a center punch.
- Ruler and marker.
- Helping hands or C-clamps.
Let’s begin.
1. Modifying Rebar
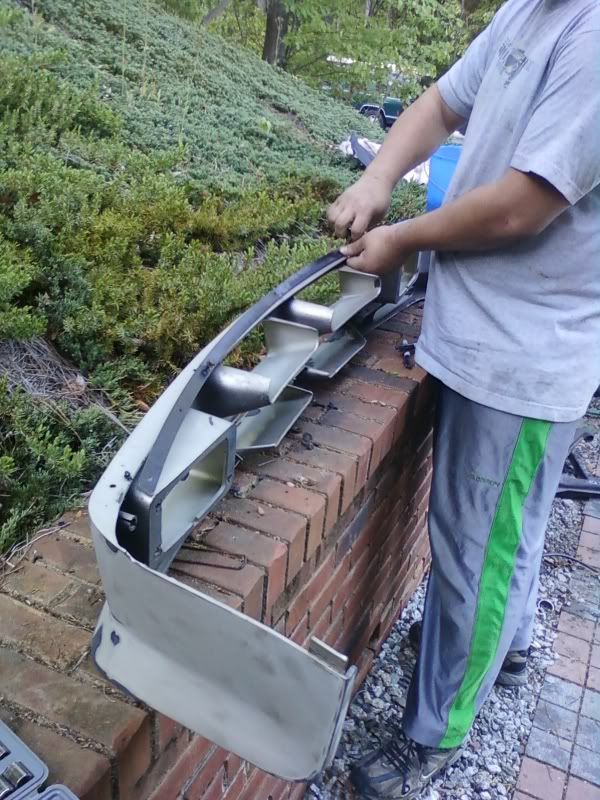
- Remove studs from rebar. Put rebar on a piece of soft wood and hammer studs out one at a time. To make sure that bar doesn’t bend, have a friend stand on the rebar over each stud while taking them out.
- Use drill and ¼” drill bit to enlarge each of the stud holes.
- Note: don’t worry if the bar slightly bent, when you hold it down or bolt down, it straightens out.

2. Preparing Spoiler
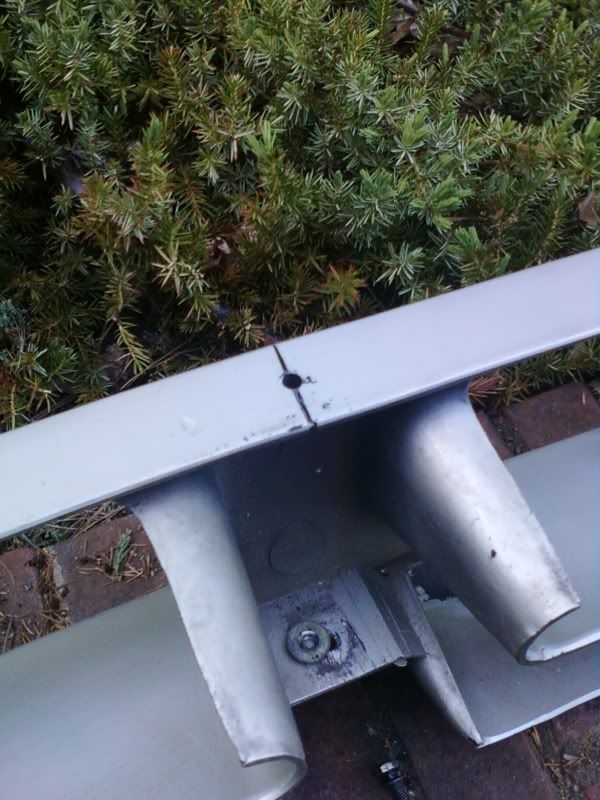
- Use marker to indicate center of the spoiler on the top shelf. Good way to mark center is to draw a line from the inside of the spoiler’s center circles all the way around to the top. Another way is to use a string long enough to stretch across entire top shelf. Fold string in 2, and mark center. Stretch string back over the spoiler, and wherever the center of the string is, that’s the center of the spoiler. Mark it with a line. It takes longer to read this, than to actually do it.

- Put rebar inside the spoiler under top shelf. Hold spoiler to rebar’s curvature, and with a ruler, measure distance from edge of the rebar to the edge of the spoiler at EACH stud hole.
- Put rebar on the top of the spoiler, align center hole to center line on the spoiler. Measure space from step 2 for the center hole. Drill 1/4” hole through the spoiler and bolt rebar down to spoiler through center hole. Now you can align rebar to spoiler, measure out the rest of the holes and drill all 5 holes.
- Remove rebar and redrill all 5 holes to 5/16”.Use ruler to measure 1.5” along the top of the spoiler from the corner, mark it. From the mark, measure 1.5” down, and mark it. Which ever carriage bolts you choose to go with, drill that size holes on both sides.
Note: measure five time, drill once for every step of the way.
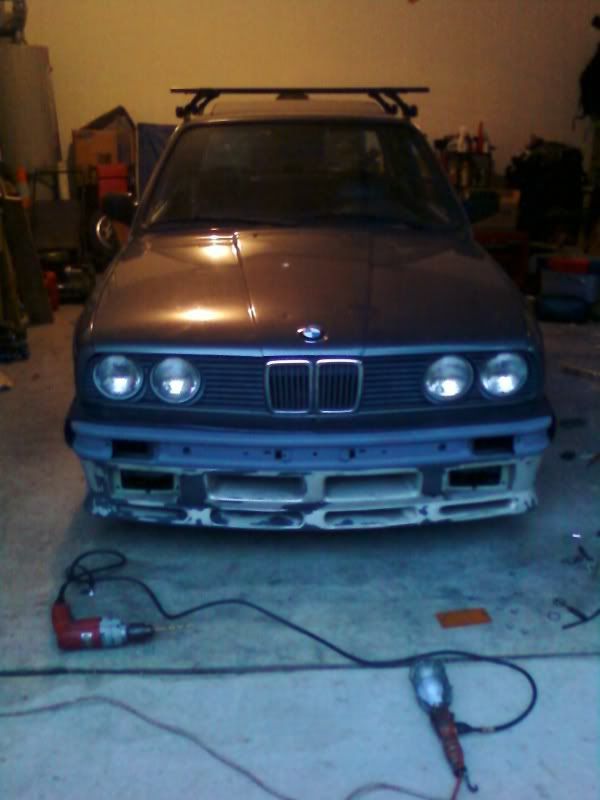
3. Preparing e30
- Pick up your e30 and put front on jack-stands.
- Remove factory under plastic, if it’s still there. Remove factory lip, if it’s still there.
- Place spoiler under the bumper where it’s supposed to go. Hold it up with the help of a friend or C-clamps and drill carriage bolt holes on both sides. Remove spoiler and redrill valence holes to 3/8”. Place spoiler back up, put carriage bolts in, place washer on the inside and tighten spoiler down, but not all the way.
- Raise spoiler to the bumper, make sure it sits even on both sides and do not apply any lateral pressure to spoiler. Lift it from underneath only, not to distort spoiler shape. While having spoiler lifted, use marker to mark center hole, just one, and remove spoiler from the car.
- Use center punch on the marked spot, and drill it out to 5/16”. Place rebar under the bumper and bolt it down through the center hole. Align it, realign it, re-realign it, make sure it sits perfectly on, not twisted one way or another. Use clamps or a friend to hold rebar flush to the bumper. Mark and center punch the rest of the holes. Remove rebar, and drill the rest of the holes out to 5/16”
Note: there are only so many times you can drill your bumpers and enlarge the holes until it becomes a pain in the ass. Measuring is a lot easier then drilling, do it enough time to be absolutely certain that you won’t have to be drilling more than once. Best installs are clean installs.
4. Installation
- Now that all holes are drilled and everything is aligned, it’s time to install it. You can paint and do whatever you’d want to do to it now, before bolting it up.
- Tighten side carriage bolts first.
- M6 bolts go in from above with a washer in place. Use M6x20 for outsides and center, and M6x35 for the other two middle bolts. Put rebar under the shelf of the spoiler, as it will be bolted in. Tighten M6x35 first, then the rest.
 [/li][li]Install fog lights, if you have them. Install plastic under-shields, if you had them.
More pics will come.
FAQ
Will be added here.
Thanks, Art.

Comment