-
-
Id suggest installing all the rings. The rings dont just serve a visual function. At night it focuses the lights into the circles, without them the light just diffuses out. Looks really nice at night.Leave a comment:
-
I have everything I need to do this job other than the alpina strip which I will be getting soon.
I'm thinking I may leave the 2 smaller cluster rings off though, just to be different. Well see though when i get to that part.Leave a comment:
-
I passed on the carbon fiber, but I've had levent's rings and alpina strip in a box from 2008. With the help of this how-to, I finally got around to putting them together. I used the ford cardinal red duplicolor (TWO COATS) that was previously suggested in this thread.(NC325iC)
Leave a comment:
-
I know I can't be the only one who finds a carbon fiber overlay and cluster rings borderline ricey and tacky...Leave a comment:
-
Sounds like thats the way they all are, then. I was wondering if it was just mine. Still happy with them though - they look great.Leave a comment:
-
Just did the rings. Had to file the cluster to get the small ones in, and the big ones are loose. I think I'll lay a bead of super glue under the big ones to avoid rattling.Leave a comment:
-
The little ones with the black base are 2721mf. The two that are small wedges are plain 2721's. Autozone didn't sell the MF's, Napa did though with a wagner cross reference at like 2.25$ a piece. In retrospect I should have just bought them online

Leave a comment:
-
Just did my cluster, so I'll chime in -
The large bulbs are just a generic (5w? Can't remember but I'm pretty sure it says it on both the bulb and the back of the cluster) fitment. If you take your old bulbs to the store, it will be realllly easy to match them up with the new ones. If I find the package of bulbs I bought, I'll post the # up. The little bulbs are BMW only I believe, as they are a special design and the bulb + base are integral.
I did glue the cover back on, its really easy and will keep it from rattling, though others say that all the trim pieces keep it in place tight enough w/o gluing it, fwiw. Does make it easier to perform further work on it in the future (although the only thing you have to take the lense off for is the trim rings, and I doubt I'll ever be monkeying with them again).
My gas & temp gauge rings snapped in place, in fact they were so tight I had to shave down the cluster a little bit to get them on. Definitely no adhesive needed. The two large rings, however, were real loosey goosey on mine and I glued them in for good measure.Leave a comment:
-
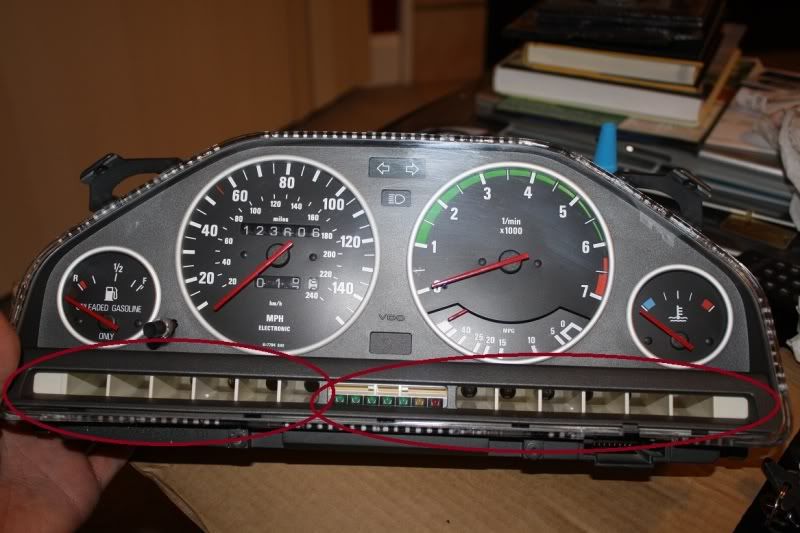
Hey levent, I just pulled the cluster to put your alpina sticker and rings on. While I have it all out I'm changing the bulbs. Do you know the bulb code of the little and large bulbs? That'll help me when I'm down at the autozone. My VDO cluster has 11 mini bulbs and two big ones with a few blank spots on the back. Does that sound right?
Do you need to glue the clear plastic cover back when you're done?
Do the gauge rings need adhesive, or do they all snap in place? I'll take pics in the next couple days when mine is done being gutenized.Leave a comment:
-
Tell you what, painting needles is a pita. Oh and Ford cardinal red looks good on them if you don't want to get BMW paint or nailpolish. Just pick up some duplicolor touch up.Leave a comment:




Leave a comment: