-
Holy Hell man! You've saved that damn car. I wouldn't have touched it with a ten foot pole, but you made it happen. I admire your dedication. Seriously really impressive. -
-
Here's todays updates. Ill post up some more pctures later of how i went about doing it, but it's not done yet
Here's how it started at about 4

And a few hours later we had this:o
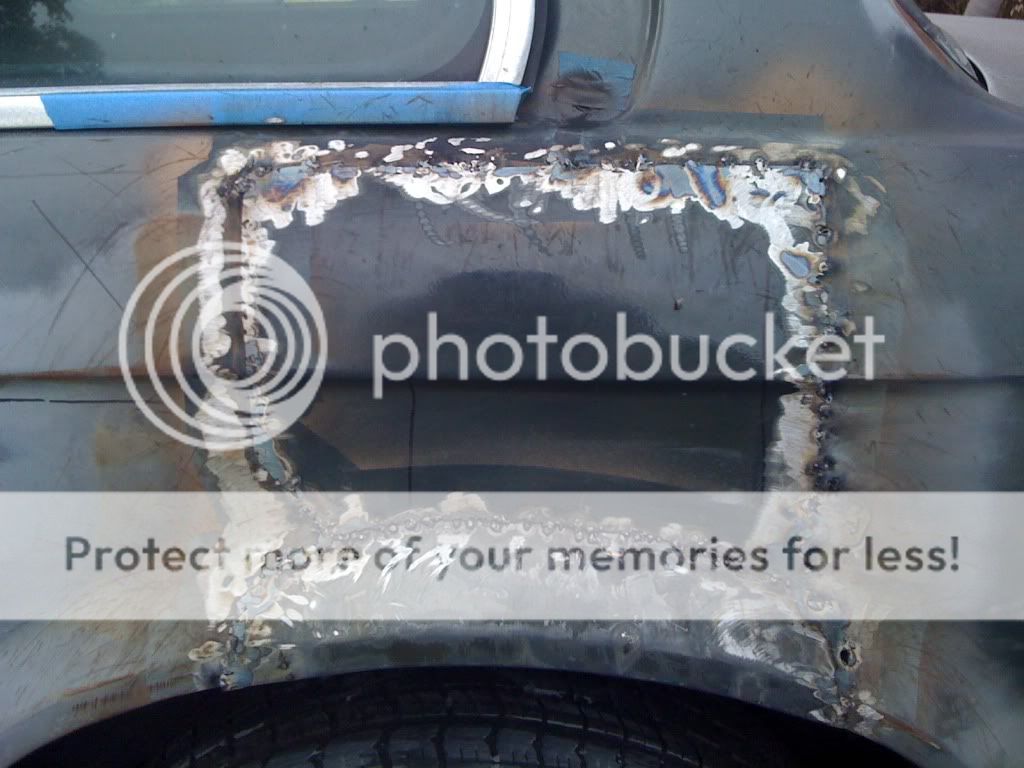
Not too bad for that harbor freight flux welder:pLeave a comment:
-
Well this is gonna slow me down a little bit. Seems that I will now need to spring some $$ for a tire for the vert. The whole sidewall is chewed up and basically paper thin now:o

But I did manage to get a can of this stuff!

Now I can finallly get those patch panels on! woo:DLeave a comment:
-
Thanks guys, it sure is one crazy ride:D
Thanks, and you're right. No place, so its basically just been sprayed in my front & side yard. And thanks for the tips on the homemade booth. That would be an awesome thing to put together for the final few coats, and would be awesome I bet at keeping the bugs and dust out. Oh, and I am doing SINGLE stage paint guys, so just color. Not color and clear.
Hopefully I can make some more progress this week!Leave a comment:
-
Wow, I thought it would never get done up right. You are doing one amazing job!
I am guessing you don't have anyplace that is wind and dust free. Here is what you should do when you finish the body work:
Go buy 8 10' 2x4s, roll of clear plastic 3' wide is good enough. Dig 8 holes 3 feet deep then bury them with 7 foot remaining out. Now get some roofing nails and cardboard. The cardboard is to keep the wind from tearing plastic free. Wrap your temp painting booth and park your car in there for a final painting. You SHOULD shoot the whole car at once to make an even coat. The temp booth will keep bugs and dust free from your finish color and the clear coating. Will also give a nice place for the paint to set up for two days to be nice and clean =)
P.S. Most DIY places like Lowes have base grade 2x4s that are CHEAP.Leave a comment:
-
Well, is there any feed back on shaving the rear emblem?

Yes, no?Leave a comment:
-
Yeah, so here's some pics of the door and a little walk through of what I did.
I started by masking some stuff off.

Masking off the insde of the door so when I grind the rusty bottom rails the metal doesnt get inside of the door and rust in there too

This one's just kind of an over all shot

Then the real work starts. Grinding down the rust. Took down more after this but didnt grab a picture.

Sanding and applying filler on the outer side

Big pain in the butt using bondo to fill in rock chips on the bottom. Took me so long to sand that stuff down. I really need to pick up some body glaze. Would make it so much easier

Almost all ready to be wiped down with some Xylene and painted.


Then after I wet down the ground I sprayed it. Came out pretty good. Still needs some more coats of paint, but much better than it was before.

And yes, I know I forgot to tape up the door lock. Realized that once I was halfway through the second coat

Some shots of the rails


And the finished project.

All in all not bad for a few hours work. Not looking forward to the body though, so I will probably do hte trunk next and then the hood, which needs a lot of work:DLeave a comment:
-
Got another door painted yesterday. I'm almost halfway done with the first coat on the whole car. The next one's going to be so much easier I hope.Leave a comment:
-


Leave a comment: