-
Looking at it now, I see what you mean. I should have done it deliberately with a better color, it would have been cool.
I assume it's something that can be fixed, but from what I can see, not from outside the bellhousing. Which means while I'm in there I'll just install the binary race clutch and call it good. Which means I'll just wait for this one to burn out.Leave a comment:
-
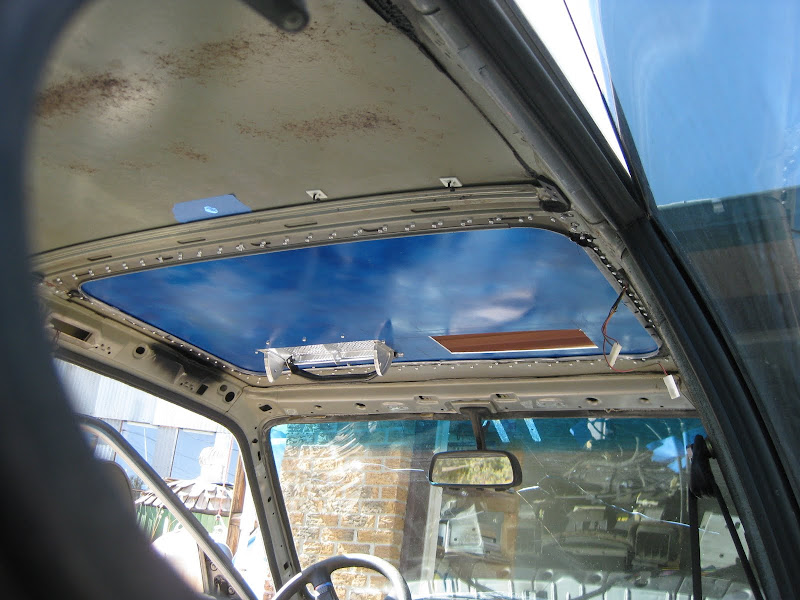
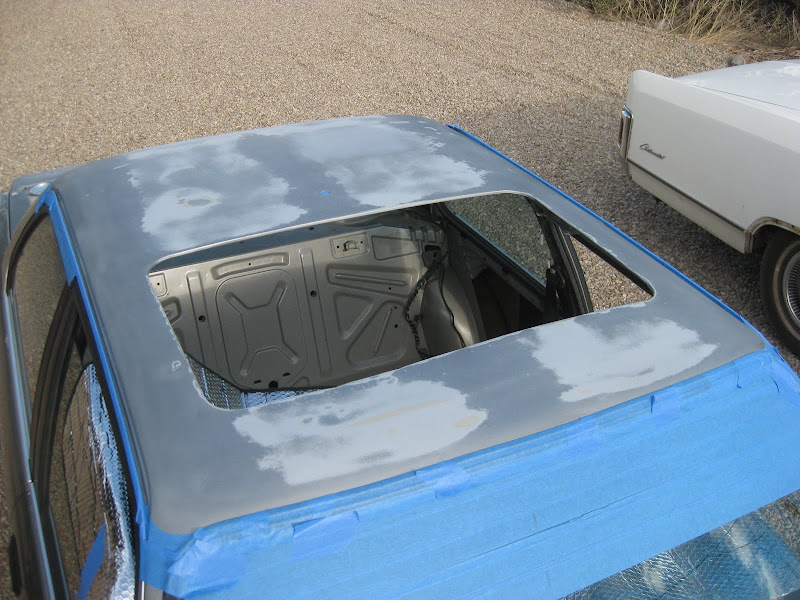
Nice!!!! I like how the inside of your sunroof panel looks exactly like the sky. That first interior shot made me do a double-take, it looked like you just installed a sheet of glass instead of the aluminum.
Also, its a bummer about that clutch, I wonder why it slips so bad....Leave a comment:
-
Took the car for a drive down to my local gravel S-turn. Practiced some heel-and-toeing, which is made very easy by the combination of a slippy clutch, tiny engine, and good pedal placement. Also reinforced the point that an LSD-manual trans combo gives you much more control over the rear than the open diff/slushbox combo I'm used to. Gonna take a few laps at CORE to sort it all out.
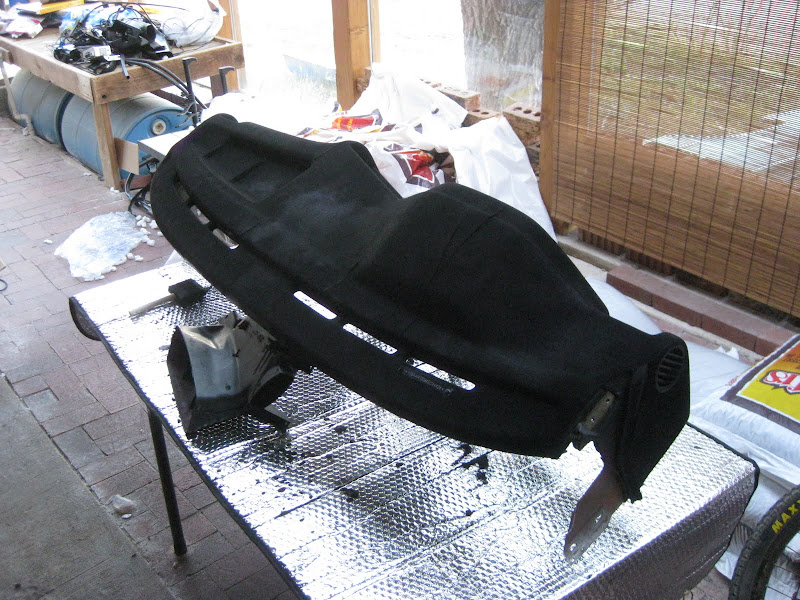
Also, I blew the excess nylon off the dash to see the final result. There are a few thin spots due to the drying adhesive, but it will definitely work. The photos make it seem a shade worse than in real life, but not much.


Tomorrow it gets put back on. Gonna be sweet.Leave a comment:
-
That's so sick. i really love where this is going. I can't wait to see more.Leave a comment:
-
Sunroof Patch and Vent - Post 3 of 3
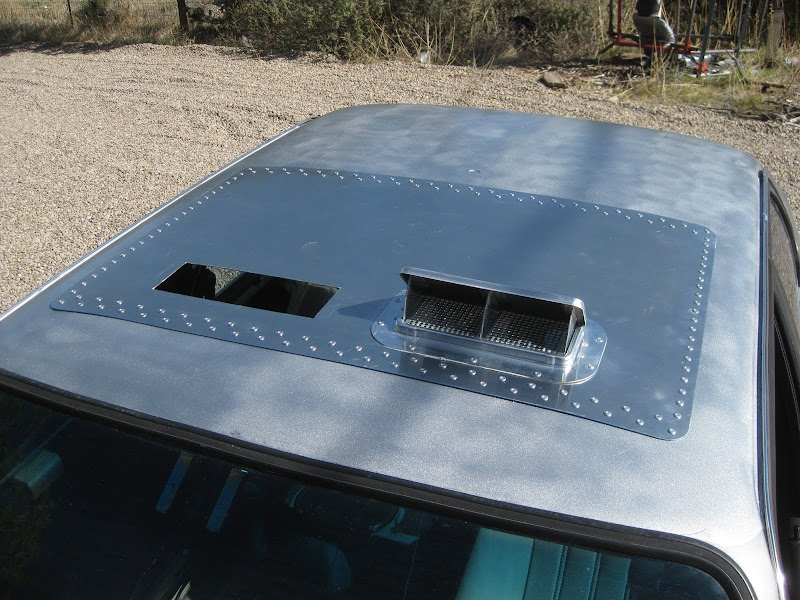
I didn't take any pictures during the riveting process, but I basically started from the center in the front and rear and worked out to the corners. I did the front corners, then came back down the sides to close it up at the rear corners. The corners, especially the front, were tricky since the roof had curves there and the aluminum didn't want to follow. I semi-solved this by applying huge pressure down on the rivet gun as I popped them off. There's a small, almost unnoticeable gap in some places, but it will definitely still seal. I also had to forego using washers on the bottom... I don't have enough hands to pull that off alone. And yes, 136 rivets is a great grip workout. Here's how the whole thing came out:


From the inside, you can see where in the roof structure the rivets attach:


And finally, a comparison of the vent open and closed:
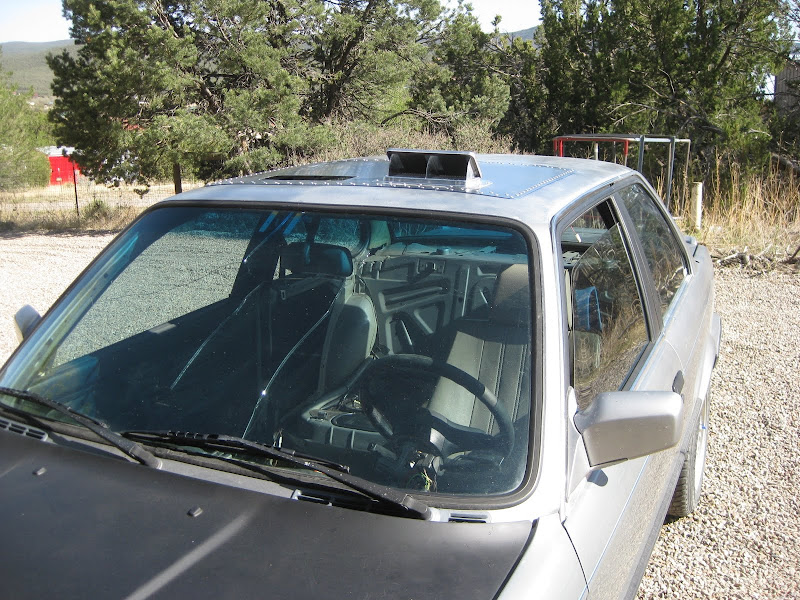

I went and took the car for a drive to test it out. The vent moves a huge, almost surprising amount of air into the car, with the rear windows cracked or closed. And with where I put them, the air hits you almost square in the face, which could be good or bad depending on the situation.
Overall, I think it looks great, it's very solid, it functions well, and it doesn't build up much heat, so I think it's a success. I'll post final pics when the second vent shows up and I install it.Leave a comment:
-
Sunroof Patch and Vent - Post 2 of 3
Here's the vent I bought:

9" by 4" opening, aluminum, 1.25 lbs. Very solid construction, from an online van supply store called Mill Supply. I applied some appropriate sealant to the vent (roof & flashing, I think):

As a note, the amount above turned out to be waaay too much, I would use half that much or less.
I slapped the vent in place and riveted it down, again with 3/16" aluminum rivets. Here's how it looks from inside and out:

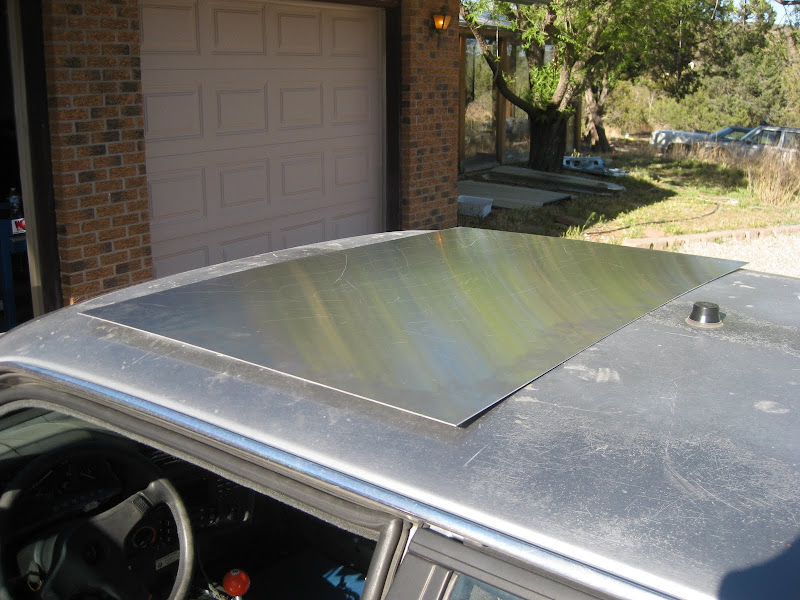
In the meantime, I was prepping the roof for a coat of paint since the original stuff was mostly gone and looked terrible. Mid prep:
As has been discussed, the paint job was botched. I tried both rustoleum "aluminum" and "metallic silver" to no avail. The only good news is that the metallic silver has great reflectivity. At one point I measured surface temps of the colors on the car, all at the same angle and in the same light, on the same material. The flat black hood was 130 degrees, the stock silver paint 100, and the rustoleum metallic silver 90. So it functions, at least.
It was then time to apply the patch to the roof. First step was to align the patch on the roof. I was able to use a C-clamp to hold it in place while I lined it up from beneath using some lines I'd drawn to mark the edges of the hole.

Once I had it aligned, I drilled the center holes front and rear but didn't rivet yet as I still had to apply the sealant. The two holes would let me line the patch back up and secure it quickly once I had done so. Here's a partially obscured cell-phone photo of the sealant:
That amount and location worked well, I had no overflow to the inside or outside of the patch.
Post 3 next.Leave a comment:
-
Sunroof Patch and Vent - Post 1 of 3
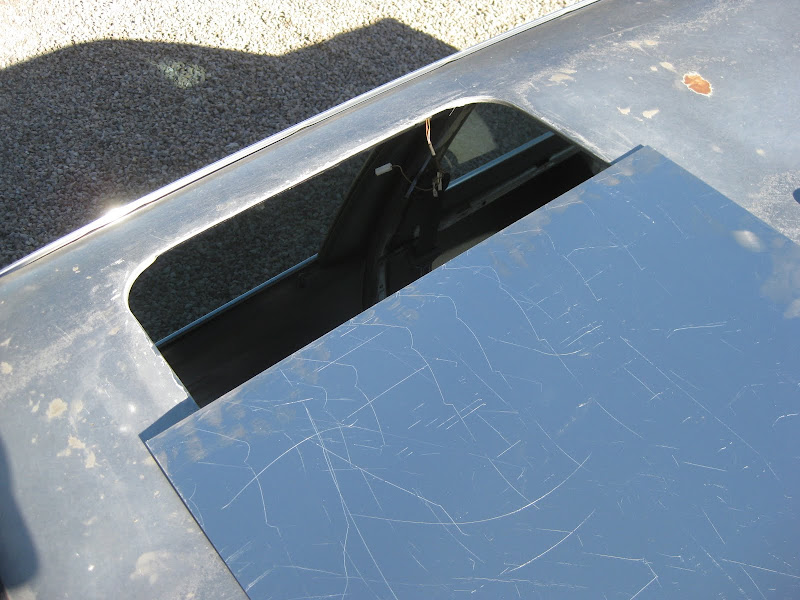
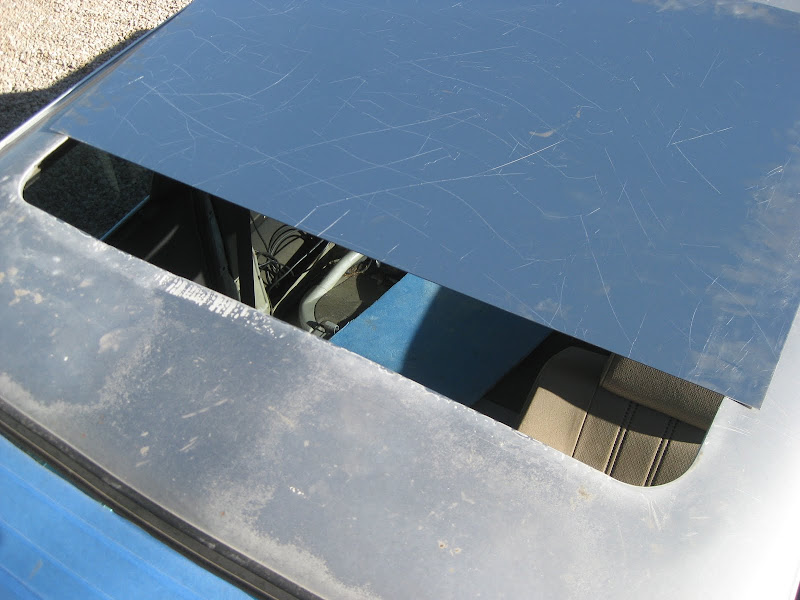
I finished the sunroof patch today, so it's time to post some info.
I started by measuring the hole left, and decided that a 24" by 36" piece of metal would work well for a patch. I went to the local MEtal Supermarket and picked up a piece of 1/16" aluminum for $30. I figured that the aluminum would be corrosion resistant, light, and easier to work with than steel. Here's how the sheet sat when I bought it, and how the length and width compare to the size of the hole:
For the reasons mentioned a few posts above, I decided to err on the side of using more rivets than less to attach the patch. I used 3/16" aluminum rivets, in 3/8", 1/2", and 3/4" shank lengths (short, medium, and long by Home Depot nomenclature). The pattern I used in front and rear was two rows of rivets, 1 1/2" spaced, staggered between inside and outside. The sides were a single row, 1" spacing. A thousand words:
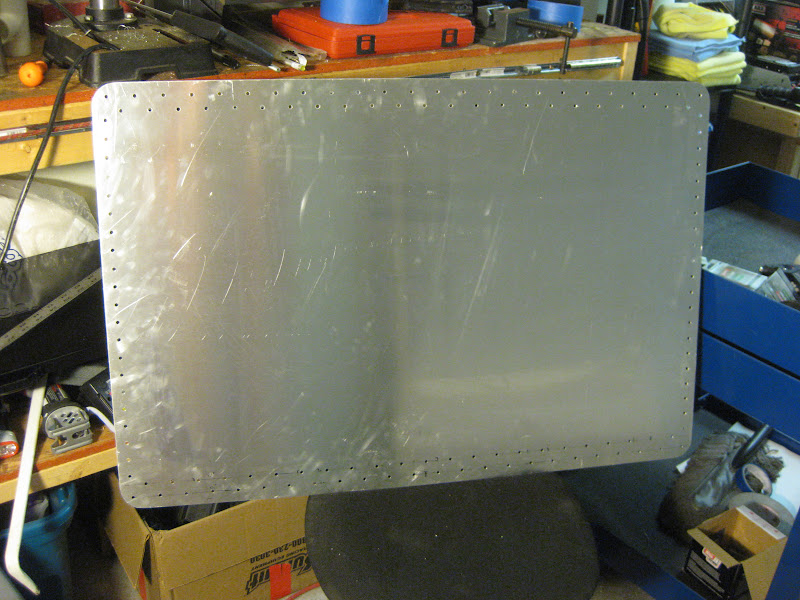
That picture also shows the corners after being rounded off. All I did was hacksaw off the corners and file them down until they looked round. Here's a closeup showing the rounding and how I did the holes at the corners:

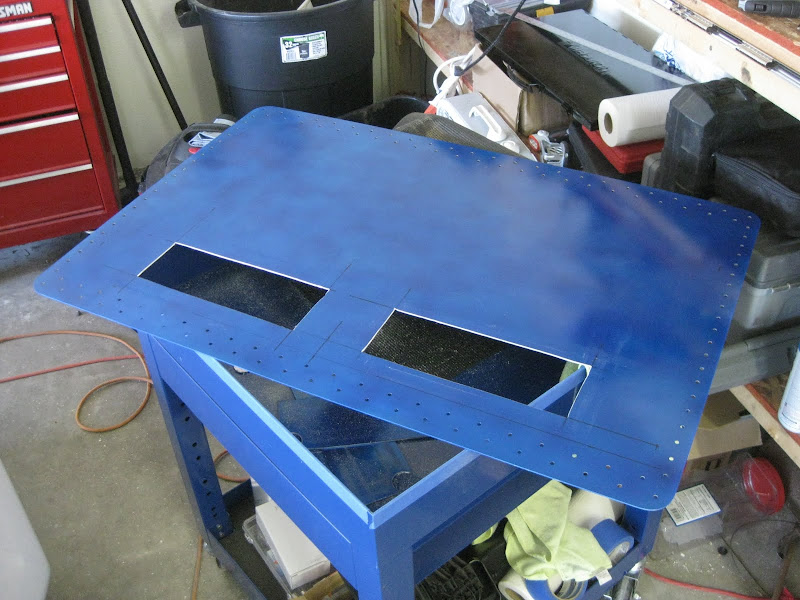
After experimenting with some blue paint, I cut the holes for the vents (10.5" by 4"):
More to follow.Leave a comment:
-
I agree, looking at that diagram, that GN to GN/RD should eliminate the need for that box. The question is, what was the point of it to begin with? I'm not sure what the inductor-with-dotted-line-coming-out-the-side is supposed to be, but it looks like the box was intended to prevent powering the Motronic if there was a diagnostic problem? Either way, I can't see a need for it any more so it will be ditched.
This may be illegible, but in case the link breaks someday, here's the diagram in question:

Leave a comment:
-
It looks like you jump the green wire to the green/red wire on the connector. If you look at the linked diagram on page 36, which details the fuel injection system it shows the OBC code relay box (number 1 in your picture) which powers the ignition coil.
Diagram link...

Great build so far, keep up the great work!Leave a comment:
-
I figure that in a repeated rollover situation, the last thing I want is for the roof to rip off halfway through the first flip and then have the hole start collecting huge rocks and dirt and stumps the next seven times around. So I'll get a good hand workout and spend an extra $5 on rivets now in lieu of a horrible blender-esque experince down the road. I even have washers for the back of each one to reduce the odds of the rivets pulling through the pathetically thin roof material. I think I'll be good.
Also, Sam, I dig the aluminum look too. My only fear is that it will corrode for any number of reasons and start to look terrible, in which case I'll respray the whole roof en masse and kill two problems with one stone.Leave a comment:
-
yeah, I kind of like the natural aluminum look of the panel. It has high reflectivity also, so it won't get hot.
That flocking stuff looks pretty interesting too.Leave a comment:
-
Panel looks good, as does the dash.
Man, there's like a million holes in that panel (damn it, again with the exaggeration... but at least I do specific fake numbers to make it almost believable... 'a million' isn't nearly as believable as 1,090,435). But I digress...
That realoem thing is wicked!
As far as riveting, HF has an air riveter, that, while semi-problematic, would still be easier than hand-riveting.
And do you need that many rivets?Leave a comment:
-
Also, mike, go to www.realoem.com and search for that part. You will have to enter your car's make, model, blah blah down to the manufacturing date. It is pretty much an online BMW parts schematic database. That will give you a part number and then you can use that to further search.Leave a comment:
-
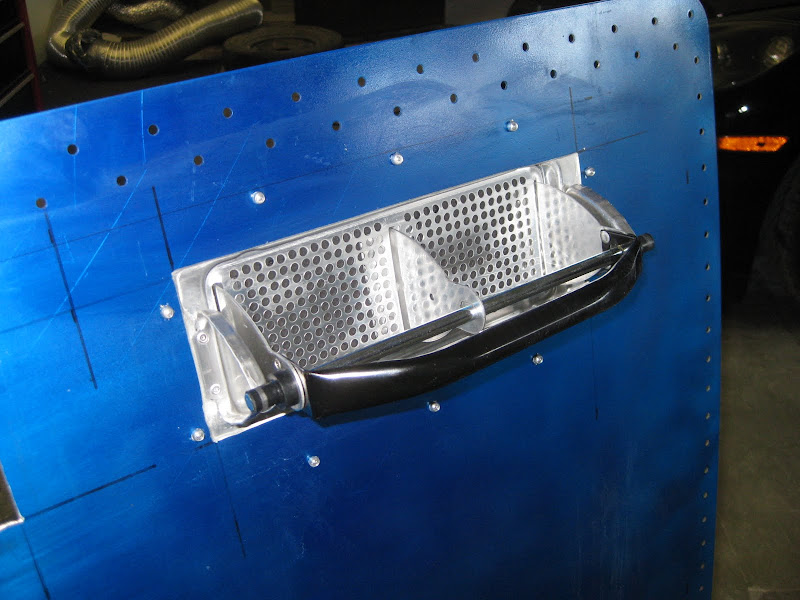
So, made some good progress on both the roof patch and the dash. Sliced a few holes in my patch for two vents and riveted one on. I'll have more detail when I write up the (w)hole roof mod, but here are a few pics:
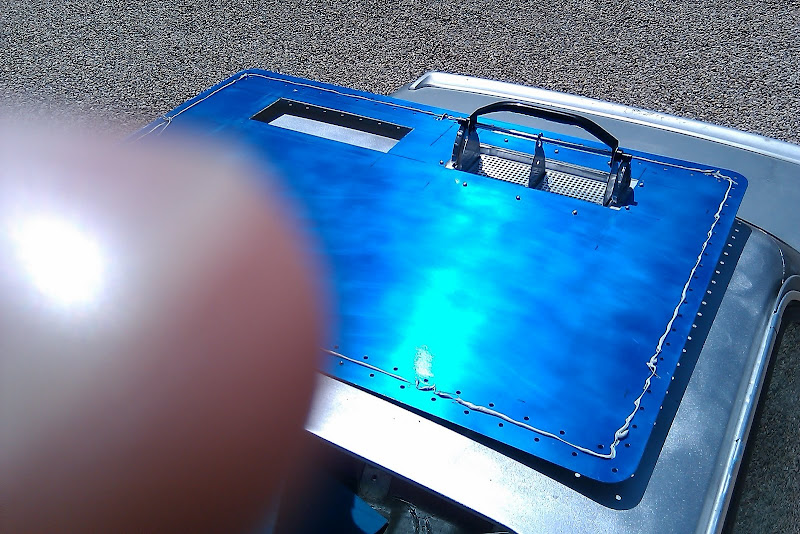
The blue is a paint I was trying out for the exterior, came out too blotchy for my taste so now it's on the inside of the car.
The vent riveted on and sealed, from inside:
And outside:
I wish I had thought about how much work it is to pop off 3/16" rivets before I decided to put 136 of them in the roof panel... tomorrow's gonna be a workout.
The flocking kit also showed up today. Again, I'll have more detail in the full writeup, but here's a quick before and after:

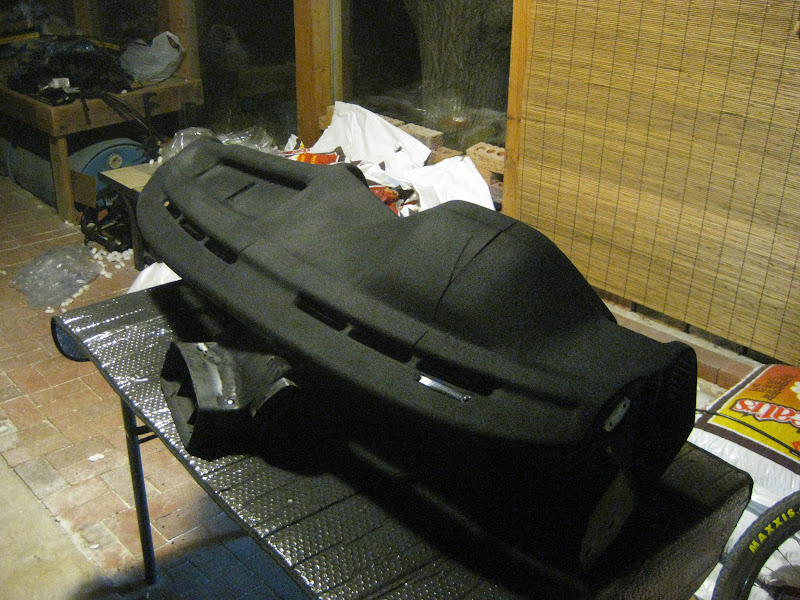
Assuming I got the fibers on the adhesive quick enough, it should look just like that when I remove the excess Sunday. If not, it will be half glossy. Only time will tell.
Tomorrow the roof patch goes on, and I try to find out what the clunking in my passenger-rear suspension is!Leave a comment:


Leave a comment: