-
On the ECU side I think is the ABS brain. The other is a cruise control brain. Not sure what No. 1 in the pic is. Central locking?
I pulled the ABS and cruise brains and wiring from mine.
Also, playing with the rally car Wednesday, so I'll post some cage pics then...Leave a comment:
-
Mike, I would say the ones on the driver's side you can try and unplug and then run the car, I honestly don't know what they all are, but the one on the passenger side inside the glove box area is the ECU, the ECU has a huge plug plugged in the back with like 30 pins or something like that, and it should say "Motronic" on it somewhere.Leave a comment:
-
-
Under dash boxes
Since I have the dash off, I have easy access to remove unnecessary crap from underneath. So, in the interest of doing so, can someone help me identify the four ECU-esque boxes under the dash? There are two on each side, numbered in the picture below. It's hard to see the ones on the passenger side, but one is quite large (1" x 5" x 10") and one is smaller, bolted to the bigger one. I assume at least one or two of the four deal with sound system or safety and can be removed, but which ones?
Pointers to a good reference will be gratefully accepted.

Leave a comment:
-
Grille treatment
So, having decided on a color scheme for the car, I went ahead and painted the various parts of the grille. First, since I was going to be using bright colors, I sprayed the little body panel between the bumper and the grille satin black.
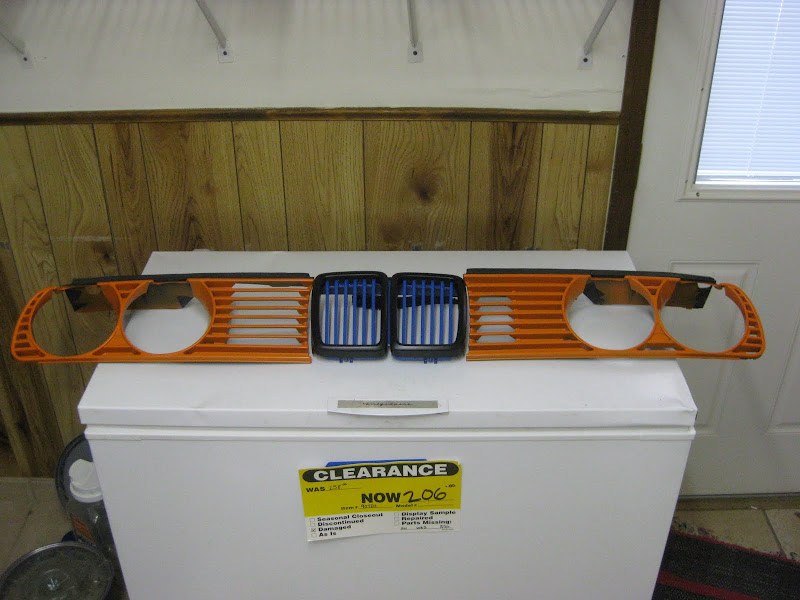
I then painted the grille pieces in blue, orange, and satin black:
Bolted on to the car, the whole thing looks like this:


Or, with the camera flash,
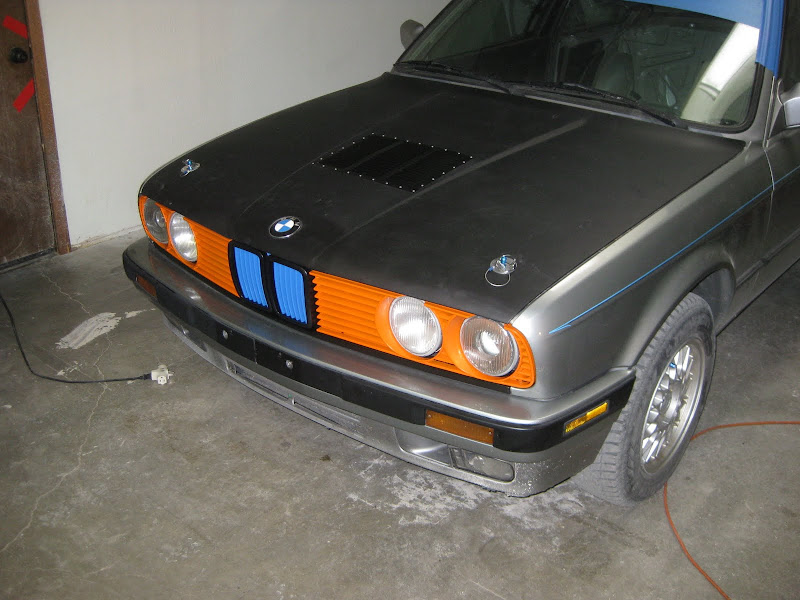
I still need to paint the valence and everything below the belt line, so the car will be much more black by the time its done. I think the blue-orange combo will be distinctive and just ridiculous enough for a rally car.
Also, I tried out rustoleum flat black on the dash, and it's still way too reflective. I'm ordering a cheapo flocking kit fron donjer.com and will do that next week along with finishing the roof vent and patch.Leave a comment:
-
Those gauge panels look like a great product for a street/track car, but I wonder about their durability in a brutal rally situation. Not that the panels themselves would break, but it seems like they would come undone from the dash and start flinging around by the gauge wires. I figure I'll bend up a sheetmetal gauge panel to replace almost all of the AC and CD player area of the dash and have everything centrally located for quick reference.Leave a comment:
-
Mike, there is a thread on here somewhere where a guy sells gauge panels that go into the stereo hole and vent holes. I'll see if I can find it.
Also, the hood is really starting to come together aesthetically with those pins. I am also really curious now to see what it will look like with the orange grilles.
EDIT: found it. http://www.r3vlimited.com/board/showthread.php?t=86233&Last edited by iamsam; 04-30-2011, 09:52 PM.Leave a comment:
-
Hood Pins
RA rules require that the hood be openable from outside, i.e. the latch mechanism must be disabled and replaced with pins. So, I ordered a blue anodized aluminum 1/2" pin and post set from Summit for ~$15. After much deliberation, I decided that the easiest and most effective way to implement the pins would be to essentially duplicate the function of the stock latch, as in holding the front of the hood down. That way, to open the hood, you unpin, the front of the hood lifts up as if you pulled the latch, and you go from there.
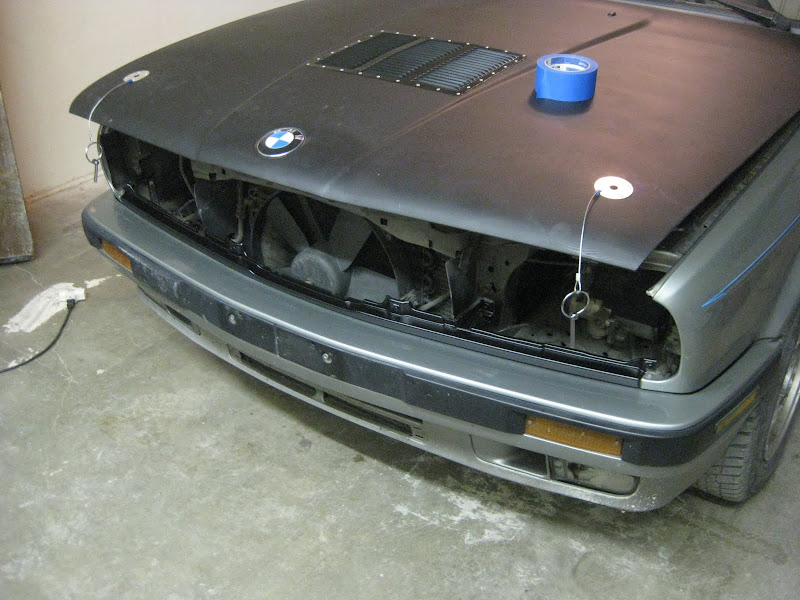
The only tricky part of the install was picking a location for the posts. I ended up going pretty close to the rubber stops that the hood sits on. I drilled through both layers of the core support for the posts. After I took this picture I decided to buy some fender washers for each side of the core support to avoid crushing it too much, but here's the location I chose:

Due to the odd movement the hood makes as it comes down, I had to cut a slot shape in the hood's subframe for the post to move through. Because I chose a post location that lined up with a hole in the hood frame, This was done easily enough with some snips and came out like this:

I also had to run the washer line through a different hole. The hole for the pin through the hood skin as so ragged because I only had a 1/2" drill bit, and fitting a 1/2" post through a 1/2" hole blindly takes mucho filing.
The set came with some little plates for the top of the hood to protect the paint from the pins (and to cover up the ragged post hole). I riveted those on with aluminum rivets. I also whipped up some little retaining wires with some 1/16" cable and a ring terminal. Here's how the whole pin assembly came out:

And the whole hood:


Here's one for the M20 fans:

I think it came out slick, and should meet the RA requirement for a total of ~$20. Also, since I had to remove the headlight assemblies to get the posts in, I took the chance to paint all of the grill pieces in my chosen color scheme for the car. I'll post pics tomorrow after reassembly, but suffice to say... the colors are unusual. Here's a teaser:
 Last edited by MasterOfPuppets; 04-30-2011, 09:25 PM.
Leave a comment:
-
How/where is it attached to the strut tower and the shock mounts? Do you have pics of that?Leave a comment:
-
You can have a look at my cage, done by Cage This, here: http://www.slapdashracing.com/Build_Updates.php
It's built to Rally America specs and was recently logbooked with flying colors. You can't see it in these pics, but the cage goes through the firewall and attaches to the strut tower, and through the rear seat panel and attached to the rear shock mounts.
Hope this helps.Leave a comment:
-
-
Since in this situation more than in drag racing the cage has a functional purpose, I figure I'll do a mockup to see what makes the most sense in terms of bracing the suspension mounts, leaving room for seats, visibility, how hard it is to climb into, etc. I already have the PVC from a previously aborted Jeep cage build, but the entirety of it was only ~$40. Seems worth it to not have a scrutineer say "if only you had done this one bar differently..."
And I seem to remember the FIA being set on the gusseted crossing diagonals for both doors. I'd probably do that anyways so that a slide into some trees would trash the door but hopefully wouldn't touch the cage and thus cause less danger of cage de-cert.Leave a comment:
-
Edit: just read the 2011 FIA standards. Doesn't look like anything too elaborate. I'm not sure you can use the bowed doorbars though.Leave a comment:


Leave a comment: