E30 Rally Build Thread

Collapse
X
 
  • Time
  • Show
Clear All
new posts

  • MasterOfPuppets
    replied
    Sunroof removal

    I also finally got all of the sunroof and supporting structure out completely. This turned out to be an enormous PITA: I don't recommend it unless you are nuts about safety and/or losing weight.

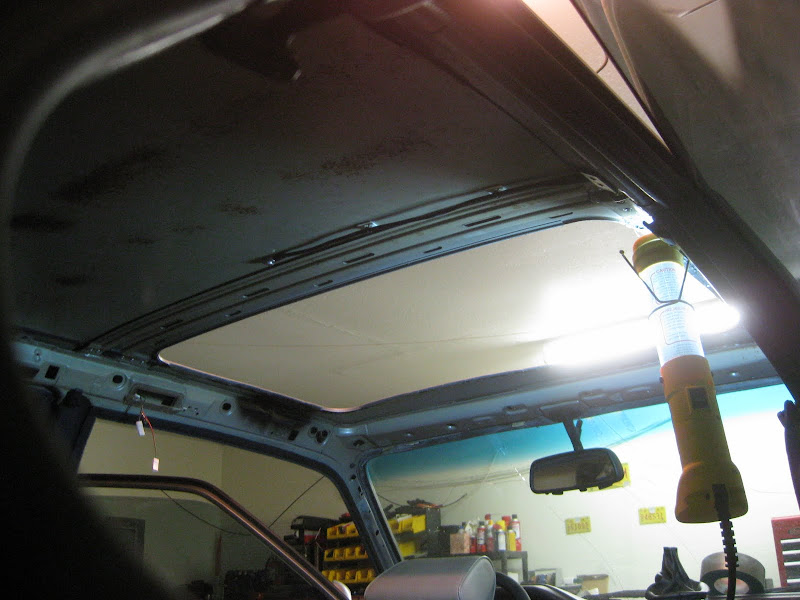
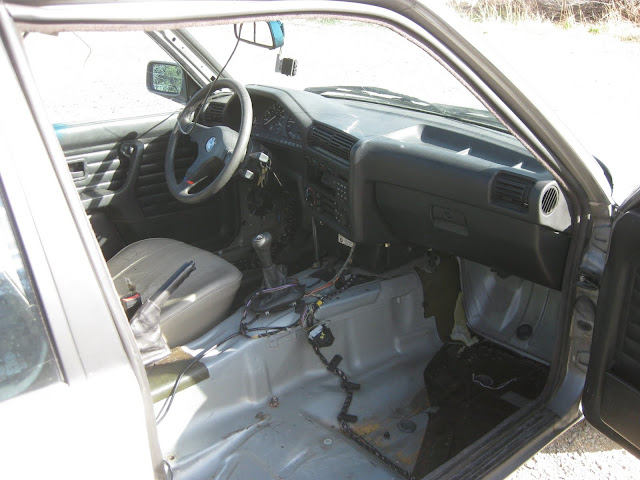
    I started by ripping out the entire headliner and the panel in the front of the ceiling, along with the visors and the diagnostic panel. You can then pull the motor and the roof panel itself. Keeping the screw lines intact requires cutting some little slots in the sheetmetal supports towards the front. You can see them in this picture:


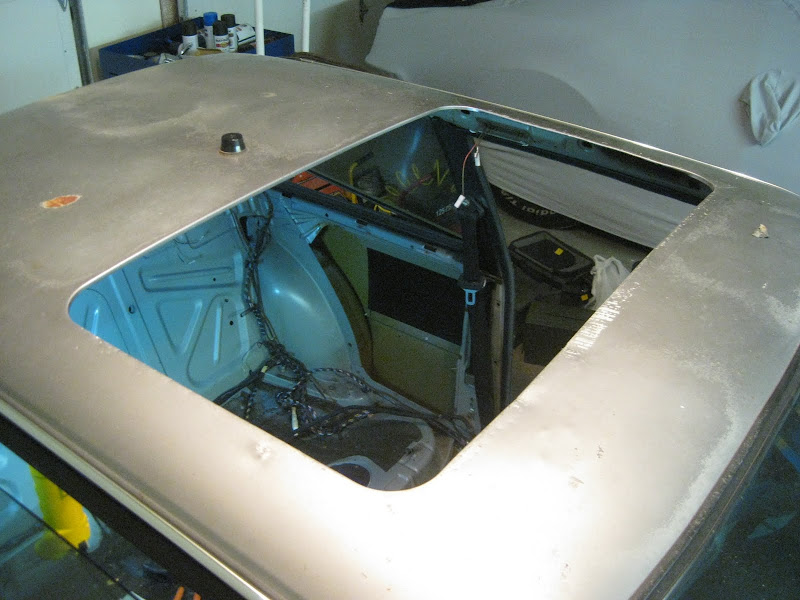
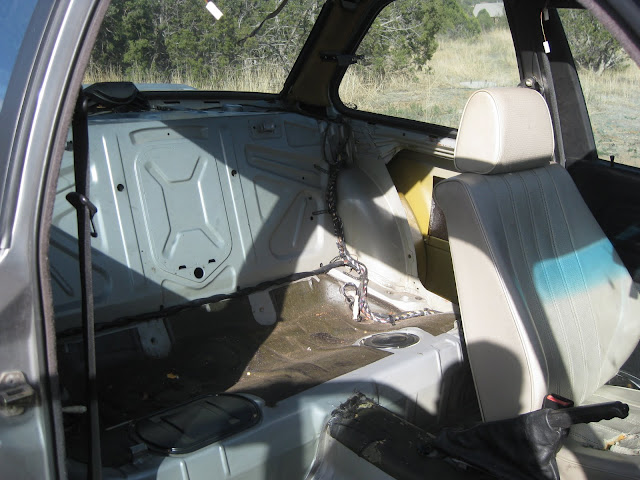
    You can see the whole sheetmetal support structure that remains when you pull the top. It's welded and adhered to the outer roof and goes all the way back to the rear window:


    Since my end goal was to have just the outer roof skin left, I had to remove the whole subroof. This turned out to be very difficult and elaborate. The subroof attaches to the outer roof with a number of spot welds (15-20) and some kind of adhesive around the entire rim. This is where the spot weld cutter comes in (it's basically a 3/8" hole saw with a depth limiting center locating pin, HF has them for $5). About 15 of the welds you need to use the weld cutter; the rest you can use a regular 3/8" drill bit.

    Drilling out the welds is made difficult by the fact that the side you can drill from almost never has a visual indication of the welds, so you have to try to line up from the weld mark on the inside of the car and drill from outside. I didn't take pics because it was impossible to see, but if you get to this point, you'll know what I mean. To top it off, the rear two welded brackets are completely inaccessible to drill or even chisel. BMW did not design this to make it easy to remove.

    After a lot of drilling, cutting, chiseling, and cursing, I finally resorted to beating the hell out of the subroof with the sledge until the whole thing came loose and I could pull it out. After bending the outer roof's flanges under, here's what I'm left with:


    Here's the subroof as it came out:


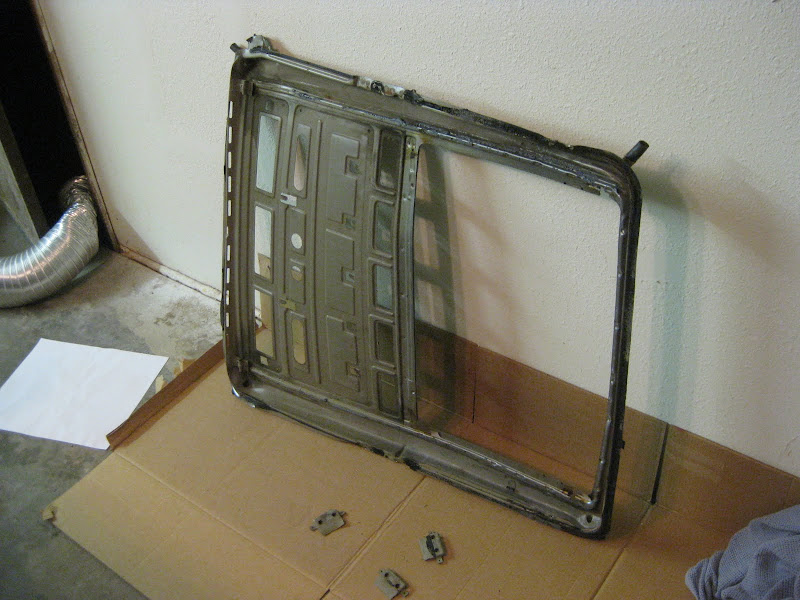
    You can see the three main weld areas on each side as well as a row of welds along the front edge. I gave the ripped/drilled/cut areas where the brackets were a quick shot of paint to avoid corrosion; here's where they are on the driver's side:


    Here's how the whole ceiling comes out after rolling all the ragged edges that are left over:


    Here's my interim hole plug solution:


    We take rain seriously here in New Mexico.

    Overall, it took probably 6-7 hours to get to this stage, so again, don't start unless you're committed! My plan now is to call up a local metal shop and get a cut-to-size piece of sheet aluminum to rivet on. I'll toss some outdoor siding/roof/window sealant on before doing so to seal it all up. A quick coat of paint on the roof and it'll be done. More to come.

    Leave a comment:


  • iamsam
    replied
    Looking good!!! The vent.... Still trying to formulate an opinion about the aesthetic appeal, of course it IS form over function primarily, so aesthetics aren't important....

    the hood looks great though, now do the trunk lid to match!

    Leave a comment:


  • colorado_cabrio
    replied
    Looking good gentlemen

    Leave a comment:


  • MasterOfPuppets
    replied
    Hood paint and vent install

    Over the last few days I managed to get my hood painted flat black (to mitigate blinding sun reflection) and get a vent installed. Here's how the hood started out:


    Not too pretty, and under much of the faded paint was body filler.

    I decided to cut the hole for the vent before doing too much prep work. The underhood, with liner removed, looks like this:


    You can see the outline of where I planned to put the vent. That spot puts it just aft of the radiator, meaning the fans should be able to force air directly up and out. Fortunately, Home Depot had a 10" by 14" vent, which was about exactly the size I had guessed I wanted.


    After trimming the flange and drilling evenly spaced holes for riveting, it looked like this:


    If you ever decide to use a floor vent like this, I strongly recommend you use sheetmetal shears of some kind to trim them down. I've tried jigsaw, hacksaw, and sawzall but they all just mangle it beyond belief. The material is way too soft. Some decent shears and some patience and they come out fine.

    Next it was time to cut the hole in the hood with a hole saw and jigsaw:


    I'm skipping alot of fabrication details; if you have questions feel free to PM. I assume most people don't care or can figure it out themselves.

    I then attacked the top of the hood with the orbital sander for a while. I encountered much filler and quit when it looked like this:


    I primed it with rustoleum "automotive primer" which seemed to work well. Meanwhile, the vent got paint (satin black):


    I then sprayed the hood with rustoleum flat black. This is tricky to do even semi-acceptably since if you do it wrong it comes out ridiculously blotchy. I've managed to get a decent technique down and it came out ok:


    Then it was just a matter of cramming in the vent, drilling the rivet holes and riveting (I used 1/8" by 1/4" alum rivets). Here's the end result on the car:


    Oh, wait, that was my interim hood made from a '73 Lincoln trunk lid. Here's the actual result:


    And a different angle, showing the non-reflectivity:


    I think it came out cosmetically acceptable, but more importantly it should allow me greater visibility while driving and help the car cool better on long, hot stages. Mission accomplished!

    Leave a comment:


  • SlapDash
    replied
    Good luck with the build!

    ABS delete, trunk tar removal, skid plates, racing seats, chassis reinforcement...

    Leave a comment:


  • iamsam
    replied
    There ya go!

    I have one more to add:

    Leave a comment:


  • MasterOfPuppets
    started a topic E30 Rally Build Thread

    E30 Rally Build Thread

    EDIT: I'll keep this first post up to date with a current pic and quick update on status.


    So far:

    Complete interior strip
    Sunroof delete and patch w/roof vents
    AC delete
    Bilstein HD shocks and stock springs
    Flocked dash
    Shift light
    Shift knob (5 ball)
    Wheel studs
    Hood paint and vent
    Hood pins
    Lassa Rally 3 tires
    TRM C1 wheels

    I've been hunting for a while for an E30 to turn into a stage rally car to meet Rally America rules. Now that I have a car, it's time to start the build and thus time to start the build thread. I'll continue updating over the next year or so as I transform the car into a rally dominating machine.

    Here's what I'm starting with:


    It's an '89 325is with 270k on the clock. Has some mods done including a 4.10 LSD from an E30 M3, short-throw shifter, a strut tower brace, and a bigger throttle body. Currently sitting on stock springs with Bilstein HD shocks. With that setup, here's how the ground clearance looks:


    The interior has already been pretty well stripped by me and Mr. CreepingDeath; pretty much all that's left is the dash and a crappy driver's seat. I even removed the power sunroof (PITA).


    The engine bay is pretty clean and pretty stock.


    I'll post more as I make progress. Coming up in the immediate future are AC delete, hood vent install, sunroof hole patch, and hood paint to flat black. Long term I'll have a big coilover swap, DIY cage, and maybe even an S50 somewhere down the line. Stay tuned!
    Last edited by MasterOfPuppets; 09-21-2011, 02:57 PM. Reason: Status - Sep 2011
Working...