-
Lol Delfín
Definitely ghastly imho. We have it bad enough with the trunk mounted 3rd brake light.. the hole drilled through the trunk lid leaking water into the toolkit just piles on :-)
I know what you mean about the retro appeal tho. I’d just get one of the old bmw analog car phone handsets and leave the antenna and transceiver box out
Just check out the euro verts
Leave a comment:
-
Just noticed in one of your pictures - my car has that funky 80's spec car phone antenna base mounted on the trunk behind the 3rd brake light too! What are your thoughts on that? I've considered finding a period looking antenna that fits the base threading or removing it when I go to wrap the car. Honestly I can't decide whether it's charming or ghastlyLeave a comment:
-
Low energy update - still waiting on some replacement top parts. Car is back together with the manual top in the interim.
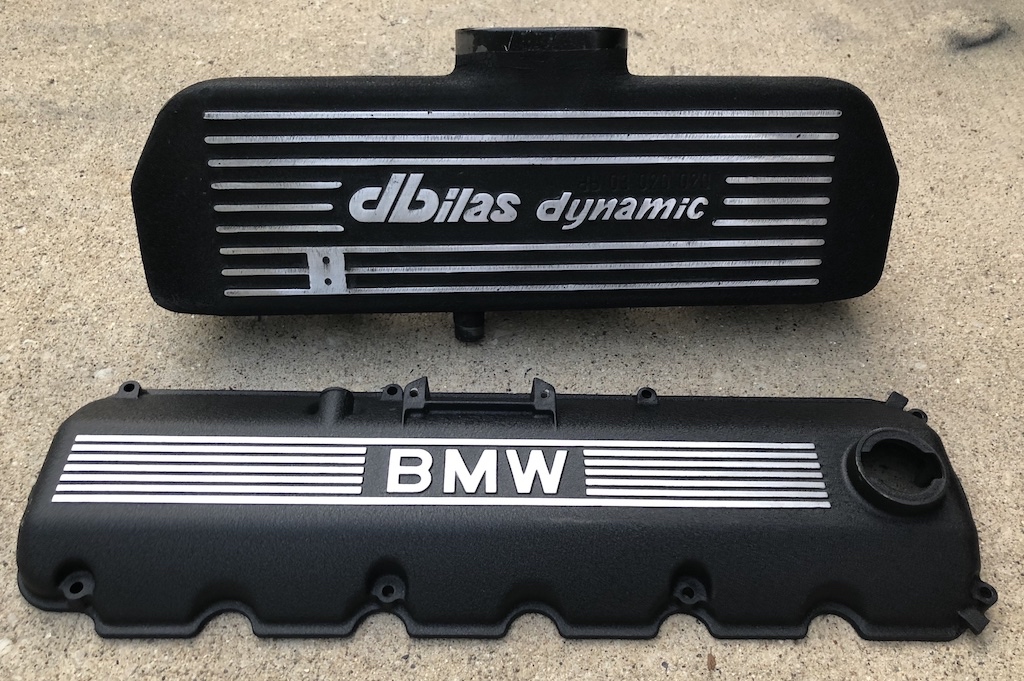
been pretty low key last couple of months. caught up on some Callie maintenance this weekend including oil/filter and repairing another bitch tube oil leak. The latter required pulling the whole dbilas setup, so might as well match the new Renewed Finishes valve cover from Levent at Gutenparts
Need to adjust the valves as well, then get under the car and replace the giubo... long long overdue. rear parking brake has been squeaking on the pass side so gonna replace those pads as well.
also still waiting to hear back from Scott at Strömung about my mtech1 tips. Also finally hear from @fporro after some prodding, and it looks like the Racing Dynamics snake header buy is back on after a 2 year wait.Last edited by bradnic; 06-11-2019, 04:03 PM.Leave a comment:
-
2 steps forward..
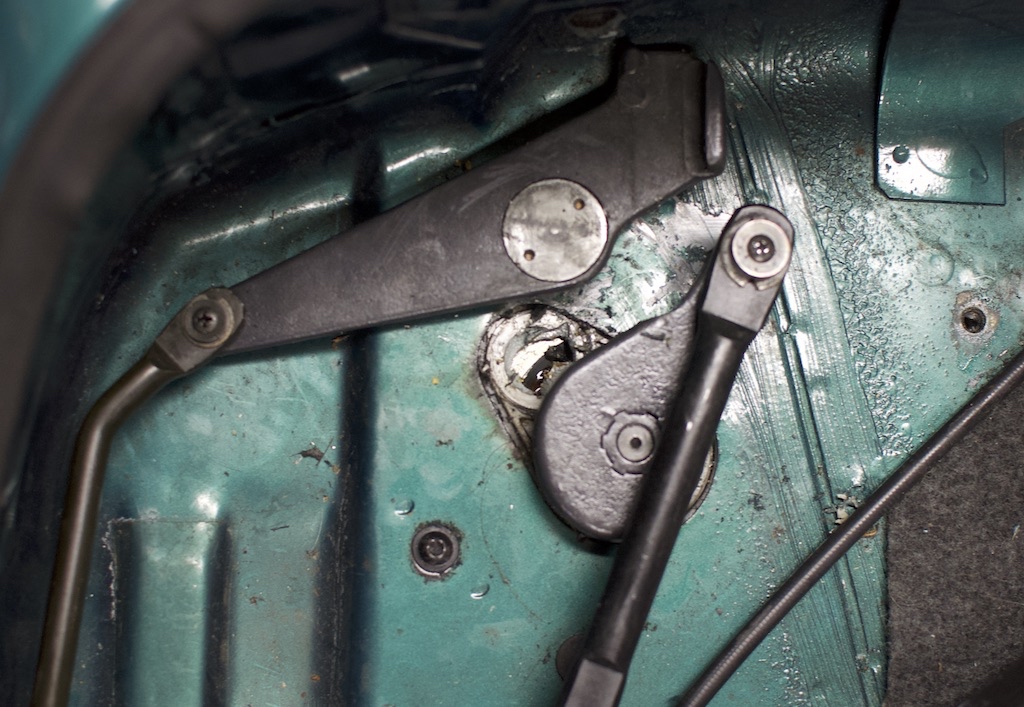
well I was able to get the top mechanism working with the top motor... quite satisfying to see the top move with the electrics..
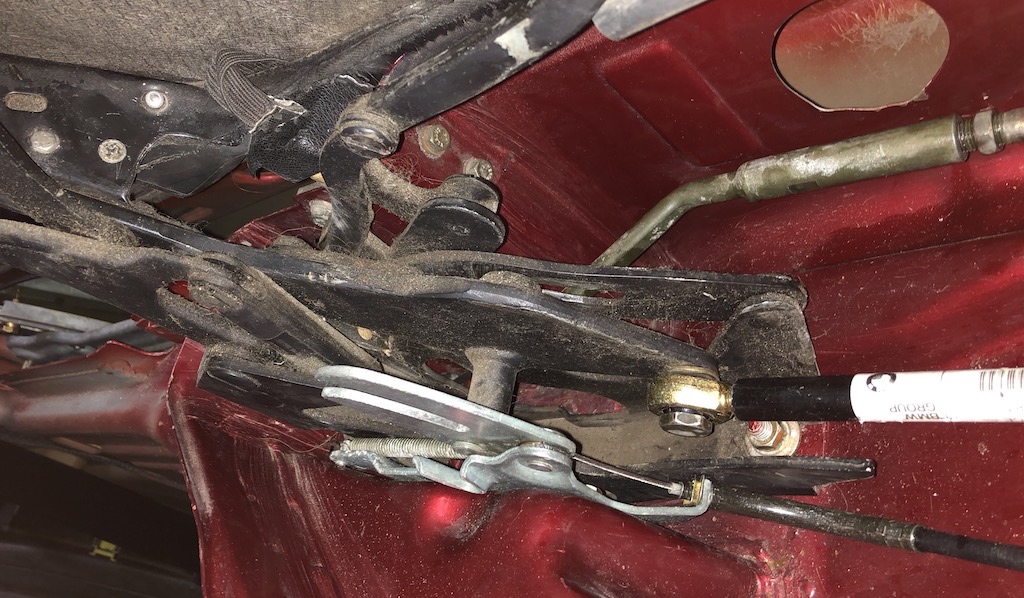
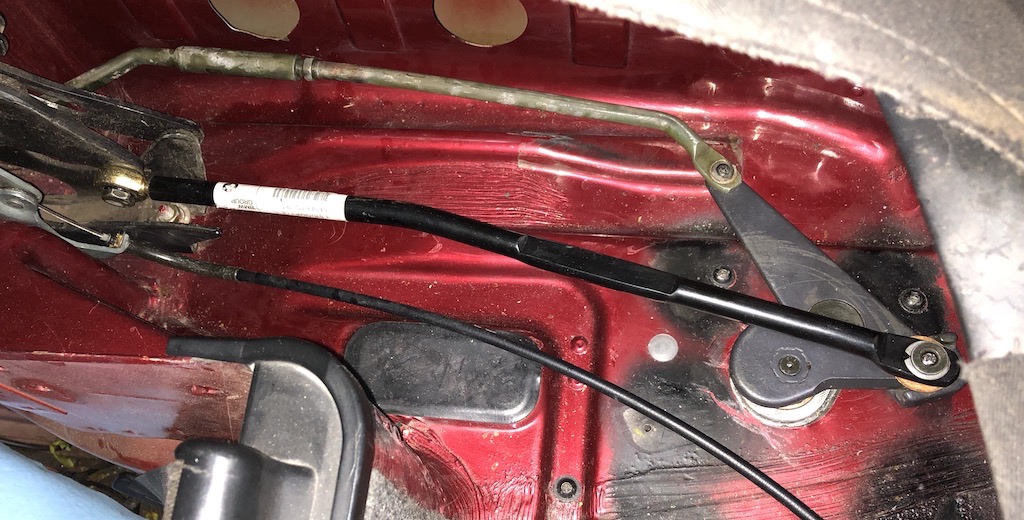
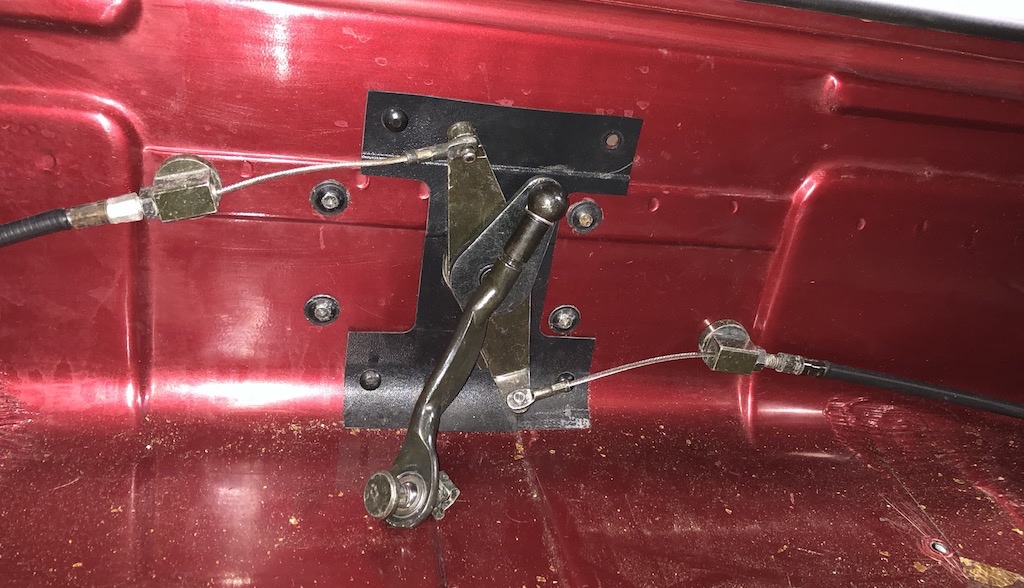
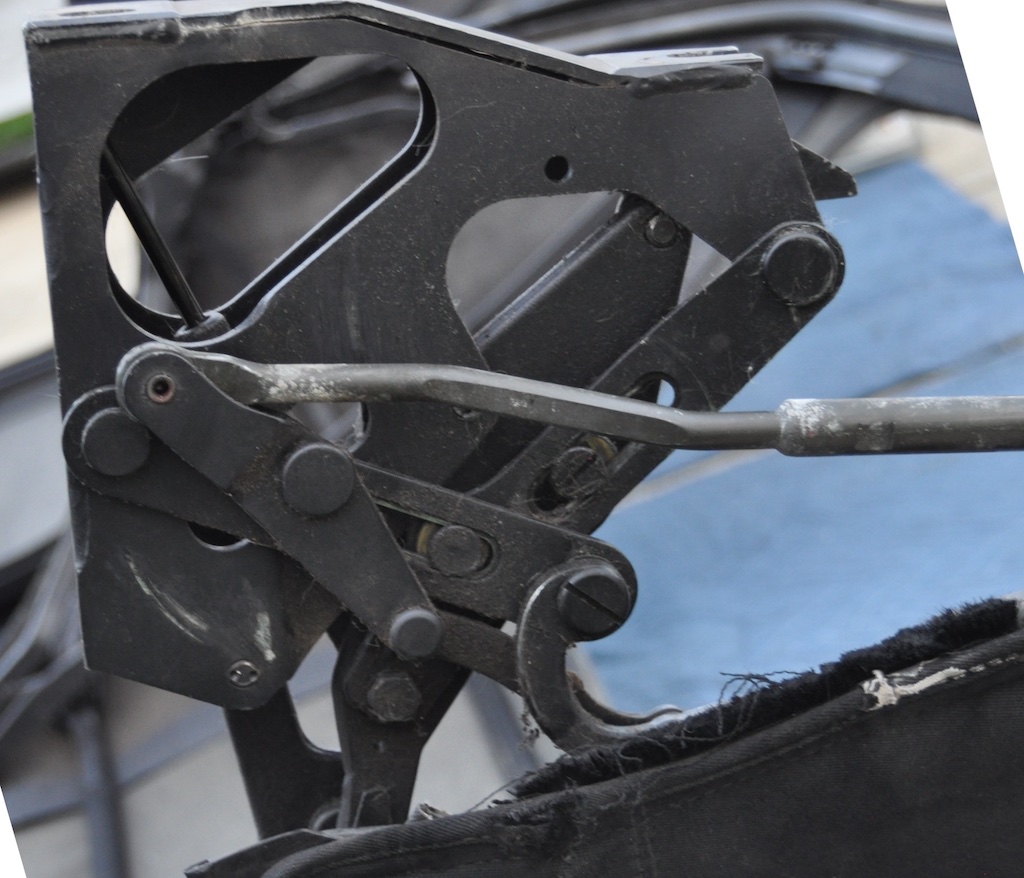
I annotated pics of the motor mechanisms for reference.
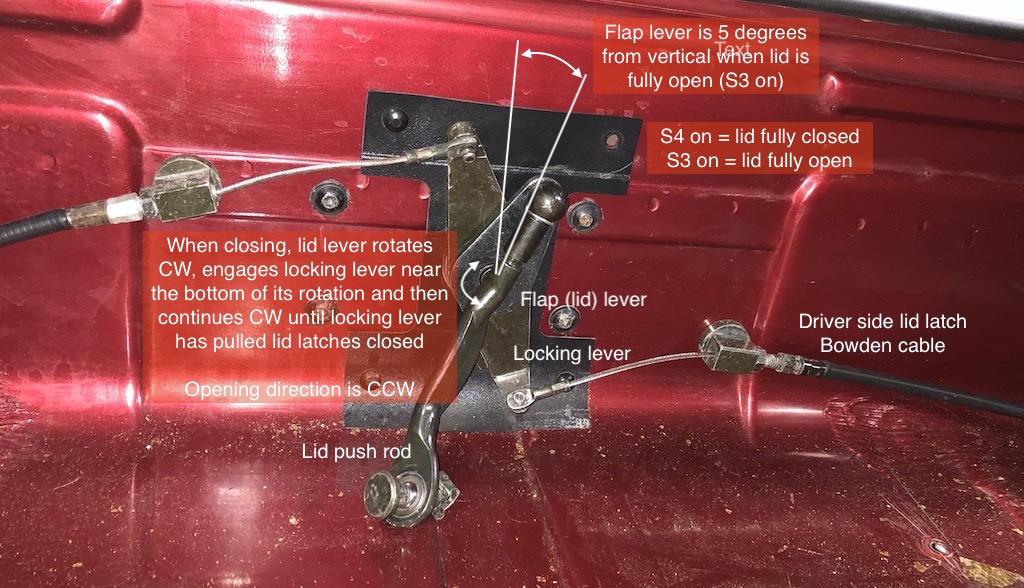
top mechanism

lid mechanism
unfortunately I also found some damage to the top frame that I will need to repair before completing the installation. Must have happened on my watch because old pics don't show the same damage
I've managed to shear some pins on both sides of the top frame.
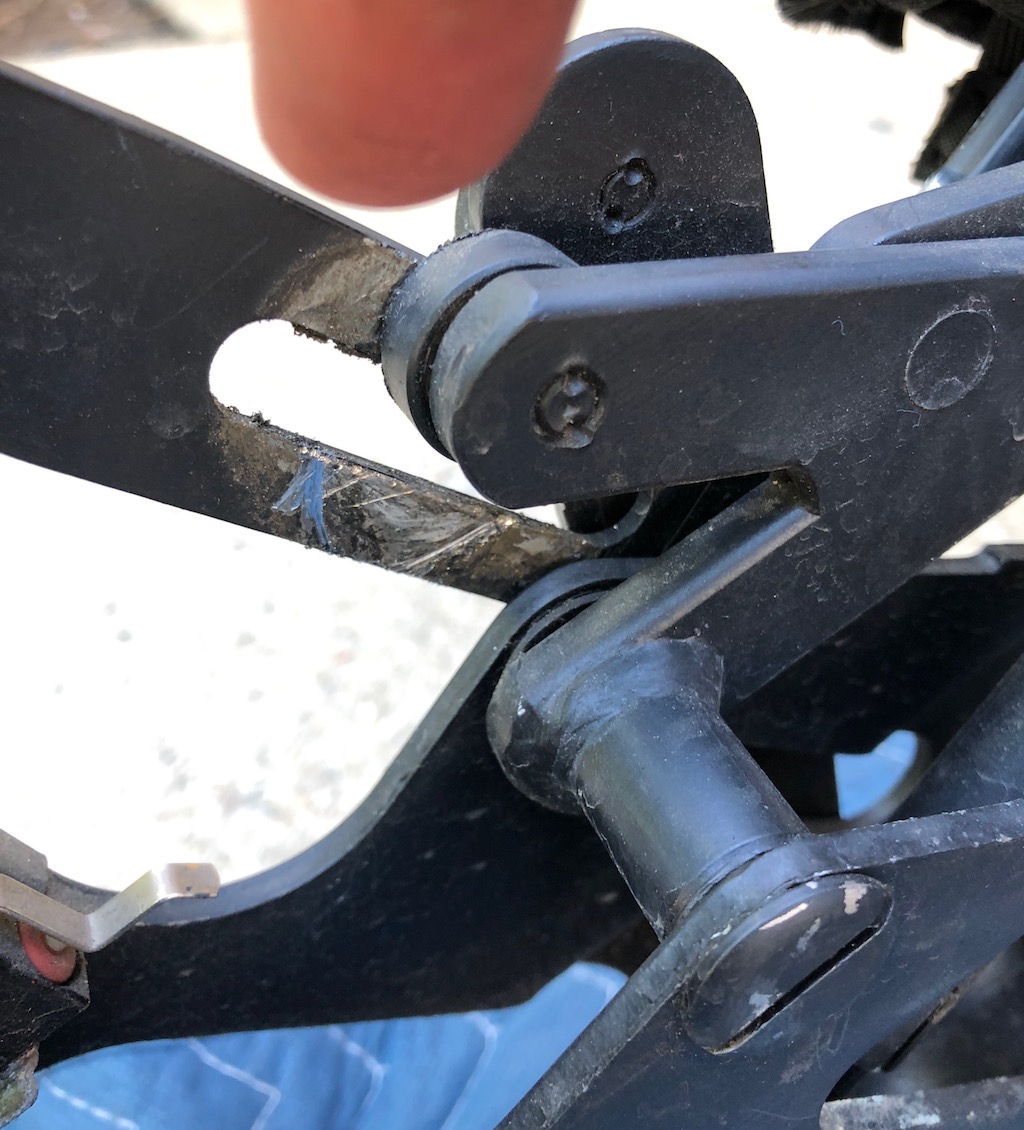

I've also managed to bend the right side brackets in the same area.
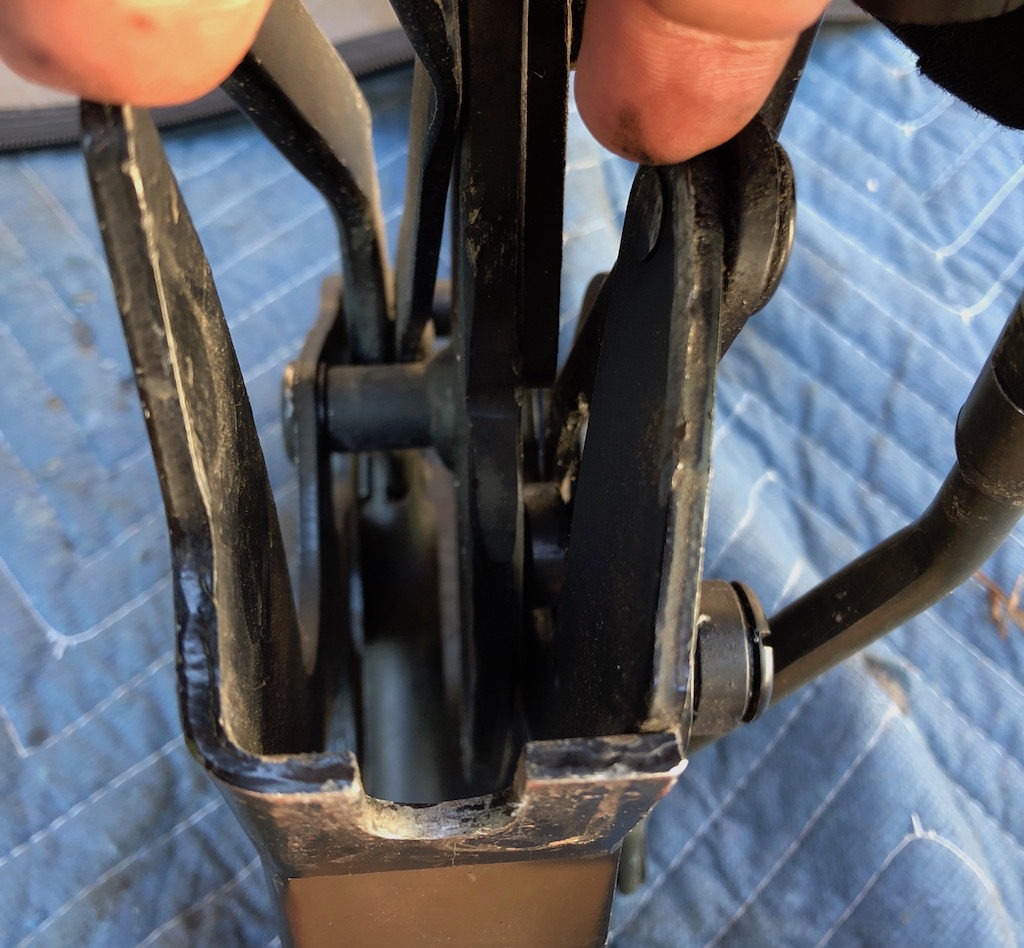
Obviously I need to get this all sorted out before I can complete the installation. So I'm switching back to manual for a while and will give this another go in a month or so.Leave a comment:
-
This process would make my brains explode. Kudos to you my friend.Leave a comment:
-
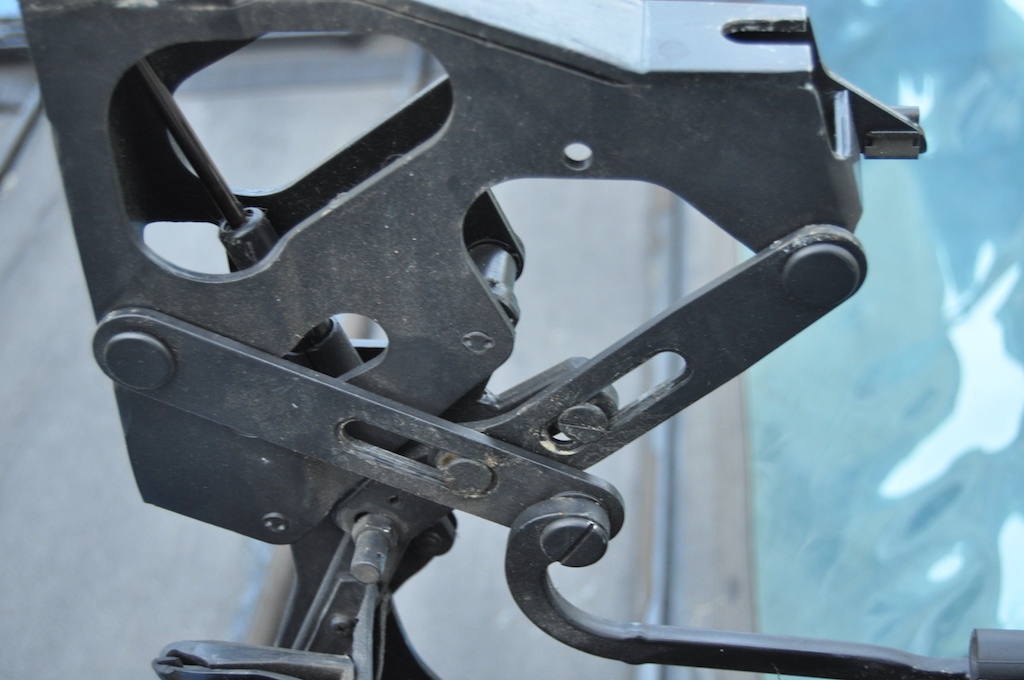
Figuring out the switch positions
As expected the top won't move. So I'm taking the time here to make sure I understand the full sequence carefully. You can hear the switches click if you move the motors and listen carefully. So it's a matter of making sure the arms attached to the motors are in the correct, "known good" position before any motors will engage.
From reading the retrofit and supplemental retrofit instruction PDFs and some other sources, this is what the switches mean.
S1 = Tensioning Hoop Up (the rear part of the top is fully open)
S2 = Tensioning Hoop Down
S3 = Lid (flap panel) Up
S4 = Lid Down
There's also the pass visor switch which shuts everything down if the top is latched
The linkages are also designed to work in sequence mechanically, with each motor responsible for two operations:
- the rear tension hoop has to be up before the top will move up or down
- the lid / flap cover has to be almost closed and mechanism moving towards lid close before the lid locks drop
So the switches AND the linkage design work together.
Gonna study that for a bit and update this postLeave a comment:
-
Started the morning off right
Did a dozen practice plug welds on some sheet metal til I got things dialed in. Then lined everything up
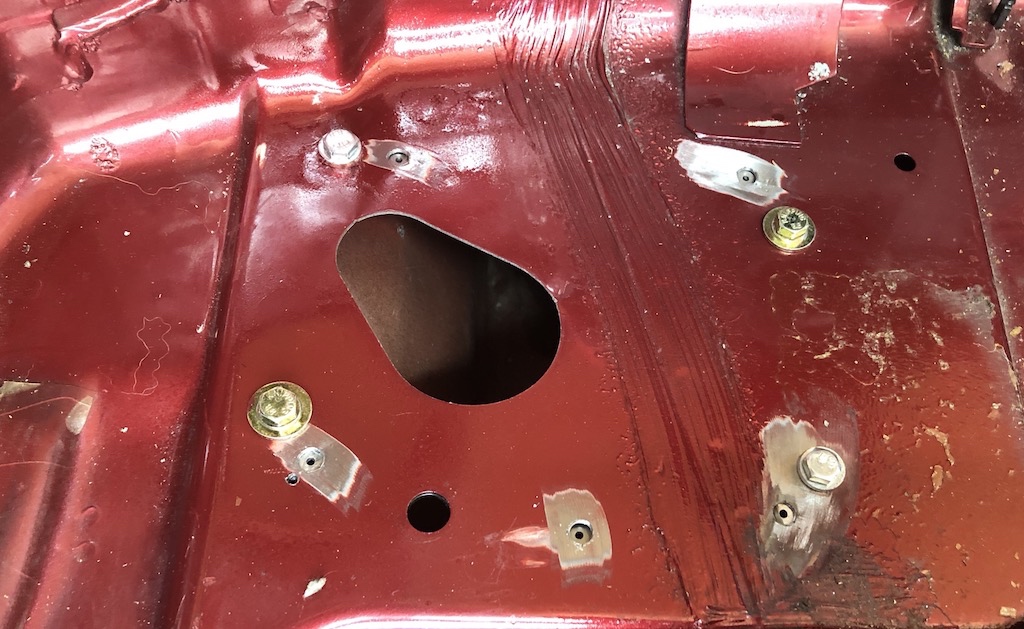
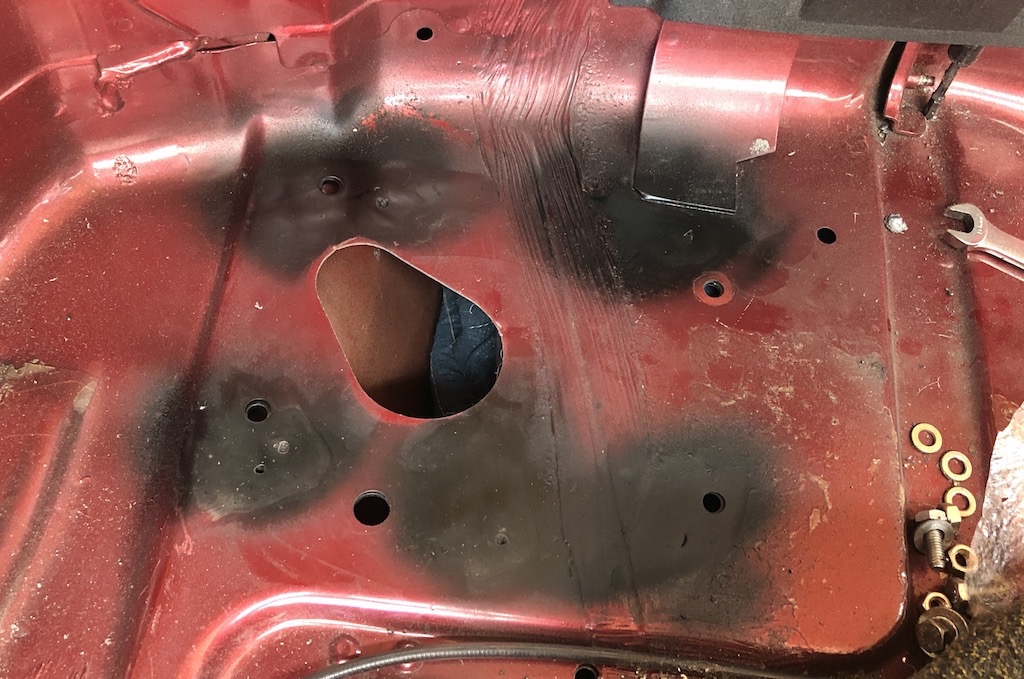
Of course it took more heat than the practice welds, but she's in. Had to weld from top and bottom. This pic of the bottom side is before grinding.
Top motor bracket installed and etch primed, both top side and in the trunk
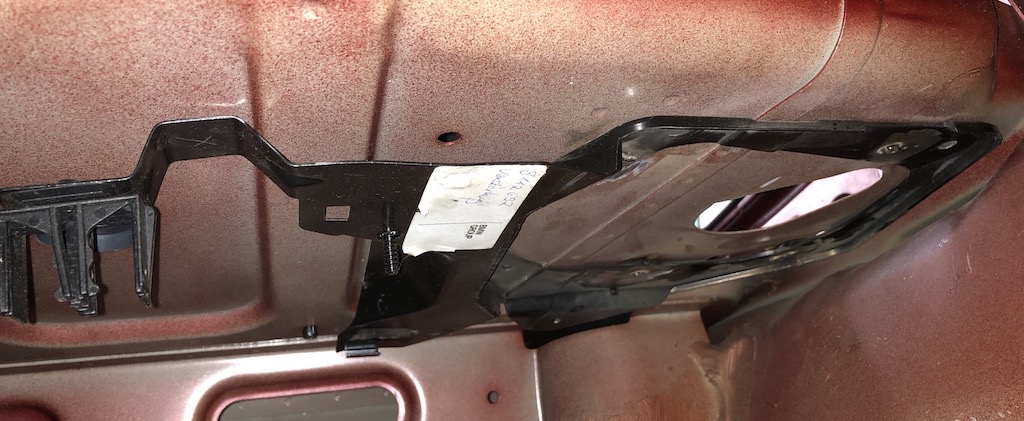
Got everything back together, swapped out the manual top for my spare electric top. Linkages are connected, motors and control box all connected up. Swapped all the manual lid cabling and brackets out - you can see the pass side electric top lid hinge
She's ready for initial calibration. Linkages all need to be set to the right lengths first, clearances adjusted. Procedure is described in the retrofit doc, and the re-sync procedure is the same one I posted a few days ago. Once I know everything's working ok I'll add the new electric top lid. Unfortunately I haven't painted it yet and found a matching vinyl. It will have to do though.
After that we'll leave her be for a while. I'll take her apart later this summer, clean up the top frame and replace the canvas. Damn shame to lose an original OEM top though - with a BMW logo on the front above the mirror and a zip out window.Last edited by bradnic; 06-03-2018, 08:55 PM.Leave a comment:
-
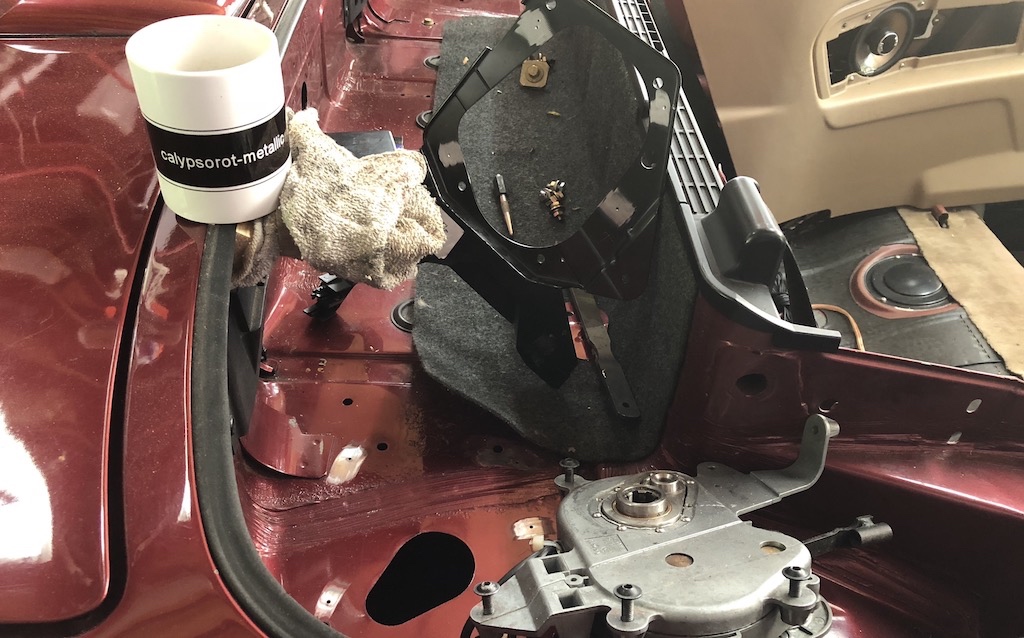
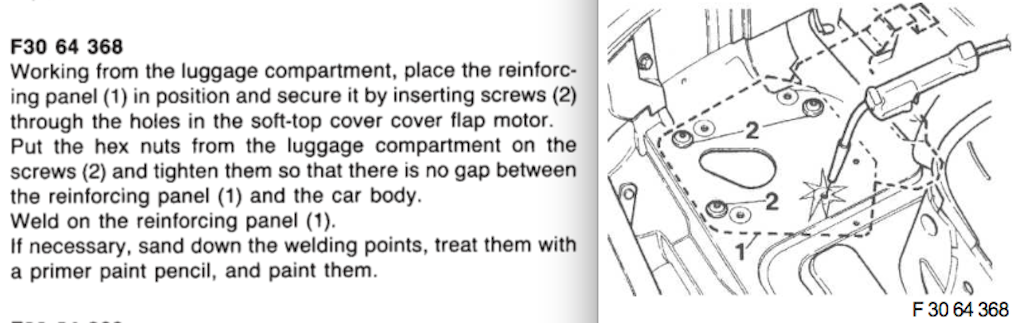
Finally ready to prep the top motor mounting area. Nerve wracking drilling holes in the car. At first I thought about welding from the trunk area up to contain cosmetic damage from welding, but I'd just be fooling myself.
Graphic above shows welding happening from above, which is certainly more convenient. That's the way I'm doing it.
Prep by bolting the reinforcement in using the tonneau lid bolts.

I then drilled 5 pilot holes across the boot and reinforcement plate.

I'll drill out the boot area holes larger and then plug weld the reinforcement in, with it bolted down.
Need to get some test welds in on some scrap metal first to dial in the settings.Leave a comment:
-
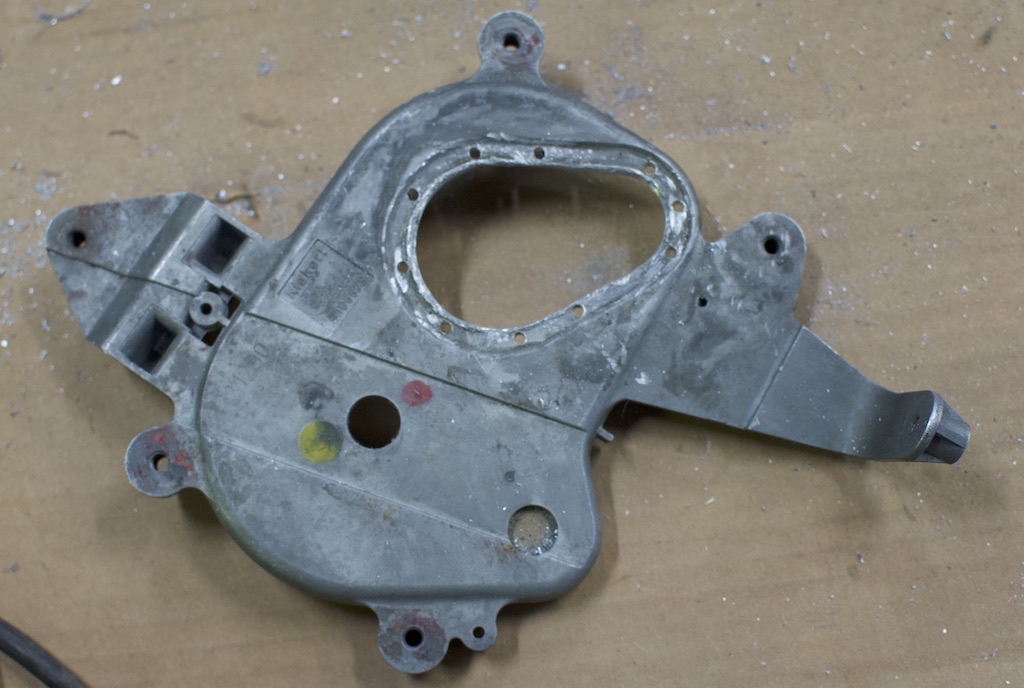
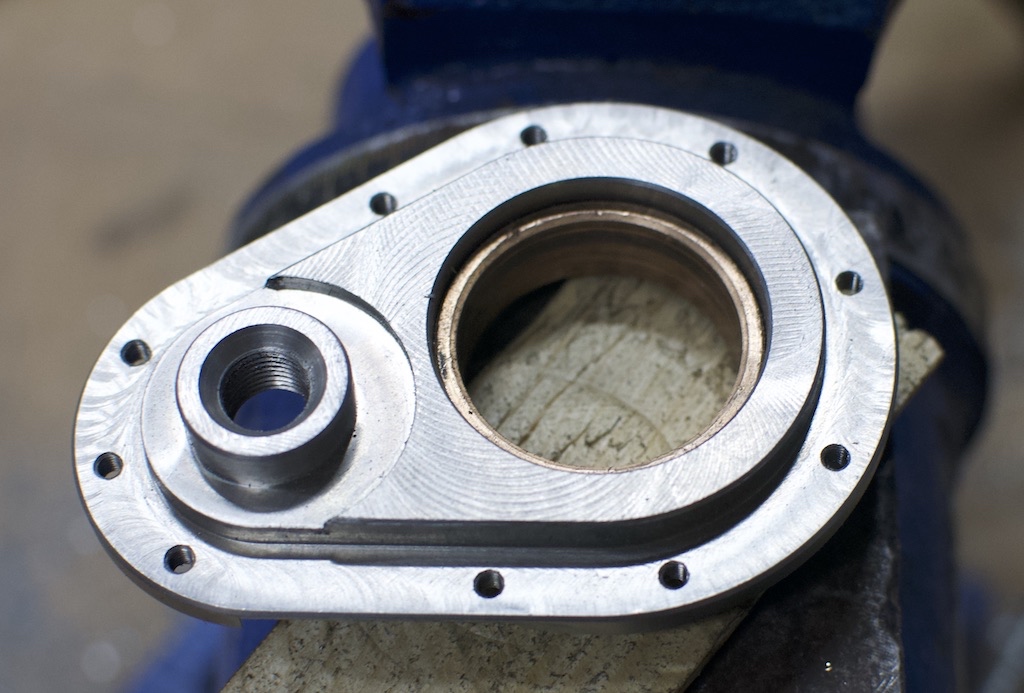
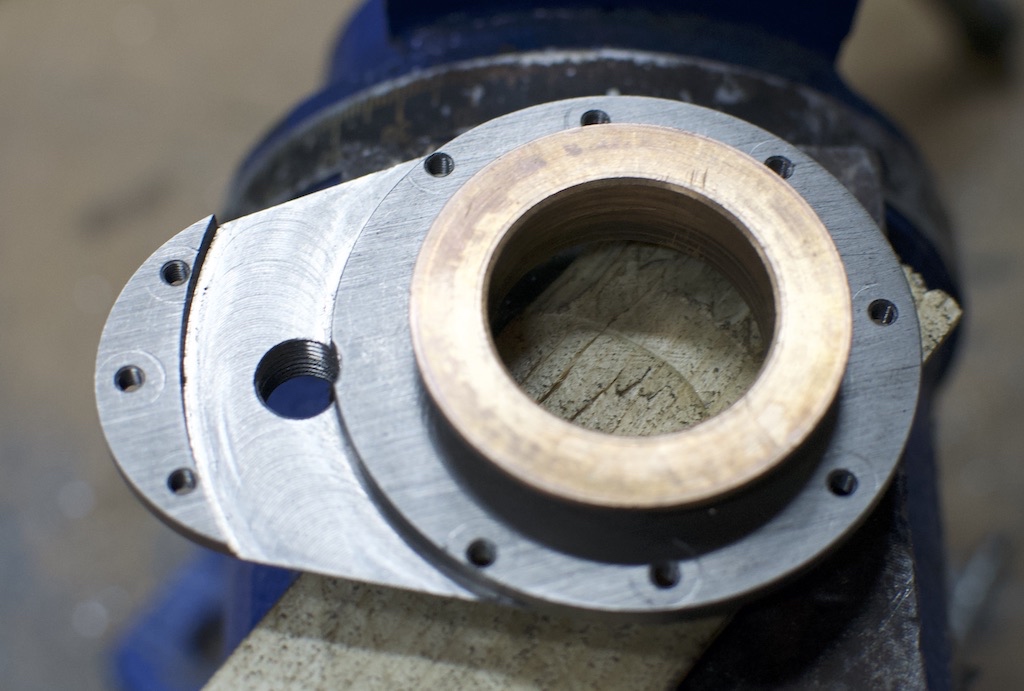
top motor repair done!
Was able to get Callie's top motor repaired finally. Messy job, a lot of cutting wheel, die grinder time and aluminum dust. Strongly recommend a drill press, as well as a small hydraulic press.
Disassembly was straight forward, and there's a DIY posted.
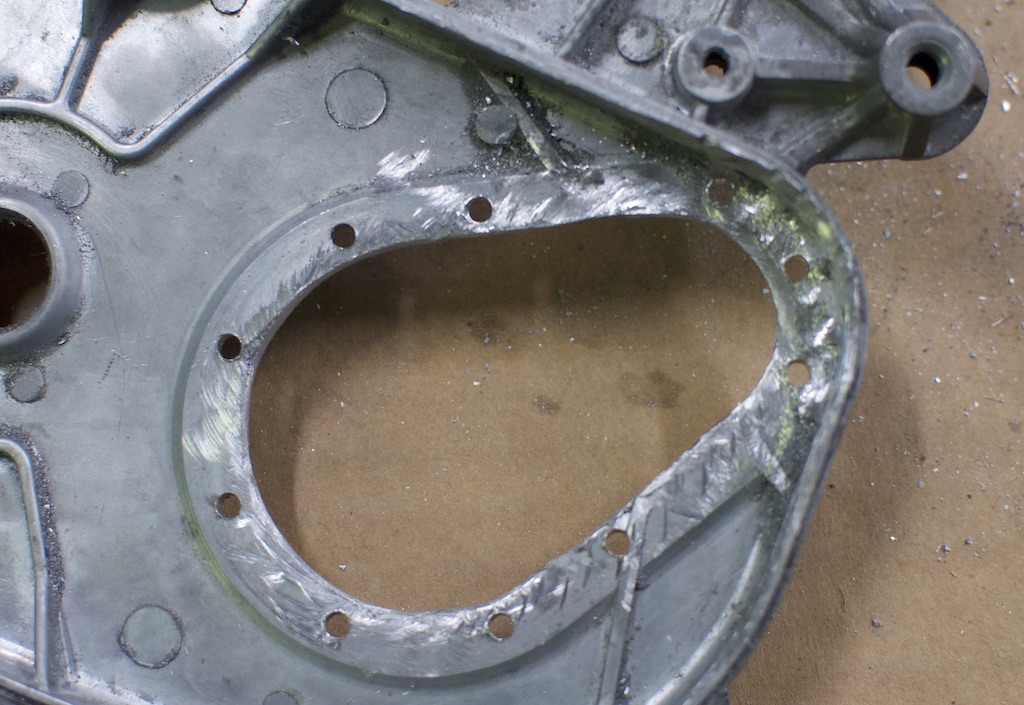
Modified top motor cover plate. Strongly recommend a drill press for the holes - it's way too easy to misalign them.
Cover after hand modification - note the small corner needs a lot of attention to grind off some ribs.

The bushing needs to be pressed back in. At least with my repair part the ID is maybe 0.1mm too small. I had to hand file the smaller OD portion of the bushing to get it to press on. All I had was a vise and a long pipe, but I made it work.
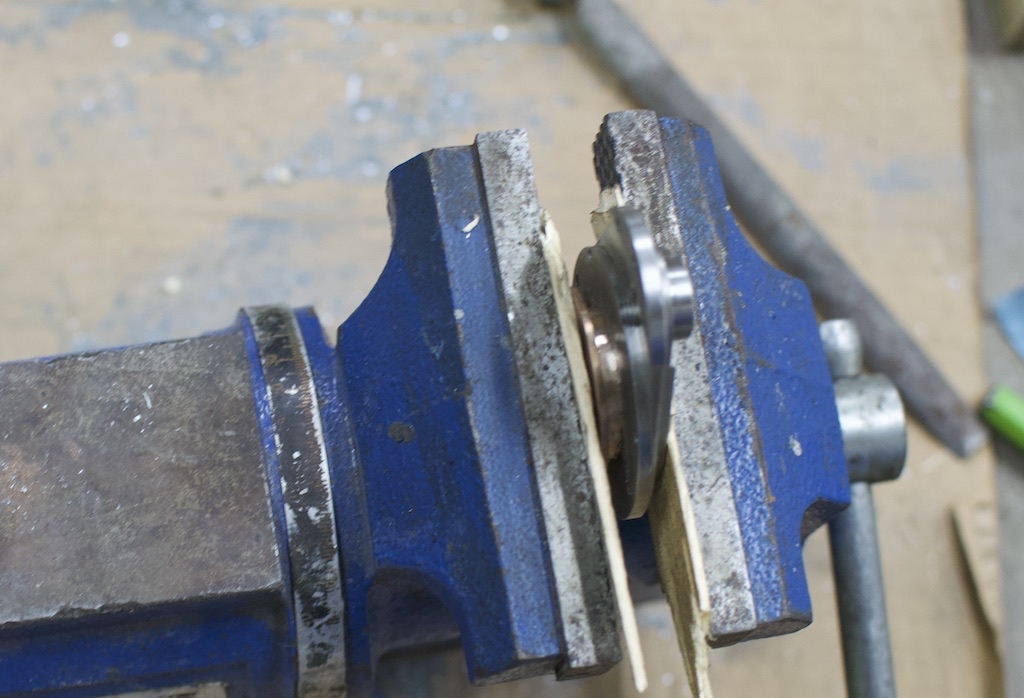
A small hydraulic press is a better choice.
Bushing partially installed
Leave a comment:
-
Ugh
All set to do the alignment on the laguna.. pop the lid cover off, top motor cover, and....
I think we figured out why it went out of sync
@MPoser will be ordering a new top motor and a repair kit for this one.. sigh. Now we know why it went out of sync this spring. Not sure how we missed it other than we left the top motor cover on most of the time we were working on things.
Good timing on getting this all figured out though.Leave a comment:
-
How the alignment procedure is done at the dealer
I'll be adding to this post shortly, but this is the realignment procedure described in the BMW top retrofit PDF. It does depend on the BMW harness tool, but all it's really doing is turning on an LED for each microswitch when that switch is closed.
You really could do everything here without the tool, but you would need to listen very carefully for the top motor microswitches slicking. Details coming.
 Last edited by bradnic; 05-28-2018, 08:43 PM.
Leave a comment:
-
hey Julien.. absolutely. consider retrofitting yours - seriously. no-one uses electric top because they think it's unreliable (it is). my goal is we all know how to maintain these systems properly, at low cost.Leave a comment:


Leave a comment: