
Looking into e85. I have a Walbro 255lph pump and 60# injectors. I need to look into this setup for ethanol use. I know the stock pumps are good for quite a bit of power already from other builds on here (read: Kamotors).
Just writing down something to look into further when I consider cam/fuel/CR:
Clean the tank really well & paint
Check if 60#ers can take ethanol
Rally Road Fuel Rail
Look into running greater than 10:1 compression 86mm pistons with e85.
Look into cam profiles and dynamic compression ratios.
Find a good cam builder.
Get a parts list for a cheap meth sprayer kit.
Link to LS1Tech discussion on static vs dynamic CR
"Static is very important, as is dynamic. They are both important, but more so on your setup because now we have to get the cam right so our effective (aka dynamic) is turbo friendly.
Dynamic will be lower, it's just a mathematical number we use to design cams. It's one of many aspects we consider, but typically we can predict future compatibility with fuels based off that number. Don't forget, a stock ls7 is 11:1, but dynamic is in the high 7s. Change the cam and we bring dynamic up to mid to high 8s on pump fuel.
What cubic inch is the engine?
As far as methanol, it's completely compatible with e85, and very much needed to cool it."
-
-
Got something in the mail today. I've got to stop making fantasy carts at VAC & Bimmerworld. Making me weak.

That is all.Leave a comment:
-
Thanks for reading!
Been tearing down this fridge someone abondoned a few houses down. It's a classy neighborhood what can I say
The french doors aren't ideal but whatevs

Smooth foam surface under the inner plastic. I held the heat gun on high at like 1150 deg F and it didn't even budge or discolor

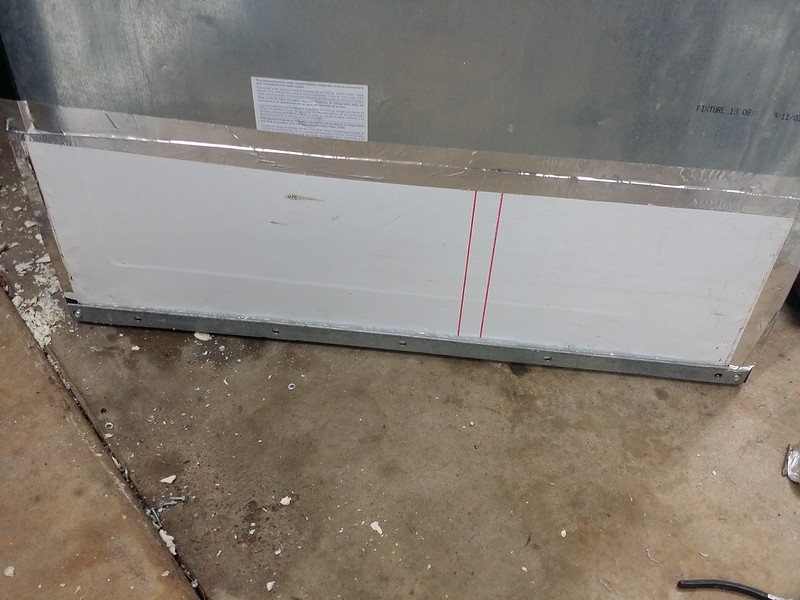
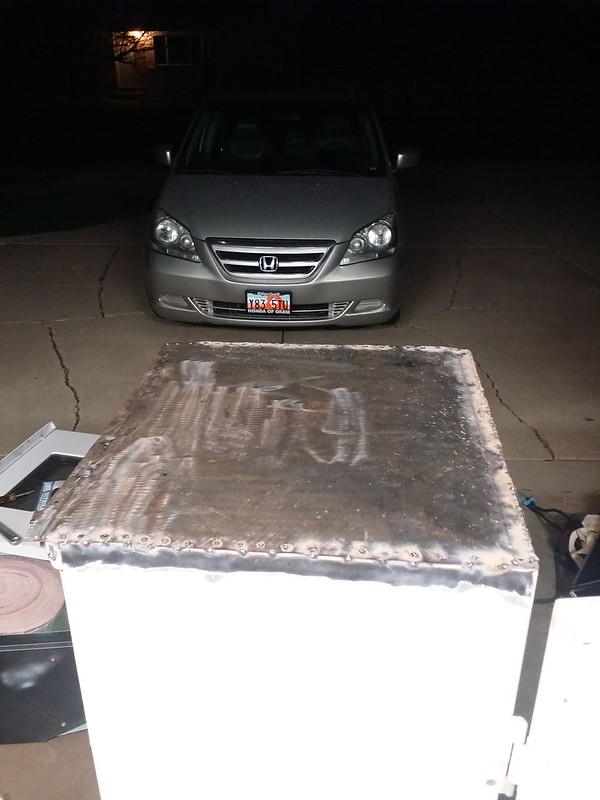
Outer "tub" all done

I couldn't be bothered to get nice fiberglass so I got the $10/40'x3 1/2" rolls and sprayed the paper backing with this stuff. I've used it on cardboard right next to the stick welder for up to a minute with no flames; fire retardedly cool
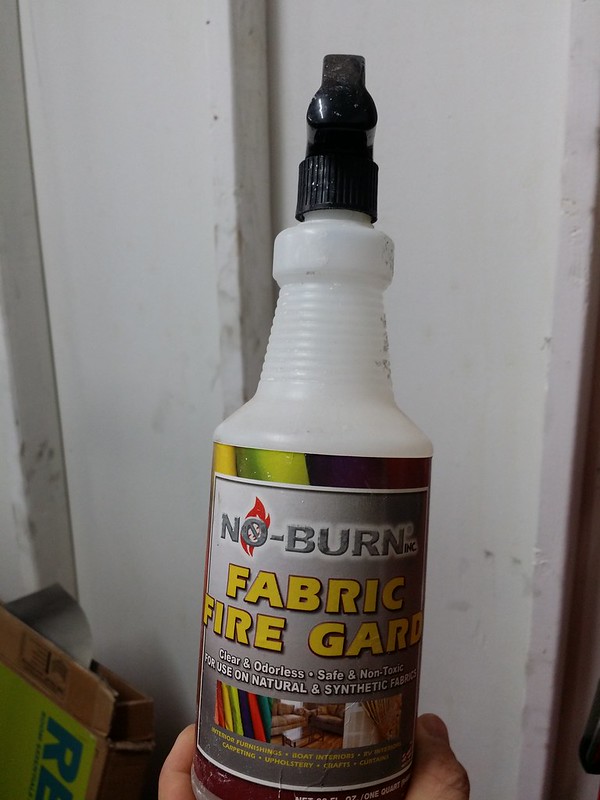
I made some ghetto double-sided aluminum tape to get it to stick in there long enough to shove the inner tub (need to buy the square tubing and sheet metal still). and sprayed between it with the fabric fire repellent. This fiberglass is so cheap, I'll have to insulate the garage this winter and make it less of a wintry hell to turn wrenches.

Tonight I got the outer tub (read: the fridge) all fluffy and pink. Who wants to curl up in this little heat haven?

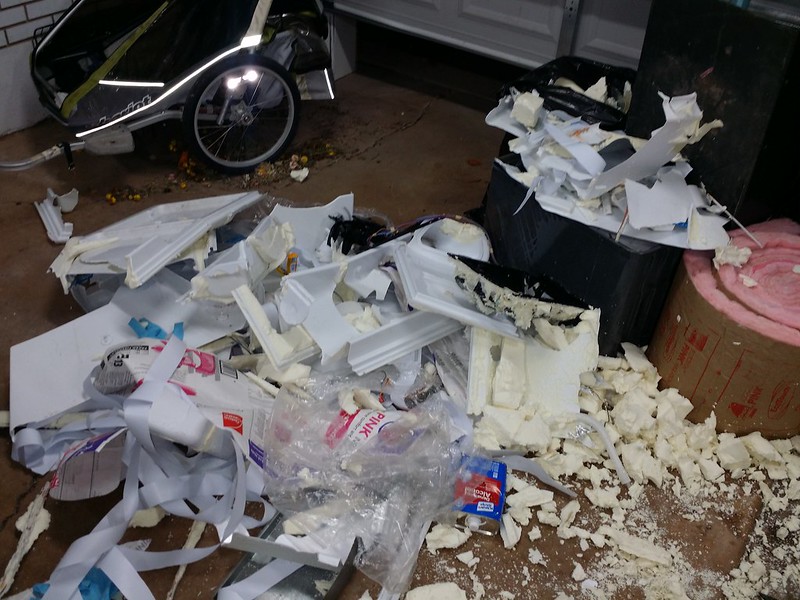
This mess from tear down alone is getting out of control. Going to be a midnight raid on the neighbor's garbage cans before trash day
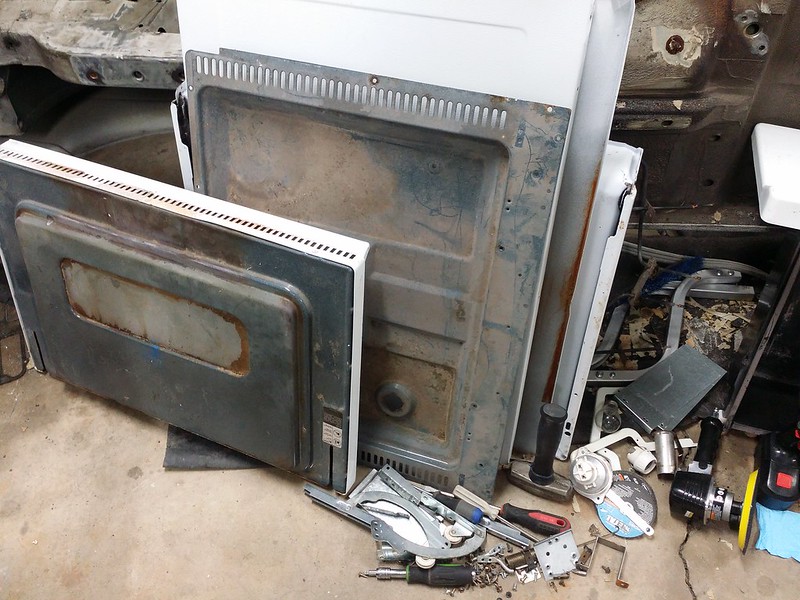
The door plastics were lightly glued but were a female dog to get out and splintered all over the place. The water & ice dispenseres were encased in carbonite and took forever to chip out & rip out. The door on the left is upside down but I plan on enlarging the hole and putting in inslated oven window in there.

The condenser fan will work well to try to get some air moving in this thing

Off topic but exciting. I share a lot of tools with my bro-in-law and he picked this up for a steal. Going to power it with my stick welder. It's got push button start and a gas shutoff timer so as soon as I get a bottle I'll break out the '85 shell and get practicing on BMdub sheet metal.

Leave a comment:
-
Thanks! I'll have a giant ad up this week. I may just rebuild the calipers and sell them refurbed.Leave a comment:
-
Caliper rebuild kit still for sale? Brand, details?
Thanks. Great build thread. Nice powdercoating oven!Leave a comment:
-
Been a long time since I've updated anything. Haven't worked on the car as much though.
Started in on the powder oven.
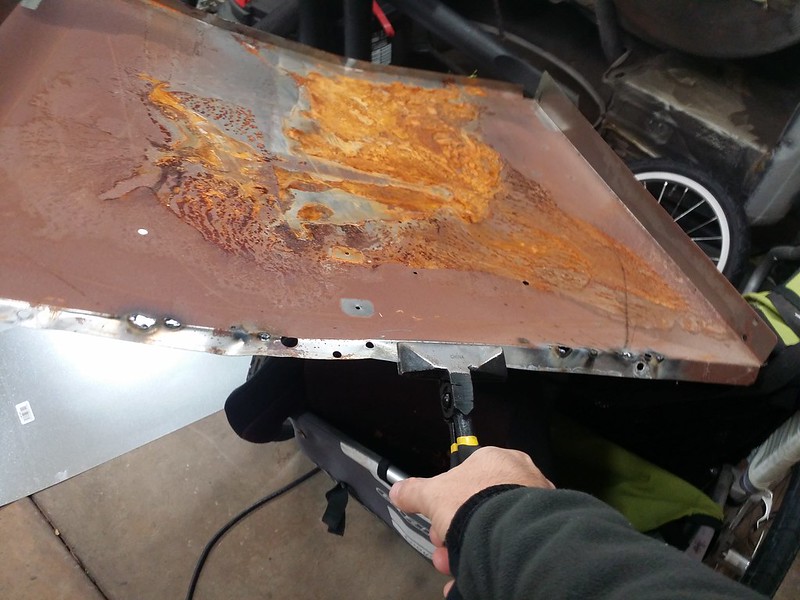
Tore the oven apart and found some useful sheetmetal to use to patch the back of the fridge.
Zipped the rust off this lovely piece
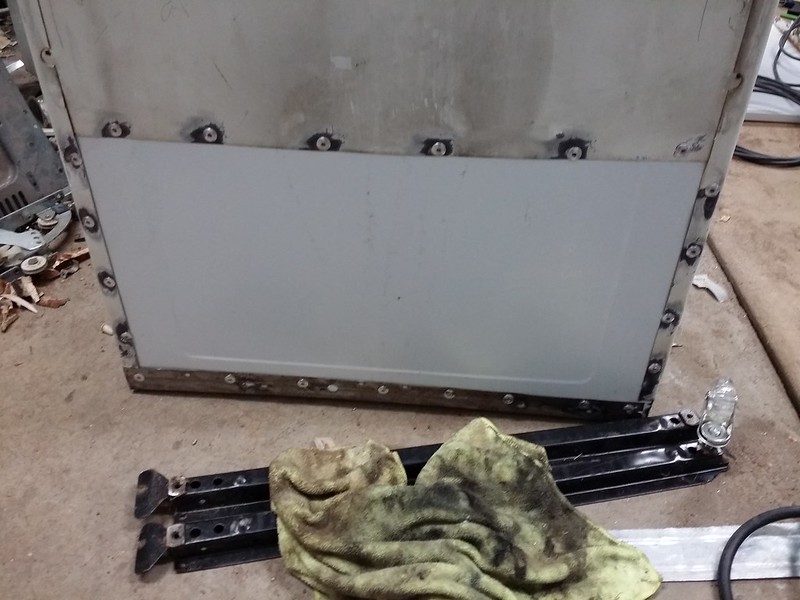
Tacked it onto the base of the oven
Now to patch the back where the compressor resided

Picked up a cheap HF rivet gun. Kind slick
Outer tub complete
On to the inner tub of the fridge. This piece needs patching for the compressor cutout as well. The insulated oven window will also be going in the door or the side. My wife said I can't put it high in the door because the pretty diamond shapes will get ruined. Can't argue with that.

Picked up some cheap, 2"-thick, $10/roll fiberglass insulation

Rock wool didn't seem worth the price
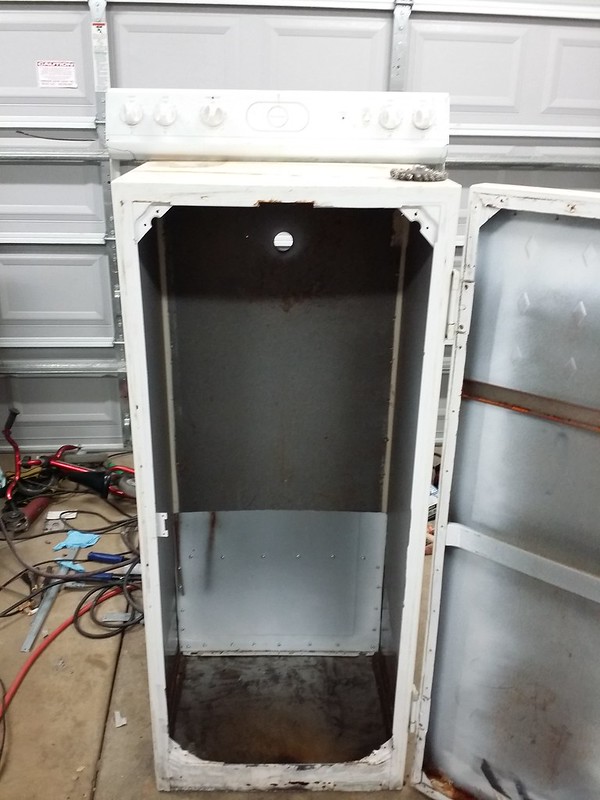
Then I scrapped the whole plan since I found a bigger fridge out on the curb with a sign that said "FREE." Problematic since it's got french doors. I'll tear it down and see if it's usable. The plan would then be to build out from the fridge sheet metal with some square tubing, add insulation, and rivet/screw some sheet metal to the outside, then add the heating elements. I'm glad I found this thing, the rear subframe was a tight fit in the single-door fridge.
I also went down to help out my brother in law on his '78 Datsun. He bought my 17x9/10 wheels so he's working on the rear quarters in glass
We laid up the other side after this using flourescent fixture difuser plastic. He's not too worried about the inside of the flares, and that's pretty practical. Pretty cool to see his process and learn some wet glass layup. Still haven't decided if I'm going sheet metal flares or buy some stuff from the Pesch Poles.Leave a comment:
-
Small update.
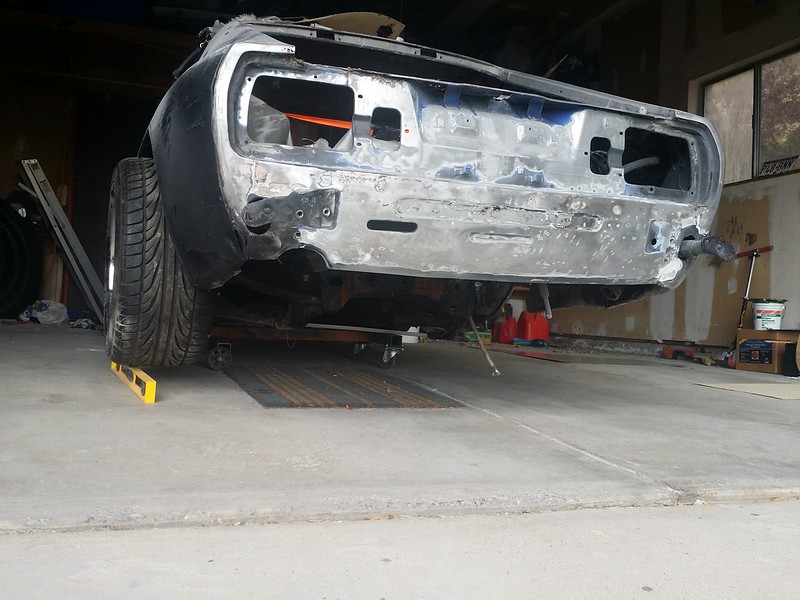
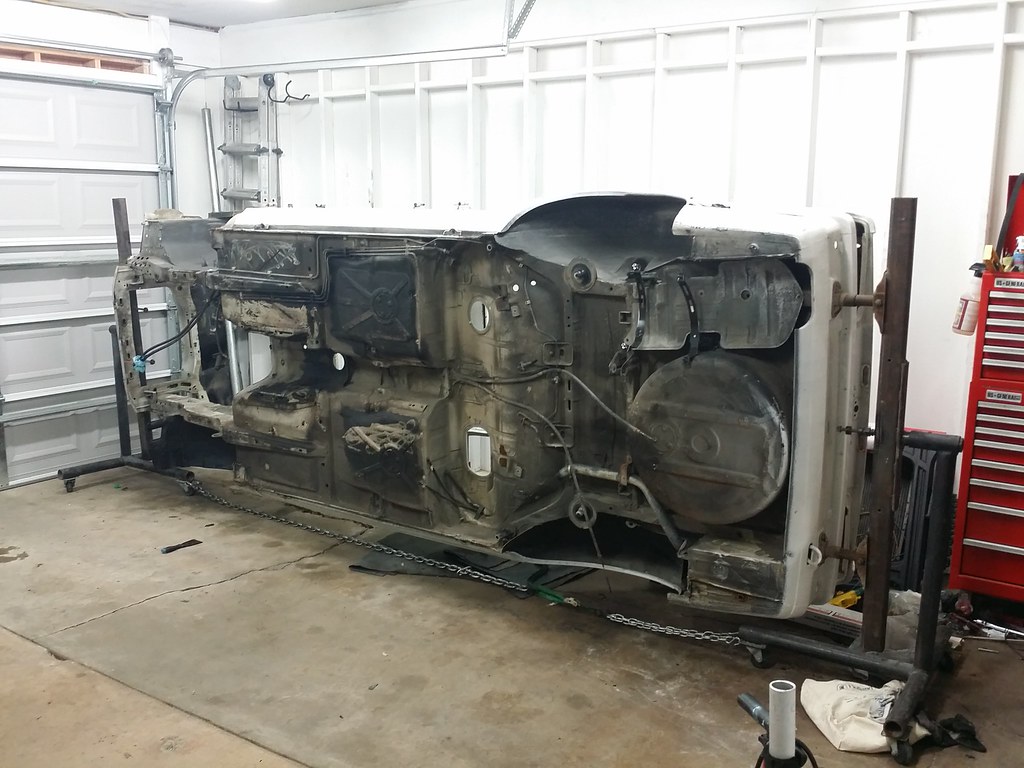
I got the car on it's side after connecting the rotisserie base with some chain and a tie down connected to some small hooks & carabiners. Works great.
Also got started on the powder coating oven a bit. I removed this fridge from an elderly lady's home after posting an ad on local news/classified site free of charge. I was looking for a single-door, sheet metal fridge that would fit the rear subframe, since that is the biggest item I'll be powder coating.
The fridge was a total B to get out of the house. I had this HF dolly with big ol tires on it and the fridge was on the 3rd floor with access by way of a rickety wooden stair case external to the house. It was absolutely awful to get down the stairs after having to remove it from the dolly and turn it 4x.
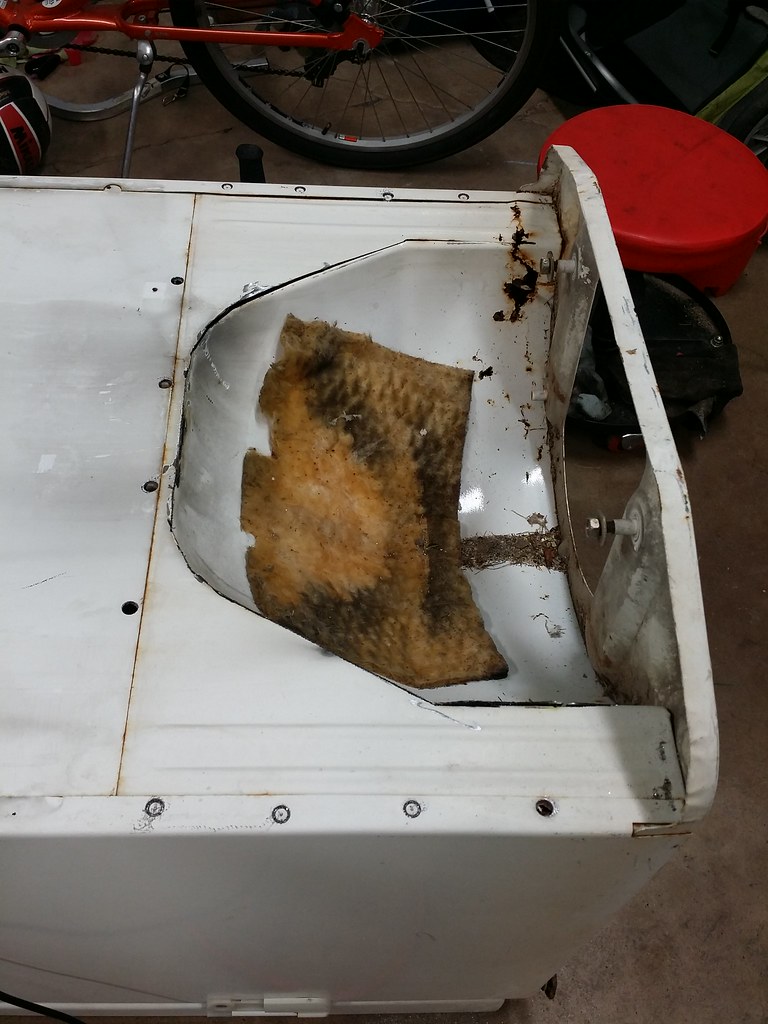
Anyway, the compressor sat on the back of the fridge and needed the shape cut out of the outter skin and the inner tub all the aesthetic fridge plastic mounted too.
Got out some tools.

Between the sawzall, cut-off wheel, and the above I managed to get the lower portion removed from the outer and the angled piece of what will be the inside of the oven bent out a bit.
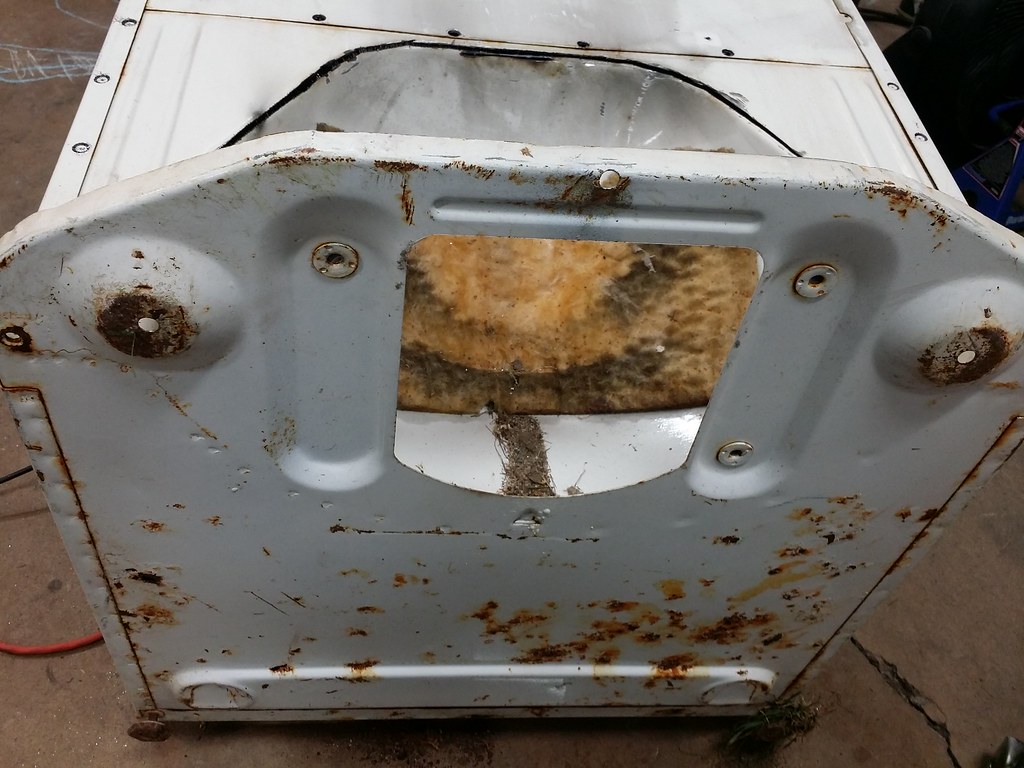
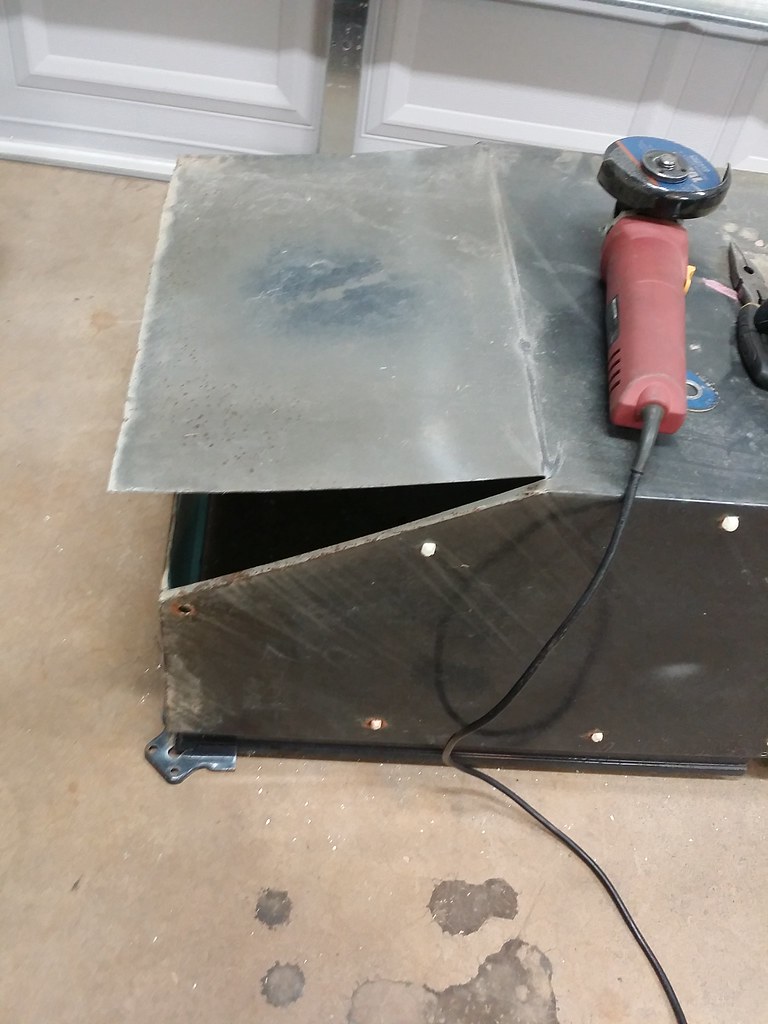
The floor was rusted out as well so that all came out with the compressor indentation.
My wife said there's no way in all of heck this lovely little monster is going to be out for our family get together this weekend, so away it goes...

Having the car on it's side really opens up the garage as well wow...
 [/url]
Next will be re-boxing in the outer and inner compartments and putting the 2" of fiberglass/rock wool insulation in. Then it's time to transfer all the guts from the kitchen oven over and do that part of this flawless oven build.Leave a comment:
-
Leak tested the head tonight by sticking some playdough in the spark plug wells (I thew away the plugs, it's all I had okay!) and letting water sit on top of the valves. I still plan on runnign water straight into the ports with the head on its side, I just ran out of time last night.
Setup:
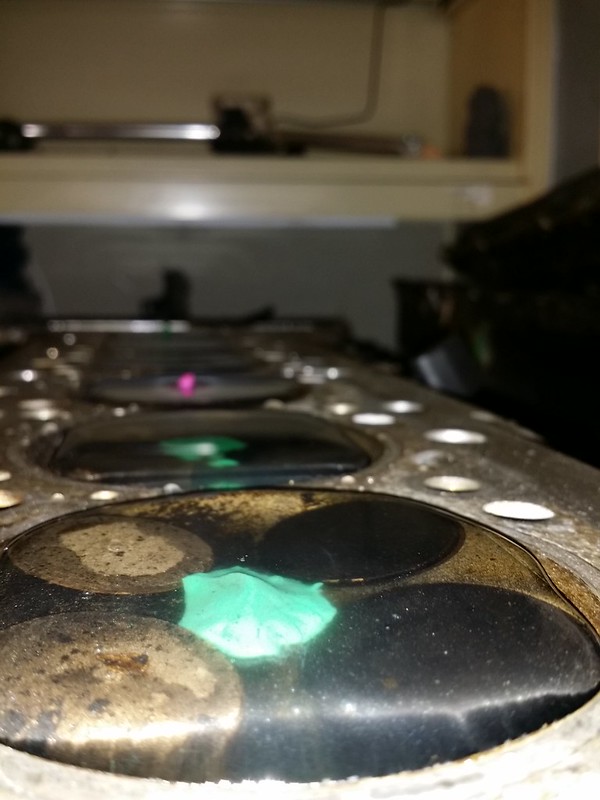
Leak down results so far: Looks like I'd expect after 100k+ with oil vapor recirc.
Blue = water leaks.

I checked out each rod and letting them sit on a flat counter and eye balling them none look bent. I spent extra time with #6 since it had the coolant in it at some point.
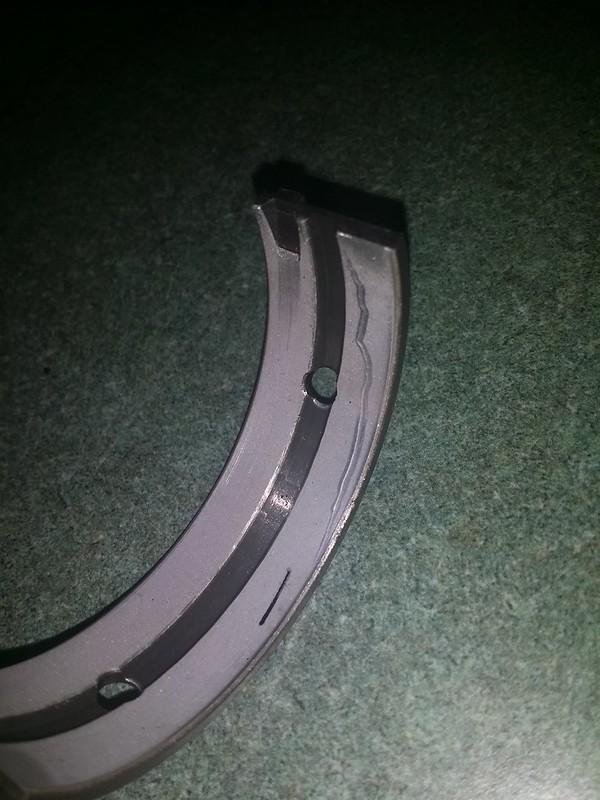
Main bearings:
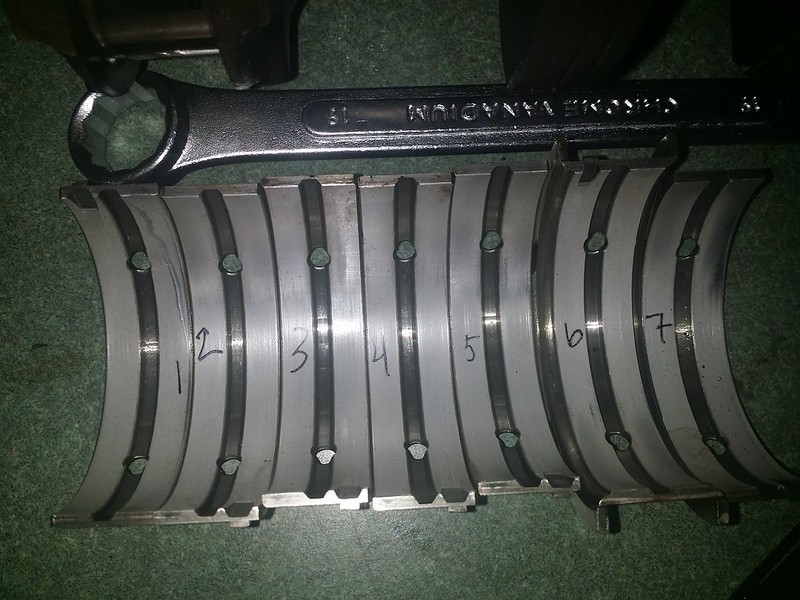
#1 Main bearing weirdness: Anyone know what would cause such wear? It def caught on my fingernail. The matching crank bearing journal looked fine and didn't have any wear I could feel at all.
I need to make a call about pistons/rods to go with a 3.0l crank anyway I suppose but it's nice to know I've got a backup.
I pulled a G250 from the pick 'n pull with this motor but a 99 328is manual just showed up so I might have to exchange this trans and go get the ZF320 and DS from that 328Leave a comment:
-
Did some work and got the M50 all broken down. I've just been cleaning and organizing since I could barely walk into my shop still having boxes and parts everywhere. I threw some old e30 stuff away, and generally made room for the m50 disassembly.
M50 side of the shop:
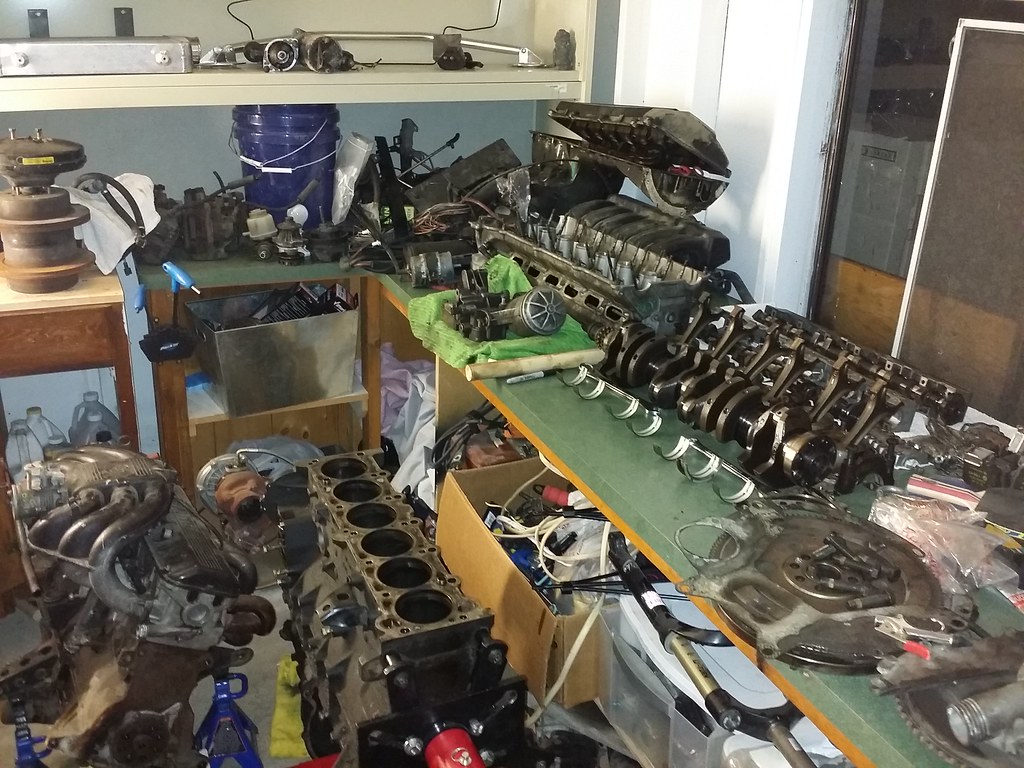
Looking at bearings everywhere things look great except for a main bearing next to cyl #1. At first I thought there was a groove worn in the bearing but it was just discoloration and had no edge to it. Crankshaft didn't have any wear that my fingernail could catch on either.
As far as cylinder walls go, the hi-wear areas at the top and bottom were noticeably different diameters from the non-wear areas at the very top and bottom. If I decide to use the m54b30 crank I'll def be making a trip to the machine shop with a slight overbore. I took a video of the cross-hatching with my phone flash on and it really exaggerated any lines with the harsh light on them. I'll link that up later (for you Chris).
All I gotta say is I'm glad to have this thing cracked apart, coolant and oil cleaned off the floor so my kids don't lick it, and the fact that I dont' have to pick up the block any more to get it in the stand...forgot to remove the rear main seal pieces when I got the block up for piston/rod removal...my old back...
My wife is taking the kids to my parents for like 5 days before the long weekend and I'm a little stoked and a little sad to have them go. I'm conflicted. I really need to get my oven built and a make-shift blasting area setup outside the garage and start cleaning some things.
Next up:
- Head water leak down test
- Disassemble head and check all the valves out
- Lear about engine rebuilds from YouTube for as much misinformation as possible and read all the comment fights to come to a decision, then ask my BIL wuts wut.
Get a notebook and check all the bottom-end parts
Ring-gap measurements - Check cyl #6 components for bends (coolant in this cyl)
- Get the sheet metal & insulation (fiberglass board/rock wool?)necessary for the oven build
I also got the car on its side.
The rotisserie bumper bar mount thing is just long enough to bump the rotisserie end but I threw my breaker bar down there for a little insurance
Got started with the wire wheel
I may try some dry ice and a rubber mallet for the undercoating...this isn't fun. It all turns into silly string as you go.Leave a comment:

Leave a comment: