
What are you doing in regards to the engine loom? Which bits are you re-using from factory
-
-
Originally posted by econti View Post
The current plan is to use the following from the M20 ECU/engine harness: three relays (fuel pump, Main, O2 Heater [already fused]), the EVAP valve, +12v switched to ECU, Tach output, Aternator Excite, Oil Pressure Switch, Dash temperature gauge, aux fan trigger, and check engine light.
I've already built the majority of the Engine loom, by cutting up the old E36 M52 harness for the connectors. I have to integrate this harness with the M20 ECU/engine harness, add the wideband, and a few other cleanup items.
I think I am also going to include wiring for the VDO gauges (oil pressure, oil temperature, and water temperature) in this loom.
When I have the harness finished and everything is tested, I'll post up my wiring notes.Comment
-
Front Calipers, Oil/Water Gauges
Finally installed the re-manufactured front brake calipers & new soft lines. I've had these since I first bought the '86 325e.
They were painted along with the rears when I did the rear end refresh in 2016.
I never installed them as the front brake hardlines and softlines were rusted together solid. Brake line wrenches were also of no help. To get them off, I cut the hardlines and used a socket.
No big deal cutting the hardlines now, as I have a Chase Bays ABS delete kit waiting to go in the car which includes new lines.
The next job was to sort out the VDO Oil & Water gauges. See the diagram for details.
I also installed the original E30 dash temperature sender (brown plug) into the M52 radiator.
I started removing the ABS pump & sensor wiring from the driver's side loom.
To finish up the day, I took 800 grit to the few spots poorly painted/splattered due to the damaged paint cans. I managed to get one spray tip working and shot another coat of colour. Paint should be cured and ready for clear early next week.


Comment
-
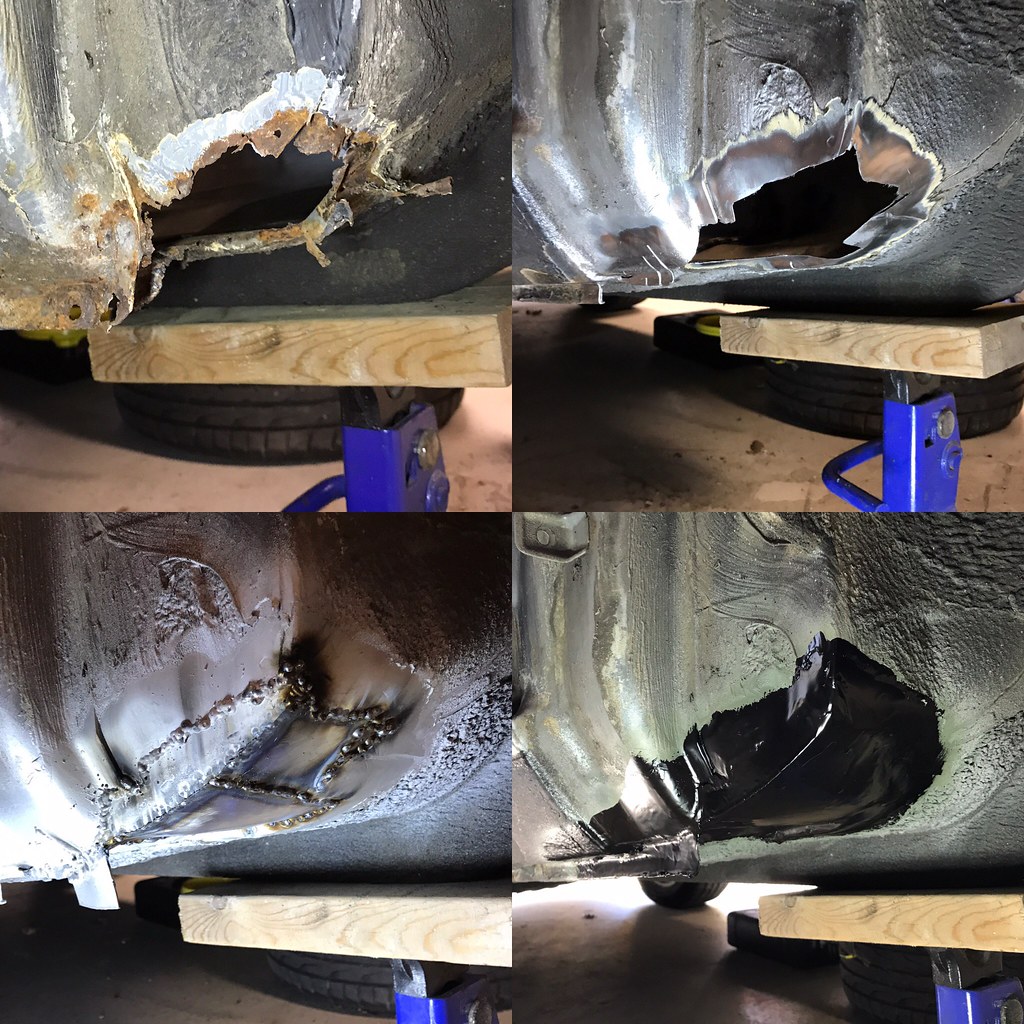
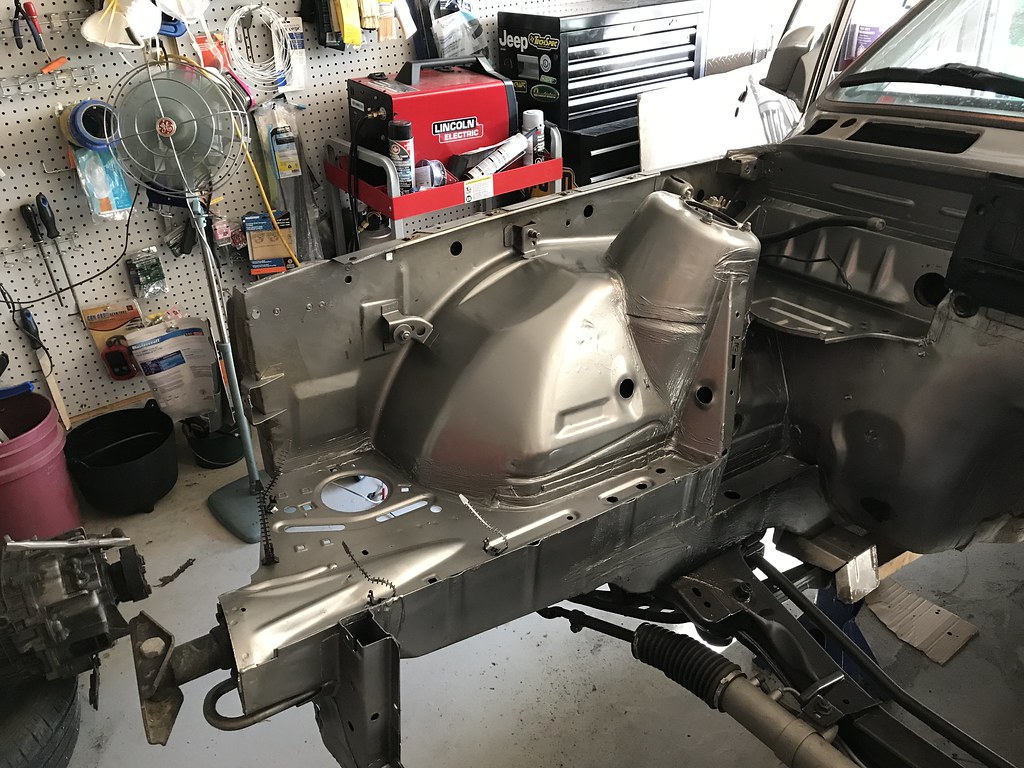
Rust Fixing, Engine Bay Clearcoated
Tackled the rusty corner of the passenger side floor. Knew about this since I bought the car in 2014, and have kept the carpet out since then to minimize further damage.
Glad I took care of it now, as it had started into the rocker. Ended up using seven individual patch pieces to fix this area.
Everything is butt welded, and checked for pinholes with a bright light.
Ground smooth underneath the car, Shot self-etching primer, followed by brushed on black rustoleum. Will topcoat with something else to match the rest of the area. Will also seam seal and paint inside the car for good measure.
Also finished up the engine bay paint by laying down three coats of high-heat engine enamel clear. Pretty happy with how it turned out, considering I didn't go the whole shaved/bondo'd approach.


 Last edited by Panici; 05-14-2020, 09:13 AM.
Comment
-
Right on, love seeing your update. SO thorough. Whens the motor going back in?Simon
Current Cars:
-1999 996.1 911 4/98 3.8L 6-Speed, 21st Century Beetle

Make R3V Great Again -2020Comment
-
Hey Simon!Originally posted by 2mAn View Post
Thanks, I always try to be thorough when it comes to the E30. Do it once, do it right!
Aiming to have the motor physically back in this week, but still have a list of things to take care of before the car will be back on the road.Comment
-
Firewall Heat Shield, X3 Brake Booster
As the original firewall blanket was crumbling to bits, I covered the firewall, transmission tunnel, and exhaust route in DEI Reflect-A-Cool.
I scrubbed the oil & grease from the transmission tunnel, and laid the Reflect-A-Cool further back then the original heat protection. Hopefully this will keep the cabin cooler in the summertime.
I plan to add some dynamat-type sound deadening inside the cabin.
To fix the 24v brake booster clearance issue, I went with an E83 X3 Brake booster & master cylinder.
From what I found online, this is supposed to be identical to the E90 booster & master, but with the hardline outputs on the correct side.
I thought this would be an almost plug-and-play solution, with just the clevis modification needed.
However I ended up having to slot the firewall (BCD of X3 booster is smaller), and remove the entire pedalbox to modify for hardware clearance.
(2022 EDIT: See Post 352, you don't have to slot the firewall.)
On the plus side, I did install the new throttle cable while I was contorted under the dash!
I'm also working on a (still growing) list of misc items. Here is what I've done so far:- Installed battery terminal block, hood strut assembly, passenger side cowl cover.
- Chopped off the ABS connectors from the chassis harness.
- Removed the (factory installed but non-functional) siren.
- Car off the jackstands, eyeball alignment.
- Second coat of paint on the rust repair.
- Removed the corroded aux fuse box.
- Modified my VDO gauge wiring to support the addition of an oil temperature gauge.
- Added an ashtray delete panel & wideband gauge (I dislike how the gauge isn't period correct).
- Removed the G260 from the M20.


Last edited by Panici; 11-03-2022, 11:39 AM.Comment
-
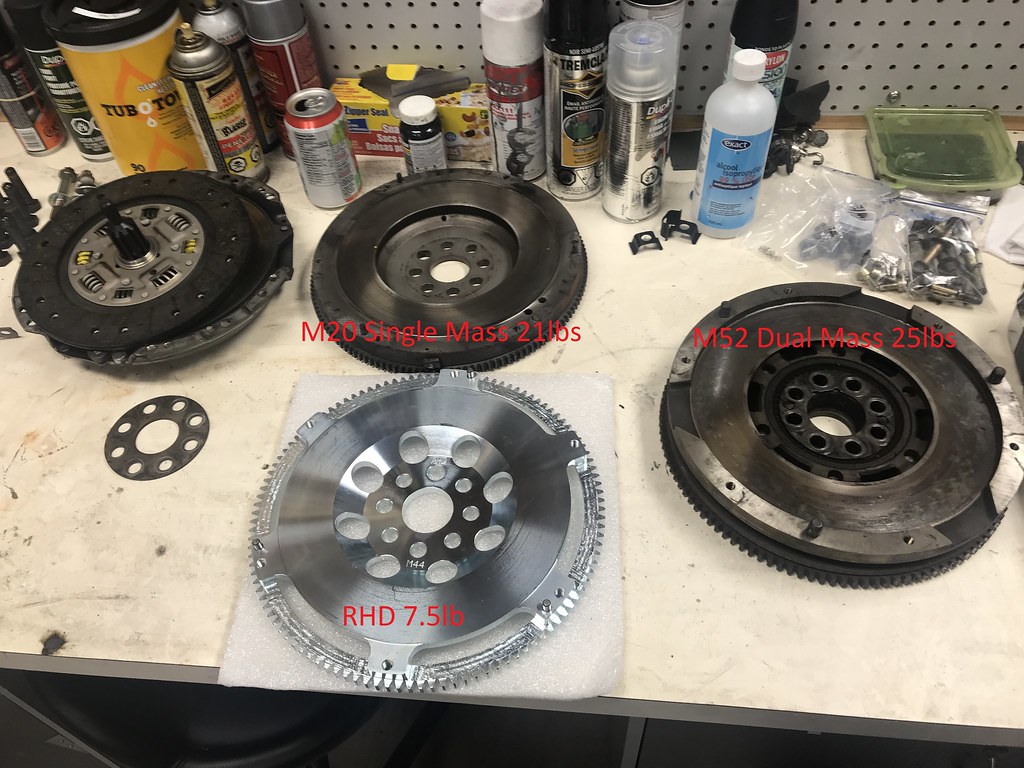
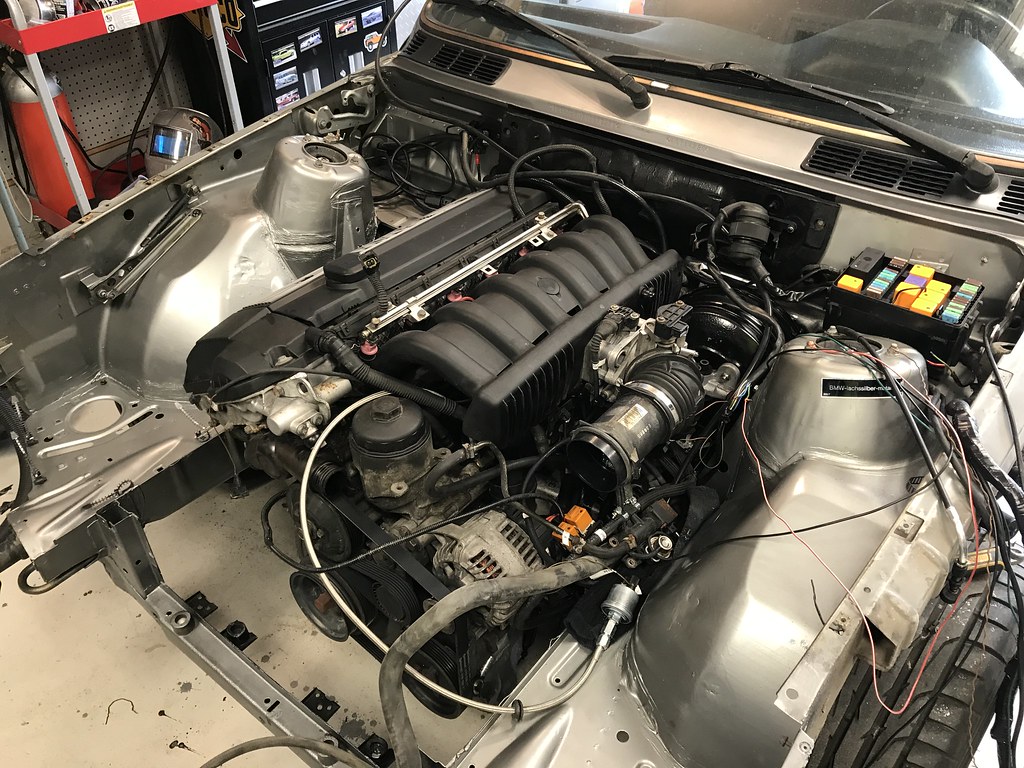
M52 Mounted, Wiring Complete, Test Fired!- Installed Racehead (RHD) 7.5lb Chrome-molly steel flywheel.
- Reused M20 pressure plate & clutch, as they look almost brand new.
- Installed G260, degreased motor and trans.
- Installed M52 into E30 with my sister's help. Went smoother once I realized the passenger side engine arm was mounted upside down!
- Mounted DIYautotune Quadspark modules under battery tray. Will relocate these to passenger compartment when I turbo.
- Rebuilt harness to include original relays (that I am relocating). Added additional fusing which fits nicely under the plastic cover.
- Finished motor harness, pulled extra wiring into glovebox. Will need to trim this shorter in the future.
- Reassembled intake manifold for test fire.
- Found that triggering O2 and Main relays from the Fuel pump output of ECU would not work, as I'm using +12v from one of them as a pullup for the crank sensor. Wired an additional output from the ECU to control these relays separately.
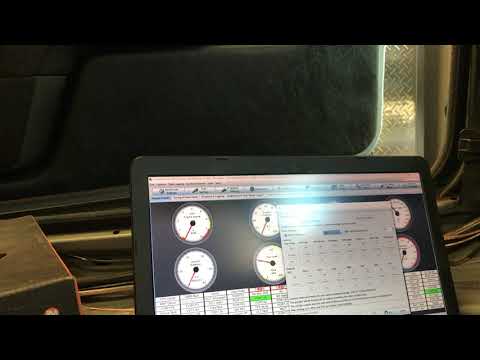
- Successfully test fired the motor!
Now I have everything electrical sorted, save for the Oil Level sensor. Going to attempt to make the E34 pan sensor play nice with the Check panel today.
Have new powersteering lines, brake master reservoir, M42 radiator on order.


 Last edited by Panici; 05-24-2020, 05:46 AM.
Comment
-
They are really easy cars to swap engines on aren't theyComment
-
I have no frame of reference, as I've never swapped a motor before.Originally posted by econti View Post
Hasn't been too difficult so far!Comment
-
Hidden Wonders Under The Intake Manifold Pt. 1- Shortened the throttle cable.
- Thought I had the correct cable for the swap, but I bought it over a year ago and didn't keep the documentation.
- This cable was long enough to reach the alternator before it was modified!
- Figured out how the E34 oil level sensor works, and added wiring to my harness to accommodate.
- This fixes the "Oil Level" Check Panel light!
- Relocated the relay box to the driver's side frame rail.
- Installed a falkmfg.com A/C delete plug. (Cleaned up the extra sealant after the picture)
- Modified the power steering reservoir bracket to fit better in the reduced space.
- Installed the Chase Bays Brake Line Relocation Kit.
- Used thread adapters from "Brake Hoses Unlimited" on eBay. Details in image attached to this post.
- Happy to report it looks like it will work with the X3 booster & master cyl.
- Waiting to tighten up the connections at the booster until after everything else in that area is sorted.
- Installed the charcoal canister.
- Made a bracket for the E36 3/2-way valve (FPR).
- Turns out this also needs +12v to activate the solenoid valve. Explains why my fuel pump sounded mad when I test fired the other day.
- Added this wiring to my harness to power up with the Fuel Injectors.


Attached FilesLast edited by Panici; 11-03-2022, 11:47 AM.Comment
- Shortened the throttle cable.
-
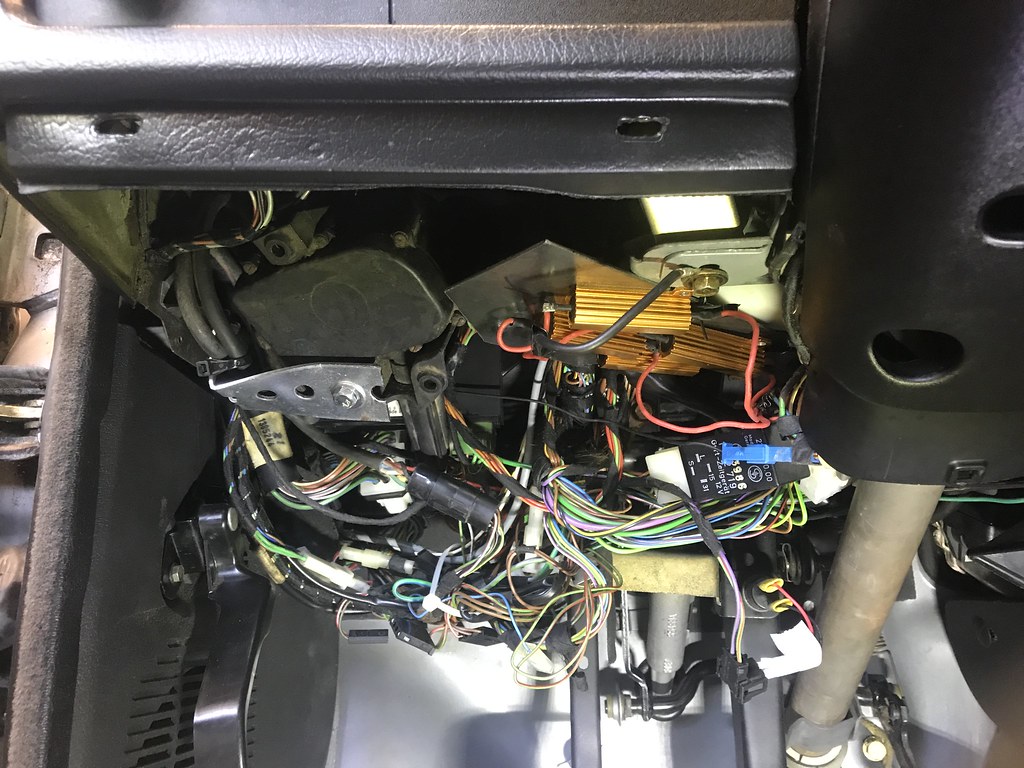
Cruise Control Relocate, Motor Mounts, Nixed DSSR- Removed the ABS computer under the dash.
- Relocated the cruise control actuator under the dash. Ran the cable through the old cruise wiring grommet.
- Will shorten this cable and use the new throttle body compatible end from the E36 cruise control.
- Made a new mounting plate for the LED signal bulb resistors under the dash.
- These previously used the ABS case as a heatsink.
- I'll likely add a PC heatsink to the backside of the mounting plate, as these resistors dump a lot of heat with the hazards running!
Realized I put the E28 motor mounts in backwards (used the inside holes to mount).
I was able to lift one side of the motor at a time with the engine crane, and rotate the mounts.
I had to also slightly trim the garagastic G260 crossmember to get proper fclearance.
I found the garagastic 10 degree twist DSSR doesn't work with the selector joint I have on the car. Easy enough to cut and weld the original selector rod.
Finished up the day by installing the driveshaft, underbody panels, and clutch slave hose.


Comment
-
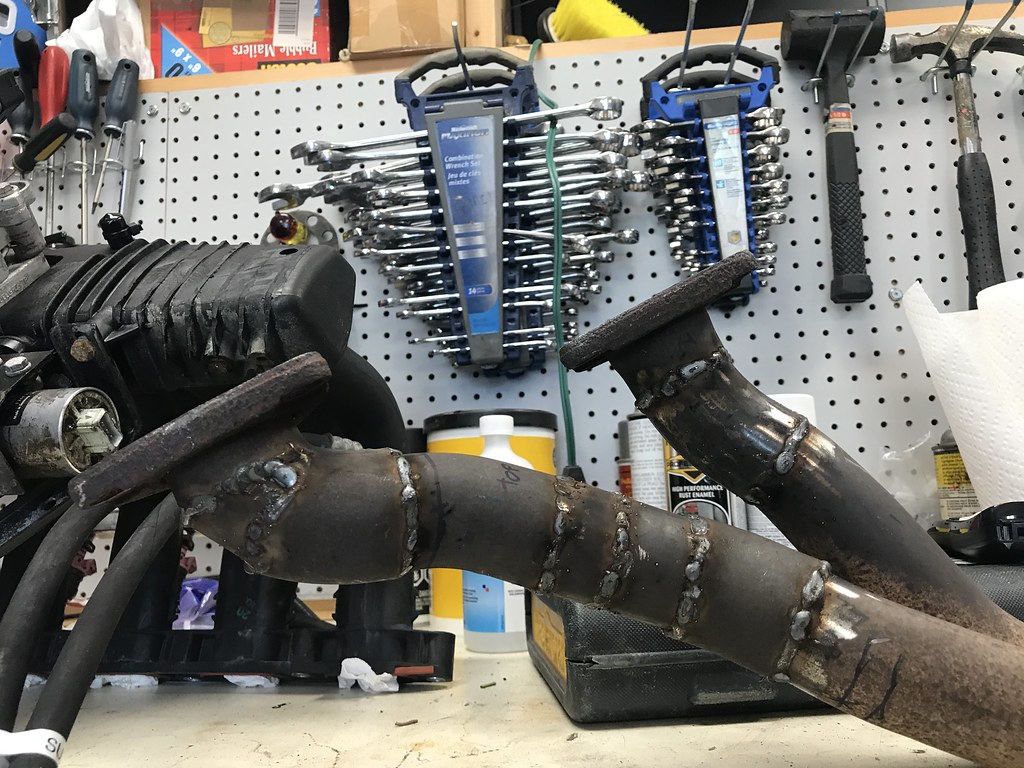
Exhaust Fabricated, Power Steering Installed
Cut up both the E30 and E36 exhaust, and made it work with the stainless OBD2 manifolds.
This was my first time doing extensive exhaust fab. It isn't pretty, but it is functional and free!
Could have made it look nicer if I prepped the surface and wasn't filling large gaps in my pieces.
Also knocked out one stud on the front manifold for clearance. Had to settle for trimming the other two, as my vice broke in half!
Finished the exhaust by installing a bung for the wideband O2 sensor.
Installed the Power Steering lines & Reservoir. Front line is touching the oil pan.
Installed VDO oil pressure sender (waiting on fittings to improve that AN line), engine bay VDO gauge wiring.


Comment
-
Good job on the exhaust. Don't be too hard on yourself about the welds, I have seen a lot worse. As long as they don't leak you are golden for a NA setup.How to remove, install or convert to pop out windows
http://www.r3vlimited.com/board/showthread.php?t=297611
Could be better, could be worse.Comment
-

Comment