
-
Motor is Running!- Installed heater hoses (heat not blowing hot now, will need to investigate)
- Added heatsink to LED flasher resistors.
- Sorted out vacuum lines from intake manifold. (Dedicated vac line to ECU)
- Ran vacuum line to ECU through grommet on driver's side.
- Deleted throttle body coolant loop
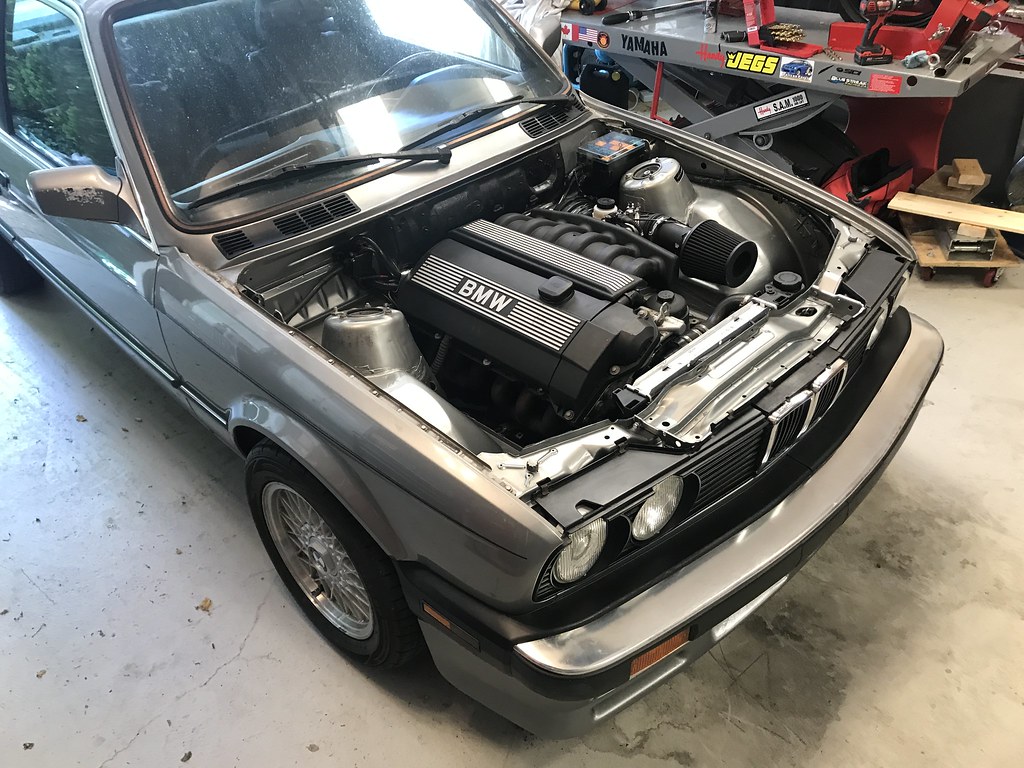
- Cleaned/degreased/painted removable core support
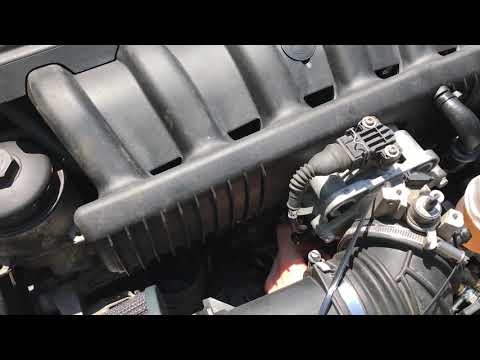
- Cleaned & mounted intake manifold.
- Test fit M42 radiator & made radiator hoses. (Is there a better/OEM option for these hoses?)
- Heat wrapped custom harness & tucked behind motor.
- Wired and plumbed engine.
- Calibrated Wideband O2 sensor.
- Started. Tuned idle fueling and ICV duty, bled coolant, filled power steering res.
- Fixed coolant leak inside car at heater core.
I found my idle fueling to be quite different then when the motor was on the wood blocks. I'm sure now that the 3/2 way valve (E36 FPR) was not working previously, and needs the +12v I've now supplied to function properly.
Would like to get a fuel pressure gauge mounted on the rail for reference.
Also, I had to give the brake booster a few love taps with a hammer to clear the intake manifold. Hopefully I didn't damage anything. STILL waiting on my 2002 brake resovoir, so I can't bleed/test the brakes.


 Last edited by Panici; 05-31-2020, 04:51 PM.
Comment
-
Reassembly, Test Drive- Made a dash gauge panel out of wood as a temporary measure ( BMW radio delete panel in the mail).
- Installed Chase Bays windshield washer reservoir.
- Installed BMW 2002 brake reservoir.
- Made and installed cruise control throttle cable.
- Bled the brakes & clutch
- Good reference to get the last bit of air out: https://www.youtube.com/watch?v=uj1dMdYgRK4
- Went for a test drive around the block with the radiator just hanging out by the hoses.
- Brakes, clutch, steering all work great!
- Reinstalled the center console, floor mats.
- Reattached the front core support.
- Installed and rewired the SPAL fan.
- Installed the front valance, fenders, headlights, grilles
- Partially tucked the front wiring harness.
Went for a 15 minute drive, starting on the basics of tuning the MS3X.
Hope to have the rest of the front end together by the weekend!


Comment
-
How did you make the cruise control throttle cable?How to remove, install or convert to pop out windows
http://www.r3vlimited.com/board/showthread.php?t=297611
Could be better, could be worse.Comment
-
Same way I shortened the throttle cable.Originally posted by rzerob View Post
I cut the outer cover carefully in half, shortened, and sleeved. Then I trimmed the inner cable to length, added the end pieces for the E36 throttle body, and welded a small nut to the end of the cable as an end stop.Comment
-
Finishing Up Motor Swap- Partial wire tuck on the front harness.
- Tucked HID ballasts as well.
- Will need to cut & splice to tuck completely. This will be a good winter project.
- Installed iS Airdam
Now that the car is on the road, I am going to be learning to tune the Standalone MS3X engine management.
Could also use an alignment in the near future.
Here is a few final garage pictures from this afternoon. I'll be washing the car and taking some beauties this weekend!


Comment
- Partial wire tuck on the front harness.
-
-
There's a LOT to like here. Nice work!Comment
-
Love the progress, the engine bay looks great! Keep it up. Must be awesome to actually be driving it for the first time in awhile'86 325e Zinnoberrot /// '02 325ci Schwarz II /// '18 M4 Azurite Black Metallic ///
Albie325 Build Thread | Albie325 COTM Jan 2021Comment
-
Comment
-
Engine Bay Beauties, Tuning
Washed the car this morning, then went for a test & tune drive.
Have the open-loop idle sorted now, and around-town driving pretty close to my AFR targets, which are still very rich as I'm learning the ropes.
Car runs and drives great just cruising around though!
Did some more work on the mid-throttle fuel maps, but need to log more time in this area.
Also did a few WOT runs. Need to pull a bunch of fuel out, but want to sort the timing first. I moved the Vanos engagement point from 4200 to 4800 so that requires some spark changes.


 Last edited by Panici; 06-09-2020, 05:29 PM.
Comment
-
Just read your entire build thread, it's been years since I've seen it.. Glad you still have the car!! Good to see you were able to get the X3 booster to fit, I installed mine a little different and removed the "sandwitch plate" or whatever you want to call it, from the booster. It's held on with those two 13mm nuts. Cool to see it fits both ways, I didn't have to drill my firewall because I removed that plate but I did have to bend my lines pretty far inward towards the firewall, to reach the new master cylinder location.
Anyways good work man,
-Kevin
1992 M tech 2 Convertible - S50 Swap
1992 e34 Touring- S50 Swap
1992 325i-S50 Swap (SOLD)
1995 e36 M3 Mugello Red - S50 (SOLD)
1991 325i Convertible Laguna Green (SOLD)
1987 325i (SOLD);1992 M tech 2 Convertible (SOLD)
1988 325i Convertible Alpine White (SOLD)
1991 Brilliantrot Convertible 80k Miles (SOLD)
1992 325i Convertible Schwarz (SOLD)
1992 318i Convertible Project-Finished (SOLD)Comment
-
Hey Kevin,Originally posted by KIRIEIW View Post
Thanks for the read-through, I know it's a little verbose in some areas.
I didn't know the sandwich plate came off, I never even thought to try! That would have been a much cleaner solution, I really didn't like having to modify the firewall.
I could also use the extra room on the front side of the master, everything is pretty tight.
If I ever have to take the booster off again the sandwich plate is going in the bin! Or maybe I'll do it just for fun when I have the motor out again. :)
Comment
-
Tuning Details, Cleaning Carbon, Relocated Spark Boxes
Had a miss on cyl 3 so threw in a set of new sparkplugs (NGK Iridium IX BKR6EIX - 6418) which sorted the issue.
Some details about my MS3X standalone ECU learning process:
I've never done any engine tuning or mapping before, so there is a bit of a learning curve to say the least!
Thankfully I had a base map which helped me get the motor running back when it was on the wood blocks.
I started off by adding a bunch of fuel and pulling a little spark uniformly from the base map.
Then I sorted out my open-loop idle and mid-throttle fuel map.
Started on my WOT fueling, and then came across a few things.
I set up my CEL to come on when the knock sensors pick up more then 40% noise. This isn't necessarily knock, it depends on how the sensors are configured (supposed to be done on the dyno), and how noisy the motor is when revved up.
I have my threshold to start pulling timing automatically at 55%.
I noticed I started out with the CEL just barely flickering around 4500rpm at WOT, but as I started to pull fuel out from my 10-11AFRs it would light up a bit more. (It was around this time I discovered the Autotune fuel map feature of Tunerstudio, which made things a bit easier compared to the log, review, change, repeat method I was using previously.)
I started to pull some spark out from the base map in those areas, but then I got sidetracked a few times.
I re-scaled my fuel and spark tables to account for future boost, so this required a rework of the fueling. Top half of the fuel and spark table is obviously untuned until I have boost ready.
I then found out that a setting called "Incorporate AFR Target" would allow me to set my AFR via a separate table, and allow the VE table to actually represent the motor's real volumetric efficiency. This changes the fuel calculation completely, and I had to start my fuel tuning over again from dead rich.
I've now set up some pretty tables in excel which allow me to track my changes and give me a different visual representation of the data.
That's pretty much where I'm at now. I've only had two runs at setting up the new fuel table. To be safe I pulled a bit more spark from both the WOT high RPM area and the low kPa mid-to-high RPM area. No idea what type of fuel was used on the base tune, but I'm using Shell 91 (No Ethanol).
I've also got a bunch of other neat features figured out on the ECU. I have my SPAL fan control working, which lets me bump up the idle at the same time etc.
I have a coolant-temperature based rev limit set up to prevent revving a cold motor up too much. Nice protection if the throttle gets stuck or something along those lines. Lots of small things too like Barometric Correction.
Ran some seafoam through the motor (pulled the Wideband to avoid damage), and some water mist afterwards. Should have knocked some carbon off the internals!
Regarding spark plugs, I swapped in some Copper NGK BKR7E (4464) plugs, which are one heat range colder. I was also advised to run copper plugs as the electrode will melt/fail earlier (compared to the more expensive/longer life plugs) as a sort of failsafe if something goes wrong with the tune.
Also changed the oil with some fresh Rotella T5 15w40, and a MANN filter.
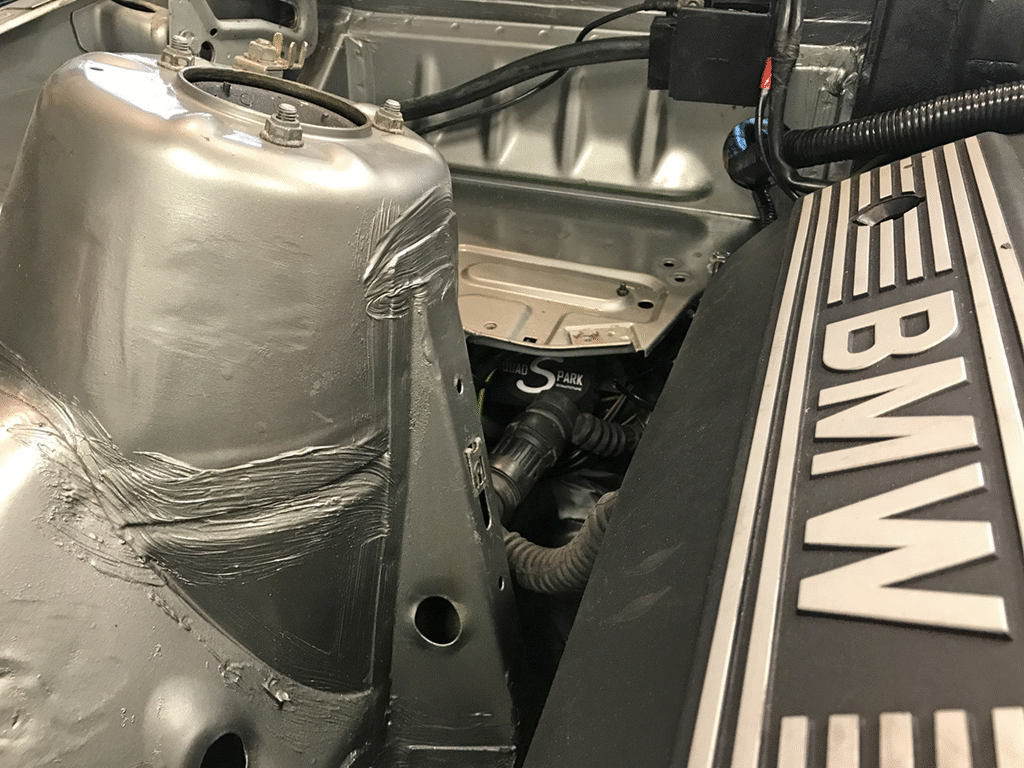
I relocated the Quadspark ignition modules away from the exhaust. They're supposed to be mounted somewhere reasonably cool, as they have their own heatsinks.
Was hoping I could build a little heat shield and get away with keeping them under the battery tray for now, but I was still getting misfiring as the area heated up (mostly while sitting still idling).
Tucked them up under the dash, can't even see them unless you stick your head underneath. Had to punch a hole in the firewall, reused an E39 gasket to make it look OEM. Bonus is the engine bay is just a little more shaved now!


 Last edited by Panici; 06-13-2020, 05:51 PM.
Comment
-
Tuning Accel Enrich, Upper RPMs, Overrun Burble
Turned on Accel Enrichment (AE), and got some base settings for the Accel-Pump mode from someone on Boosted E36 World facebook group.
Turns out his curve of fuel vs TPSdot is completely different then what I would end up using, but at least it gave me a starting point.
Here is a video and corresponding log of some revs when I first turned the AE turned on.
You can see the big knock spike on the first tip-in from idle, and see the CEL flash in the video at the same point in time.

I found that the wideband can't respond fast enough to see fueling changes made by AE in real-time, so a lot of the AE tuning was done by trial-and-error, making changes and feeling how the motor responds.
I know there are better methods to tune AE, but I've now got it in the ballpark.
Here is the curve I'm currently using. No more tip-in knock, throttle response and drivability are both good.

I was getting misfiring at RPMs over ~6000, so I gapped the colder NGK BKR7E from .030" down to .027".
Along with trimming my fuel out in that rev range, the issue is almost resolved.
I also added a fat ground wire from my Quadspark modules to a clean & bare chassis point, further away from the ECU grounds.
I'm going to try adding some timing back in, as i'm still 5-6 degrees below my base map in that area.
(Picture of plugs when they were gapped at .030")

Here is my current fuel/VE table. Keep in mind that the bottom row is 15kPa (Overrun), and top half is untuned boost areas. It's quite an improvement compared to the one in my previous post.
I'm starting to play with timing in the 15kPa area as well, aiming to get some nice burble on the overrun without getting too crazy into the pops & bangs territory. Currently at 1.8deg timing in that bottom row.
You can really see how the Volumetric Efficiency (VE) drops off in the higher RPMs. That's a great visual showing how restrictive the M52 intake manifold is at higher rev ranges.
 Last edited by Panici; 06-22-2020, 03:19 PM.
Comment


Comment