
Haha I appreciate it. I will probably be doing oil changes on the 4runner, Jetta and friends 4runner in addition to your car!
-
Si vis pacem, para bellum.
New Hawtness: 1995 540i/6 Claptrap
Defunct too: Cirrusblau m30 Project
Defunct (sold): Alta Vista
79 Bronco SHTF Build -
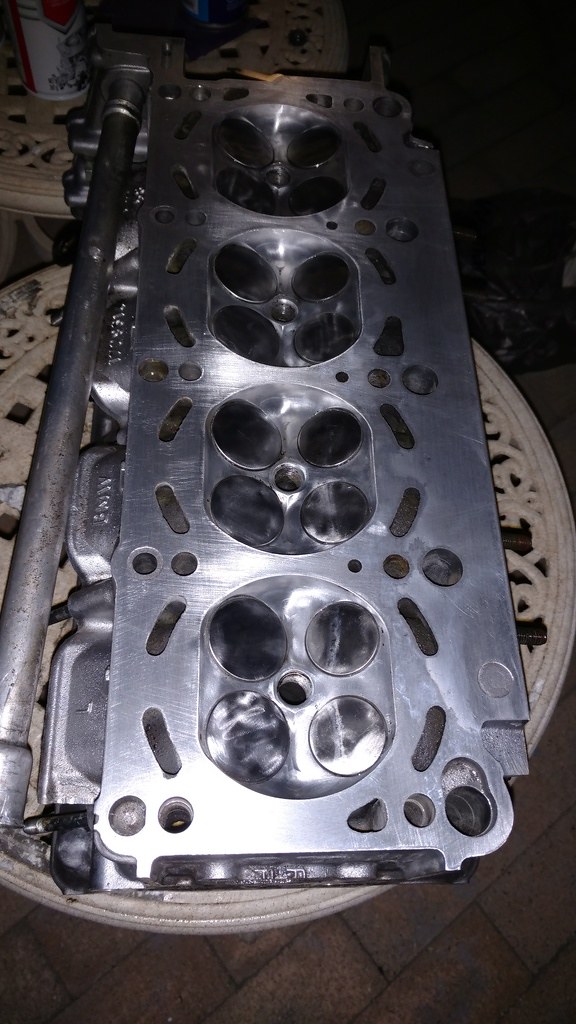
Been a busy couple of weeks. I did manage to get the driver's side head cleaned and ready for cam install. FYI, adding grease to the combustion chamber and then letting it heat up in the sun for several days does not work. It just makes a mess.
I grabbed my Chicago Electric Dremel knock off (been fantastic so far) and grabbed several wire wheels and nylon wheels and went to town. Best results were to use a razor blade on the valves to break away most of the chunkiness then use the nylon wheels to polish them up. Also went after the chamber a bit and cleaned them up. Didn't remove any material either.
Also went over the sealing surface of the head with 180 grit 3M sandpaper. I read that when using composite, not MLS, head gaskets, its best to have a finish of about 180. I may regret this.
 IMG_20160716_202351398_zpsmwdyfqwq by Paul Abbott, on Flickr
 IMG_20160716_202359577_zps3meu5qzs by Paul Abbott, on Flickr
I am going to dig out the passenger head and see if I can't clean it up a bit more even though the cams are installed already.Last edited by marshallnoise; 10-21-2019, 09:03 PM.Si vis pacem, para bellum.
New Hawtness: 1995 540i/6 Claptrap
Defunct too: Cirrusblau m30 Project
Defunct (sold): Alta Vista
79 Bronco SHTF BuildComment
-
Tried an idea I had about the valve covers. I really don't want to spend money on having them powder coated cause I just want the fucker driving at this point. Basically, I wanted to see if I could just use a wire brush to remove the original coating and see if it can get down to a semi-closed pore state.
You decide:
 IMG_20160719_203912107_zpsbi6nbfn9 by Paul Abbott, on Flickr
 IMG_20160719_203917568_zpselutgdgg by Paul Abbott, on Flickr
Its finally slowed down a bit at work this month (I am an accountant) and I really wanted to get the driver's head assembled.
Shh, don't tell my bosses.
 IMG_20160720_103621746_zpsxyoviw6p by Paul Abbott, on Flickr
 IMG_20160720_110911693_zps1fxwv77i by Paul Abbott, on Flickr
 IMG_20160720_110920425_zps5sj7uo2x by Paul Abbott, on Flickr
 IMG_20160720_112942617_zpsee75nhcn by Paul Abbott, on Flickr
 IMG_20160720_114430912_zpsmkjbs4x0 by Paul Abbott, on Flickr
It went together real easy. I need to check the passenger side tensioner again. I noticed that it doesn't do as good of a job putting preload on the chain like the driver's side does. Just looking at all the old pictures you can tell its sagging more than the driver's side.
Also spent a few minutes making a head bolt thread cleaning tool.
Works like a charm.
 IMG_20160720_201516493_zpsowja9lr9 by Paul Abbott, on Flickr
 IMG_20160720_201521260_zps5enz1de6 by Paul Abbott, on Flickr
Last edited by marshallnoise; 10-21-2019, 09:05 PM.Si vis pacem, para bellum.
IMG_20160720_201521260_zps5enz1de6 by Paul Abbott, on Flickr
Last edited by marshallnoise; 10-21-2019, 09:05 PM.Si vis pacem, para bellum.
New Hawtness: 1995 540i/6 Claptrap
Defunct too: Cirrusblau m30 Project
Defunct (sold): Alta Vista
79 Bronco SHTF BuildComment
-
It looks like an engine now!
I picked up some 320 grit sandpaper and a sanding block and went after the block surface and the cylinder heads again. I chased the threads in the block again, blew them out with compressed air. Carb cleaned the mating surface and piston tops. Blew them out again. Wiped down the cylinders after rotating the assembly a few times. Then did a final wipe down of the block mating surface and the cylinder head mating surface with mineral spirits, took a swig and then marched on.
 IMG_20160724_133403928_zpsncsobbho by Paul Abbott, on Flickr
 IMG_20160724_133411303_zpstafmdea4 by Paul Abbott, on Flickr
I had to pull the dowel pins and I buggered them up real well. I eventually had to make alignment studs so I could get the gasket on and the head lined up. These pics show the dowel pins still in.
 IMG_20160724_172224495_zpsvmgrgabo by Paul Abbott, on Flickr
 IMG_20160724_172231656_zpsbo88e6kg by Paul Abbott, on Flickr
And here are the heads slapped on.
 IMG_20160724_210449881_zpsnd7xojse by Paul Abbott, on Flickr
 IMG_20160724_210459658_zpsu69q3gxh by Paul Abbott, on Flickr
 IMG_20160724_210506756_zpsugpuvfwf by Paul Abbott, on Flickr
Lessons learned here:- Use a razor blade held at a 90 degree angle and scrape most of the junk off first
- Then carb clean
- Then 180 grit to remove some of the rough stuff
- Then 320 grit to smooth things out a bit
- Clean, clean, clean
- Torque specs are 22 ft lbs, then 80 degrees, and another 80 degrees
- (I just eyeballed them, these are TTY bolts after all)
- The cam lock tools are awesome, but a giant pain in the ass and get in the way
- The cam lock tools have to be removed to get the last two (back) head bolts in
- This is why its important to set piston 1 to TDC so when you remove the cam lock tools, the valves won't hit the piston tops
I will be able to spend a half hour at a time from here on out and get it put together over the next week. I still need to tap and fill the oil feed gallery. Should be easy.Last edited by marshallnoise; 10-21-2019, 09:09 PM.Si vis pacem, para bellum.
New Hawtness: 1995 540i/6 Claptrap
Defunct too: Cirrusblau m30 Project
Defunct (sold): Alta Vista
79 Bronco SHTF BuildComment
-
Beautiful engine! These hybrids are really helping the BMW V8 cause.Comment
-
They are a great looking engine. Packaging sucks though. You can see why GM stuck with the pushrod design. These are physically massive engines for little displacement.
But, when built right, they run fantastic. I am excited to see what differences there are. Buddy Jason and I are going to do a dyno day to see how much more porting and stuff does on an m60b44. To my eyes, there isn't a whole lot of material to clean up. So that should be interesting.
Sent from my XT1575 using TapatalkSi vis pacem, para bellum.
New Hawtness: 1995 540i/6 Claptrap
Defunct too: Cirrusblau m30 Project
Defunct (sold): Alta Vista
79 Bronco SHTF BuildComment
-
At least these engines are powerful for their weight, Aquila Racing claims a 10 kg saving over s65/lsx with same trans and driveline and then we can run lighter transmissions + diffs as well. Can't wait to see the dynos. These engines are hiding something, because the valves and cams are right next to the s62 and those support 450 hp the second you get good headers!Comment
-
If this was a track car, good headers would be worth it. I seriously think that if you want to have fun on the cheap though, a 100 shot should be easily doable. Exotic parts on a car like this...meh.Originally posted by whitebulat22 View PostSi vis pacem, para bellum.
New Hawtness: 1995 540i/6 Claptrap
Defunct too: Cirrusblau m30 Project
Defunct (sold): Alta Vista
79 Bronco SHTF BuildComment
-
Chipping away - Oil Passage Block Off
Remember what I said about me taking 30 minutes at a time to put this thing together? Proof.
I attempted to tap the oil passage port that needs to be blocked on the b44 bottom end. My taps blow and I am not about to drop as much cash as required to get a good set of taps. But I was able to get a used bolt started. I gave it a couple of turns and I am pretty darned sure it's not going anywhere.
 IMG_20160726_200133040_zpsj7lvdm8t by Paul Abbott, on Flickr
There is the bolt head cut off.
 IMG_20160726_200712006_zps4nc20wpi by Paul Abbott, on Flickr
And another view with the chain guide installed.
 IMG_20160726_200845670_zpsji6rengy by Paul Abbott, on Flickr
Last edited by marshallnoise; 10-21-2019, 09:16 PM.Si vis pacem, para bellum.
IMG_20160726_200845670_zpsji6rengy by Paul Abbott, on Flickr
Last edited by marshallnoise; 10-21-2019, 09:16 PM.Si vis pacem, para bellum.
New Hawtness: 1995 540i/6 Claptrap
Defunct too: Cirrusblau m30 Project
Defunct (sold): Alta Vista
79 Bronco SHTF BuildComment
-
Its coming together nicely!Comment
-
Big data dump ahead.
Since tapping and installing the bolt that will stop a low oil pressure condition at idle, I have done some work and just not posted it. Starting to get good here.
I had to start getting the timing chain guides back in position. It was an interesting process getting the timing chain out in the first place with the final step being to remove the idler sprocket. I decided to leave the sprocket installed, wrap the chain around the way it should, adding guides along the way, take off the passenger intake sprocket and then get it clocked in the right position.
Blank drivers side head.
 IMG_20160727_192335971_zpscc2qtdst by Paul Abbott, on Flickr
Installed the OCV Cyclone thing-a-ma-jig behind the first guide.
 IMG_20160727_193727976_HDR_zps4jfkafgu by Paul Abbott, on Flickr
Temporarily installing the lower timing cover to get the bottom end at TDC. You can see the little nub pointing the direction of the crank position sensor.
 IMG_20160727_194445612_zpsiaxqhsq8 by Paul Abbott, on Flickr
So 3 of 4 guides installed showing how it won't simply slip on.
 IMG_20160727_194852551_zpso44whvp3 by Paul Abbott, on Flickr
Hard to tell here, but this is the tensioner timing chain guide with the sprocket oil feed (black thing) installed into the idler sprocket.
 IMG_20160727_200655712_zpsjblpfxx6 by Paul Abbott, on Flickr
Better view.
 IMG_20160727_200704508_zpsfdayppfo by Paul Abbott, on Flickr
And another view. There is an oil passage that runs through it carrying it from the block to the idler sprocket.
 IMG_20160727_200715658_zpsndd8gfup by Paul Abbott, on Flickr
So I got the chain installed by pulling the passenger intake cam sprocket, getting it rotated properly with the arrow up and tensioned nice and snug.
 IMG_20160727_201024630_zpsulmr9kuc by Paul Abbott, on Flickr
Side view.
 IMG_20160727_201036625_zpszxvkwxah by Paul Abbott, on Flickr
That was the end of a Tuesday last week. I think. Whatever.
This greeted me yesterday. It received the coolant crossover pipe and lower timing cover as well as drivers side upper timing cover.
 IMG_20160802_183004670_zpsfdj31dpn by Paul Abbott, on Flickr
I am not going to use paper gaskets on this thing nor the little metal gaskets either. I figure they are one time use and this bastard (all BMWs) leaked anyway. I figure good prep is more important with the paper and metal gaskets so good prep and a real high quality RTV will even be better. Prep was similar to the cylinder heads: Razor blade clean, mineral spirits, 180, then 320 grit sand paper, final wipe clean with mineral spirits and a good wipe down with a clean cloth. Time will tell if I am a fool or not.
I am using my favorite go-to The Right Stuff wherever I can. That is what you can see on the picture below.
 IMG_20160802_195256492_zps5cslxmsk by Paul Abbott, on Flickr
Installed with Mikey's crotch for your viewing pleasure.
 IMG_20160802_195801948_zpsiiiqp4wg by Paul Abbott, on Flickr
I kind of got after it and didn't take any pictures of the lower timing cover going on and the same with the drivers upper timing cover (long ass names).
 IMG_20160802_203649858_zpskfv7mvo7 by Paul Abbott, on Flickr
The main challenge with using RTV as opposed to paper or metal gaskets that ride on dowel pins, holding them in place, is that you have to free form the gasket material. I laid it on very thick. The main purpose was that some of these gaskets are certain heights so that every thing lines up later. My technique was to create my material, level it out pretty evenly, take a straw and clean up the holes where bolts go and then let it sit for 5 minutes so it firms up a bit. Its hard when you have an X and a Y axis to contend with. Taking it slow is key. Once in place, I start every bolt and gently snug them down. The next day I torque them to where they ought to be. Once again, time will tell.
Got home from work early today and finished up the front timing cover for the passenger's side.
 IMG_20160803_192929602_zpsaw71v6s9 by Paul Abbott, on Flickr
While that timing cover was tacking up, I knew I needed to get the old motor off the engine stand so I could take the flywheel off. I bought a T60 extended socket for the experience. Still don't know if it is the right size. I will figure that out on Friday.
I have tight space on the side of my house when dealing with engine stands and hoists. But I made due.
 IMG_20160803_195352182_zps1bjdyq6k by Paul Abbott, on Flickr
 IMG_20160803_200249737_zpspzj6aals by Paul Abbott, on Flickr
And this looks much worse than it actually is.
 IMG_20160803_201519718_zpscutugjrx by Paul Abbott, on Flickr
 IMG_20160803_201527863_zpsfpn734mr by Paul Abbott, on Flickr
Flywheel that's been out in the weather a bit. I may take it somewhere and see if it is still good. It held great when I took it out. So who the heck knows.
 IMG_20160803_201534861_zps43xkkkov by Paul Abbott, on Flickr
And finally put the drivers upper timing cover on. Bolts are in and aligned, but not snugged down. The passenger side is snugged down after sitting for about 24 hours.
 IMG_20160803_202924605_zps8j19vw22 by Paul Abbott, on Flickr
I might have time tomorrow night to install the tensioner, remove the cam lock tools and see if I smack some pistons up.Last edited by marshallnoise; 10-21-2019, 09:27 PM.Si vis pacem, para bellum.
New Hawtness: 1995 540i/6 Claptrap
Defunct too: Cirrusblau m30 Project
Defunct (sold): Alta Vista
79 Bronco SHTF BuildComment
-
Two things:- The Internet Lied 1: The Crank Pulley Bolt aka Jesus Bolt is not TTY and costs $75 from the dealership
- The Internet Lied 2: Flywheel bolts are not a T60 size; they are T55; EDIT: Its a T60 but the shank of the bolt has to be turned down in order to fit properly according to THIS thread.
Last edited by marshallnoise; 08-04-2016, 09:49 AM.Si vis pacem, para bellum.
New Hawtness: 1995 540i/6 Claptrap
Defunct too: Cirrusblau m30 Project
Defunct (sold): Alta Vista
79 Bronco SHTF BuildComment
-
never once have I considered buying a jesus bolt. I've always reused mine.Comment
-
Yeah, I am glad I didn't consider the hype.Originally posted by Dj Buttchug View Post
Got my flywheel off the m60. Took the tool and did this to it:
 IMG_20160806_162809067_zpstsaetd2r by Paul Abbott, on Flickr
Its a 200mm T60 and yes, my hands are huge. It took about 40 minutes with a Dremel. Its hardened and it took a lot of trial and error. But it works. All the machine shops in the area poo-pooed me.
 IMG_20160806_162812664_zpsd1uyd8cq by Paul Abbott, on Flickr
Went back to work on the motor.
Installed the timing chain tensioner. Yes, there is a bit of The Right Stuff goop there. Meh.
 IMG_20160807_141515674_zpsicf2y86p by Paul Abbott, on Flickr
Then I rotated the motor around a couple of times. No grinds, no stops and everything moved freely. Thank goodness for that.
And here is what I am going to do with my valve covers: not a damn thing. I may, later, buy another set of covers (maybe my m62b44 covers) and have them done up all pretty.
 IMG_20160807_150839244_zpspwnzkczn by Paul Abbott, on Flickr
I wanted to get to the oil pan. But forgot to put the cap on my bottle of Mineral Spirits...so it looks like I spilt milk.
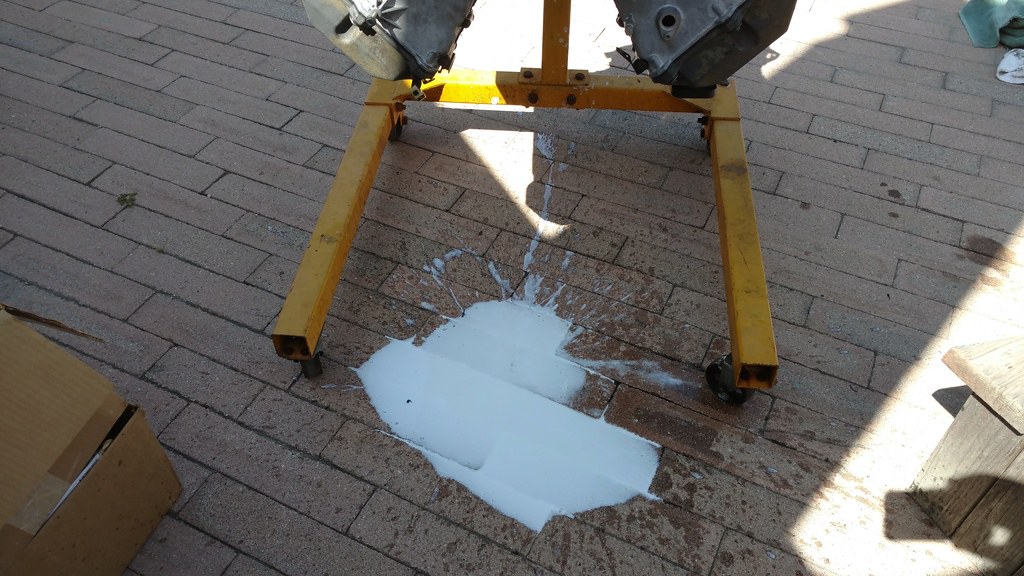 IMG_20160807_151659953_zps71kghbj2 by Paul Abbott, on Flickr
There is the pan installed. More goop.
 IMG_20160807_155529371_zpsxrwlqgeu by Paul Abbott, on Flickr
So something super annoying about my m60 was the oil filter housing was held on with extra long studs that made it difficult to maneuver it out of the way when installing the alternator or anything really. I found some other bolts that are the right size but shorter and sit flush with the housing. Stud and nut up top; bolt on the bottom.
 IMG_20160807_161400586_zpswpkavgbz by Paul Abbott, on Flickr
New bolts are at 10 and 4. The housing will have to be pulled out of the way to install the alternator later.
 IMG_20160807_161555654_zpsu7okylix by Paul Abbott, on Flickr
 IMG_20160807_161601546_zpsa9cwrtkg by Paul Abbott, on Flickr
Drivers side headers on. Did I mention these things are nice? Also the drivers side motor mount is installed too. Have to do that before the oil filter housing. Dropped a pic. Sue me.
 IMG_20160807_163403370_zpsm8x89efi by Paul Abbott, on Flickr
Got the passenger side motor mount on.
 IMG_20160807_164446078_zpsp9ctotch by Paul Abbott, on Flickr
Interlude:
B44 Block
 IMG_20160807_164525614_zps224hseb2 by Paul Abbott, on Flickr
 IMG_20160807_164532944_zpsh2zjkrvj by Paul Abbott, on Flickr
B40 heads
 IMG_20160807_164547643_zpsfslhedvj by Paul Abbott, on Flickr
Passenger side headers installed
 IMG_20160807_165537814_zpsvv3s8ncf by Paul Abbott, on Flickr
Some idiot made work for me. I gotta cut off the studs and get fresh bolts on there.
 IMG_20160807_165544184_zpsv9yssz1f by Paul Abbott, on Flickr
And that's how she sits for the evening.
 IMG_20160807_170802384_zpsqmjbxibi by Paul Abbott, on Flickr
Oh and dip stick installed.
 IMG_20160807_170808996_zps0tuu0wvt by Paul Abbott, on Flickr
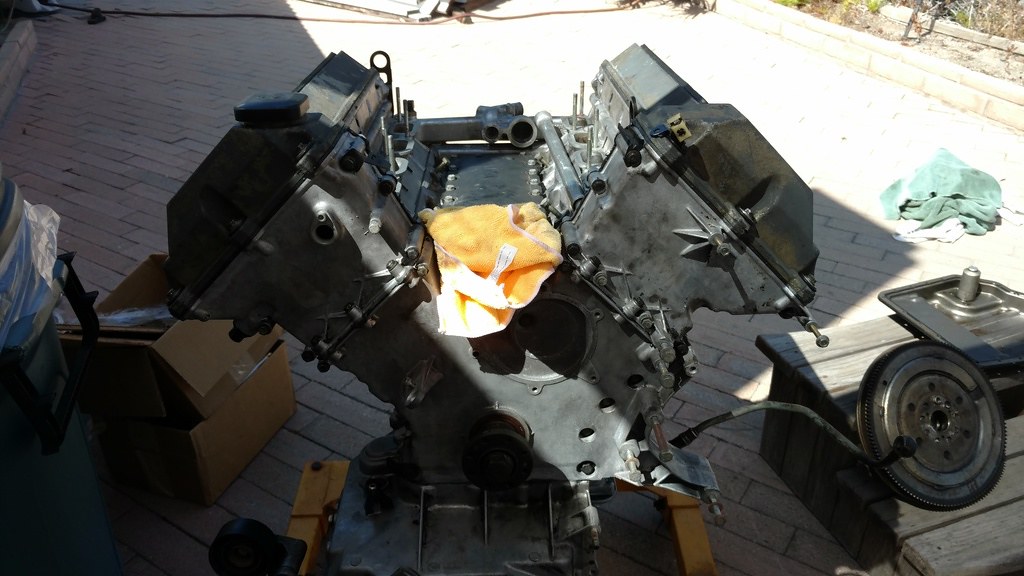
Next step is knock sensors (gotta find them), coolant crossover pipes, water pump, crank pulley, Jesus bolt, intake manifold, various sensors, etc.
I am going to pull the harness completely out of the car and get rid of the crusted crappy harness sheath removed and rewrap it. I have ideas on some little mods I want to do too to the electrical crap. Needlessly complicated and not serviceable.Last edited by marshallnoise; 10-21-2019, 09:33 PM.Si vis pacem, para bellum.
New Hawtness: 1995 540i/6 Claptrap
Defunct too: Cirrusblau m30 Project
Defunct (sold): Alta Vista
79 Bronco SHTF BuildComment
-
Nice work!Comment

Comment