Announcement

Collapse
No announcement yet.

1995 e34 540i/6 *m60b44* - Return to Some Kind of Glory

Collapse
X
 
  • Filter
  • Time
  • Show
Clear All
new posts

    #46
    Victory is mine!!!

    This post shall be dedicated to my victory over the broken bolt.

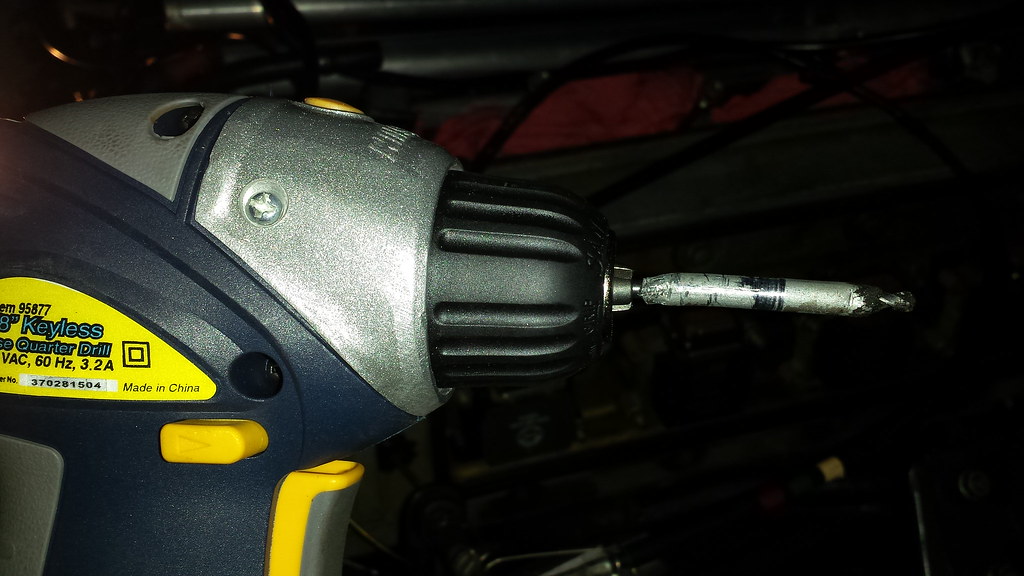
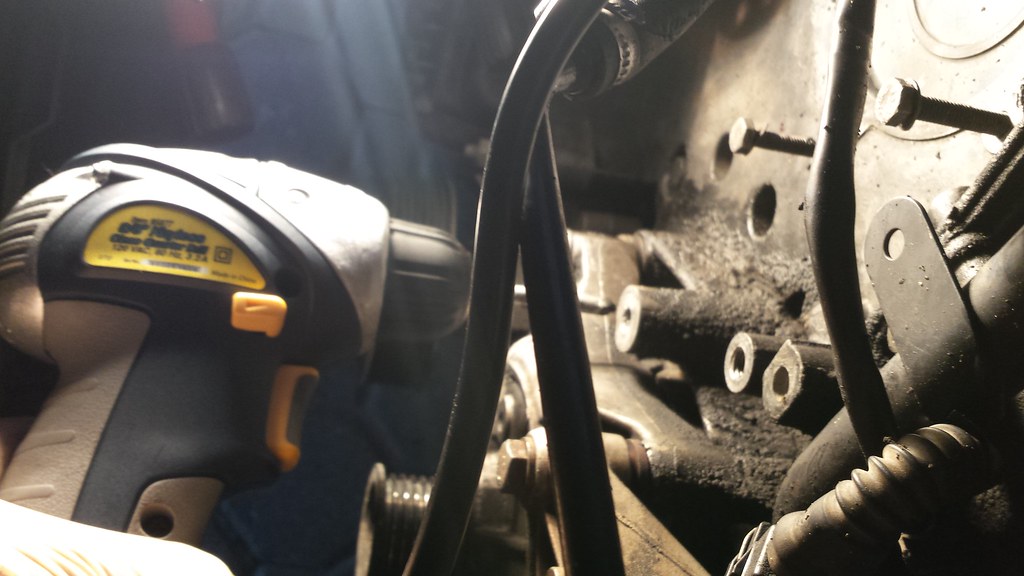
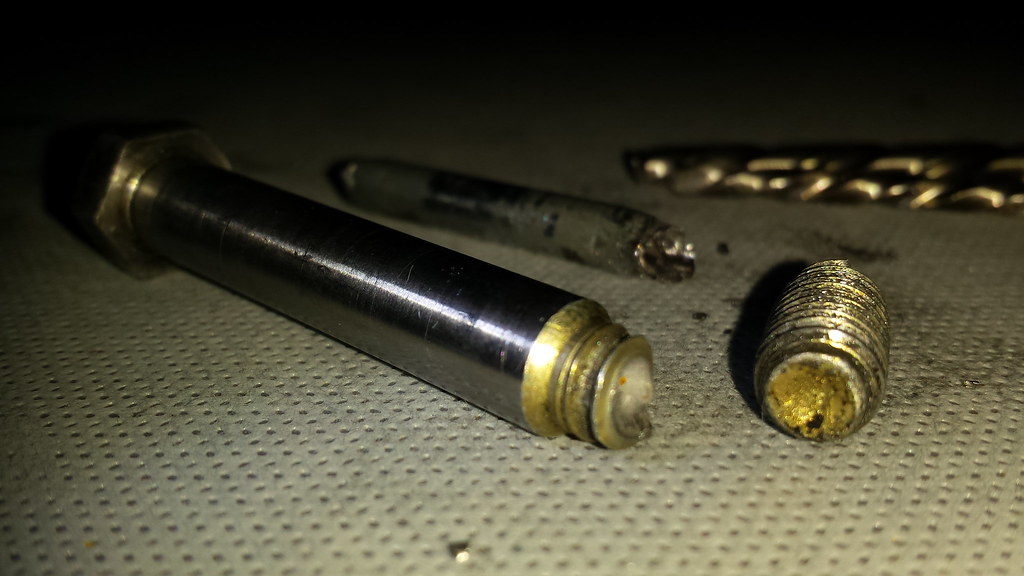
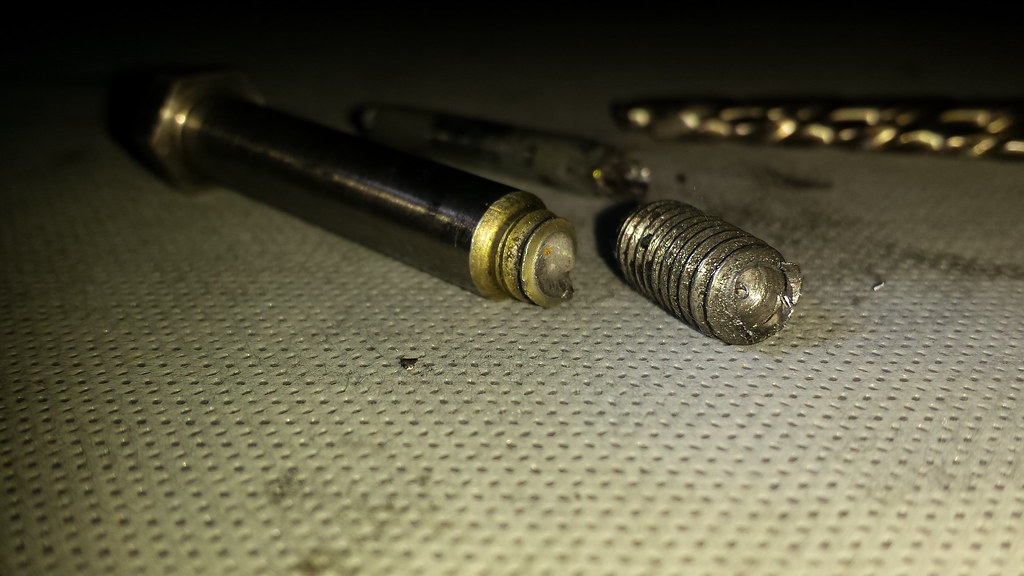
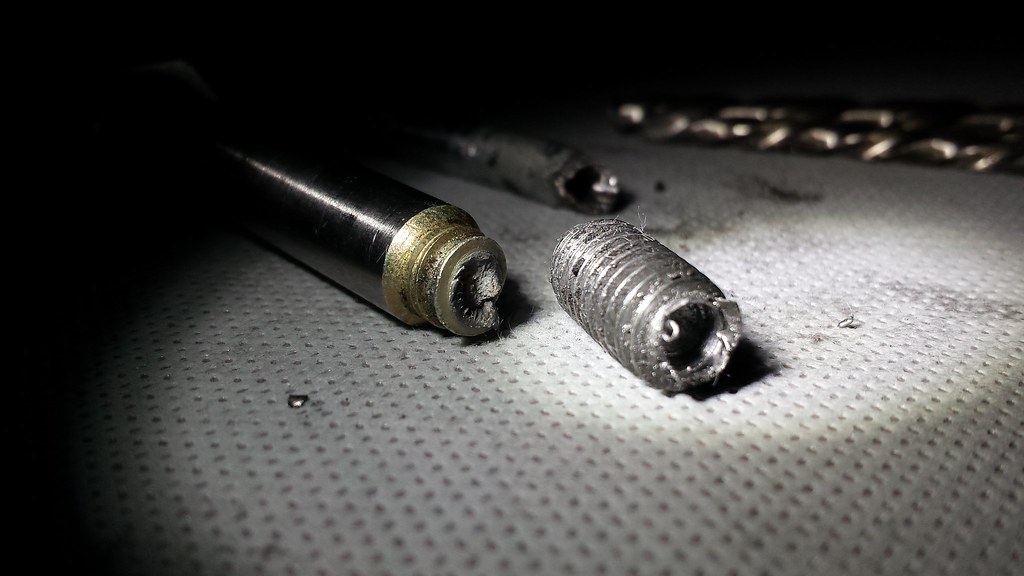
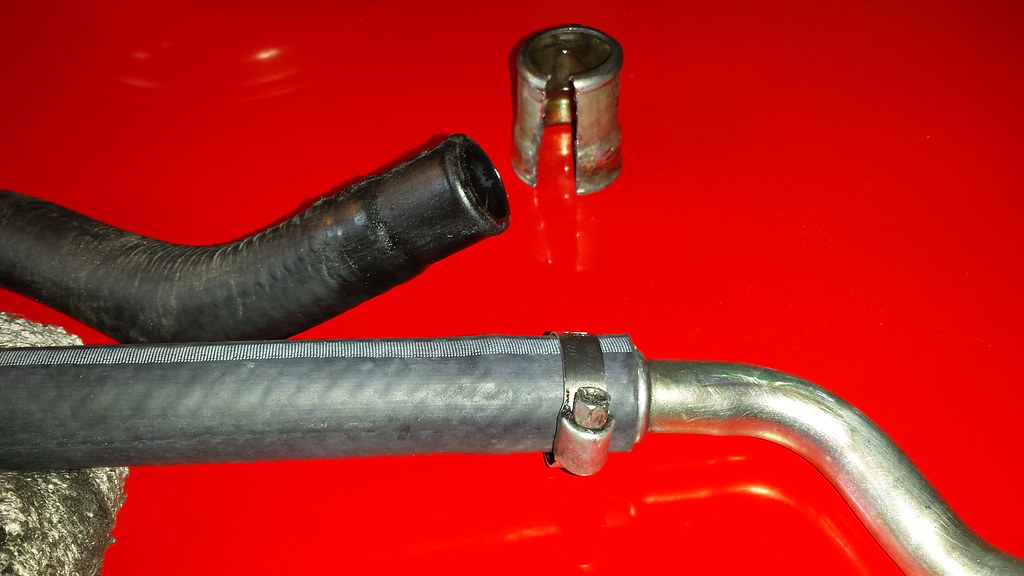
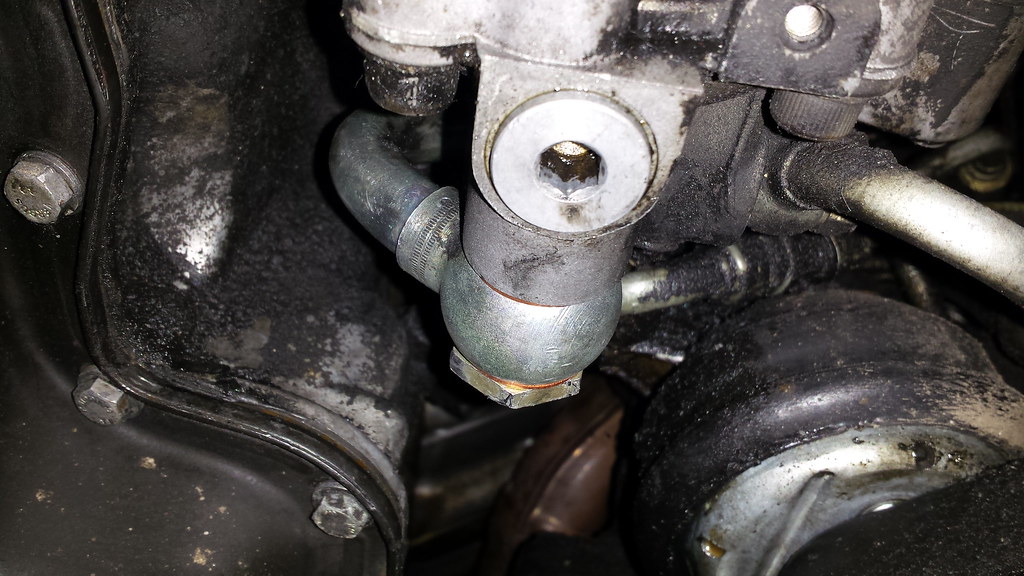
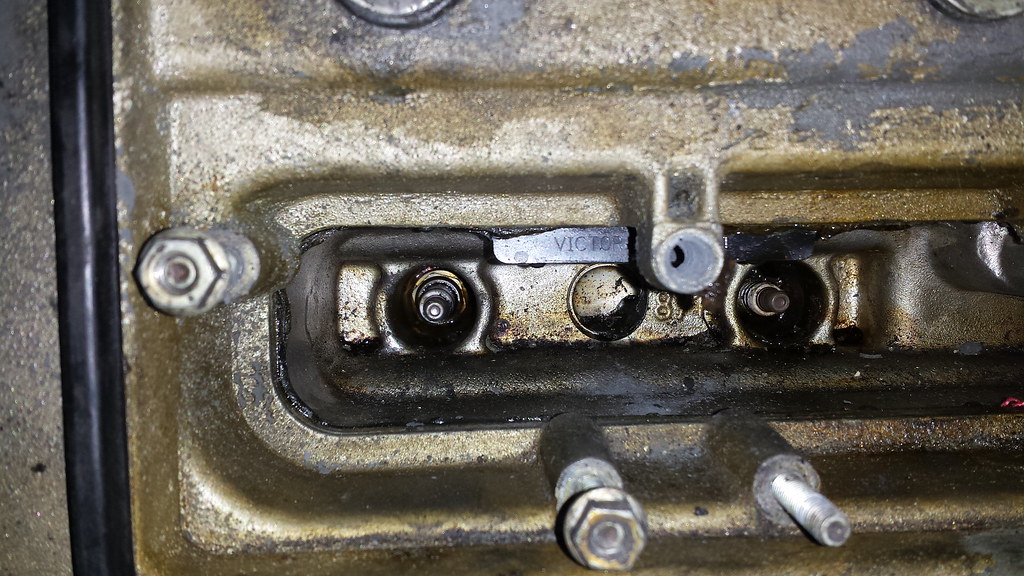
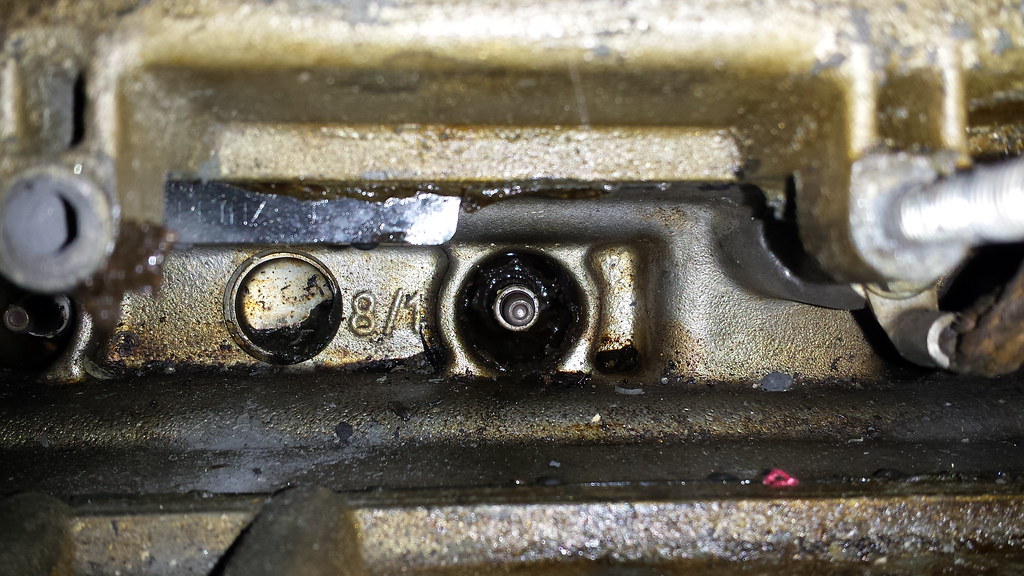
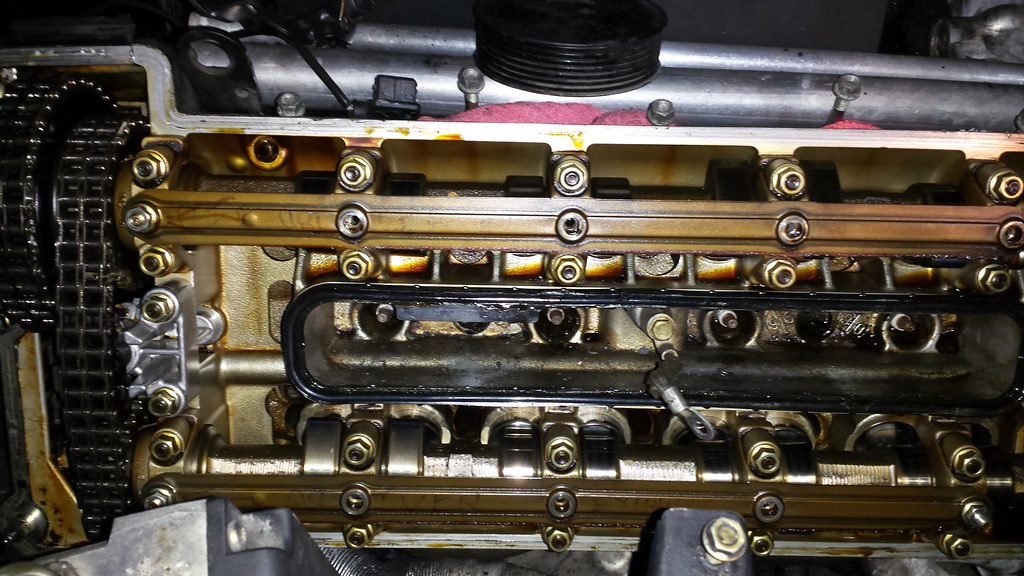
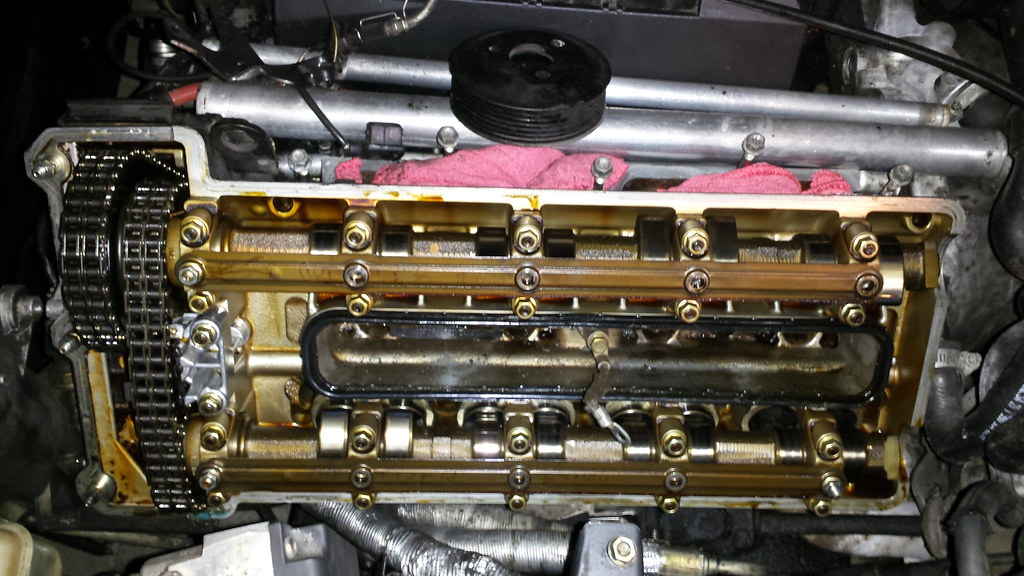
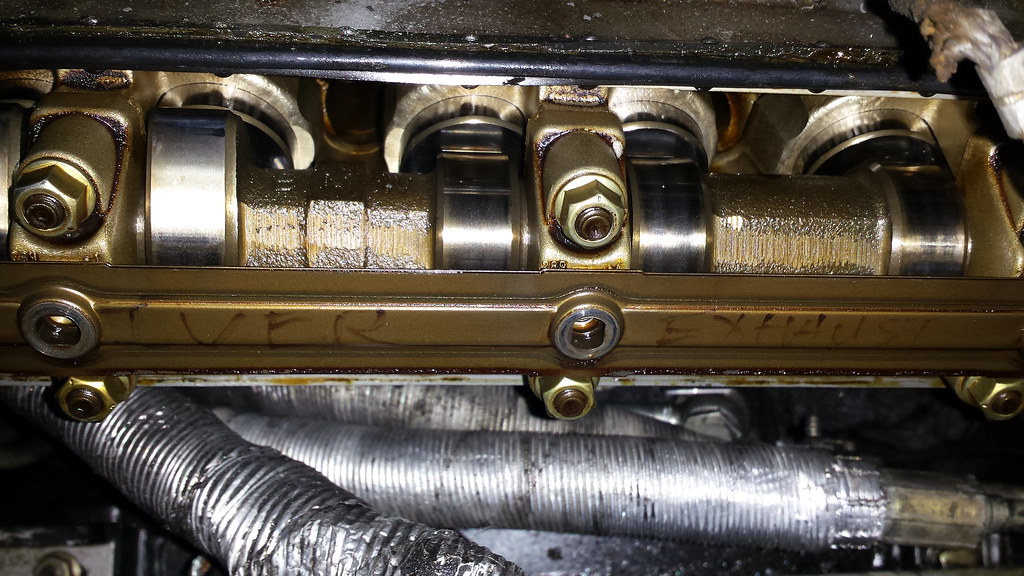
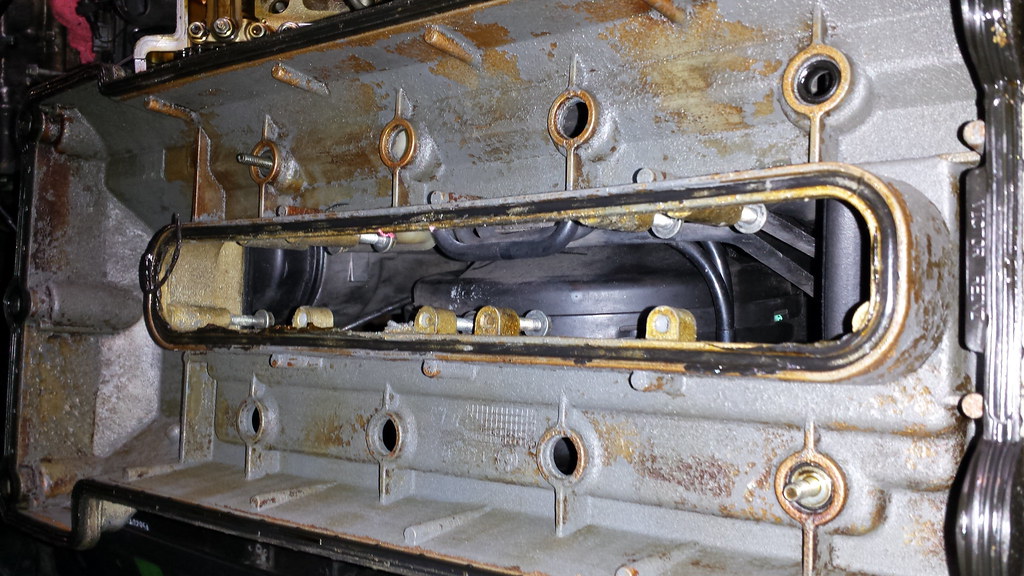
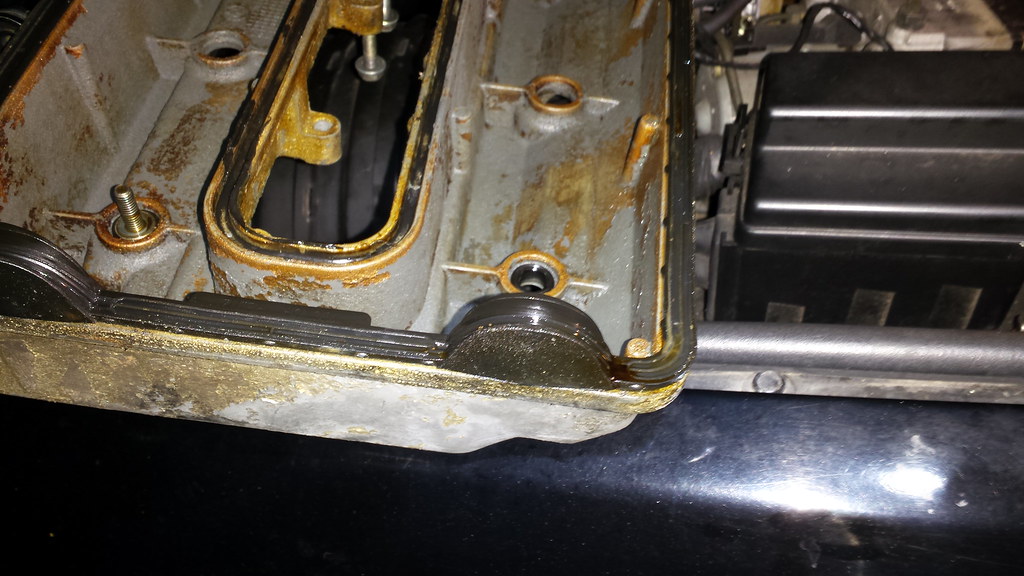
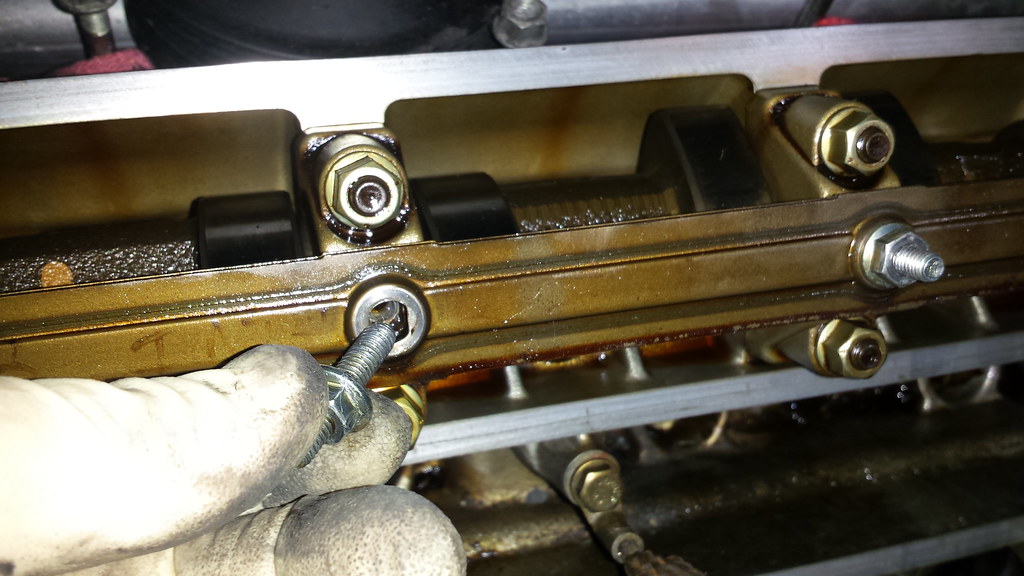
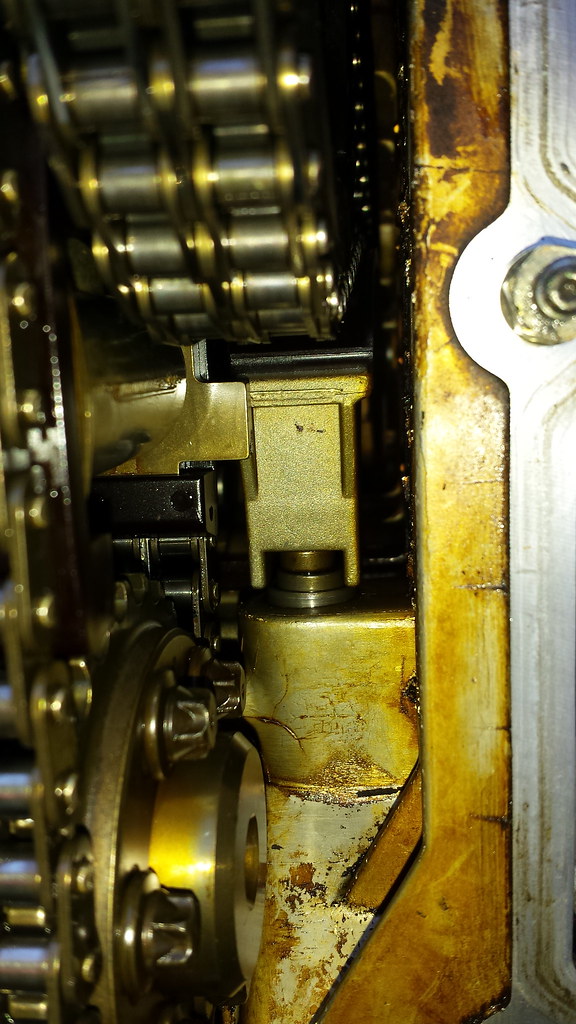
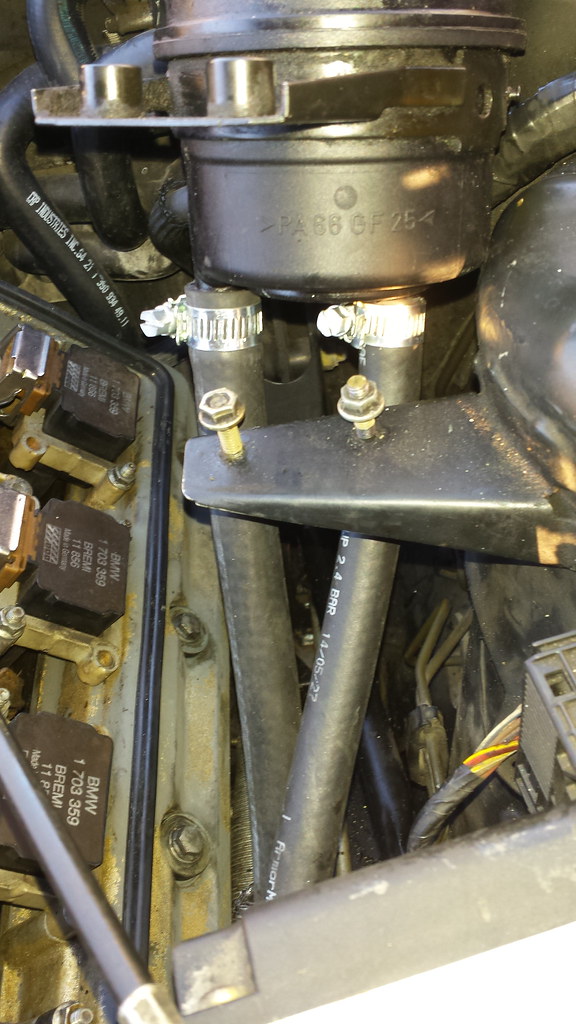
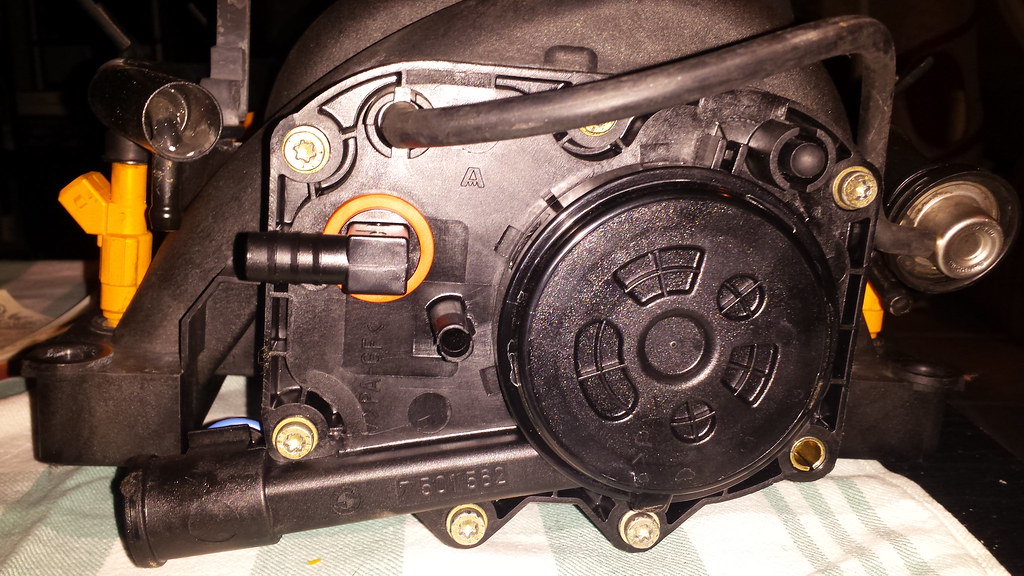
    I managed to get that broken bolt out without disturbing the threads. It was initially not promising at all. It was very difficult to see if I was drilling at the correct angle and also right in the center of the sheared off bolt. But with my little Harbor Freight left hand bit set and Harbor Freight right angle power drill, I was able to get that fooker out. A tip I read about was to use some brake line or other pipe to guide the bit in there and not bugger up the threads.

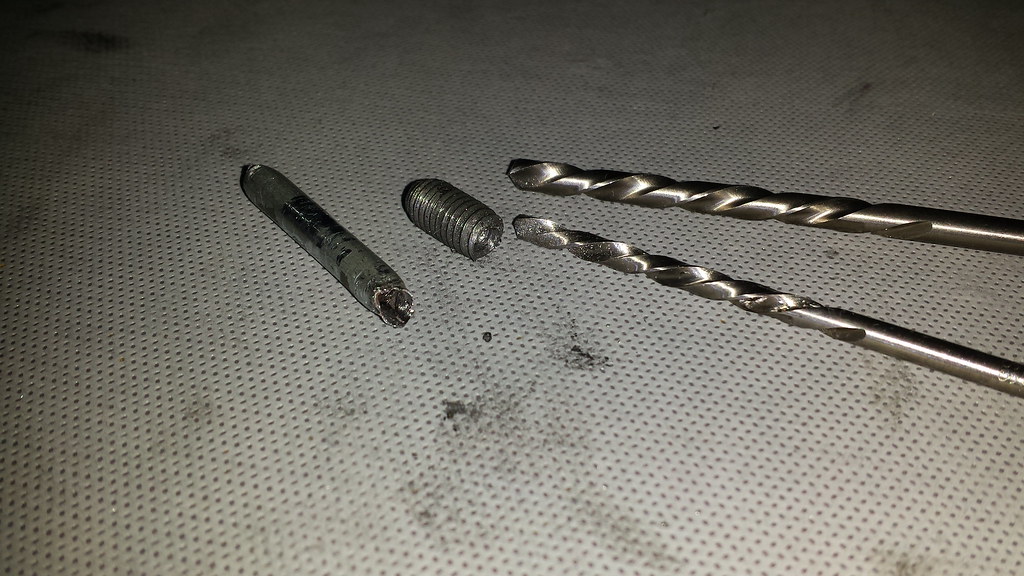
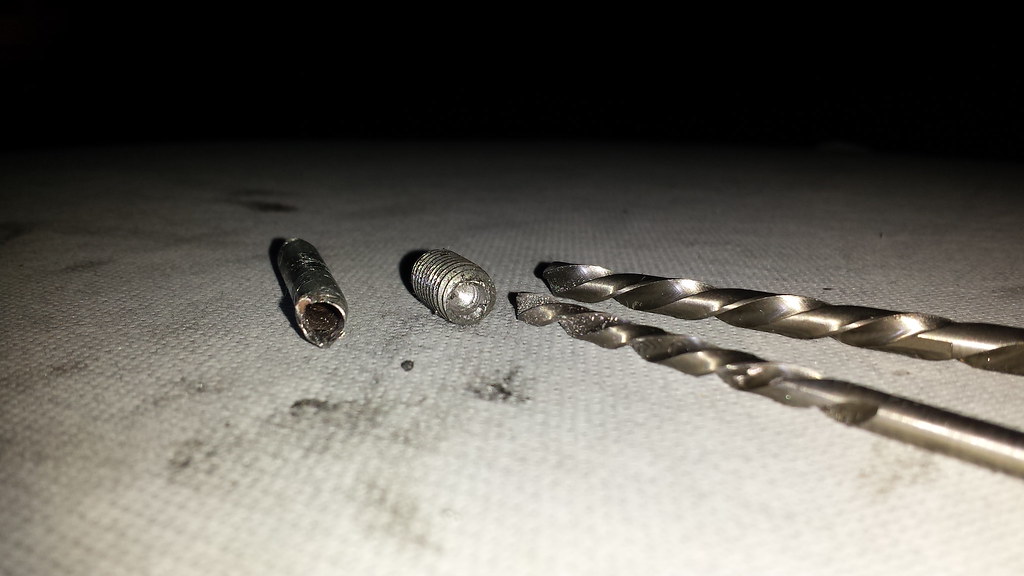
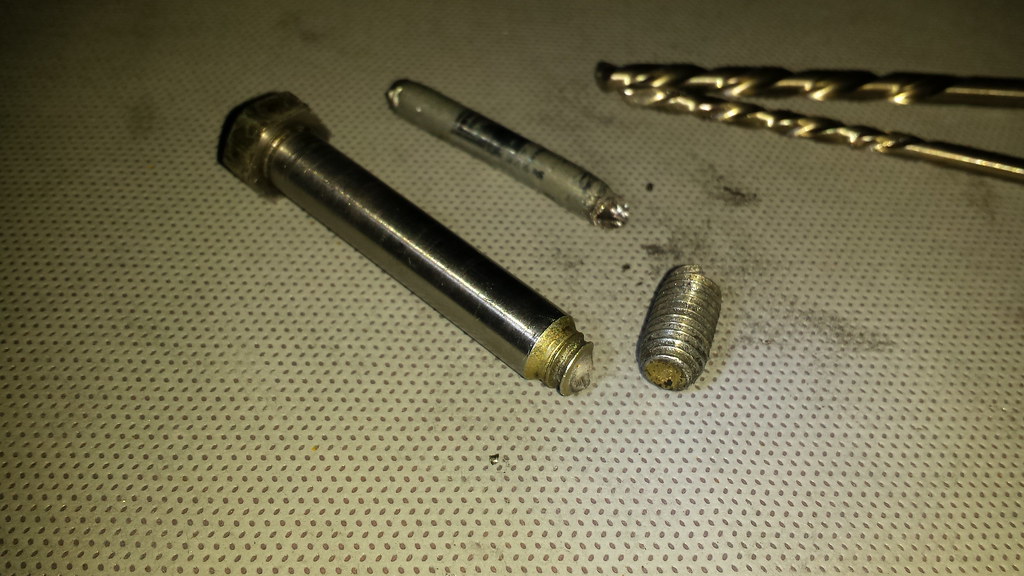
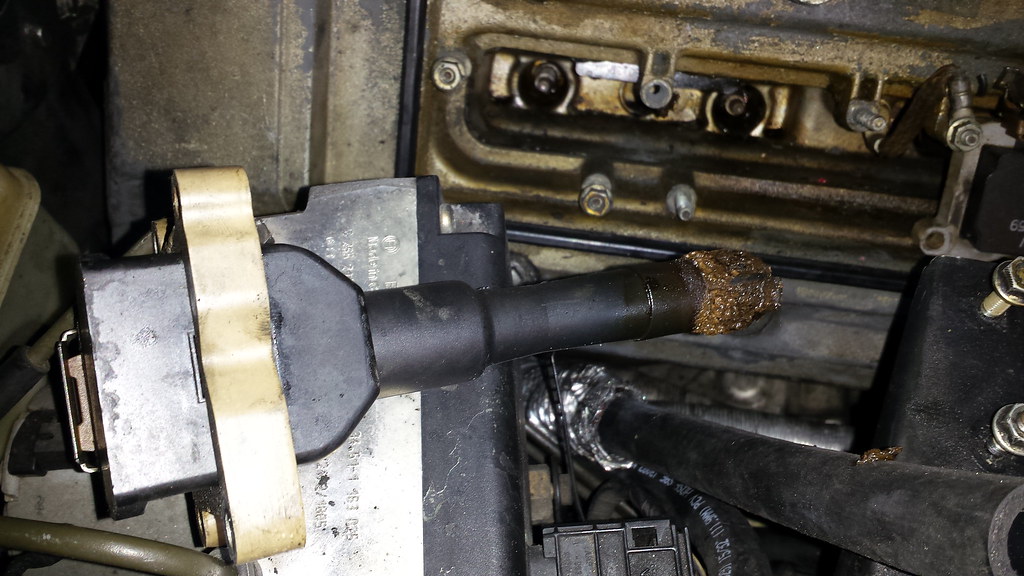
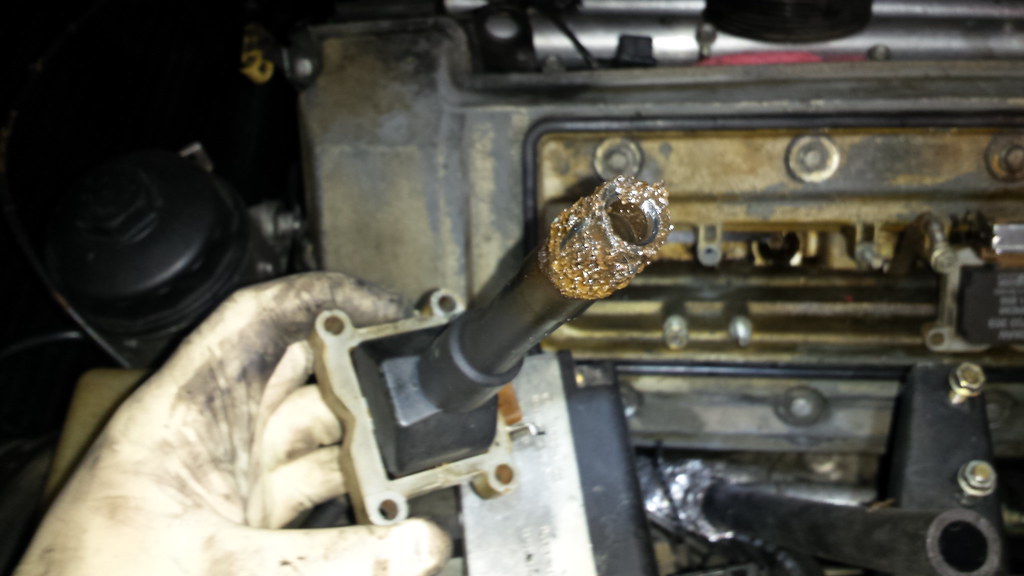
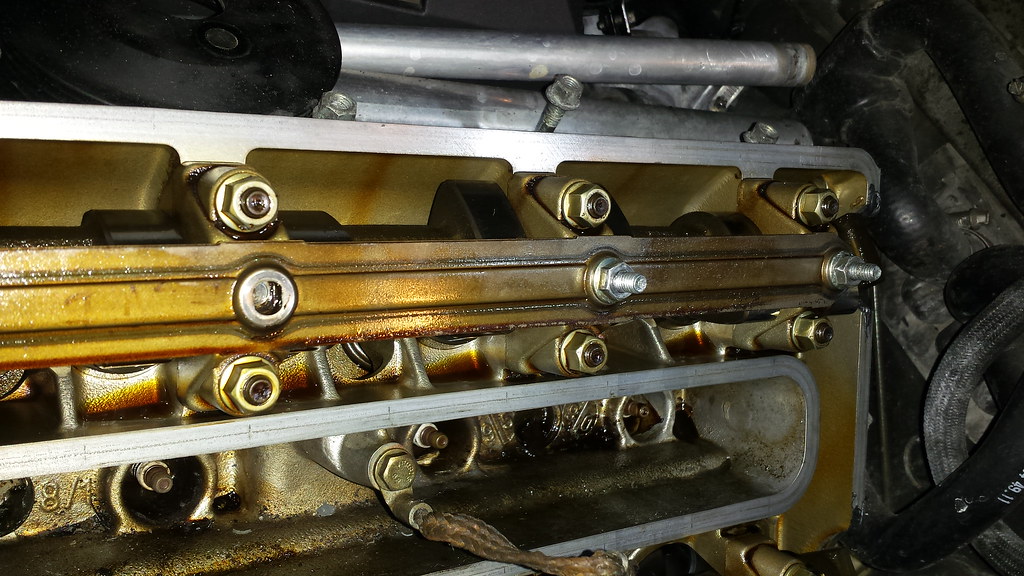
    Copious pictures to memorialize the first time I was able to extract a broken bolt successfully.


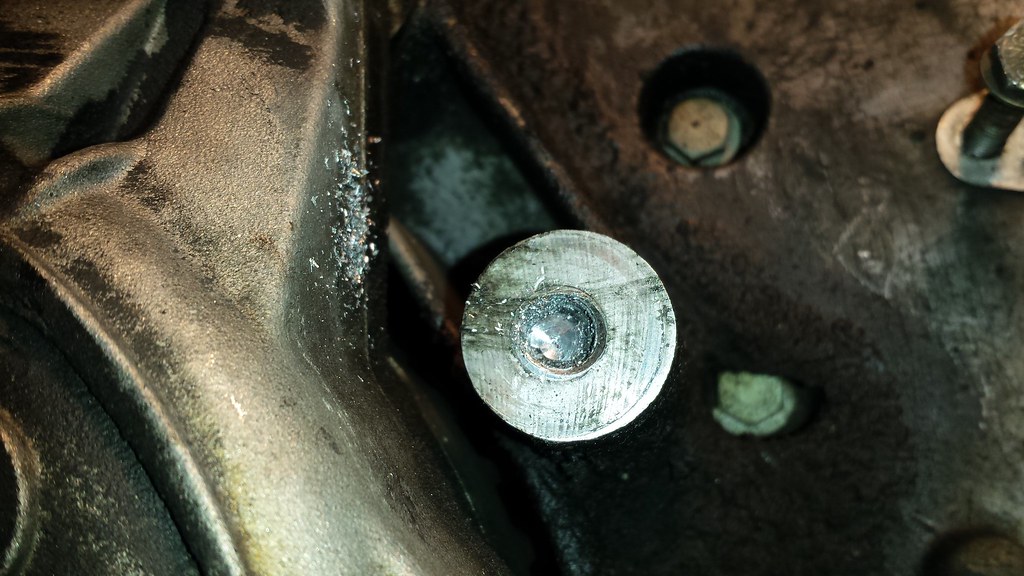
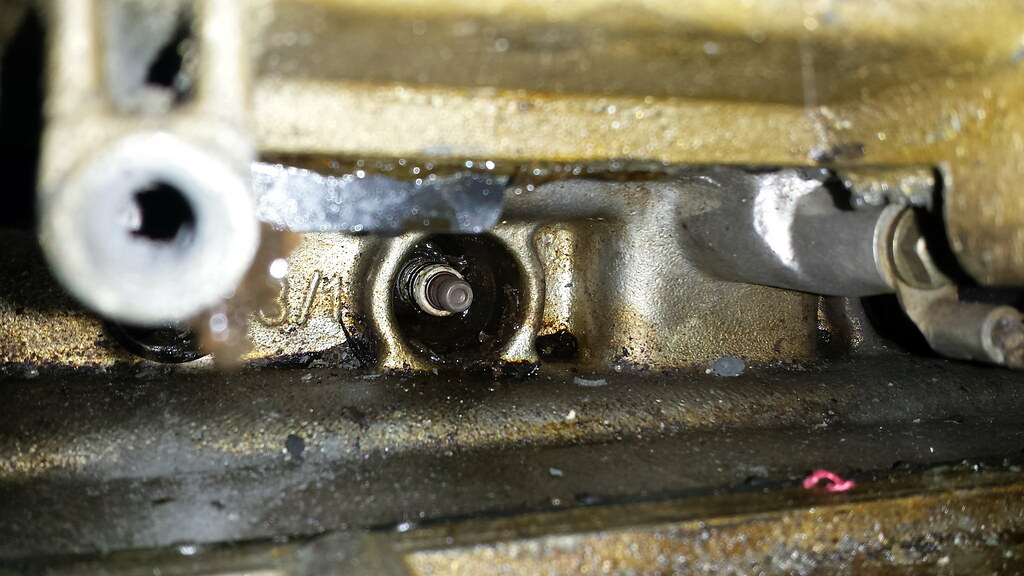
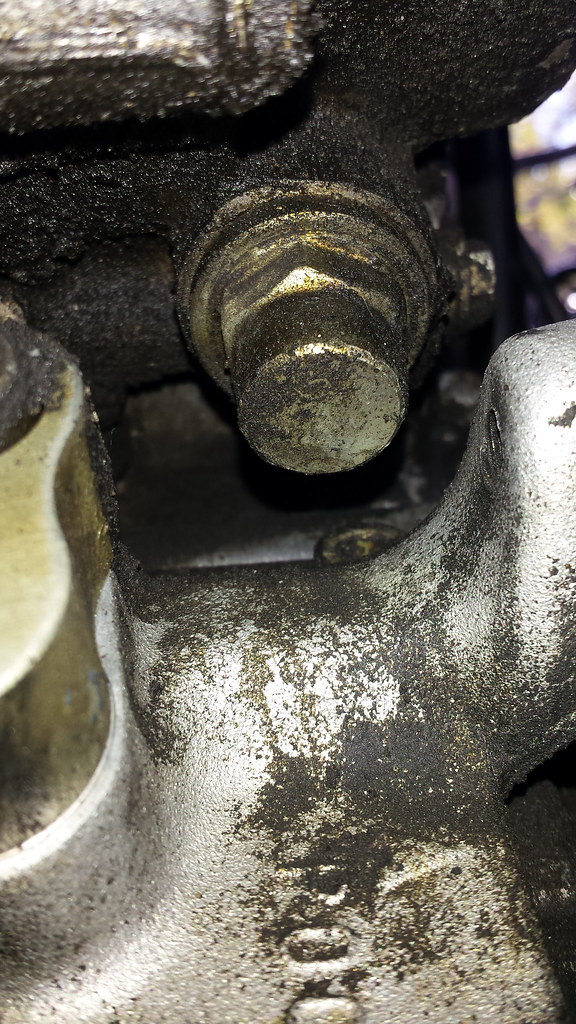
    Got to this point below and thought I was screwed. Went up to a bigger size and then decided to go back to a smaller size and drill it out some more. Then went back up to a bigger size again.


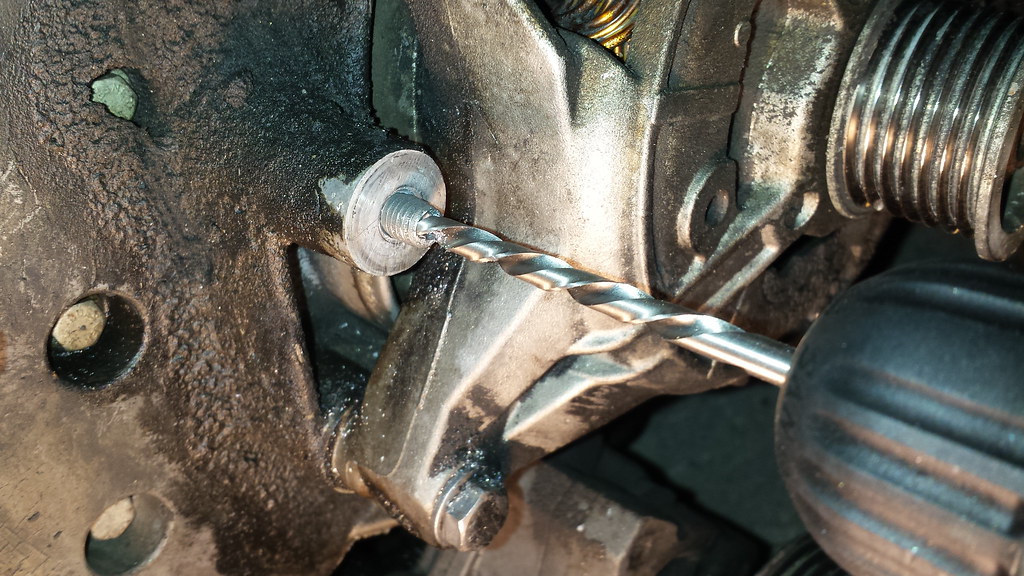
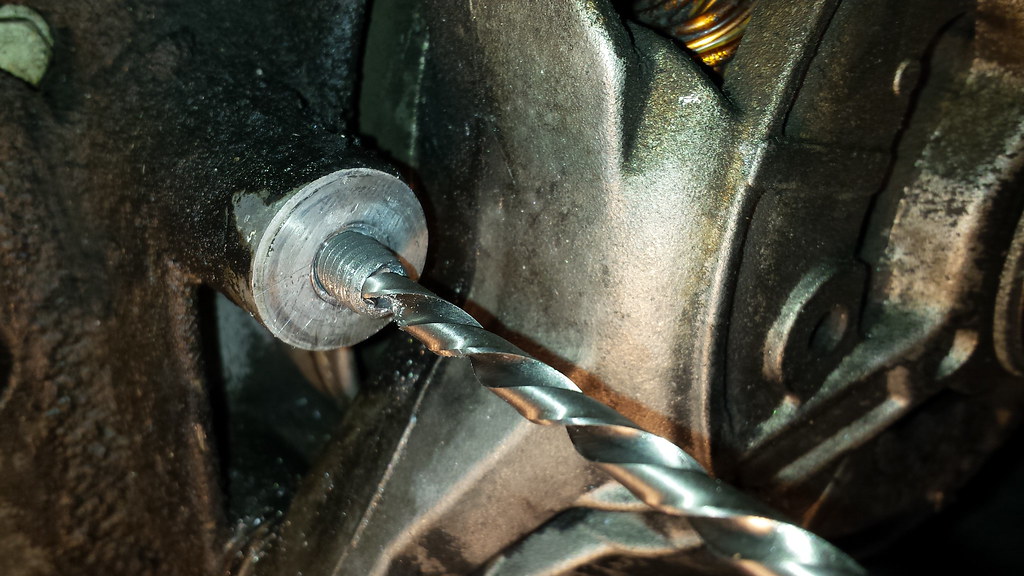
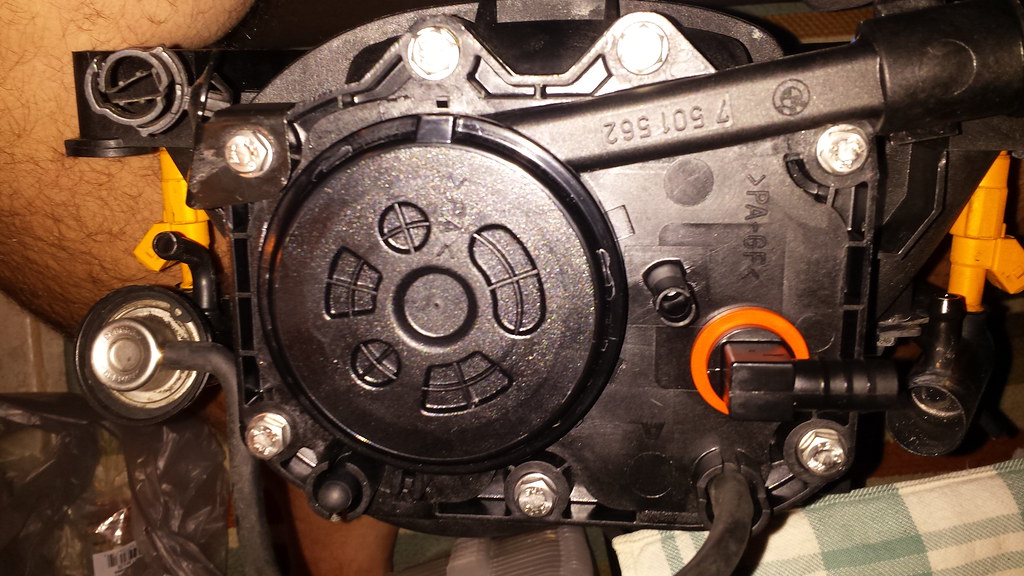
    The trick is to go super slow and do not get eager. Be patient. Once I drilled again with the smaller bit and went what seemed fairly deep, I gave the larger bit the opportunity to get some purchase on the walls of the smaller hole. Then I felt resistance. Lots of it. Gave it more torque and bam! The remainder of the bolt backed out clean.

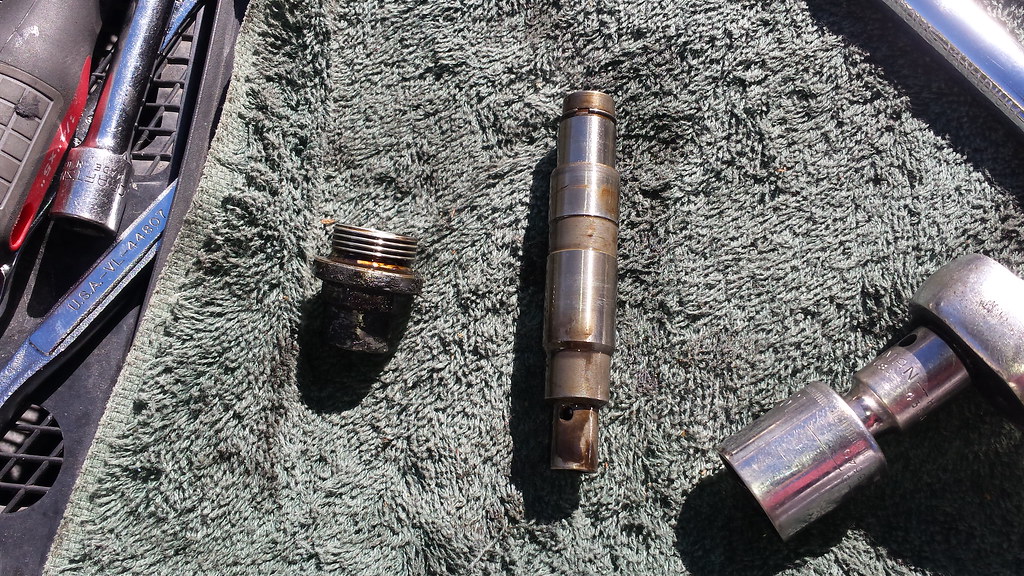
    Was super surprised I was as accurate as I was.


    [/url]


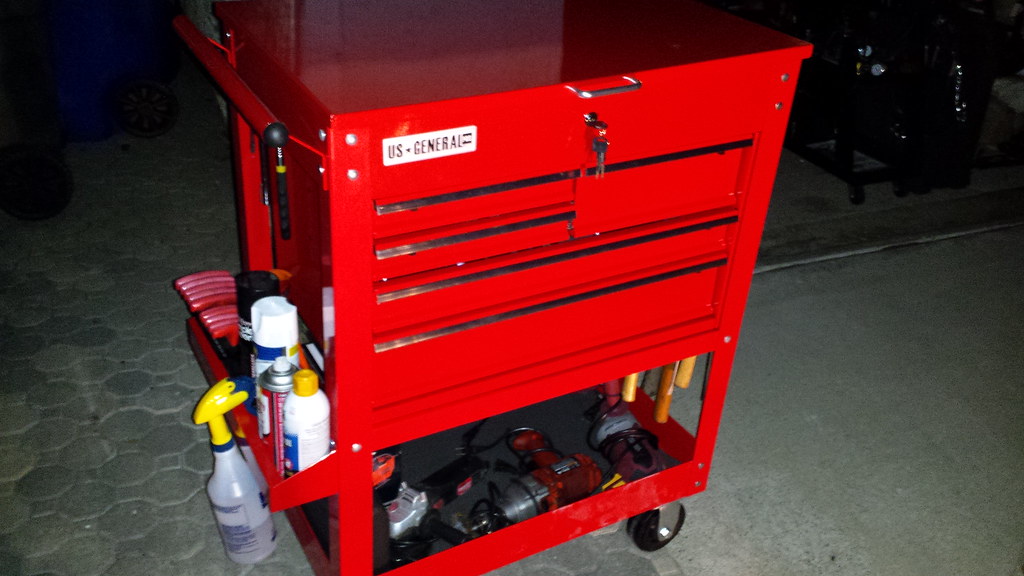
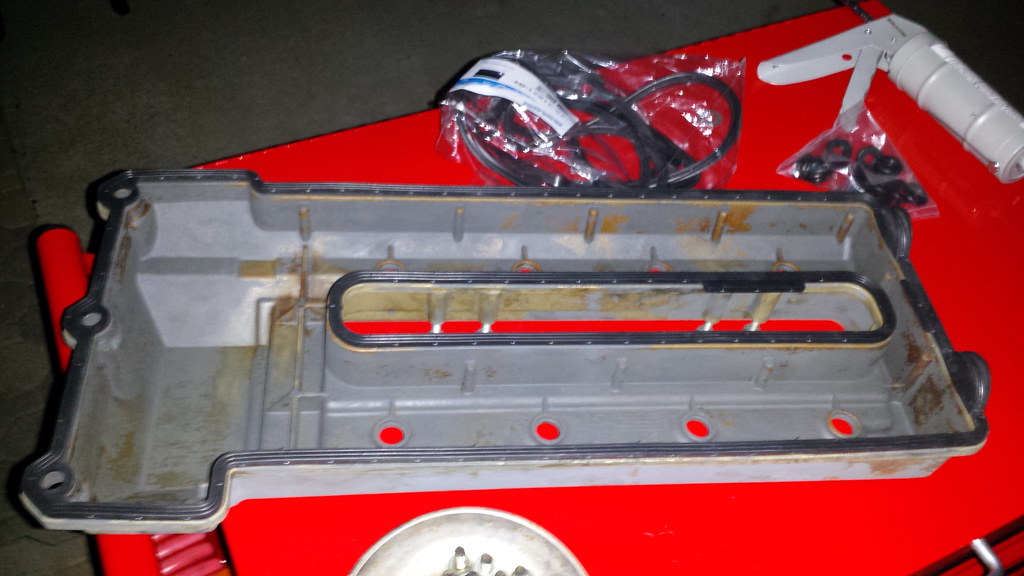
    I splurged on myself the other day at Harbor Freight and bought a rolling cart. I had a lot of tools, tons of sockets and specialty tools and the like, but I was working out of three tool bags and then some smaller tool pouches. This thing was a bitch to put together, but having all my tools in one place and on wheels is a godsend.

    r
    Last edited by marshallnoise; 09-01-2017, 12:39 PM.
    Si vis pacem, para bellum.

    New Hawtness: 1995 540i/6 Claptrap
    Defunct too: Cirrusblau m30 Project
    Defunct (sold): Alta Vista

    79 Bronco SHTF Build

    Comment


      #47
      Since I need to go to the junk yard to get a new bolt for the idler pulley bracket anyway and I need to get to the driver's side valvecover gasket, I am going to try and pull the power steering lines from the car and repair them by cutting off the crimped on sleeves and using regular band clamps with new high pressure hose.

      Why? They are leaking.

      Several write ups have been done on getting the lines out for one reason or another. Most involve removing the power steering pump and alternator to get clear access. Since my belts are already off the car, I may go ahead and do that just for giggles. Plus, it frees up more room to clean the engine bay from 20 years of grime.

      This terrifies me: http://www.e34addicts.com/Alternator...cement_Warning

      And this seems to over simplify things: http://www.e34addicts.com/Power_Steering_Pump

      But this one seems the most complete: http://www.bimmerforums.com/forum/sh...se-Replacement

      The idea is to use what Shogun did on his e36 and e32. See THIS post.

      EDIT: I am going to try this to remove the alternator...
      Originally posted by http://www.bimmerforums.com/forum/showthread.php?1364995-M60-Altenator-Removal-Help[/URL
      ]
      1. Remove the fan shroud and fan. (32 mm wrench and a flat blade screw driver)
      2. Remove the belt and the tensioner (13 mm socket)
      3. Loosen the oil filter housing (10 mm socket and wrench)
      4. Remove the power steering pump pulley. (13 mm socket)
      5. Loosen three nuts or bolts fastening the alternator to the engine. (13 mm socket)
      6. Remove two electrical connections on the alternator. (10 mm and 13 mm socket)

      Drop the alternator to the floor.
      That should give me room to get to the power steering stchuff.
      Last edited by marshallnoise; 10-14-2015, 03:29 PM.
      Si vis pacem, para bellum.

      New Hawtness: 1995 540i/6 Claptrap
      Defunct too: Cirrusblau m30 Project
      Defunct (sold): Alta Vista

      79 Bronco SHTF Build

      Comment


        #48
        Number 3 above proved to be difficult because a stud stayed in the block. I managed to remove it though and was able to get the alternator out. I will take it and get it tested on Friday at Vatozone. This has opened up the space I expected it would be there to get at the power steering junk.

        I have a busy weekend and tomorrow is wrapped up with work and church band rehearsal. Might be able to do a thing or two on Friday. Main objective is to get a replacement bolt for the one that I broke. If there are any decent two-piece Style 5s, then I will get them. I remember seeing some when I was at the yard last time. I should have grabbed them when I saw them.
        Si vis pacem, para bellum.

        New Hawtness: 1995 540i/6 Claptrap
        Defunct too: Cirrusblau m30 Project
        Defunct (sold): Alta Vista

        79 Bronco SHTF Build

        Comment


          #49
          Pretty quiet weekend. Friday, I ran over to the yard and found that bolt I broke off; amen. Also got some small brackets that I know I was missing and the center console hazard switch and another set of window switches.

          Also took down a brand new shed from my mom's house and moved it over to my house (long story). But it diverted my attention from working on the car to cleaning up the freaking mess on the north side of my house. I also pulled some more parts from the e30 tripod shell. All I have to do is pull the differential and I am ready to get rid of the thing. I hate looking so white trash in the front of my house.

          Amazingly enough, an e30 with no motor doesn't need all 4 wheels/struts to sit level. Thought that was rad. I'll snap a pic of it and post it for posterity.

          What has been holding me back from re-assembling the top end of the motor again is wanting to do work in the bay that needs attention while I have more access. Currently, the alternator is removed which gives me great access to the power-steering pump and lines heading up to the reservoir. I know I have a leak in the system and its a bitch to find out where it is coming from. Replacing all the lines with OEM stuff is out of the question: Just too much money and too little payoff, in my mind.

          The system consists of a reservoir, pump and steering box. Most systems that use steering racks seem to run an integrated cooler that is built into the rack (just a long run of hard-line) that the hoses attach to. For the recirculating ball setup, they have a set of pipes arranged in a coil that extends from the low pressure side of the box to the reservoir. I have researched some on the e34m5 forum and many folks have deleted the coil without any issues. Plus, I have the option of putting in a B&M transmission cooler in place of the coil if I do run into issues.

          Sorry, the image referenced below is lost!!!

          Bypassing the cooling coil eliminates several joints that are potential leak hazards. The red is the high pressure line and apparently can't be replaced with merely high pressure line and standard clamps. But the yellow and the blue can be replaced with new line and standard clamps. You just cut the collar and it exposes a standard hose connection. The blue line will be a VERY short run from the reservoir to the box as the reservoir sits right above the box itself. As a stop gap, I could get a long run of new line and have it whip back to the reservoir. Meh. Yes, I know I will be decreasing capacity of the PS system. I'll try and get out there tonight and see if I can get the lines out of the car.
          Last edited by marshallnoise; 09-01-2017, 12:45 PM.
          Si vis pacem, para bellum.

          New Hawtness: 1995 540i/6 Claptrap
          Defunct too: Cirrusblau m30 Project
          Defunct (sold): Alta Vista

          79 Bronco SHTF Build

          Comment


            #50
            Didn't get poop done except drain the PS pump. Sure looked like ATF mixed with the Pentosin CHF 11 I put in there. Fuuuuuu!
            Si vis pacem, para bellum.

            New Hawtness: 1995 540i/6 Claptrap
            Defunct too: Cirrusblau m30 Project
            Defunct (sold): Alta Vista

            79 Bronco SHTF Build

            Comment


              #51
              Got some poop done tonight. I realized I sound like Darth Vader on video because I am fat. Now that is out of the way...20 years of heat cycling and rubber do not mix.

              Here is where I discovered one obvious source of the leak.
              Just a quick video showing one of the many sources of my power steering leaks.


              And here is a vid of Darth Vader explaining why the power steering line cooler setup is retarded.
              Sorry I sound like Darth Vader. I am fatter than I should be. Oh well. I am just describing where the power steering cooling pipes run from the reservoir a...


              I did manage to get the yellow line in the post above out of the car. There was only one small snafu. First, the 24mm banjo bolt on the pump was stupid tight. Secondly, the metal portion of the feed-line to the pump is actually secured to the frame-rail. As usual, I just go slow and try not to break shit.

              Here is the line I removed. The rubber was just brutally hard and no wonder it receded from the fittings and clamps.
              20151020_192059_zpsdlyimkev by Paul Abbott, on Flickr

              Close up shot of the collar that I need to remove to reveal a regular barb fitting.
              20151020_192106_zpsbba6vhgu by Paul Abbott, on Flickr

              Here is the end of the hose that attaches to the reservoir.
              20151020_192142_zps6vge6zlm by Paul Abbott, on Flickr

              The collar cut but not separated.
              20151020_193635_zpsobj6iw0k by Paul Abbott, on Flickr

              Finally separated. Only took a screwdriver and a twist. It opened right up.
              20151020_193713_zps56sbv6ca by Paul Abbott, on Flickr

              The damage.
              20151020_193801_zpsiuw01ywi by Paul Abbott, on Flickr

              And this isn't the hose that I am going to use, but for mock-up purposes, it works.
              20151020_194029_zps7piditf7 by Paul Abbott, on Flickr

              I need a plan of attack at getting the blue line separated. It is really buried in the bay and obstructed by the red power steering hose. Probably going to have to remove the motor mount and lift the engine up a bit to get access.
              Last edited by marshallnoise; 10-22-2019, 03:28 PM.
              Si vis pacem, para bellum.

              New Hawtness: 1995 540i/6 Claptrap
              Defunct too: Cirrusblau m30 Project
              Defunct (sold): Alta Vista

              79 Bronco SHTF Build

              Comment


                #52
                And proof that you can't trust the internet, or realoem at least, when you use the serial number method of pulling up your car in realoem, it won't tell you if you have self-leveling suspension or not. I had no clue, though I knew the tourings definitely had it. All my research before told me that all the 540i cars used Pentosin.


                Apparently the LAD suspension uses a different canister. Since mine uses part number 1 (not 2), then I should be using ATF as opposed to Pentosin. Which explains the red color of the fluid I drained earlier.

                Oh well. EDIT: Upon further review, the internet is still confused. And so am I.
                Last edited by marshallnoise; 10-27-2015, 11:35 AM.
                Si vis pacem, para bellum.

                New Hawtness: 1995 540i/6 Claptrap
                Defunct too: Cirrusblau m30 Project
                Defunct (sold): Alta Vista

                79 Bronco SHTF Build

                Comment


                  #53
                  Power steering hoses, in!

                  The saga of the power steering hoses has come to a close. My buddy Mike came by (we are friends from church and he was given a 97 4Runner too that we work on) and helped me remove the blue power steering line. It proved to be a pain in the rear because of how close it is to the block and the fact that the red high pressure line is blocking access.

                  Even still, we had to unbolt the motor and jack it up to get enough room to see what was what.

                  20151024_143150_zpstxyi4elk by Paul Abbott, on Flickr

                  Once in there, we could feel that there was a bolt holding the red high pressure line in position. When that was unbolted and moved out of the way and the motor higher in the air, we had unfettered access to the blue line's banjo bolt. Its a 22mm btw, and really freaking on there.

                  20151024_143209_zps8fg6acwx by Paul Abbott, on Flickr

                  With that line out, we went to Vatozone for new line and hopefully crush washers. Got the line. Did not get crush washers there. Headed over to Mossy BMW and they found the new crush washers. Got back to the house and fitted the new hose and reused the heat shielding. Toyed with the idea of reorienting the banjo fitting but it really can only go one way. Lowered down the motor and quit working on it. That blue line was the hardest part of working on this car so far. The rest of it will go back together pretty easy and I can do it at night if I need to.

                  Decided to pull the differential from what is left of my e30 prior to sending it to the junk yard and then messed around with the tripod30.

                  video, sharing, camera phone, video phone, free, upload


                  Don't mind the fatass. That's just me. All 6'2" and 305lbs of me.
                  Last edited by marshallnoise; 10-22-2019, 03:28 PM.
                  Si vis pacem, para bellum.

                  New Hawtness: 1995 540i/6 Claptrap
                  Defunct too: Cirrusblau m30 Project
                  Defunct (sold): Alta Vista

                  79 Bronco SHTF Build

                  Comment


                    #54
                    Fixed the video. I have them default to private.

                    Anyway, did another "while you are in there" purchase. I placed an order with revshift for 95A motor mounts. About the same price as OEM and should last longer.
                    Si vis pacem, para bellum.

                    New Hawtness: 1995 540i/6 Claptrap
                    Defunct too: Cirrusblau m30 Project
                    Defunct (sold): Alta Vista

                    79 Bronco SHTF Build

                    Comment


                      #55
                      Had a reasonable day doing car stuff. I finished scrapping the Cirrusblau project. Click on that in my sig if you want to see the last post with some pictures and video. Glad that is over with and don't have to look too much like a redneck anymore.

                      Decided to power wash the piss out of the 540i under carriage and engine bay. I hated working on power steering soaked/road grime. No pictures, but it was simply nasty. Used full strength Purple Power and let it sit for 20 minutes. Then just went to town. The stuff literally fell off the car in chunks and bits. My arms will thank me for it later.

                      Also took the alternator down to Vatozone where they told me that it is bad. They did say that it was putting out the 140 amps it was rated for, but didn't really say why it was dead. I may take it to another shop and see what they say. But here is a video of the alternator and me spinning the pulley a bit.

                      Just trying to figure out if the noise is bad enough to warrant replacing bearings or not. BMW part number 12311747204. Shot with Zoom Q2HD


                      I have looked at some DIY's and since I have a shop press, I think that replacing the bearings wouldn't be so horrible and a voltage regulator is a piece of cake. I don't know, would rather not do the work until it was necessary. I can pull it and replace that stuff in one day if it craps out in the future.

                      Give it a listen and let me know what you think.

                      EDIT: Turns out the salesman at Vatozone just sold me a bill of goods. Said it failed the test. In post 58 I update the info. The alternator is good. This stands as a lesson to me; if someone tests something for you and it fails, take it somewhere else just to be sure.
                      Last edited by marshallnoise; 10-22-2019, 03:29 PM.
                      Si vis pacem, para bellum.

                      New Hawtness: 1995 540i/6 Claptrap
                      Defunct too: Cirrusblau m30 Project
                      Defunct (sold): Alta Vista

                      79 Bronco SHTF Build

                      Comment


                        #56
                        Got back into it last night!!! What helped the most was that the rain ceased and I am using a flashlight strapped to my forehead. Shit worked great actually. Big fan.

                        Received these from Revshift. Look to be great quality. Should be for $120 bucks! They will get installed once I am done doing the valve cover gaskets. Passenger side looks easy to install and the driver side should be easy because I have the alternator out already.

                        20151104_193415_zps0idxoaea by Paul Abbott, on Flickr

                        Crawled under the car to see about 15 spiders that set up shop under various parts of the car from the front bumper to the ground and from the rocker panels to the ground. These are the ones that vary in size and put their legs together so they look like they only have 4 legs as opposed to 8. This year is the year of the spider in San Diego. It seems that way to me at least. So I gave them a viking burial without the raft or lake: yes, I sent them to hell with a MAPP gas torch. I hate spiders.

                        But once under there, I managed to get the send line for the power steering pump installed. Went as good as I could expect. Nothing amazing picture-wise but I attached a photo because it is way cleaner under there than normal.

                        20151104_195653_zpsmpcvoate by Paul Abbott, on Flickr

                        While I had the motor up in the air a bit, I wanted to get a good crack at the valve cover gasket on the driver's side. Would you believe there was a surprise under the them?

                        Anyway, here are the pics of the coil packs. The packs themselves look to be in great shape save for the frothy oil/water whipped concoction.

                        20151104_201112_zpssuneur8b by Paul Abbott, on Flickr

                        20151104_201126_zpsha8l4ozx by Paul Abbott, on Flickr

                        Three of the four had this madness on them. Plug holes below.

                        20151104_201240_zpsyh9taygu by Paul Abbott, on Flickr

                        20151104_201246_zps3eoybegk by Paul Abbott, on Flickr

                        20151104_201250_zpsad44laym by Paul Abbott, on Flickr

                        Here is the driver's head with the cover removed. Looks pretty good to me. The lobes have minimal wear from what I can read.
                        20151104_203555_zpscovrgvsh by Paul Abbott, on Flickr

                        20151104_203615_zpsrwv33swu by Paul Abbott, on Flickr

                        Upon further inspection, someone has been into this motor. No idea who, but they were pretty organized it seems. And they wrote in English. :D
                        20151104_203604_zpsijxm2fpx by Paul Abbott, on Flickr

                        I still need to locate the block number to find out if the block is Nikasil or Alusil. It might be that the techs who performed the swap (if it was swapped) did this to keep track of what side the motor was. Either way, its interesting. The motor is stupid strong, so I don't care much.

                        Here are some pictures of the underside of the valve cover. The gaskets were Victor Reinz for what its worth.
                        20151104_203622_zpsyg1uiqfy by Paul Abbott, on Flickr

                        20151104_203637_zps65ubync4 by Paul Abbott, on Flickr

                        20151104_203648_zpsuncl94us by Paul Abbott, on Flickr

                        The valve cover didn't have any tell tale signs that the gaskets were prepped by someone on the forums. If done by an enthusiast, they would have probably placed a splash of RTV (or something) in the known trouble spots of the gasket and where the front cover touches the head (big oil leak opportunity there). I will be doing this.

                        The tips of the valve cover were gnarly like they always are, so I decided to get the pressure washer out and go crazy on it. Seemed to get rid of a large portion of the flakiness and remove oil stains. This way I can see how good of a job I did on the valve cover gasket install.

                        I stopped there for the night. Might get out there and try to scrape off the remainder of the gold flake color on the valve covers and get them down to bare metal. Or I may say screw it and just reinstall the driver's side.

                        Felt good to get out there and wrench though.

                        Edit: After reading about the magnesium valve covers, I am going to just bolt them back on. One day I will get another set and have them powder coated. Apparently that's the only way to keep them from looking like shit forever. Something to do with heat cycling, the coating, oil and magnesium that nets ugly ass valve covers on m60 motors.
                        Last edited by marshallnoise; 09-01-2017, 12:55 PM.
                        Si vis pacem, para bellum.

                        New Hawtness: 1995 540i/6 Claptrap
                        Defunct too: Cirrusblau m30 Project
                        Defunct (sold): Alta Vista

                        79 Bronco SHTF Build

                        Comment


                          #57
                          Got some more work done today. Work was slow and I was up early so I was able to duck out around 2:15 which meant I would be home at 3:30 or so. Threw on some junk clothes and decided to tackle the engine mounts.

                          I had figured they would be pretty simple to install, but it proved to be more challenging than I had expected. Removing the lower bolts was easy and I had previously done this to get access to other parts of the engine. The top driver's side bolt was easyish with the alternator out of the way. The passenger top bolt is tough because of the angles involved, until I moved the electrical harness out of the way that I didn't even notice was in the way in the first place. Even still, it took me bolting them on the top, lowering the motor down, bolting the bottoms and then raising the motor up and down again to get them to seat better.

                          When doing the motor mounts, turns out the driver's side wasn't even connected to to itself. Just tore it to bits. With the help of a power steering leak.
                          20151106_193548_zps2fa9quva by Paul Abbott, on Flickr

                          20151106_193537_zpsankcpqtd by Paul Abbott, on Flickr

                          Proof of shiny new parts.
                          20151106_173400_zpsfdkhnbna by Paul Abbott, on Flickr

                          20151106_173410_zpsx1jljvck by Paul Abbott, on Flickr

                          Returned my focus to getting the driver's side valve cover reinstalled. Well, 6/11 of the valve cover studs came out with the nut when I took it off a couple days ago. So the next step was to break the nut free from the stud and reinstall the studs. That was merely time consuming, but went well.
                          20151106_181055_zps4cxx6mgl by Paul Abbott, on Flickr

                          20151106_181106_zpsgu7buqsa by Paul Abbott, on Flickr

                          I prepped the cylinder head with the six dabs of RTV and installed the new gaskets and covers. Went off without a hitch.
                          20151106_173431_zps9qvsjif6 by Paul Abbott, on Flickr

                          20151106_193520_zpsfsyxy7v2 by Paul Abbott, on Flickr

                          Ran around like a decapitated chicken trying to locate where I placed the bolt that I had sheered off and finally found it in the trunk with other misc items. Decided to install the idler arm to be done with it.
                          20151106_193513_zpsligifyzj by Paul Abbott, on Flickr

                          Grabbed a bite to eat at Two Brothers from Italy (above average Italian food) and ran into a kid with a clean e34. Too low for me, but it looks nice.
                          20151106_205607_zpssop2wmmv by Paul Abbott, on Flickr

                          20151106_205623_zpsqp9vqith by Paul Abbott, on Flickr
                          Last edited by marshallnoise; 09-01-2017, 01:05 PM.
                          Si vis pacem, para bellum.

                          New Hawtness: 1995 540i/6 Claptrap
                          Defunct too: Cirrusblau m30 Project
                          Defunct (sold): Alta Vista

                          79 Bronco SHTF Build

                          Comment


                            #58
                            Another good day of work on the car. Probably not do anything tomorrow.

                            I had a bazillion (5) errands I had to run this morning so I didn't get working until noon or so. But one of those errands was taking my alternator to another Vatozone for testing. Sure enough, it passed three times in a row. I think the guy who tested it initially just wanted to sell me a new alternator. The girl who helped me today was a store manager and she seemed very honest and on top of it. Refreshing.

                            Since finishing the driver's side valve cover gasket yesterday, I popped over to the passenger side. To my surprise, the inner gasket seemed to be doing its job because there was minimal oil in the plug wells and nothing of the frothy whip like on the driver's side. Strange enough, there was no writing at all on the passenger side cylinder head.

                            20151107_123127_zpssk0xvrgl by Paul Abbott, on Flickr

                            I managed to only have to put in 5 studs as the rest of the studs stayed in.

                            While I was in and working on that side, I installed a new lower timing chain tensioner. In don't expect earth shattering performance out of it because the original one looked to be in good kit. Insurance though...

                            20151107_123134_zps3py9cx0d by Paul Abbott, on Flickr

                            20151107_123151_zpsxtjlqgc1 by Paul Abbott, on Flickr

                            This shows context.
                            20151107_123203_zpsn0mq4aou by Paul Abbott, on Flickr

                            Old tensioner!
                            20151107_124320_zpsfq2cb5ut by Paul Abbott, on Flickr

                            I cleaned up the valve cover in the same manner as the driver's side and this time blew it dry since I wanted to get it back on today. It was slightly trickier to get it on than the driver's side. But I managed to get it done with little issue.

                            After this, I decided to put my newly tested and certified ok alternator back in and bolt up the power steering pump pulley. I first tried to do so from the bottom: Like an idiot. Then I realized that I had about a football field's worth of space in the front of the engine.

                            In the pic below, the alternator is installed, but it shows how much room there is as opposed to dicking around from the bottom.
                            20151107_153647_zpsxa5ovmwr by Paul Abbott, on Flickr

                            I removed the pulley tensioner setup I installed yesterday (3 bolts) and popped the alternator in. Well, it wasn't that easy either. The B+ line was really short and a bitch to get started. Even still, I had to fight the oil filter housing to get it in right. Plus, I can't figure out where the top bolt is that goes in the 3rd alternator hole. I left it alone. Put the idler pulley setup back in.

                            At this point I lowered the motor back down and cinched up the motor mounts. Then I began work on the power steering lines. New hose clamps, new hoses. Buttoned them up.
                            20151107_161527_zps8zfch5ox by Paul Abbott, on Flickr

                            Finally I was able to start assembling the remainder of the motor and get it slowly back to order. Apparently a guy with a V neck isn't allowed to install parts from BOSCH.
                            20151107_153628_zpsnlijecdu by Paul Abbott, on Flickr


                            So I blew the top of the motor clean and installed the knock sensors, ran the coolant tubes to the back (new seals) and began prepping the water pump area. Once that was clean, it was time to make my own gasket with my favorite stuff: The Right Stuff.
                            20151107_161758_zpsg7kjxr1c by Paul Abbott, on Flickr

                            There she is all installed.
                            20151107_170417_zpsofjzvxst by Paul Abbott, on Flickr

                            I had some trouble getting some of the bolts started for some reason. What I do know about The Right Stuff is that I very much doubt it even needs bolts to hold the water pump to the block. That stuff gets crazy sticky.

                            At any rate, I am glad to see this thing start to get put back together. I know I need to spend more time on the wiring harness as the casing is super hard and brittle.
                            Last edited by marshallnoise; 09-01-2017, 01:20 PM.
                            Si vis pacem, para bellum.

                            New Hawtness: 1995 540i/6 Claptrap
                            Defunct too: Cirrusblau m30 Project
                            Defunct (sold): Alta Vista

                            79 Bronco SHTF Build

                            Comment


                              #59
                              Chipping away.

                              Had a few hours in the middle of the day to get a bit of work done. I was able to bolt on the harmonic balancer/crank pulley and throw the new belts on the car.
                              20151110_132404_zpsueivgzvs by Paul Abbott, on Flickr

                              Then also replace the heater core octopus hose.
                              20151110_133943_zpsii5sxmaw by Paul Abbott, on Flickr

                              Totally forgot to take a picture of it installed.

                              I was just about to install the intake manifold but remembered I wanted to change out the PCV valve bolts from the torx bits that came from the factory. When I removed the throttle body, I had to cut the bolts off with a sawzall. I was able to replace those with M6 1.0 x25mm hex head bolts but in the process I bought Home Depot out of them.

                              When I went to HD to find more bolts, they still hadn't replenished their supply. Headed off to Lowes and found them in stainless steel.
                              20151110_192604_zpssbfre65q by Paul Abbott, on Flickr

                              20151110_192652_zps3xj6l0ck by Paul Abbott, on Flickr

                              20151110_193358_zpsexst748u by Paul Abbott, on Flickr

                              20151110_194647_zpssvqtmjoe by Paul Abbott, on Flickr

                              Now it is ready to get installed. Glad for it too!
                              Last edited by marshallnoise; 09-01-2017, 01:23 PM.
                              Si vis pacem, para bellum.

                              New Hawtness: 1995 540i/6 Claptrap
                              Defunct too: Cirrusblau m30 Project
                              Defunct (sold): Alta Vista

                              79 Bronco SHTF Build

                              Comment


                                #60
                                Wow great work. You are really attacking that motor from every angle. Better of to have pulled it and done all the work?
                                ACS S3 Build / Dinan 5 E34

                                Comment

                                Working...
                                X