Announcement

Collapse
No announcement yet.

85 323i grey market euro - M tech 1 build.

Collapse
X
 
  • Filter
  • Time
  • Show
Clear All
new posts

  • pandaboo911
    replied
    Originally posted by 2002jm View Post
    Yes, fogs mount to m-tech spoiler. Don't think you need the valance. In fact the valance might be in the way of the spoiler air ducts or fog light backs.

    Nice build, watching!!!! and learning.

    jm


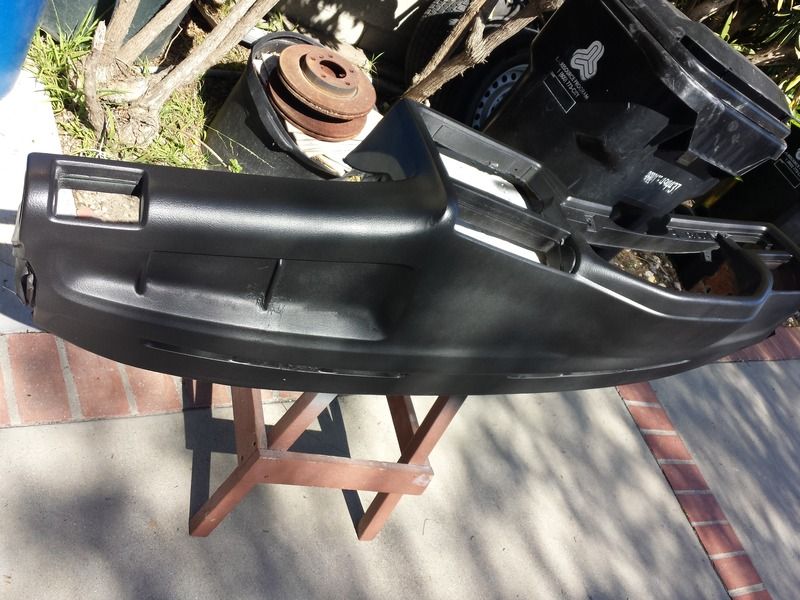
    I think some Mtech 1 have the fog light mounts and some dont. Mine did not have the fog mountings so I epoxied some mounts. Look in my build thread to see an example.

    Leave a comment:


  • Court M3
    replied
    Keeping an eye on this one for a potential build down the road! Nice work so far.

    Leave a comment:


  • reelizmpro
    replied
    When I bought this car the PO said it wasn't charging or had a drain and needed an alternator. The alt bracket was loose and belt was slipping a bit so I thought that was the culprit. I bought a new battery since the old one was trashed. I had driven it around but only a few miles and everything seemed okay except the battery was low.

    When I test drove the car the other day, I noticed the speedo didn't work and the battery light is out so I pulled it and went thru all the traces. Then I remembered...on early models, pre 86, the alternator cannot charge the battery if the cluster battery bulb is out. Turns out the bulb was good but the socket wasn't making good enough contact and actually measured open on the DMM. I reflowed all the joints on the PCB and as well as the solder contacts for the battery bulb this time. Now the battery light illuminates with the key on as it should. I can't drive the car since the front end is in pieces but I'm confident I fixed both the speedo and the charging issue. The ETM shows power that goes through the battery bulb also goes through the speedo. BMW later updated clusters with a resistor in parallel to prevent this problem.

    Now that the boring stuff is out of the way...I wired up the 10" JL Sub and Fosgate amp that came with the car. I like sealed enclosures as the bass is tighter and they can be smaller size so you still have plenty of space.


    Also forgot to mention, I installed a 2nd trunk light as well. This combined with the light from the parking lights really lights up the trunk at night. Excellent low cost mod.

    Leave a comment:


  • reelizmpro
    replied
    Got the dash in and the electrical wiring all sorted out. Not bad! This car has a comfort relay that powers the windows when the doors are open without the key having to be in the ignition. M tech 1 wheel and fresh switches installed.


    These are original mats from my first 85 325e. Kept them in storage for 17 years after the crash.


    Next is the subwoofer/amp install and deciding if I should keep the interior blue or switch to black. I'm missing the rear seat. Finding a blue seat would be a challenge but black is readily available. Either way the front seats will need to be dyed.

    Leave a comment:


  • reelizmpro
    replied
    I went thru the instrument cluster today (broken odometer gears and right side light is out) and decided to machine polish the plastic cover which cleaned it up nice! unfortunately it also made an existing 1 inch crack a 2 inch crack. Oh well, I'll have to grab another one at some point. SI board batteries were toast so I ordered up some AA NiCad's. Seems these aren't as common as they used to be. Most places don't carry them anymore in favor of NiMH and LI. While waiting for the batteries to arrive, I've been experimenting with a capacitor. I'll keep you updated on that. Another option is Programa's battery less board but at $150, I'd rather just replace the batteries. This is deja vu for me as this is one of the first DIY mods I did to my first 85 325e back in the day.

    Leave a comment:


  • 2002jm
    replied
    Originally posted by reelizmpro View Post
    Now that you mention it. I think the fogs mount to the M tech 1 spoiler correct? so the valance is not needed? I haven't looked into it.
    Yes, fogs mount to m-tech spoiler. Don't think you need the valance. In fact the valance might be in the way of the spoiler air ducts or fog light backs.
    Nice build, watching!!!! and learning.
    jm

    Leave a comment:


  • bobaflesh
    replied
    Subscribed, I need to do this on my dash.

    Leave a comment:


  • reelizmpro
    replied
    Originally posted by efficient View Post
    What you going to do with the front euro valance?
    Now that you mention it. I think the fogs mount to the M tech 1 spoiler correct? so the valance is not needed? I haven't looked into it.

    Leave a comment:


  • efficient
    replied
    What you going to do with the front euro valance?

    Leave a comment:


  • rzerob
    replied
    Subscribed.

    Leave a comment:


  • 2mAn
    replied
    wow that came out really nice, making me reconsider the flocking process since my car isnt a fuhraze race car

    Leave a comment:


  • kronus
    replied
    that came out surprisingly well!

    details on the mtech kit? I guess it's a race now, with three 323i mtech I builds going at the same time here.

    Leave a comment:


  • reelizmpro
    replied
    Dash is filled using the Urethane padded dash filler. This stuff is great! My only complaint is that it hardens way too fast so only mix small amounts at a time and only do one long crack or a couple of small ones at a time.


    This is after the 2nd coat, on the 2nd day. I sprayed on another coat to even things out a bit. I will take another pic after the final coat dries completely tomorrrow.
    I should have spent a little more time on prepping the storage tray area...I know but I got lazy and my main concern were the cracks which are all filled and covered up. As expected, the Plastidip still shows the factory grain while giving it the rubberized look of the new dashes! This is what I was hoping for. Sorry about the shadows. If it looks good outside of the car, I'm sure it will look great inside. This is my first time working with filler, sanding, etc. I have thrown away dashes in better condition than this one. This is something I wanted to try out since I had nothing to lose but cost of material and a few hours. A dash with fewer cracks would have much better results.
    Last edited by reelizmpro; 03-26-2016, 01:29 PM.

    Leave a comment:


  • kingston
    replied
    I will probably be trying it out soon...

    Leave a comment:


  • KIRIEIW
    replied
    I'm still waiting for a guinea pig to try this out :D
    http://www.r3vlimited.com/board/showthread.php?t=359871


    In all seriousness however, I think a replacement dash would be the route to take. And awesome pick up! Your having me think twice now about purchasing a set of euro bumpers for my own car..

    Leave a comment:

Working...
X