
Right, my M20 idles at 650-700. The oil light triggers at 7psi iirc, and normal is around 8 to 10psi when fully warm (I strongly believe this which is causing my concern). I know its not 15psi for certain (too high). A higher idle will definitely bump it up though - the average is usually 10psi per 1000RPM.
My sensors are remote in a sandwich plate with maybe 10" of SS lines coming from the stock oil dist. housing. Two years ago I had the sensors on the sandwich plate on the block though with the same readings.
I still don't think your temps should go over 200*F either, especially with no thermostat. I think you're fine though and that something is up with the gauges?
-
Yes. Where is your sensor located? Yours sounds very low. I think 15-25 is more normal.
Even with my old stock motor my idle was over 20psi with T6.
I should also mention that my idle is about 950-1000 rpm due to the 8lb flywheel and big cam. I don't know if that bumps it up a few psi. I've seen M20's idle as low as 650-700.Leave a comment:
-
At 190-200 *F your oil pressure is at 30psi+ idling? That doesn't seem quite right.
I'm using Rotella 15w40 and at operating temperature my oil pressure is around 7-10psi. (M20 turbo)
It's also hard for me to surpass 220*F oil temp unless I'm beating on the car repeatedly - and this is with the addition of a turbine. I also have the same sized cooler you (behind the grilles)with a thermostat. I average around 190*F cruising/freeway/whatever.
VDO gauges.
I wonder what's going on here.Last edited by ak-; 08-13-2017, 06:42 AM.Leave a comment:
-
Thank you Chris! Much appreciated.
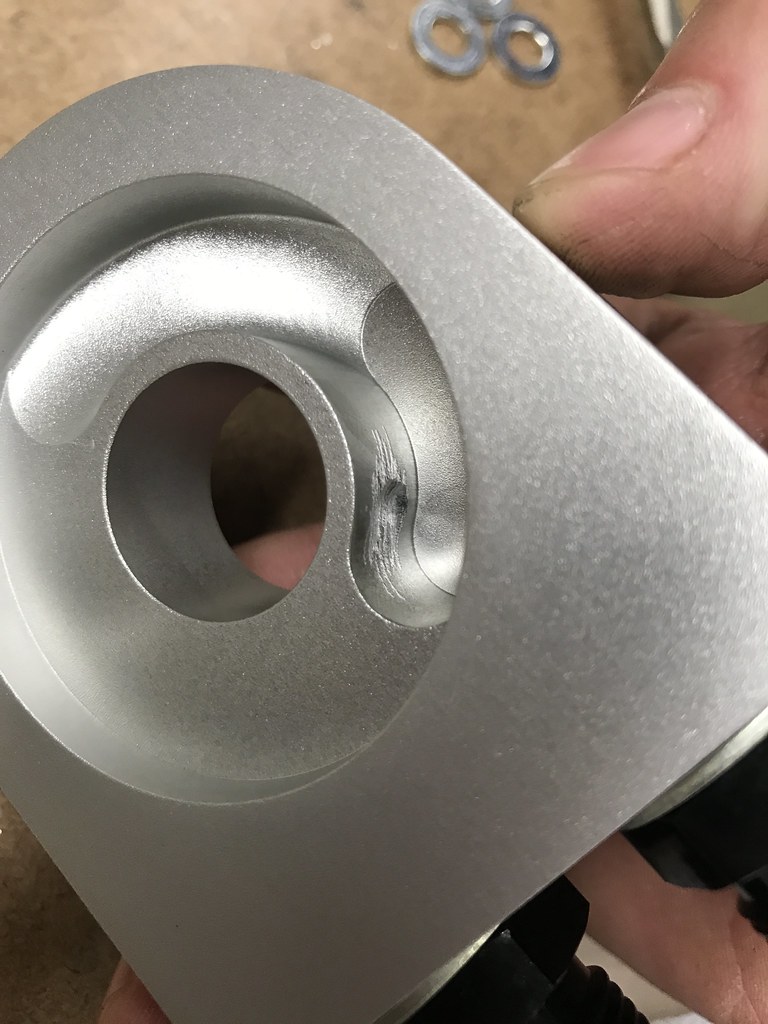
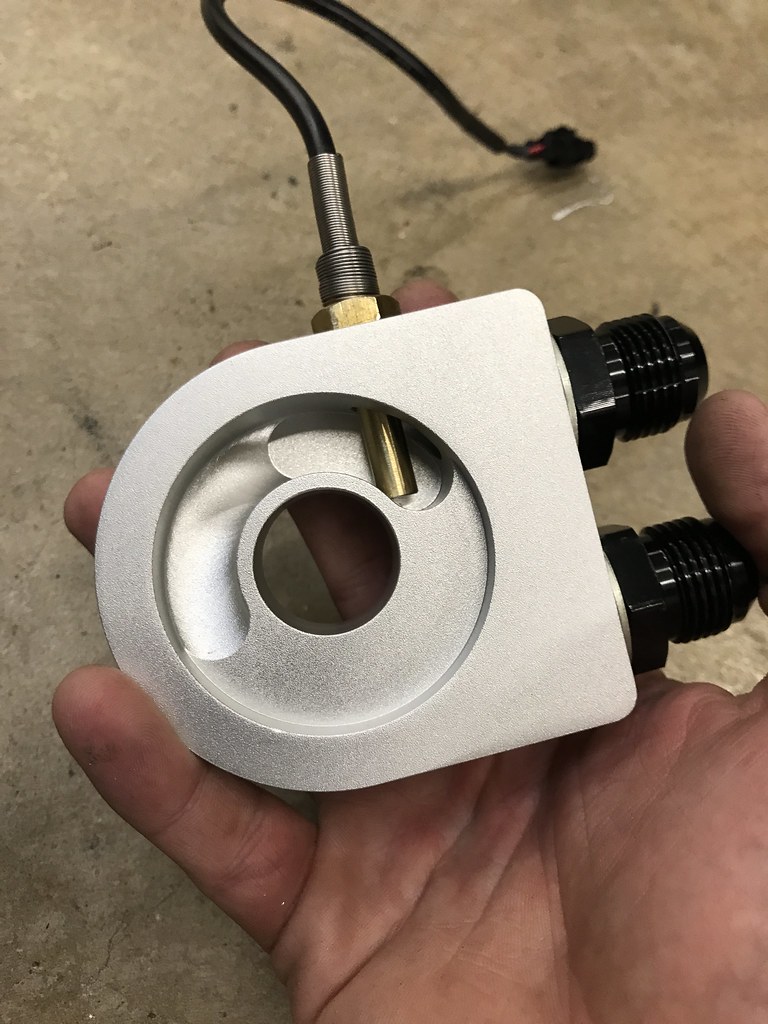
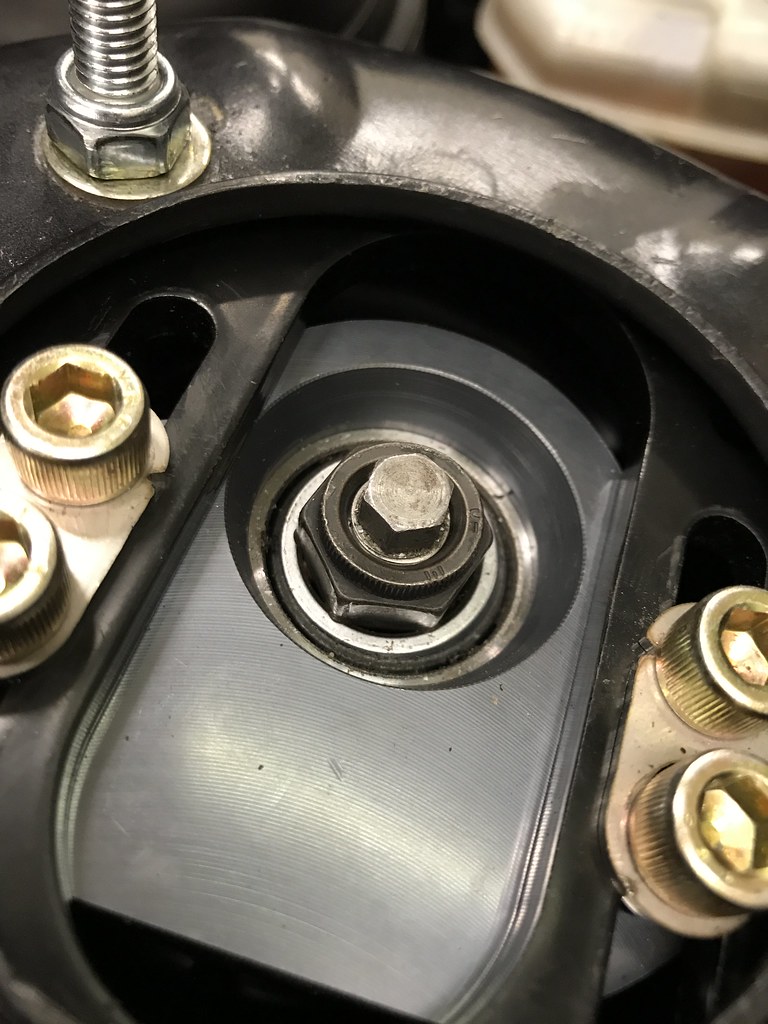
I wouldn't say the sensor is 'blocking' oil flow, but it's definitely in the path. When I was installing it, the thought crossed my mind, but I figured:
1) The sensor is purposely long so it sits in the flow of oil.
2) Most sensors from other brands are the same. If they are shorter, it's not by a lot, and the shorter ones are usually fatter.
3) Oil doesn't have to flow through that machined channel. It can be in any portion of that opening/cavity. Keep in mind that the side pictured is the oil filter side, and the opening for the oil filter is a recessed cavity as well.
4) Because of the open cavities in both the sandwich plate and the front of the oil filter, it seems like there is plenty of room for the oil to flow into the filter. The sensor several millimeters past where the AN fitting meets the plate, the oil can flow behind the sensor, and more importantly it can go in front of the sensor and fill up the rest of that open cavity.
Is it perfect or ideal? Probably not, but I don't believe that it's a major problem. I very well could be wrong though; I frequently am!
I forgot to mention in my post that when I changed the oil during the oil cooler install, I had departed from my previous Rotella T6 5w40 oil. I had that around because I use it in my Subaru, and it's cheap, so I had run it temporarily in the M20, but I always thought it was too thin, especially for track use. I switched over to Redline 15w50. That alone raised my oil pressure a good 10-15*. I probably should have tried T6 again to see if the oil cooler alone changed my pressure at all.
On the street I've only been able to get the oil temp up to about 190-200, and at that temp my idle is at about 33-35psi. It was previously about 21-23psi with Rotella T6, but it would also get up to 225* on the street easily.Leave a comment:
-
I might rethink that Oil temp sensor placement/sensor brand - that is blocking a large portion of your oil flow in it's current arrangement.
Nice to see a well documented thread, vs. JOM/XXR/Junk steering wheels. ;)Leave a comment:
-
Some new things and updates on past issues!
First off, the camber plates are holding up even though I had to remove the top bushing and didn't get the last 1-2 threads of engagement on the stover nuts. I had put blue loctite on them and will continue to monitor. The camber plates pop a little bit, but they are not binding badly. I'd say they were worth it due to the high quality spherical bearing and the increased camber I got.
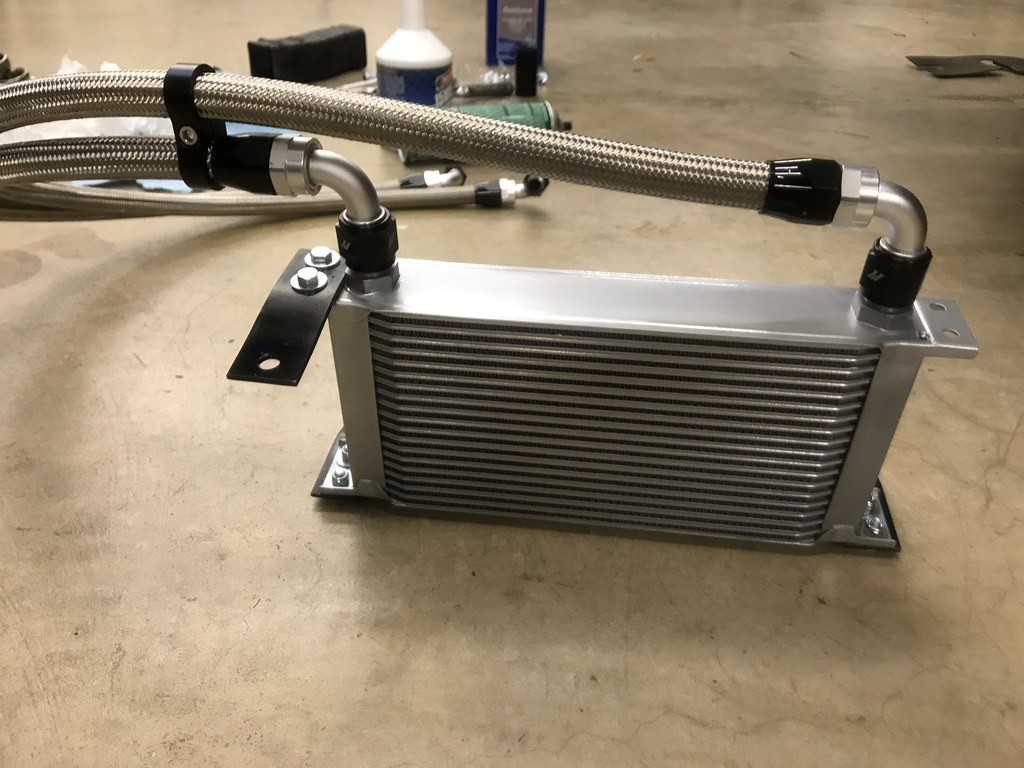
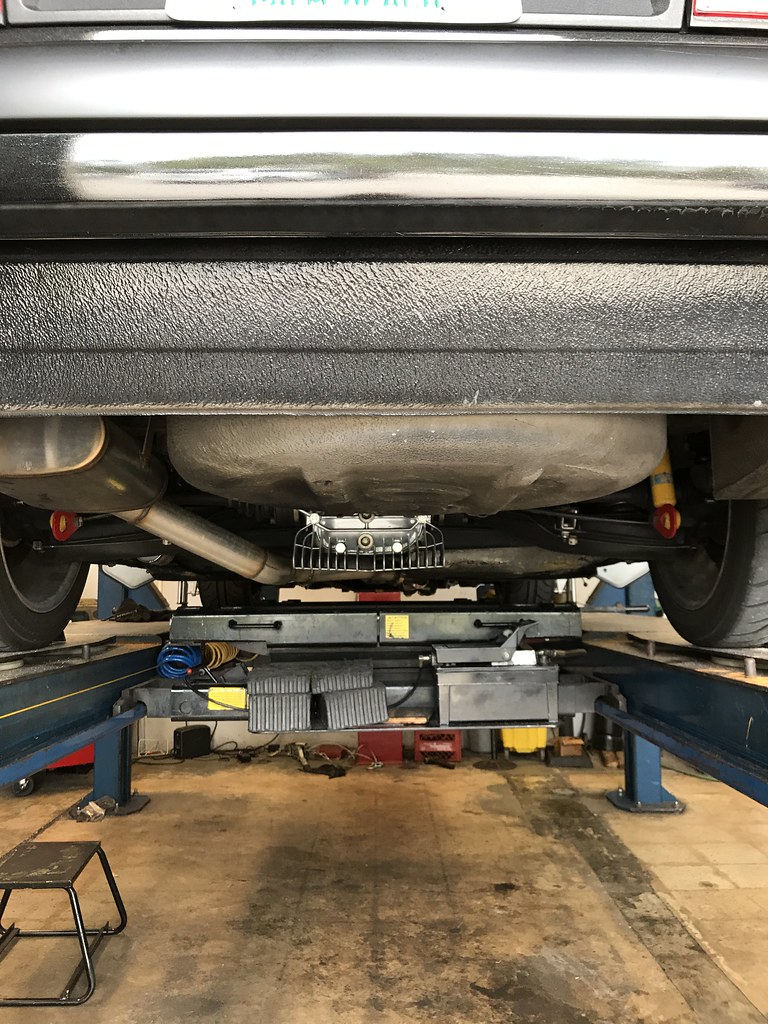
Next up, I installed my oil cooler. I started out with the Mishimoto Universal 19-row Oil Cooler Kit. I went with the non-thermostatic sandwich plate since it's one less thing to leak or fail. If your car gets daily driven I would recommend the thermostatic plate so the oil warms up faster. The kit comes with 1x 4ft and 1x 5ft braided stainless -10AN lines, but I also bought a 3ft length just in case.
I started out by mocking everything up. It was easy to tell the 5ft line was too long for anything, and I'd be using the 3ft and 4ft. I could also see that while the lines come with one end having a 90* bend and the other end straight, I would need both ends to be 90*. I took them to a local race shop where I discovered Mishimoto uses a weird non-standard outer diameter, so standard -10AN fittings won't work. Essentially, the inside diameter is -10 but the outside is closer to -12. Mishimoto doesn't sell just their fittings, so I ended up buying another line and using the 90*s off the 5ft line and the other one I bought.
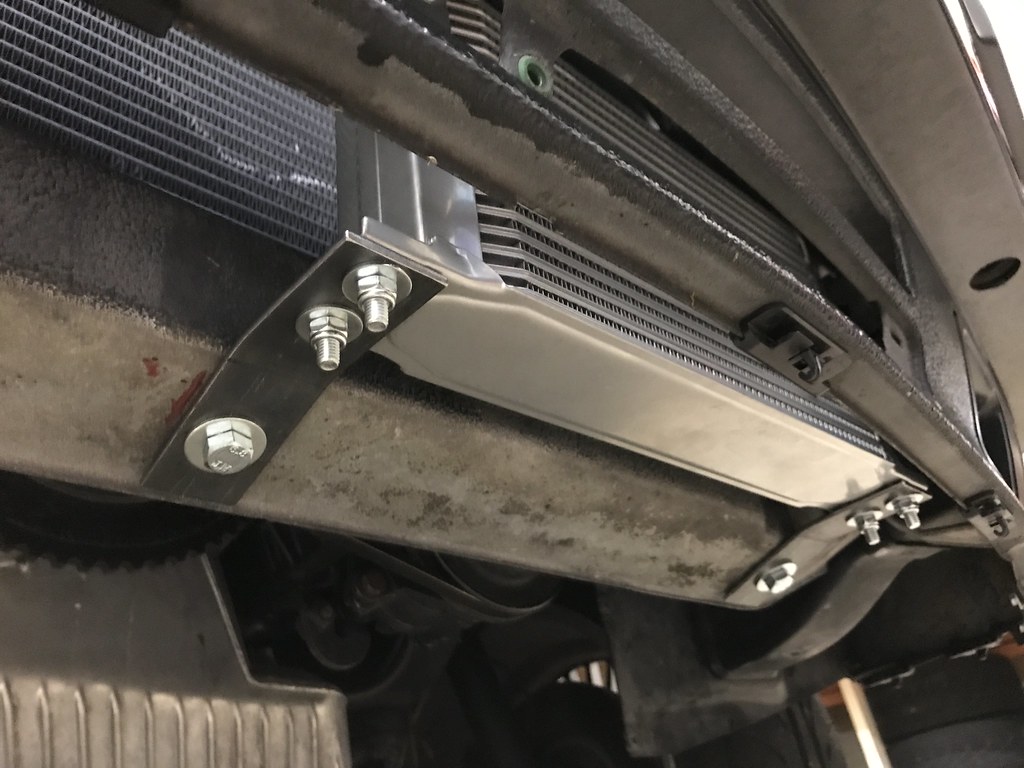
Routing the lines without any tight bends and using the 3ft and 4ft lines without chopping them lead me to mounting the oil cooler core on the driver's side of the car. The lines transitioned smoothly, and I was able to utilize a lot of the stock radiator plastic ducting to help me route air properly both into the oil cooler and the radiator. I also made a bottom cover to keep air from passing underneath the cooler, with holes in the back to let out the hot air after passing through the cooler.
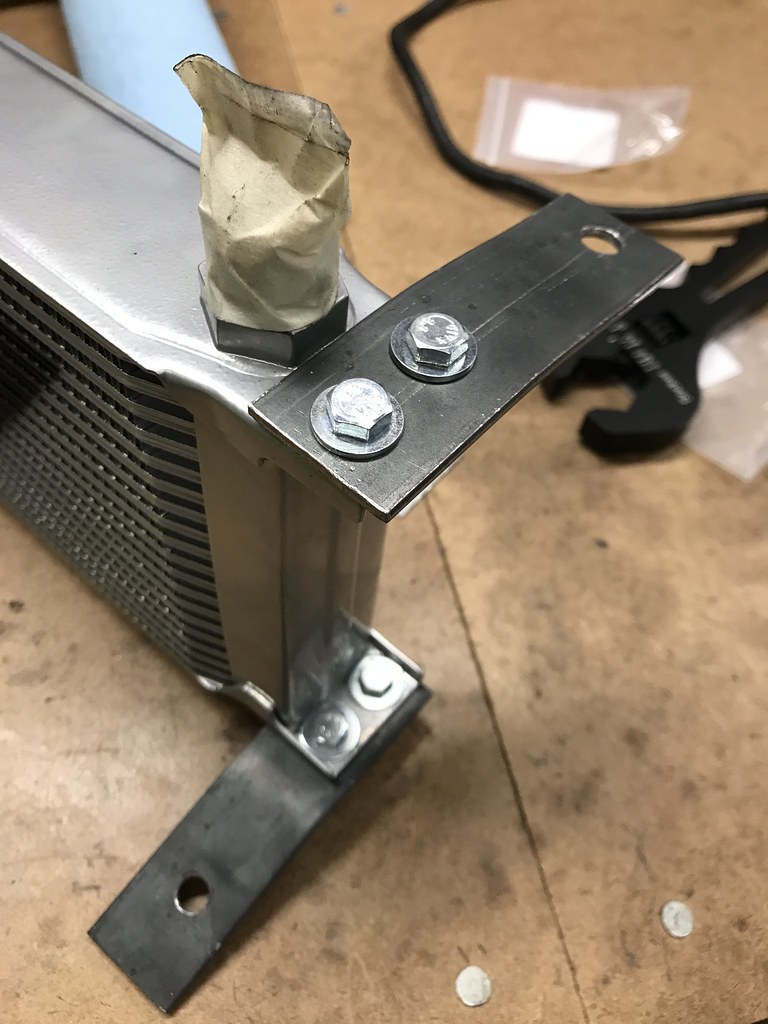
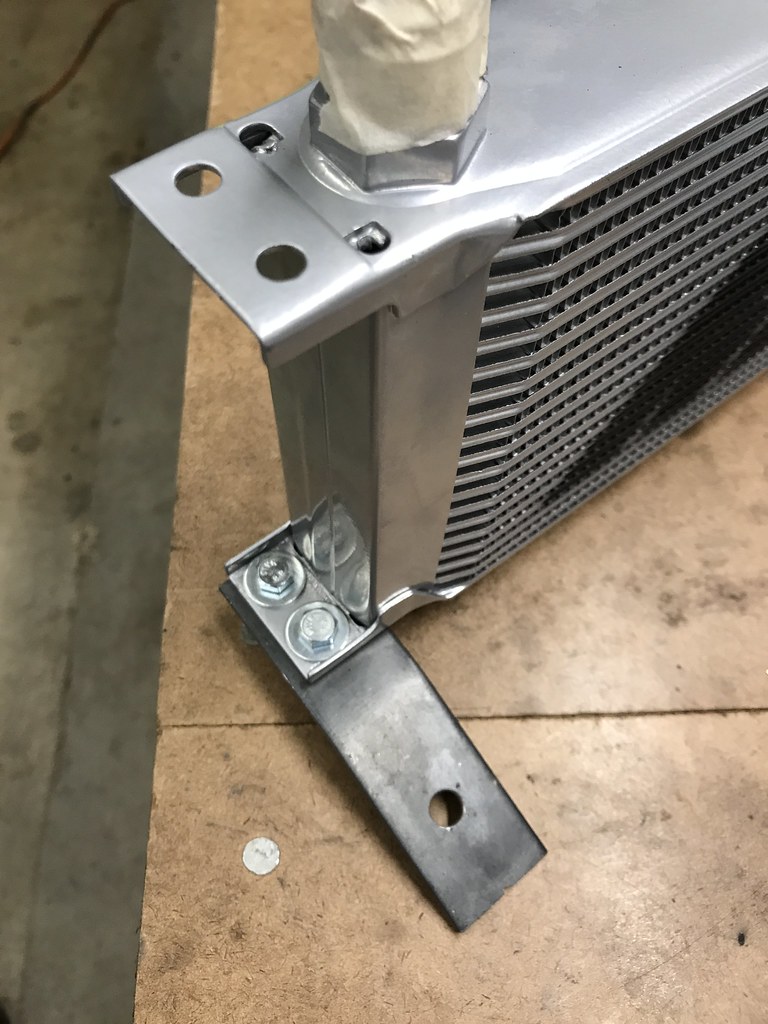
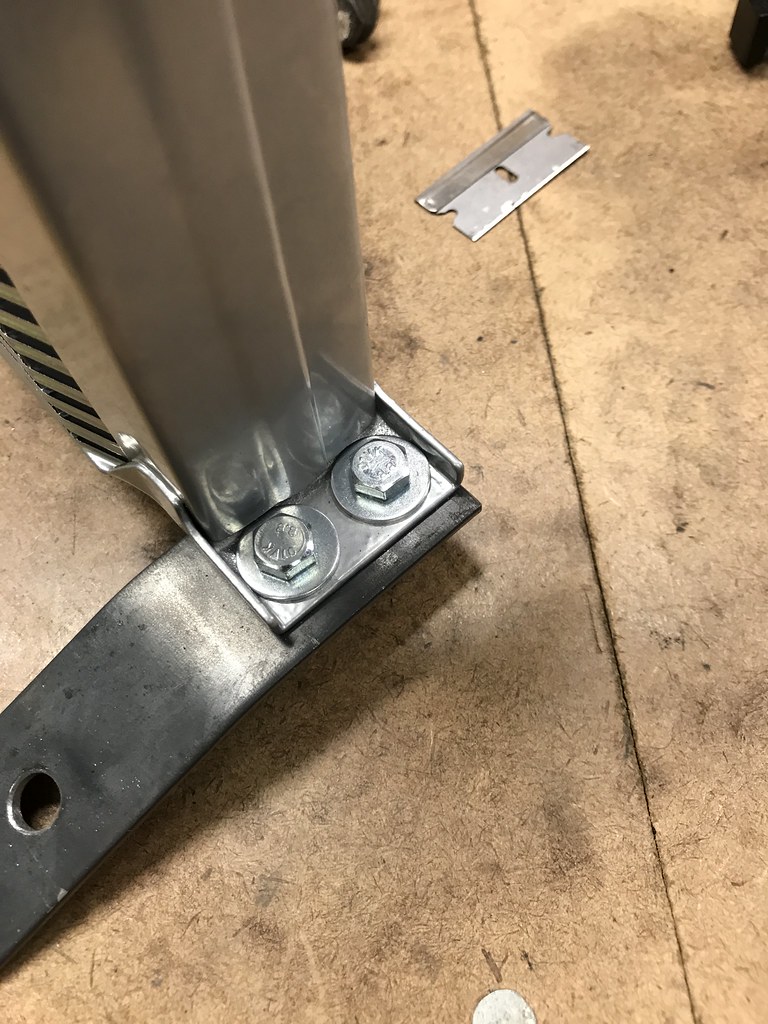
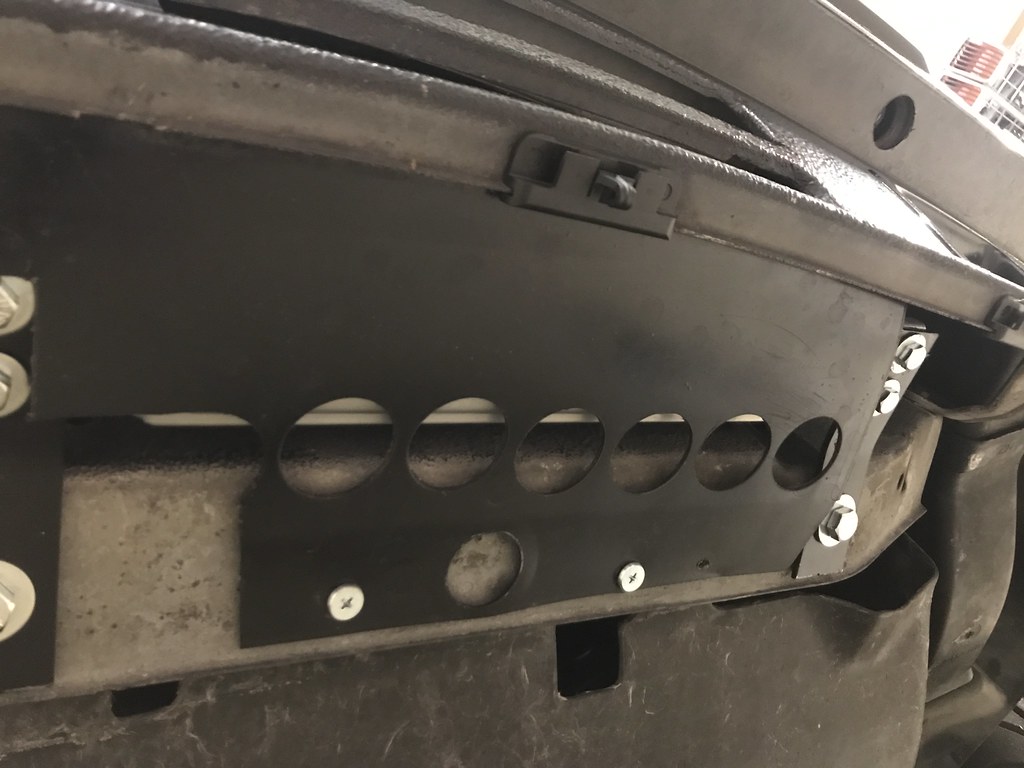
I bent the brackets from 1/4" thick, 1.25" wide steel flat stock. I used M8 rivet nuts to attach them to the radiator core support underneath. I did one top bracket for bracing, attached to the underside of the valance. The 19 row cooler is almost the perfect height to fit within the opening in the valance. The brackets mounted the cooler nice and solid.
Lastly, I trimmed the valance where the bottom row trim piece snaps in on the driver's side so it doesn't block the core at all. Then I trimmed my the 318iS bottom row block off trim in half, and made some more plastic ducting to keep the passenger's side open for the radiator, and the driver's side flowing into the oil cooler.
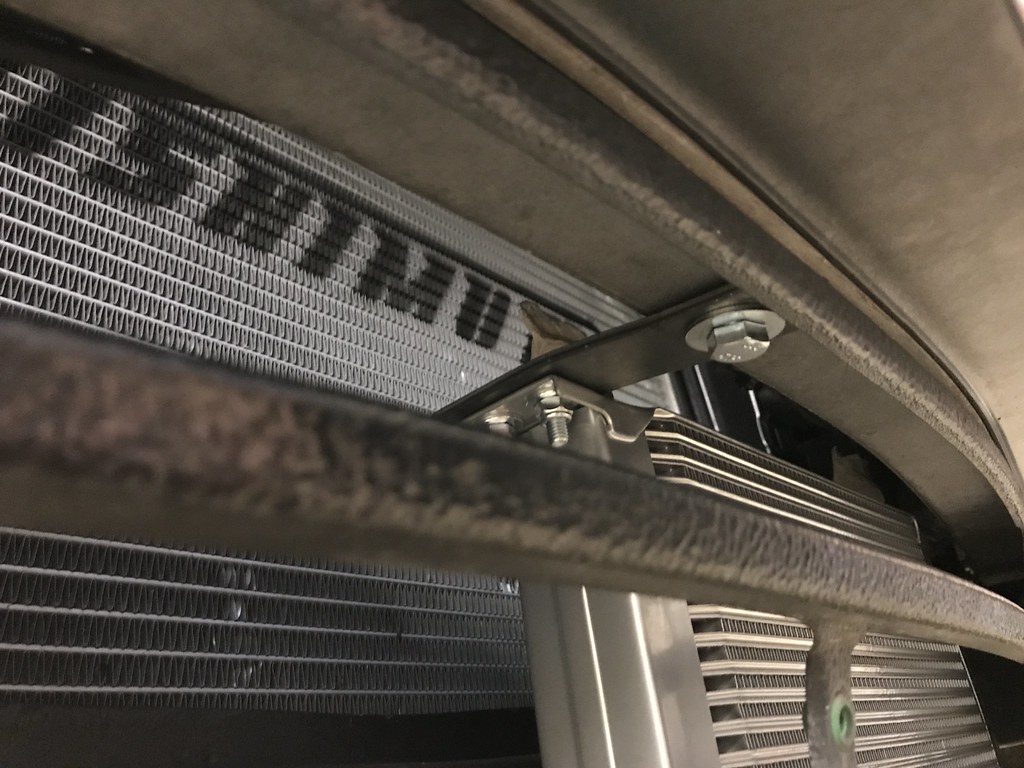

The thermistor for my oil temperature was bottoming out in the new sandwich plate, so I needed to clearance it a little bit with a dremel and a grinding bit. I cleaned it out THOROUGHLY after grinding to get all the shavings out.
Vibrant makes very nice line couplers that are cheap, about $6 and they are nicely machined and anodized aluminum. I used a few of them in key places to keep the lines apart.
Here is the valance after being cut, and then the trim back in place.
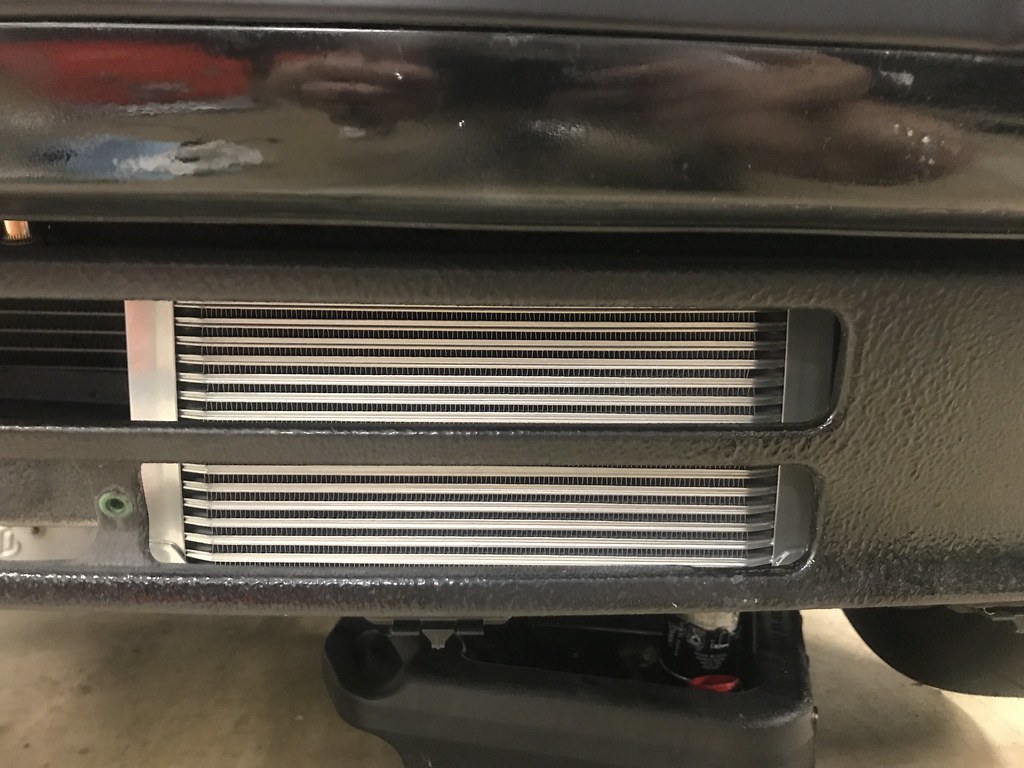
Block off trim under the oil cooler, and then the holes underneath.

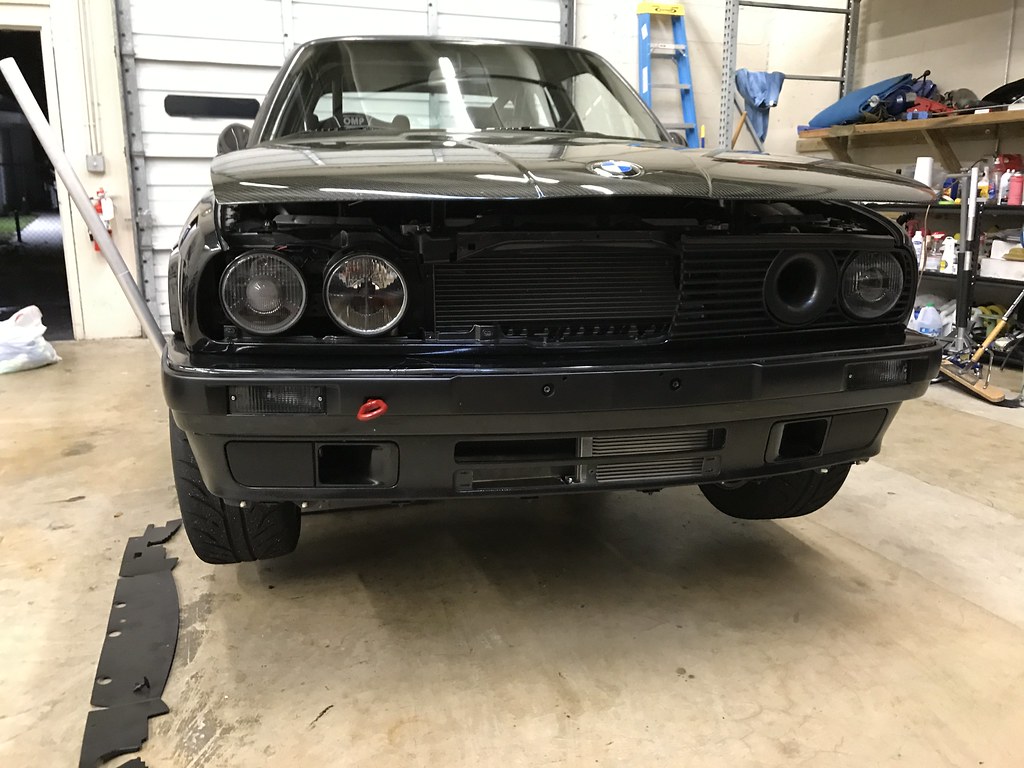
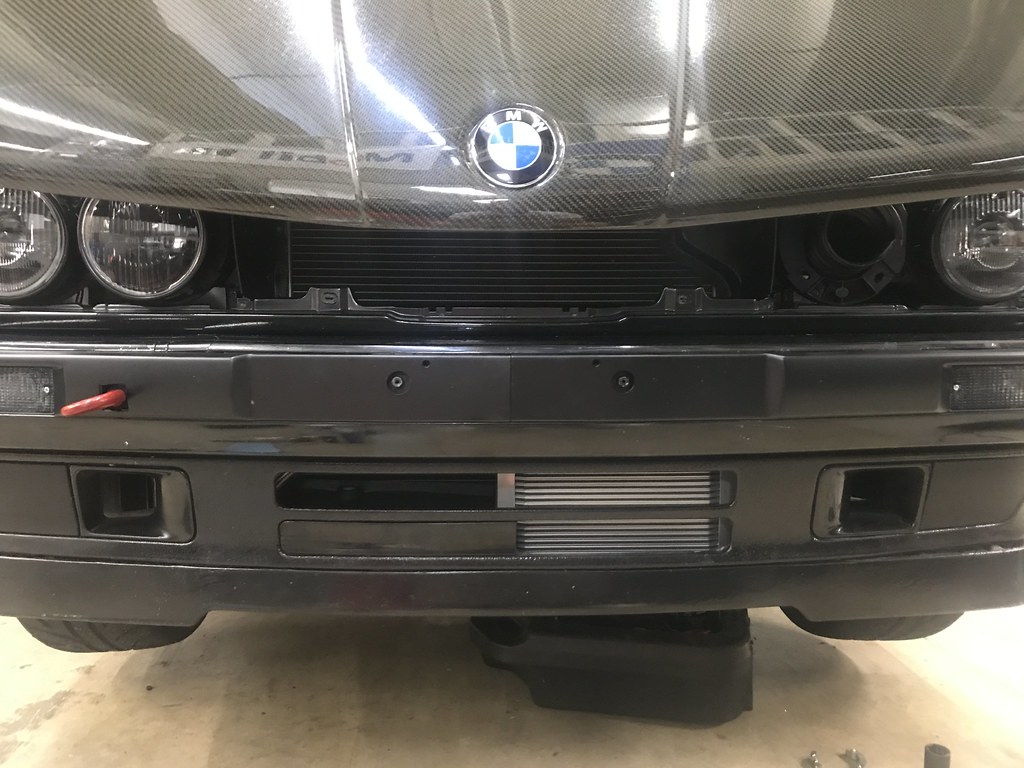
I forgot to take some good front end photos of the car with the grills back in and not so close up, but I actually like the look of it off-center. It bothered me at first, but when the car is on the ground, it's not very noticeable, and it just looks purposeful. Plus, I think it functions well the way it all came together. I forgot pictures of the sandwich plate area as well.
The lines pass through the stock oil cooler line slots in the undertray, so it all lined up and worked perfectly!
I drove the car around for 45 minutes to warm the oil up good and kept checking for leaks. I could easily see a 20-25* F difference in the oil temperatures. I'm hoping to stay in the 240-250* max range when on the track.
Luckily the lines and sandwich plate were all leak free!
Right when I was about to drop the car back down on the ground, I saw that there was oil all over my tranny bellhousing again. FUCK. At first it looked like it was coming from inside the bellhousing. I had already changed my rear main seal and input shaft seal when I put the new motor in, and it was leak free! I was seriously pissed. I have a track day and an autocross coming up this week, and that was seriously going to dampen things. I didn't want to burn up another clutch from oil getting on it.
After poking around it became apparent that the leak was higher up on the tranny itself, and just pooling by the drip slot on the bellhousing. I took the flywheel cover off to be sure, and it was dry inside. PHEW. Having changed all the seals: input, output, selector rod, detent pin cover, I figured it was the top vent leaking. Sure enough, when I touched the vent cover, I heard a hiss as it let some pressure out of the tranny, and it was all wet up there.
After doing some research, I came across this thread and several on the SpecE30 forums. Apparently the fluid leaking from the vent is very common on track cars! I had not noticed any leakage before when driving on the street, but it must have leaked and got the tranny all wet during my last track day, and I just noticed it now.
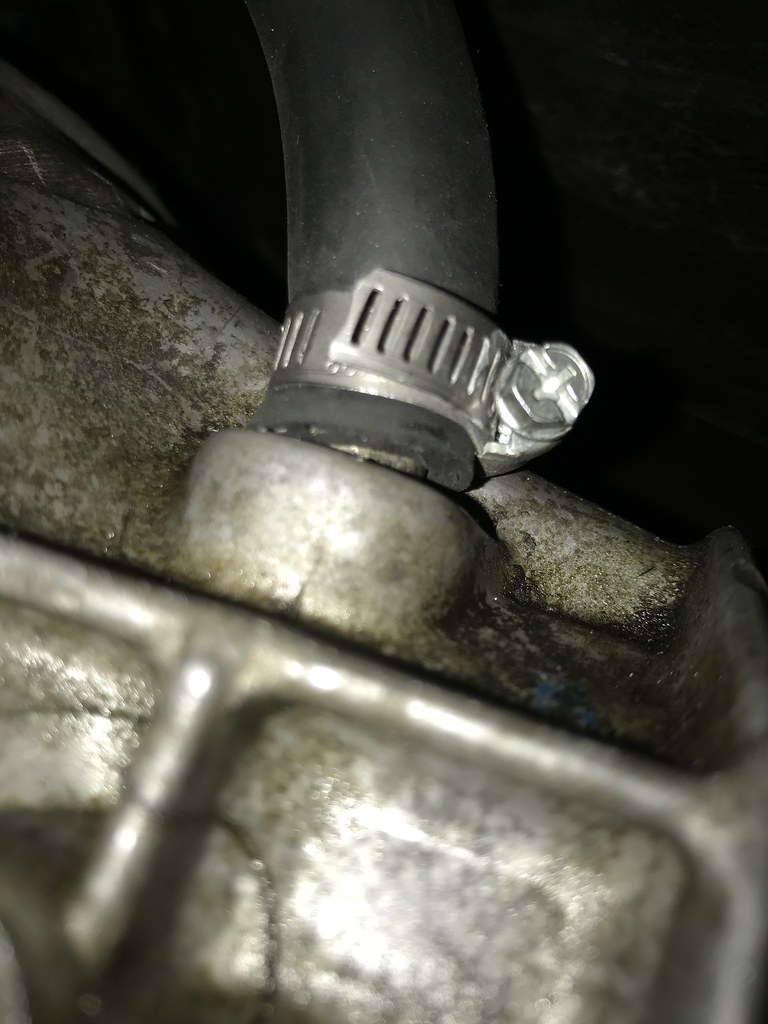
The best way to fix this is to drill and tap the vent nipple and put a 90* fitting on it. I was not about to drop the tranny just to do this though. bmw-slangen and others have had success putting a rubber hose on the nipple and running it up into the engine bay, so I went that route.
I disconnected my exhaust, shift linkage, CSB, tranny support bracket, loosened the motor mounts, removed the clutch slave cylinder, and removed the bracket/brace under the bellhousing that sits behind the subframe (preventing your motor from shifting too far forwards if you have bad driveline mounts). This allows you to drop down the tranny enough to give a little more clearance to install the breather hose.
First push off the plastic vent cap. You're going to be working blindly, but tighten your hose clamp a little bit so it's not too loose on the 1/2" hose, and then slide it over the breather nipple based on feel. Tightening the hose clamp is the hardest part with the limited space, but mine went on and it was on there solid. Raised the tranny back up and checked the hose. It doesn't have much room, especially with the large 1/2" hose, but it wasn't pinched so it should flow freely. Then I ran the hose up near the fuse box and capped it with a breather filter from the auto parts store.
I had tried slipping 3/8" hose on there. It would go on but pop off immediately. I think the nipple is 12mm, so the 1/2" hose was perfect. A normal hose clamp worked fine, there is just so little room to get a wrench on for tightening it, so it's tedious.
If you track or even autocross your car you should go ahead and do this! I wish I had known last time my tranny was out, as it would make the job a lot easier.
Thanks again bmw-slangen!
I'll get some better pictures of the front end of the car, as well as where I mounted the breather filter for the tranny in the engine bay this week. I'm sure I'll have some photos from the track day and autocross as well!Leave a comment:
-
you threw alot of money and work at this car, and it definitely shows. Good shit man!Leave a comment:
-
Thanks man!Originally posted by Joeyz31 View Post
Camber plates are a royal pain, especially since no matter what I'm still limited by the stock size spring hitting the inner strut tower. Oh well, coilovers will solve that when the time is right!Leave a comment:
-
Wow, awesome thread. your car looks great. I just read through your most recent post about the top hats and can completely relate. I just went through the same thing with a pair of older IE camber plates and ended up just going back to stock top hats for now. I totally feel your pain. I miss having any camber up front but will have to wait until i do coilovers. Regardless, glad you figured your set up out and it looks awesome.Leave a comment:
-
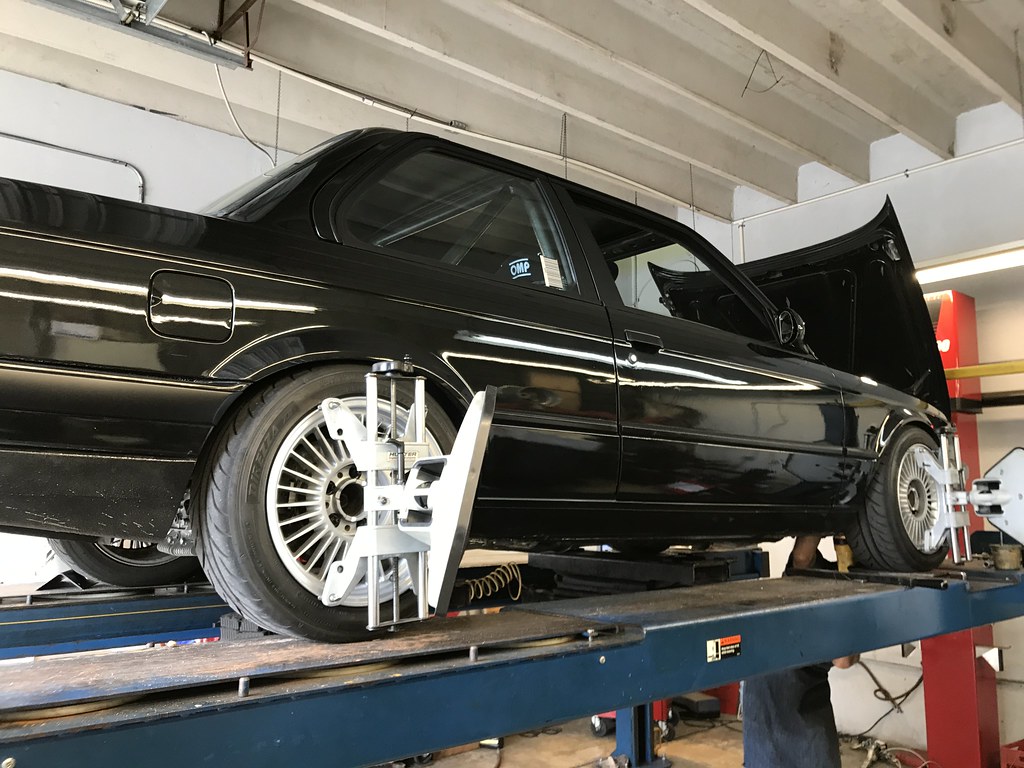
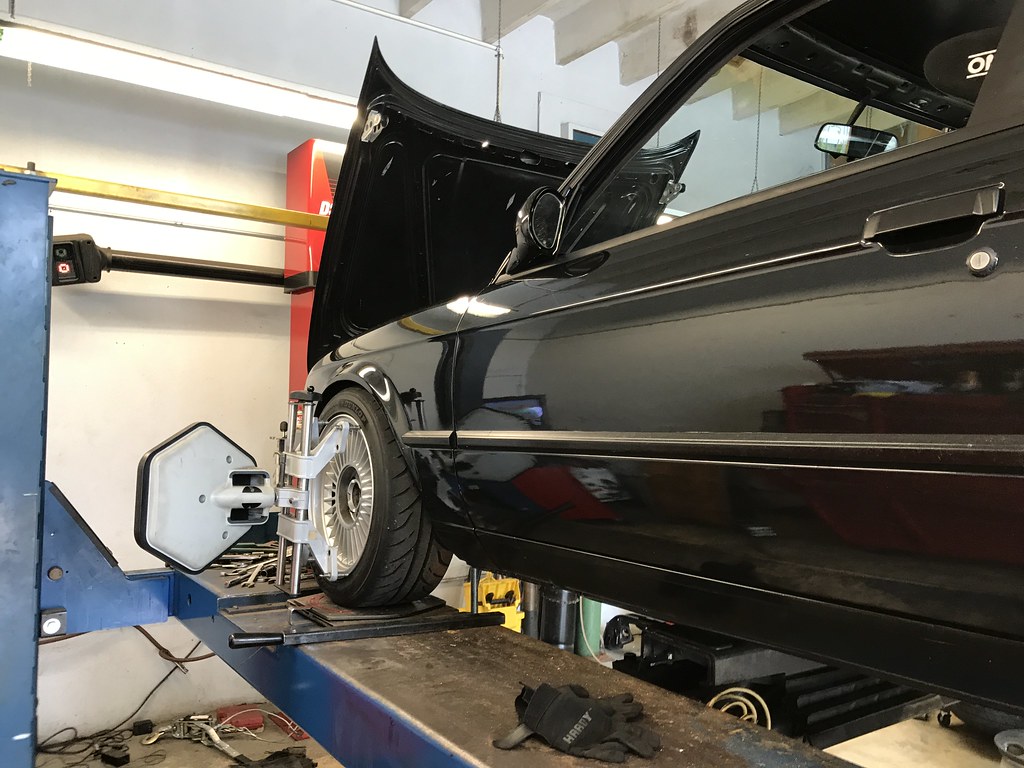
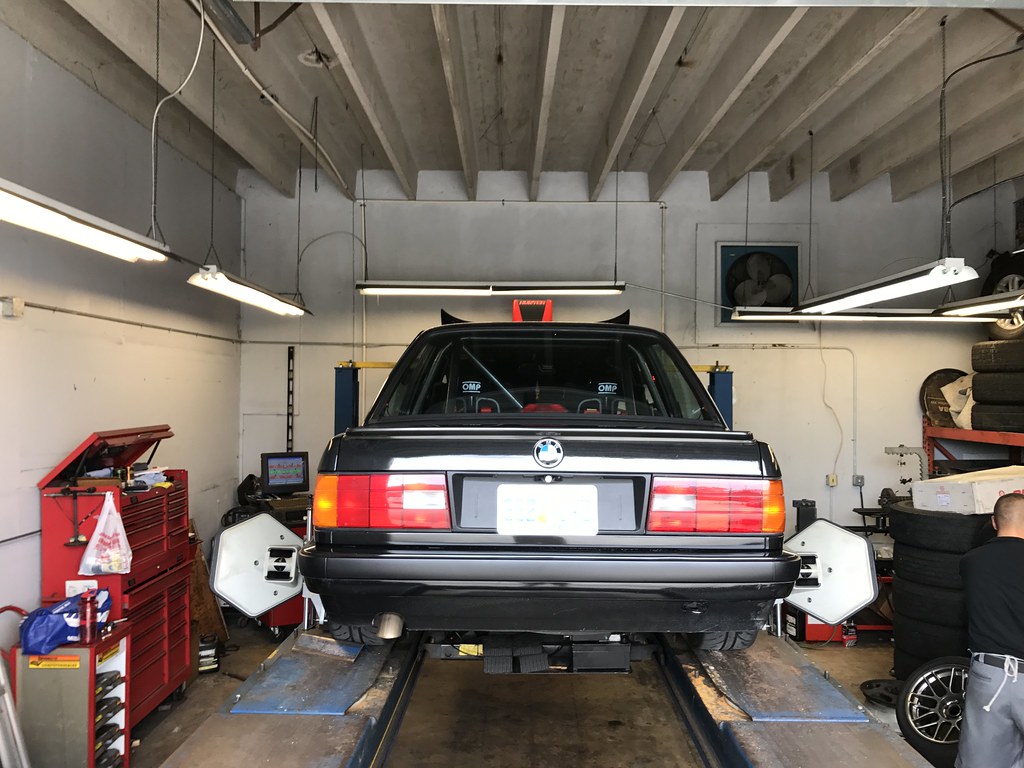
Lots of updates, with not a lot of pictures to go along! I missed the track day deadline on the 18th, but I DID make it to the autocross on the 22nd which I was thrilled about. It was a bit of a thrash-fest the last week to button up the interior, get the new camber plates installed, and get the car aligned.
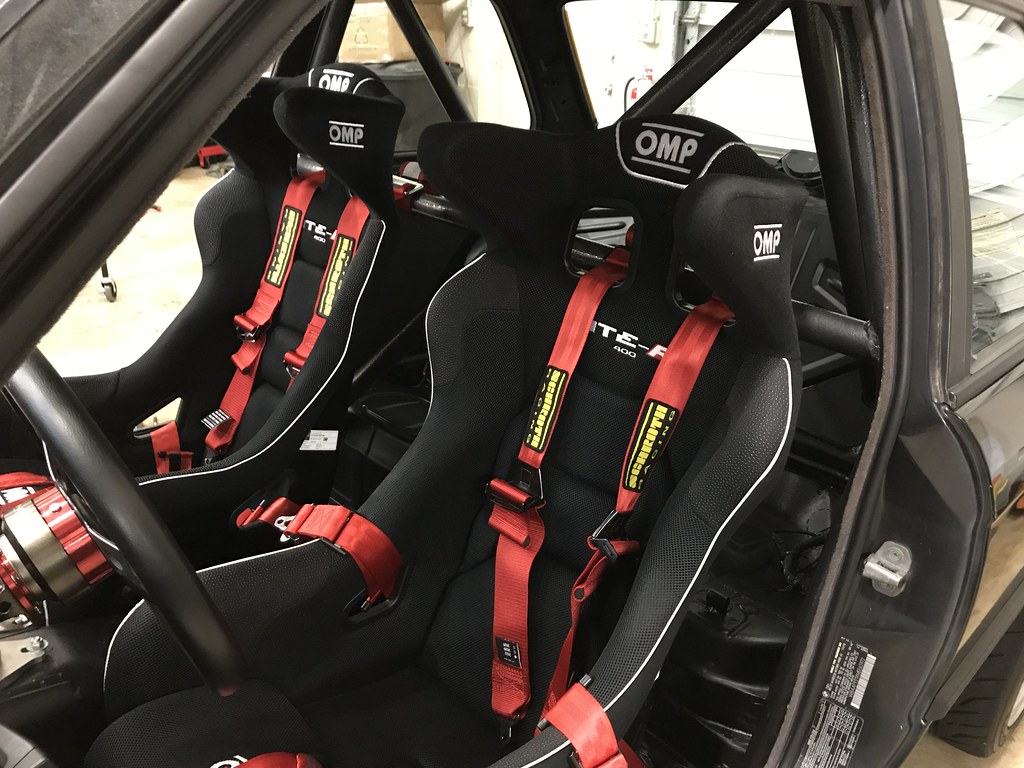
My friend helped me align and wrap the belts on the roll bar. Luckily the lengths of the lap and sub belts as supplied by HMS Motorsport were good and I didn't have to adjust those. That whole process was pretty easy. I drilled the holes for the sub-belt eyebolts, painted over the raw metal, and then used clear RTV to seal the plate underneath to prevent moisture from getting behind the plates. It took some experimenting with washers to make sure that the eyebolts aligned in the proper direction while also reaching the correct torque spec.
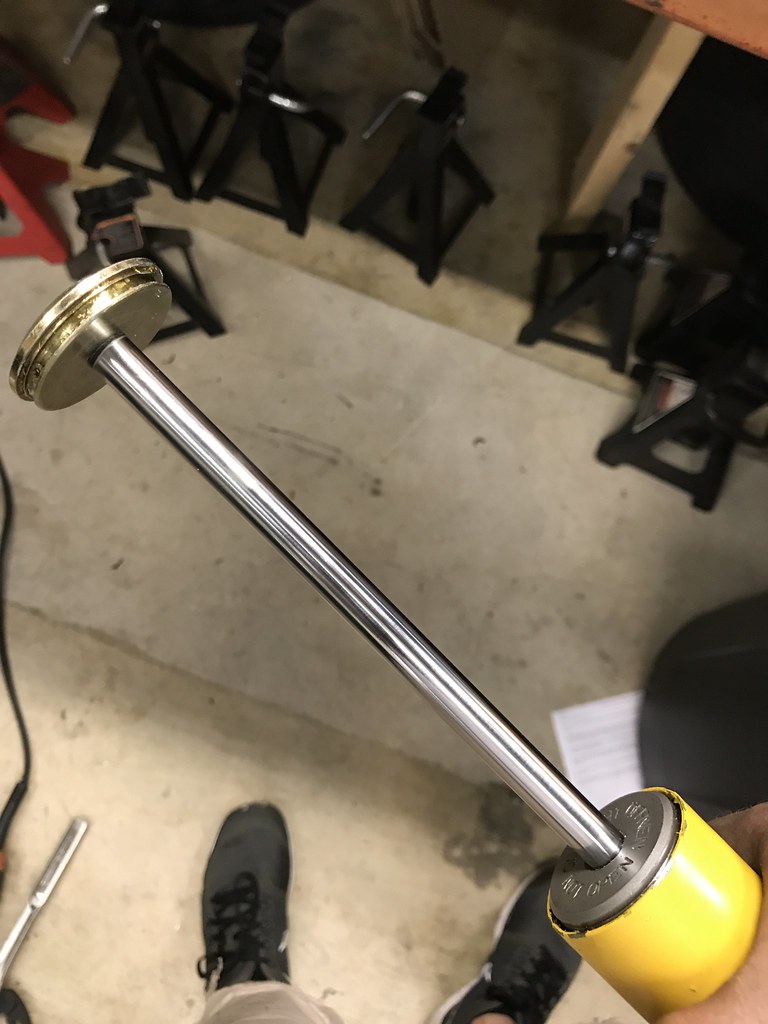
Installing the camber plates was not simple at all, just as I suspected. I started out with disassembly, and I also pulled out my Bilstein Sports as I was going to shorten the internal bump stops by an inch. As it turns out, my bump stops had already disintegrated themselves and were essentially mush. They just crumbled out when I opened up the shock body. I obviously didn't have anything else to put in there, so I cleaned them up and reassembled without bump stops.
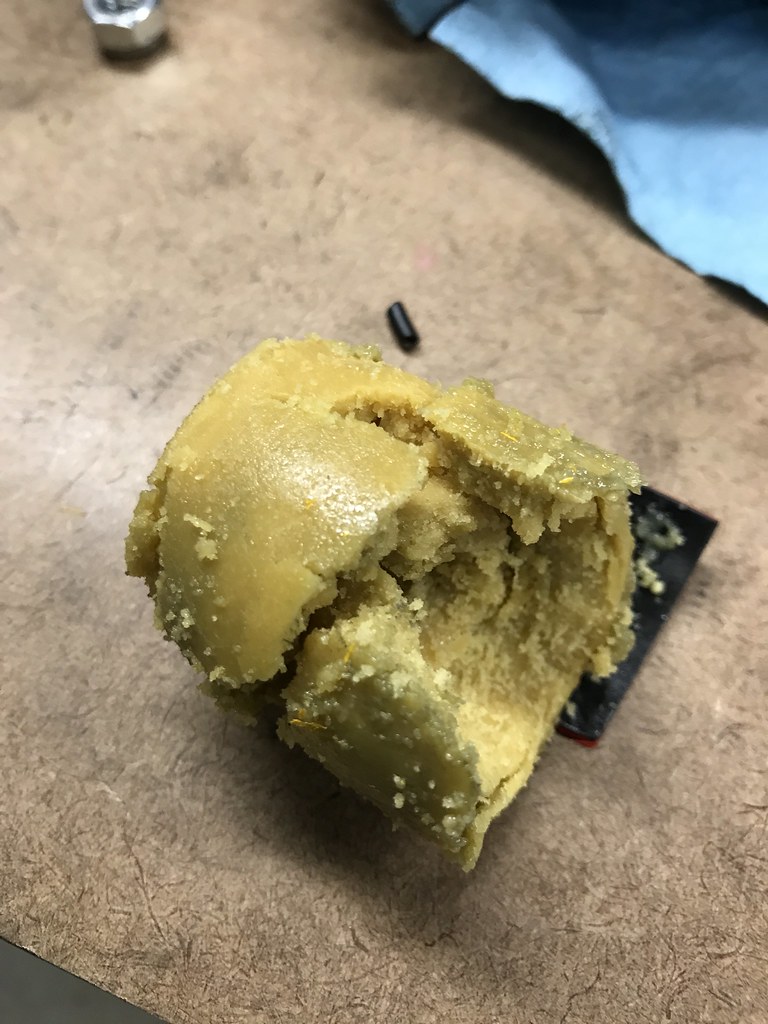
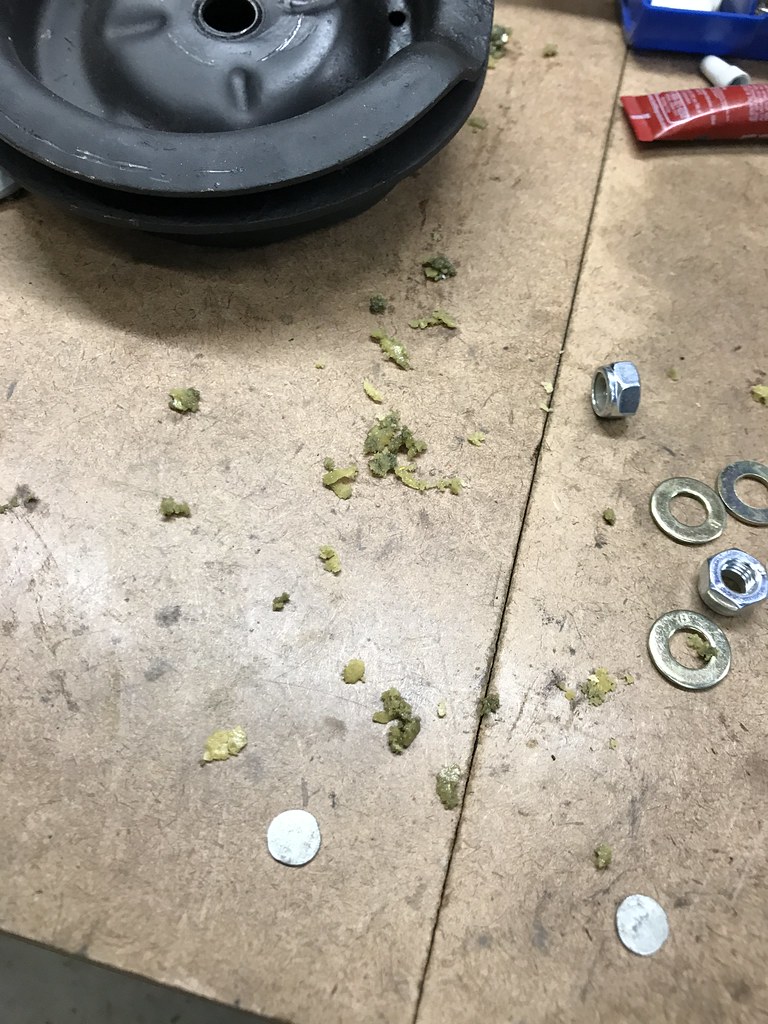
That is less than ideal, but I don't think I am going to end up doing anything. These shocks are still good, but they are pretty old and came with my old chassis. I plan to upgrade to coilovers in the near future, so this will do for now.
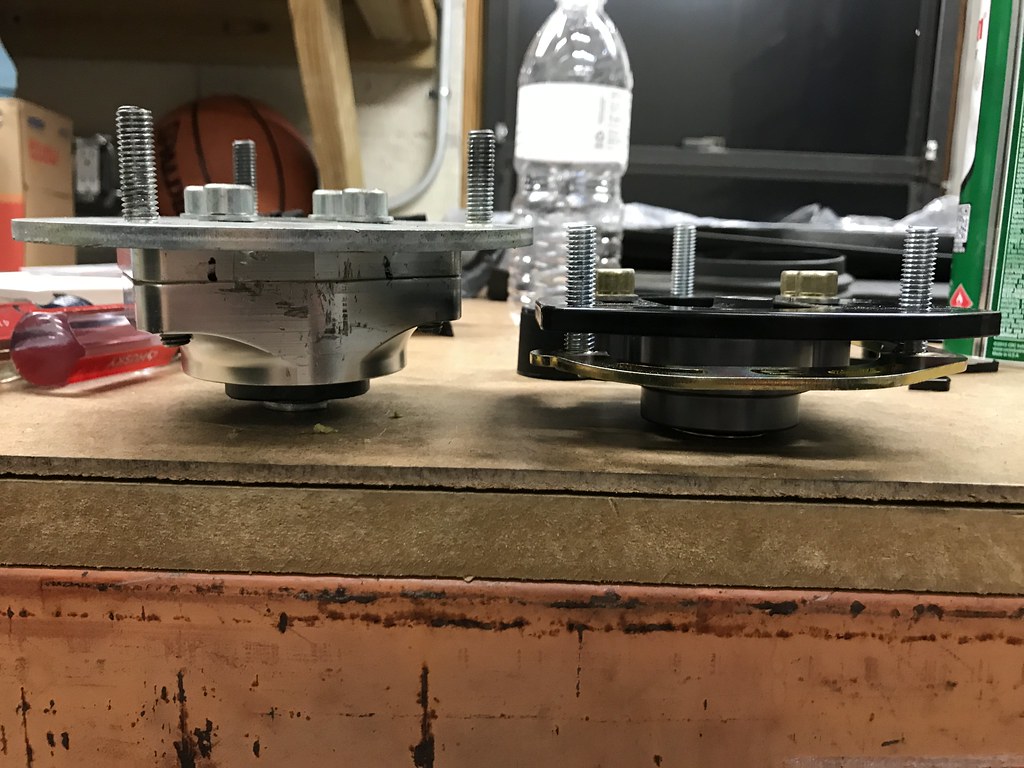
Next up was the Ground Control SpecE30 race camber/caster plates. They are very nicely made pieces. As you can see from the photo below, the stack height is much thinner than the IE plates I had previously.
I had previously had lots of binding issues with the IE plates, so I was skeptical that these were going to clear the spring perch without binding. Sure enough, they were essentially in direct and full contact with the spring perch when I installed them as advised by Jay @ GC. I had purchased brand new spring hats to make sure they weren't bent at all. As it turns out, my old ones were indeed bent. The new ones went in with the stock flat washer, and they were completely bound up.
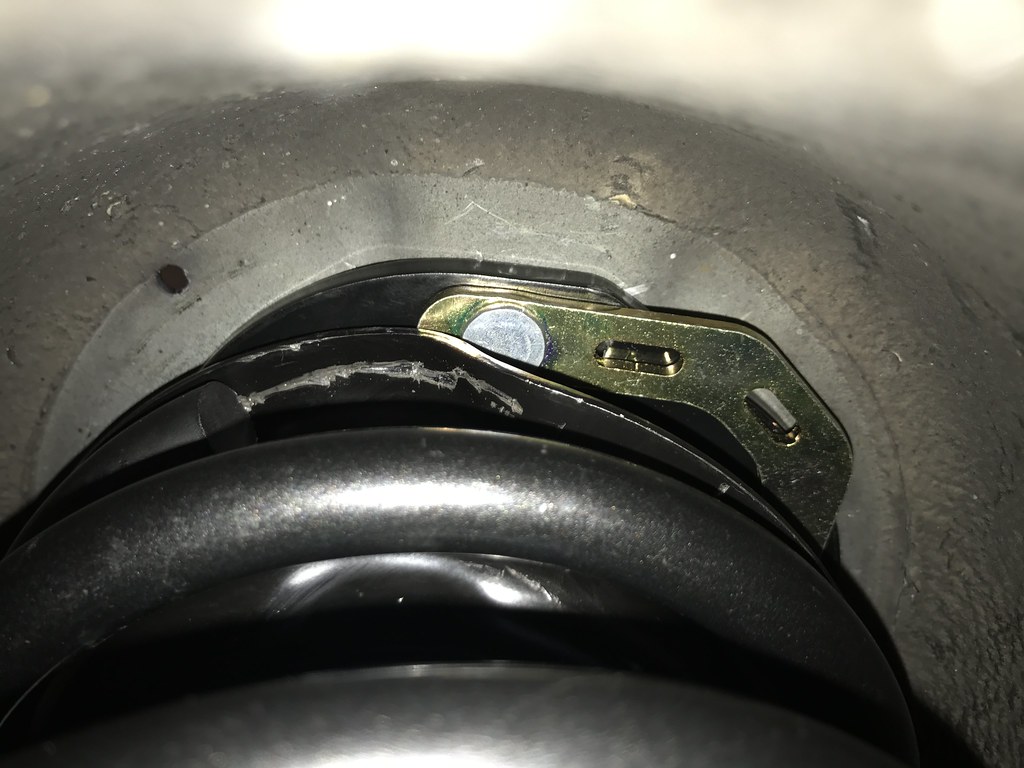
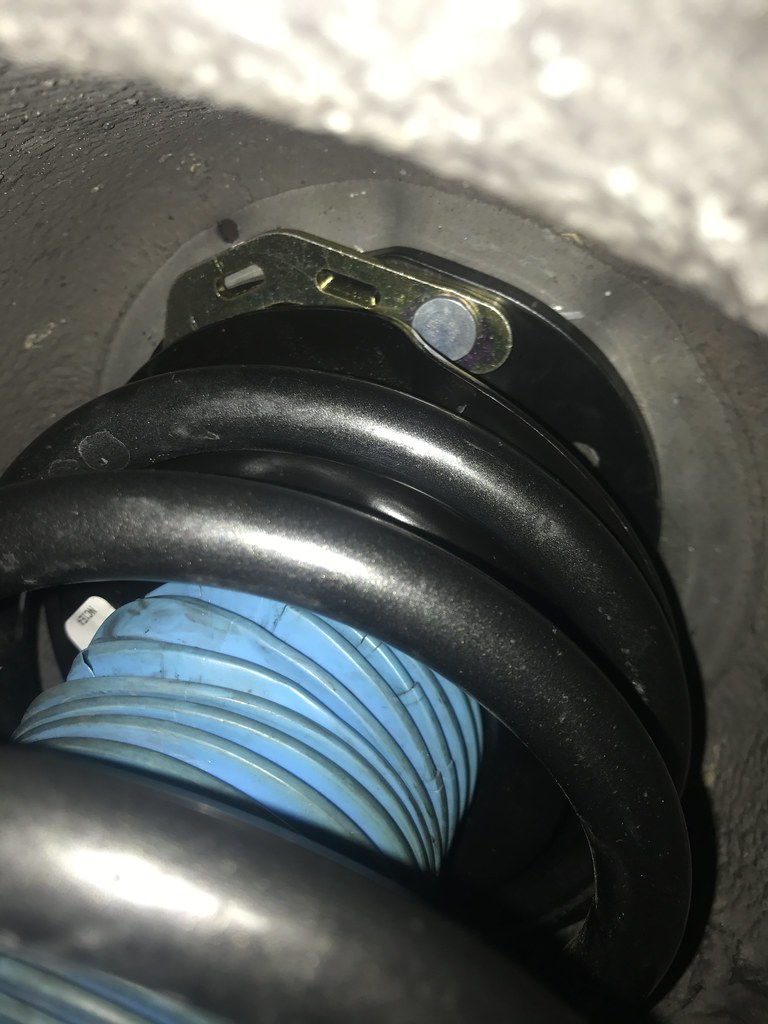
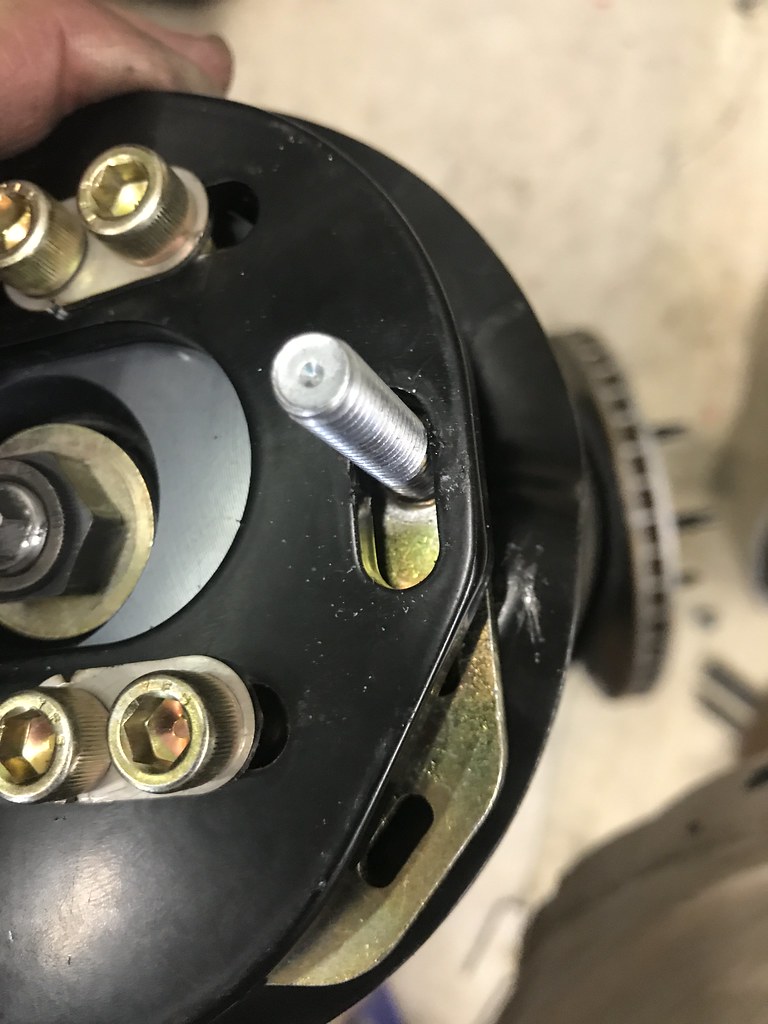
I kept taking them in and out trying out different combinations of spacers to get them to clear without binding. It took several frustrating hours, but I found a stop-gap that is going to work until I switch the coilovers. I needed 4 spacers under the plate. The problem was that my Bilsteins did not have enough thread left over to engage the top nut. I had to get the car aligned that day, so I ended up taking off the top brass washer/spacer that is included with the GC plates. The shaft is still aligned by the lower spacer, and while this is certainly not ideal, it's working okay so far. The top nut still is about 1 thread short of fully engaged, so I installed it with blue loctite. It has not loosened up at all (yet). The nut, shaft, and spherical all spin freely with the steering, as intended, so I think it should work until I upgrade to something else.
The alignment was pretty easy this time. I gained about half a degree of camber with the lower GC plates than I had with the IE's, which is about what I had hoped for/expected.
Belts and seats back in the car!
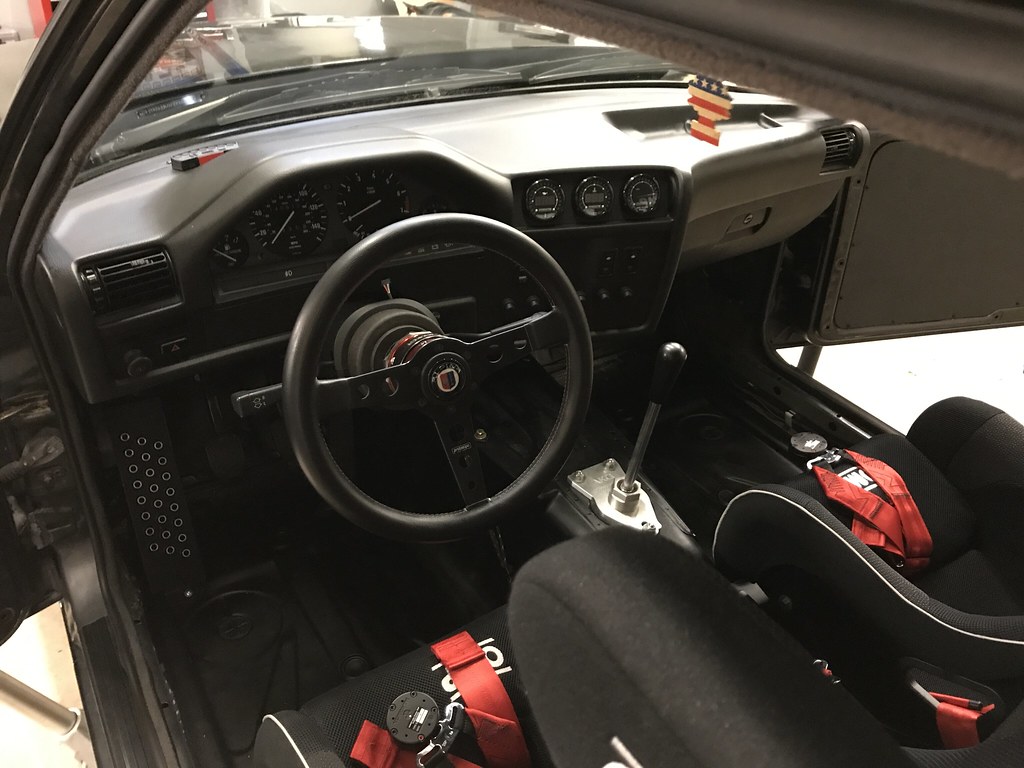
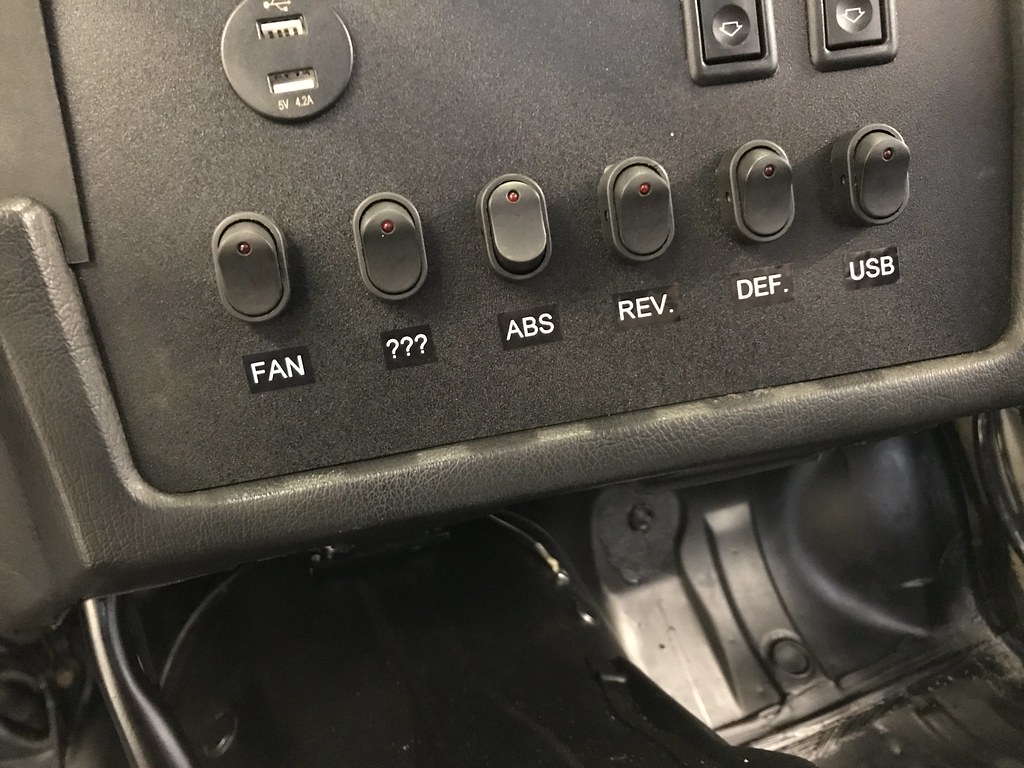
The morning before the autocross, I did some small things to the car that I had been putting off. I aimed the headlights (THEY WERE BAD!), changed the oil, labeled my switch panel, plugged some holes in my firewall and tranny tunnel, and a few other small things.
Here's a couple of pictures from the autocross. It was on a fairly large karting track. Not technical, but a lot of fun! I was in 3rd gear at times.


Lastly, here is a link to a cell phone video a friend of mine took. You can hear the exhaust pretty well in the video. I forgot to setup my GoPro, but I'll make sure to take some video myself at the next event.
Leave a comment:
-
Thanks fellas!
Yesterday I was hoping to install the camber plates and the sub-belt anchors, and finish up the last tiny bit of work on the dashboard. However, as soon as I plugged in my hazard light switch I realized I had an electrical issue. When the key was off/out, turning on the hazards also turned on my cluster, power to the window switches, and turned on my aftermarket gauges. When the key was switched on, it all worked normally.
I spent hours trying to figure it out. I did everything from testing all fuses, to removing and testing every relay in the engine bay and under the dash. I also tried multiple hazard switches, multiple headlight switches, removing all switches, tracing the splices I had made under the dash, etc.
It seems like the issue is with fuse 24 and/or the K7 unloader. I tried different relays on the K7 and nothing seemed to work. Fuse 24 is only for the constant power to the hazard lights. Pulling fuse 24 would obviously stop the issue, but also keeps the hazards from working with the key off.
The only other thing I could think of is that it had something to do with the switched power from fuse 4 (grey/violet wire). I had snipped out the glove box light and glove box switch, which runs on the same circuit. I don't know if that could be related in any way.
The other curious thing I found is that my grey/violet wire had an OEM splice close to the base of the hazard switch. I could not find that splice anywhere in the ETM. I don't remember what it was originally for. I had been using it as a switched 12v trigger wire for my electric fan relay. With the key off and the hazards on, that grey/violet wire which is supposed to be switched 12v was getting power. Last ditch idea is that there is a short inside the switch, bridging the switched grey/violet with the always hot red/white wire. But having tried two switches, it seems unlikely that both would have the same issue.
It drives me nuts that I couldn't find the issue, but I had to move on. I spent a good 5 hours trying to figure it out. For now I have pulled fuse 24, so the hazards don't work with the key out. I didn't want to risk a power drain when the car is off. Other than that I couldn't find any other issues or problems. Maybe I'll come back to this down the road.Last edited by Digitalwave; 07-16-2017, 06:03 AM.Leave a comment:
-
If anyone following this thread is electrically inclined, please check our these 2 threads. I'm dumb and can't figure this stuff out on my own.
ABS toggle switch: https://www.r3vlimited.com/board/sho...d.php?t=409414
Defroster and hazard toggle switches: https://www.r3vlimited.com/board/sho....php?p=4804906
I've got links to the appropriate ETM pages in the threads, so someone that has a better understanding of electric schematics can probably figure out what I am trying to do easily.Leave a comment:
-
Innovate MTX gauges. The left is oil pressure and oil temp, the center is water temp and voltage, the right is a wideband.
The shift light is seriously the coolest thing. Ecliptech made a hell of a product! It has 2 buttons and a pretty robust menu system. It's really customization and surprisingly easy to setup.Leave a comment:

Leave a comment: