Announcement

Collapse
No announcement yet.

Project Weißer Regen: 91 318iS Restomod

Collapse
X
 
  • Filter
  • Time
  • Show
Clear All
new posts

  • roznic
    replied
    Originally posted by Jordan View Post
    Yes, extremely so. The bottom stainless crap is crimped in place but can be pried out relatively easy. Once it does everything just falls apart. Clean fleece and covers, discard old charcoal, and pack with new charcoal upon reassembly. It uses about $5 of charcoal and saves the $300 the stupid thing costs new.

    Here is someone elses photo, and note he drilled out the crimps which I did not need to do... this is also like 20% of the charcoal actually inside.


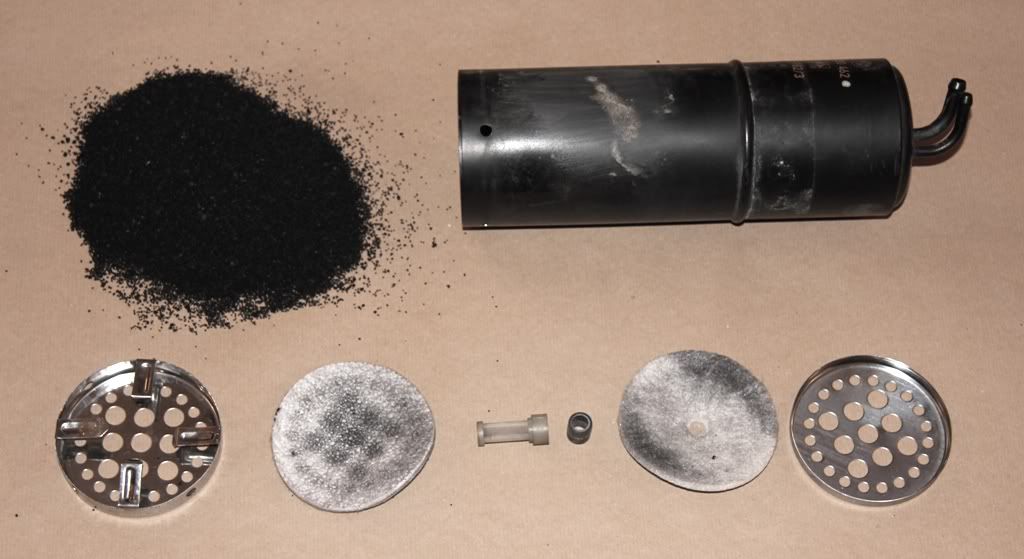
    Perfect timing lol..
    Any specific charcoal to use and where to source it??
    Thx.

    Leave a comment:


  • Jordan
    replied
    Originally posted by Digitalwave View Post
    Is it easy to "rebuild" the charcoal canister?
    Yes, extremely so. The bottom stainless crap is crimped in place but can be pried out relatively easy. Once it does everything just falls apart. Clean fleece and covers, discard old charcoal, and pack with new charcoal upon reassembly. It uses about $5 of charcoal and saves the $300 the stupid thing costs new.

    Here is someone elses photo, and note he drilled out the crimps which I did not need to do... this is also like 20% of the charcoal actually inside.

    Last edited by Jordan; 04-01-2019, 08:40 AM.

    Leave a comment:


  • Digitalwave
    replied
    Is it easy to "rebuild" the charcoal canister?

    Leave a comment:


  • bradnic
    replied
    That’s the most gorgeous charcoal canister I’ve ever seen lol. Love it, and definitely doing that in my E30s

    Leave a comment:


  • Jordan
    replied
    A little more farting around in the garage today, putting in small items and trying to makes notes as I go as to what odds and ends I need to put in on my dealer order Monday.

    I install the rear c-pillar foam trim. The passenger side was still available so I purchased it, the drivers side unfortunately is NLA. I recreated it as best as I could with foam and butyl sound deadener.


    My OCD wants to make another matching one for the passenger side and junk the genuine one buuuuut man you're never going to see it once the headliner goes in anyway.

    Making no cut wiring adapters for the Euro city lamps


    I completely forgot to take any photos but I opened the charcoal canister and dumped all of the old charcoal into the trash. This canister came off my parts car which had not run in 10+ years, the charcoal still stank of varnishy gasoline. I refilled the can with new activated charcoal and crimped the bottom back on. Once done I carefully masked the screen printed lettering tight up on the letters and then painted the canister so it looks new again. I was careful to blow in light around the letter mask and the end result looks perfect.


    Last task for the day was getting the reconditioned engine air cleaner set in place.

    Leave a comment:


  • Sh3rpak!ng
    replied
    Nicely done. Those complex lines are a royal pain to do at all, let alone reproducing the OEM line...

    Not sure if you've ever come across these brake line fittings (or perhaps you have but decided not to use); they appear identical to the OEM fittings from what I recall after purchasing a few years back. Cohline brand.

    Bel-Metric sells metric hardware & specialty automotive supplies nationwide. Visit our website to purchase metric fasteners, nuts, bolts, Time-Sert kits & more.


    Sent from my SM-G960U using Tapatalk

    Leave a comment:


  • Jordan
    replied
    Todays project is one I have been putting off for awhile but had to be done. I wanted to throw out the old brake lines but I could not do that until I had replicated them in new PVC coated steel brake lines. I went with the Poly Armor brand as it is identical in every way to what was originally used in our cars, color and all.

    All of the old lines were perfectly find from a function standpoint they just had bumps, scratches, scrapes, and corrosion on them being 28 years old and all. The flare nuts also of course looked like crap.

    Making new lines means being able to install replated flare nuts... so here we go.

    There are 5 lines total that run between the ABS pump and the brake master cylinder area, one of them runs around the firewall to the right front caliper, another to the left front caliper, and yet another to the proportioning valve for the rear brakes.

    I separated the lines from the plastic spacer/holders and proceeded one at a time to carefully bend new straight brake line to match them perfectly.

    The lines with the fresh flare nuts of course are the ones I made.


    The hardest line of them all is the one that runs from the ABS pump to the right front caliper just because of how many complex bends it has and how damn long it is makes it difficult to hold and articulate while bending. All said and done I managed to faithfully reproduce each line the very first time with the exception of the super long one which I flared before installing a flare nut.... fuck... lol...


    Leave a comment:


  • rzerob
    replied
    Originally posted by Replicam3cabrio View Post
    Is a special tool, you can use an under size allen key but you are risking stripping the screws as they are brass.
    Sorry if I gave any misinformation. But like I said it has be a while since I messed with a stock head unit.

    Leave a comment:


  • bradnic
    replied
    @jaysterling at cantelouperadio.com has the pentalobe tool available for $5
    https://cantalouperadio.com/products/bmw-anti-theft-radio-removal-tool

    Radio looks great mounted up doesn’t it? Looks even better lit up.

    Making it Jordan-worthy took about 15 hours of work, mixing and matching bits from 12 (!) different radios.
    - Hardest part was getting a properly functioning tape deck together that was quiet and reliable. The tape deck that was delivered has components from 5 different radios. Tape head was cleaned and degaussed using professional solvents and tool, all rollers were cleaned as well. I finally found a source for tape deck belts too which is great news for cassette junkies.. As I find replacement rollers, capstans an other bits I'll add them to my tape deck refurb service.
    - The amplifier is completely rebuilt (all the 5907s and 5908s from @jaysterling, Levent, myself are).
    - Hardware is hand picked and correct, including the colored screws holding the tape deck in place
    - all lighting replaced with new
    - top and bottom covers are mint (I am going to start getting covers replated in the future)
    - faceplate and knobs ultrasonically cleaned and detailed by hand. In fact we replaced the faceplate that shipped with an immaculate one I obtained later.
    - heatsink was cleaned and polished to remove scratches (not functional but it brings it up to the snuff with the other external bits)
    - external radio harness replaced (these parts are NLA, and replacing them requires disassembly of the amp

    Here's the radio on Jordan's bench - he pulled the covers off to swap out an A- faceplate for an A+ one

    -the LCD assembly on the right is from 3 radios and has a new backlight in it
    -all the orange looking bulbs are new, as is the anti-theft LED
    -all the buttons were cleaned. the green button LEDs checked out ok so were left alone
    -all the high temp insulating tape is replaced with new
    -the tape deck is reassembled from 5 different units as mentioned above. It's very difficult to find 30+ year old components with both the mechanical and electronic bits functioning properly. The mechanicals are incredibly complex too, with multiple motors levers and switches.
    -the volume control was replaced with a refurbished part. it has 4 different parts to it including the on/off switch and push button.
    -the joystick has 4 switches on it, and it's common for the left and right ones to go out requiring replacement.

    Will add some additional pics to this post so not to pollute Jordan's thread
    Last edited by bradnic; 03-30-2019, 09:04 AM.

    Leave a comment:


  • Replicam3cabrio
    replied
    Is a special tool, you can use an under size allen key but you are risking stripping the screws as they are brass.

    Leave a comment:


  • roznic
    replied
    Originally posted by AndrewBird View Post
    They aren't quite allen bolts, they only have 5 sides, not 6. You can usually get away with a smaller allen though.

    If you flip up the little covers on each side of the radio, the bolts are there.


    Second this[emoji115]

    Leave a comment:


  • AndrewBird
    replied
    They aren't quite allen bolts, they only have 5 sides, not 6. You can usually get away with a smaller allen though.

    If you flip up the little covers on each side of the radio, the bolts are there.

    Leave a comment:


  • rzerob
    replied
    Originally posted by 2mAn View Post
    I have the factory unit in mine and want to send it to him, but I dont have the tool to pull the deck and Im trying really hard to not scuff any of the plastic. Is there a tool out there thats easily available to pull the OEM headunits out?

    That interior looks fantastic though!
    I am pretty sure the tool is just a really small allen wrench. I have not had a stock radio in my car in 10 years so I could have it mixed up.

    But there should be two allen bolts on the far side of the face of the head unit under two plastic hinged clips. After I unscrewed mine I just pulled on the clips gently until it pulled out far enough to grab the actual radio.

    The allen bolts don't come out completely. They just hang on to the radio.

    Leave a comment:


  • 2mAn
    replied
    Originally posted by Jordan View Post
    If you are wanting to keep the factory radio you would be hard pressed to find better than what he can put together for you.
    I have the factory unit in mine and want to send it to him, but I dont have the tool to pull the deck and Im trying really hard to not scuff any of the plastic. Is there a tool out there thats easily available to pull the OEM headunits out?

    That interior looks fantastic though!

    Leave a comment:


  • Jordan
    replied
    The antenna wire was still braided into the power antenna red/white wires. It is no doubt original, but yes I agree most I have seen are the light gray color.

    This evening I installed the center controls panel, and finally got around to installing the completely rebuilt CM5908 radio I got from Brad last month. Its certainly the nicest and cleanest example I've seen in one of these cars. He combined the best components he had to make me this unit.


    If you are wanting to keep the factory radio you would be hard pressed to find better than what he can put together for you.

    Leave a comment:

Working...
X