Announcement

Collapse
No announcement yet.

1990 - 24v swap

Collapse
X
 
  • Filter
  • Time
  • Show
Clear All
new posts

    Now onto some more exciting progress....the body shop folks were great to deal with and I got to check on the progress periodically.

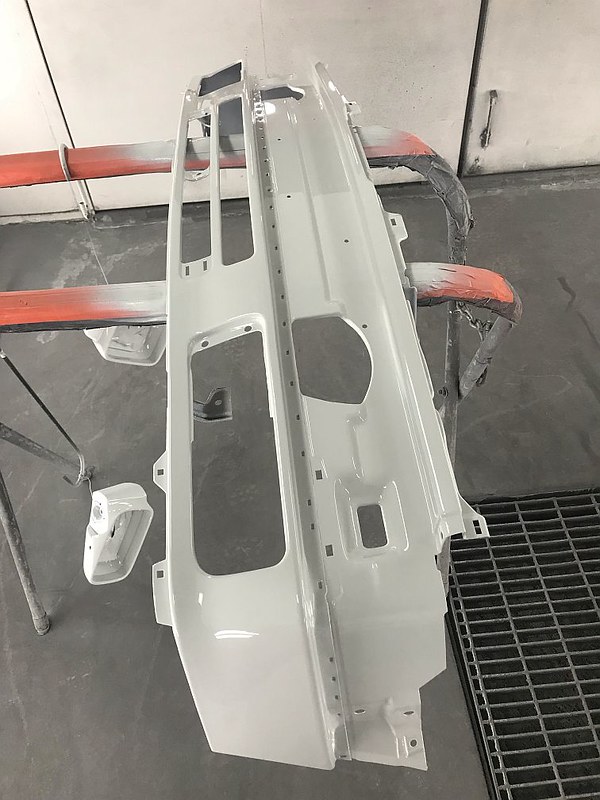
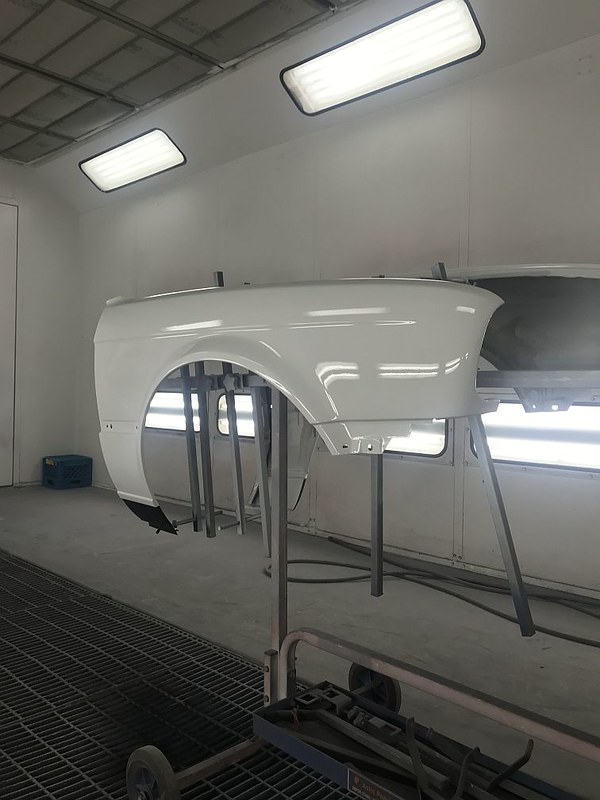
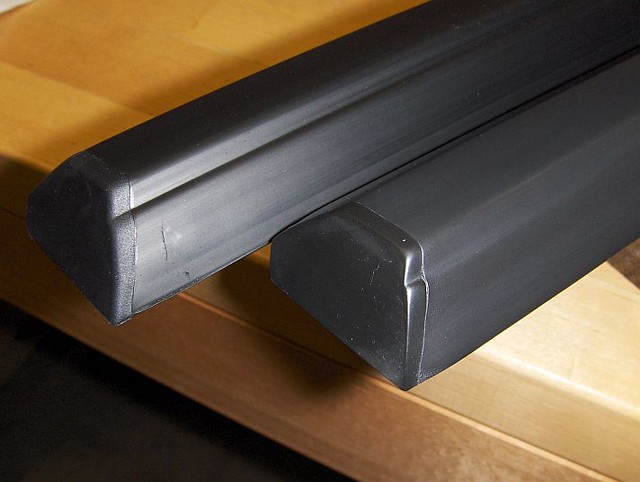
    All the misc. parts in paint:


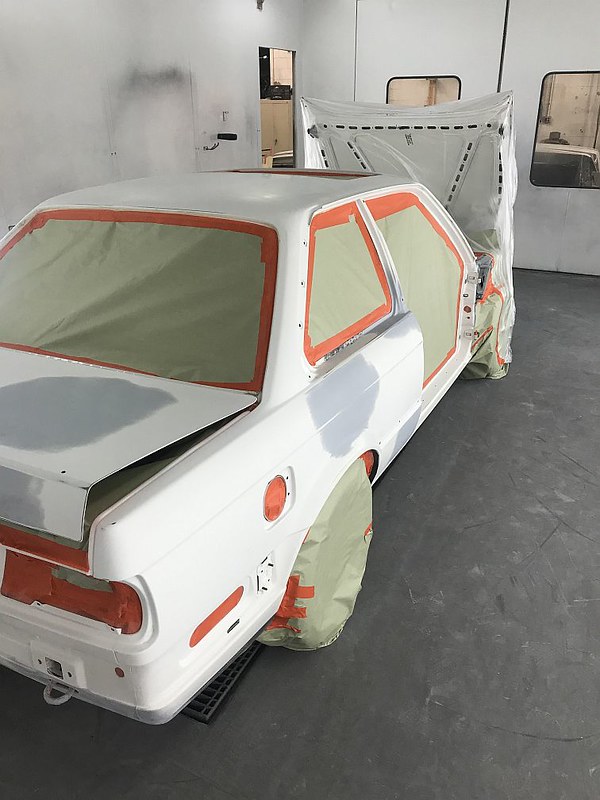
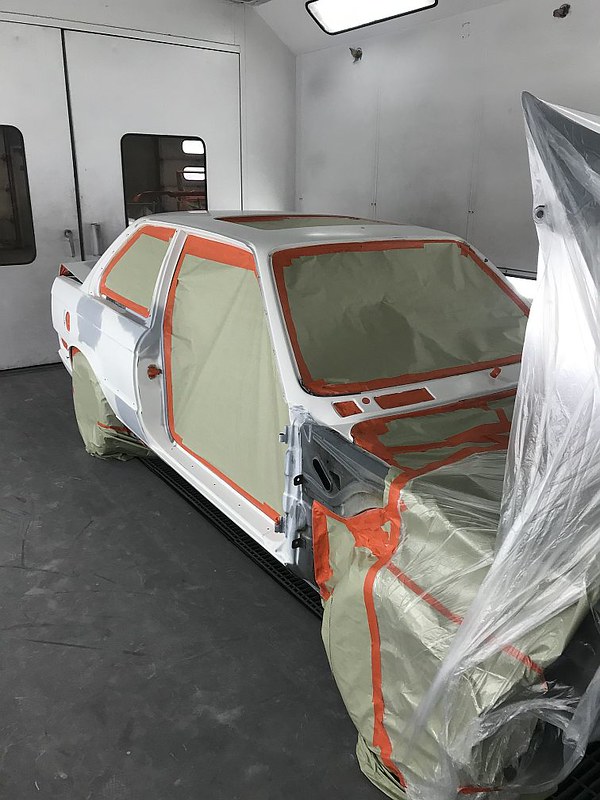
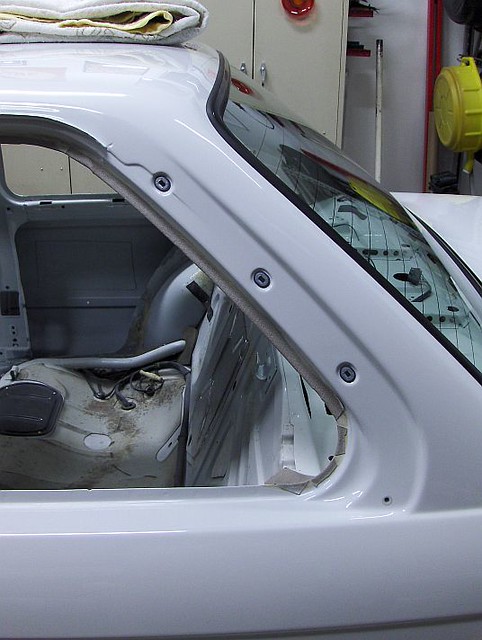
    The body work done and now ready for paint:
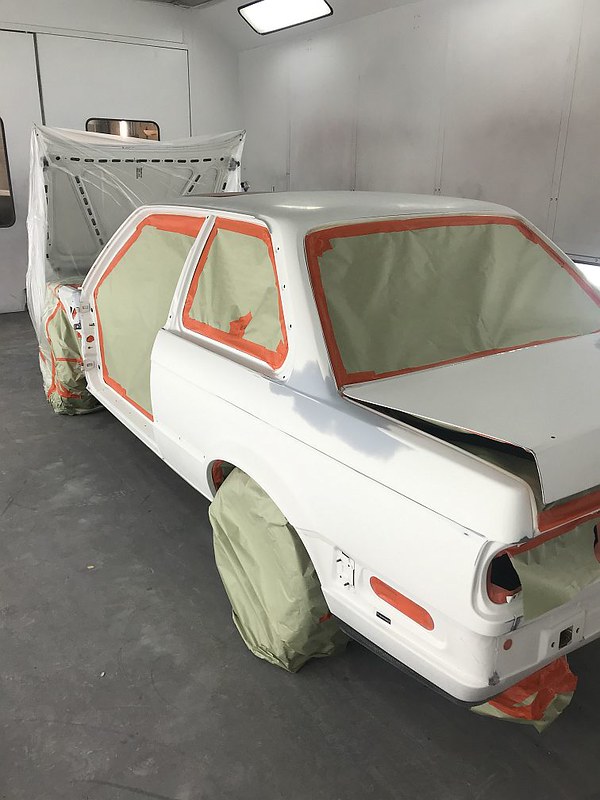
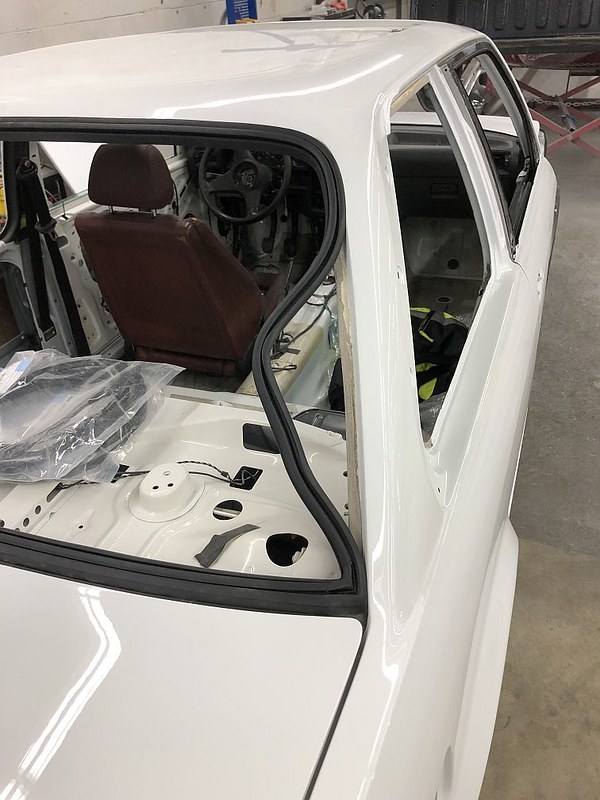
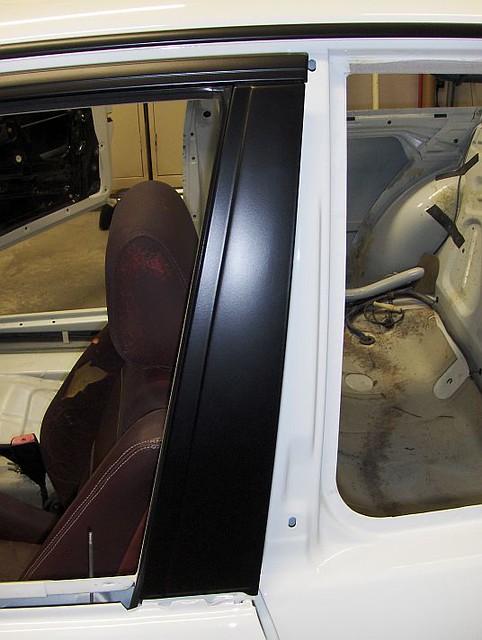
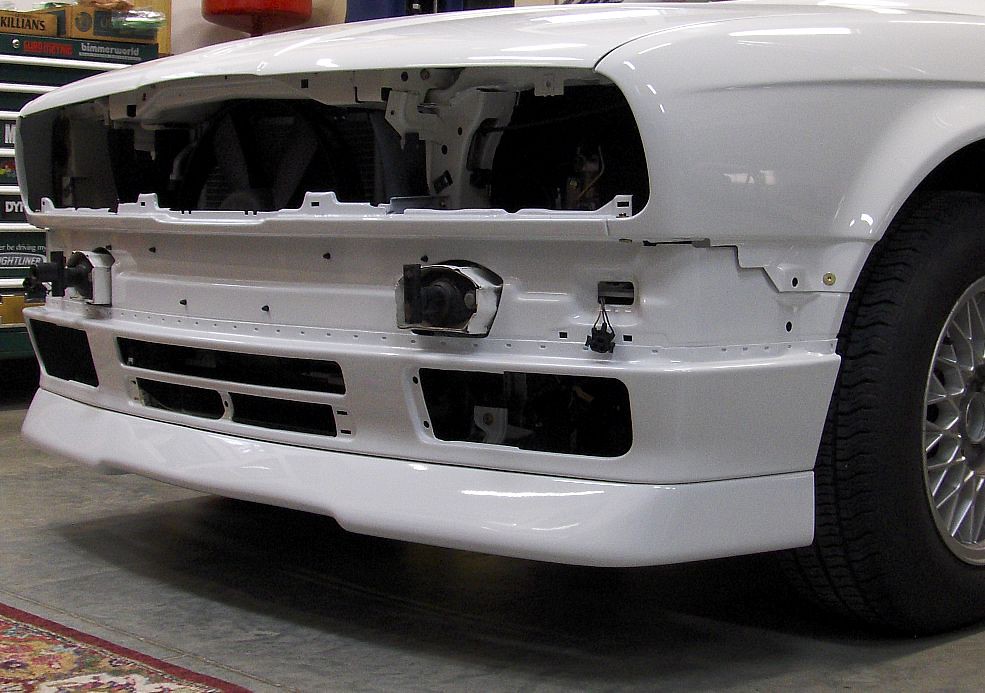


    Base coat done:


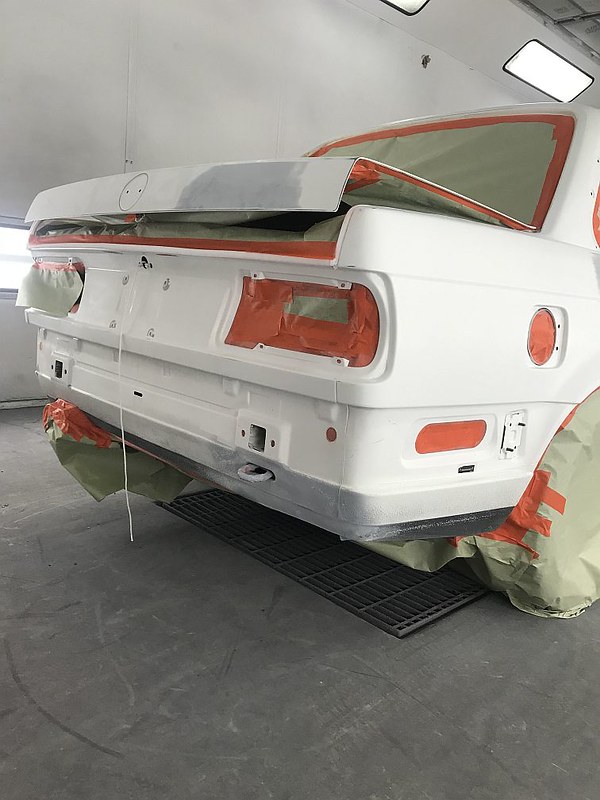
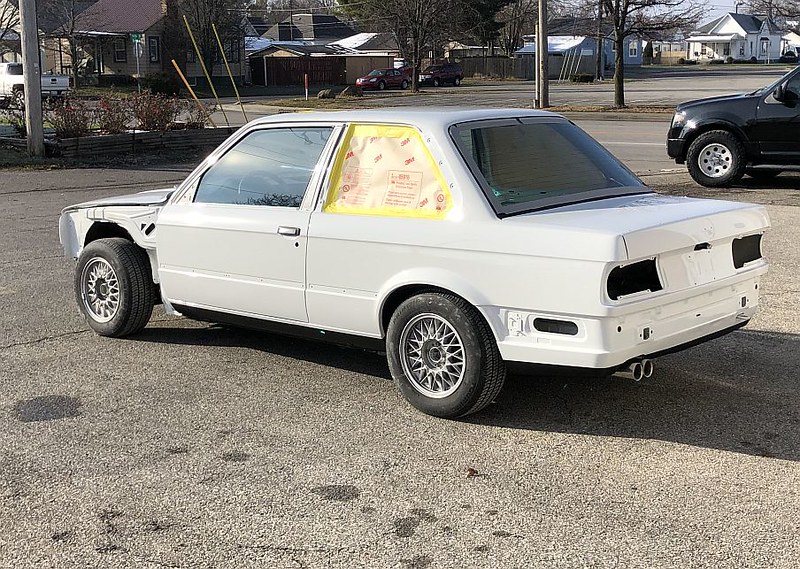
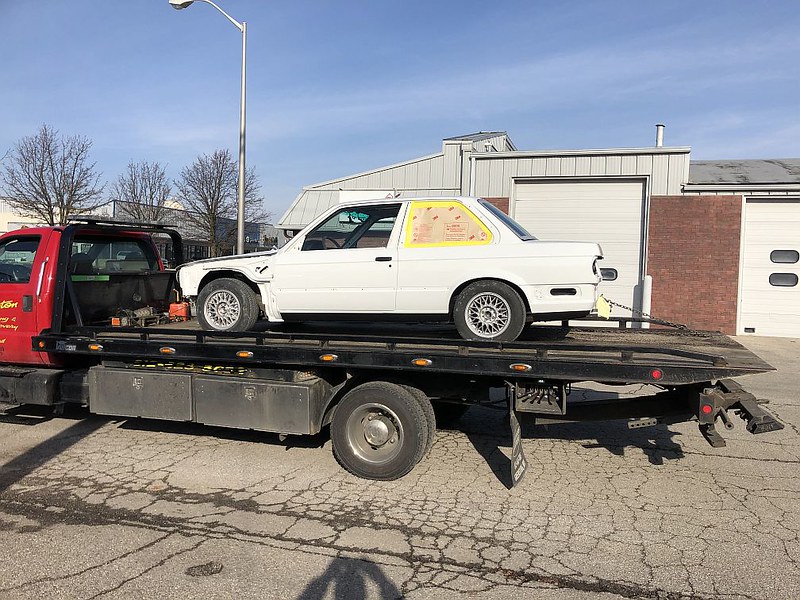
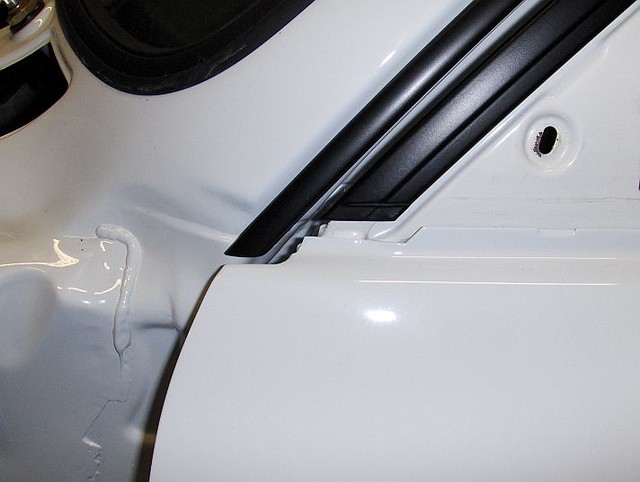
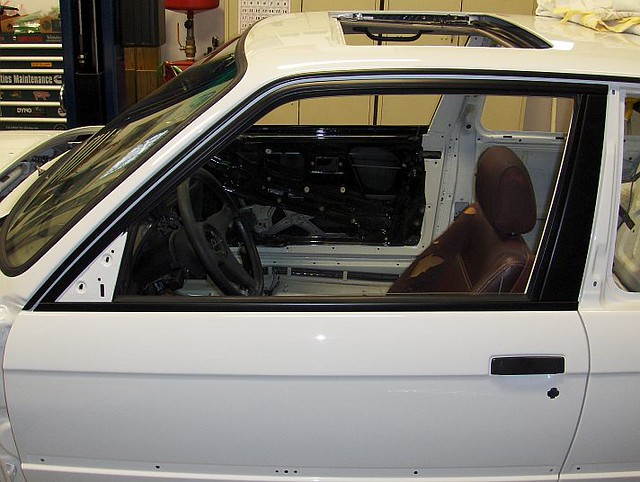
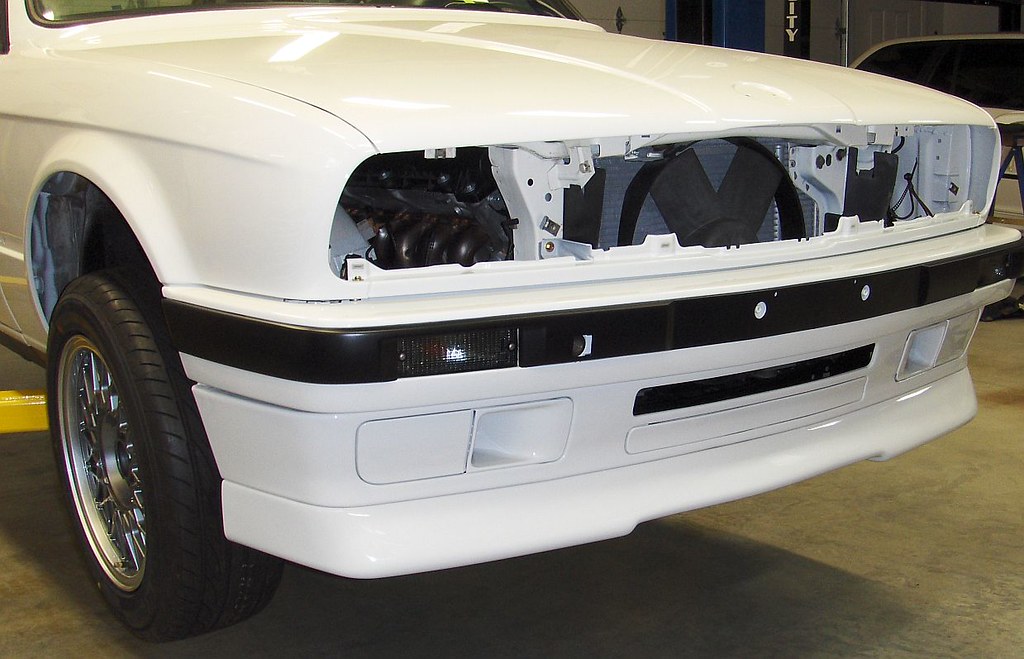
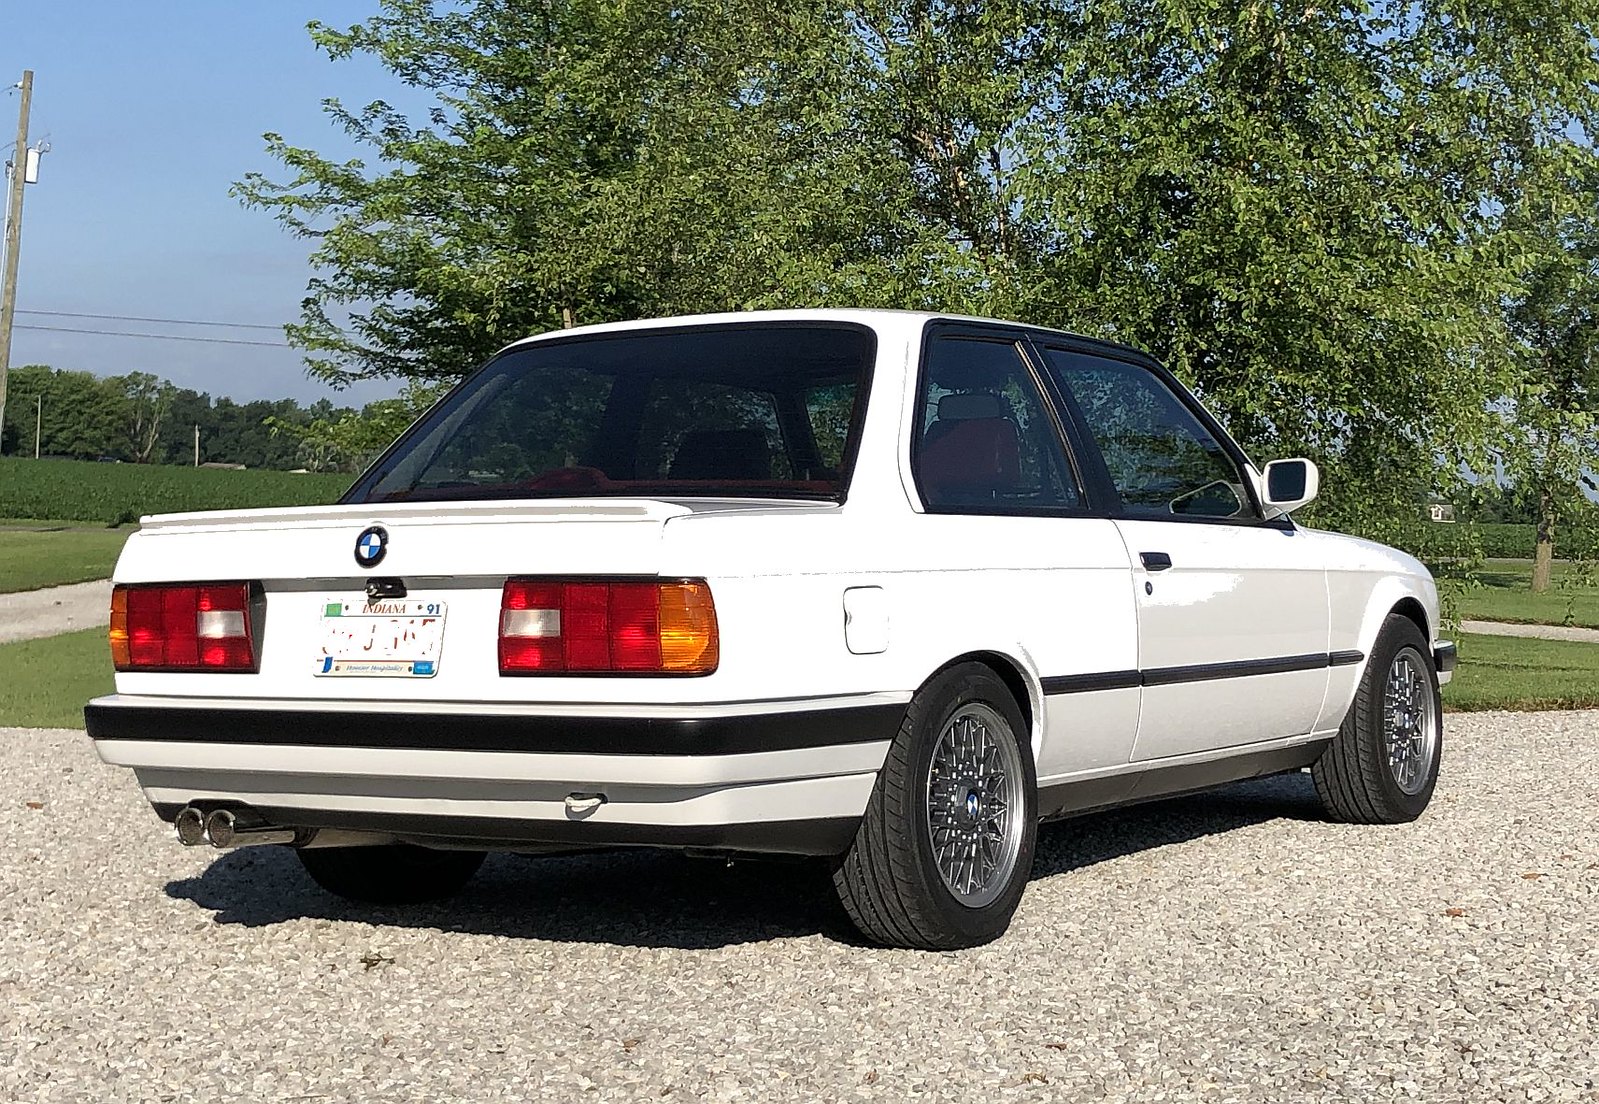
    Clear done, chip guard and black paint on the lower bits:


    More to come...

    Comment


      I wanted to use the body shop's glass guy to install the front and rear windows but he didn't like how the new seals fit and gave up. Perfect. As others have noted on the forum, the new seals seem to be too big but I didn't believe it....so I went into the shop to have a look.


      It did not look promising, but I decided to give it a shot and got them all to fit with a bit of massaging. Then a couple of the guys at the shop helped me install the glass for the trip home, I'll install the lock-strip's later when I get the right tool.


      At this point it was apparent that I was not going to drive this thing home (it was tempting but also way too cold) so we taped up the windows to keep them from blowing out and covered the side window openings and installed the trunk latch, etc. for the ride home on the roll-back.

      Here it is out in the sunlight:


      On the way:


      Once home, I could admire all the areas that had been repaired and check out the beautiful paint job.


      Comment


        I'd never installed new lock strips in a new gasket so I was not sure what to expect. Using a couple of plastic trim tools was not working for me so an order was placed for a CR Laurence equalizer lock strip tool pn: pa1348.


        With a bit of a learning curve, this tool made the work easy. The rounded corners are the hardest because the gasket wants to bunch up as you push the tool around the radius, plenty of soapy water made the strip slide in easier. Interestingly, the separate lock strip that goes below the rear window was the hardest to install even though it is basically straight, on this I resorted to some silicone grease for lube. I was also super paranoid about scratching the paint so I covered everything in blankets.


        Installing the fixed side glass was next. I had cleaned up the gaskets and other than some superficial damage to one spot they were as pliable as new. I had trouble finding any documentation on how best to install the metal trim into the rubber so I took a few pics along the way and will try my best to describe the process. What worked best for me was to install the lower section first, work the rounded rear corner in place and then proceed around the diameter.

        Clean the glass of any residue that would prevent it from easily sliding around in the gasket, I found a straight blade and some foaming cleaner to work the best.


        Next spray a little soapy water solution into the the gasket where the glass is located and install the glass.


        Set the trim on top of the gasket and look at how everything fits into the lower channel and corner channel.


        The lower edge of the trim has a small lip that hooks into the gasket groove first (red arrow) and then then the lower square profile of the gasket gets pushed into place (green arrow). Note that two channels in the gasket meet at the corner (red circle) so you will need to manipulate this into place as you angle the trim into the rubber.


        Work initially with the trim at a slight angle and get the lip started in the groove. Everything will want to move around at this point so be patient. Use that soapy water.


        The corner will look like this if everything is seated properly and the lower edge of the gasket will have sucked up the trim leaving only the thin edge exposed.


        For the remaining upper perimeter, you need to twist the upper gasket away from the trim while pushing the lower gasket into the trim channel...its almost a rolling motion. Once you get it down, it will go quickly.


        It should look like this when you are done.


        If the gasket is not quite seated in a couple of areas or you can't quite get it started, I found that this cheap tool was indispensable.


        Before installing the side glass, the correct hardware must be in place to prevent small leaks and ensure it fits tightly against the body of the car at the B-pillar.

        On the bottom there is a clip with a threaded rod that snaps into the frame, followed by a washer which is followed by a rubber washer, on the top there is a threaded rod clipped into the outer section of trim, covered by a plastic cup followed by a rubber washer.


        In the chassis there are two small black plastic guide clips that usually self destruct when you remove the window or have disappeared over time. (Ignore the binder clips and look at the center top and bottom of the B-pillar).


        Now you are ready to install the glass...if you look closely in the pictures above you will see a blue colored 1/8" nylon parachute cord placed into the channel of the gasket where the pinch weld of the body holds it in place. This cord is wrapped around the perimeter of the window with about a 12" overlap at the bottom. You place the glass into the opening, making sure the threaded rods on the trim are lined up with the holes and then starting at the bottom slowly pull the cord while placing slight pressure on the glass. The cord should pull the lip of the gasket over the pinch weld and seat everything properly.

        I had a helper hold the window assembly while I manipulated the cord, it was actually fairly easy. I know experienced folks have done this without a helper...but that's not me....

        Comment


          I'm a little out of sequence with these pictures because I took so many over a few days....the side trim actually went on prior to the rear side glass.

          Just documenting the sequence of install and the placement of the clips as well as the soft butyl rubber that was used to keep things from rattling...

          The upper and vertical door trim use small metal clips, the small tabs tend to get bent or break so plan on replacing them.


          The vertical trim has some soft butyl material behind it that eventually hardens, I replaced with new at the same locations as the factory.


          C-pillar trim prep.


          I was never able to find these little rubber buffers for the bottom of the trim in the parts diagram but the foam strip is available. Thanks to Albie325 who found these alternatives on Amazon - Hudson Hi-Fi .75" Silicone Hemisphere Bumper, Non-Skid Isolation Feet with Adhesive


          Install the roof gutter trim, slide the small trim joint cover towards the front of the car and then install the C-pillar trim.


          The door B-pillar trim goes on next, followed by the trim around the top of the window opening.


          You want to mind the gap at the front of the door to leave room for the lower trim along the bottom of the window....you can see the lower edge of the trim ends along the same line as the lip in the door skin.


          Finally the lower trim piece....don't forget to install the rubber window wiper on to the trim piece if you had it removed.


          The gap at the front should follow the line of the upper trim which will align the rear perfectly.


          Comment


            The sunroof always makes me nervous for some reason but the install generally went smoothly. I used this excellent guide:


            My sunroof had the two piece seal from new, so that's what I used for its replacement. I marked the center of the smaller (front) seal, marked the center of the panel and installed to match. The rear seal longer than needed so need to cut it to fit after you wrap it around the panel.


            Now carefully install....


            Every E30 I have owned has had a broken drivers side lock cylinder at some point...this one was no different. I purchased the repair kit p/n: 51 21 9 556 313 and got to work.


            Cleaned and lubed the pass side lock and installed both with new gaskets.


            SIdebar....Has anyone noticed that the new Roundels BMW is supplying for the trunk lid don't fit? The posts are too long and they bottom out on the inner structure...so they need to be carefully trimmed with a Dremel, etc. Here is a comparison new to old:


            Comment


              Now for something a little more fun...recovering the rear parcel shelf. Mine was faded nearly white and looked pretty bad. I haven't done much carpet work so I was not exactly sure what to use...I gave the folks at Your Auto Trim Store a call and they were awesome. They recommended a non-backed flexible material called Ozite:


              Additionally they recommended 3M 90 spray adhesive:

              3M™ Hi-Strength Spray Adhesive 90 is an extremely versatile, fast-drying spray adhesive that bonds strongly to a wide range of materials. This product's permanent bond provides fast results while remaining easy to dispense thanks to a variable-width spray pattern. The high-solids content of this adhesive offers a high initial grab, sufficient bonding range, and a fast dry time. 3M™ Hi-Strength Spray Adhesive 90's combination of maximum-strength bonding and clean appearance makes it ideal for projects of all kinds, such as general industrial maintenance and repair projects; large-surface bonding of wood, laminates, MDF, and other substrates; and bonding for tilt-up construction.


              I carefully peeled off the old carpet material and scrapped off any remaining high spots with a razor blade.


              The "Red" is a good match to the late model Crimson rear deck.


              Cut the carpet to the rough size, spray the adhesive on the carpet as well as the parcel shelf and wait a few minutes before marrying the two. I did the center section first, then each side, followed up by the small lip on the back edge. The nice thing about this material is how it can stretch around the contours of the panel. A few V-shaped cuts at the tight corners (outside of where the rear belts pass through) and around the 3rd brake light area help the material lay flat.


              Once the glue is dry, cut all the openings carefully with a straight blade and then admire your work.


              Before the carpet goes in I decided to add a bit of sound deadening to the floor and behind the rear seat. This was very strategically placed by tapping on the areas and listening to the sound...ha ha.


              Comment


                Front Valence install is pretty straightforward, however fitting the fenders gets more challenging when the paint is fresh. The most difficult part of assembling the front end was the alignment of the fender and hood; lots of adjustment in various directions takes quite a bit of patience to chase around. I found it easiest to set the gap of the fender to door first, lock down the lower bolt on the inner fender, then close the hood and adjust the fender top to hood gap...pushing in slightly at the body line on the fender will lift the panel.....then lock down the upper inner fender bolt. Next open the hood, snug the fender top bolts so they just barely move with pressure on the fender and then close the hood again and set the upper gap, lock down and then adjust the hood height at the front hinge and finally at the back guide to match the fender position. At this point you can lock down any additional loose bolts. Some of these steps must be repeated to get the best fit.


                BMW uses a low profile torx bolt to allow more clearance for the bumper cover at the lower-outer front fender and I also added one to the front corner-edge so I could make the gap tight without interference. Part number: 51 41 1 959 137


                Once the fenders, etc. were aligned/done I installed the Reiger lower lip.


                Then the remaining bits and pieces; bumper, fog blanks, lower valence blank installed.


                Fender liners pieces and brake ducts were next, I modified the undertray to fit with the Red46 skid plate so the inner lower fender liners were properly supported.


                Compared to the front, the rear is easy. I aligned the rear bumper before paint and marked the location of the bolts on the bracket to make install smooth.


                I still had a lot of cleaning to do on the interior, the seats and door panels were in decent shape but really dirty. My favorite method to clean leather is Ivory bar soap, a soft brush, water in a spray bottle and many towels. Scrub the leather with the soap, wipe off the dirt, spray with water to remove the remaining residue and wipe dry.


                After cleaning, I applied Leather Master - Leather Vital conditioner and set the seats out in the sun to soak it up. I have tried many different products and really like how well this works; it does not leave a sticky residue and it is not too expensive.

                250 ml bottle Leather Vital penerates the leather to soften and nourish it. Excellent for older leathers and also improves the feel of stiff leathers.


                Comment


                  The drivers door card had some of the typical de-lamination of the vinyl on the lower edge, however the passenger side had some water damage on the press-board backing. The panel had curled inwards at the bottom edge and was torn in spots where the fasteners pulled through....apparently when they installed the new door, they decided a vapor barrier was optional....

                  For the repair, I used Gorilla glue, clamps and long strips of 1-by furring strips. To get the press-board flat, I pulled back the vinyl, saturated the panel with water (so it was flexible) and then clamped the panel between two pieces of wood. When the panel was almost dry, I applied the Gorilla glue to reinforce the area. I also was able to fix random cracks in the panel with the Gorilla glue.

                  After everything was dry I borrowed an upholstery staple gun and used 1/4" deep by 1/2" wide staples to re-attach the vinyl covering.


                  Before installing the repaired door cards, I installed new vapor barrier. This comes from BMW in one large sheet that has enough material to do 3 coupe doors - part number: 51 95 1 924 961


                  The material is super clear....therefore hard to see when installed properly.


                  The seat belts, rear side panels, seats, door cards, etc. are now ready to go in.....


                  I'm running a M-tech 1 steering wheel and hated the mess of the airbag under-dash panels and brackets, so I sourced the proper pre-airbag steering column trim from AWDBOB and the lower panel from Ebay.


                  Next up was to figure out the side moldings...they were rough and I would prefer new pieces to match the fresh look. However, as we all know, most of these pieces are NLA...but the quarter panel trim is still available so I ordered them up. Once the new parts were in hand, the old parts l painted with SEM Trim paint did not match. So rather than paint the new parts, I decided to take another approach and sourced a good used set of door/fender trim (again thanks AWDBOB) and try another approach. I cleaned the old parts and carefully removed the majority of the oxidized rubber with a green Scothbrite pad in a soapy water solution. This knocked down the majority of the rough texture but the old trim did not quite match the new....so I experimented with some chemicals and found Acetone would smooth the trim perfectly, however it dried so fast it would leave streaks.

                  With some practice I developed a technique to wipe the Acetone on the part in a manner that left the same look as the new parts. Here is a shot of the practice trim; clean on the left and how it was originally on the right:


                  New quarter panel trim on the left and cleaned trim on the right:


                  I was stoked. Install is straightforward, don't forget the small grommet at the back edge of the door where the threaded rod passed through the skin - part number: 51 13 1 916 449


                  The final bit of assembly was the door seals ($$$$$$$$) and the inner/outer rocker trim:


                  Done.

                  Comment


                    Time scale is now June 26 2021 and this is how it looked when all was said and done.


                    I've been driving it regularly and addressing small little issues as they come up...it is a fun drive with the M52 swap.


                    Remaining future projects:

                    Alignment

                    Sort the AC compressor installation - the Z3 compressor will not fit, the clutch hits the lower radiator hose - and charge

                    Aim the headlamps

                    Finish cleaning the dash vents
                    Last edited by mjweimer; 07-31-2022, 11:33 AM.

                    Comment


                      Lovely work! This car has turned out beautiful, especially the interior.

                      Do you mind me asking the p/n of the hose you used for the lower reservoir hose? I've researched but wanted to clarify with you.

                      Comment


                        i dont like white cars, but this looks amazing, the cardinal interior is perfect. Love your attention to detail

                        Comment


                          sharp looking car, Matt. good on you for sticking with it. you have come a long way since you started. thanks for sharing and congrats to you on the finished product.

                          FWIW, i've used several E36 24v air con compressors in E30 w/ 24v - worked great every time. food for thought.
                          '72 2002 pickup | '88 M5 | '89 330is | '89 M3 | '01 Z3M | '11 328xi-t

                          Comment


                            Originally posted by rudy View Post
                            Lovely work! This car has turned out beautiful, especially the interior.

                            Do you mind me asking the p/n of the hose you used for the lower reservoir hose? I've researched but wanted to clarify with you.

                            Thanks Rudy, luckily the interior was in pretty good shape considering the age of the car.


                            I used the stock E30 hose from the lower expansion tank to the metal tube under the M52 intake. I just cut it to length and routed it in roughly the same position...unfortunately I don't have a picture of it but I can grab one for you if it helps. The hose part number is: 11 53 1 722 743.

                            I was also able to use both ends of that same hose (the main section that runs from the water pump to the heater core) to make a heater hose that ran from the metal tube to the core. It required a splice connector to make the alignment right and keep it from kinking and you can see a pic in post #93.

                            Comment


                              Originally posted by eternal24k View Post
                              i dont like white cars, but this looks amazing, the cardinal interior is perfect. Love your attention to detail
                              Thanks! I really enjoy getting all of the details right and trying new ways of getting things done...hopefully it holds up....ha ha.

                              Comment


                                Originally posted by e30austin View Post
                                sharp looking car, Matt. good on you for sticking with it. you have come a long way since you started. thanks for sharing and congrats to you on the finished product.

                                FWIW, i've used several E36 24v air con compressors in E30 w/ 24v - worked great every time. food for thought.
                                Appreciate the kind words. Yeah, it has been a real project but no complaints....I had several other large projects in the garage over the past years that took time away from this one but I never lost interest. All of my cars now have some sort of engine/drivetrain swap now so never a dull moment.

                                Timely comment on the AC compressor. I had originally planned on using the Z3 compressor but it hits the radiator end tank (among other issues with the hose/fitting clearance at the front). The compressor and bracket are different from the coupe/sedan M5x/S5x so I need to swap brackets to see how a "normal" compressor fits. Since my Nissens radiator has started leaking from one of the end tank gaskets (less than 1k miles) it's a good time to swap compressor brackets. Here are a couple of pics of the interference and the two compressors.


                                The M50 compressor nose is 3mm shorter so it will likely just barely clear the end tank of the radiator...has this been your experience? I am making the assumption it sits in the same basic location because it uses the same belt but maybe the bracket rotates it out of the way?


                                It looks like the Mishimoto aluminum radiator has thinner end tanks but it has a slightly thicker core...and since I need a new radiator this could be an option. However, I'm concerned this will create a new issue with interference of the mechanical fan and the core. I've got something like 6-7mm clearance currently and the Mishimoto is about that much thicker (stock ~44mm and Mishi ~51mm)


                                I'd love to hear more about your experiences with all of this fitting together. Thanks!

                                Comment

                                Working...
                                X