
Love the detail ��������
-
88 325is. S54, CSL airbox, Motec M800, Motec C127, Motec PDM15, Stoptech STR, MCS 2 way coilovers, Forgeline wheels, Recaro SPA, Eisenmann, Personal, lots of custom.
90 318is. As new OEM+, BBS LM, AST 4210 2 way coilovers, Wilwood SL6R/SL4R, Dynaudio, Recaro Experts -
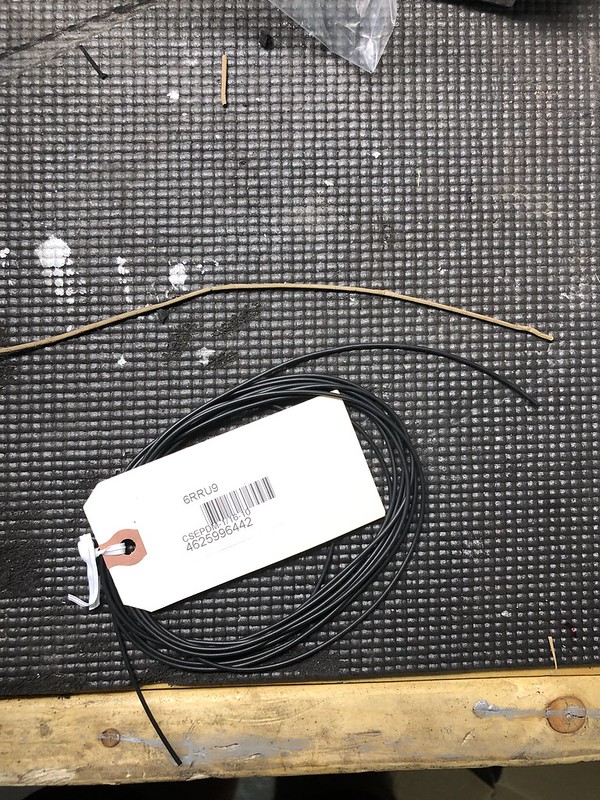
I ran all new speaker wire.
Also, I'm jelly at how clean your car is inside. Mine was full of grime and rust, and an amazing amount of mud and dirt. I spent a good day just wiping it down with soapy water to get all the dirt and dust out. Car looks damn near new once you got it down to the metal.I do things.Comment
-
I had to run wires like this as well, was a pain in the ass.
I noticed my car had the factory wires in a twisted pair and they all ran up the driver side.
They're run up the driver side because the battery cable is on the passenger side and can induce a lot of noise into unshielded audio wires if they are next to it. You could run the passenger kick panel wires along the driver side and then across the dash.
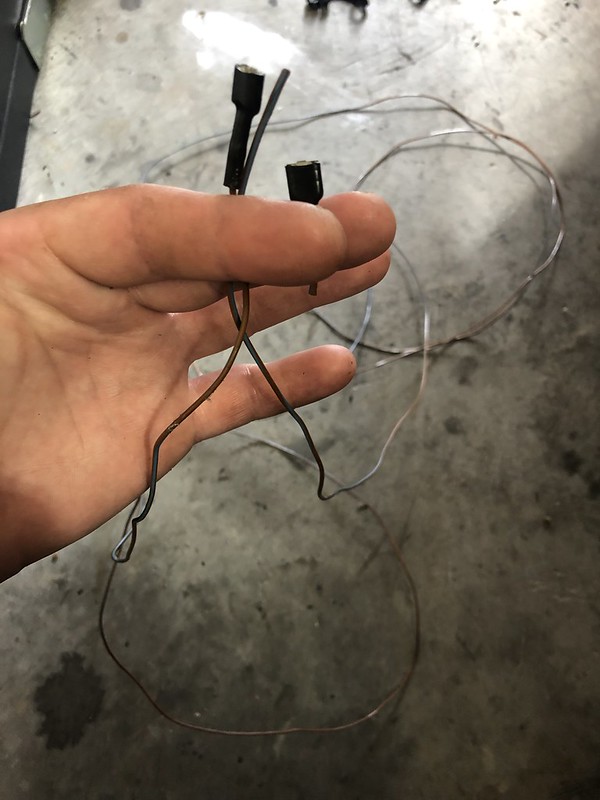
For your door tweeters, did the wires lead back to the kick panel speaker? are they just spliced together there from the factory or separated? I want to add door tweeters to my car too
Comment
-
YOU love MY detail?? Your thread is phenomenal. I'm blushingOriginally posted by burkey001
I'm absolutely shocked at how little rust there was, it's been a pleasant surprise. When I was under the car, some pieces disintegrated in my hand. The body has been spotless though, not sure how a New England car managed that one.Originally posted by Melon
Yes, the wires were taped back behind the blank panel in the door where the tweeters would be and the other ends were just taped to the side of the main harness in the kick panel behind the speakers, unattached to anything. They are two separate wires that are taped/shrink wrapped together. The driver's side pair had individual spade connectors at the tweeter. On the passenger side, the two wires came together into one plug, see my pics. Both sides had separate spade connectors at the kick panel speaker. I'm going to take a look at the rear premium speakers I have to get an idea of how the tweeters are wired to the speakers within the housing. Theoretically the fronts should be wired identically just with longer wires up to the tweeters. When I do it I'll write it up, should be in the next week or two.Originally posted by pandaboo911
I ended up renting a rug shampooer from Home Depot and got all the carpets cleaned. Took awhile and my knees make me look like a cheap hooker from the rug burns but they came out well:
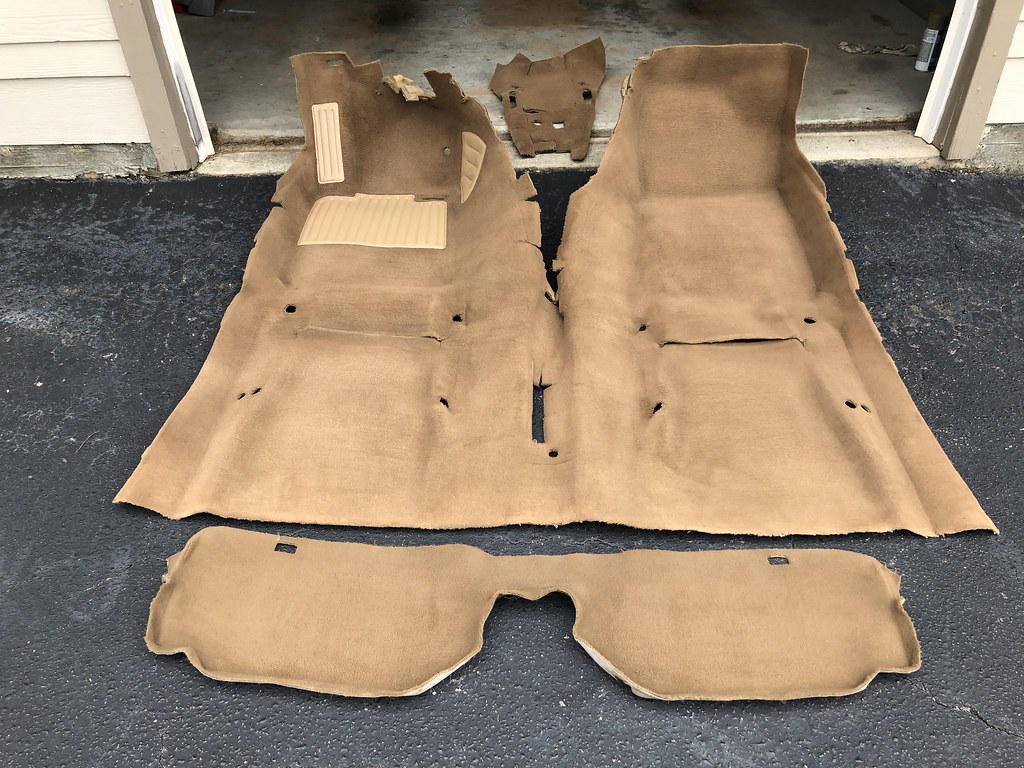
My original carpet:

The spare:

I'm really torn on which to use. I hate the fact that the spare one is cut, but it's in such better shape otherwise. And the color is such that I probably wouldn't even need to redye it. My concern now is that if I use it, the rear carpet piece won't match, I'll start by dying it and see how close I can get it to match, then go from there.
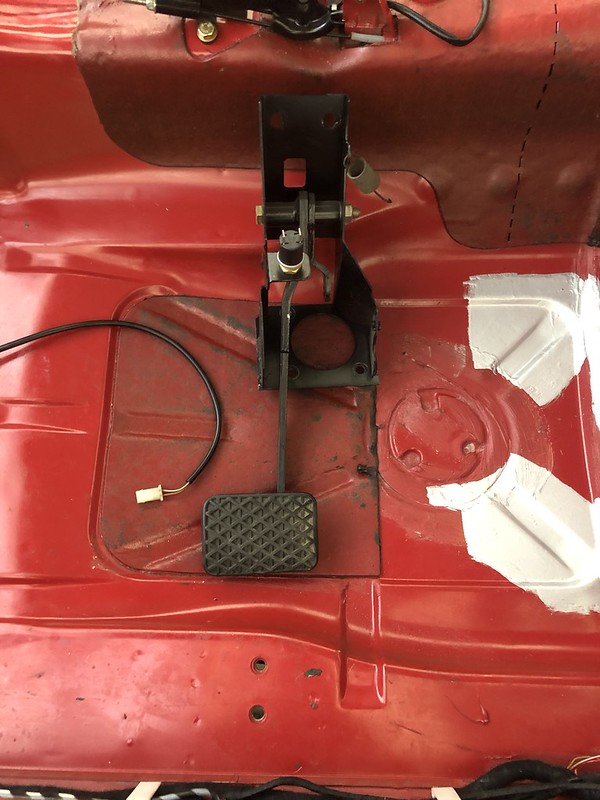
Also ended up repairing all that rust on the floor pans:


I really poked and prodded to see if I could find any more, but there honestly wasn't any. A little on the accelerator pedal bracket but that was it. I ground it down to bare metal, killed the rust with some formic acid, then painted over with some Rust Bullet:
The extent of my rust repair:


Took all of about 25 mins and I was done.

I'll put the black top coat on the accelerator pedal bracket once the base layer is dry since you'll see it. Black should make it blend in with the pedal. The rest I'll just leave since I'll be covering with sound deadener anyway and they'll never see the light of day again. I was actually going to order some 138 Zinno paint from Paint Scratch, but one can ended up being $40 with shipping. Fug dat.'86 325e Zinnoberrot /// '02 325ci Schwarz II /// '18 M4 Azurite Black Metallic ///
Albie325 Build Thread | Albie325 COTM Jan 2021Comment
-
How nice of bmw lol. I was dreading having to run wires through the door but i guess everything is already there. It's almost like they knew people would be modding these. Kinda reminds me of the accessory connector.Originally posted by Albie325 View PostComment
-
Mine was cut like that.

You can't tell at all, plus it can be removed again with the IHKS intstalled.I do things.Comment
-
Good point, didn't even think about that. I think I'll end up going with the spare and hope that the rear piece comes close to matching after a redye. If it looks too terrible I'll keep my eyes peeled for a replacement.Originally posted by Melon'86 325e Zinnoberrot /// '02 325ci Schwarz II /// '18 M4 Azurite Black Metallic ///
Albie325 Build Thread | Albie325 COTM Jan 2021Comment
-
Got some odds and ends done over the last few days.
First I wanted to get all the wiring done and tidied up so I could get it all out of my way.
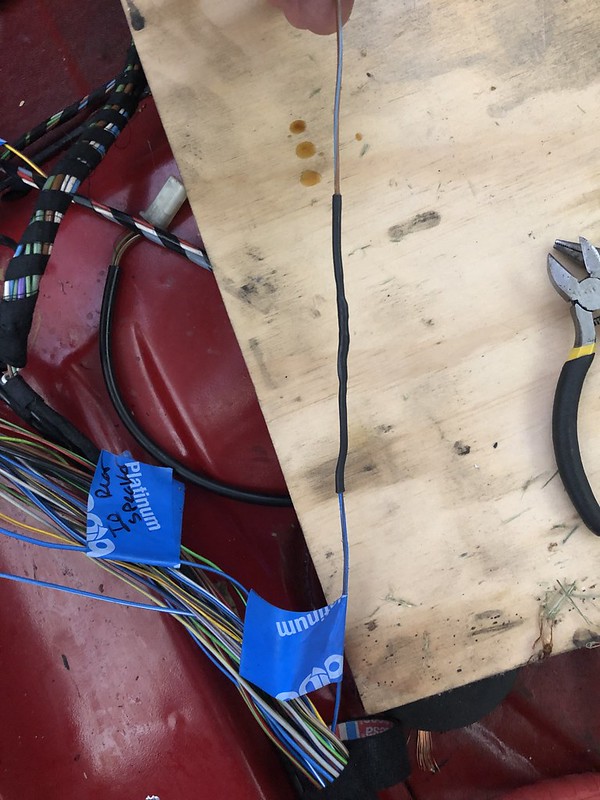
I ordered some speaker wire from Crutchfield, but then I had an epiphany: I need an extra blue/brown and yellow/brown. Why not just use the "spare" blue/brown I already have, and then just unsplice the yellow/brown from the front speaker and reroute it directly up to the head unit? So that's what I did.
Here's the extra random blue/brown from the front speakers that was routed over the center console:
Left the Blue/brown from the fader connected to the passenger rear Blue/Black. Cut the passenger front Blue/Brown and soldered in my "new" blue/brown:

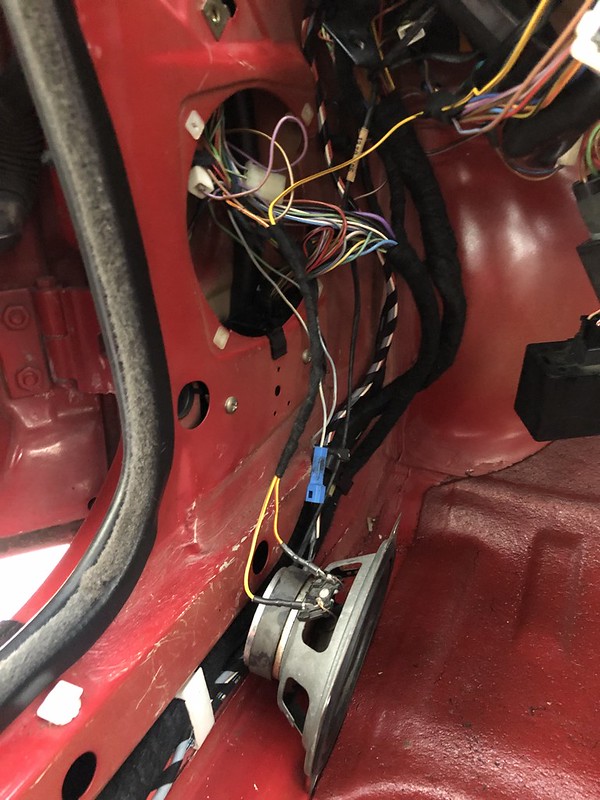
Original BMW speaker wire still in great shape:


Keep it tidy:
Unspliced the driver front yellow/brown and just ran it directly to the head unit:

Rewrapped all the looms in fresh Tesa tape as well.
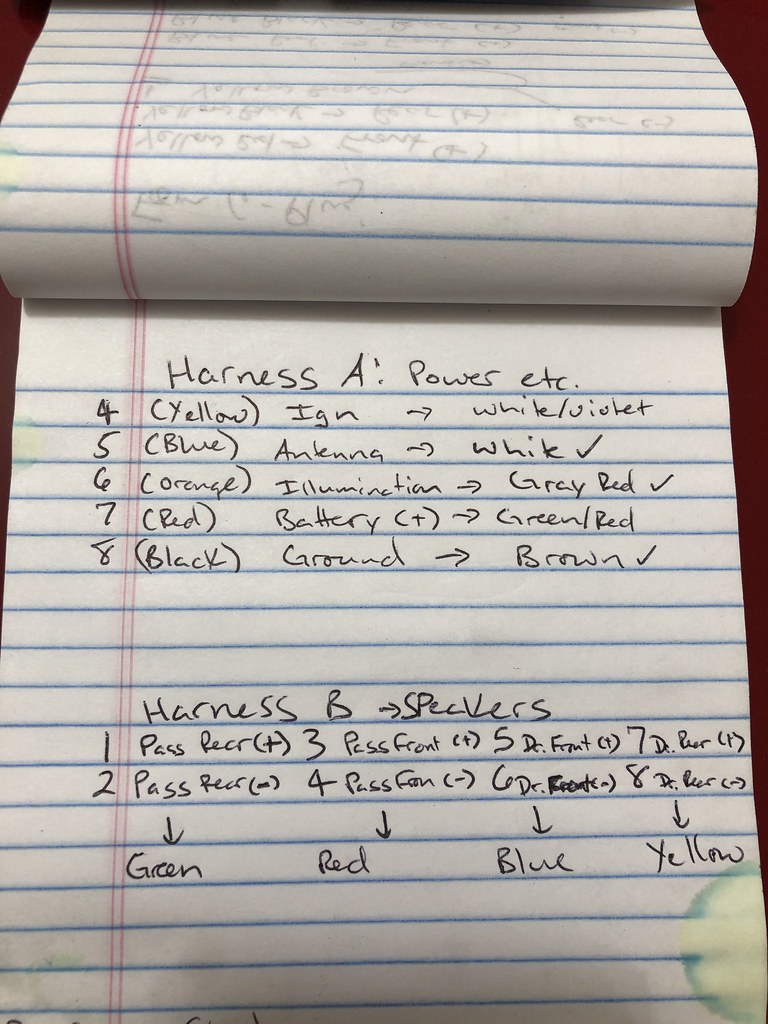
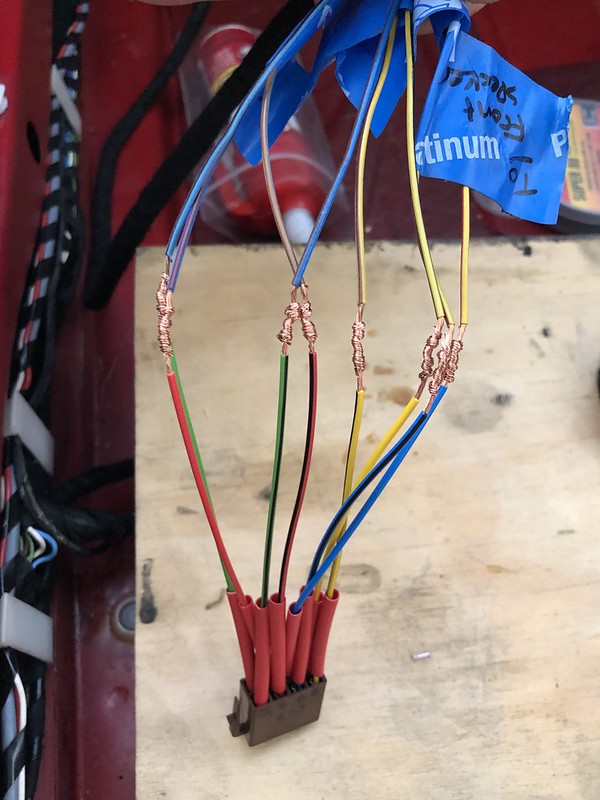
Then I went and wired in the new connectors for the headunit:
8 Channels for the speakers:

And 5 wires for the power input:
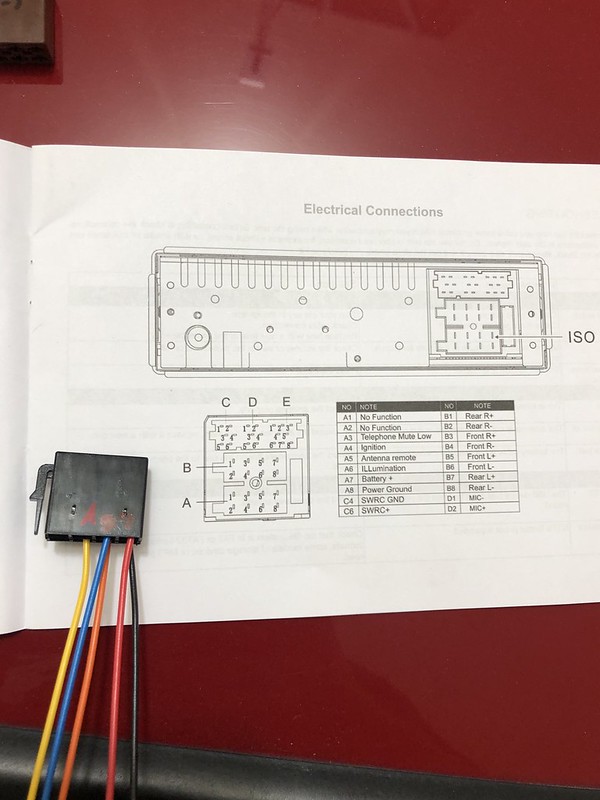
Matched all the wiring up based on the old connectors:


Based on the diagrams above, here's how my wiring matched up:
Was a little nervous to cut out all the old connectors:

Soldered them all up and slid on some heat shrink to finish the deal:


Fingers crossed it all works as expected. Will wire up the speakers and front tweeters once the rest of the interior is back in.
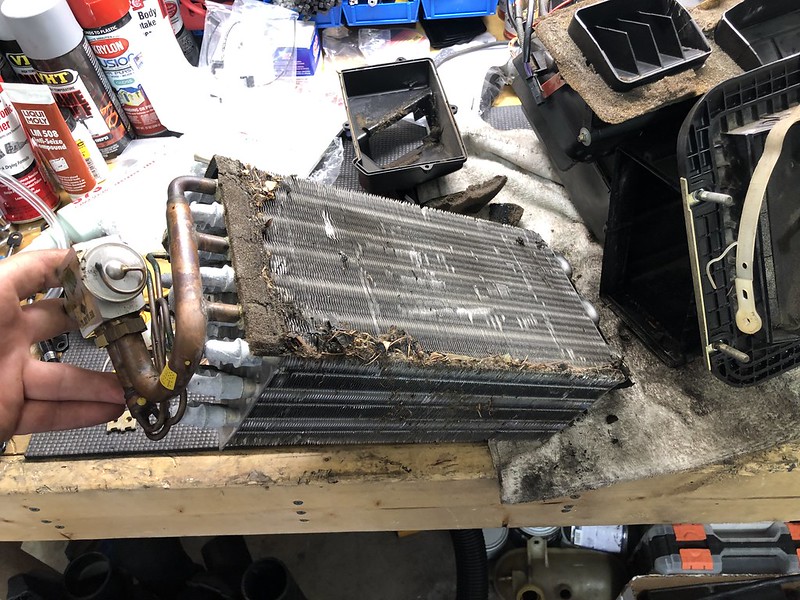
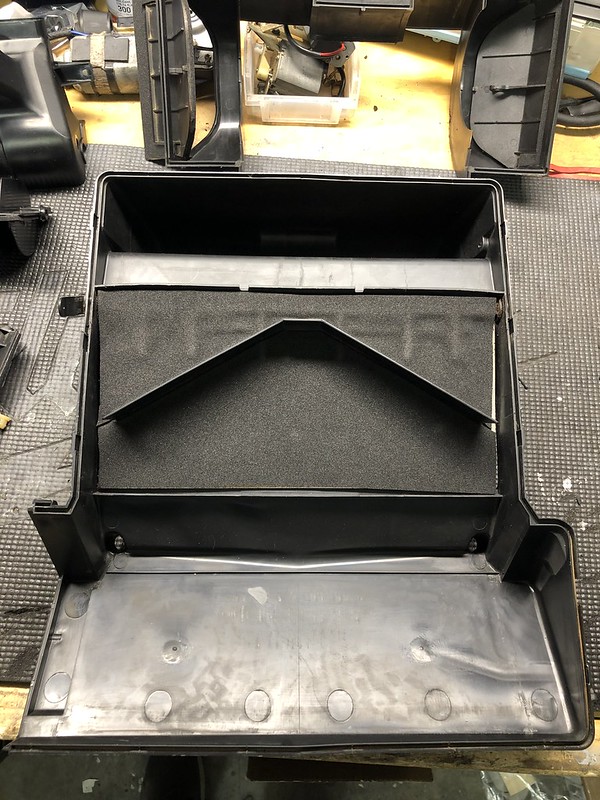
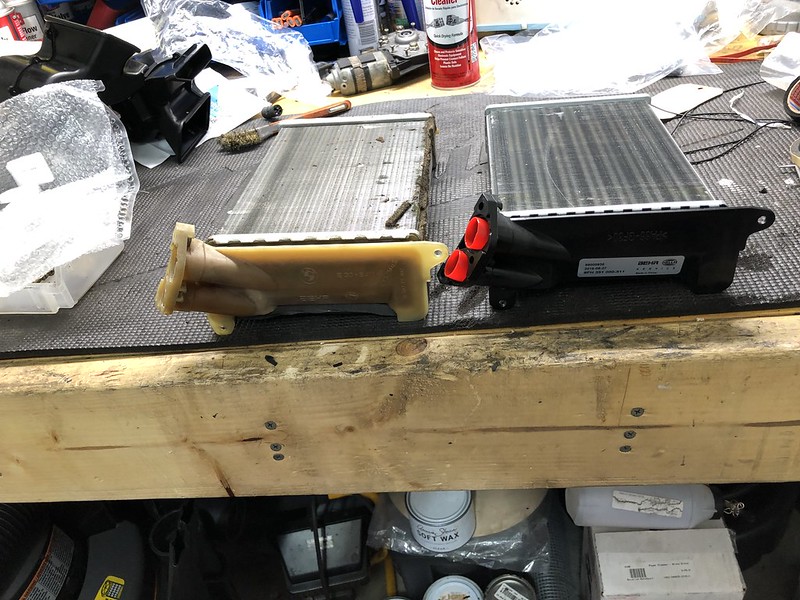
Also got to work breaking down and cleaning the IHKS, it certainly needed it:

Evaporator core:
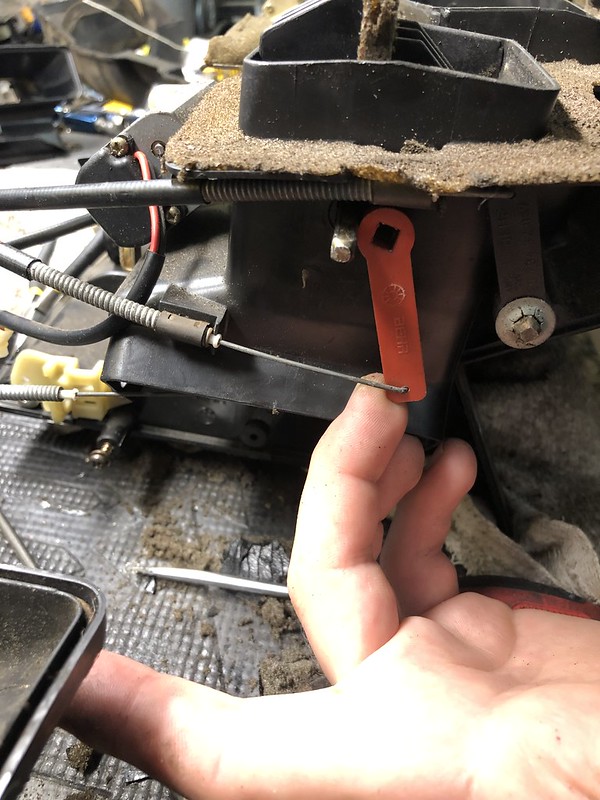
As for taking the system apart, it's pretty intuitive. Remove all the little silver clips to separate the top and bottom halves. The only tricky part was figuring out how to get a few of the damper flaps out. There are 2 square metal rods that run along the inside of the unit that hold in the two flaps for the the main cabin blower, and another for the long middle windshield defrost flap:
Remove these metal end clips, there are two more on the other side as well:

Each of the cable connector arms slides off:
Then you can tap the rod through and pull it out the other side:

Then you can GENTLY spread the vents apart and pop the dampers out. Be careful as you can easily crack the plastic.


The remainder of the dampers just pop out, some can be stubborn. Use a plastic pry tool to help you:
Used the compressor and a pressure washer nozzle with some Simple Green to clean everything up.

Soaked all the smaller pieces in a bucket, the old foam pretty much dissolved in the water. What was left of the adhesive peeled off pretty easily after 20 minutes in the water. I'm waiting on some new foam to come in as well as a roll of rubber cord for the gasket seal between the upper and lower halves (you'll see what I mean when it comes in) so I'll finish up with the cleanup and reassembly in a later post.
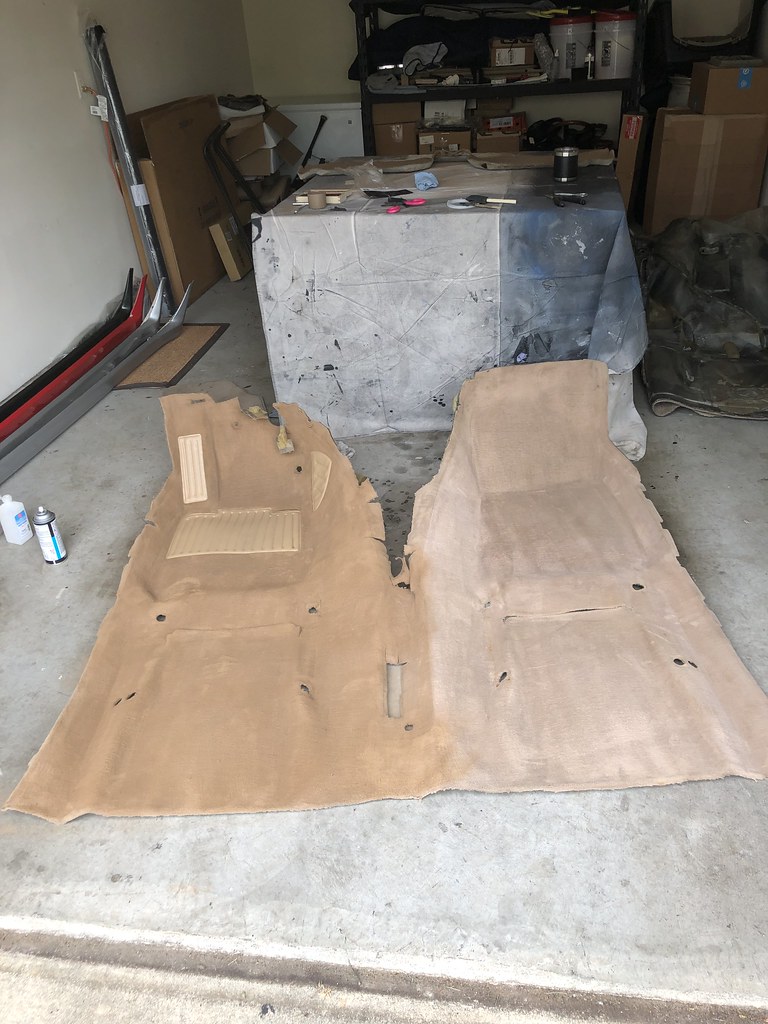
Today, I got the carpet redyed. I decided to go with the spare carpet, but ended up cutting out the missing center console section from the original carpet as it was in good shape. This way, I'll still have carpet underneath the IHSK and center console but can now remove the remainder of the carpet if I ever need to without having to take the whole IHKS out. Thanks to Melon for pointing out how convenient that could be.
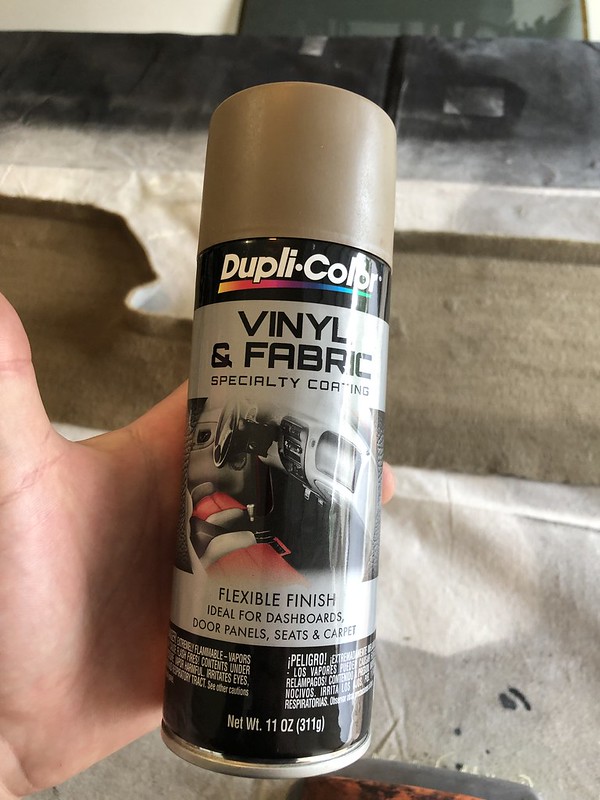
I used DupliColor vinyl and fabric paint, I chose Medium Brown as I read their Desert Sand is much too light. I started with the rear carpet:
Spare main carpet on the left, original on the right. Obviously you can see where I painted and where I didn't on the rear section:

I ended up doing 3 coats, it honestly looked really good after just 1. I brushed the carpet in between coats to keep the nap soft using a nylon bristle scrub brush. For each coat, I brushed the carpet uniformly in one direction and applied a coat. For the next coat, I brushed the carpet uniformly in the opposing direction and applied another coat, and so on so that the paint got into the fibers from all directions.
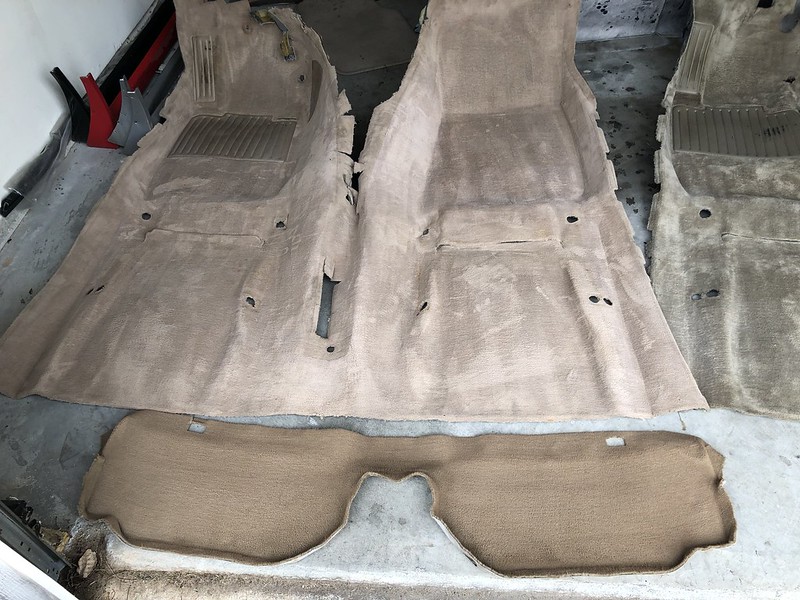
I was hoping to get away with not painting the main carpet section as the spare carpet actually looked pretty good, but the color was way off. So I continued:
For the vinyl inserts, I used SEM Vinyl Prep prior to spraying:
All done:
I did 3 coats, which used up 3 total cans of paint. I bought 10 cans after reading some other DIY's. I guess going from a light color to a slightly darker light color uses a lot less paint than trying to go from anything to black. I still have a few other items to paint, but looks like I'll have a ton leftover. The carpet feels just like regular carpet, not hard or rough at all.
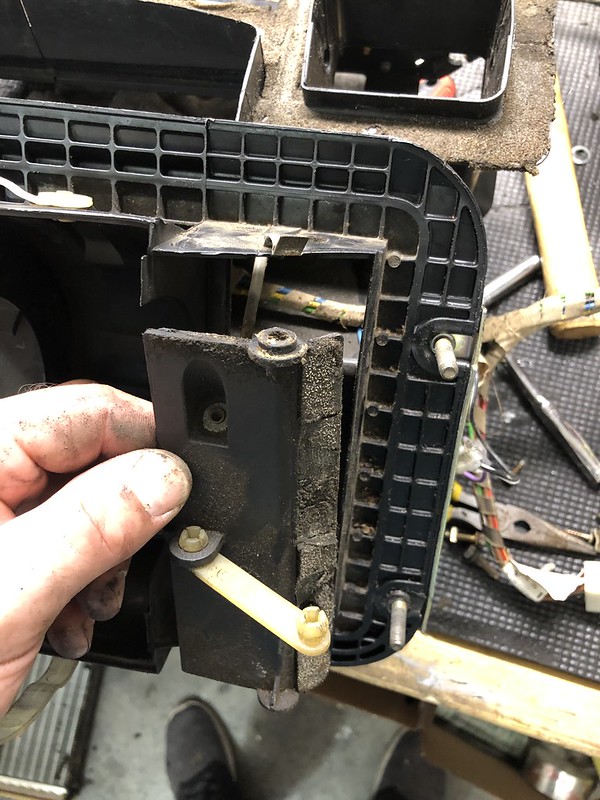
I also removed the old monopedal as I figured there's no easier time to take it out than with the entirety of the dash out of the way:
Cleaned up the manual pedal setup:
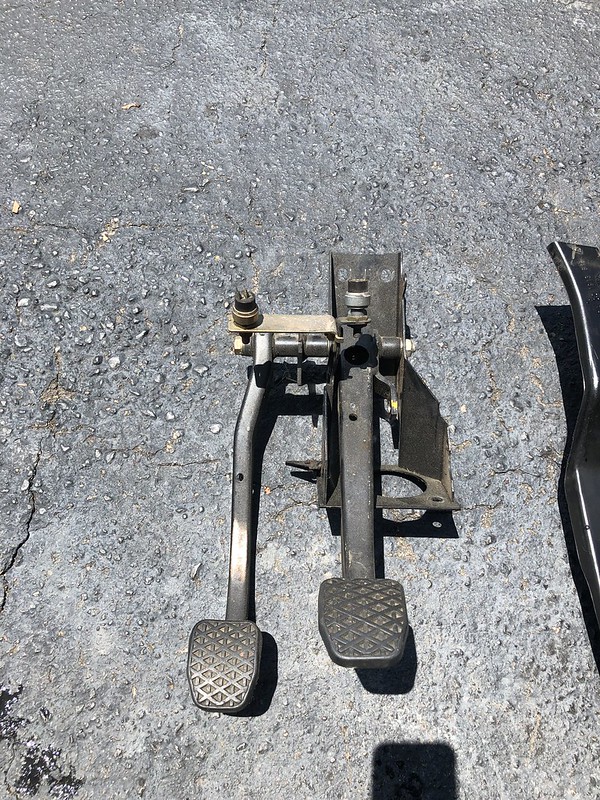

Some adhesion promoter and a couple coats of SEM Ultra Black Satin later:

No turning back now...'86 325e Zinnoberrot /// '02 325ci Schwarz II /// '18 M4 Azurite Black Metallic ///
Albie325 Build Thread | Albie325 COTM Jan 2021Comment
-
Great work, this is going to look and feel like a new car when done!Last edited by Tzantushka; 06-12-2019, 06:06 PM.E30 320i vert
But daily drive is Volvo V60 PolestarComment
-
I hope so!Originally posted by Tzantushka
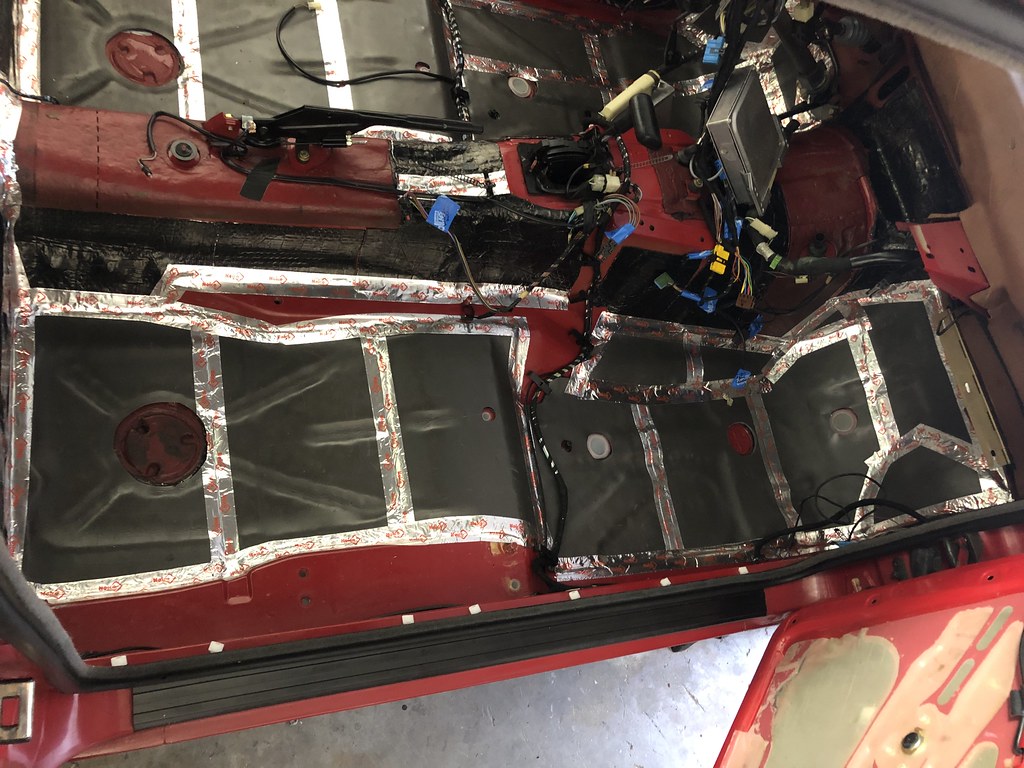
Spent the day putting sound deadener throughout the cabin:
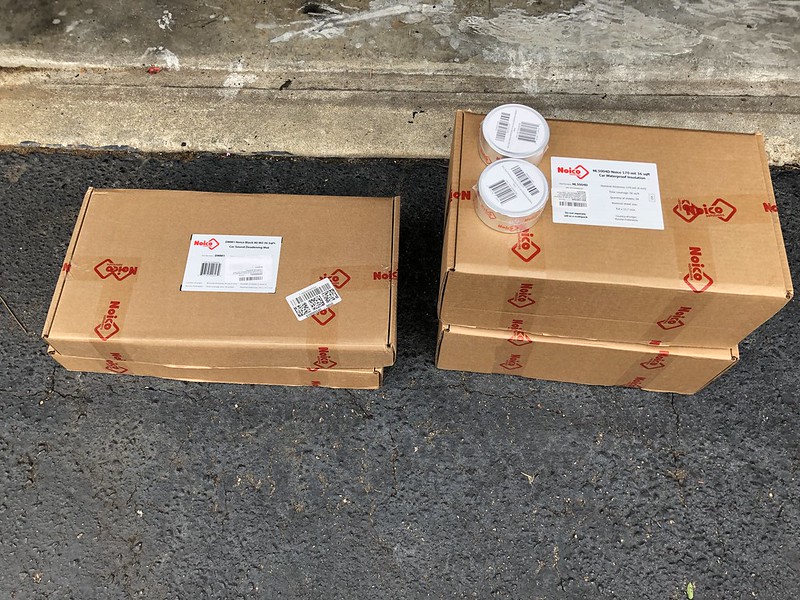
I went with Noico, they had great reviews and price was right. I also saw another R3V'er who used it in his build and liked it. I used 80mil as a base, and in places where I had enough room for it I also added a layer of 170mil neoprene over the top.


I made sure to keep all drain plugs exposed.
After what seemed like a game of Tetris from Hell, I got the entire interior done:


I found evidence of the repair to the driver's rear quarter panel, if not for the filler from pulling out the dent I would have never known it was there, the shop that did the work did a really good job:

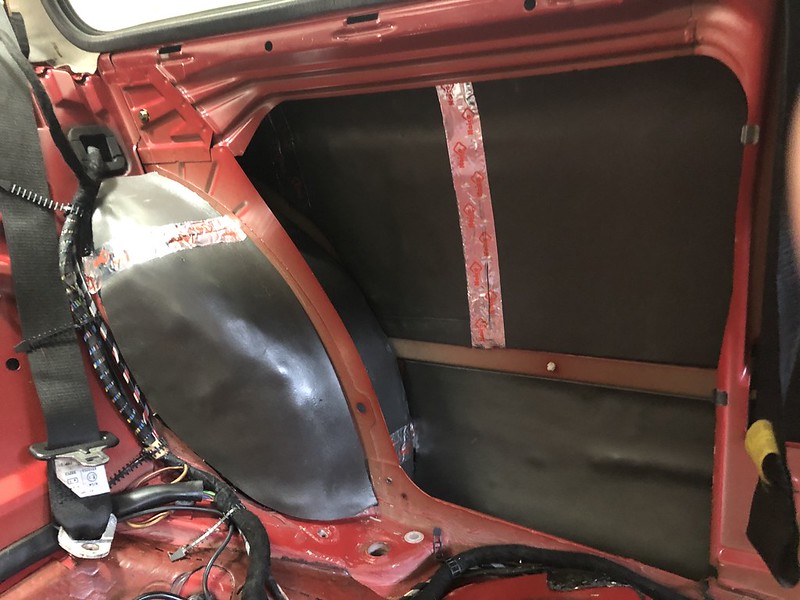
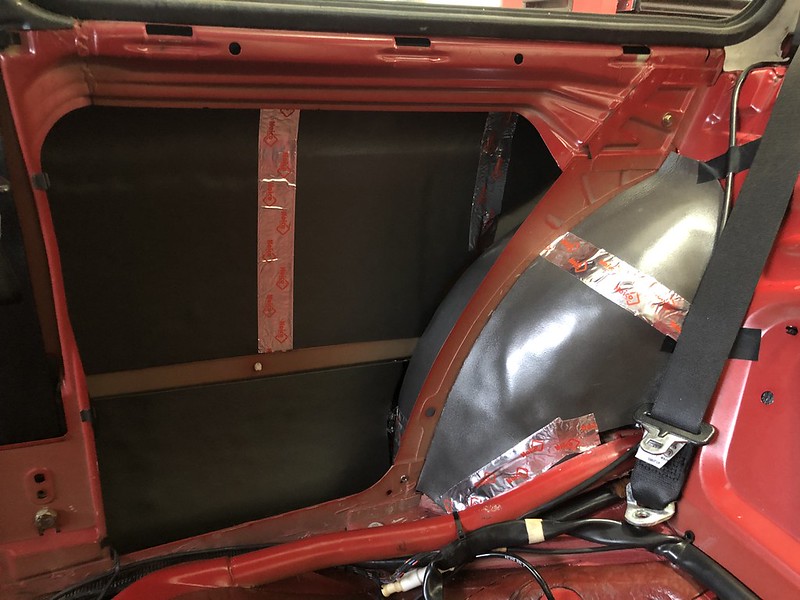
Hopefully this will help the rear deck speakers sound a little more lively:

I bought 72 sq/ft of each layer, I could have probably gotten away with just one box of each for the interior. I didnt use the 170mil for all sections as it was pretty bulky and I didn't want to have fitment issues with the center console and rear seats. Theres also already factory sound deadener to much of the interior so I left it in place and didn't really go over it.
I still need to do the inside of the doors and the trunk. I left the windows rolled down when I disconnected the battery so can't get to the exterior panel, and the trunk is full of interior parts. My driver's window regulator clicks when the window is rolled all the way down so was going to refurb both of the regulators anyway, I'll add the deadener to the doors when I have the glass and all the mechanisms out.'86 325e Zinnoberrot /// '02 325ci Schwarz II /// '18 M4 Azurite Black Metallic ///
Albie325 Build Thread | Albie325 COTM Jan 2021Comment
-
Dude, I forgot to tell you, I have plenty of neoprene if you want it.I do things.Comment
-
Sure NOW you tell me. All good, I ended up buying some pretty cheap on Amazon and got the IHKS all sorted out. Waiting on one of the foam seals to come in, apparently there’s 2 similar but different ones and of course I ordered the wrong one. Thanks for the offer thoughOriginally posted by Melon'86 325e Zinnoberrot /// '02 325ci Schwarz II /// '18 M4 Azurite Black Metallic ///
Albie325 Build Thread | Albie325 COTM Jan 2021Comment
-
Okay, been chipping away at some projects.
Got all the IHKS components cleaned and re-foamed:


As for the rubber cord sealer along the seam of the two halves of the IHKS I mentioned in an earlier post, this is what I was talking about:

It also seals the AC evaporator core cover:

By now it had plasticized and crumbled in my hand. The part is NLA, however I ordered 10 feet of 1/16" rubber cord on Ebay and it was the perfect match:

I got all the damper flaps back in and connected and lubed the hinges with some silicone grease so they wouldn't squeak:

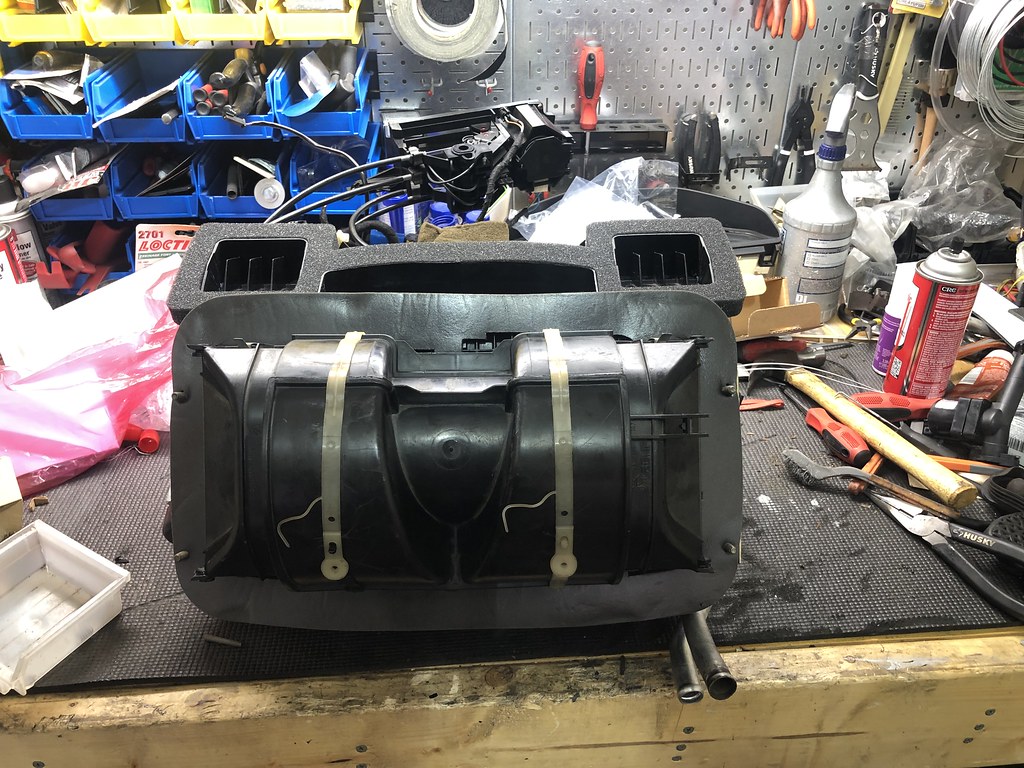
Got the two IHKS halves back together and put all the metal clips back in place. Then I went about replacing all the heater core and AC evaporator parts:
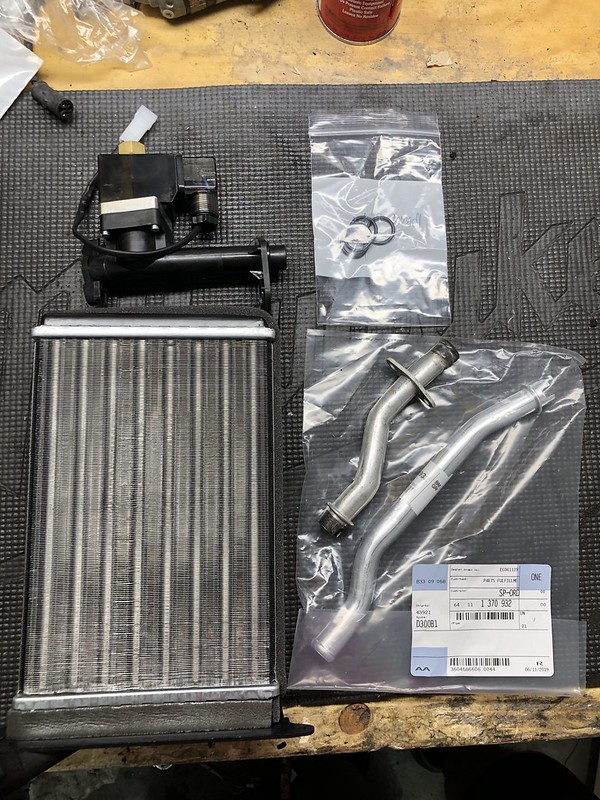
I could only replace the longer of the aluminum heater core pipes, the shorter one is NLA however mine appeared to be in good shape without any holes or pitting.
Be mindful before you trash your old heater core, you need to pop out these little square nuts and swap them into the new unit in order to screw the valve and aluminum pipes into place, there's also several of them in your old heater valve as well:

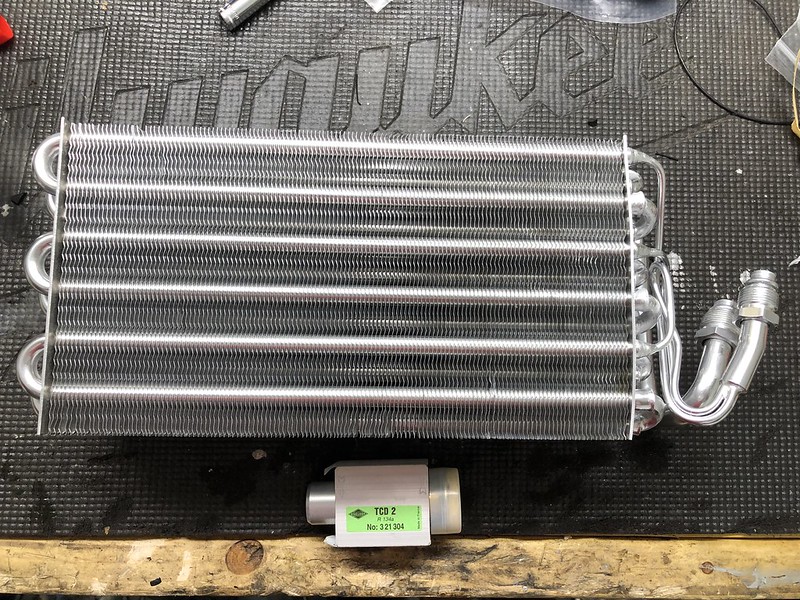
New expansion valve and evaporator core:
I replaced the O-rings and lubed them with PAO oil prior to install, you don't want to install them dry. I chose PAO as I'm going to keep the system as R-12, and PAO is compatible with both R-12 and R-134. All the seals, oil, and new components will be compatible with R-134 should I ever decide to switch over.
New temp gauge:


You have to uncoil that long sensor and use a long, thin punch to poke a hole in the evaporator fins in order for the sensor to slide in. I forgot to take pics of this, sorry for that. If anyone is interested I can take pics of the old one and show you what I mean.
New blower fan resistor, my fan was only working on full speed, a common indicator that the resistor is no good. Also replaced the broken fan shroud strap. My OCD is a little annoyed that the new one is black and the old ones were white but hey, I'm not racist:

New gaskets:
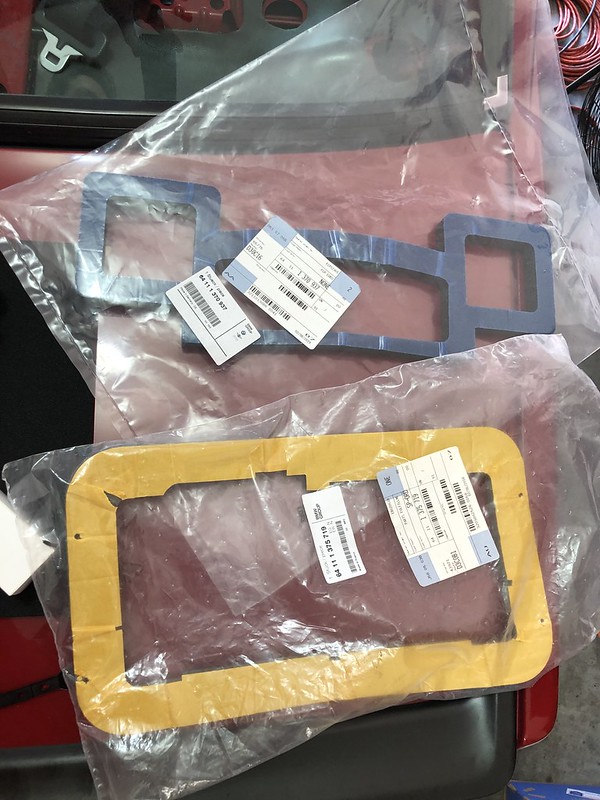
The bottom gasket which seals the IHKS to the firewall is actually the wrong one. There's apparently 2 versions. Hard to tell, but the one I ordered is a little too fat and the cutouts aren't right:
Took a couple extra days (and another $35) but this is the correct seal:

Got my extra carpet cutout in place:

And got the IHKS installed:

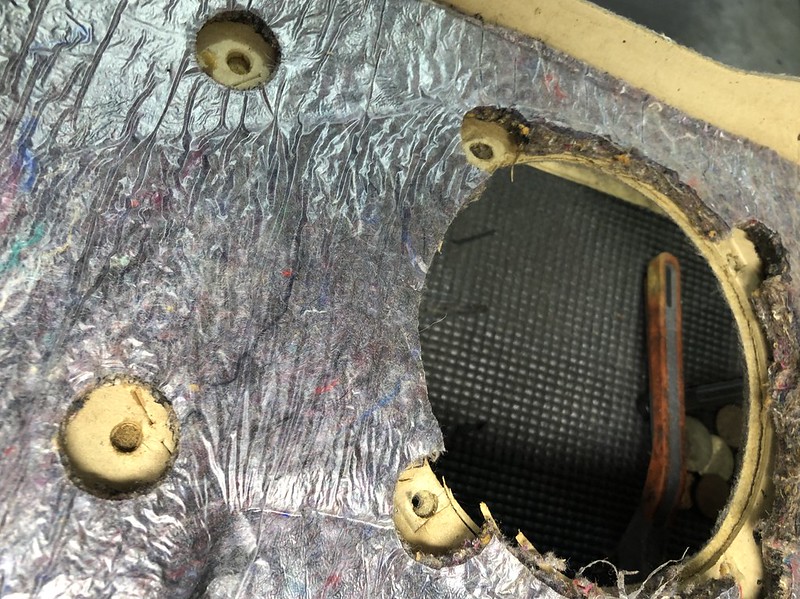
Went to go put the firewall cover back on and realized how bad the foam on it was so fixed that too:


In between projects I took the better half out to the ballpark. I'm a huge Yankees fan and Aaron Judge and Giancarlo Stanton were rehabbing at AAA Durham (next town over from Raleigh) last weekend so I went to see them, pretty cool:

Anyway, back to the car:
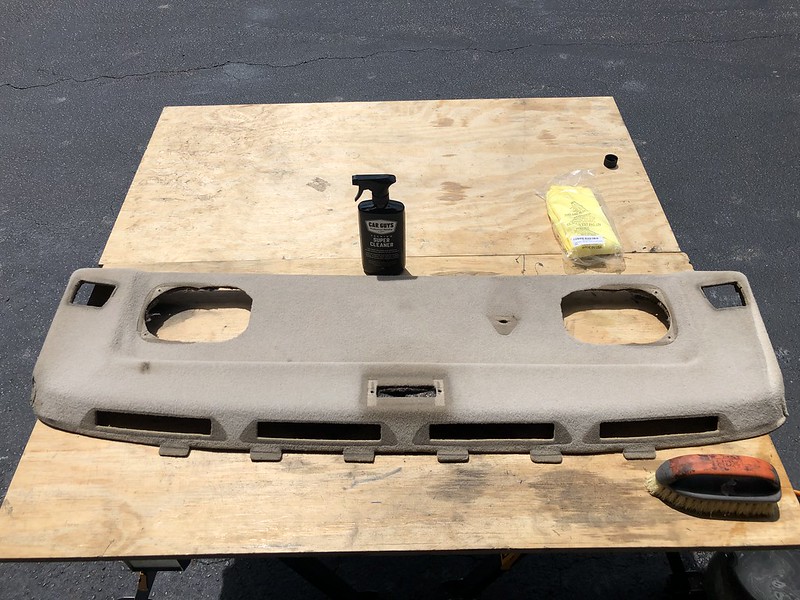
I got to work on the rear parcel shelf to do the premium sound upgrade. As stated in multiple threads, the cutouts for the premium speakers are already there under the sound deadener, you just need to cut out the perforations:


Then just cut out the carpet with a sharp blade.
Got the carpet cleaned and redyed as well:

Also repainted the vents and seat belt holder:

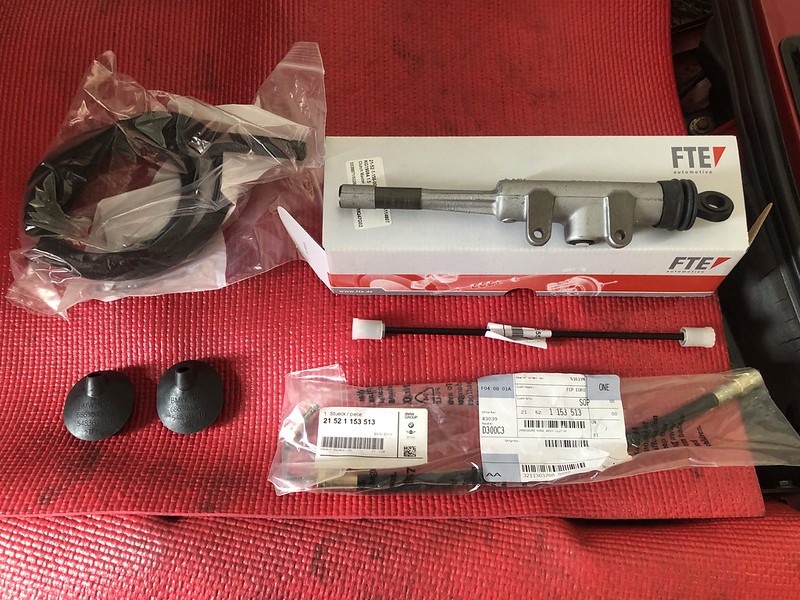
Got the brake assembly and all associated parts installed, figured it would be way easier with the dash still out of the way:
No pictures, kindof tight under there. Even with the dash out it was still a chore to get to some of the nuts.
Probably not necessary, but after all the work on the carpet and floor I clamped the clutch master fill line in place rather than spill brake fluid all over the place. I'll do the same at the brake fluid reservoir when the time comes:

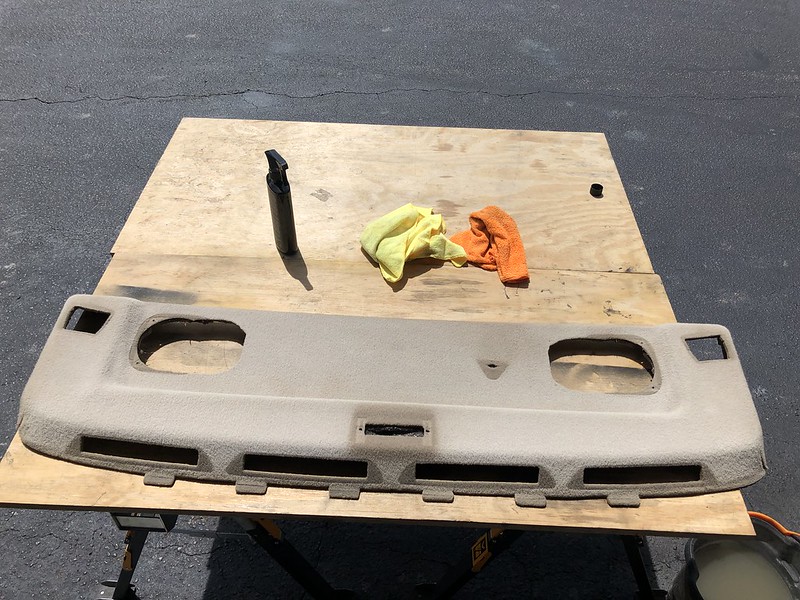
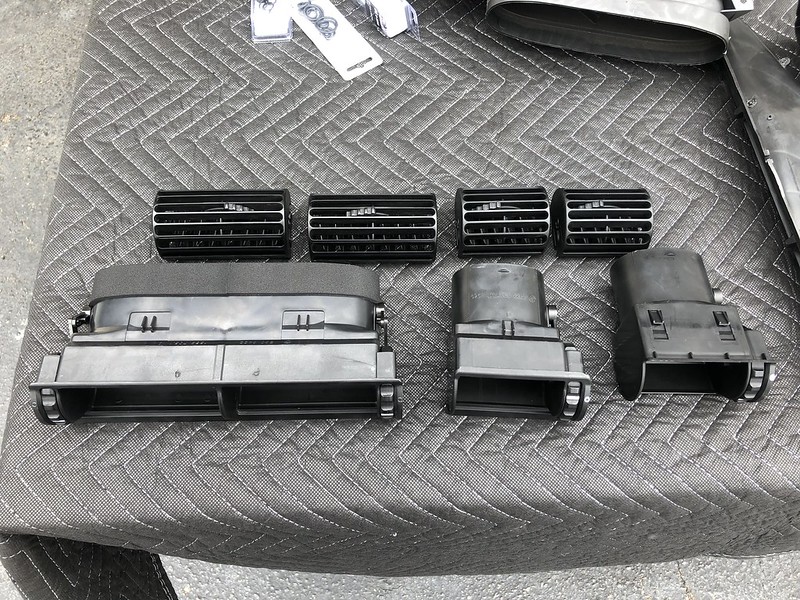
Last, I got to work swapping all the vents and ducts over from my old dash to the new one. I gave them a good cleaning first and replaced the foam:

My old vents were a little loose so I used a trick I found in a thread awhile back about making them tighter so they'd actually stay pointed where you want them to. A little rubber O-ring fit onto the pivot point and lubed with a little silicone grease. Much tighter and everything swiveled smoothly:
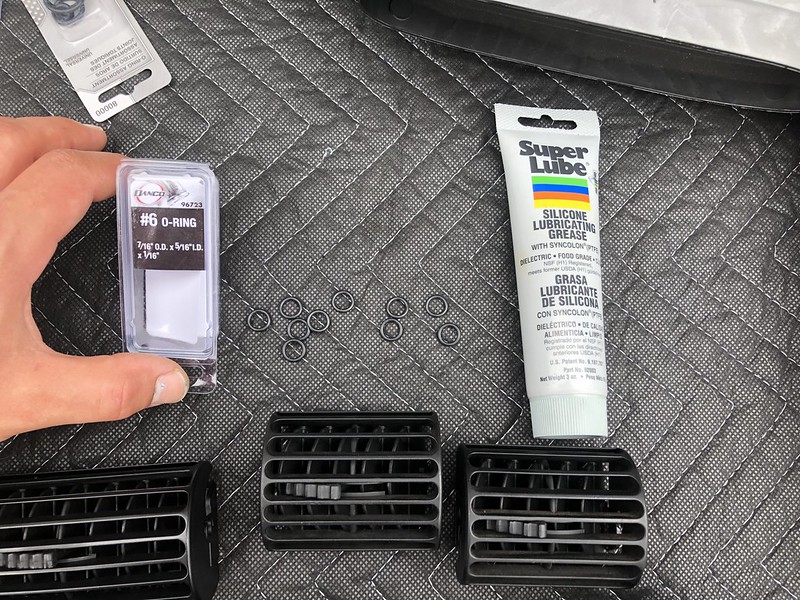

Could have probably gone with one size smaller O-ring but these worked well.
Once all the vents and ducts were in place, I swapped over my VIN tag and treated the dash with some Aerospace 303, came out looking pretty sweet:

I went about weaving the wiring harnesses back in through the appropriate holders etc. Took some time, but have all the wiring in the right spots nice and clean.
Ahhhh FINALLY I have a presentable dash:


Prior to calling it a day, I got the front premium speakers and tweeters wired up, I'll post that up tomorrow. With the dash finally installed I can get to work getting the rest of the interior in, which I hope to do tomorrow as well.'86 325e Zinnoberrot /// '02 325ci Schwarz II /// '18 M4 Azurite Black Metallic ///
Albie325 Build Thread | Albie325 COTM Jan 2021Comment
-
Great job on the HVAC assembly. I will be using this as a reference when I do the job myself. Where did you get all of the different foams? Do you have any links?How to remove, install or convert to pop out windows
http://www.r3vlimited.com/board/showthread.php?t=297611
Could be better, could be worse.Comment
-
Dude!

That looks awesome!
Great job on the IHKS, it's really not bad once you get it apart.
Man, poking a hold in the evap core made me super nervous, but it all worked out pretty well.
Few questions;
How can I get the vents out without damaging the dash?
And some deets about the spacer to get the vents some resistance back.I do things.Comment
Comment