
rzerob So the whole car has clear bra on it and a lot of that would peel off with the clear bra. The scrape went through the bra in some spots and left a nice wave in the bumper which wouldn’t bother me too much cuz I could get that out with some heat, however there’s a small but very noticeable dent in the metal of the quarter panel that definitely went through the paint. This car is essentially my dream car (aside from a Ferrari which ain’t happening) and I plan on keeping it forever so I’d rather just get it repaired and have it looking 100% again. This is why we can’t have nice things I guess...
-
Last edited by Albie325; 07-05-2019, 05:33 PM.'86 325e Zinnoberrot /// '02 325ci Schwarz II /// '18 M4 Azurite Black Metallic ///
Albie325 Build Thread | Albie325 COTM Jan 2021 -
Melon check out this thread:
https://www.r3vlimited.com/board/sho...316683&page=11
Found it very helpful when trying to decide between the Continental and Clarion headunits.
At post #152 I saw earthwormjim post a pic of his Continental that he swapped the diodes on. Basically changed the button diodes and backlight to diodes with the correct amber wavelength to match what is on the OEM backlight. It matches perfectly to the BMW items. I contacted him about it thinking maybe I’d buy the diodes and do it myself. Apparently they’re SUPER small and someone like myself with minimal electronics experience would have a tough time with it. He offers it as a service for a fee, parts and shipping included. He was awesome to deal with and I highly recommend it, pricing was very reasonable as well.'86 325e Zinnoberrot /// '02 325ci Schwarz II /// '18 M4 Azurite Black Metallic ///
Albie325 Build Thread | Albie325 COTM Jan 2021Comment
-
Great progress .....looking goodComment
-
I'm not that worried about it matching, at least I wasn't until I saw that. That's amazing. I never did get my OBC lighting to work. It seems as if the lighting power goes through the door chime and interior lighting system, which mine is all Hodge podge. I was planning on running a 12v hot to it, but it got lost in the shuffle.Originally posted by Albie325 View Post
How much was it? PM me plz.I do things.Comment
-
I promise I haven't been sleeping on the job. Been knocking out a few things here and there.
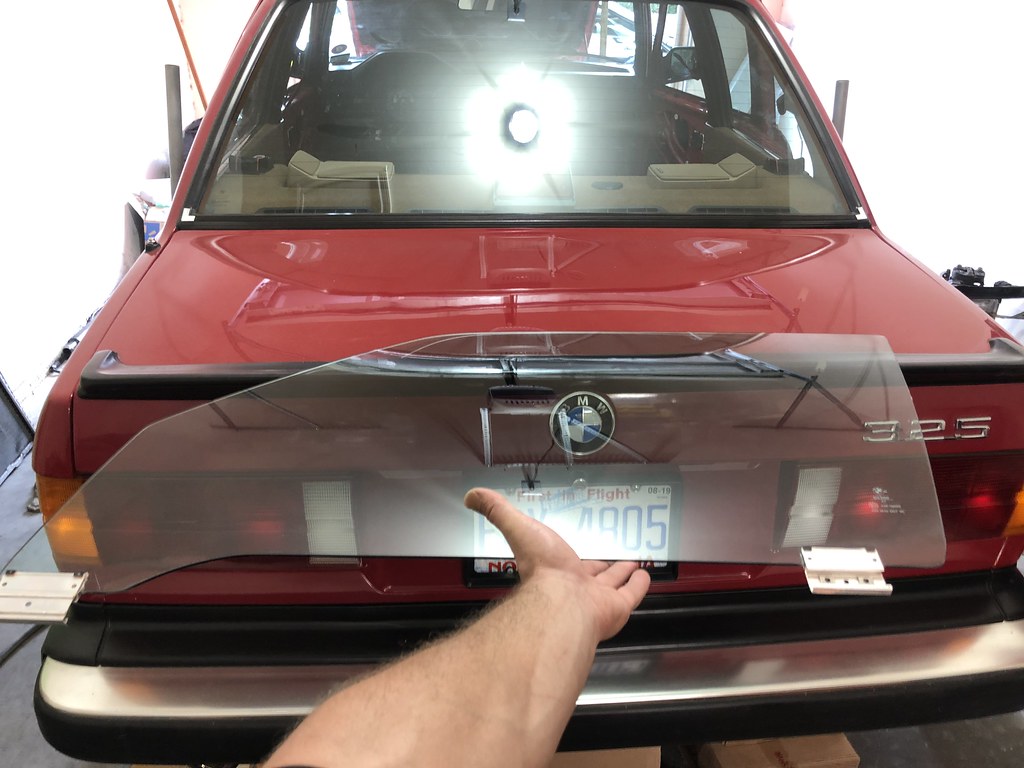
Got the front windows removed, the driver's side had these hideous scratches from the PO removing a parking sticker with a razor blade:

Always drove me crazy. I started by trying to buff it out with cerium oxide powder, but they were too deep. I then tried sanding as a last resort followed by cerium oxide.


The finish was very nice and crystal clear. Unfortunately the sanding wasn't 100% even and the glass looked like a funhouse mirror by the end, oh well. I had a spare that I'll use for now, it too has some scratches so I'll be on the lookout for a nicer one.
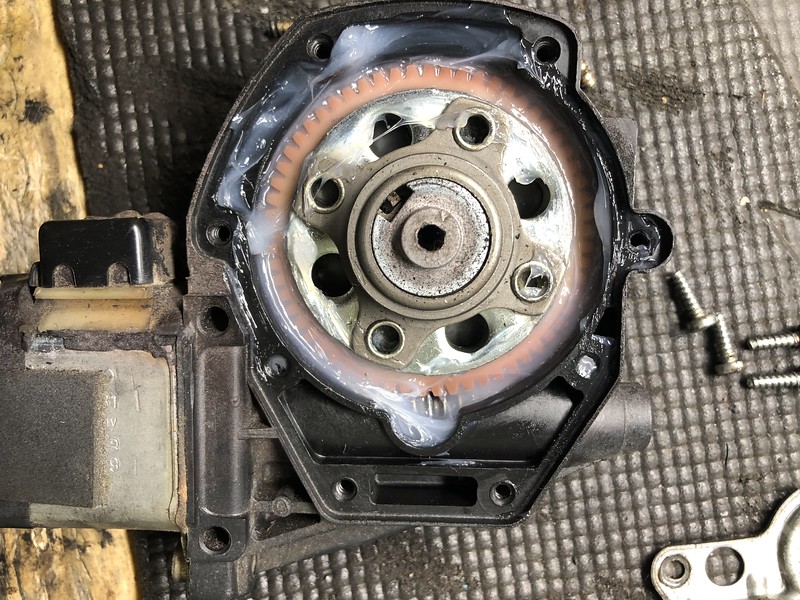
Next I had to replace the driver's side window regulator, it would always click at the bottom of the window travel if you held the button down.


Turns out the snake drive gear was flattened out at the bottom and the motor would slip causing the clicking:

I bought a spare awhile back and cleaned all the old grease out of it. I then cleaned the passenger side (which worked well) as well as both motors and re-lubed everything:

I used silicone/PTFE grease as it's supposed to be plastic-safe:
Got the sound deadener installed while I had the windows out:

Reinstalled everything and put new weather seal on the doors:


Got everything reinstalled and all worked great, no more clicking either!
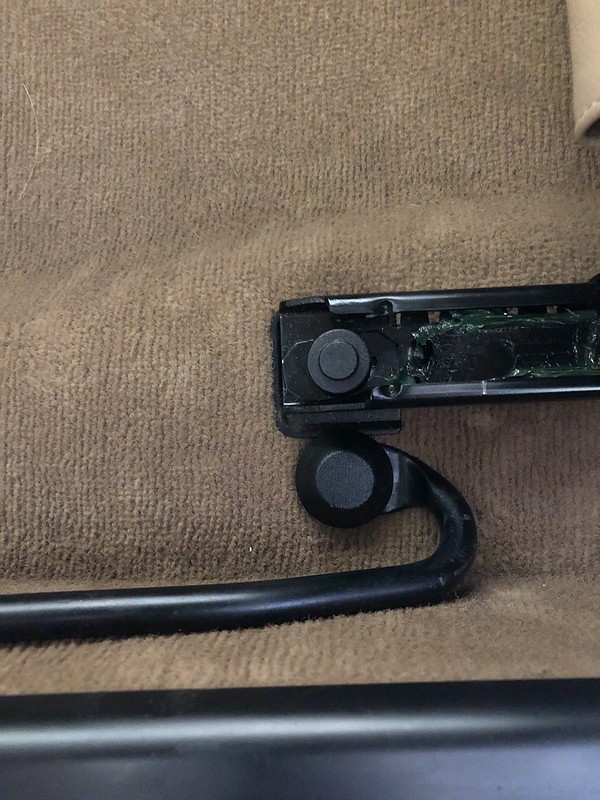
Now that I have the bluetooth head unit I don't expect to listen to the radio all that often so wanted to limit the amount of times the antenna goes up and down to save some wear and tear on the antenna motor. I read on another thread (by bradnic if I remember correctly) about installing a switch between the antenna power and the head unit so that you can control when the antenna goes up and down.
Here's how I did it:
First, pull the the white antenna power wire through a blank slot in the control panel (previously my fader switch) and cut it:


Then crimp on 2 spade connectors:

Next, attach the ends to an on-off switch of some sort. If you have the spare spot on the control panel like I do, a fog light switch works perfectly. If your control panel is full, you can use one of these smaller switches and mount it elsewhere. The key is just that it has an on/off function:


Now the antenna only goes up if I press the button. If I'm listening to BT, it stays down. If I decide two turn the radio on, it will still stay down until I manually hit the button for the antenna to go up. Pretty clean and easy mod, took less than 10 mins.
Last, I started getting the interior ready. Started by painting some houndstooth door cards I picked up somewhere along the way:


They came out great.
Last, I had been waiting to install my seats until I got my seatbelts back from re-webbing. I decided to go with black webbing with a red border since the car is red. I think it adds a nice little accent and really happy I went with it:

Also got the front seats installed, was a pain tracking down all the bolt covers. I had a few but was missing some. Ended up finding a few on Ebay to complete the look, devil's in the details:

Hard to get great pics of the interior in the garage, lighting isn't the best and it's a little tight in there. I'll get some better ones when I'm driving again.
Also, the front door tweeters are still available new and are about the same price as the used ones I saw on Ebay. Seeing as I'd bought 3 of them used and 2/3 were no good, I figured I'd just buy new and be done with it.

I hooked the battery up, turned the sound on and sat in my "new" sport seats while blasting some tunes. Man, what a difference the sport seats make, so much more comfortable and the sound was excellent with the sound deadening and upgraded speakers. Very happy with this part of the project!
Last I need to buy some mats, I'm having a hard time deciding between these two from Coco Mats:


I like to color of the bottom swatch but not necessarily the material (original CocoMat). The top swatch is more monotone but looks really nice, and I love the material way better (Sisal). I'll open it up to a vote I guess?
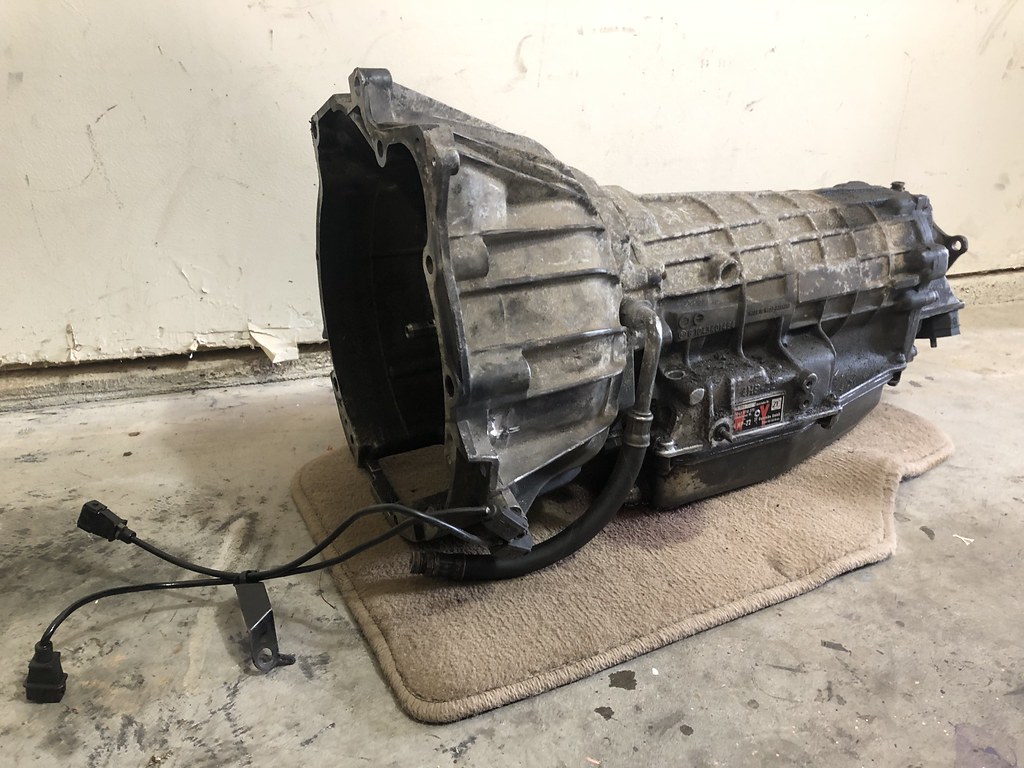
With the interior about 95% done, I started on getting the trans out. I got this beast done today:

I was dreading this job as everyone laments how difficult it is. I started by removing the front mounting bracket. I then got the outer, more accessible mounting nut off no problem but couldn't feel the inner, "bitch" bolt to save my life. To my surprise, the starter wiggled a bit, and then I just wiggled it out! Whoever did the auto swap when the original autotragic overheated must not have ever installed it. I may consider doing the same as it never caused me or Big Al any problems in the time we've had the car.
I then got all the bellhousing bolts out except for the top two, I need to pick up a longer extension to reach them. Hoping to have that done tomorrow. Also dropping the F82 off tomorrow to get fixed as well as the flywheel for a resurfacing. Hoping for a happy Monday!Last edited by Albie325; 07-23-2019, 02:48 AM.'86 325e Zinnoberrot /// '02 325ci Schwarz II /// '18 M4 Azurite Black Metallic ///
Albie325 Build Thread | Albie325 COTM Jan 2021Comment
-
Today was a success:
Going to do the rear main seal while it's out. Also need to freshen up the manual trans with new input/output shaft seals as well as a selector shaft seal among some other new parts before reassembly. Once I have the trans back in, it's timing belt/water pump time as well as camshaft and crankshaft seal, and oil pan gasket replacement. Then all should be good to go!'86 325e Zinnoberrot /// '02 325ci Schwarz II /// '18 M4 Azurite Black Metallic ///
Albie325 Build Thread | Albie325 COTM Jan 2021Comment
-
OOoooO i've been looking at cocomats for a loooong time now trying to decide on a color. I think the original material will last a good amount of time tbh. I do agree the other material is nice, but i wonder if the cocomat material will soften up a little bit over time and work better over time? I have a hard time deciding as well. love those mats though.Comment
-
That antenna switch mod is the next thing I've been meaning to get to.
So handy and useful. Hate that the Conti head unit extends the antenna regardless of the source your using.If it's got tits or tires, it's gonna cost ya!Comment
-
Love the radio antenna mod... Did a similar thing a couple months back so I could listen to cassette tapes (don't judge!) and bluetooth without the antenna always being up. I used a universal rocker switch and made a custom board for it to sit hidden away inside the front ashtray.
Sent from my moto g(6) using Tapatalk(OO=[][]=OO) For LifeComment
-
Good choice on the seatbelts, it's one of the things that I get the most compliments on in my car.
Also farewell auto sloosh box!
I like this one:
I do things.Comment
-
Yeah man I've been back and forth about 10 times on a few different options. I finally decided on the darker sisal swatch (just really felt like the other would shed like crazy), however when I went to place my order I found out it's backordered until October and they told me that the newer batch is unlikely to be identical in color due to they dying process. I didn't want to wait that long, so decided to go with a sisal mat that's a bit lighter, I actually think it will contrast well. Hope to have them in 3 weeks or so, stay tuned.Originally posted by jeenyus
Yah I was surprised when I fired up the head unit that the antenna stayed up on BT mode. I was intending to do the mod either way so nice to have it regardless.Originally posted by Stanley Rockafella
Ha!, if I could find all of my old cassettes I might have reconsidered ditching the OEM radio, I'm shocked you can still find them. No judgement here, sounds like you made a nice little setup with the hidden switch.Originally posted by 15Michaeljoseph
Got a TON of important projects done today, will plan to post it up in the next day or so'86 325e Zinnoberrot /// '02 325ci Schwarz II /// '18 M4 Azurite Black Metallic ///
Albie325 Build Thread | Albie325 COTM Jan 2021Comment
-
Fantastic updates! You're going to love the car with a manual trans- what diff is in the car?Comment
-
AWDBOB I swapped in a rebuilt 3.25 lsd, a lot of people recommended it for the eta engine. It really did make a big difference with the auto trans in, excited to see what it does with the manual'86 325e Zinnoberrot /// '02 325ci Schwarz II /// '18 M4 Azurite Black Metallic ///
Albie325 Build Thread | Albie325 COTM Jan 2021Comment
-
So got a lot of the big maintenance items out of the way over the last few days.
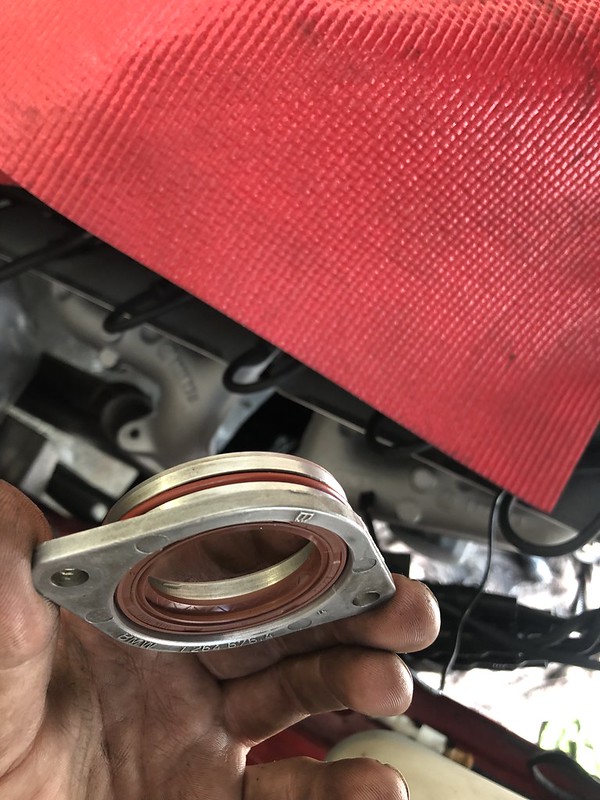
With the trans out, I did the rear main seal, was a pretty easy job:

As the Bentley states with essentially all the engine oil seals, the original seals are installed flush with their retaining brackets. When replacing them, be sure to drive them in 1-2mm deeper so that the new seal doesn't ride in any grooves in the metal shaft left by the old seals leading to a leak:

There wasn't a groove in the ouput shaft, however there was in the crank shaft which you'll see later. If you are not going to be doing the oil pan gasket, you'll need to seal the rear main seal carrier to the oil pain using a silicone sealant.
While I was back there, I decided to replace the heater hose coolant connector on the back of the head, I couldn't quite get to it when I had the intake manifold off:

It was pretty crusty but seemed to come off ok until:

One of the bolts sheared off flush with the head. Ugh. A 10 minute job turned into a bout a 4 hour ordeal.
I ended up having to drill out the old screw and re-tap the hole (it's an M6 x 1.0 for those interested), but I had to drop the subframe in order to get enough tilt on the engine to get a drill in there. Ended up working out great though:

Sorry for the lack of pics. It was a rough day, I was cranky as hell, and it was tight under there.
I ended up removing the engine coolant plug and flushed the whole system through the rear hole until the water was mostly clear, got a bunch of gunk out. Replaced the old plug as well, don't forget your crush washer:

Tightened up no problem:

Next I wanted to get the waterpump/timing belt done, along with the cam shaft, crank shaft, and intermediary shaft seals:
After removing all the necessary pulleys/cap/rotor:

This was AFTER some degreasing. The front of the engine was caked to the point I couldn't even tell where the TDC marks were.
The waterpump/timing belt change is very well documented so I'll spare you. As for the crank shaft/intermediary shaft seals, I didn't find much in the way of DIY's so I'll go into more detail about that part of it.
Remove the crank pulley and vibration dampener, there's 6 13mm bolts holding the pulley in place. There's a tab on the crank timing belt gear that only allows them to go back on one way. They're just held in place by friction at this point, mine popped off with relative ease but you may need to tap them off with a rubber hammer.
You'll need some type of holder tool to hold the crank steady while you break the front crank bolt loose, it's torqued to 350ft/lbs so it's on there damn good.
I ended up just buying this, it wasn't too bad price wise and made the job very easy:

Using the crank shaft pulley bolts, get the holding tool attached to the crank belt gear:

Don't worry about aligning the TDC marks yet. Stabilize the end of the holder tool against something rigid, mine ended up resting on the power steering bracket. If you are planning to do the camshaft seal, break that bolt loose but don't remove it. Next you can break the intermediary shaft bolt loose (again, don't remove, just loosen it so that you can remove it once the timing belt is off). Last, I went for the big boy:
First I tried to just use an impact gun, the bolt just laughed at it.
I ended up getting it off using a big breaker bar as well as a full jack handle (and all of my super-human strength):

Once the bolt was loose, I then snugged it up just so that I could turn the crank to align my TDC marks:


Now you can remove the bolt:

At this point you can remove the tensioner as well as the belt. Point of no return...

Obviously from here on out you have to be very careful not to allow the camshaft or crank to rotate or your timing will be fubar'ed. The intermediary shaft doesn't matter.
The old belt was actually in very good shape:

Next remove the crank belt gear, it is aligned with a woodruff key in the crank and will only go back on one way, mine slid out pretty easily:

Remove the woodruff key, it was a little hard to tap out but I used a small flat head and eventually got it:

Last, remove the intermediary sprocket:

You're now ready to remove the lower crankshaft cover, it's held on by 2 13mm and 4 10mm bolts. You'll also need to remove the 3 oil pan bolts that screw into it.

Remove your water pump and clean everything up. If you aren't planning on removing the oil pan and replacing the gasket like I am, make sure you stuff some rags in the gap to prevent anything from falling in.
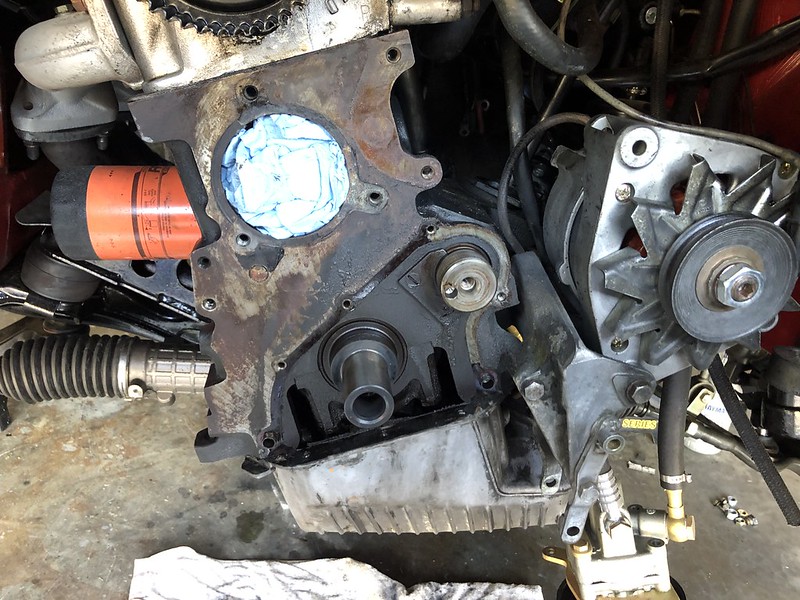
All clean:

Our replacement parts:

Clean up the cover and tap out the old seals, a 36mm and 46mm socket were perfect:

As with the rear main seal, the old seals were flush with the front of the cover with about 1mm of space towards the back:

I tapped the new seals in so that they were 1mm deeper and flush with the back:
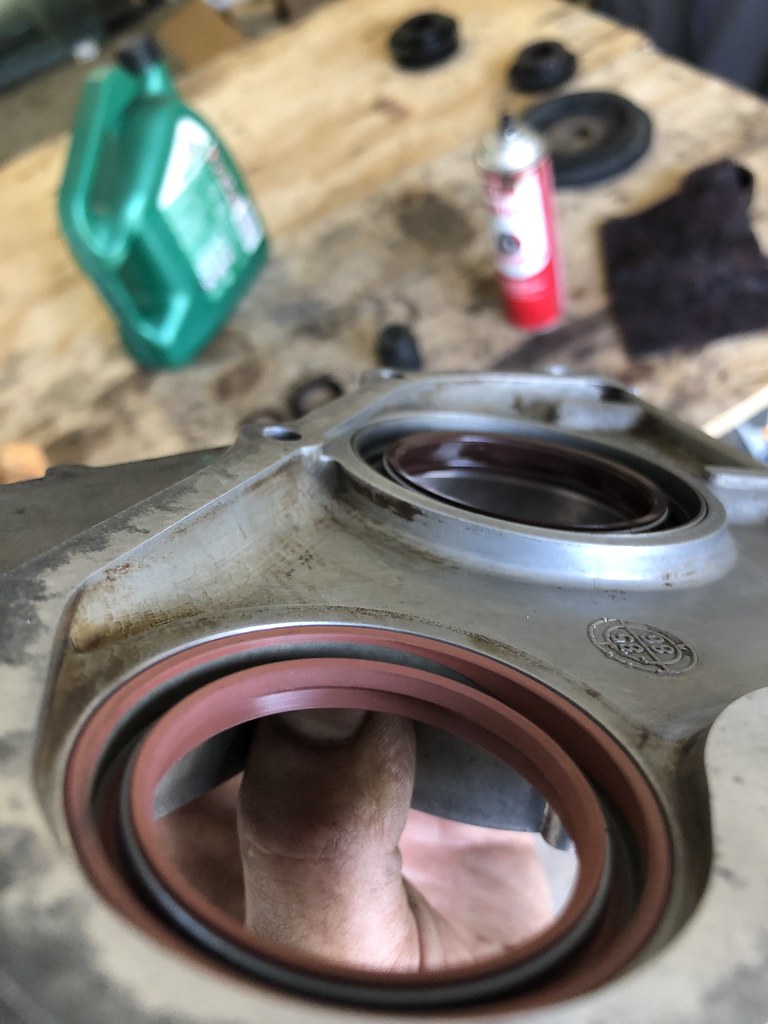
Here's why:

The old seal causes a groove in the crankshaft, if you reinstall the new seal at the same depth as the old one it will ride in that groove and cause a leak. You have to install it deeper to get it past that groove so that it can seal to a fresh part of the crank shaft, nice and snug.
I got the gasket in place against the block, there's two dowls at the bottom where the 13mm bolts go that help hold it in place while you get the cover put back on. Coat the crank and intermediary shafts with a light coat of oil and guide the seals over the shafts, first the intermediary as it sticks out farther, followed by the crank. I used a small, flat non-marring pry tool to (gently) help make sure the seals went on without binding. If you are not going to be doing the oil pan gasket, you'll need to seal the crank/intermediary shaft seal carrier to the oil pain using a silicone sealant. I'm removing mine so didn't have to worry about it.

Reinstall and torque down the bolts, and this part's done (10 newton/meters for the 10mm, 22 newton/meters for the 13mm bolts)
Tap in a new woodruff key, lightly oil the crank shaft, and slide the crank belt gear back on. I was relieved when it still lined up perfectly:

Next I did the camshaft seal. Remove the camshaft pulley mounting bolt that you broke loose earlier, followed by the distributor rotor mount and the pulley. I was cruising along on a hot-as-balls day and forgot to take pics here, sorry. There's 2 10mm bolts that hold the camshaft seal carrier in place, remove those and you'll have to use a thin flat tool to pry/wiggle the camshaft seal carrier off. Once it's out, remove the old inner seal and reinstall as before, and don't forget to change the outer O-ring as well:
Clean off the camshaft and lightly lube with oil along with the camshaft seal O-ring and tap back into place. Reinstall the 10mm bolts for the carrier. Reinstall the pulley and distributor rotor mount and screw in the bolt but don't tighten. Ensure that your TDC mark is still aligned.
Since I didn't take many pics of the camshaft seal replacement, here's a good DIY that I used:
https://classicbimmerbits.com/e30-ho...l-replacement/
There's also a lot of other really good DIY's on that site including a full write up of the timing belt/water pump.
At this point, install your new water pump and belt tensioner, making sure the tension spring is compressed. The rest is the usual timing belt replacement.
Once the belt was installed, I turned the crank through 2 full revolutions and...my marks thankfully still lined up dead on. Went about cleaning up and repainting some crusty bits and got everything reinstalled:

I also got a special delivery over the weekend:

My refurbed AFM from BavRest, now I can actually start the car once all this shenanigans is done. Still waiting on my cluster which will be a few more weeks, I have a few spares I can use for now.
All that's left now is the oil pan gasket (god I've talked about it so much I just want it done already) and the trans install, followed reassembly of the driveshaft and exhaust. I've already started refreshing the Getrag 260 as well as the shift carrier, when I get that all finished up and mounted I'll post it up as well. Hoping to have this thing running in the next 2 weeks... famous last wordsLast edited by Albie325; 07-31-2019, 05:09 PM.'86 325e Zinnoberrot /// '02 325ci Schwarz II /// '18 M4 Azurite Black Metallic ///
Albie325 Build Thread | Albie325 COTM Jan 2021Comment
-
good stuff,,, well done,Comment
Comment