-
Yeah my upstairs has jets on two sides. Tankless hot water heater equals endless relaxation if you choose to pay the gas bill and water bill. I toy with getting a hot tube but feel it would be wasted electricity. -
^ those shower panels are awesome! We just installed one and it took a fraction of the time to install, plus its large enough to cover screw holes from the original system.
Just hook up the hot and cold and done!Leave a comment:
-
This is how I did my kitchen


We outsourced for the tile floor but the older gentleman did an awesome job. And this is my shower. It is getting a glass tempered door in the next month.
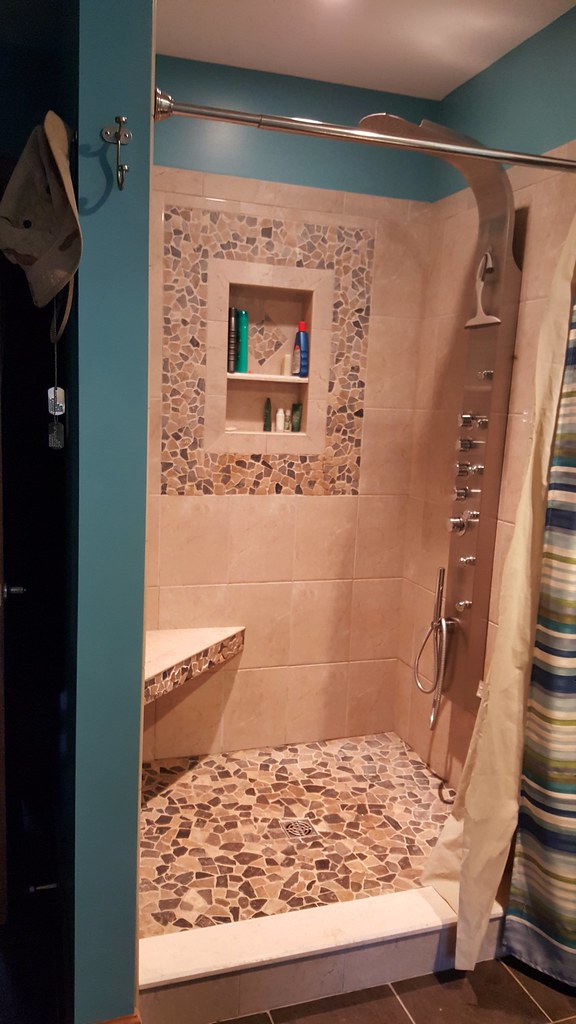
It has a schluter drain system that is slick and tile guy loved it along with the drain. That is on wood, I did two layers of Advantix flooring osb, one the sub floor the other the flooring then the tile over it.Last edited by M-technik-3; 09-06-2017, 01:18 PM.Leave a comment:
-
Agree with Flyboyx about the fully tile shower. I did one recently, but my shower sits on concrete at grade. If it had been sitting on wood, I would not have done the tile floor, regardless of how much the wife complained.
Also, while the cheapie 200 dollar basic tile saw will easily do the trick for you when it comes to tile floors, the same cannot be said for doing a tile shower (at least, if you care about craftsmanship/quality). I had to pony up over 500 dollars for the sliding table tile saw in order to attain the level of quality I desired. Just something to keep in mind if you want to start placing tile anywhere other than a floor.
Your work looks great though. Which reminds me, I need to get some pictures up of my finished bedroom!Leave a comment:
-
Tile shower pans are really hard to seal up. Generally, they always end up leaking somewhere in the long run. The corners of the vinyl liner or where the drain penetrates the sheathing or both. I only do them on concrete slabs where it doesn't matter. If you want to switch out your tub, I highly (as in HIGHLY) recommend the acrylic shower pan I posted a photo of a couple pages back.
Your tile work looks great, btw.....Leave a comment:
-
Here's after another wipe down to get the haze off, grout was about 24hours in and shows how light it got. It is even though, lighting makes the one spot appear much worse.Attached FilesLeave a comment:
-
-
Got the floor down, but I screwed up and learned a lesson in grout. I think I cleaned it too soon and used too much water, it lightened up pretty bad after this photo, everywhere except the corners where I didn't mess with it much. Picked up some Aqua mix seal n enhance yesterday and tried a spot, seemed to help out some. Going to seal it all tonight and hope for the best. If I can't deal with it, I guess I get to cut it out and try again.
New pex plumbing everywhere I could get to, new insulation down below, and ended up returning the OSB in favor of some 23/32 BC plywood. Father in law came down to help me install the board and tiles. Now we are on the hunt for a new vanity, and next project will be removing the shower liner in favor of a tile wall. Part of me still wants to remove the tub, divider wall, and do a 100% tile shower.Attached FilesLeave a comment:
-
-
The door stairs and the door were pre-existing, I have just redirected the bottom half next will be the top. If I can get a home improvement loan I plan to add a dormer on the side where you see the door. Adding a full height ceiling will boost the house value when it comes time to sell.
All the improvements have been cash and bartering.Leave a comment:
-
the door wouldn't be heavy enough to compress the shims. you do have to make sure the frame is tight against them. i am guessing this is your problem. i suggest you take out one screw from each hinge and replace it with a screw long enough to go all the way into the wall stud. put a shim stack there to make sure you don't bow the frame. they do make plastic shims but i don't think they are necessary. i generally prefer the wood version because they thickness of each shim varies a bit. sometimes you need a thicker one, sometimes thinner.....
m-technic 3, looks like nice work you are doing on your home. i bet after all this time, you are getting tired of renovating. that is an interesting solution you have come up with to place your doors tangential to the sloped roof line. i have had that occasion once or twice and all i did was cut an angle on the corner next to the roof instead of making the angle even on both sides. also, houses of that era usually need tons of wiring work. often plumbing too.
the home my wife and i live in is a tract home that was built in the late 70's. every other home in the neighborhood was built with galvanized water pipes. for some reason, mine came with copper. i thank my lucky stars for this every time i work on it.Last edited by flyboyx; 09-05-2017, 05:24 AM.Leave a comment:
-
All makes sense, thanks! Yes they were all pre-hung doors.
I think I may need to pay more attention to my shim stack at the bottom of the hinge side(compression) especially with the solid doors. It may be that they weren't tight? Or maybe they just compressed due to the weight and being soft wood shims.
Do they make hardwood shims?Leave a comment:
-
Last room in the house I completed 3 years ago

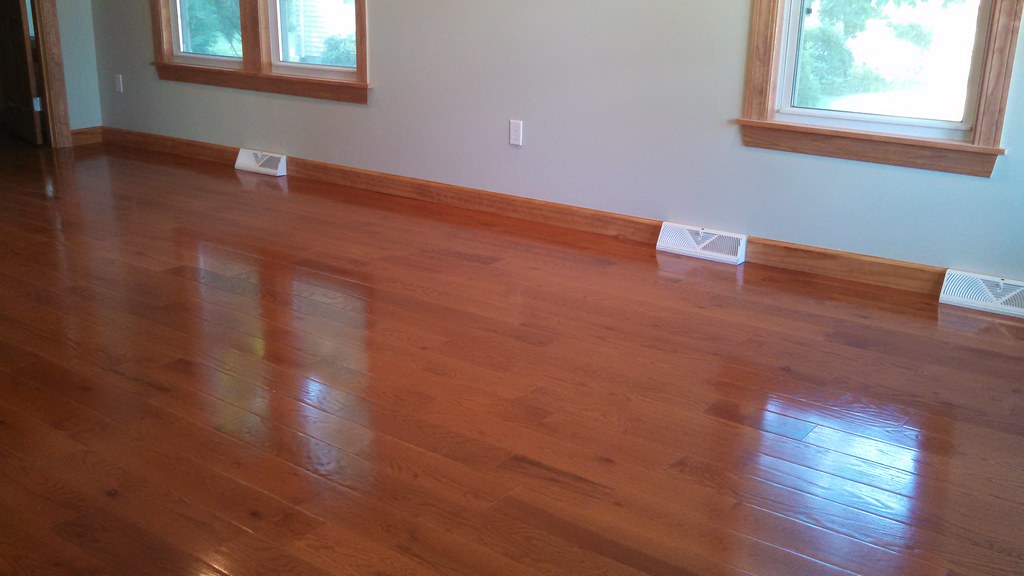
Whole house has been gutted and gone through, Money Pit! Moved a bedroom and kitchen and basement staircase. Made first floor bathroom double the size, 5x5 walk in tiled shower 2nd floor tbd will be Master Suite or 2 bedroom making house a 4 bedroom from an original 2 bedroom.
Need to put a dormer on the second floor in the back of house to allow me to redirect the staircase and put a proper entry as right now it has this funky door cut into roof line
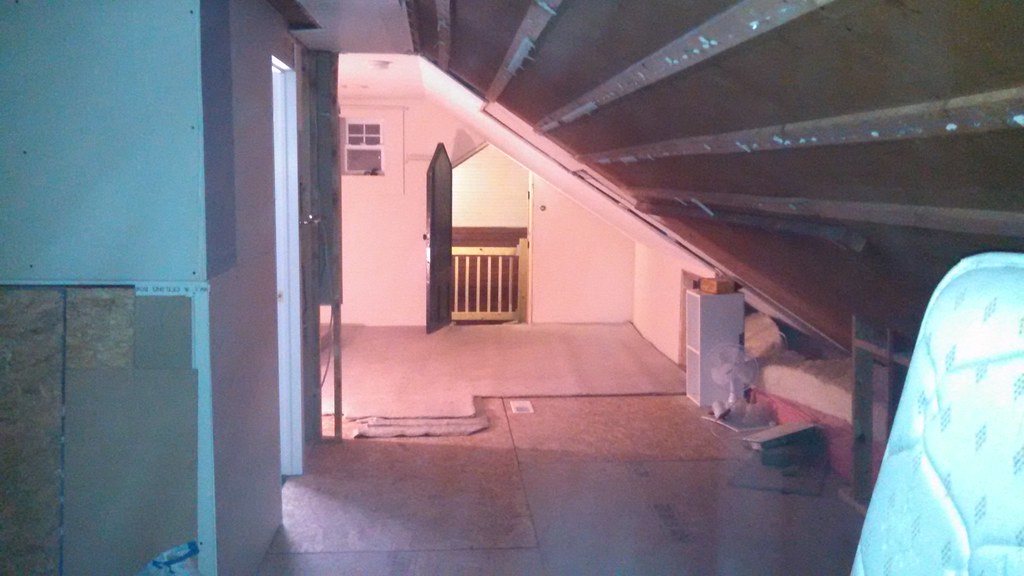
see door at far end, the sheetrock area is a full bath, house was built in 1908 I can't believe it didn't burn or fall down. It had numerous things I had to correct over the last 8 years.Last edited by M-technik-3; 09-05-2017, 02:07 AM.Leave a comment:
-
If your door is drooping it's likely that the stud you secured it to on the hinge side is flexing. If you have access to the framing id double the stud and maybe even block it over to the next stud in a couple of placesLeave a comment:
-
hmmm.....
i don't honestly know what ez hang brackets are. i usually install hollow core doors for interior use. that is what people normally use in these parts. i have installed a lot of exterior doors and they are always solid and much heavier.
my first question is: are you installing the door and frame together as one unit or are you installing the door into a pre-existing frame?
when installing door and frame as a unit, my method is to start with the hinge side of the door. get a good level and plumb that end of the frame both forward and aft, then sideways. this is by far the most important step. if its a hollow door, i usually just shoot in a few 16 gage air nails through the shims i would have used between the door frame and the stud in the wall. i always use at least 3 shim stacks. one at the top, middle and bottom. i try to put them pretty close to the height of the hinges. if the door is solid, i will run a deck screw through the jamb instead of air nails. i think perhaps your problem is that the door frame is moving on you as you install the door because of its weight. have you tried the deck screw method?
once the hinge side is secured, i check it again both ways for plumb. only then do i start working my way around the frame. on the latch side, i close the door and check that the clearance is even all the way around. sometimes i will stick a shim or two under the very bottom of the frame in the hinge side so that the gap at the top of the door is even. when that is in place, i put a shim stack about 4" down from the top of the frame on the latch side. once i am sure everything is lined up and the gaps are all even, i will put a screw or nail though the frame so that it impales the shims. i put a shim stack by the latch and then another shim stack about 4" from the bottom of the door.
you will notice that i didn't mention putting any shims between the top of the door frame and the header. normally this isn't necessary. the trim will usually hold it in place just fine once it is installed. occasionally there is a gap issue at the top. in this case, i will make a shim stack and use the appropriate fastener to even out the gap.
that should be good enough to hold in place until you nail on the trim. be mindful of the gaps as you nail on your trim. you can sometimes adjust the gap a little with a pry bar as you are nailing on the trim. put a finish nail about every 8 or ten inches in the trim that will go through the door frame and also the wall stud right next to the door you are installing.
hope that makes sense and helps you out.Leave a comment:
-
Future reference use Roxol to dampen sound it cost more but it works.Leave a comment:
-
Any tips on hanging solid core doors? I had to hang 10 of them a few months ago and almost immediately they started sagging and catch the upper corner. I eventually got smart and started to compensate for droop, but was wondering if there's a more consistent method for hanging?
Is it partly due to quality of hinges?
And I was using EZ Hang brackets.Leave a comment:


Leave a comment: