If this is your first visit, be sure to
check out the FAQ by clicking the
link above. You may have to register
before you can post: click the register link above to proceed. To start viewing messages,
select the forum that you want to visit from the selection below.
This thread will breath until BMW NA comes out with a free maintenance plan for e30s.
Ok so here's a little something...Kingston are you paying attention ? I dont believe I have ever read about anyone doing this...bits and pieces here and there but this should be the first comprehensive, illustrated & detailed description..of a cowl refresh !!
Go get popcorn.
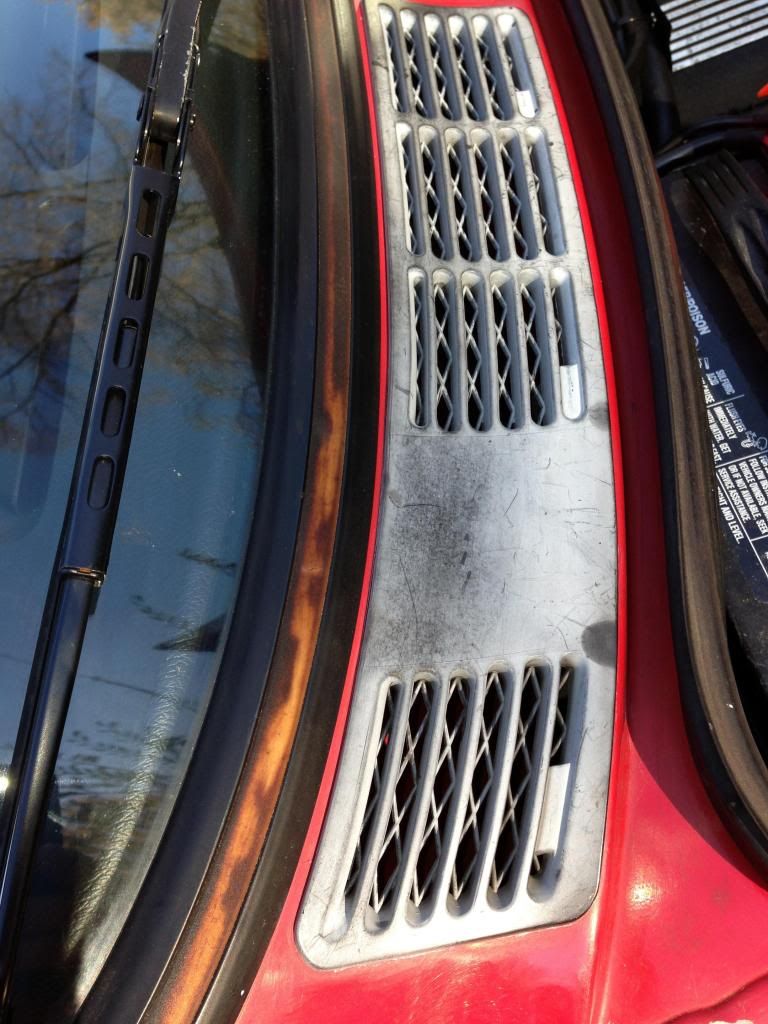
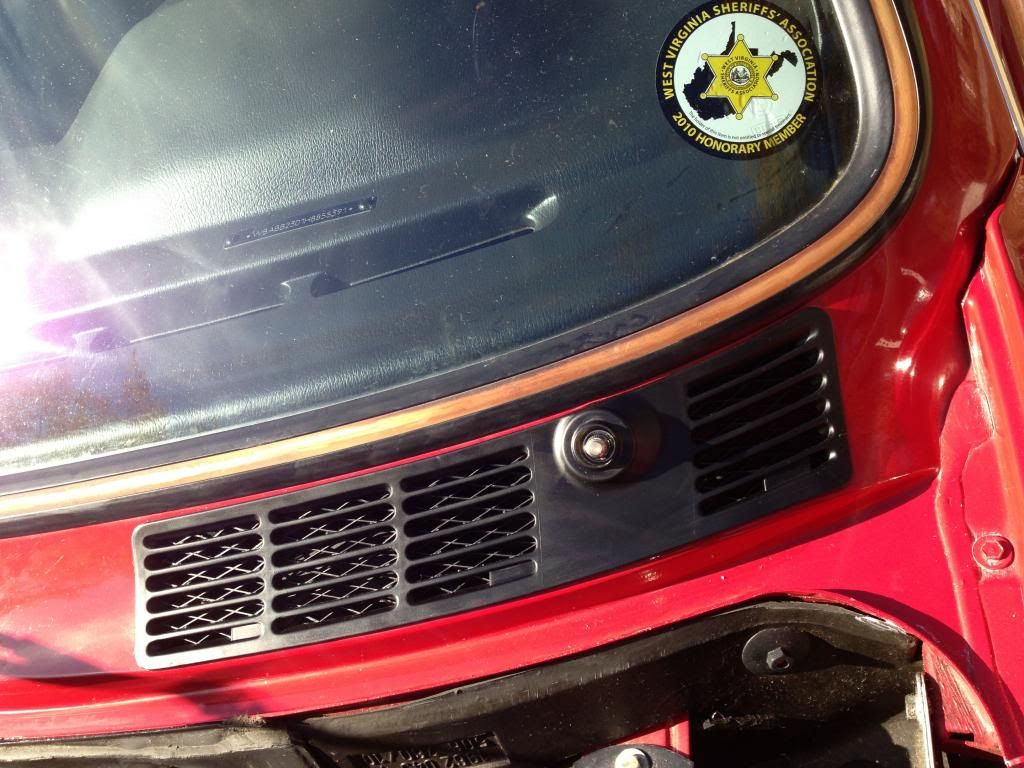
Here is what your typical cowl looks like. Faded grills is what everyone sees.
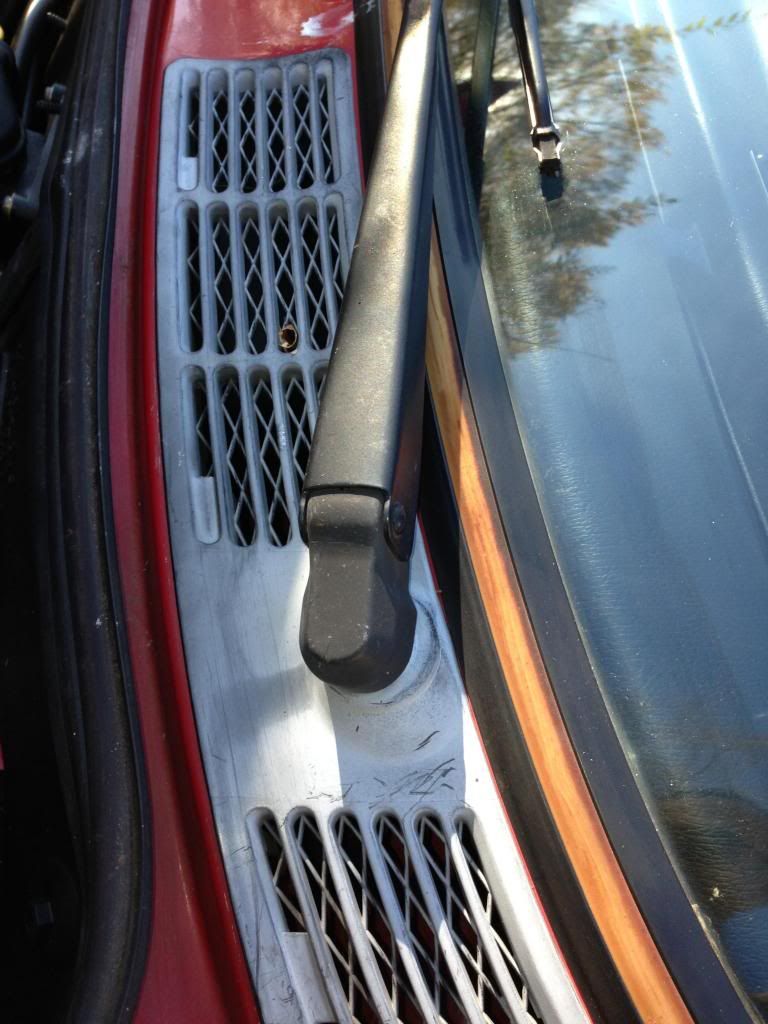
yet lurking beneath this esthetic nightmare is something much worse. Im talking about rotten damper rings
This seemingly harmless condition actually can lead to the early failure of your wiper motor. The ring keeps the wiper spindle on axis and as it begins to wobble that movement is transferred to the ball joint on the bottom of the spindle which by virtue of the levers and fulcrums in your wiper linkage actually passes this extra effort back to your motor in the form of a hernia.
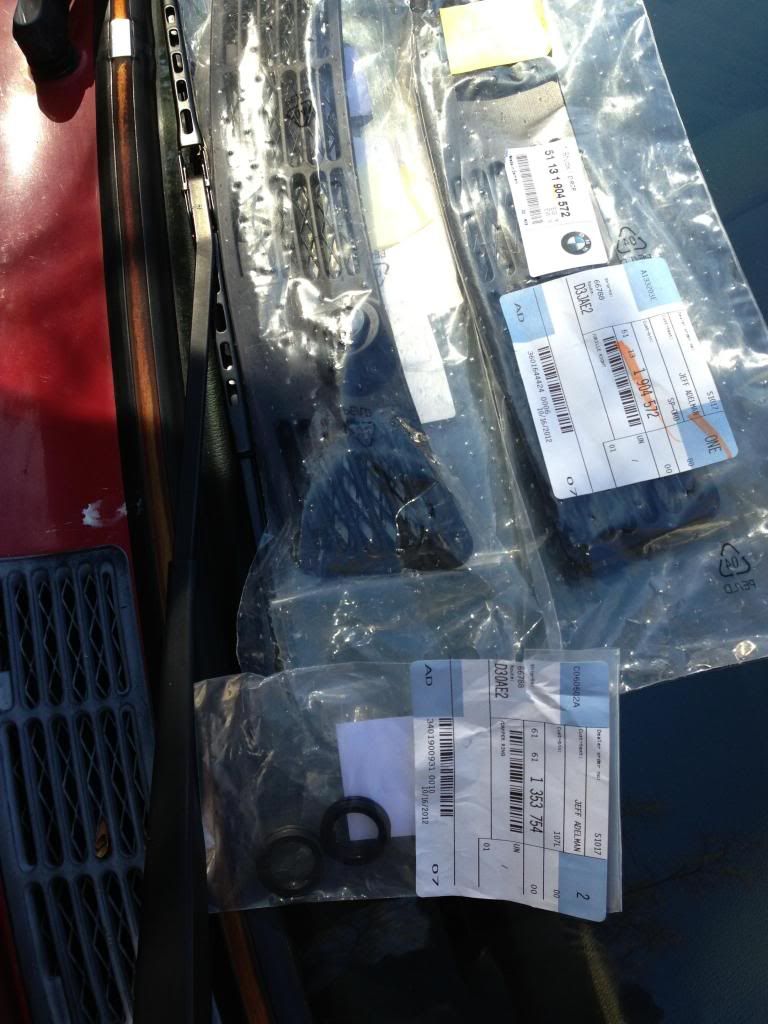
To address this blight on our cowls here is your kit
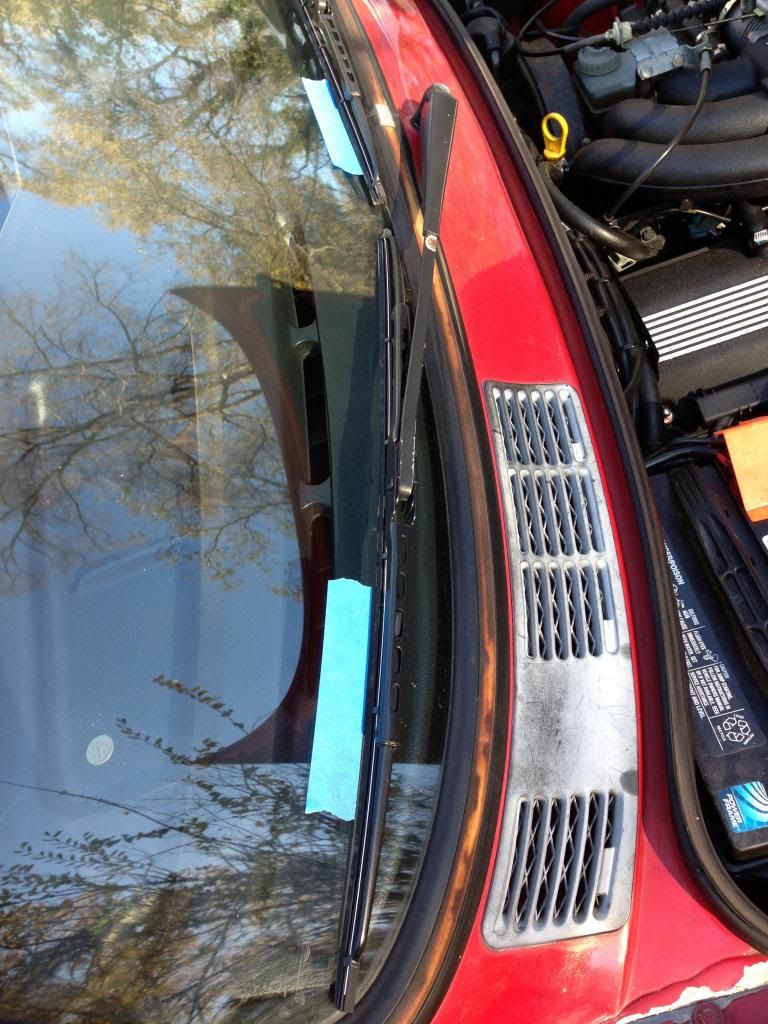
The first step in this process is to put tape on the windshield. I prefer blue cause it goes with my eyes and if you have to ask me why the tape then turn in your e30 keys and go borrow your sister's Kia. You are an embarrassment to us all
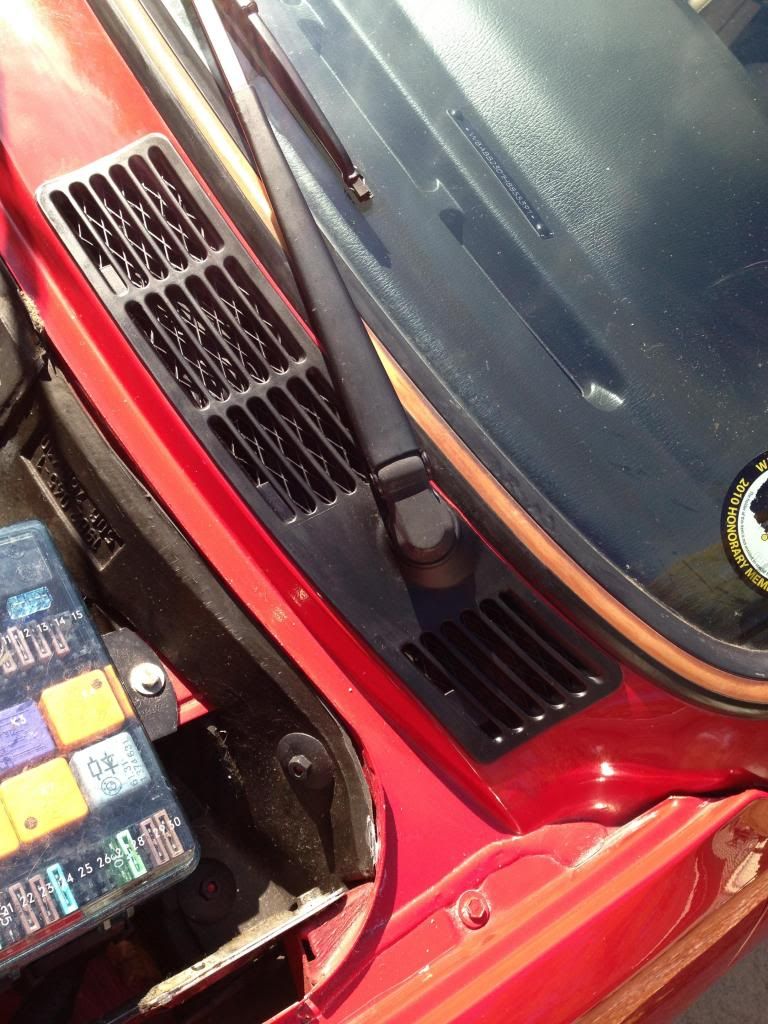
Hopefully you can remove the wiper and nut without help to get here. Note the circlip on the spindle as we will come back to it
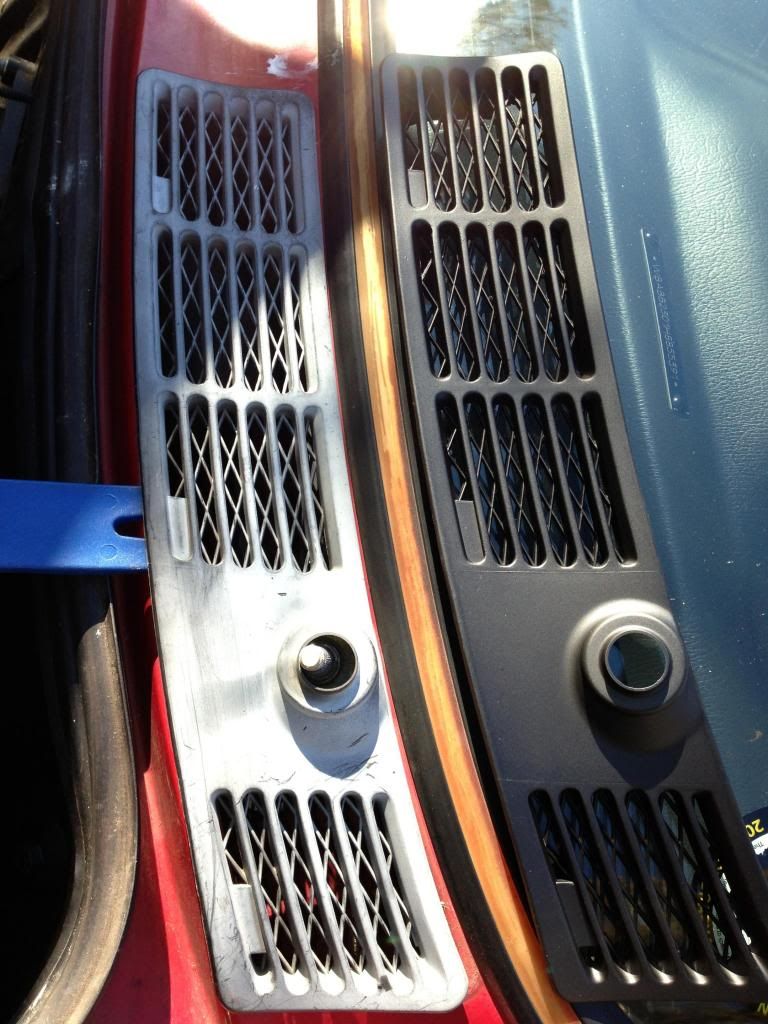
The difference between the new and old grills speaks for itself. I know you can paint them, but....they are $13-5@ brand new so why would you bother. Note the position of the blue tool. It is right at the filler in the vent. There are 3 such fillers and under each one is a spring clip. The windshield side of the grill has tabs so it will lift out when you release the 3 spring clips.
The problem here is that these clips are rather stiff and they lock in too the brittle plastic of the grill. If you break that plastic the grills wont be happy so push in with the blue tool just far enough to be able to pry up so the clip clears the metal of the cowl but not so far that you will break the other 2
clips. Behold the spring clip.
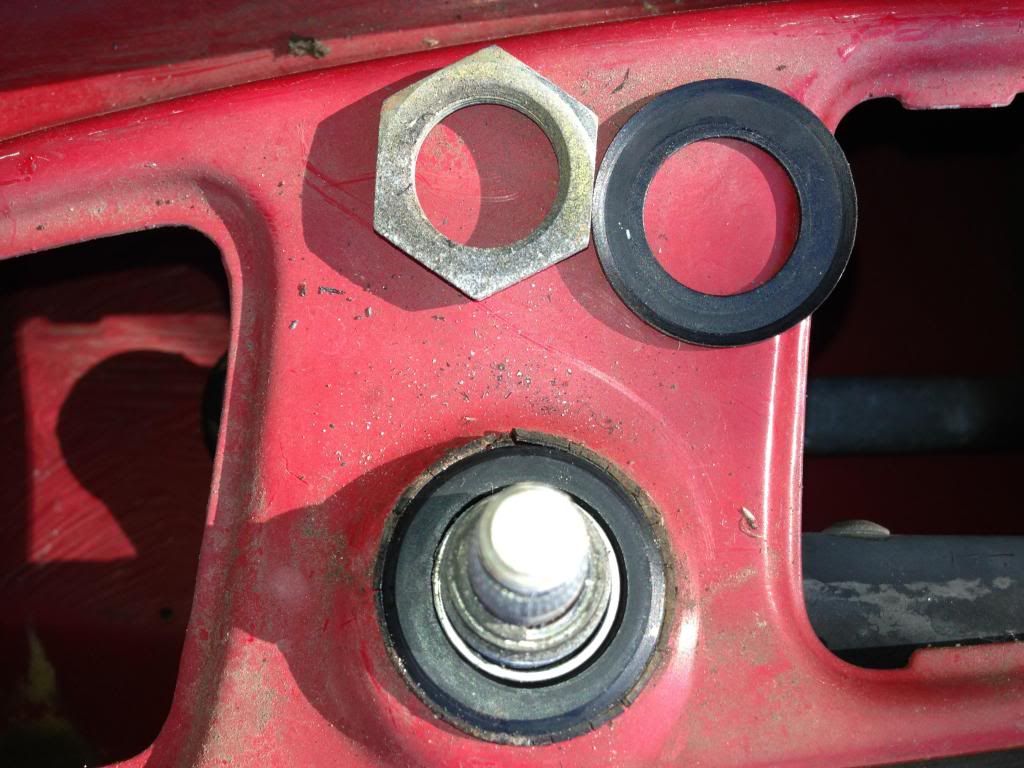
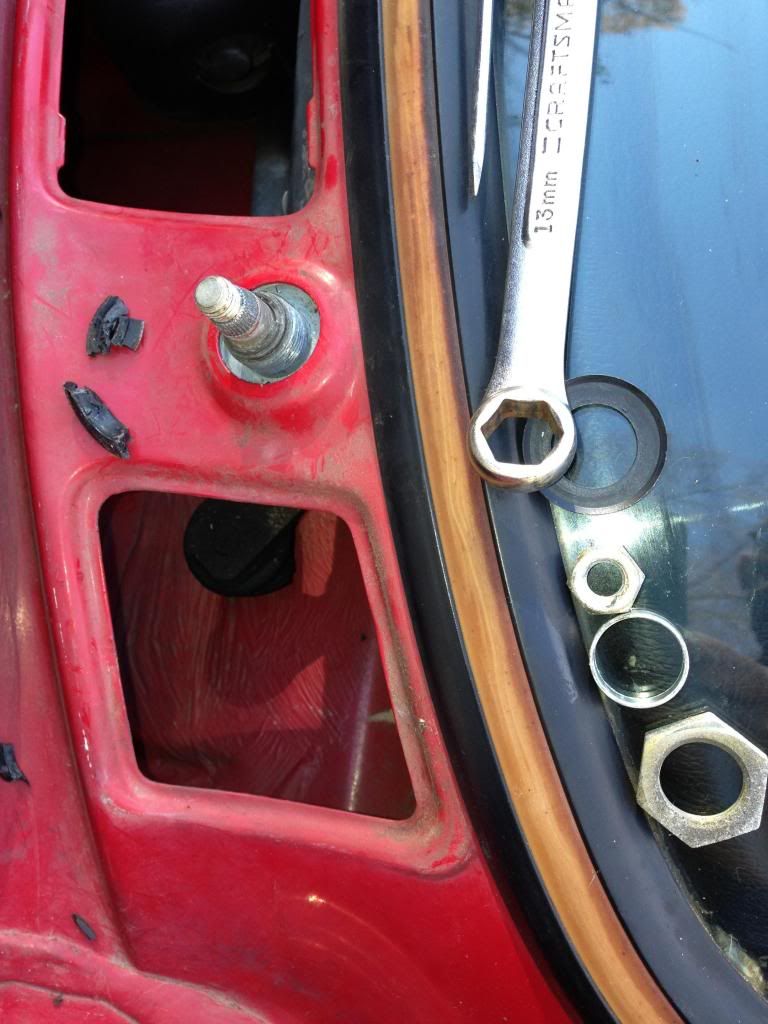
Which leaves us here
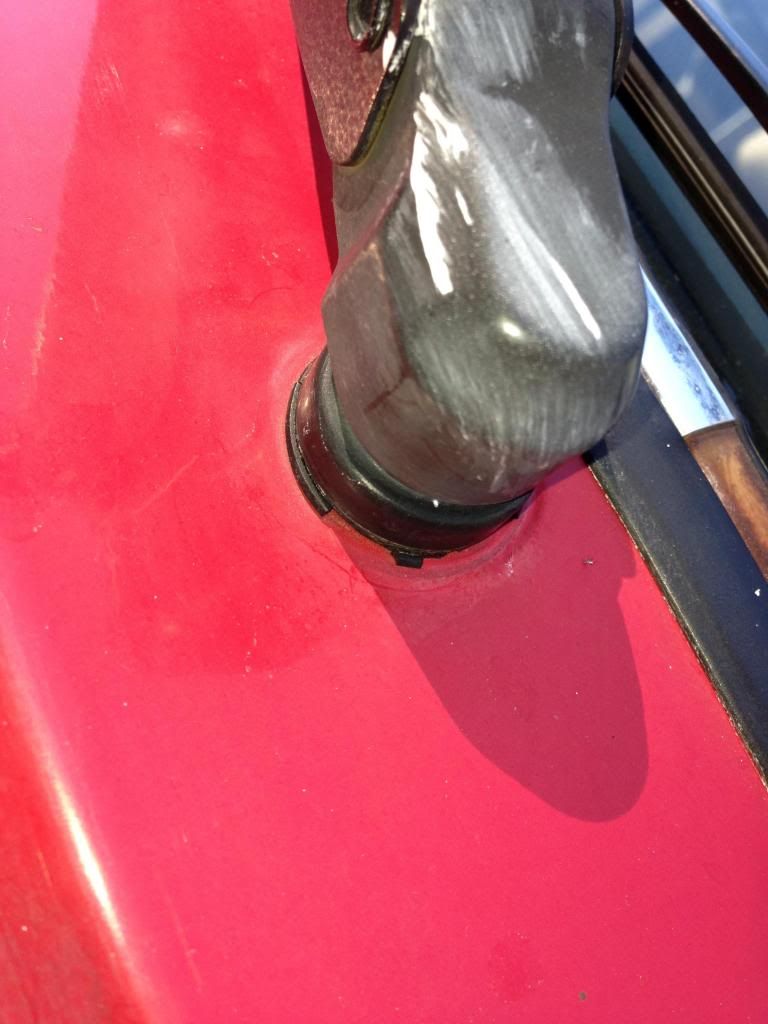
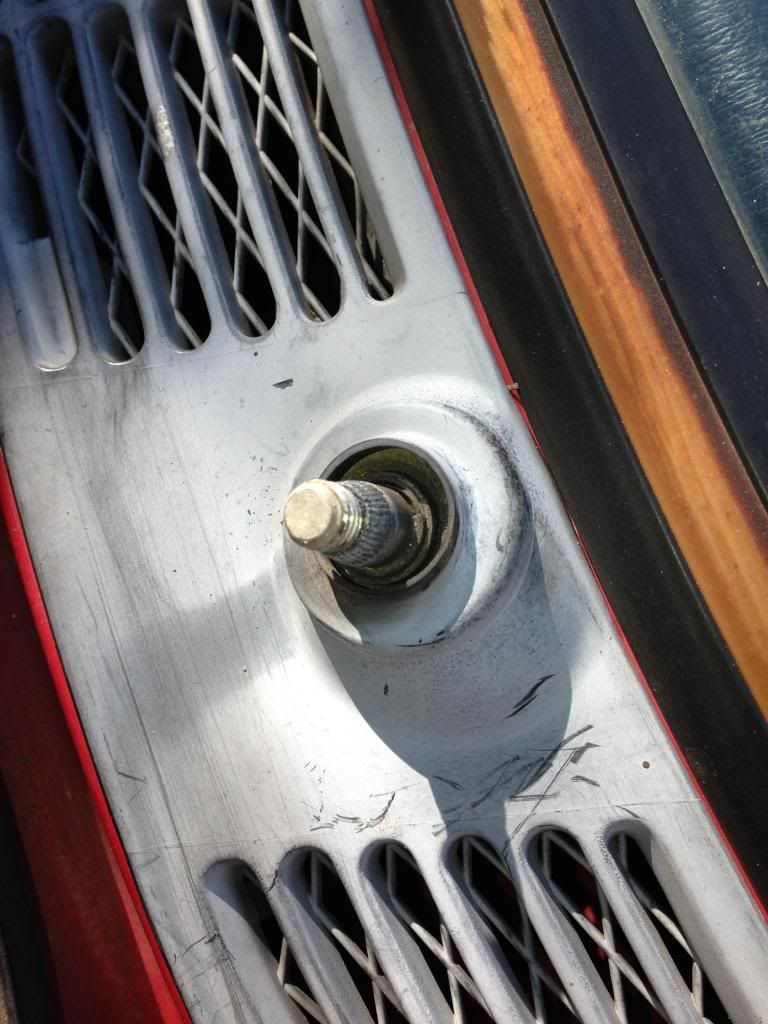
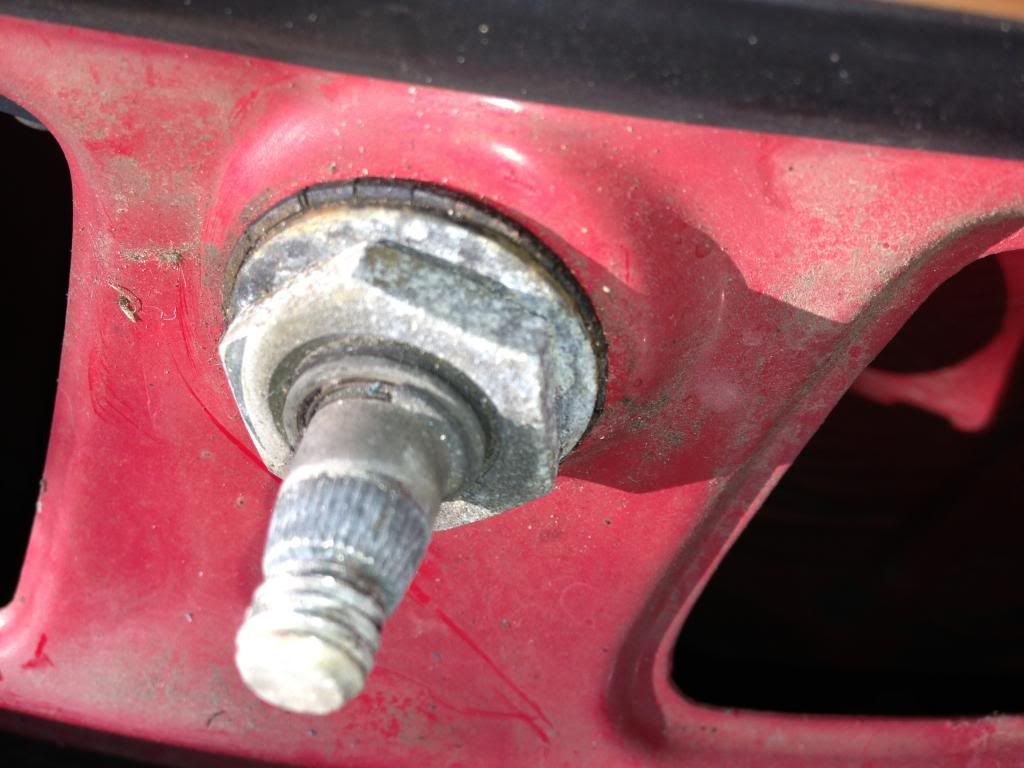
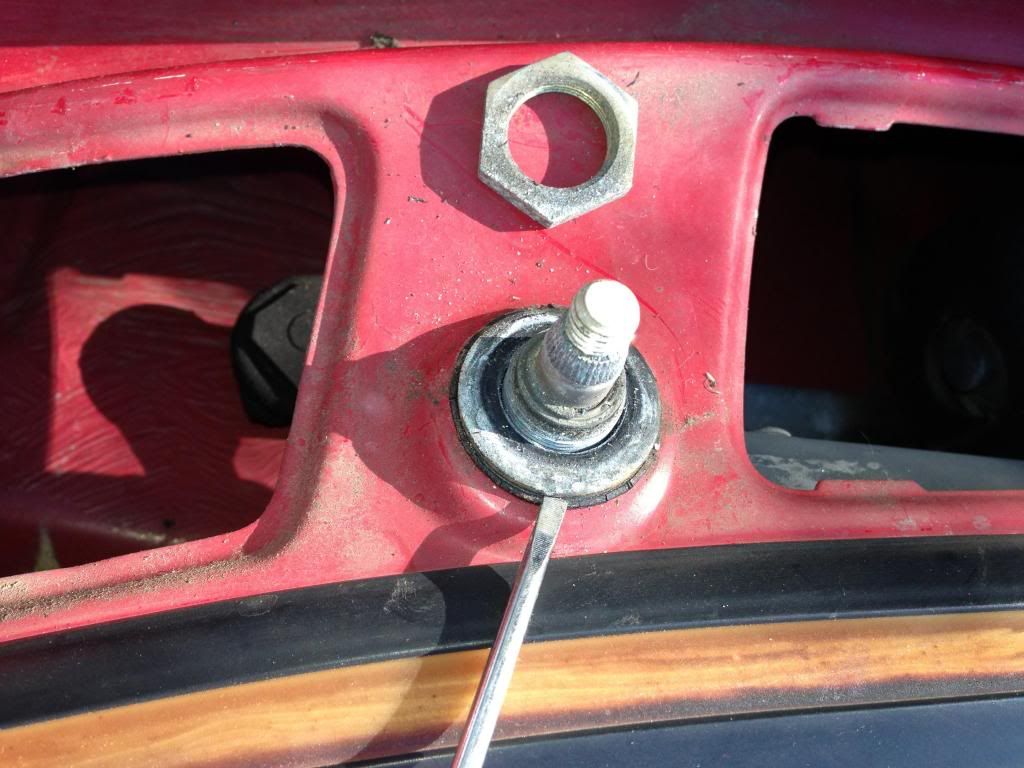
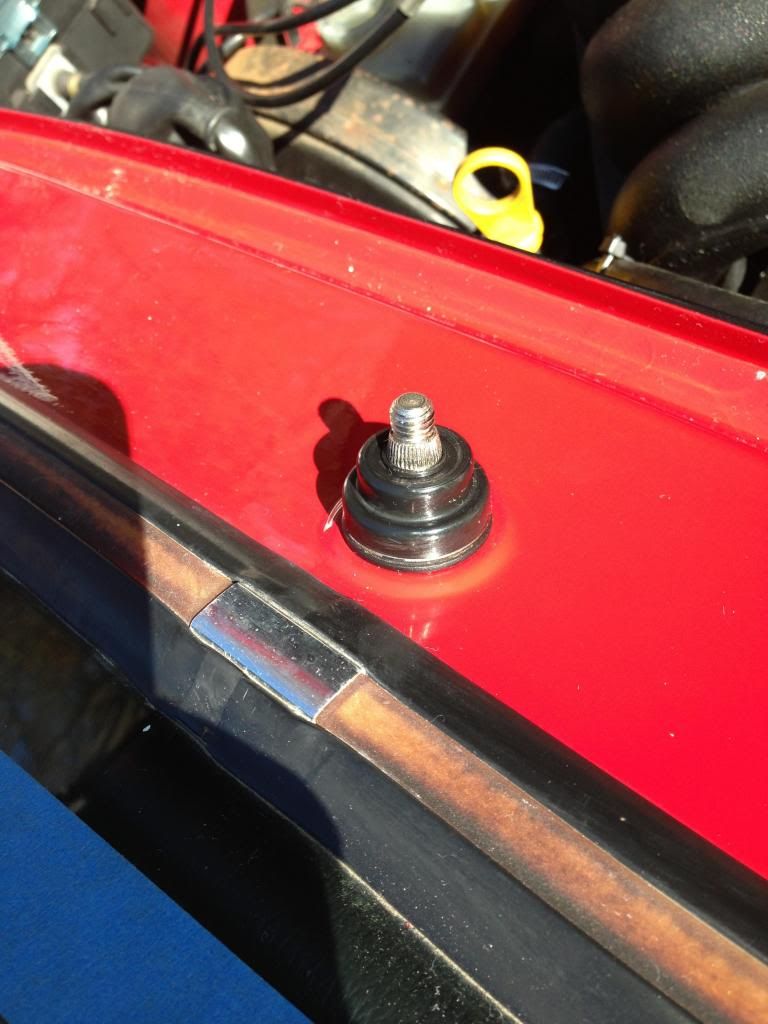
First the nut comes off then you lift the washer
With the washer and nut off you are now starting at....<drumroll>...the damper ring. Note the silver collar inside the damper ring as this is what causes most people problems.
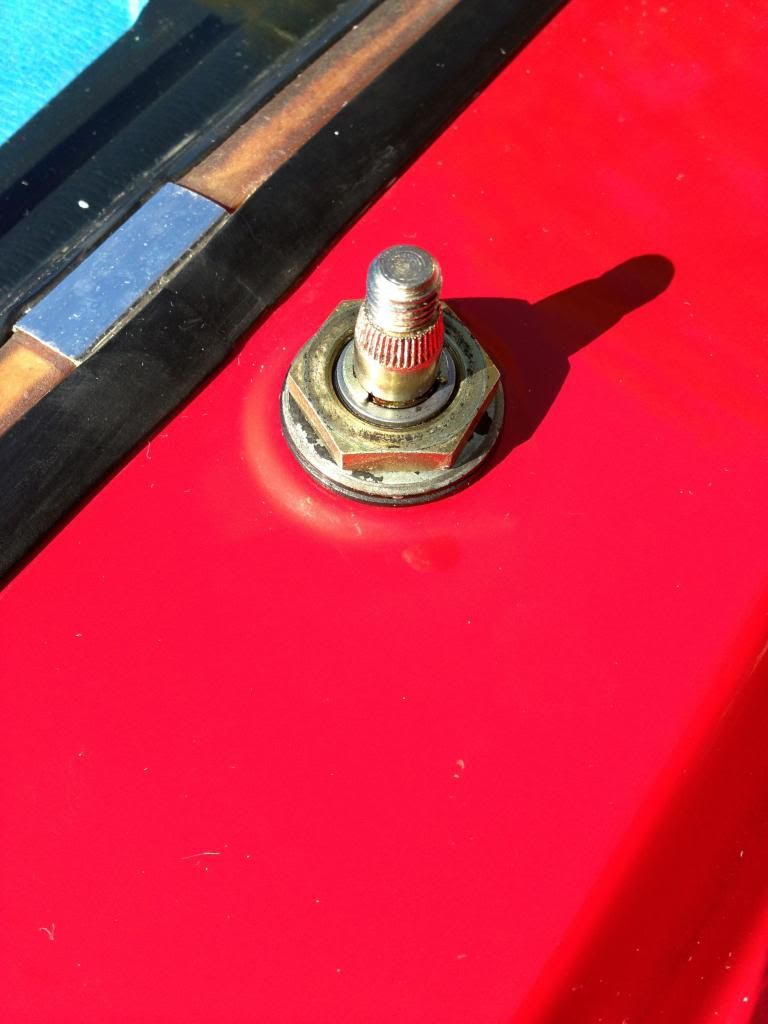
You must remove the collar before you attempt to do anything with the ring. It a bit snug but it actually pries out quite easily with a small screwdriver. Here it is part way out. Note the crumbling damper ring that the life of your wipers depends upon.
Here we are completely torn down
This is a housekeeping opportunity to clean where..the sun dont shine..and to do a minor service on your wipers since its probably the only time you will ever do this until they break.
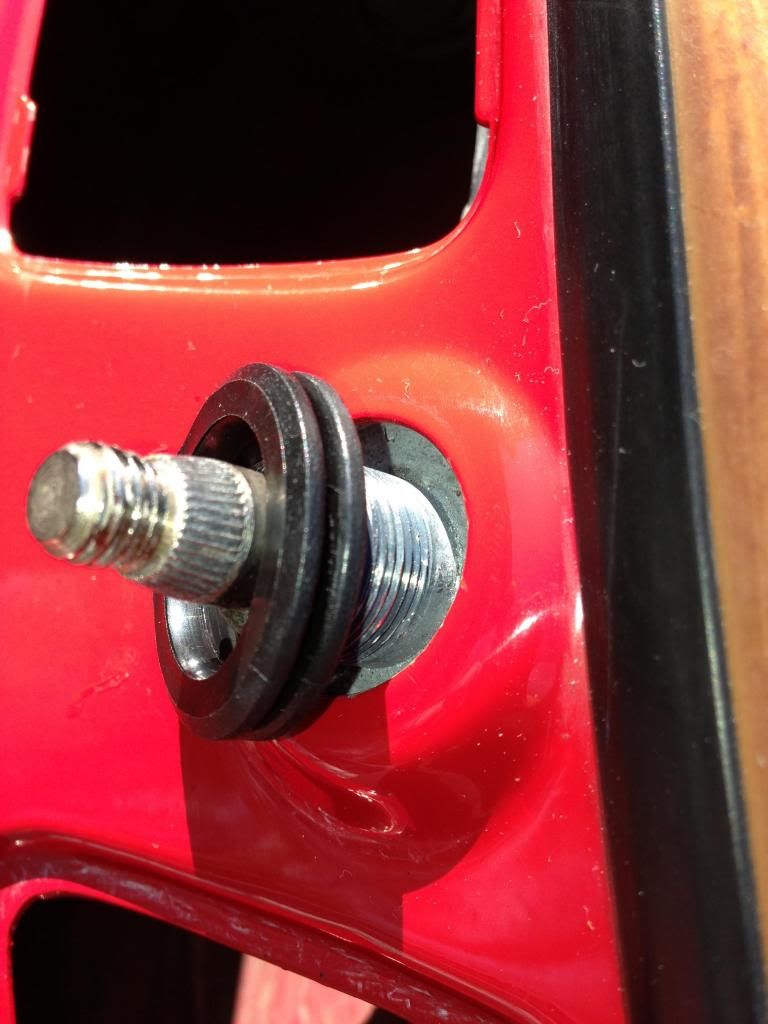
The is a circlip, washer, wave washer and rubber seal. The rubber seal is extremely delicate and does not appear to be available by itself, so DNFIU !! I used the tip of a razer knife to gently pry it up and I did not remove anything beyond what you see here
I then dipped by small screwdriver in some clean engine oil and fed a couple of small drops down the spindle, running the wipers for a few seconds to distribute the oil. After that I cleaned the cowl and gave it a good wax
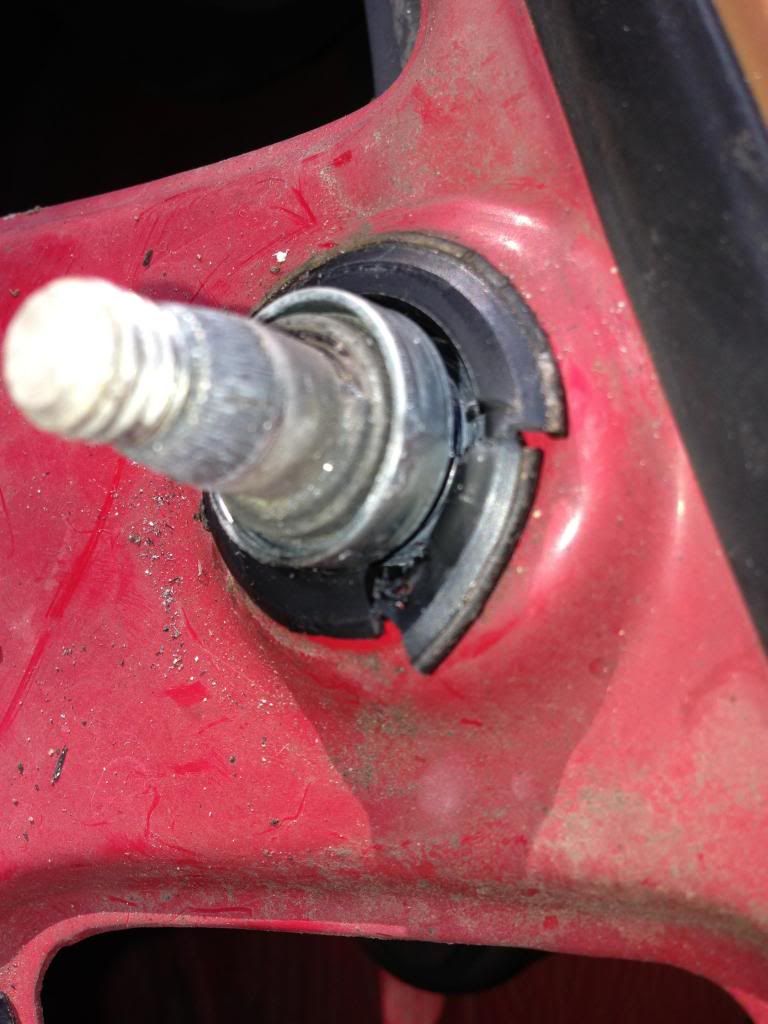
Now comes the fun part. The damper ring has a bit of a mind of its own and of course you do not want to damage the paint. I used a bit of my favorite rubber lube which is cable pulling lube as its water based and rather effective (I use this for CAB in stalls as well). You really do need to shove this baby in and I again use my small screwdriver with extreme care to help the lower lip of the ring get under the cowl.
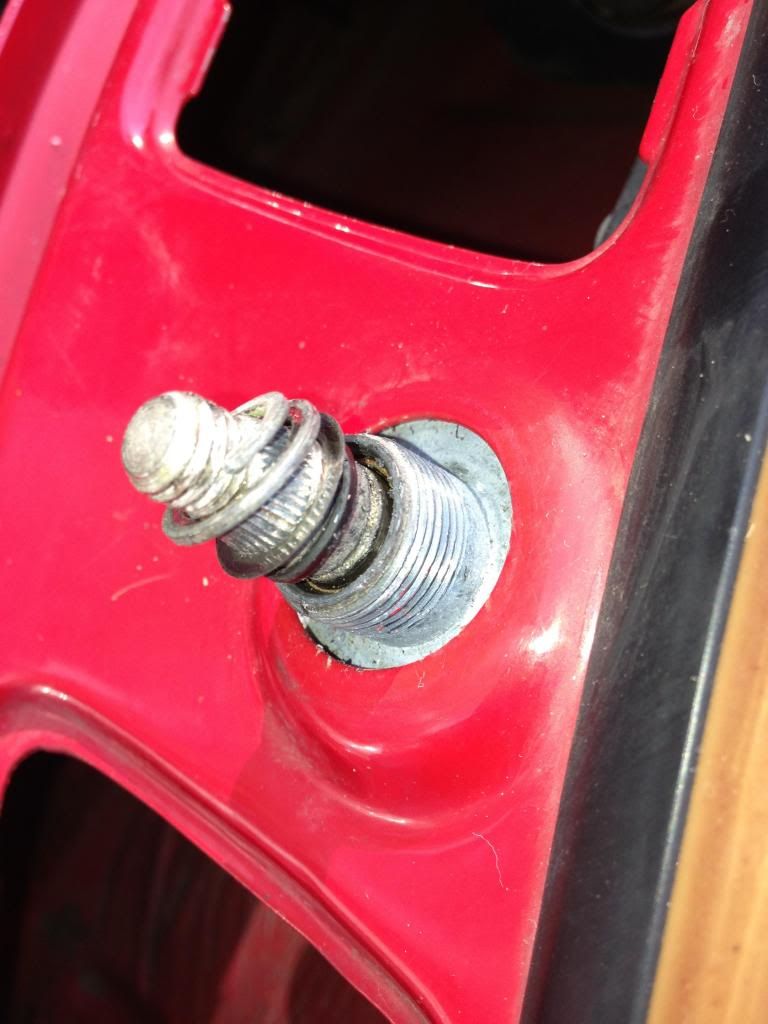
NOW you can put the collar back. At this point its fairly obvious why you do not want to remove or replace the damper ring with the collar in place. There just isnt enough room. When you put the big retaining nut back on keep in mind that it is compressing the damper ring beneath the washer. This will help seal the outer lip against the cowl while the inner bore compresses against the collar. You do not want to crush its guts so be reasonable. Its thin rubber and the flat washer can score your paint.
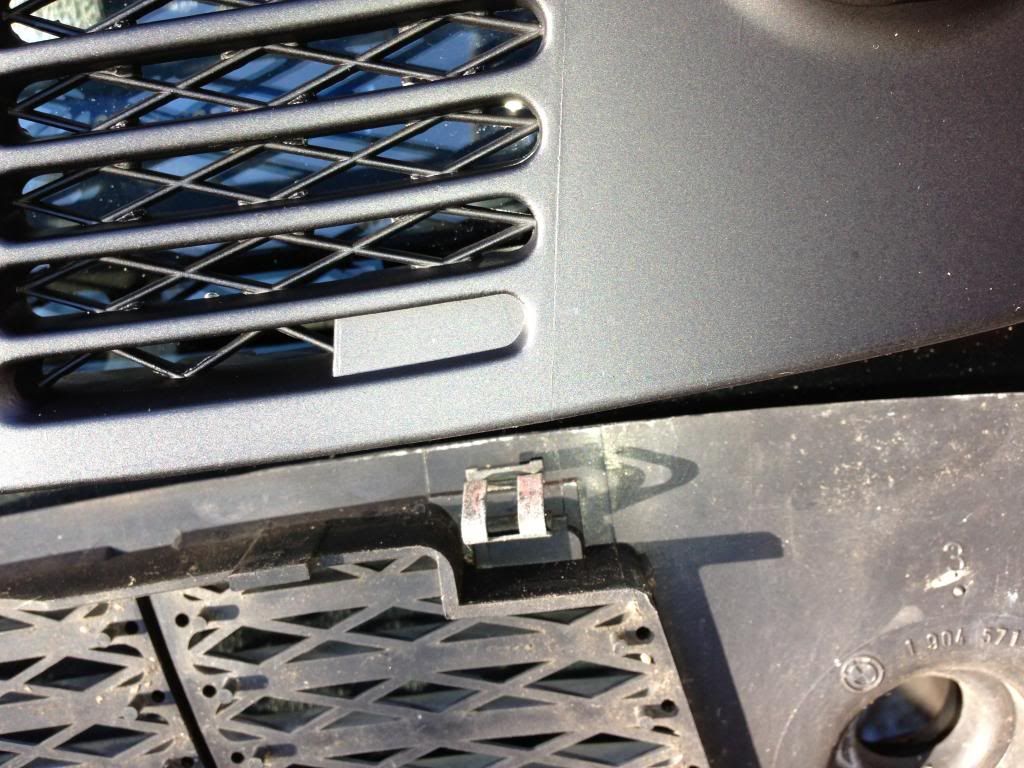
Then put the new grill back. Remember to insert the windshield side tabs first then press down on the engine side. I found that the springs clips actually wanted helpso I used the blue tool again to compress them just enough to lock in to place.
Replace the wiper
and the drivers side is done
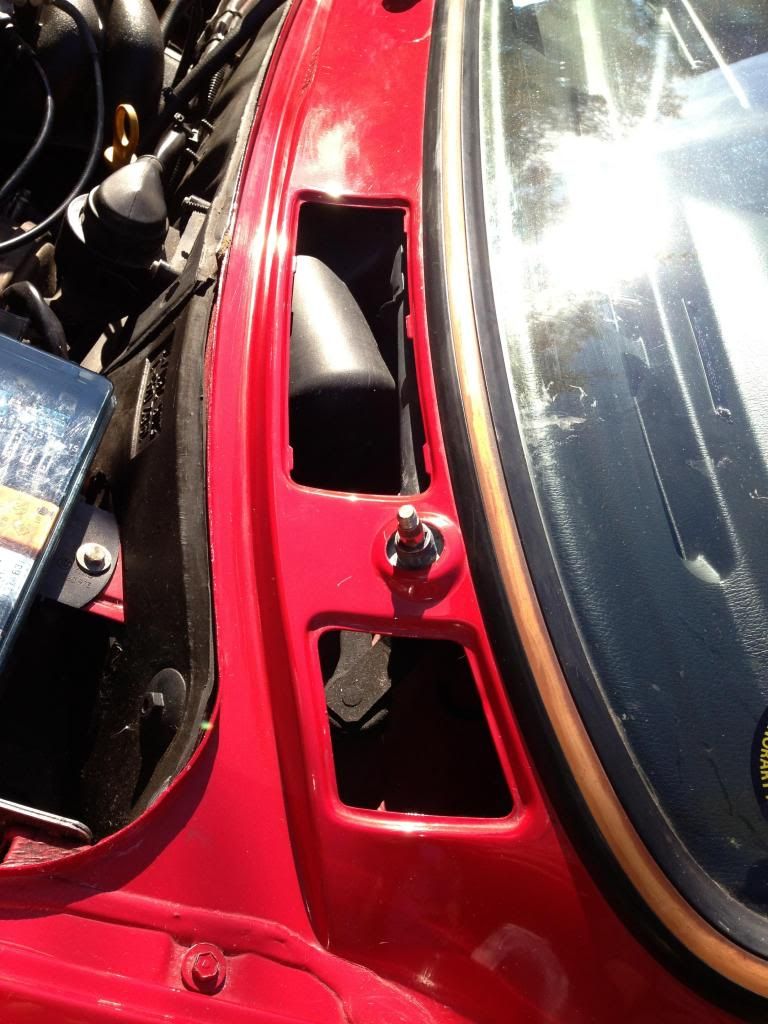
The passenger side is essentially the same except without the grill (its to the left..tilt your head to see it)
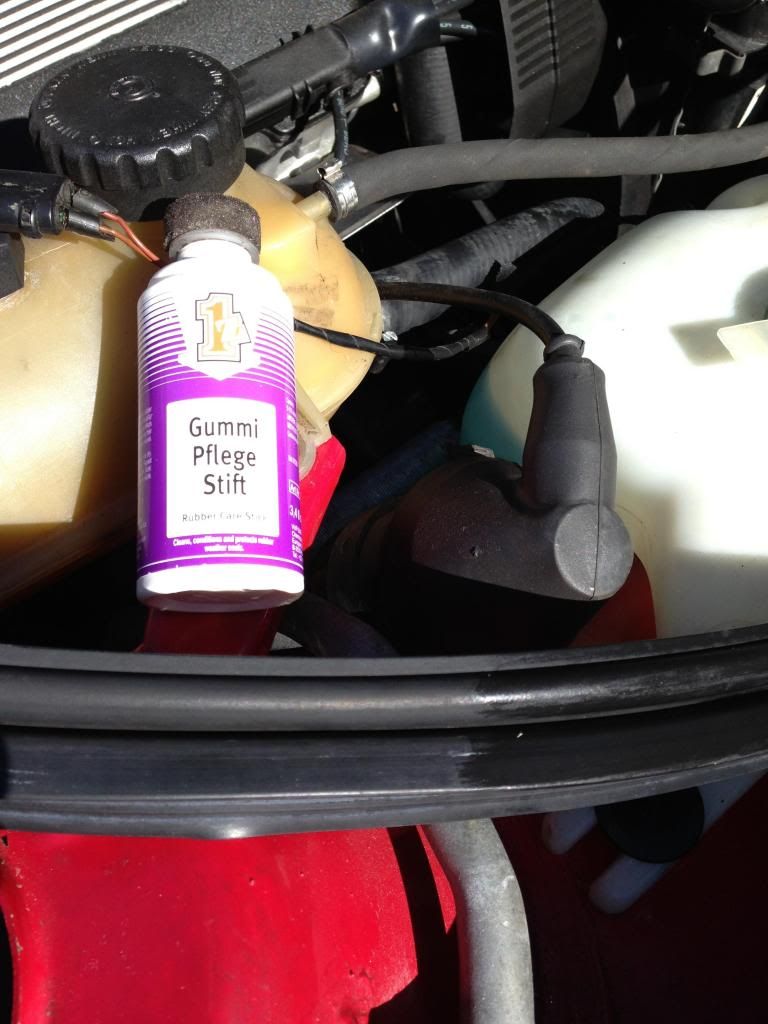
Lastly, you want to give your hood seal a drink of Gummi Pflege. It will love you for this.
Intermission. Go pee.
Last edited by jeffnhiscars; 12-01-2012, 06:09 PM.
Seat Shocks....I have passed the baton to John Christy from Ninestitch. Email John or Garrett at ninestitch1@gmail.com
So what does the Gummi product do? Keep the rubber soft and prevents oxidation?
Thanks.
Its made by Einszett in Germany and can be bought from the dealer or for that matter Amazon. Has a nice citrus smell and built in applicator foam
Gummi Pflege Stick
Conditions rubber weather stripping on car doors, windows and trunk lids reducing squeaks, rattles, wind noise and water leaks. Protects and keeps the rubber elastic. Restores color to dried out rubber. Protects against extreme temperature and UV rays. Solvent-free, water-based formula. Easy-to-use shoe polish type applicator makes application simple without the mess.
Conditions all weather stripping around doors, hood and trunk
Temperature resistant for long-lasting protection
Prevents rubber from drying and cracking
With built-in foam applicator for easy application
Water-based, doesn't contain petroleum solvents that can dry rubber
OEM+ or bust! reelizmpro: I will always be an e30 guy.. I still do all of my own labor TrentW: There's just something so right about a well-built M20 in an E30 e30m3s54turbo: I save my money for tuner parts.
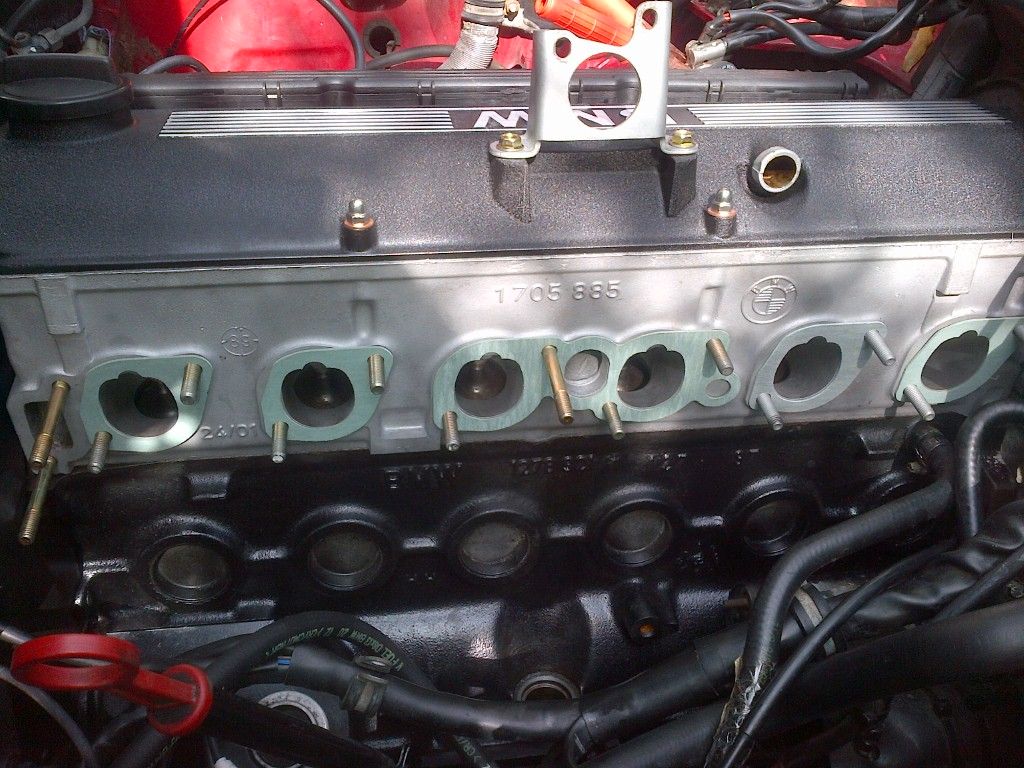
I'm only guessing but I suspect some of you would like to know how the engine turned out.
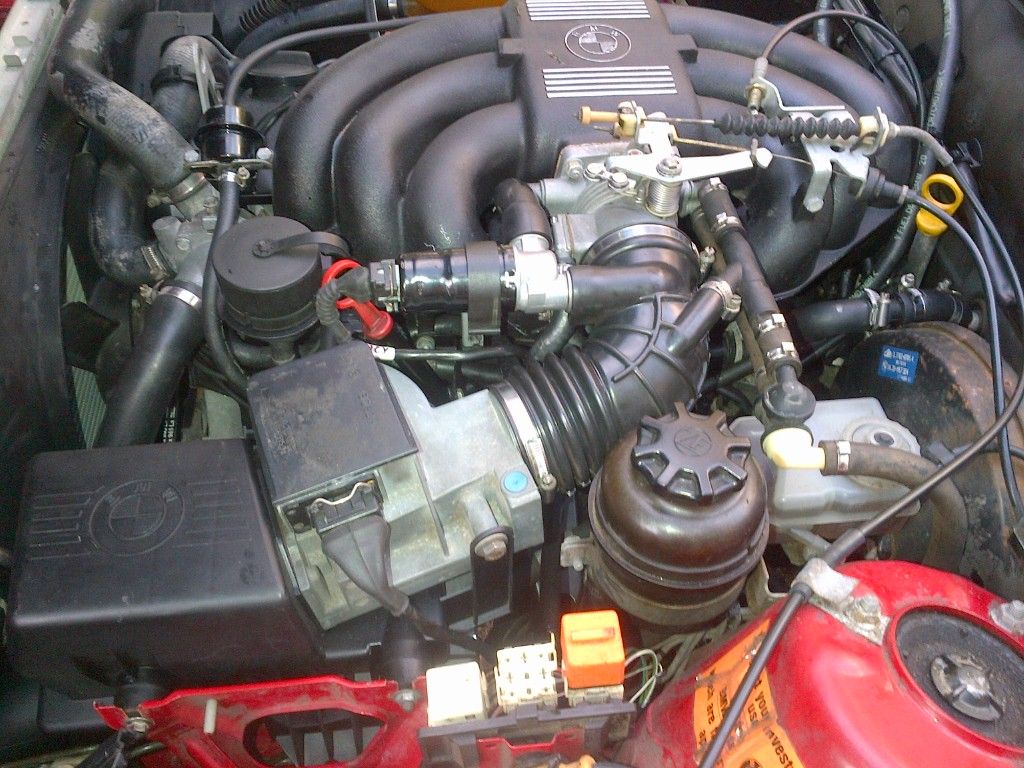
Here we are with the head bolted down. You can see I spent a fair amount of time cleaning things up. The head got all new studs, copper manifold nuts & stainless acorns which I got at HD for $.58@. The acorns were a bit shallopw so I used the copper washers to raise them and to add that old marine engine touch.
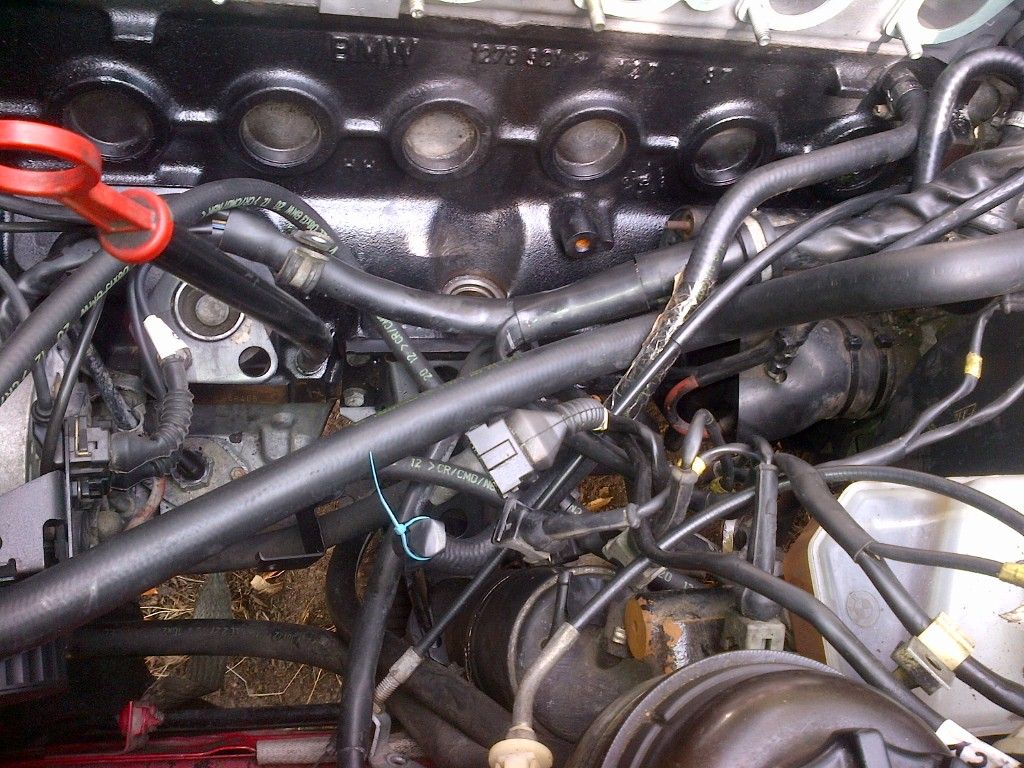
This is typical "head off" spagetti
and of course the infamous bitch tube. I tried putting the zip ties completely around the spring but found that that made getting it over the tube a bit tight so I ran the zip ties only around the top and bottom coils. Make sure you keep them 180 degrees apart of the spring will gimp on you. Just hold it steady, snip the zips and guide the upper end in to the intake manifold.
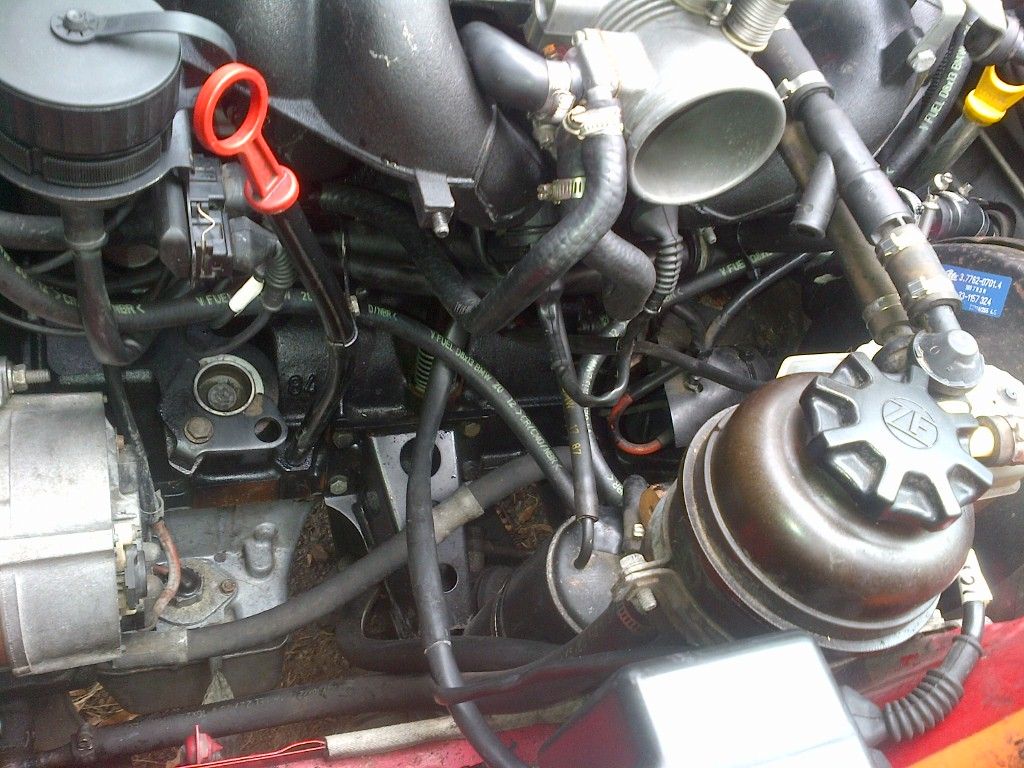
This is what the drivers side looked like at this stage
It sounds quite straight forward and so far it really was...until this. The VR downpipe gaskets would absolutely not slide over the studs on the manifold. Being a layered metal gasket they have no give and simply put, they are cut wrong. I tried to drill the holes a bit larger and shredded one. I tested the manifold to conform that the studs slid in to the flange. They did.
Bottom line is that the holes are cut to match the body of the studs but not the threads. They are garbage. Fortunately, I am 5 minutes from Viking Imports, my local foreign parts supplier, and Richard there got me a pair of Elrings in short order. They are a much better made product (I used thier head gasket) and they worked like a charm.
This is the Elring. There kmjay be better ways to install the exhaust manifolds, but since the 2 flanges are married I found it easier to mount both manifolds to the downpipe then work the whole mess in to place. Not too much cussing to attract the cops.
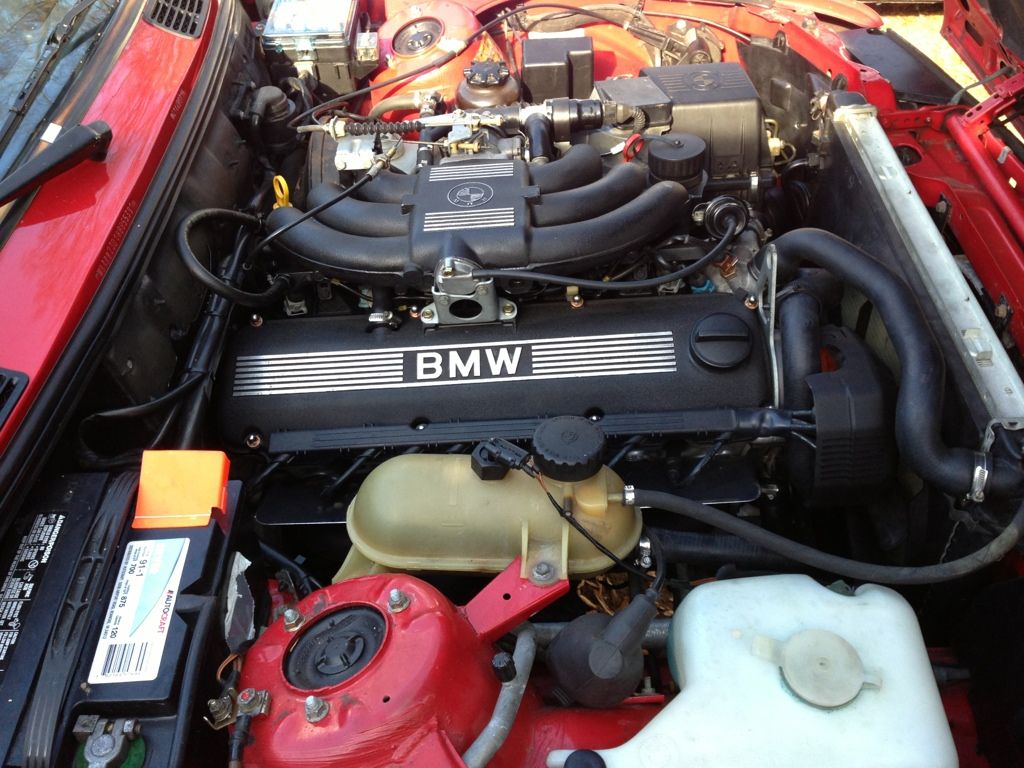
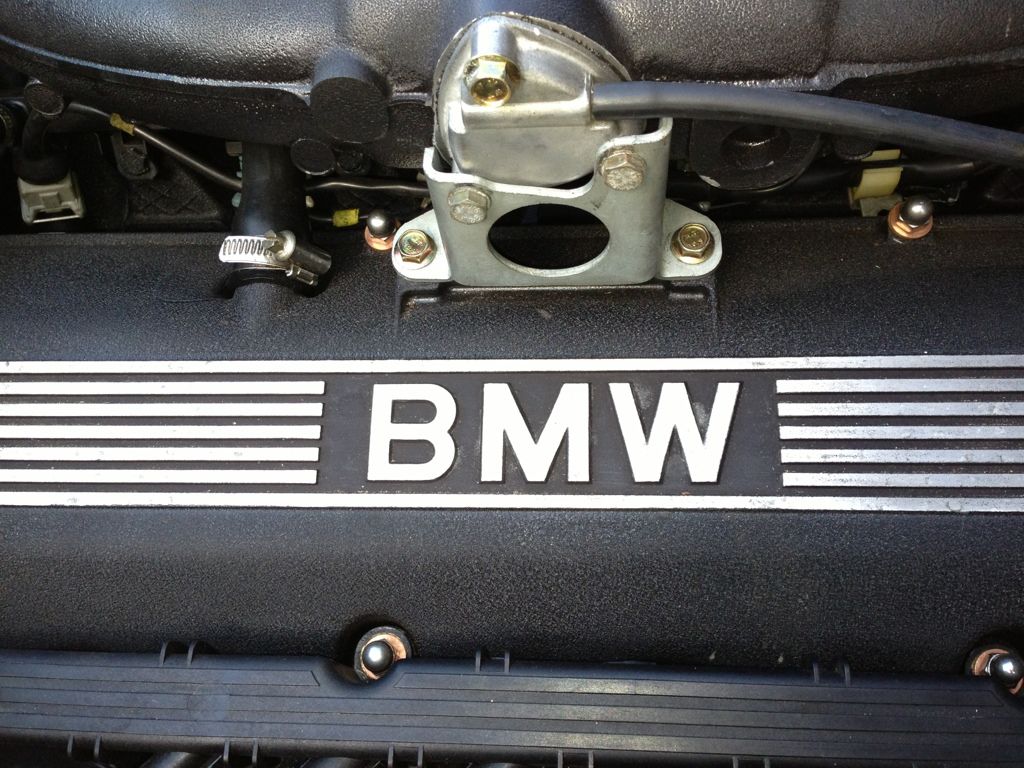
Finally its all buttoned up
and this
and this
Can you taste it ?
Where are my keys ?
Seat Shocks....I have passed the baton to John Christy from Ninestitch. Email John or Garrett at ninestitch1@gmail.com
It sounds quite straight forward and so far it really was...until this. The VR downpipe gaskets would absolutely not slide over the studs on the manifold. Being a layered metal gasket they have no give and simply put, they are cut wrong. I tried to drill the holes a bit larger and shredded one. I tested the manifold to conform that the studs slid in to the flange. They did.
Looking good man!
Yeah, I remember the VR exhaust mani gaskets being lame! When I did my headgasket and my buddy's we put the intake manifold and exhaust manifolds on before we install the head, this seems a lot easier. Just remember to do the bitch tube (ask me how I know haha).
Anyways My point being when the head was out of the car and I installed the exhaust manifolds I was able to use a flathead and hammer to slowly keep tapping the VR gasket over each stud. It eventually would free up and fit fine.
Glad to see elring's worked much better.
Your signature picture has been removed since it contained the Photobucket "upgrade your account" image.
Looking good man!
Yeah, I remember the VR exhaust mani gaskets being lame! When I did my headgasket and my buddy's we put the intake manifold and exhaust manifolds on before we install the head, this seems a lot easier. Just remember to do the bitch tube (ask me how I know haha).
Anyways My point being when the head was out of the car and I installed the exhaust manifolds I was able to use a flathead and hammer to slowly keep tapping the VR gasket over each stud. It eventually would free up and fit fine.
Glad to see elring's worked much better.
I'm becoming a fan of Elring. IMO there is no excuse for something as simple as a $5 flange gasket to need a workaround.
As for pre assembly of the head, its an option for sure but I chose not to wrestle with the extra weight when there was no particular gain involved... like if you bench press 250 and haven't been to the gym in a few days :-)
I had an extra pair of hands to put the head alone on just to be safe. The rest I did solo in my own sweet time.
Seat Shocks....I have passed the baton to John Christy from Ninestitch. Email John or Garrett at ninestitch1@gmail.com
I'm becoming a fan of Elring. IMO there is no excuse for something as simple as a $5 flange gasket to need a workaround.
As for pre assembly of the head, its an option for sure but I chose not to wrestle with the extra weight when there was no particular gain involved... like if you bench press 250 and haven't been to the gym in a few days :-)
I had an extra pair of hands to put the head alone on just to be safe. The rest I did solo in my own sweet time.
That's where the engine hoist comes in handy :)
Your signature picture has been removed since it contained the Photobucket "upgrade your account" image.
A hoist to lift a head...and I thought I was a lightweight...lol.
If its not off a D8 I'm good.
Good suggestion. May do that.
Thanks everyone for the encouragement.
It's not about not being able to lift it, it just makes everything easier. Lining it up and all that. Like I said I had the exhaust manis and intake mani installed. Yeah, I was able to lift it up, but it would sure be tough to try to line it up leaning over the fenders!
Your signature picture has been removed since it contained the Photobucket "upgrade your account" image.
It's not about not being able to lift it, it just makes everything easier. Lining it up and all that. Like I said I had the exhaust manis and intake mani installed. Yeah, I was able to lift it up, but it would sure be tough to try to line it up leaning over the fenders!
agreed. exactly how I did it. bolted intake and exhaust manis to the head and took my time aligning everything. did it all solo.
OEM+ or bust! reelizmpro: I will always be an e30 guy.. I still do all of my own labor TrentW: There's just something so right about a well-built M20 in an E30 e30m3s54turbo: I save my money for tuner parts.


Comment