Announcement

Collapse
No announcement yet.

e30 316 build x2 (m52/m50, turbo, 3pcs bottle caps etc)

Collapse
X
 
  • Filter
  • Time
  • Show
Clear All
new posts

    #31
    This is absolutely fantastic. I can't believe the work put in to those bottle caps - that is dedication to such a pooh-poohed OEM part.

    Simply amazing.
    sigpic

    4 doors.. so much room for activities!

    IG @bluebombr

    Transaction Feedback:

    http://www.r3vlimited.com/board/showthread.php?t=323622

    Comment


      #32
      I fucking love the three piece bottle caps! i kind of want to cut mine up now.

      Comment


        #33
        Top notch work. Well done!
        sigpic

        Comment


          #34
          Originally posted by econti View Post
          A friend expressed concern that the centres don't have a recess for the lips to sit in and take the weight of the car, do you have any detailed pics?
          Sorry for the questions, they look absolutely dope and I want to find out if I can do something similar :)
          Yeah it's a problem, I know. I added more material to my centers so that they would hold. unfortunately I don't have more pictures.

          Comment


            #35
            And continue with the build by finishing the exhaust. This tubing for wastegate took way too long to make. I was very limited by space, so that's best I could fit there.


            Fortunately the downpipe was easy to make. The tube for wastegate is missing flex-piece.


            Welds are very poor looking because I didn't realize to clean up the areas before welding. But hopefully those will do the job.

            I also finished the rest of the exhaust.


            Some heat wrap.


            I will change the plastic zip-ties for metal ones when I find some.

            Then I got the Plug and Play megasquirt, so I can start the thing:


            But first I have to get the turbo manifold ready, so I sandblasted it and sprayed some ceramic coating.


            Painted also the turbo.


            And cured the paint in oven.


            Everything starts to be in place.


            I had to modify the cheap wastegate, because it wasn't sealing properly. Also changed the spring to one with lower spring rate.


            When everything started to be ready in engine compartment, I started doing the fuel system. i'm using the stock fuel pickup from carburetor-engine. So I added second pipe for fuel return. I soldered it in place, just like the stock one.


            All works out perfectly.


            And finished product.


            Averything in place. Just like from factory


            I didn't have time to finish up the rest of the fuel system, so I just hooked up the ECU and tried that one. Everything seems to work fine Here is little video of that.

            Comment


              #36
              For wheel bolts I managed to find yellow passivated versions.


              Looking nice.


              For instrument cluster I got the coding plug, so the tachometer will show correct readings with 6 cylinder engine. I also ordered custom instrument cluster form germany, but I will get it later.


              Also cutted the plastic covers to fit with inter cooler pipes.


              At turbo side, I made bigger hole to get air for the filter.


              Then to the trickier stuff. To get the engine started, I needed to get rest of the fuel system working. In trunk I placed Carter pump to transfer fuel to surge tank.


              Then underneath of the car is the fuel filter and Aeroflow pump to trasfer the fuel to engine.


              For fuel I'm using re85 (e85 ethanol fuel which is made from organic waste here in Finland)


              And click here for the first start attempt.

              It started but it was running crazy rich because I messed up some settings in megasquirt. It even splattered unburn fuel all over the engine bay :D After all I managed to get the settings right.

              Then I made the downpipe.


              Bolted all in the exhaust side in place.


              And started tuning the megasquirt. After while I started the autotune and got the mixture right for lower rpm. I don't have the insurance yet to drive public roads, so I had to test it in gravel :( But however here is the result.


              I still have lots of tuning to do, but it's good start.
              Last edited by pazi88; 09-10-2015, 04:50 AM.

              Comment


                #37
                And here's the new gauge cluster with the old one. As you can see there is even room for future improvements :D Also there is oil temp gauge instead of that useless fuel consumption meter. (originally the car didn't even have tachometer.)


                The interior is almost ready now. I only need to swap the steering wheel.


                And some photo after washing:


                At this point I started having problems with the cooling system puking out every time I put some stress to the engine. The pressure test and everything showed that engine should be fine, but it wasn't. So I will need to take the head of to fix that.

                None the less I still built the boost control for the engine. For that I needed pressure outlet from charge pipe:


                And then added VW n75 valve to control boost and the valve is driven by megasquirt. I'm not going to use some stupid old bleed valve ;)


                And finally I manged to get the steering wheel done. The leather was in ok condition, but threads were gone. I had to sew it back together:


                And some VHT vinyl paint and it's done:


                looks a bit better than the original:


                And the whole interior is now just perfect:

                Comment


                  #38
                  It was now fall 2014 and I needed to reveal the car in Hifi and Tuning Show, but because of the engine problems the car had to be towed:


                  There were little problems, but still we got the car on display.


                  I even got a trophy.


                  Few pics:


                  Then I took head off. it took only about 1,5 hours to do :D


                  At least the number 3 has been leaking and also the 2. But the 4 and 5 don't look fine either.


                  I didn't find any cracks so I just took that to machine shop, to be refurbished.

                  And here it is back. They said that it was quite warped, but it's ok now. They pressure tested it and didn't found any other faults.


                  Surfaces on the block cleaned.


                  Then goes in the gasget (athena cooperring)


                  And head in.


                  Then new guiderail for upper chain because the old was cracked:


                  And a upgrade parts for rattling VANOS unit. The brown piece on left is the old part and the parts right are the new upgraded version.


                  Then new coolant, oli and oil filter and everything is ready (the oil and coolant were mixed because leaking headgasket).


                  Finally short test to make sure that everything is working: http://instagram.com/p/uD3EReHD1h/

                  Comment


                    #39
                    After finishing the engine, it seemed to work fine. So I went to dyno to get the papers, so I can get this legally registered in finland (I have to prove that engine has less than 204hv). After little bit of tweaking we got the low enough numbers from the engine.


                    But just after day this happened:


                    Suddenly the temperatures started rising and there was big cloud of mist. So I stopped and we towed the car to inspect what went wrong:


                    So nothing serious. The fan just hit the radiator and broke it. I need the change it electrical one, so that would not happen again.

                    Also after driving few hundred kilometers, I found several things that need to be fixed. First of all the seat belts weren't working. That's because I accidentally mixed belts from different model year. So I had to change them to match each other.


                    Also the drivers seat felt very loose, even after fixing that. So I took it apart again and found this:


                    Good place to learn tig welding:


                    And after that fix, the seat felt solid again.

                    Then smaller things. For example new license plate lights:


                    And I took the tint off the headlights (not legal in finland):

                    And notice how high it is :D I had to raise it to get the whole thing registered. That's because you need to have at least 8 cm ground clearance to be legal. Don't worry. I will lower it again, after I get it registered ;)

                    With the new radiator everything is working. Unfortunately I had to wait for next summer to drive.

                    Here is the car in sleeper mode with original steelies.


                    I like it because there is no clues how much power it has, so it will be surprise for the other road users :D

                    Comment


                      #40
                      New headlights:


                      Not genuine HELLA lights but very good quality DEPO replicas. I already installed those, but didn't took any pictures.

                      Then I got the billet flywheel to use with the sachs sre-765 pressure assembly:


                      And here is the pressure assembly itself:


                      Practiced some aluminum welding. I needed that 90 degree bend to compressor housing to save some space for turbo oil return.


                      Also made the cold side charge pipe from aluminium to save some weight.


                      Got the turbosmart kit to fix the leaking wastegate:


                      luckily the the china wastegate was so exact copy o the real turbosmart, the spare parts fitted to it:


                      And now it doesn't leak:

                      When that was installed back to car, I pulled off the old drive shafts:


                      And fixed. I still need to add straps to outer end, because one's i got were rubbish.


                      Got the flywheel back from balancing:


                      Everything needed for clutch upgrade. Even now OEM bolts from BMW.


                      And installed:


                      But then I ran into broblem, because the engine wont turn anymore. The pressure assembly is hitting gearbox, so I need to take it of again...

                      I also made to local magazine:


                      But because the engine didn't turn over, I had to take the gearbox off again:


                      There was some small markings were the pressure assembly had hit the sides:


                      I just used angle grinder to make more room:


                      Also I changed the shift pin for 5th gear, because it did't center correctly.


                      Also added some gold for insulation.


                      Now everything is assembled again and new clutch works as it should.

                      Then I made quick heat shield from them. And also to prevent valve cover gasket from melting.


                      And installed:


                      I took some pictures with new headlights on and with new fatter rear tires. The rear end is still too high and there is ton of dust on the car after winter.


                      Comment


                        #41
                        It was start of summer 2015 in last post. After that I took the car on use and it was best feeling in the world to get to finally drive the car I have built so long time.


                        Here is video when I got the engine tune dialed in. Sorry for bad audio:


                        After that I had lost of problems with misfires and I solved them changing new ignition coils. But those misfires still managed to do something for the engine, because it started running badly. I checked everything outside the engine and nothing was wrong. Then I did compression test and result was:

                        1 - 14 bar
                        2 - 13,6 bar
                        3 - 14 bar
                        4 - 14 bar
                        5 - 9 bar
                        6 -14 bar

                        So the number five has lost compression for some reason 
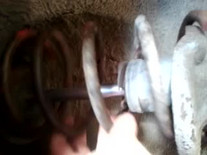
The intake valves on number five looked quite bad, so we thought that the valves are leaking. So it was time to tear apart the engine again... I took the head of and pistons looked quite good. Only the number five is bit cleaner that the others:


                        Then I checked the valve leaks and one intake valve on number five was totally toasted and only 5 valves of 24 sealed properly:


                        It looks like the valve has been hitting the fire ring in the athena cooperring headgasket, and that's why it's leaking:


                        Here are the intake valves in cylinder number five:


                        The left one was leaking badly. I stopped working at this point and ordered new gasket for the cooperring (I reused the fire rings) and new head bolts. It was few weeks before summers main event, bimmerparty and I wasn't too worried to get the engine back together before that.

                        Only few days before the event, I got the parts and started working with the head. I lapped all the leaking valves so they will seal properly and changed new valve seals.


                        Everything went smoothly and just before I was about to put the head on, I noticed something funny on number five piston. I rotated engine so that pistons 2 and 5 are at highest and the piston 5 was few millimeters lower than piston 2. Blah :( Only few days to the start of the even and had to take apart the rest of engine also. And out came this:


                        The number five connecting rod had bent (maybe because of those misfires caused by bad coil). Luckily nothing else was broken and I had one spare set of identical connecting rods, so I just changed the bent one. It was 9 AM when I took that out and I assembled the engine such an hurry that at 4 PM I started the engine :D Everything worked fine and I just gave the car quick wash and headed to home. Next day I spent tuning the engine and surprisingly it stayed together. So next day I could head to bimmerparty. The charge pipe got loose on the way but I managed to get here and fix the problem before 1/4 mile:


                        And few pics with my e36:


                        At the 1/4 mile I had problems with the start because the rear tires were hopping quite badly. But I still managed to run 13,5s with 188 km/h speed:


                        After that everything has worked in engine and I have already used two sets of rears:


                        The rear tire hopping was fixed by lowering the rear as much I could. That of course ruined my wheel alignment, so I lost even more traction. I will have to modify the toe-in adjustment in rear to get that sorted.

                        But anyways here is some extra pics from bimmerparty:


                        And here is the situation from last weekend:


                        The summer is now slowly turning into fall here in Finland so I will shortly put this back to garage. The plan for the winter is to at least fix the alignment problem in rear and change better tires. I'm thinking of using some semi slicks. Also if I have time and money I will change H-profile connecting rods to engine and do some other fixes too, so I can use more boost ;D
                        Last edited by pazi88; 09-10-2015, 04:53 AM.

                        Comment


                          #42
                          Originally posted by pazi88 View Post
                          Yeah it's a problem, I know. I added more material to my centers so that they would hold. unfortunately I don't have more pictures.
                          Awesome, thanks.
                          Car looks and sounds mental! Best of luck with more boost :)
                          sigpic

                          (clicky on piccy to get to thread)

                          Comment


                            #43
                            Originally posted by efficient View Post
                            very nice, only thing i don't like is your tire selection is too small.
                            keep up the good work
                            Those are widest I could fit to stock fenders. But as I said I'm changing those to semi slicks next winter.

                            Originally posted by econti View Post
                            Awesome, thanks.
                            Car looks and sounds mental! Best of luck with more boost :)
                            Thanks. i'm now running about 1 bar boost (~14 PSI) but I haven't gone to dyno, so I don't know the exact horse power figure. I think it's around 400 hp. That's already quite much because this only weights 1060 kg (~2300 pounds)

                            Comment


                              #44
                              Now when I finished the story about my e30, it's time for my brothers e30. It's basically the same kind of -85 316 with carburetor m10 without any options as mine. It had all kinds of butchering going on, but it seemed like solid car. So my brother bought it at fall 2013 as his winter beater:


                              To be able to drive that, we needed to change new front brakes, steering rack and basically whole front suspension, because it was in horrible condition:


                              There was also problems with rear suspension:


                              We also swapped the 4 speed transmission to 5 speed:


                              And some stuff for engine too, so we wouldn't die to exhaust gasses:


                              But after all my brother used it as daily driver during winter. You can see the car in action in this video of mine, when we did some drifting on lake ice:


                              After driving the winter, it looked like the car was ready to be scrapped. There was rust all over the place, engine lost all of it's power, brakes didn't work, clutch didn't work and parts were falling off.

                              Still we thought that I have so many extra parts laying around the garage, so maybe we try to make this some kind of drift/track missile with as low budged as possible. First of all I had -91 e34 525IA, which I bought for few hundred euros. It's in working condition, so we thought we could use the rear axle, brakes, wheels, drive axle, transmission and m50b25 engine from that. From some scrapped e36 we got the steering rack and front suspension, so we started to have the basic stuff to do the build.

                              So first you need to do some burnouts:


                              And then we started taking thing apart:


                              The rear springs were really easy to remove:


                              Engine out, ready to be scrapped:


                              Yuck!


                              We knew that this was rusty, but didn't knew it was this bad:


                              Some previous owner has cutted the brake hoses and replaced them with hardlines:


                              No wonder the brakes stopped working....

                              Nice prepwork in the front bumper.


                              Maybe the same guy did the wiring:


                              And maybe the rust "fixes" too:


                              Everything like that had to come out. After that we put our first rust fixes to the floor. Not very nice looking, but will do the job.


                              For a while it was the Flintstones' Car:


                              And first things we had to buy were new side skirts and some new sheetmetal for rear quarter panels.


                              Then the rear axle came out. Almost....
                              Last edited by pazi88; 09-10-2015, 04:53 AM.

                              Comment


                                #45
                                More horrible looking patches for the floor:


                                And for the drivers side wheel arch:

                                (The passenger side looks the same)

                                Then we took off the drivers side sideskirt. It wasn't even attached from the lower part, which is not good, because it's part of the cars structural integrity.


                                Someone had fixed the front corner at least three times, with very poor results:


                                New inner skirt in front corner:


                                This is supposed to support the rear axle, but now it was other way around and the sideskirt was supported by the rear axle:


                                All had to come out:


                                Starting to build new supporting structure for rear axle:


                                Oh hi!


                                Inner wheel arch fixed:


                                And lastly the new sideskirt:


                                As you can see, the wheel arch looks horrible. But there is no point of fixing that, because we are going to use these fiberglass arches:


                                The passenger's side wasn't any better:


                                Very depressing..


                                But just cut the rotten part off.


                                And replace with new:
                                ยจ

                                There is some work in the drivers side front support beam:


                                Comment

                                Working...
                                X