
jealous. I've seen a technoviolet m5 down here for around 5k once. I was pissed. Sub.
-
1986 LTW M52 (First project 2015- )
1998 e36 328ic/5 -
Roundie alpina pig cheek’d (1969)
1967 2002 parts car
1994 318iS junked. -
Thanks everyone! I'm really looking forward to getting her back on the road.
Paul's stuff definitely looks super nice. I'm just hesitant on whether or not I want to go full spherical or not. A buddy of mine had installed spherical on the front of his E39 M5 and neither of us were a fan. The NVH vs. performance benefit just wasn't worthwhile for a street car. He's going to be installing Turner sphericals on his E34 soon though, so I definitely want to drive his car before making a choice. I should have plenty of time to make a decision as you'll see.Originally posted by paynemw View Post
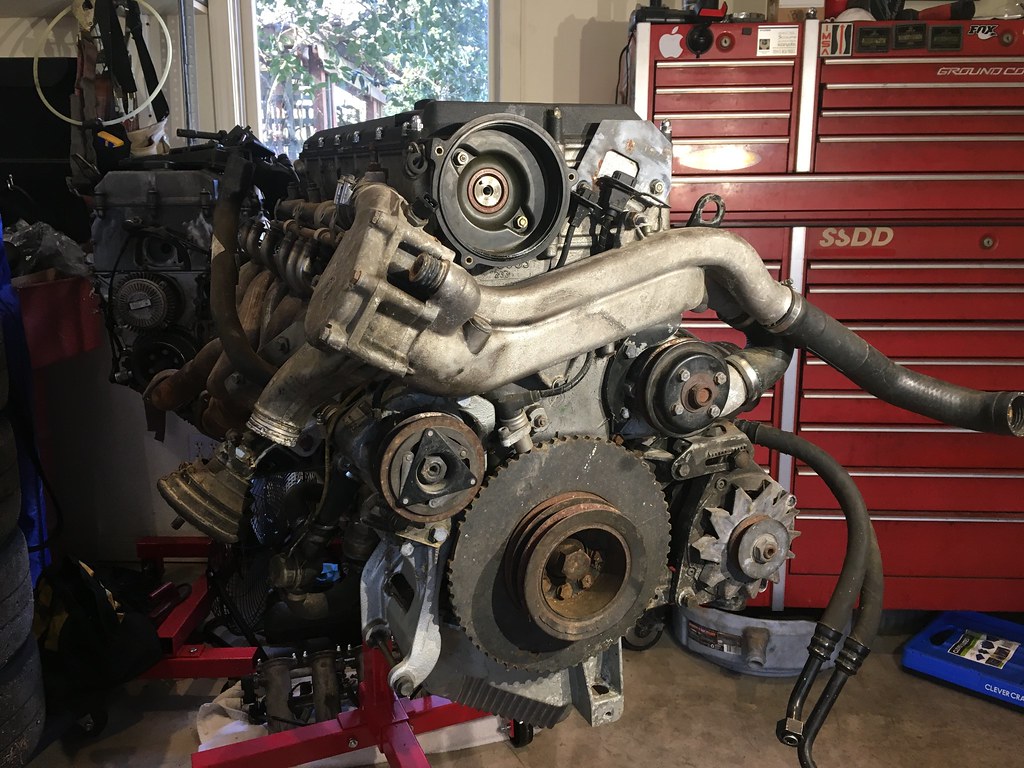
So I had the engine up on the stand and a week or so later I started tearing into it to see what kind of secrets the old S38 was hiding.
IMG_3078 by Alex Barroso, on Flickr
Took plenty of pictures of little details such as wiring and vacuum line routing for when reassembly time comes. These old motorsport engines just have such neat little details.

IMG_3079 by Alex Barroso, on Flickr
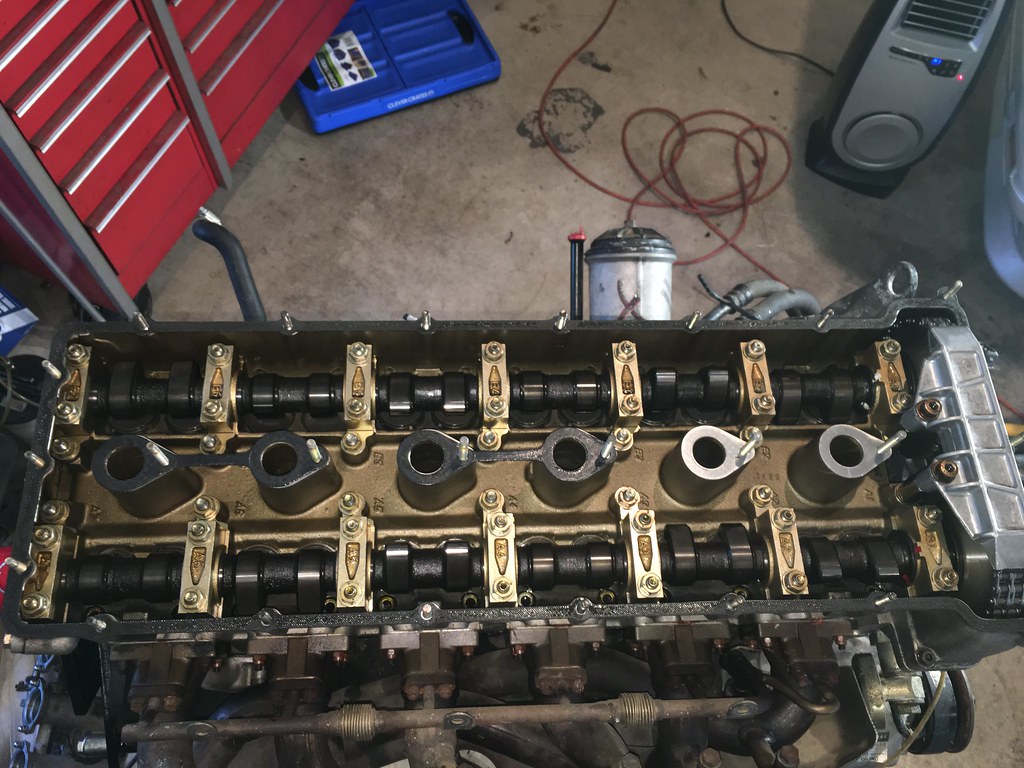
The cambox design is pretty neat as well. Everything looked pretty clean and tidy up there, as it should. No corrosion on the cams thankfully.
IMG_3080 by Alex Barroso, on Flickr
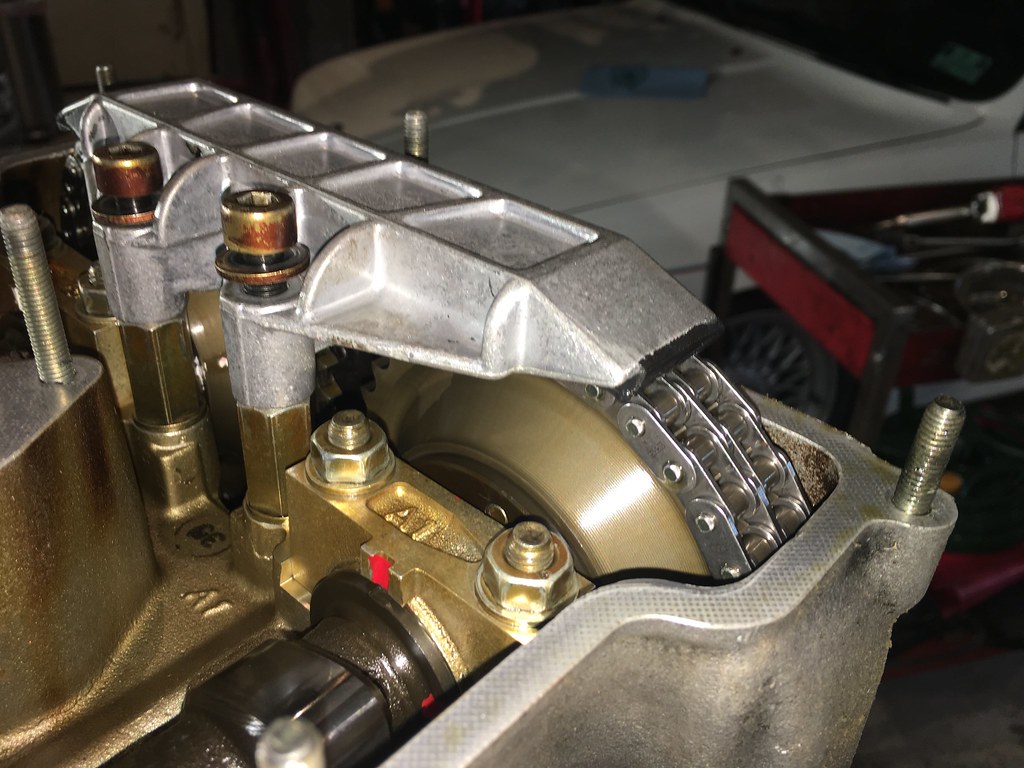
Some confirmation of some of the items I found in the stack of receipts. Brand new timing components are a major bonus! The timing chain tensioner has also been updated to the S50b32 unit at some point so all of the timing components should be good for a long time to come.
IMG_3083 by Alex Barroso, on Flickr
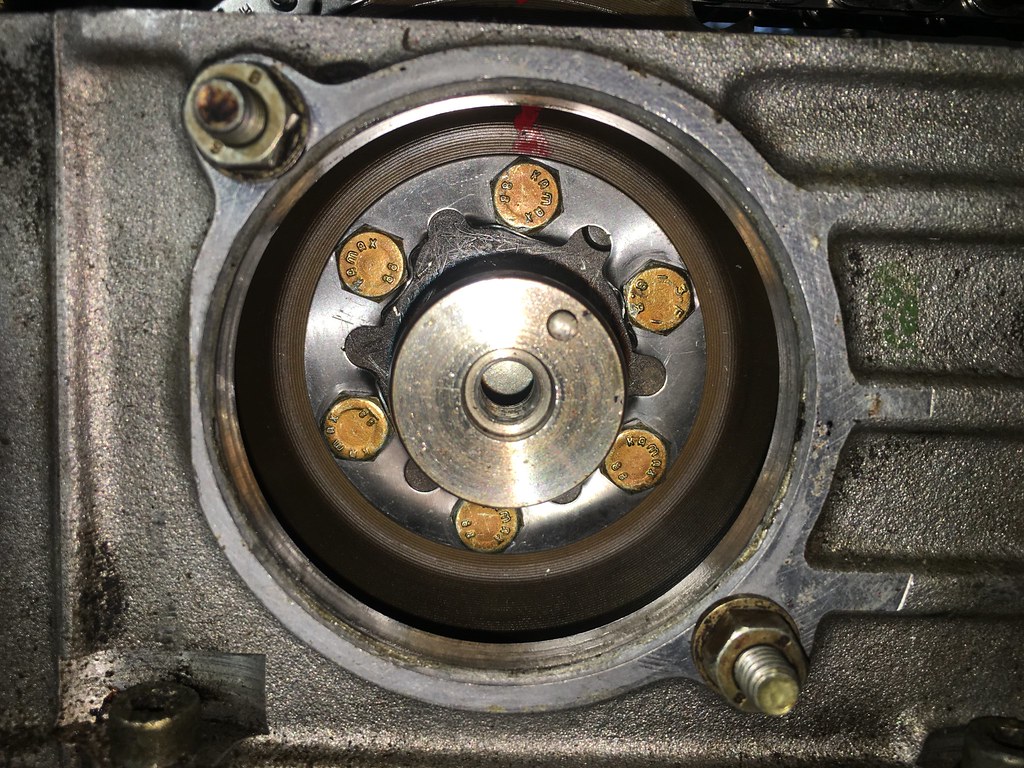
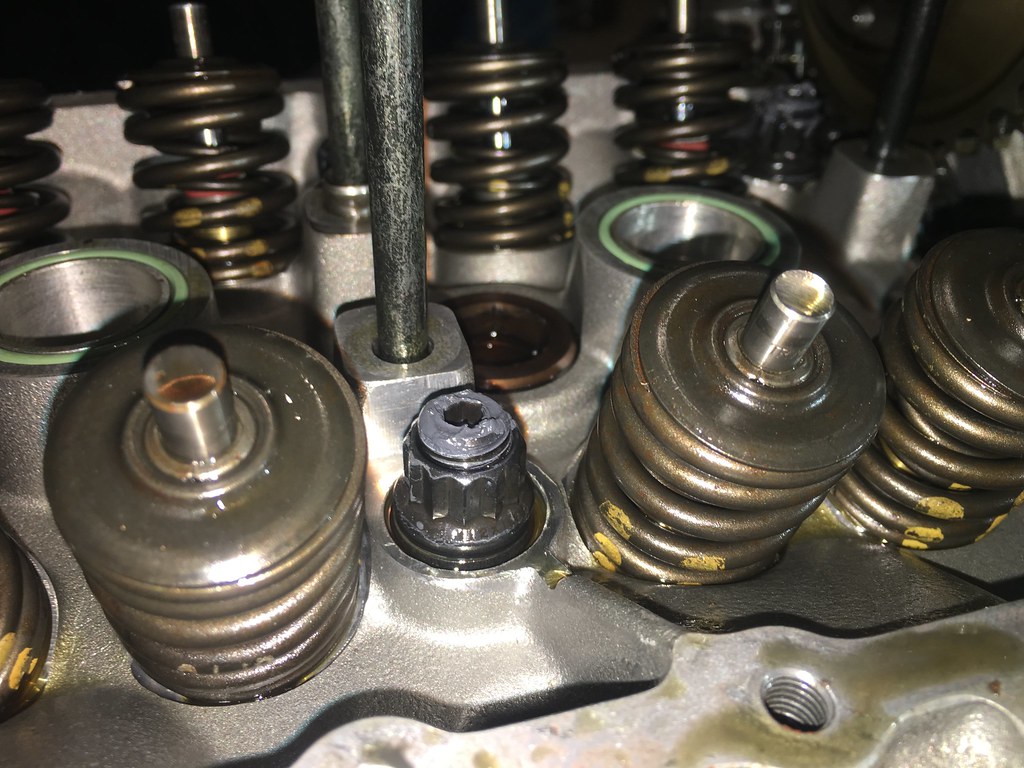
I thought these lockplates for the cam gear bolts were also a nifty detail. I haven't seen a design like this before, but it's a pretty cool solution. I'm going to order some new ones if they're still available.
IMG_3085 by Alex Barroso, on Flickr
Cams out and timing components all loose. The big old cambox casting looks pretty empty!
IMG_3086 by Alex Barroso, on Flickr
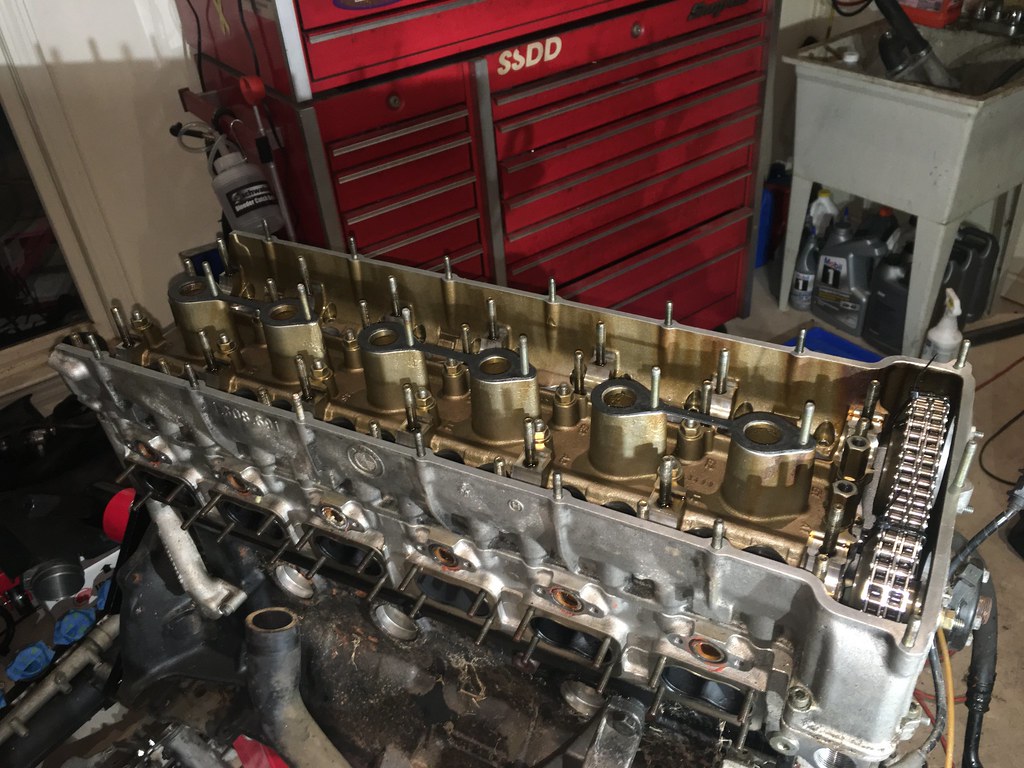
Cambox comes off and reveals some of the details of the head.

IMG_3088 by Alex Barroso, on Flickr
As the receipts indicated, ARP headstuds were installed during the rebuild. Unfortunately, it seems like something went wrong when they were torqued as some of the nuts felt as if they were torqued to the 70 ft-lb spec, but others were nearly hand tight. Seems that they used plenty of thread lubricant as ARP specifies though.
IMG_3089 by Alex Barroso, on Flickr
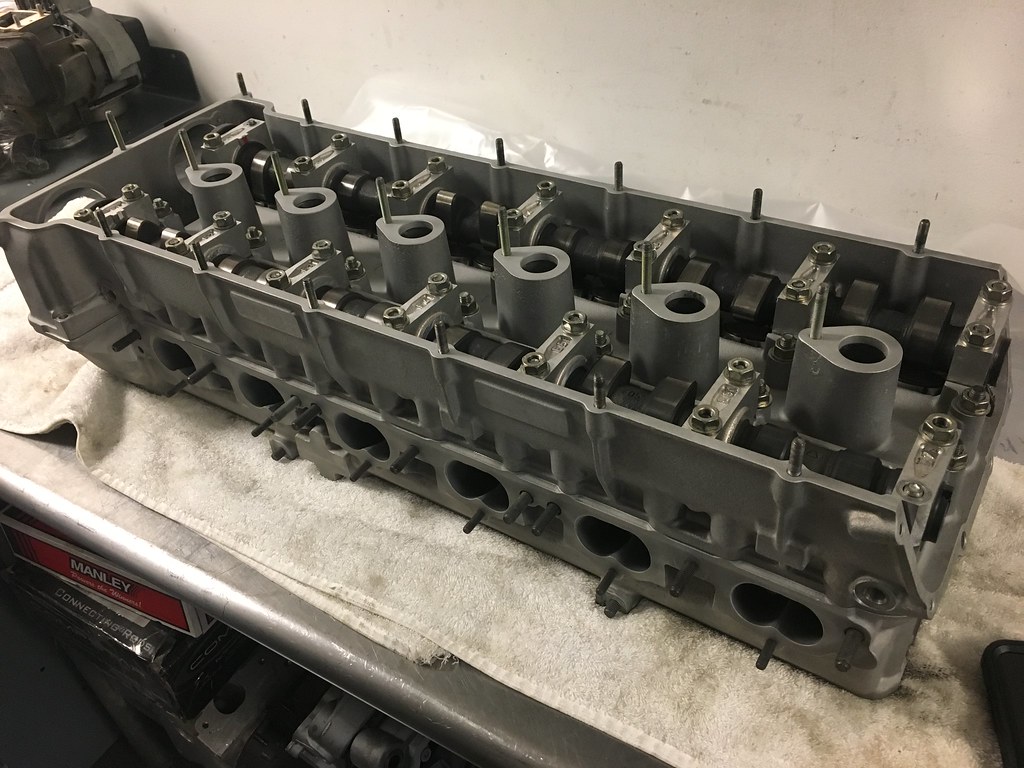
Cams, buckets, and head all laid out on the bench.
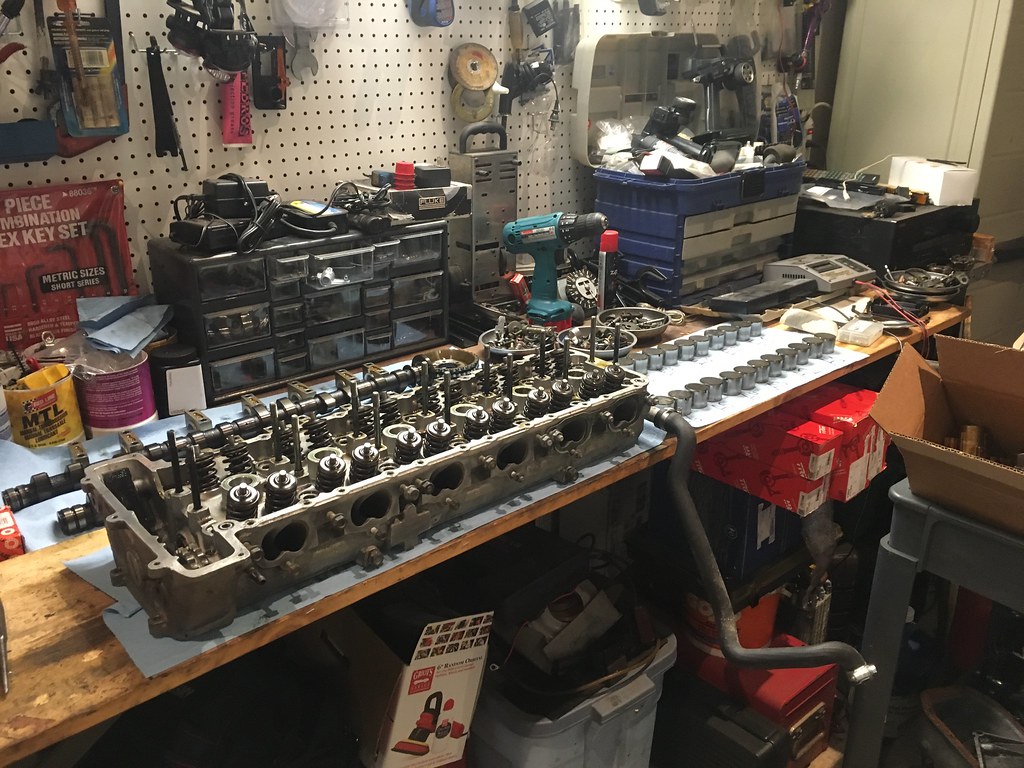
IMG_3103 by Alex Barroso, on Flickr
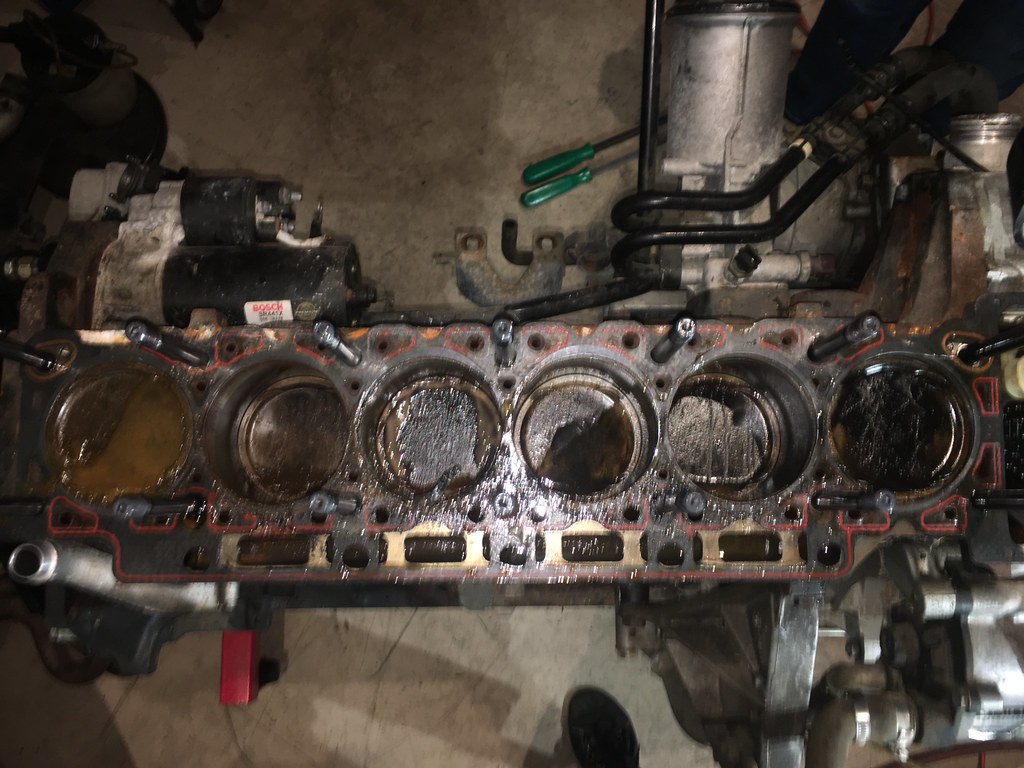
And finally, once the head comes off the nastiness is revealed. Getting the head off was a bit of a worry in and of itself though, as I had to use a pry it all the way off the studs. Once it was off, some problems were immediately apparent.
IMG_3090 by Alex Barroso, on Flickr
The smoking gun can be seen as the failure of the metallic rings of the headgasket in cylinders 3 and 4. Oddly enough, the failure wasn't in the section which the cylinders share, but on the passenger side of the bores. I'm really not sure what would have caused a failure like this, but it seems that it must have happened during the install, especially when considering that the story, as far as I'm aware, was that coolant was being pushed into the cylinders right from initial start up.
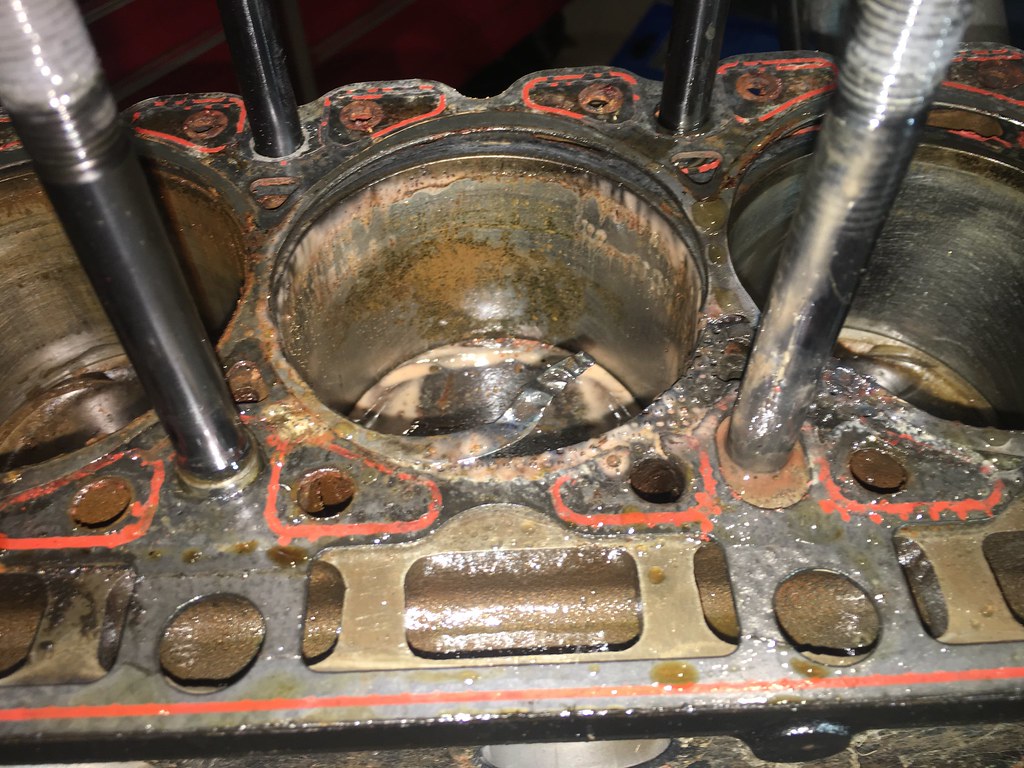
IMG_3091 by Alex Barroso, on Flickr
Sorry about the blurry picture here, but the failure in cylinder 3 can be seen in this one. The failure in cylinder 3 in no where near as pronounced as cylinder 4.
IMG_3092 by Alex Barroso, on Flickr
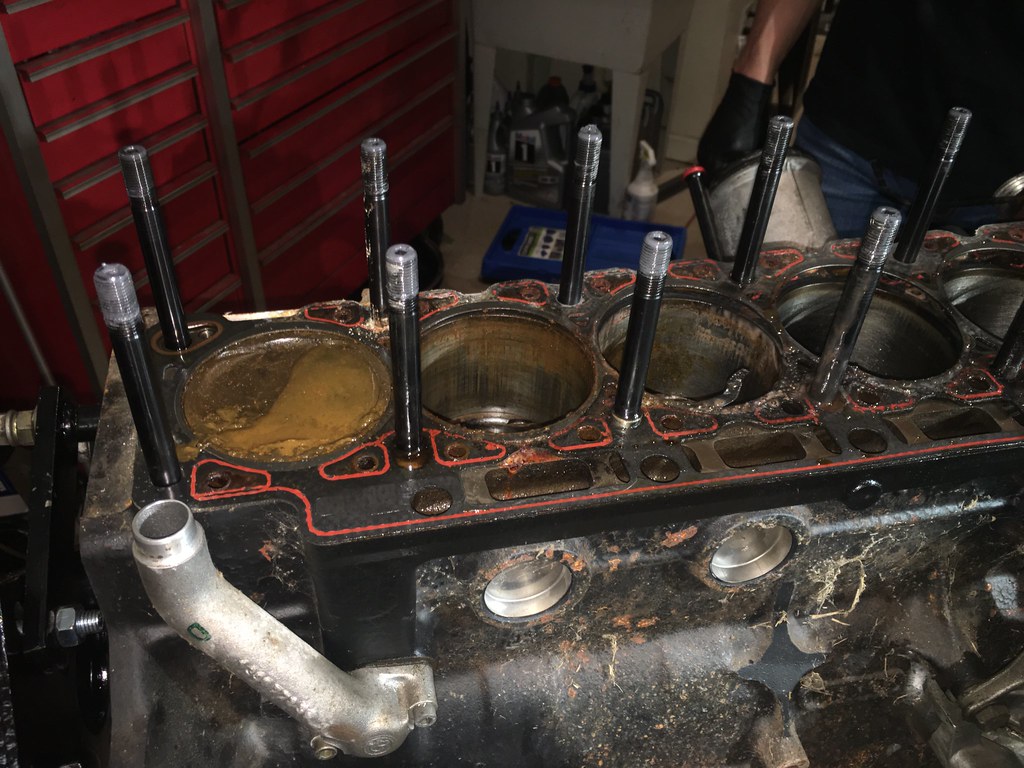
I cleaned up the bores and piston tops a bit to get a better look and asses and damage to the bores or deck.
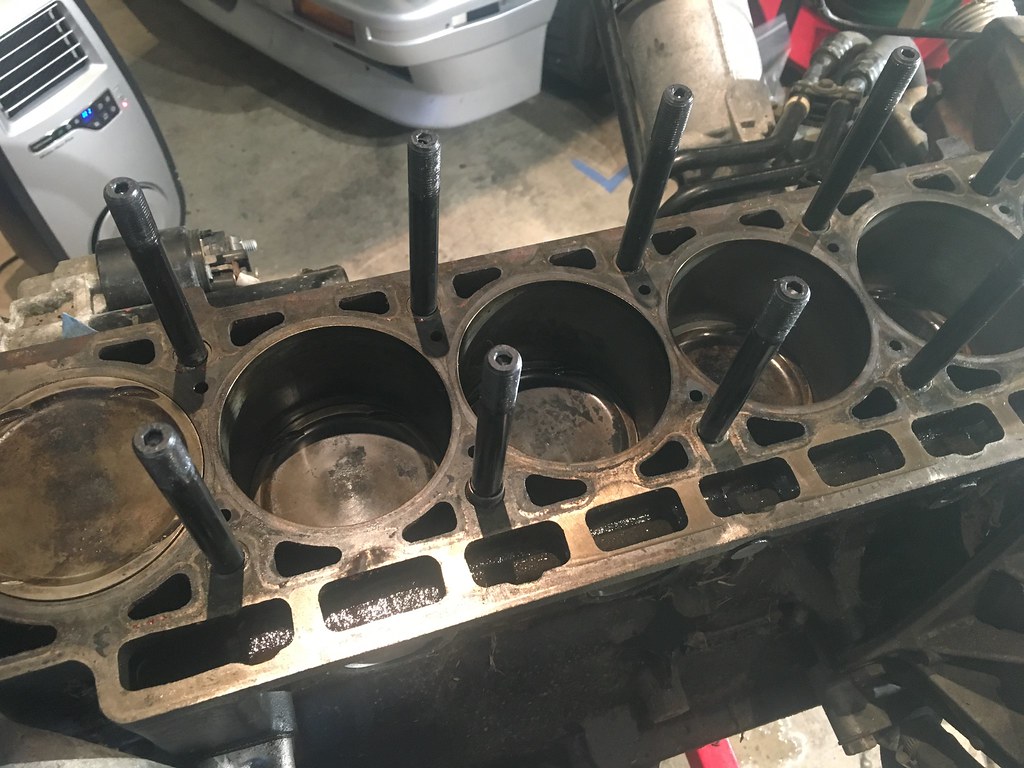
IMG_3105 by Alex Barroso, on Flickr
Cylinder 4 must have had a lot of moisture sitting in it after the failure, and unfortunately it was at the bottom of the stroke while it sat for all that time. The bore developed a quite a bit of visible corrosion. While it couldn't be felt by touch, it was definitely a concern and was going to necessitate some amount of honing at a bare minimum.
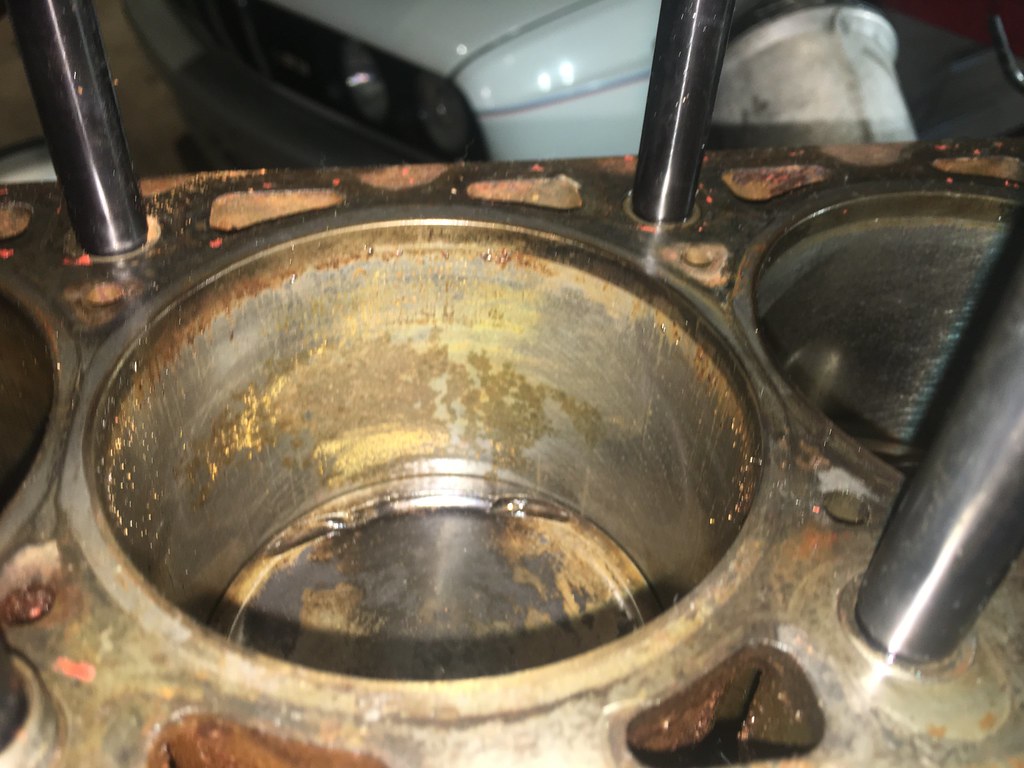
IMG_3107 by Alex Barroso, on Flickr
Once I had gotten the head off the engine and after seeing the visual condition of the bores alone, I decided that something needed to be done. The bores already have 160,000 miles on them, and some of them have developed corrosion.
The obvious choice was to go for an overbore, but I really only wanted to go for the first overbore size (.020mm). The problem was that parts sources were in disagreement whether or not the pistons and rings were available or not for the .020mm overbore. Luckily, both the pistons and the rings turned out to be available, but had to be sent over from Germany.
Since everything was going to have to go off to the machine shop I went ahead and continued the disassembly. Flipped the block over, took the pan off, and started taking a poke around the bottom end. The oil pump looks very fresh. Going to have to go back through the receipts and see if I can find anything about that. As I started taking the rod caps off it was apparent that all of the bearings were "new" as well.
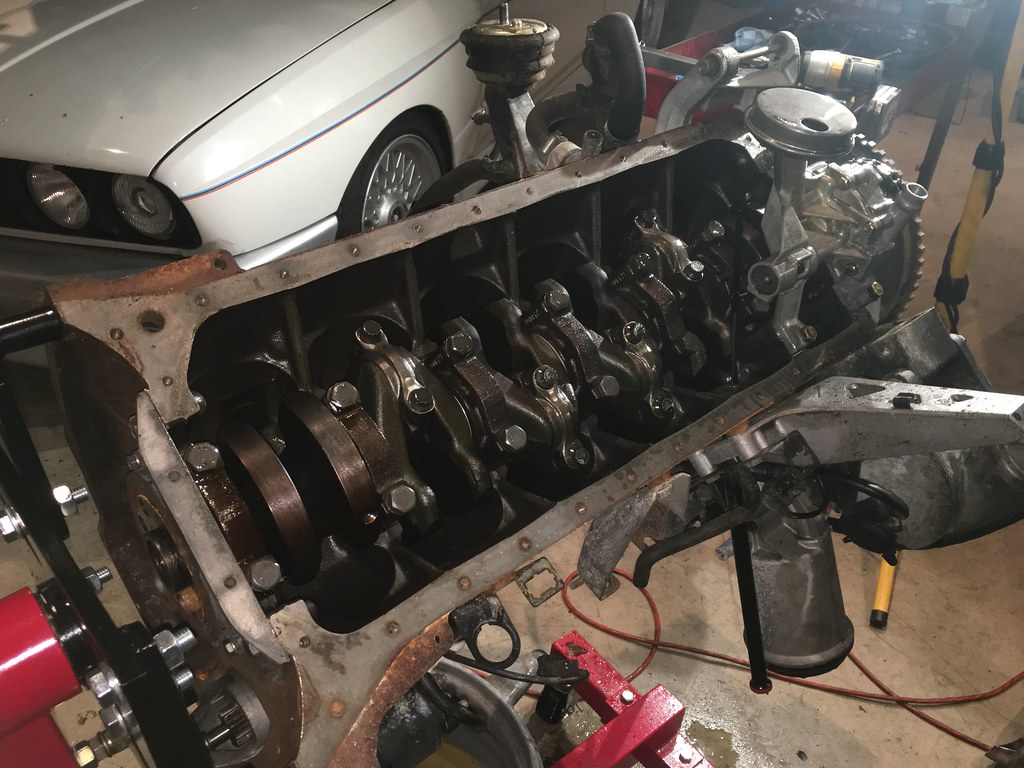
IMG_3109 by Alex Barroso, on Flickr
All that was left after getting the rods and pistons out were the accesories on the front of the engine, the crank pulley, and the timing cover. A few lines were missing off of the airpump. I think I've decided I just want to delete it when the engine starts going back together. The M30 parts hunt is on.
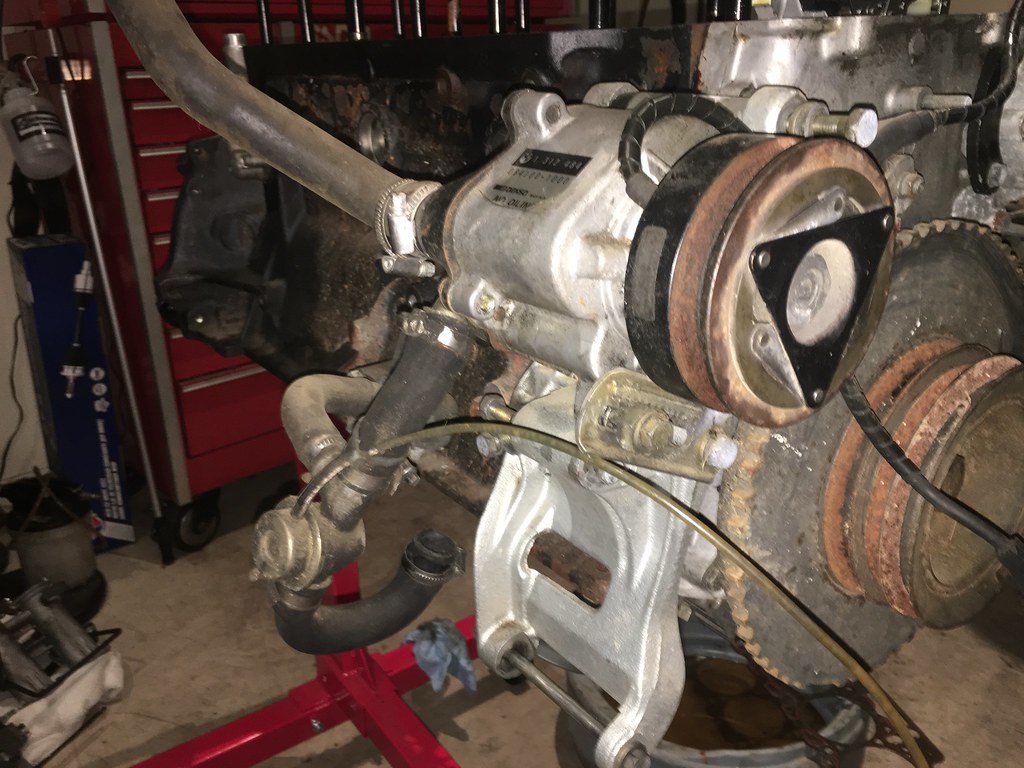
IMG_3112 by Alex Barroso, on Flickr
Soon, all the was left was the crank and headstuds. I left the crank in so the machine shop could check the current bearing clearances.
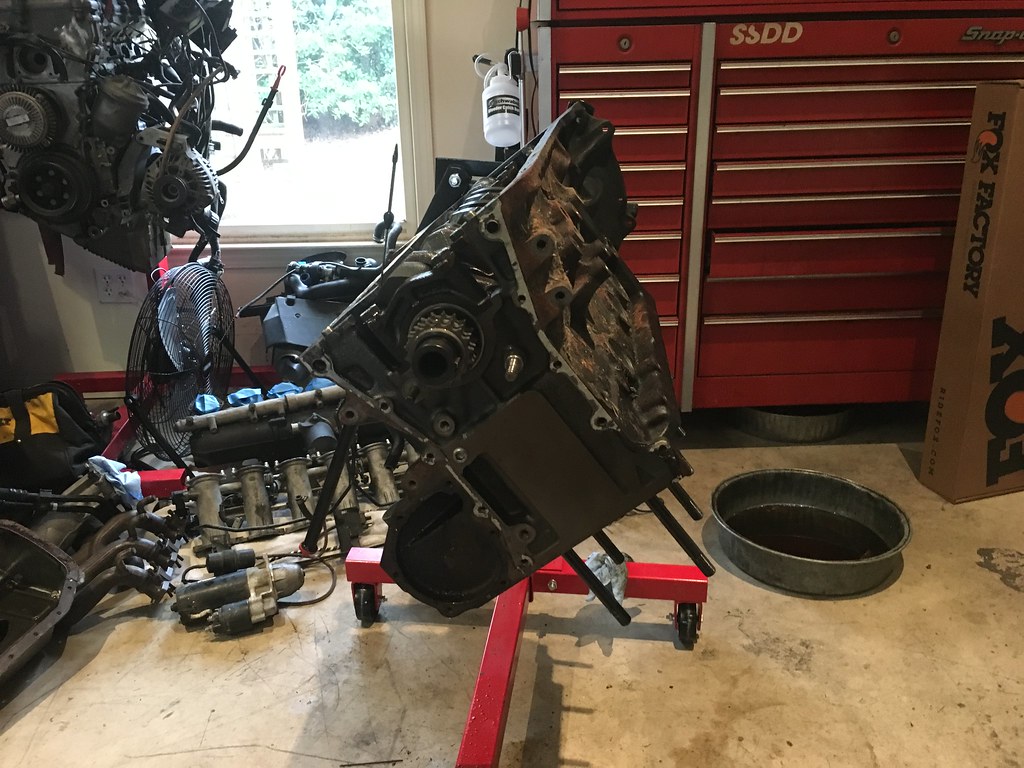
IMG_3116 by Alex Barroso, on Flickr
I loaded up the head (in the box) and the block in the back of the 318 and headed over to the machine shop. The rear of the poor E30 was quite low! It looked pretty goofy with some reverse rake.
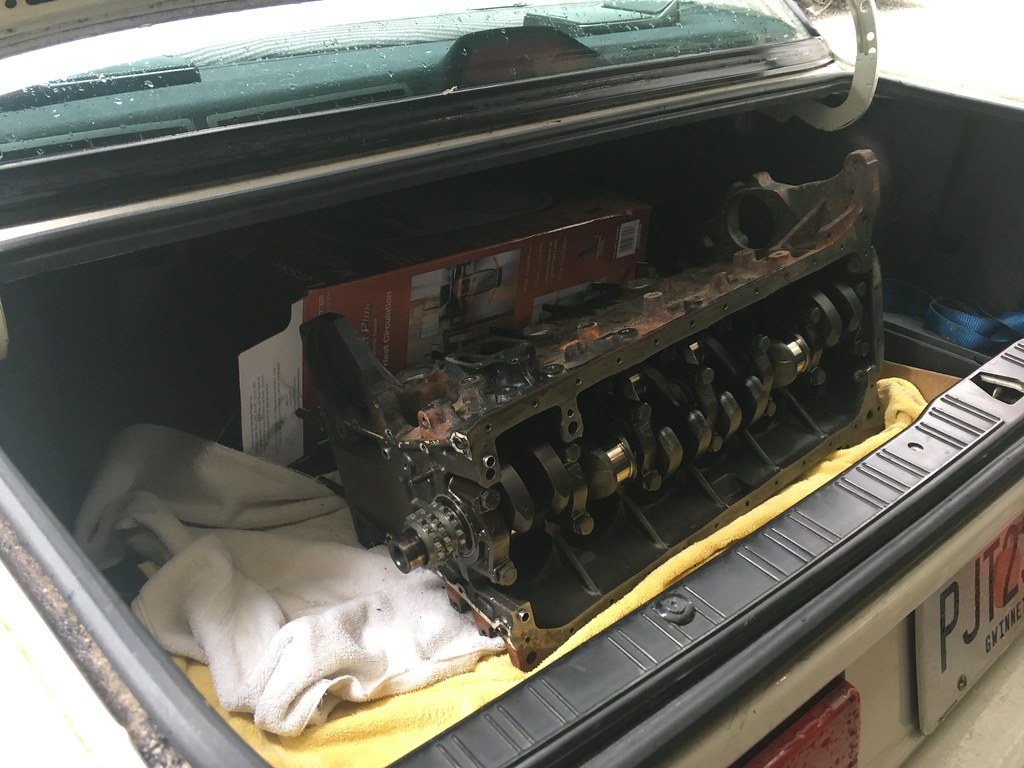
IMG_3117 by Alex Barroso, on Flickr
So that's pretty much where I'm at now. I'm not really too disappointed with what I found. I went into the project assuming that this was probably the route that I was going to have to take. Luckily I've got a machine shop that I trust that's on the job. The head and block are going to be pressure tested, measured, and machined as needed. The machine shop is a couple weeks behind, but it's not a huge deal as the pistons and rings are going to take awhile to arrive.
In the meantime, I'll be gathering lots of needed parts. I'm also on the lookout for an M30 powered E34 being parted out in order to get what I need for the SAP delete and single vane power steering pump conversion.
I hope to have some updates on the engine in the next few weeks and I'll be sure to keep everyone posted!75' M42 Powered 2002
AW 318is

Comment
-
Nice to see some progress on this! When you install ARP studs you should recheck the torque on them the following day. Also they need to be checked again after a full heat cycle. I suspect that these steps might not have been followed when the motor was built.IG: deniso_nsi Leave me feedback here
Comment
-
Worth checking the re-use length on the studs to ensure they've not been overtightened beyond the elastic range.
TBH, a fairly lucky find on the engine. With the mileage a rebore would have been prudent anyway and should give you a nice fresh engine. Avoiding a lot of the expensive extras is nice too (timing kit etc)Comment
-
It'd hard to tell from these photos, but it looks like a Victor Reinz head gasket. (IE: Cheap)
It also looks like it was too small for actual bore diameter.
Did you measure this before throwing parts away or dropping the engine at the machine shop?
Also, those cam gear locking plates are on (or should be) every S14/S38/M88 engine.
Still available new from BMW.Below the radar...Comment
-
Is this necessary for OEM studs? I've never heard of this before.Originally posted by dude8383 View Post
Great thread OP, and very well documented! Subscribed, looking forward to followingComment
-
OEM stretch bolts don't require re-torquing. But hard ARP bolts require after heat cycle. I don't remember if that was even mentioned in the ARP instructions :?: I have also noticed that with ARP bolts, the first bolts to be tightened are bit loose after tightening the last ones. So you need to go through the bolts second time to get all tight enough.Originally posted by Mazdayasna View Post
Also I have never had problems with Victor Reinz gaskets. In m50 engine even 14psi of boost with stock replacement Victor Reinz head gasket wasn't a problem. So I would not blame that.Comment
-
Unfortunately I can't seem to find many specifications on the ARP studs. I haven't even find any official documentation for the S38 application, only the M30. I'll definitely keep looking to see if I can find a re-use length number.Originally posted by alistairolsen View Post
It was indeed a Victor Reinz. I didn't actually measure the gasket bore, but there wasn't a noticeable lip on the gasket, and it was definitely an S38 gasket. I'm still at a bit of a loss as to what have caused the gasket to tear like that... Especially if the story I was told was correct that the engine began leaking coolant into the cylinders right after startup. It would at least make a little bit more sense if it had failed after a bit of use due to a failure to re-torque the head fasteners after the first heat cycle.Originally posted by UNHCLL View Post
I just took a look at the M30 installation instructions and there is no mention of a re-torque after heat cycling, but it's definitely a must-do in my mind. The instructions do suggest torquing to 90 ft-lbs in 3 steps, so in 30 ft-lb increments. Thanks for the suggestion to do a final once over after the final torque though, I'll definitely do that. Taking the cam-box back off to do the heat cycle re-torque is going to be a bit annoying though.Originally posted by pazi88 View Post
So I haven't done much with the car lately, and not much progress has been made at the machine shop. I had bought what I thought was a full set of factory (Mahle) S38 pistons for $600, but it turned out that I bought a single factory S38 piston for $600. :shock:
I decided spending almost as much as I spent on the car for pistons alone was not a wise decision, and luckily I was able to return the piston even though it was a special order part from Germany (thanks, BMW of Fairfax!).
I ended up having Wiseco make a set of factory-spec 0.20mm over-bore pistons. The order was placed a few weeks ago, so hopefully it will only be another week or two until they get here and then the machine shop will get started on the engine.
As of right now, the only other things I have on my need-to-do list are: rebuilding all four calipers, buying and installing M30 power steering components, and buying and installing M30 AC components. I'm sure that list will go rapidly once the car is actually running though.
Hopefully updates won't be too far away!75' M42 Powered 2002
AW 318is
Comment
-
Sub'd
What a find! Long sitting cars are a gift and a curse.2009 BMW 328i xDrive (Daily/winter drift king)
1987 BMW 325i (Currently torn apart)
Instgram: @Ebola.30Comment
-
I'm actually kind of stoked that this is in the condition it is in...mostly out of selfishness because now I get to watch an s38 get rebuilt lol but also now you'll know that it's in tip top shape!Comment
-
I know I'm nitpicking but on an M30 you do in fact need to heat cycle it and then do one final pass on the head bolts.
 IG: deniso_nsi Leave me feedback here
Comment
-
Any updates on this awesome project?Comment
-
He's running SE30 NASA Championships this weekend @ COTA, been prepping for a while. I know the motor is ready to go back in, supposedly looks amazing, but I haven't heard anything beyond that.- '88 m54 coupe
<3Comment
-
It's still around
Well, I didn't do very well keeping up with this thread. Progress ended up being super sporadic as the machining took longer than expected and then life got in the way of getting everything back together in a timely manner. It's just about running and driving now so I suppose it's time for an update.
So I guess we left off with the engine going to the machine shop, so here's one of the shiny Wiseco's that arrived at the machine shop.

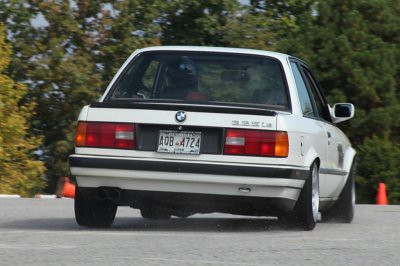
I pecked away at a few small tasks while waiting for the engine to come back. Cleaned up a few things, including the transmission and wheels. The transmission is actually a G260/6 that was bought new by one of the previous owners as indicated by one of the many receipts that came with the car. I'm pretty happy with that, as the few G280's I've been around have all had syncro issues.
New tires were also on the to-buy list....

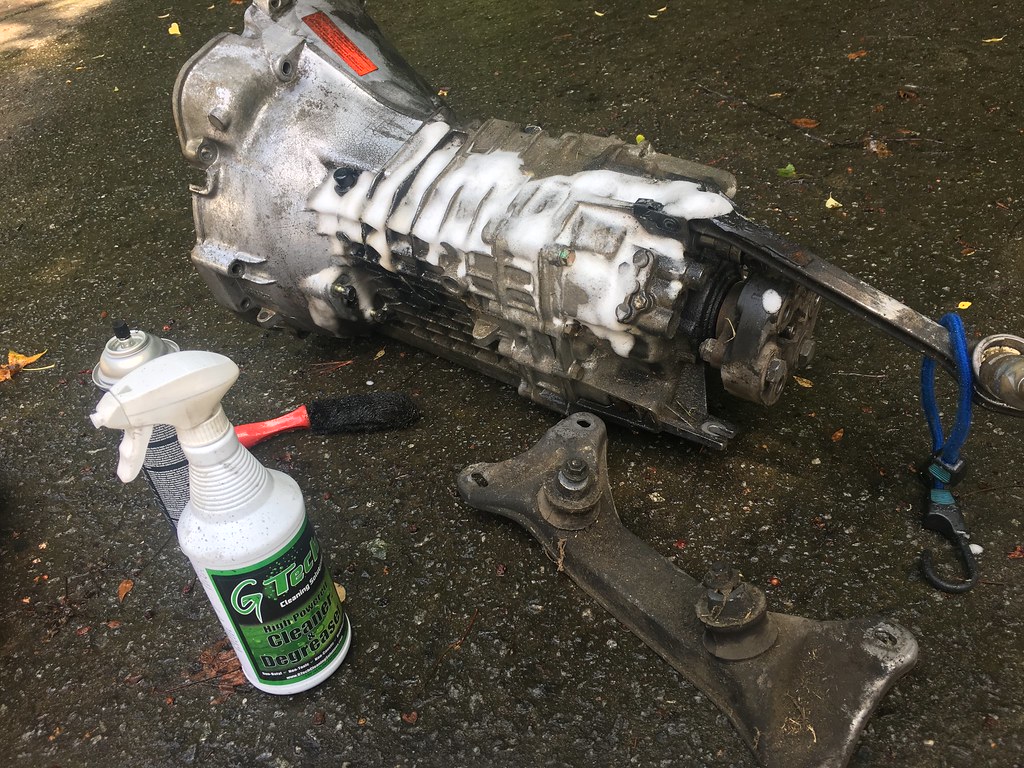
I also tried doing some leather treatment for the first time. I had heard good things about the Leatherique process, so I tried it out on the front seats. It was still cold when I did it, so the seats never got to bake in the heat during the treatment as suggested by Leatherique. I definitely happy with how they came out.


I didn't treat the rear seats for good reason. I got crazy lucky when a buddy of mine sent me an EBay listing for a black M5 rear center console seat in nearly perfect shape for not a whole lot of money. Where was it located? Metro Atlanta. That one couldn't have worked out better, and of course the E30 did it's usual hauler duties with no complaints.
I also bought a new battery so I could test out the cluster and the other electronics. Success!

Stopped by the machine shop a week or so before the engine was ready and got to take a look at the head. These suckers a big!
Not long after, the block and head came home with me!


I had a little sideline project going on when the engine came back though (come to find out, as these little sidelines really start to snowball and uncover more and more problems). When originally taking the drivetrain out, I was getting really annoyed by the brittle chips of firewall insulation falling down the back of my shirt. It looked like ass too, so I wanted to do something about it.
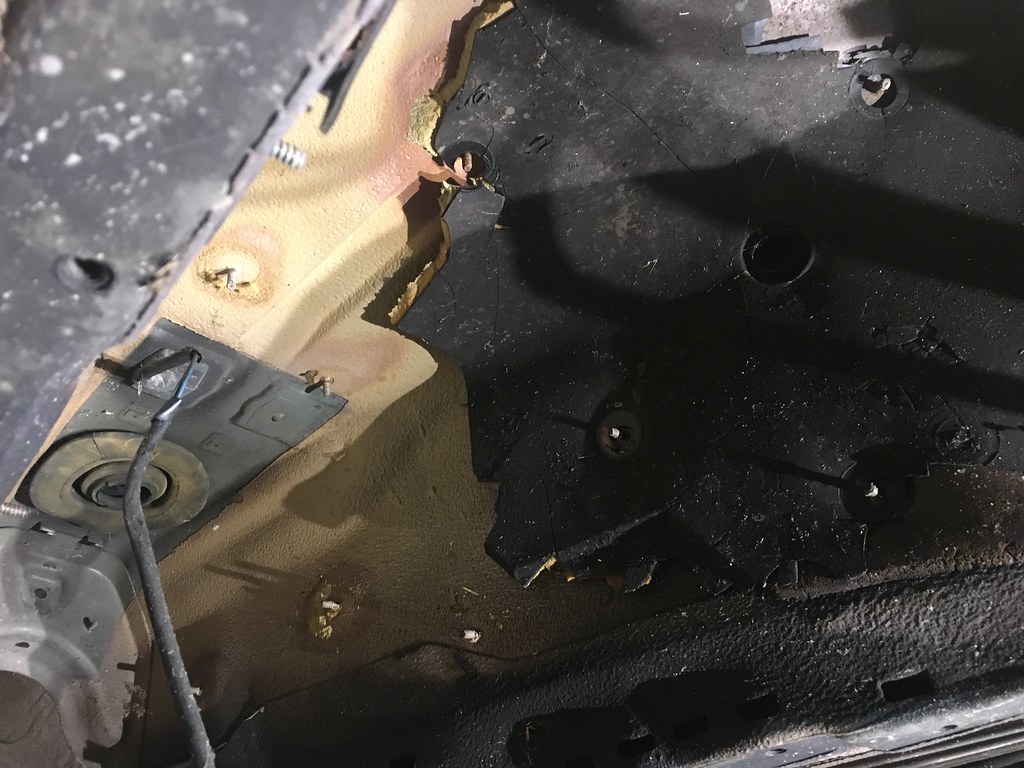
I don't remember what the confusion was back when I was trying to figure out what I needed for the replacement, but there were multiple E34 firewall/trans tunnel insulation part numbers. I think there were even multiple in the M5 diagram on RealOEM. As I remember it, there was only one number that even said there was a chance of availability. I had a buddy of mine order it and was told it was the last one in stock (don't remember if that was U.S. or worldwide.).

Check out that production date!

I'll skip to the finished product, but that ended up being a huge pain in the ass. It looks way better though, and hopefully will make a big difference versus the almost non-existent insulation had I not gotten a new piece.
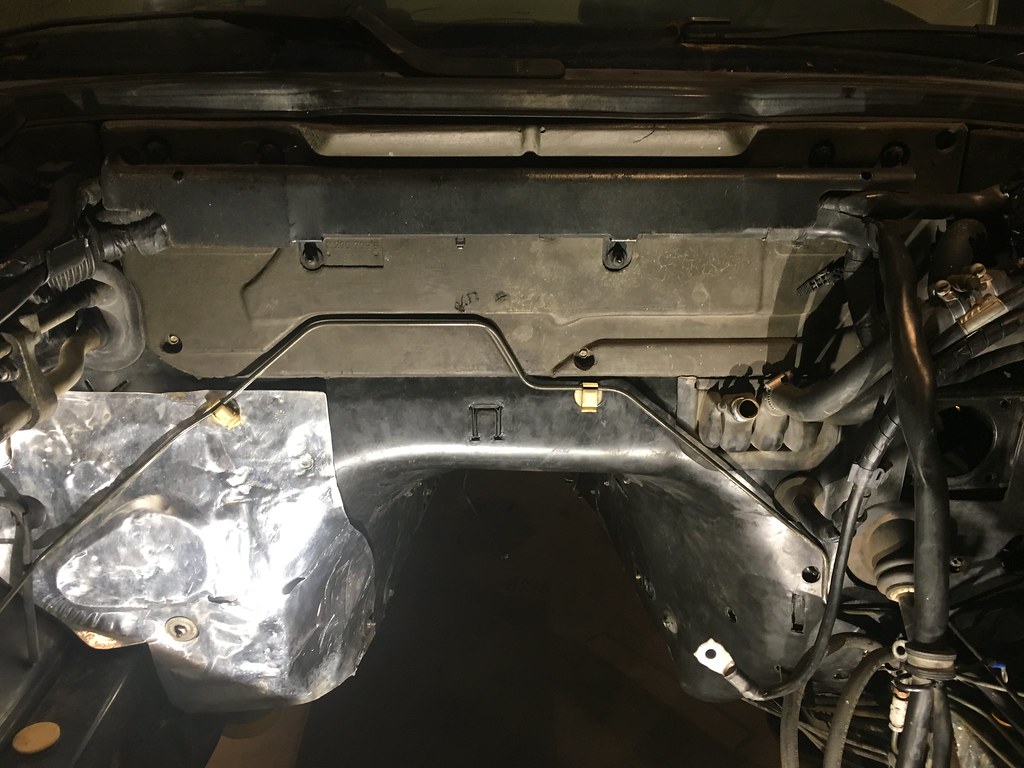
However, as I mentioned earlier, I uncovered some issues during the insulation project. While taking apart the braking system, I found this. Brake fluid isn't supposed to be orange and chunky, is it? That ended up being another issue to attend to later down the road.

Once the insulation was sorted, it was time to turn back to the engine assembly. First up, block on the stand.

Things went slowly as I tried to remember how things were supposed to go back together, what went where, etc. Any small mistakes at this point could be very costly and or very time consuming. The machine shop had also bought some parts they figured I'd need, but they didn't always get everything, so I'd have to periodically take inventory to find that I didn't have some dumb little part I needed. It'd also been quite awhile since everything had been taken apart and our shop is not the most organized, so I'd often spend a good bit of time trying to figure out what had come back clean from the machine shop, what I had forgotten to get cleaned, and what I had stashed in some kind of "safe" place.
Still, I'd make progress here and there.

I also had some of the really nasty/worn parts blasted by a local buddy with a better equipped shop so that I could do a quick spray bomb on them. I won't bore you guys with too many of those pictures though.

Bottom end continuing to go together. I reinstalled the ARP headstuds to do a dry assembly to check clearances just to be super safe and make sure nothing got shaved too far or that any dimensions got screwed up on the pistons. At the time I was still contemplating whether or not I wanted to go through the trouble of re-using the ARP's or just use stock head bolts.

Head back on and cams timed. Getting the timing right and the chain back on the sprockets is a bit tricky with the space constraints at the front of the cam box.
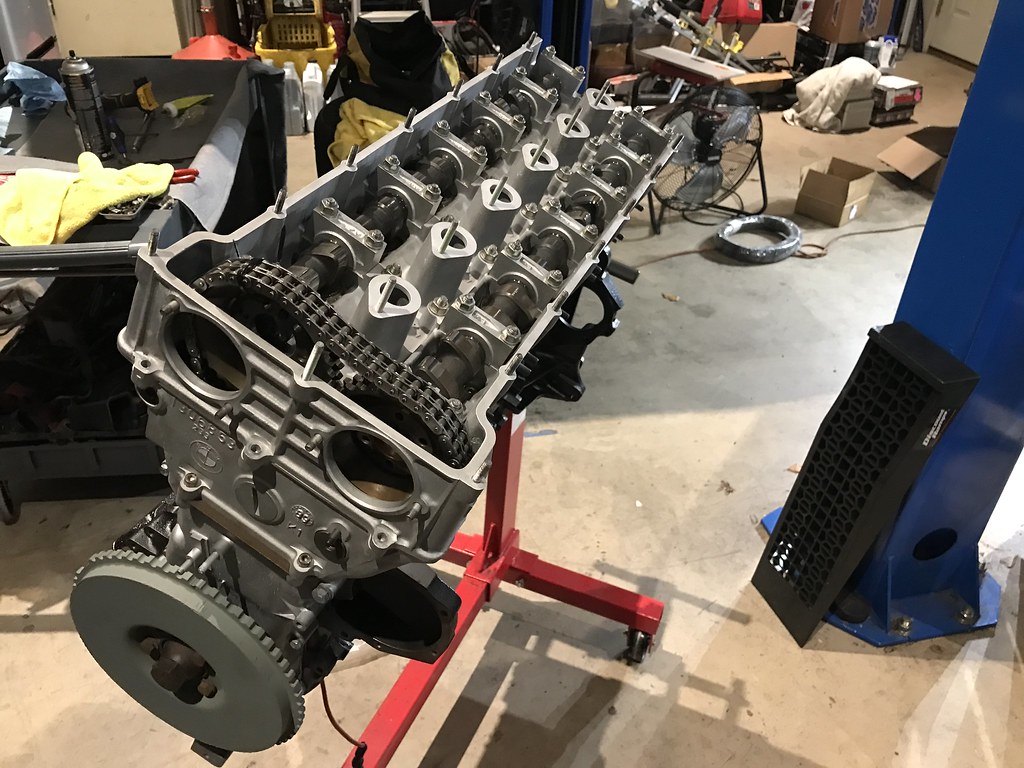
Hooray! No contact. I remember measuring the actual clearances, but I forget where I wrote them down. I used an old factory gasket that came in a box of random parts with the car, but the adhesive had gone bad and started chipping so it wasn't usable for final assembly anyways.

That box of random parts also just so happened to have a full set of brand new head bolts as well. Between that and struggling to get the head on and off with the studs, that made my decision in regards to head fasteners quite easy. If anybody wants a set of M30/S38 ARP headstuds I'd be happy to sell them. :)
I snapped a quick picture when we got the engine timed for the final time. After lots of double checking (I get paranoid) I finally had a complete S38 rotating assembly!

I think that's it for tonight. I plan to get up nice and early tomorrow morning and drive the car for the first time! I guess I have a lot more catching up to do on the thread 75' M42 Powered 2002
AW 318is
Comment
-
Great update! Can't wait to see further progress on this one!Comment

Comment