Announcement

Collapse
No announcement yet.

My Inherited 88

Collapse
X
 
  • Filter
  • Time
  • Show
Clear All
new posts

    #16
    You are into your car, and having fun making it your own, and that is awesome.
    But...

    PLEASE stop running/driving it until the necessary maintenance has been done. If the timing belt (a $60 part) breaks (which usually happens without warning), lots of parts in the engine WILL break, and you will have a MUCH more expensive repair on your hands.
    Also, you should check the brakes, check the suspension/steering, and probably get new tires. Tires have a shelf life, and even an unused tire, with full tread, can go bad due to age. The rubber itself dries out and breaks down over time. If the car sat for two and a half years, the tires are junk.
    You should also, at a minimum: change the spark plugs, flush the coolant (which will be part of the timing belt/water pump job), change the oil, and change the fuel filter.

    Please address safety and maintenance issues before modifying/driving the car. I would hate to see you put time into the car making it your own, and then have a catastrophic failure. Making the car safe, reliable to drive will produce a better ownership experience than any modification, cosmetic repair, or stereo will.

    Lastly, when performing a diy repair, such as your rain gutter fix, try to stop and think about the long term consequences. Basically, of the fix doesn't work, or if you decide to re fix it with the proper OEM parts in the future, how hard will your day repair make it? Using sealant as a temporary fix is fine, but too often you see people who "know better" than the engineers who designed the car, and everyone else who repairs it the OEM way, that start making changes (cutting/drilling) that are very hard for them, or the next owner, to undo.

    Everyone here on r3v wants to keep e30s alive, and I for one am glad to have you join us! I promise you that if you tackle the maintenance, and make your car reliable and safe to drive, you will have a much better experience, and making it your own will be even more rewarding.


    TLDR: buy a Bentley repair manual, and do maintenance before modifications.

    (Sorry... I am hung over and long winded)
    Last edited by Andy.B; 01-11-2014, 09:03 AM.

    Comment


      #17
      First of all, the necessary maintenance has been done. Timing belt was done. Oil changed and filter and a 12 point inspection. Not like I'm driving it and breaking it. I wanna make it last and I'm taking the precautionary steps to keep it going. I may be new, but I'm not stupid.

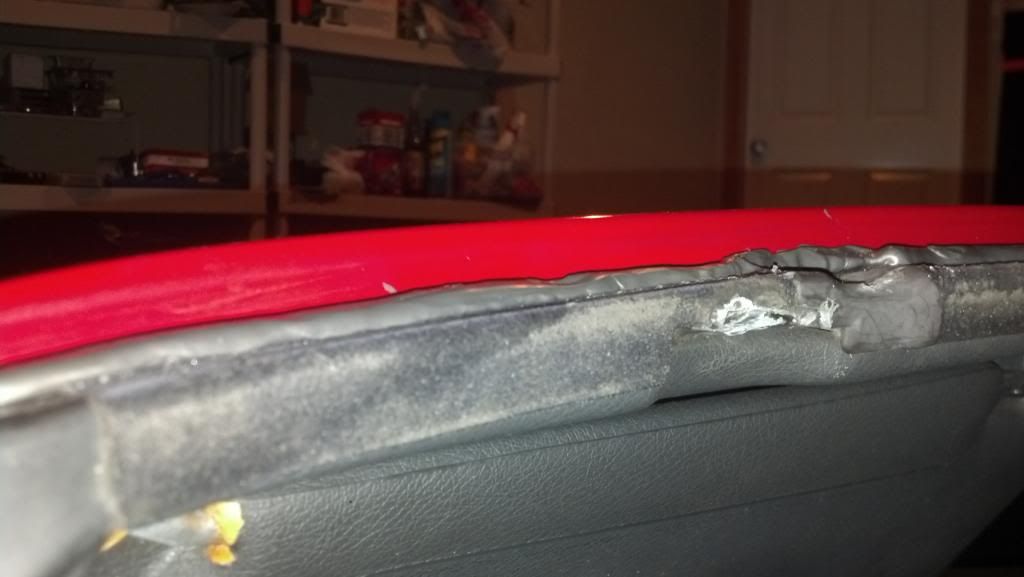
      I also haven't really made any changes that would affect the "oem fix". The Silicone didn't work how I had planned. It stopped the leak in the corners but started in a different location due to my bad placement of it. I might redo it but this time with black silicone so that it won't look so obvious and I will make it a lot cleaner looking. It doesn't ruin the rubber strip... just makes the gap tighter. I just peeled it off and it came off like elmer's glue from your hands.

      I would never drill/cut my car unless it's very popular thing that is proven to work by many people. I'm not modding it.. lol. Just a simple water leak fix. I in no way think I'm smarter than the original car engineers. I stated above that I have a Bentley too. Did you even read or just look at the pictures and start getting pissed off at some kid working on his car in what I agree looks to be ridiculous ways. lol. But no harm done, I ain't offended. I respect your opinion and I very much would like to respect the car. I have no income though, so I'm left with these tiny little detailed things to work on for now. But as far as maintenance, I have other threads for that, and I'm definitely working on that also.
      My Photography - http://www.flickr.com/photos/106236166@N06/ - My Photography

      Comment


        #18
        Originally posted by tonyloban View Post
        First of all, the necessary maintenance has been done. Timing belt was done. Oil changed and filter and a 12 point inspection.
        Great! Somehow I missed that. I saw it recommended before, and didn't see you acknowledging that it had been done.

        Originally posted by tonyloban View Post
        Did you even read or just look at the pictures and start getting pissed off at some kid working on his car in what I agree looks to be ridiculous ways.
        Haha... Not pissed off... worried. More than anything, I want beginners to be aware of the importance of safety and maintenance. I'm glad to hear that you have that covered.

        I am certainly guilty of making a temporary fix on a car that ends up being more trouble than its worth in the long run. I hate think there are others following in my footsteps. Ha ha.

        Originally posted by tonyloban View Post
        But as far as maintenance, I have other threads for that, and I'm definitely working on that also.
        Sound like you are on the right track. Awesome.

        (I am far less hung over and grumpy today... )

        Comment


          #19
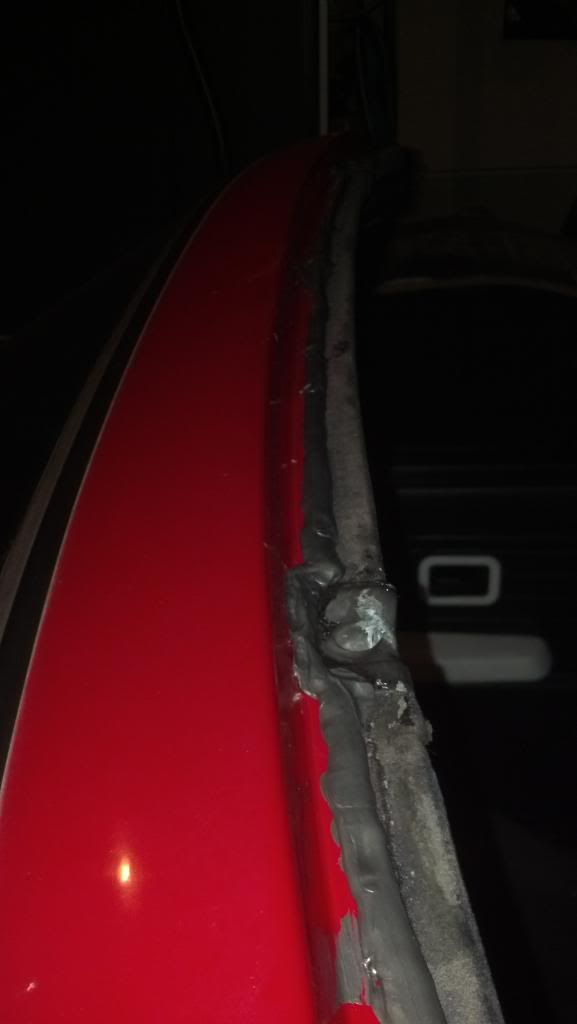
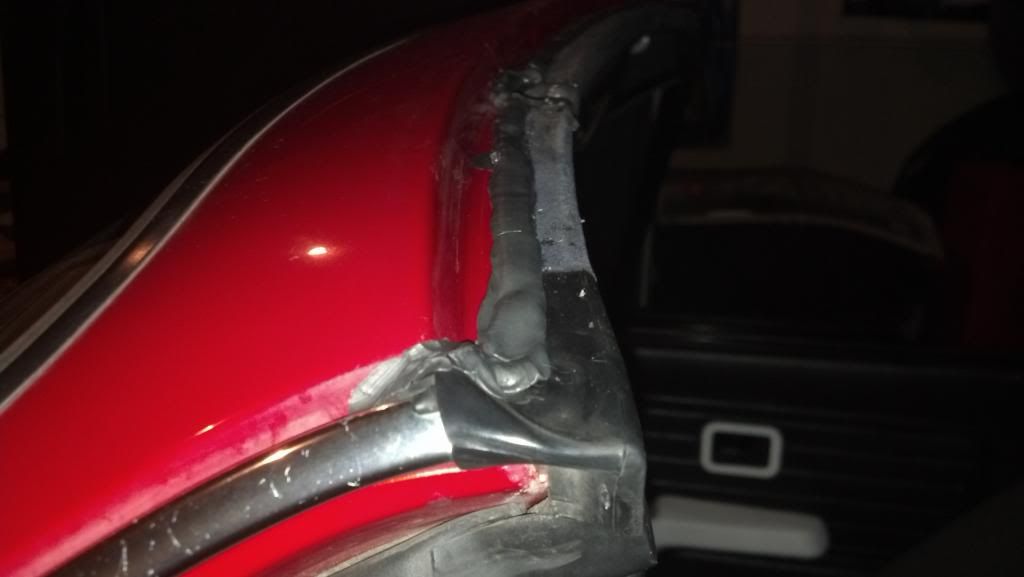
          I have fixed the leak successfully!!

          I used the same Permatex silicone ($8) but a black one. Pretty much it feels like a rubber strip, a tad bit rubbery and squishy, but harder than the strip on the soft top.

          I no longer have to hang a bucket on my visors when it rains. Pics:

          EDIT: PRO-TIP: Spread and form it with a piece of ice. A trick I learned from shoe goo when putting it on my skate shoes. The silicone doesn't stick to the ice and lets you shape it really nicely. It's not exactly easy to get a professional looking shape, but it will definitely look a lot better (with enough effort, you could get a good squared off shape.)


          I had to get it into those corners on the outside because the previous fix, on the passenger's side, the water got into there more and started leaking through there, but that doesn't happen now.


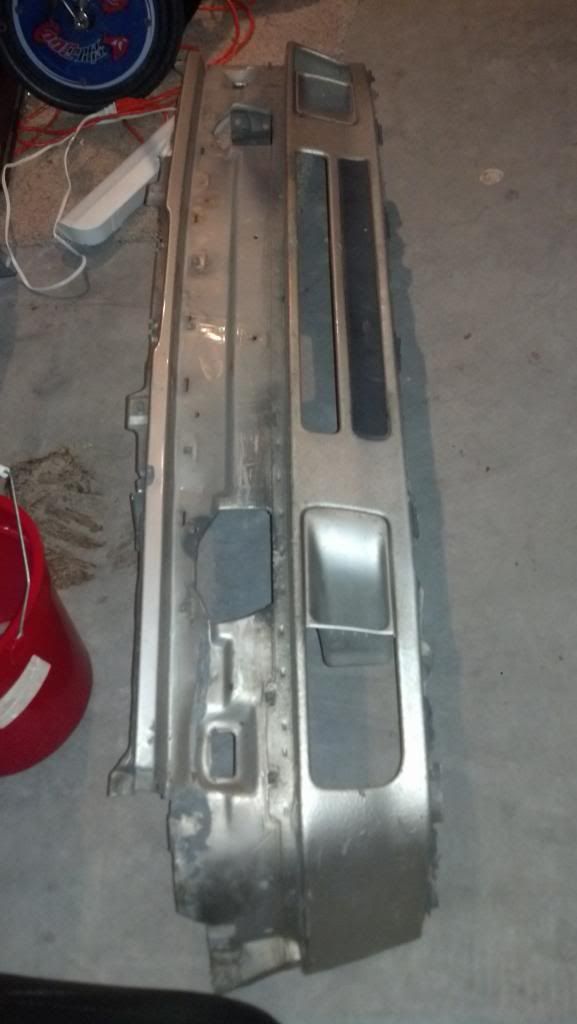
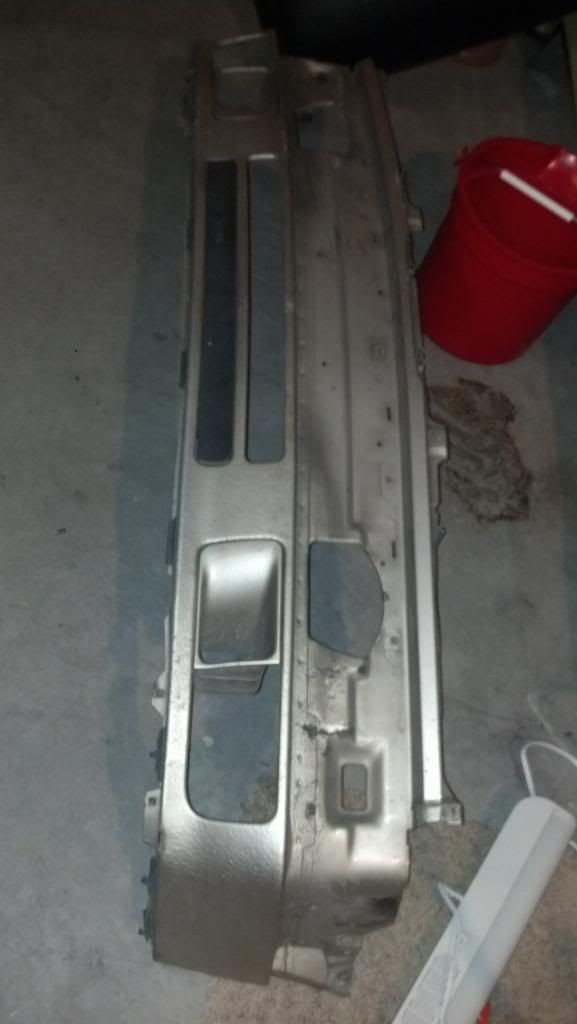
          ALSO, I remember my brother kept saying something about taking care of the car and not to sell the bumper, but I never actually saw the bumper until I went into the basement today to look for something... LOOK WHAT I FOUND!


          It's metal. I'm not very educated on bumpers so can someone tell me what this bumper is called and what I would need to install it. It looks like I need some sort of trim for it too?
          My Photography - http://www.flickr.com/photos/106236166@N06/ - My Photography

          Comment


            #20
            Originally posted by tonyloban View Post

            ALSO, I remember my brother kept saying something about taking care of the car and not to sell the bumper, but I never actually saw the bumper until I went into the basement today to look for something... LOOK WHAT I FOUND!


            It's metal. I'm not very educated on bumpers so can someone tell me what this bumper is called and what I would need to install it. It looks like I need some sort of trim for it too?
            That is not the bumper. e30's front bumper areas are made of two parts. The actual bumper and the valence. What you have in that picture is the late model Valence. (e30s had a slight appearance update midway through its run)

            The piece in the picture bolts onto the body of the car and the actual bumper (which is chrome/metal diving board on your car) goes over it. Gimme a sec and I'll explain better. It's a bit drawn out


            EDIT:
            Early Model:


            Late Model (Facelift):


            These are the two variations of e30. The change happened in 1988 for Coupes and Sedans and 1992 I believe for convertibles. The pieces are directly interchangeable (for the front anyways). Prefacelift, the cars had shorter valences and metal bumpers (diving boards in the US) as seen with your car. After the facelift, the cars came with the valence in your picture and plastic bumpers like in the second picture I posted

            Sidenote: in 1988, the transition year for coupes and sedans, the cars came with late model valences but kept the metal bumpers. So there's that little quirk but a lot of people source plastic bumpers and put them on. Other then that, the bumper combos are pretty straightforward.

            Also in 1988 and 1989, a few models came with ellipsoid (projector) headlights instead of the standard sealed beams. Your car has the ellipsoids
            Last edited by ky0u; 01-15-2014, 07:45 PM.
            Web Designer / Front End Developer
            My Portfolio & Website


            IG: @w_illriderz

            Comment


              #21
              I ended up making another thread for the valence. Thanks for the answer though!
              My Photography - http://www.flickr.com/photos/106236166@N06/ - My Photography

              Comment


                #22
                Today, I got my paycheck and went and spent it all on adjustors for my drive belts that snapped a couple weeks ago while driving. My radiator also got damaged by one of the belts I think, so I bought a used one for $20. I got all the belts on and I even replaced all the coolant. No pics, but this was the most mechanical work I've ever done on my own on a car. It was loads of fun and tiring, but she drives once again!
                My Photography - http://www.flickr.com/photos/106236166@N06/ - My Photography

                Comment

                Working...
                X