
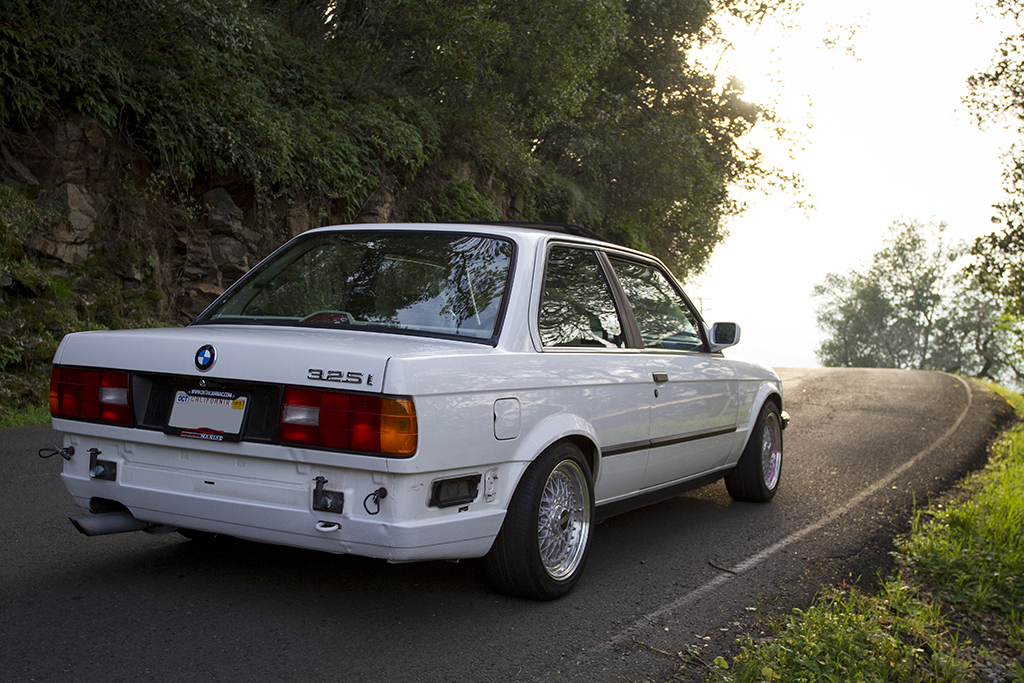
How she sits today! Run through my thread to get more info and photos of my progress!!

Hello everyone,
First off, I'd like to apologize if this post is a bit all over the place. It's late and since I've done so much over the last few months of my ownership it's a bit hard to include every little detail, so I'll summarize the important info for my first post!
I've been here a few months now and figured it's time to formally introduce myself. My name is Andrei, and I live in the Bay Area. I've held a passion for cars from a young age and enjoy wrenching in my free time. As a high school senior I will be pursuing a degree in mechanical engineering in the fall.
A few years back in 2013, I purchased myself my first car. As a 16 year old high school student I had been interested in turbocharged cars (aren't we all). When I was much younger, maybe twelve or thirteen, my parents told me I would have to work and save up money myself in order to purchase my first car, unless I wanted to drive an 87' plymouth reliant K (which was the first car they owned after moving to the states). So I worked and saved making my own businesses. Building computers; Pressing, shaping, and finishing custom longboards; and buying and selling skateboard components for profit; along with the old mowing lawns, helping with yard work and working alongside my father, a detailed oriented finishing carpenter; I was quite successful and saved up a large chunk of cash for a young kid. My friends constantly made fun of my frugal behaviors, but it in the end it all payed off.
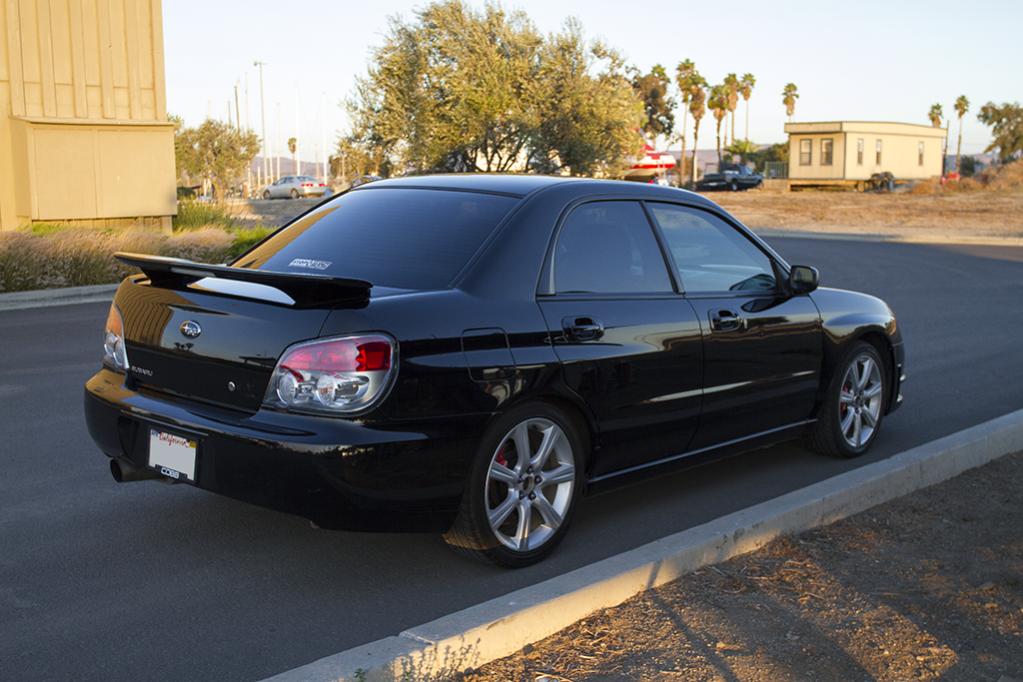
As I was saying, I was interested in turbocharged cars and my friend Kyle had an awesome subaru WRX. I took one ride in it and knew this is what I needed in my life :hitler: After months of searching, I found an amazing deal. A 2006 WRX. It was on the higher end of my budget and I would have to borrow some money from my parents to complete the price, (I have since paid them back), but I figured it was a great deal that I couldn't pass up. After all, he had a few people wanting to check it out on the weekend ready to hand over money. I headed over on a Thursday and bought the car; It was amazing! Since I had only ridden in one once, and had little exposure to proper sports sedans, I was just so impressed with it. From my perspective, the owner seemed very humble and downright trustworthy. Mechanically it looked solid; No modifications, always serviced at the dealer and he said everything was a-okay, so I trusted him and with other buyers fast approaching later that day, I didn't have the time to get a compression check. (BAD IDEA) A month later I received my first misfire code. I spent many many hours of Google searching, testing, and chasing the dilemma. Replaced the fuel injectors, spark plugs, grounding mods, you name it, I tried it. Then I realized it was either a ringland or burnt valves. I figured I would just save up for a motor rebuild and drive it how it was since it wasn't that bad and only noticeable on cold starts at idle. I continued to modify the car and enjoyed it to its potential. Going to meets, making new friends, and learning the do's and don'ts of the car world. Before I started parting it out, I did quite a bit of work. Tint, sti cluster swap, seats, coilovers wheels, intake, downpipe, a tune, you name a bolt on, I probably had it. (other than blow off valves... those are gross :giggle:).
Sorry for the poor quality photo, Never found the time to do a proper shoot for it!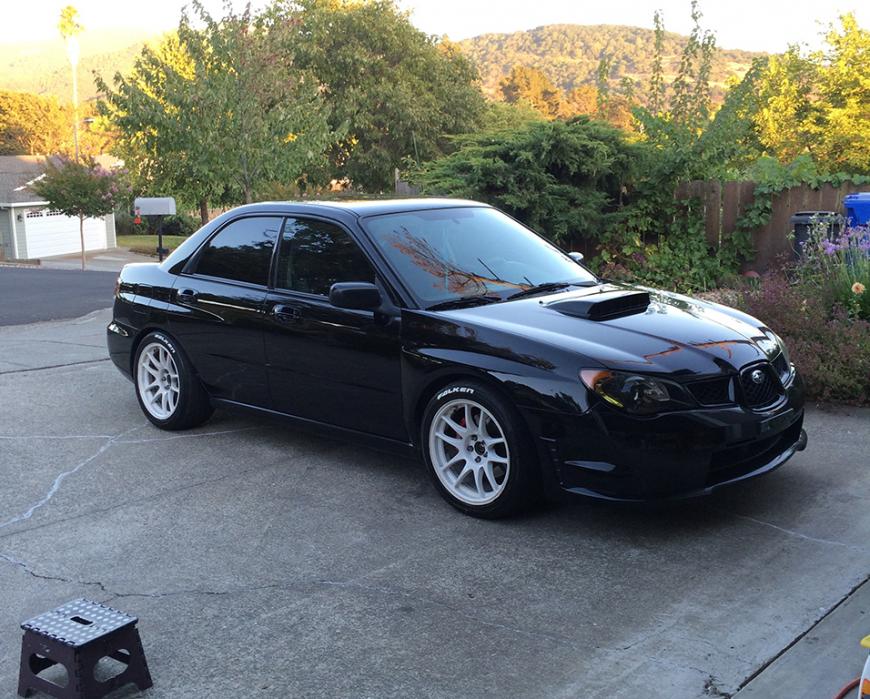
A year passed by, and the missfire gradually started getting worse. I figured since I would be heading to college this year, I would have to either rebuild and spend all my funds I raised working the past year to do the build, or sell the car. It now had quite a few miles so I decided the rebuild wasn't worth it. I decided to part the car out and made all my money back in parts, then parted with her in October. I took a small loss on the car in turn for having the comfort in allowing the next owner to know everything I knew about the car. From every oil change and the little imperfections to the misfire. I didn't want to be "that asshole" who sells a car without telling the buyer of the issues.
Being in my senior year of highschool, I originally wanted to learn to sail for my senior project. Seeing as nobody wanted to let me borrow their boat and the project had to be fairly individual, that ship sank quite early.
Before I decided on the WRX, I was also considering an E30. It was a platform I really loved. Balance, amazing handling, German engineering, RWD, reliable, and easy to modify, I considered building one of those. I figured since I'm looking for a car anyway, and have no plans for my senior project, I might as well restore an E30! Actually, I was already planning on it, and had been searching r3v and craigslist for a month or so for the perfect platform.
I wanted a late model, 6 cylinder, r3v happy coupe that could somewhat compare to my wrx. Sure not as fast, but I didn't want to settle for a lower power model wince I was used to 250hp.
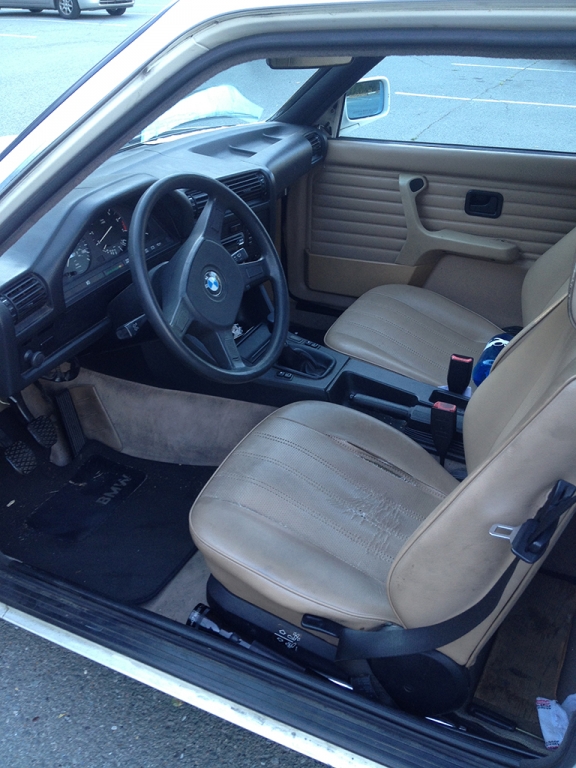
In late October, I picked up an 1989 white 325i coupe. Boy was it RATCHET ;D The perfect starting ground for my restoration. Mechanically sound, but not totally there on the appearance. There were TOO many issues to list, from missing glove boxes, to cracked bumpers, to nasty interior and gross engine bay, cracked and faded trim, weathered plastics, ugly wheels, missing parts.... Anyway, you get the point.
But wait it gets better! :popcorn:
This car was enthusiast owned, so it already had some appropriate upgrades. H&R sport springs and Bilstein shocks, IE sway bars with reinforcements and new bushings, z3 steering rack, new wheel bearings, and a few other minor mods. I had the car inspected by North Bay Bavarian and it checked out well with no major outstanding issues that couldn't be fixed with a weekend and some elbow grease. I was so excited to start my project!
The day I purchased the car

For the past few months of owning this car, I have enjoyed it so much! I've been doing quite a bit of work as well. (What I'm going over now is not all in order, and some of it has taken months to complete due to lack of time or not having the parts, but I'll summarize what I have done.)
The first issue I had was my car wasn't getting up to temp. The needle would sit under the 1/4 mark, especially with the cold weather we were having here in California "Burr" :nice: I ordered a new t-stat from blunttech and flushed the coolant. Turns out the thermostat in the car was a 75 degree vs 80. Not that big of a difference, but now it goes past the 1/4 so I'm happy with that!

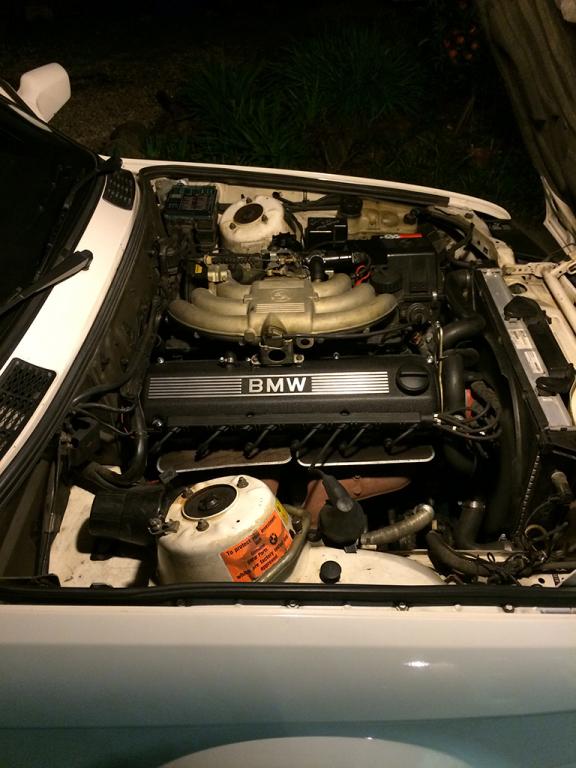
The engine bay was gross and had quite a few years of debris under it so I decided to cover up all the electronics and clean it up. Much better now! Recently I also purchased a valve cover from a member and painted it with vht wrinkle paint. Sanding down the raised logo and "cooling groves" if you'd like to call them that, I finished up the engine bay for now.
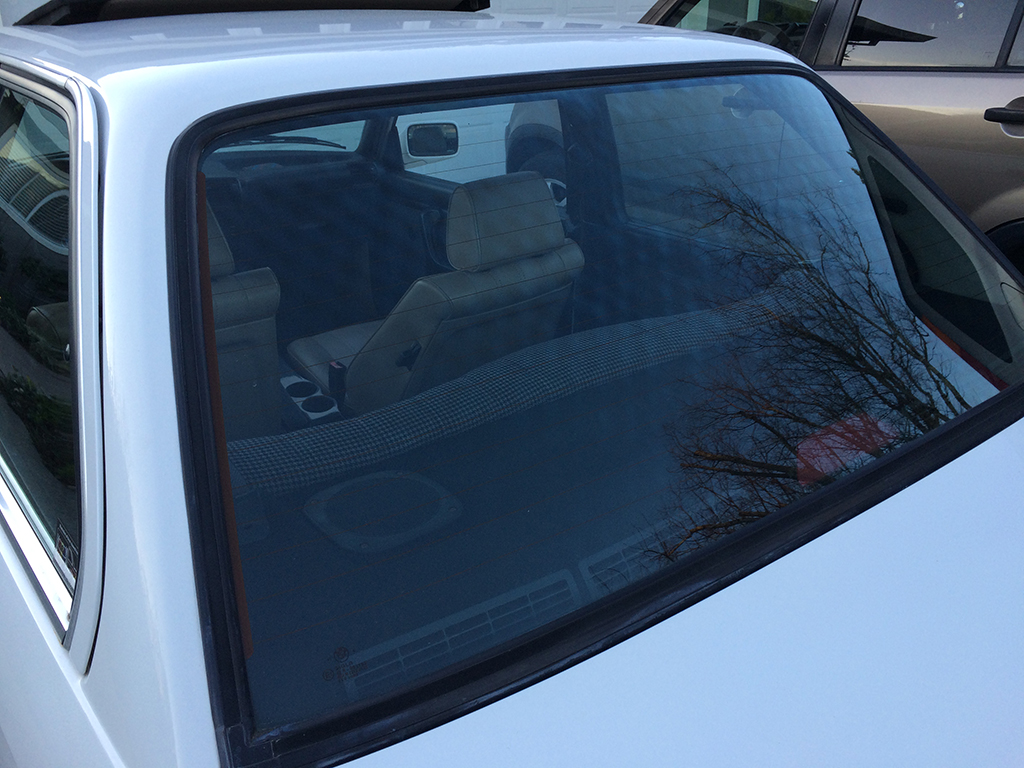
I removed the tint a few weeks after buying the car, man that stuff is ugly when it's that dark and only on the rear three windows! I'll eventually go with a clear UV protectant film to keep the heat out, and my interior fresh.
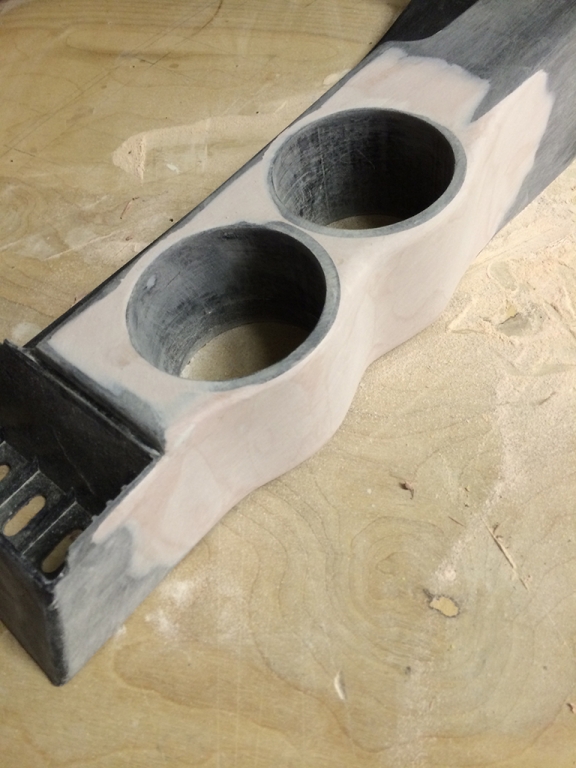
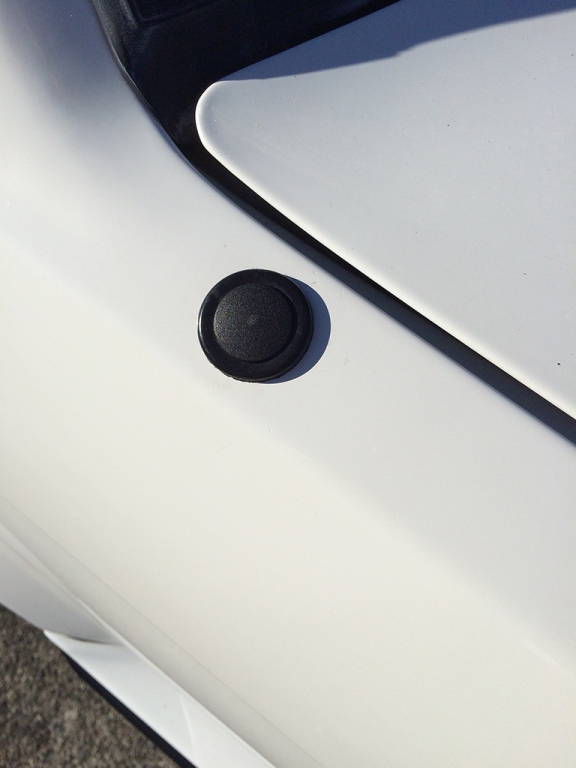
Why no cup holders!? I guess it was just a German mentality thing, so I made my own :D

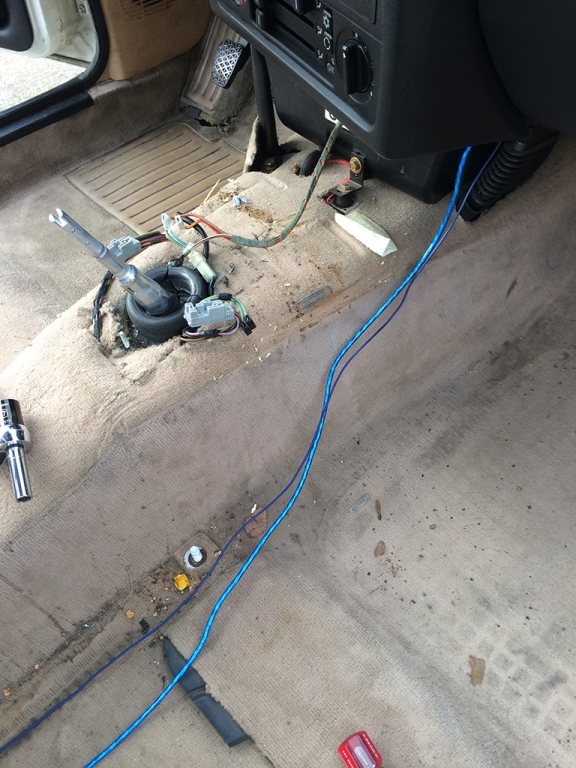
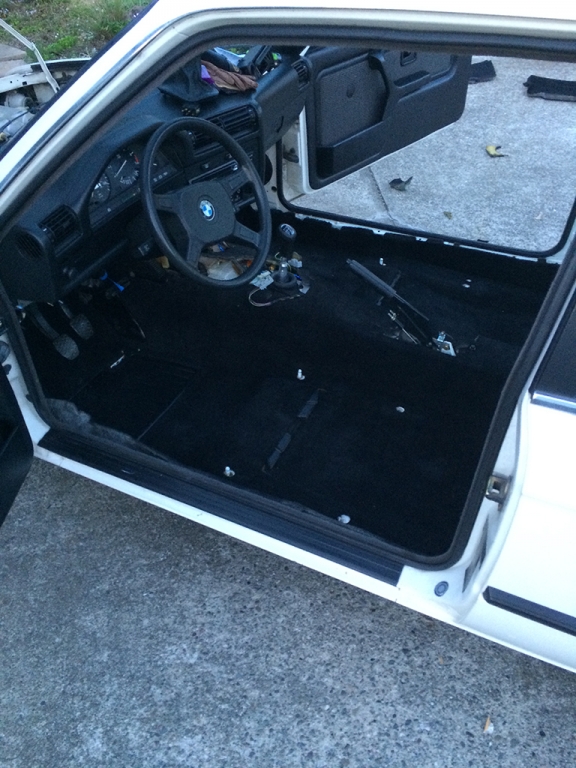
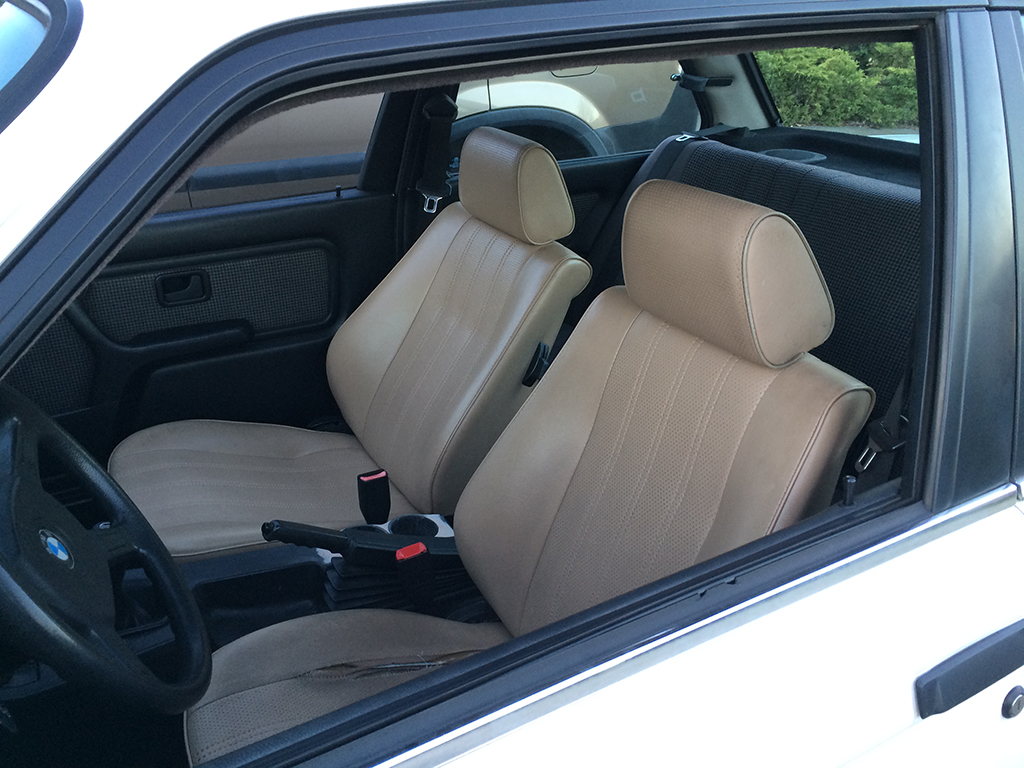
That same weekend I picked up a set off houndstooth door panels and rear seat. All in good condition, just needed a little cleaning other than the door panels, which vinyl had lifted from the backing and was chewed up one side. I fixed it by cleaning the surfaces, applying contact cement to both sides and heating and stretching the chewed up vinyl over the backside. Although chemical adhesion is nice, I cut some staples to a size thin enough they wouldn't poke through for some mechanical fasteners. I also purchased a grey coupe carpet from another forum member. Don't remember his name, but he stated it was "10/10"... Well it arrived and it wasn't... But much better than what I had. So I worked with it and had both the rear seat and carpet professionally cleaned and I proceeded to dye the carpet and rear deck. I then cleaned the door panels and installed it all. For a while I drove around with half carpet in my car due to a water leak. Turns out the passenger door seal needs replacing and would leak water in when it rained resulting in a puddle in the rear passenger footwell. I have now installed the carpet so I'm hoping to replace the door seal before it rains. Definitely don't want to pull the carpet again...
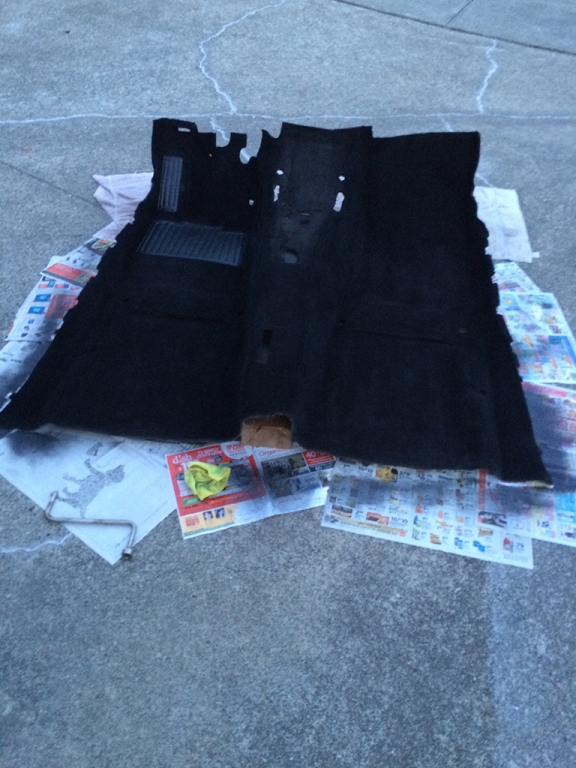
old carpet
"new" carpet
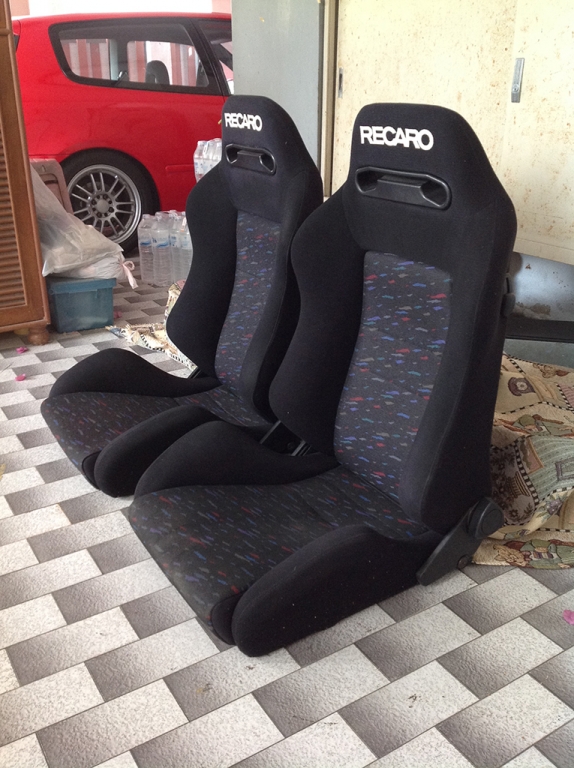
I didn't purchase front seats for a reason. I wanted something sporty! After poking around on ebay, forums, and craigslist, I found a sweet clean set of recaro lemans srd's (rare confetti pattern) Super cool seats which will be pared with massive seat brackets. Still waiting on these to arrive...
I hope to flock the dash once I find a long weekend to pull the dash. It has a few cracks so I figured "why not make the best of it" and flocking/ suede has always looked really cool to me. Because rallycar... I guess... haha!
The 6 button obc supplied with the car was pretty ugly. Neglected, scratched up, and the lights were missing. I decided to go with a euro clock and wired it all up! Super easy install if you can use a soldering iron and looks great- retroooooooooo.
Future interior steps- Renown steering wheel, upgrade speakers and head unit, paint kick panels, flock dash, install seats
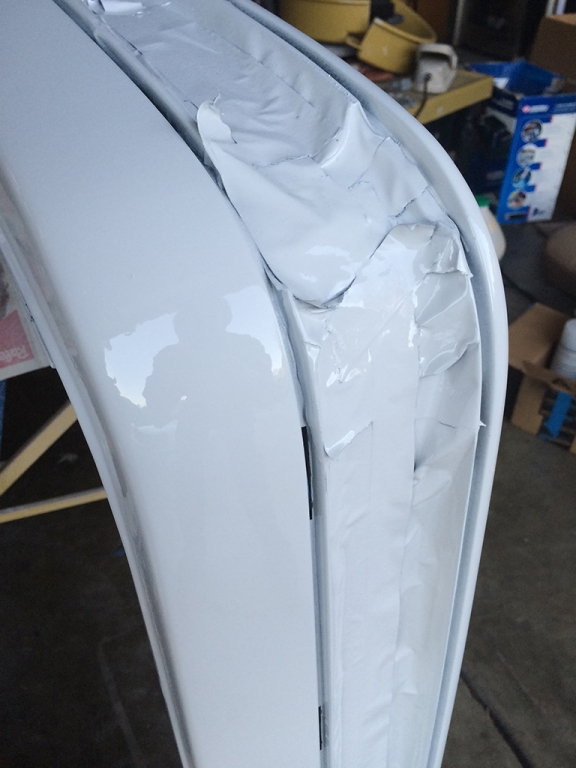
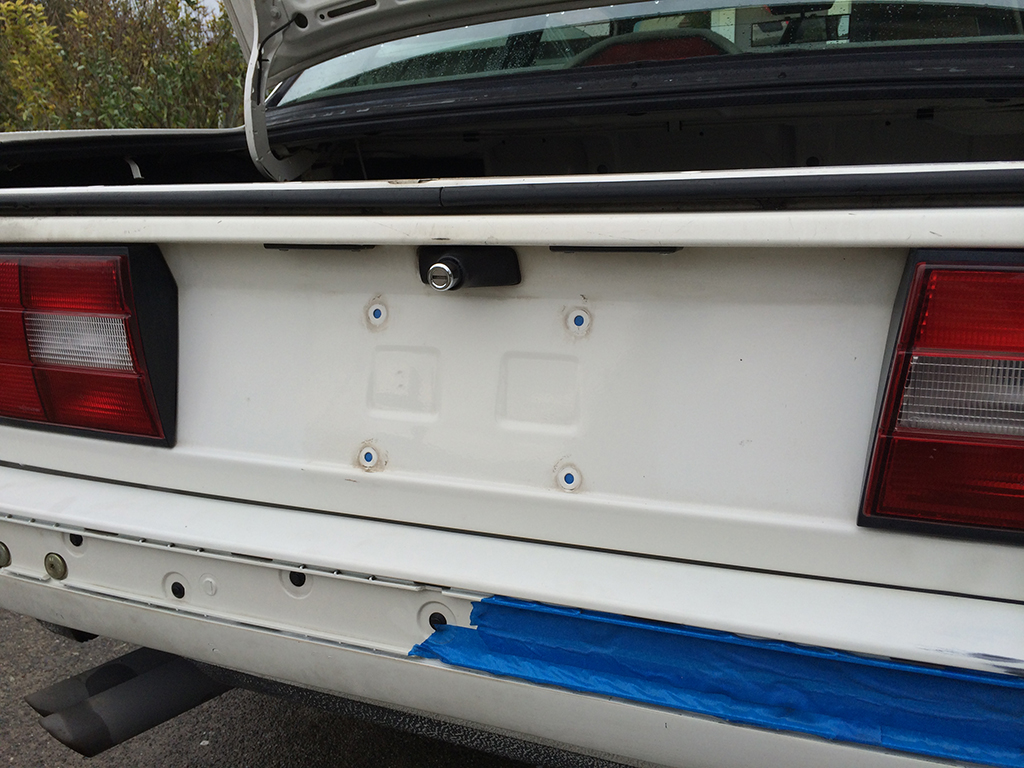
Moving on to the exterior. Where do I start! The rear bumper was hit a while back so the rear trim and bumpoer was cracked. I pulled the bumper and removed the trim which was now trash from all the scuffs and cracks. I ordered 5 peice euro trim from blunttech (amazing service and fast shipping, I highly recommend them) and purchased some color matched paint from my local automotive paint shop. I sanded down the bumper and filled in the damaged spots with body filler, primed it, and painted it. Good as new! It may have taken me two cans to learn how to shoot it correctly... The first can came out super blotchy but I had better luck with the second. While I was at it I sanded my rear valence, primed, and painted that as well! Installed the trim and the rear end looks better than ever!
Throughout this process I also was able to complete a few other exterior parts. I purchased a euro plate filler from a r3v memeber and installed it. without it felt like the car was missing something. I also purchased and installed an is front lip. I figured I would go with the black on white scheme and leave it black.
I always like the bbs rs look and for a while was thinking I could afford "real wheels". I then realised how much i would have to spend and figured it wasn't worth it. One day I was searching CL for some wheels and a white 89' for door was up for sale. It had a clean set of 15 inch bbs rs001's on it and I had to have them. I figured hey, if he's selling the car, i'm sure he'd be willing to part with the wheels too. I sent him an email expecting no response, and fianlly two weeks later he emailed me back and we worked out a deal. I traded my wheels and tires for his plus cash. I'm happy, he's happy, and the new owner of his car are happy. I guess I just lucked out!
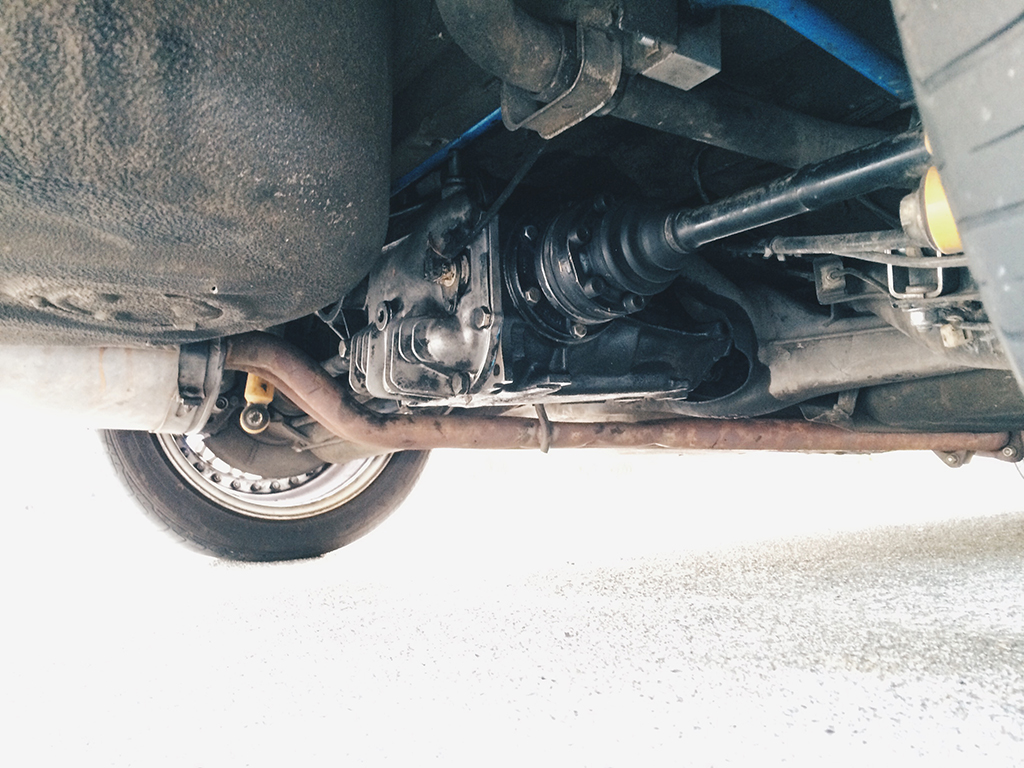
Some other things I have done on the exterior are repaint the side trim, replace the US grilles with euro grilles and black out the badge. Recently, I also installed a 3.73 lsd filled with fresh royal purple 75w-90. no more peg leg burnouts!
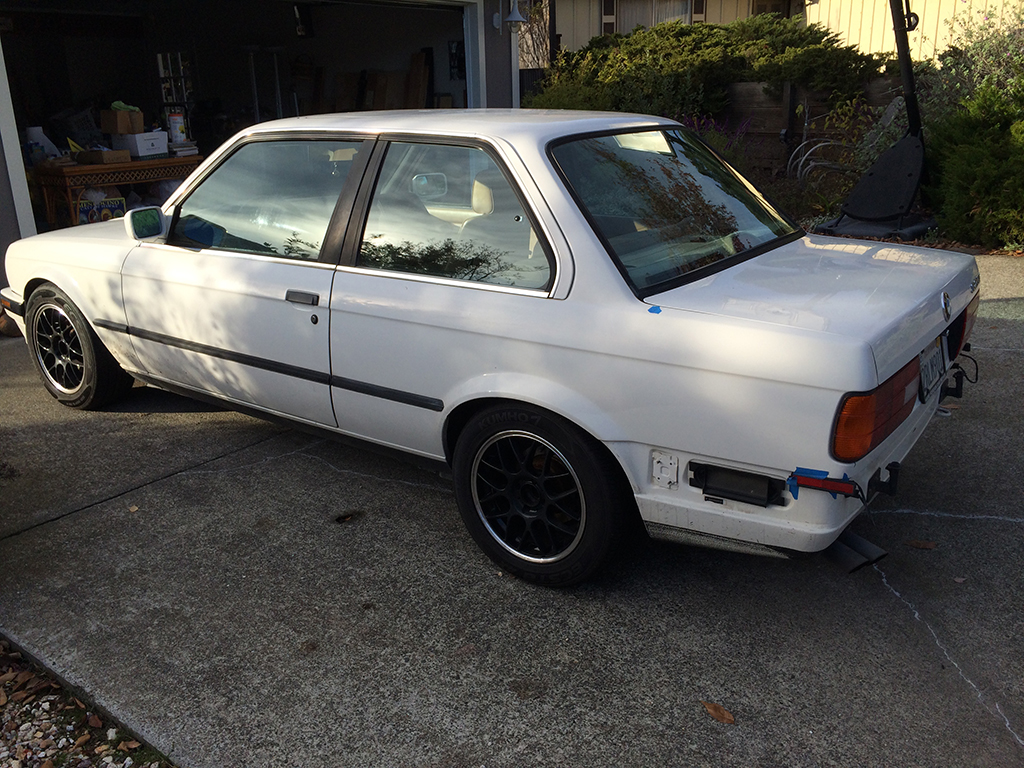
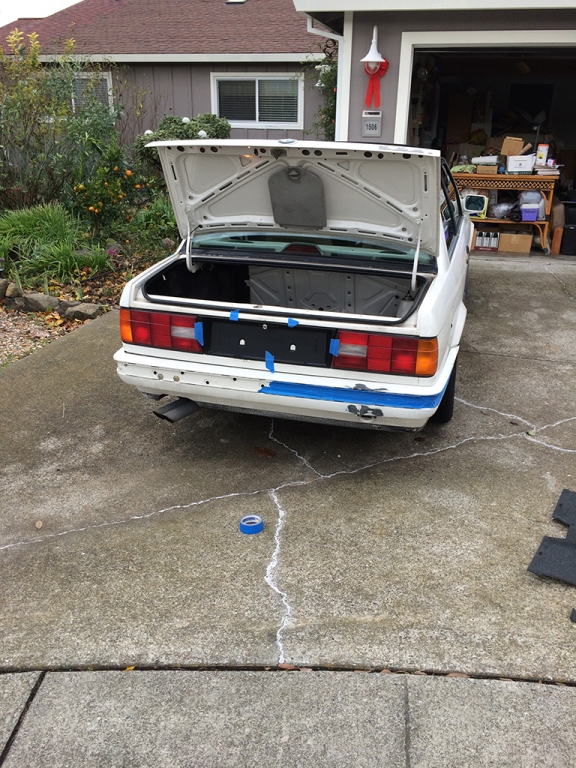
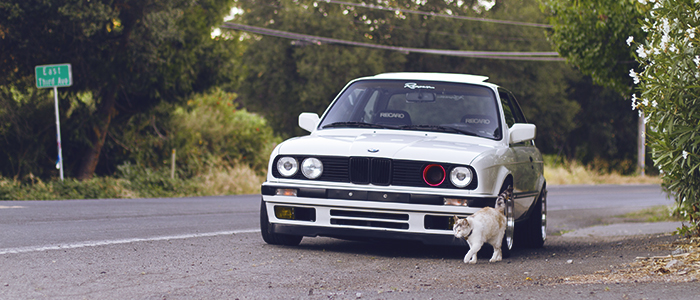
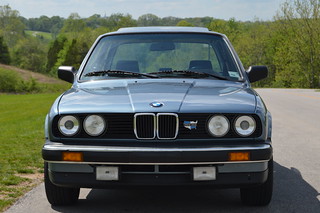
As it sits today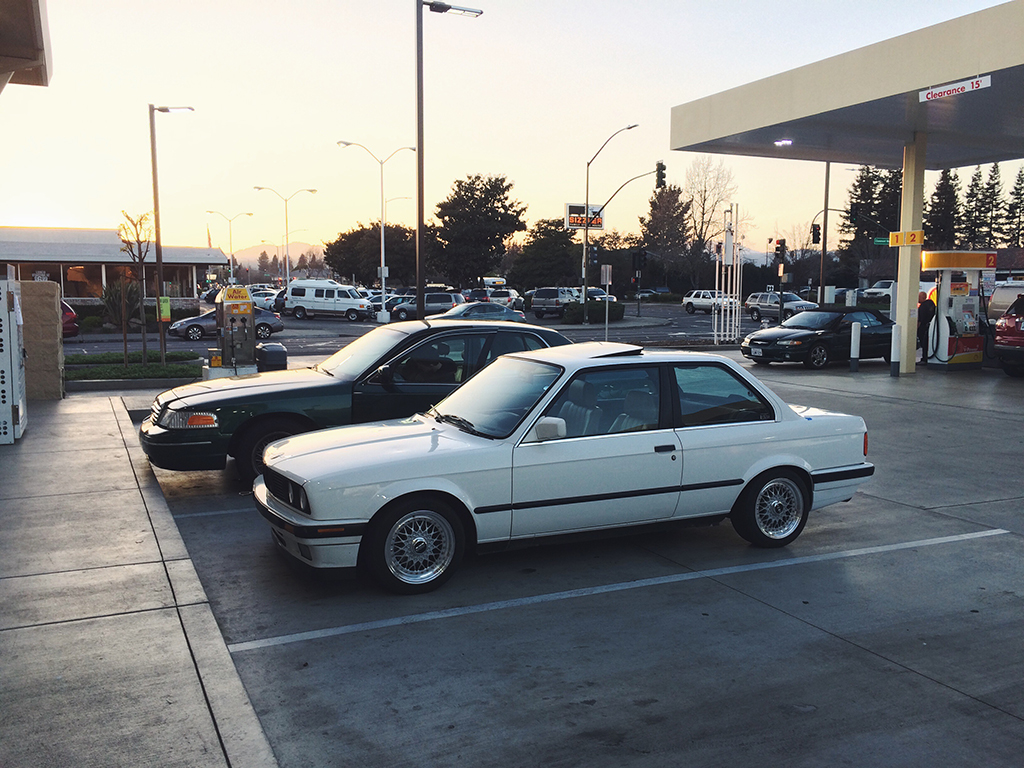
That's it for now! I didn't cover every little detail, but this is a summary of the big things I have done. I have quite a few plans for this car and will be updating my thread whenever I do something new! Enjoy!
Hello everyone,
First off, I'd like to apologize if this post is a bit all over the place. It's late and since I've done so much over the last few months of my ownership it's a bit hard to include every little detail, so I'll summarize the important info for my first post!
I've been here a few months now and figured it's time to formally introduce myself. My name is Andrei, and I live in the Bay Area. I've held a passion for cars from a young age and enjoy wrenching in my free time. As a high school senior I will be pursuing a degree in mechanical engineering in the fall.
A few years back in 2013, I purchased myself my first car. As a 16 year old high school student I had been interested in turbocharged cars (aren't we all). When I was much younger, maybe twelve or thirteen, my parents told me I would have to work and save up money myself in order to purchase my first car, unless I wanted to drive an 87' plymouth reliant K (which was the first car they owned after moving to the states). So I worked and saved making my own businesses. Building computers; Pressing, shaping, and finishing custom longboards; and buying and selling skateboard components for profit; along with the old mowing lawns, helping with yard work and working alongside my father, a detailed oriented finishing carpenter; I was quite successful and saved up a large chunk of cash for a young kid. My friends constantly made fun of my frugal behaviors, but it in the end it all payed off.
As I was saying, I was interested in turbocharged cars and my friend Kyle had an awesome subaru WRX. I took one ride in it and knew this is what I needed in my life :hitler: After months of searching, I found an amazing deal. A 2006 WRX. It was on the higher end of my budget and I would have to borrow some money from my parents to complete the price, (I have since paid them back), but I figured it was a great deal that I couldn't pass up. After all, he had a few people wanting to check it out on the weekend ready to hand over money. I headed over on a Thursday and bought the car; It was amazing! Since I had only ridden in one once, and had little exposure to proper sports sedans, I was just so impressed with it. From my perspective, the owner seemed very humble and downright trustworthy. Mechanically it looked solid; No modifications, always serviced at the dealer and he said everything was a-okay, so I trusted him and with other buyers fast approaching later that day, I didn't have the time to get a compression check. (BAD IDEA) A month later I received my first misfire code. I spent many many hours of Google searching, testing, and chasing the dilemma. Replaced the fuel injectors, spark plugs, grounding mods, you name it, I tried it. Then I realized it was either a ringland or burnt valves. I figured I would just save up for a motor rebuild and drive it how it was since it wasn't that bad and only noticeable on cold starts at idle. I continued to modify the car and enjoyed it to its potential. Going to meets, making new friends, and learning the do's and don'ts of the car world. Before I started parting it out, I did quite a bit of work. Tint, sti cluster swap, seats, coilovers wheels, intake, downpipe, a tune, you name a bolt on, I probably had it. (other than blow off valves... those are gross :giggle:).
Sorry for the poor quality photo, Never found the time to do a proper shoot for it!
A year passed by, and the missfire gradually started getting worse. I figured since I would be heading to college this year, I would have to either rebuild and spend all my funds I raised working the past year to do the build, or sell the car. It now had quite a few miles so I decided the rebuild wasn't worth it. I decided to part the car out and made all my money back in parts, then parted with her in October. I took a small loss on the car in turn for having the comfort in allowing the next owner to know everything I knew about the car. From every oil change and the little imperfections to the misfire. I didn't want to be "that asshole" who sells a car without telling the buyer of the issues.
Being in my senior year of highschool, I originally wanted to learn to sail for my senior project. Seeing as nobody wanted to let me borrow their boat and the project had to be fairly individual, that ship sank quite early.
Before I decided on the WRX, I was also considering an E30. It was a platform I really loved. Balance, amazing handling, German engineering, RWD, reliable, and easy to modify, I considered building one of those. I figured since I'm looking for a car anyway, and have no plans for my senior project, I might as well restore an E30! Actually, I was already planning on it, and had been searching r3v and craigslist for a month or so for the perfect platform.
I wanted a late model, 6 cylinder, r3v happy coupe that could somewhat compare to my wrx. Sure not as fast, but I didn't want to settle for a lower power model wince I was used to 250hp.
In late October, I picked up an 1989 white 325i coupe. Boy was it RATCHET ;D The perfect starting ground for my restoration. Mechanically sound, but not totally there on the appearance. There were TOO many issues to list, from missing glove boxes, to cracked bumpers, to nasty interior and gross engine bay, cracked and faded trim, weathered plastics, ugly wheels, missing parts.... Anyway, you get the point.
But wait it gets better! :popcorn:
This car was enthusiast owned, so it already had some appropriate upgrades. H&R sport springs and Bilstein shocks, IE sway bars with reinforcements and new bushings, z3 steering rack, new wheel bearings, and a few other minor mods. I had the car inspected by North Bay Bavarian and it checked out well with no major outstanding issues that couldn't be fixed with a weekend and some elbow grease. I was so excited to start my project!
The day I purchased the car
For the past few months of owning this car, I have enjoyed it so much! I've been doing quite a bit of work as well. (What I'm going over now is not all in order, and some of it has taken months to complete due to lack of time or not having the parts, but I'll summarize what I have done.)
The first issue I had was my car wasn't getting up to temp. The needle would sit under the 1/4 mark, especially with the cold weather we were having here in California "Burr" :nice: I ordered a new t-stat from blunttech and flushed the coolant. Turns out the thermostat in the car was a 75 degree vs 80. Not that big of a difference, but now it goes past the 1/4 so I'm happy with that!
The engine bay was gross and had quite a few years of debris under it so I decided to cover up all the electronics and clean it up. Much better now! Recently I also purchased a valve cover from a member and painted it with vht wrinkle paint. Sanding down the raised logo and "cooling groves" if you'd like to call them that, I finished up the engine bay for now.
I removed the tint a few weeks after buying the car, man that stuff is ugly when it's that dark and only on the rear three windows! I'll eventually go with a clear UV protectant film to keep the heat out, and my interior fresh.
Why no cup holders!? I guess it was just a German mentality thing, so I made my own :D
That same weekend I picked up a set off houndstooth door panels and rear seat. All in good condition, just needed a little cleaning other than the door panels, which vinyl had lifted from the backing and was chewed up one side. I fixed it by cleaning the surfaces, applying contact cement to both sides and heating and stretching the chewed up vinyl over the backside. Although chemical adhesion is nice, I cut some staples to a size thin enough they wouldn't poke through for some mechanical fasteners. I also purchased a grey coupe carpet from another forum member. Don't remember his name, but he stated it was "10/10"... Well it arrived and it wasn't... But much better than what I had. So I worked with it and had both the rear seat and carpet professionally cleaned and I proceeded to dye the carpet and rear deck. I then cleaned the door panels and installed it all. For a while I drove around with half carpet in my car due to a water leak. Turns out the passenger door seal needs replacing and would leak water in when it rained resulting in a puddle in the rear passenger footwell. I have now installed the carpet so I'm hoping to replace the door seal before it rains. Definitely don't want to pull the carpet again...
old carpet
"new" carpet
I didn't purchase front seats for a reason. I wanted something sporty! After poking around on ebay, forums, and craigslist, I found a sweet clean set of recaro lemans srd's (rare confetti pattern) Super cool seats which will be pared with massive seat brackets. Still waiting on these to arrive...
I hope to flock the dash once I find a long weekend to pull the dash. It has a few cracks so I figured "why not make the best of it" and flocking/ suede has always looked really cool to me. Because rallycar... I guess... haha!
The 6 button obc supplied with the car was pretty ugly. Neglected, scratched up, and the lights were missing. I decided to go with a euro clock and wired it all up! Super easy install if you can use a soldering iron and looks great- retroooooooooo.
Future interior steps- Renown steering wheel, upgrade speakers and head unit, paint kick panels, flock dash, install seats
Moving on to the exterior. Where do I start! The rear bumper was hit a while back so the rear trim and bumpoer was cracked. I pulled the bumper and removed the trim which was now trash from all the scuffs and cracks. I ordered 5 peice euro trim from blunttech (amazing service and fast shipping, I highly recommend them) and purchased some color matched paint from my local automotive paint shop. I sanded down the bumper and filled in the damaged spots with body filler, primed it, and painted it. Good as new! It may have taken me two cans to learn how to shoot it correctly... The first can came out super blotchy but I had better luck with the second. While I was at it I sanded my rear valence, primed, and painted that as well! Installed the trim and the rear end looks better than ever!
Throughout this process I also was able to complete a few other exterior parts. I purchased a euro plate filler from a r3v memeber and installed it. without it felt like the car was missing something. I also purchased and installed an is front lip. I figured I would go with the black on white scheme and leave it black.
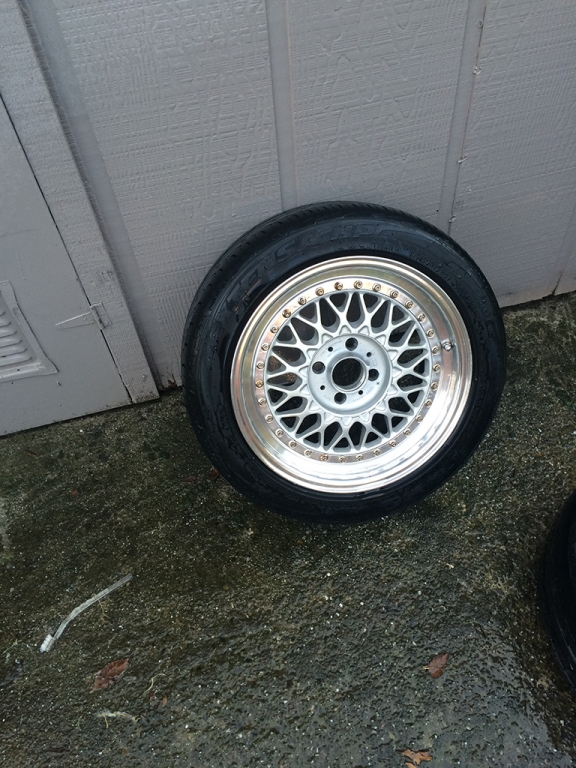
I always like the bbs rs look and for a while was thinking I could afford "real wheels". I then realised how much i would have to spend and figured it wasn't worth it. One day I was searching CL for some wheels and a white 89' for door was up for sale. It had a clean set of 15 inch bbs rs001's on it and I had to have them. I figured hey, if he's selling the car, i'm sure he'd be willing to part with the wheels too. I sent him an email expecting no response, and fianlly two weeks later he emailed me back and we worked out a deal. I traded my wheels and tires for his plus cash. I'm happy, he's happy, and the new owner of his car are happy. I guess I just lucked out!
Some other things I have done on the exterior are repaint the side trim, replace the US grilles with euro grilles and black out the badge. Recently, I also installed a 3.73 lsd filled with fresh royal purple 75w-90. no more peg leg burnouts!
As it sits today
That's it for now! I didn't cover every little detail, but this is a summary of the big things I have done. I have quite a few plans for this car and will be updating my thread whenever I do something new! Enjoy!


Comment