
I say get a big pan, pull the fill tube, and hope for the best. You could probably jam a rubber stopper in there
-
- Josh
1990 325is
Need a shift boot?
Looking to buy shift boot frames, PM if you have one to sell
Here's what happens when you let the internet pick your license plate -
I just dropped the subframe a couple inches and slid the bolt out. Easy.2001 silver/Blk 325 cabby. SOLDOriginally posted by codyep3
1988 Blk/Blk e30 factory wide body kit car SOLD
1992 DS/BLK 325 m-tech II apperance pack cabby SOLD!
2002 325xit Sil/blk. SOLD
2012 328i xdrive touring. Wht/blk. SOLD
2009 135 cabby. monacoblue/blk leather SOLD
2007 Z4m coupe. Silver grey/black/ aluminum. 1of50
2010 F650gs twin
2016 M235i cabby. Mineral grey/Red leatherComment
-
I just did this on my mom's z3. Exact same rear suspension. I have the accessibility to a lift and other fun shop equipment where I work. I dropped the entire rear subframe because after 162k miles, all of the bushings were shot. I used a bench vise and sockets to replace the trailing arm bushings and a 20 ton shop press for the subframe and diff mounts. I have good working knowledge now of what I need to do on the e30 and now the time should be cut in half...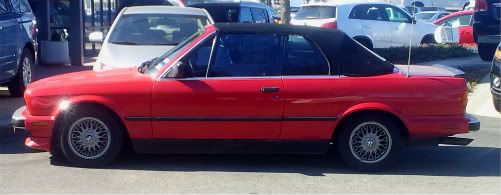
Comment
-
As a suspension engineer, I would like to add some information to this thread that I rarely see explained.
As mentioned earlier, it is vital to leave the bushing bolts loose until the car is at ride height. If you don't have a ramp to drive on to, then use a jack to raise the suspension arm to normal ride height, then torque your bolts. This is for rubber bushings only. Rubber bushings twist to allow the suspension to move. The beauty of this design is it's sealed and virtually frictionless. But if you tighten a rubber bushing and then lower the car to the ground, it will twist and preload the bushing, leading to premature wear and early failure.
Urethane suspension bushings rotate around their central metal sleeve. This moving joint won't bind like a rubber bushing, so you can install, torque and then put the car on the ground. But this two piece design of urethane bushings can squeak and wear rapidly if not kept lubricated. I would never use urethane bushings on a street car unless the factory rubber ones were massively flawed or unattainable. For a track car I would use Delrin or UHMW or metal bearings and then maintain them as needed. So basically urethane suspension bushings are almost always the worst option for all applications.
For street (and occasional track) you should always use rubber suspension bushings. If you want better suspension control, BMW offers firmer 'Motorsport' bushings for some applications. Use those if they are available.
For fixed parts (sub frames, differential housings etc.) urethane mounting is a great choice. It's typically more oil and UV resistant than rubber, and can be had in varying hardness' to suit the application.
I hope that helps a few people.Comment
-
Forgive me, but you sound like someone who knows a bit about the theory of what works, but not so much about the actual application of what works on the e30.
If you did have actual practical experience using the all the different options on the street and track, then you'd know that a good 2-piece urethane trailing arm bushing does have it's distinct upsides on a street car (or dual-purpose car).
for example
-if lubed properly they will not squeak.
-90a-ish durometer gives a nice firm feeling without the harshness associated with harder compounds.
-much easier to install in 2-piece format rather than the oem one-piece rubber bushings.
-bmw does NOT off "motorsport" versions of the e30 trailing arm bushings.
-more resistant to oil.
-higher material rebound as compared to umhw/delrin.
While I respect your personal opinion, I simply disagree in practice. I also agree this thread doesn't cover a lot of material differences, but if you search you'll find lots of fairly technical coverage already (at least as much as one can expect from an online message board).Comment
-
DON'T REMOVE THE BRAKES BEFORE REMOVING THE AXELS
Trust me. You're gonna want that E-Brake.Drive it hard. Maintain it well.
Convertible Technical & Discussion
A Topless MemorandumComment
-
Personally, I opted for the OEM style trailing arm bushings. The removal and install really wasn't bad at all. I fabricated the tool that is shown in the following link: http://84.45.115.78/e30zonewiki/inde...ing_Arm_Bushes.
One thing they don't mention in the above link. Warm up the housing with a torch prior to removal of the old bushings. Doesn't have to be red hot or anything, just enough to loosen things - you might get a wee bit of smoke - that is enough. Makes a TREMENDOUS difference. We didn't do it on the first one, and farted around for a bit. Once we clued in on the heating, the other three came off with no trouble. And for the install, clean up the inside of the housing with a wire brush or something. We used a round brush attached to a cordless drill and polished them nicely. Then dip the bushings in some soapy water and set up the tool. I doubt you'd be longer than 30 minutes doing all four (assuming you're doing this with the trailing arms off the car).
Edit to reflect later posts -
And yes, I got Lemforder ones. :) On the north end of the border, they ran me $35 a pair, so $70 for the set. Can't believe how much more we still get nailed for parts here compared to the US... and the two dollars are way closer than when I was a kid.Last edited by estoguy; 09-19-2014, 04:14 PM.Estoguy
1986 BMW 325, Alpenweiss ~ "Elsa"
Need a photographer, come visit my site: http://estoguy.wix.com/unique-perspectivesComment
-
Oh yeah, heat is essential during this process.
And if you go with OE bushings make sure you get Lemforder.Comment
-
FWIW, a large c-clamp and large socket will remove/ install the cab's pretty easily. I agree with using some heat on the removal.Comment
-
Drop the rear subframe and do the subframe bushings at the same time. Protip on the subframe bushings - burn them out. Set the things on fire with a torch, let the center drop out, wait five or ten minutes while it continues to burn, scrape the rubber off the top of the subframe mount then lightly hammer the subframe bushing metal ring - it'll come out with five or six light hammer hits and a punch.
Did subframe bushings / RTABs / brake lines on my E30 today in about four hours. Painless.91 318is - Gone
16 VW GTI
07 Aprilia TuonoComment
Comment