Announcement

Collapse
No announcement yet.

This build escalated quickly...

Collapse
X
 
  • Filter
  • Time
  • Show
Clear All
new posts

    #31
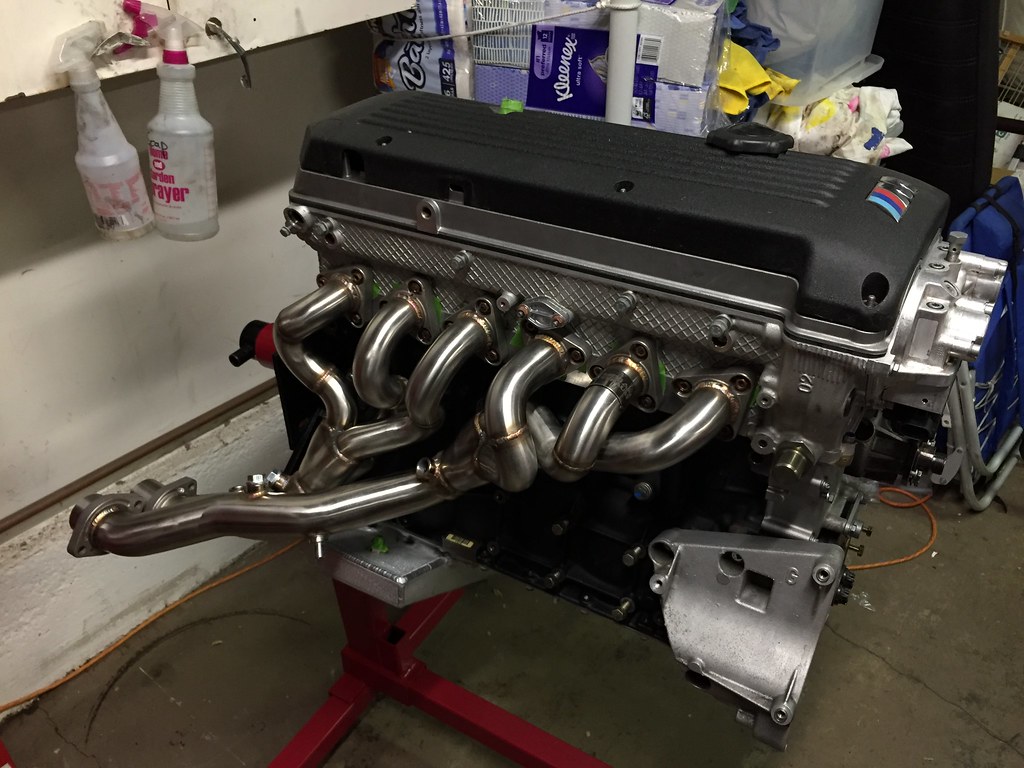
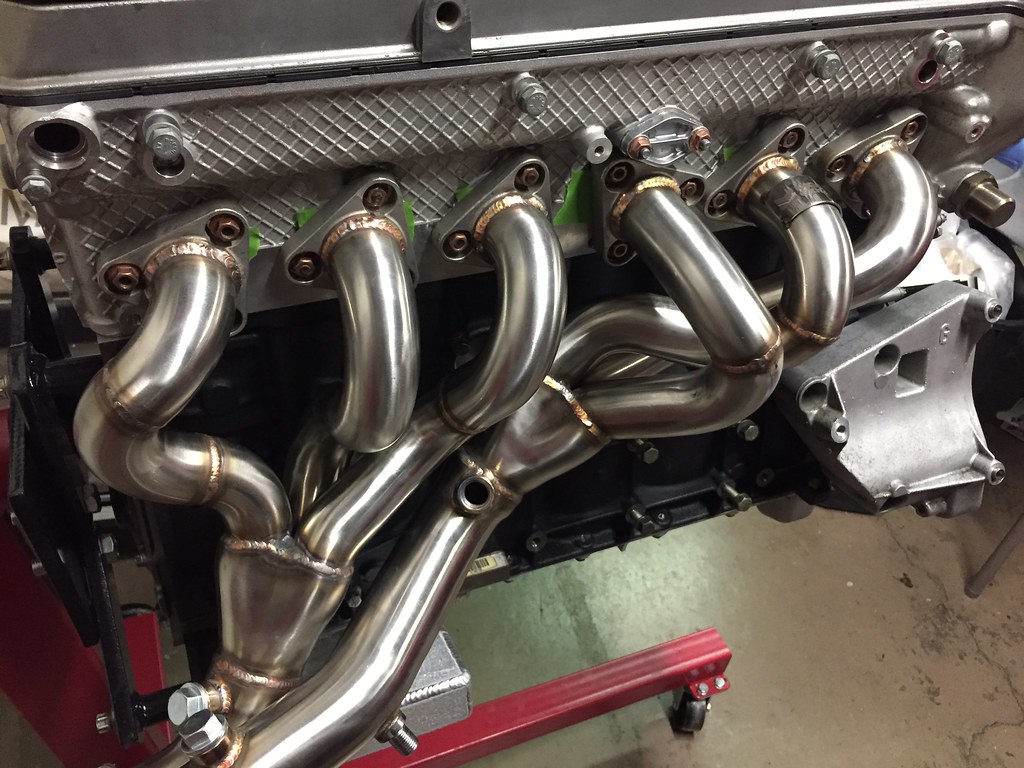
    Test fit the the Megan headers I ordered off Ebay, lined up just fine on the head. Not to shabby for $300.

    Untitled by Evan Nessim, on Flickr
    Untitled by Evan Nessim, on Flickr

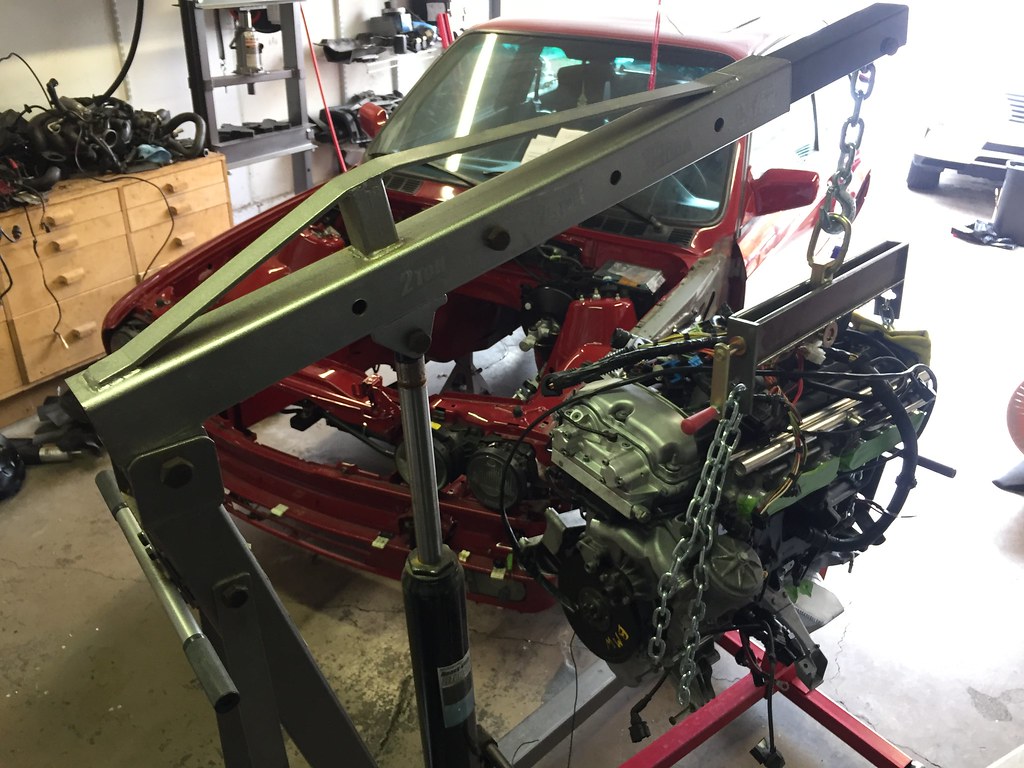
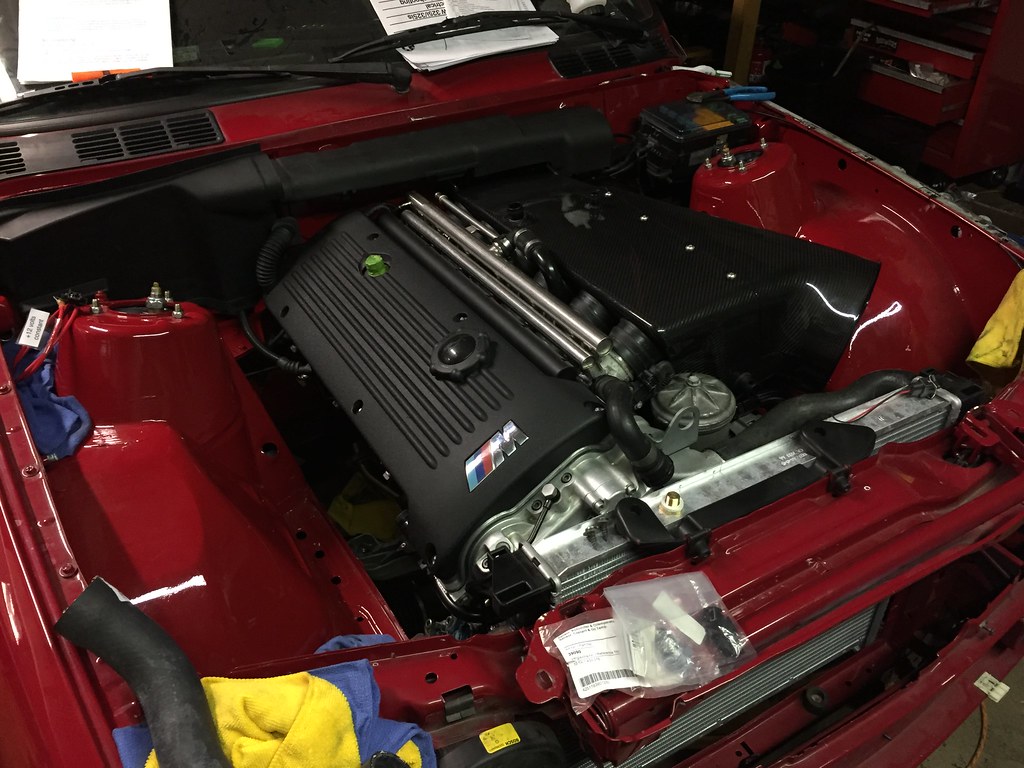
    Last Sunday I had everything buttoned up on the motor. A friend came by to help me guide it in. Felt like Id never see the day!

    Untitled by Evan Nessim, on Flickr
    Untitled by Evan Nessim, on Flickr
    Untitled by Evan Nessim, on Flickr
    Untitled by Evan Nessim, on Flickr

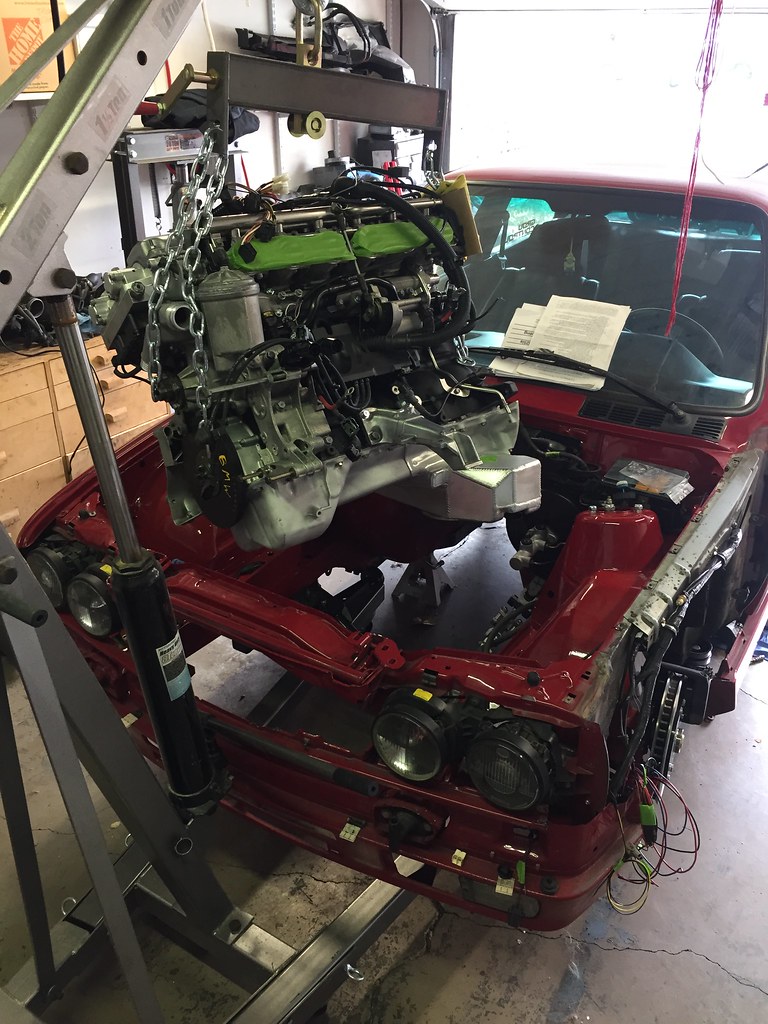
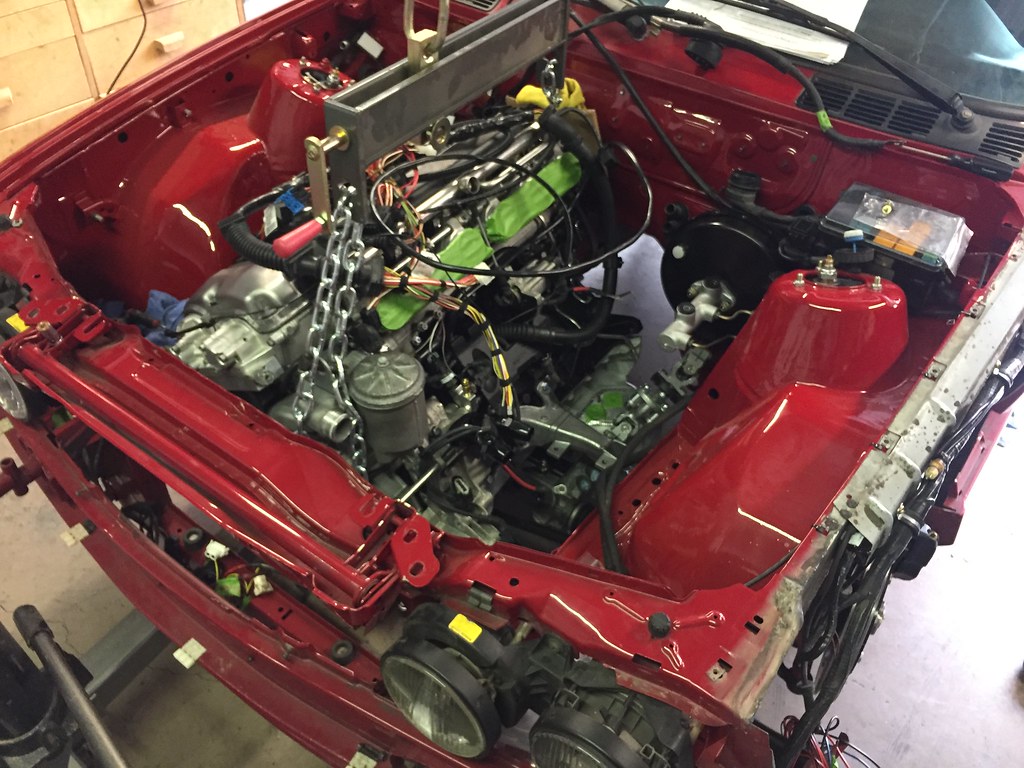
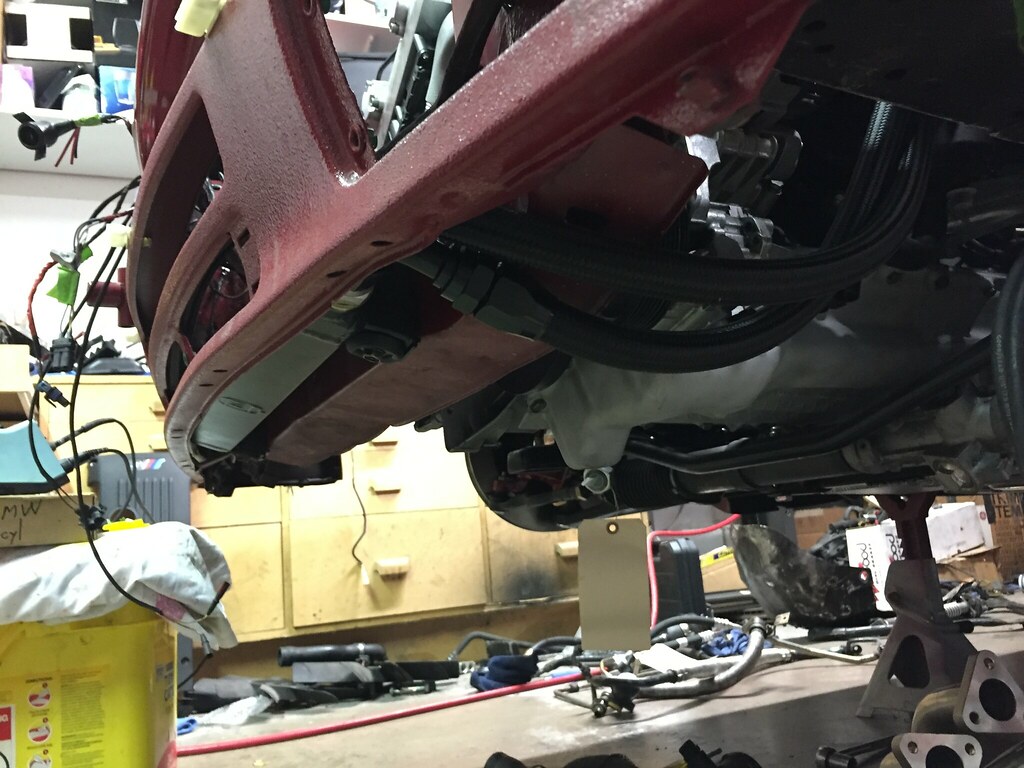
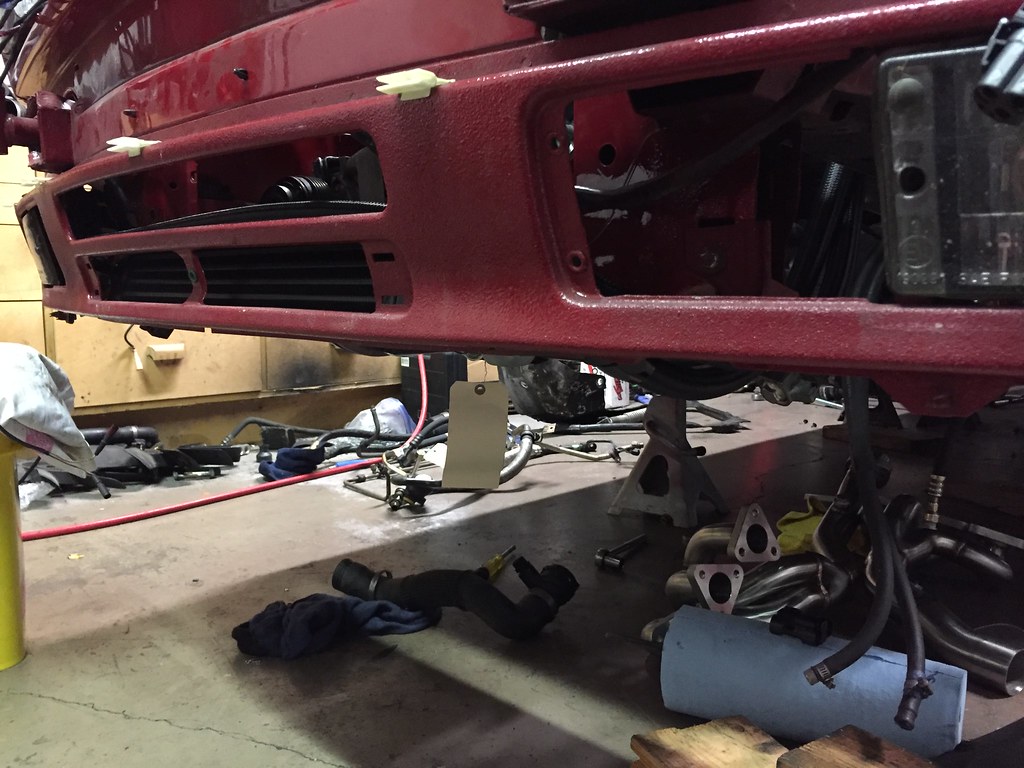
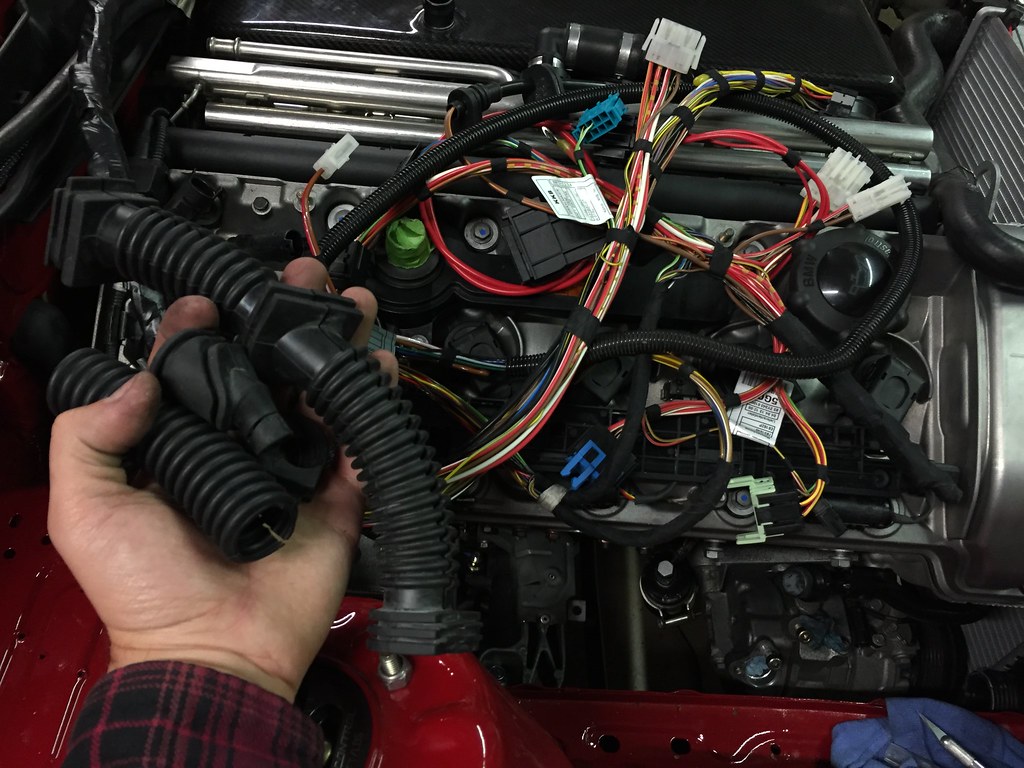
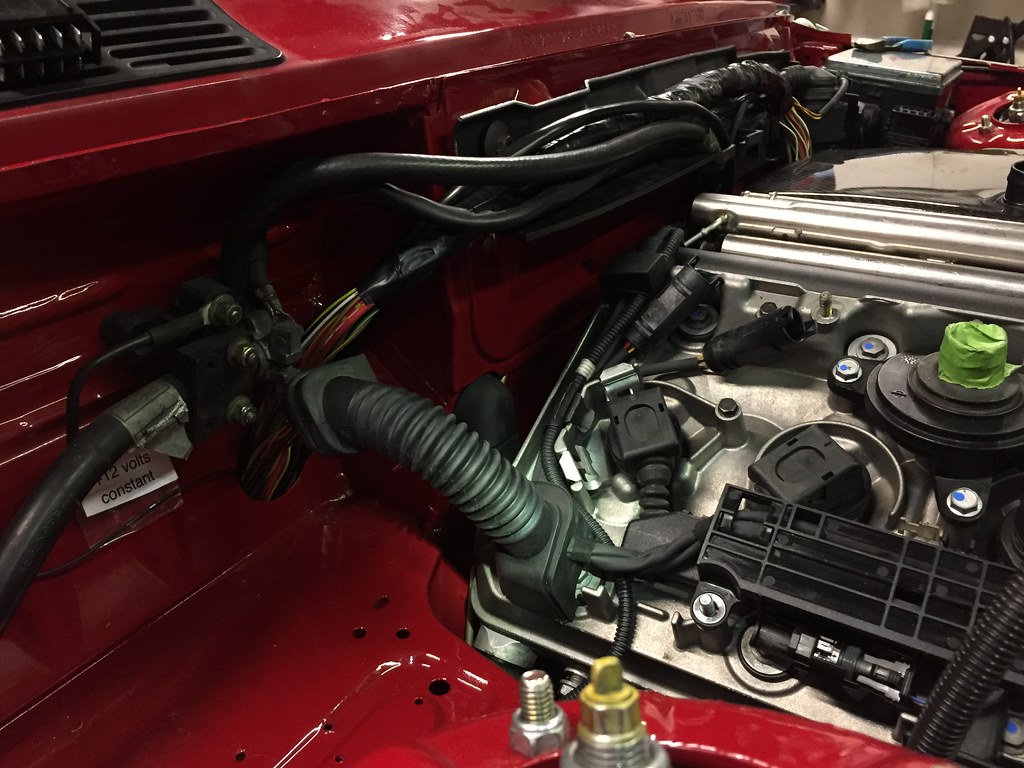
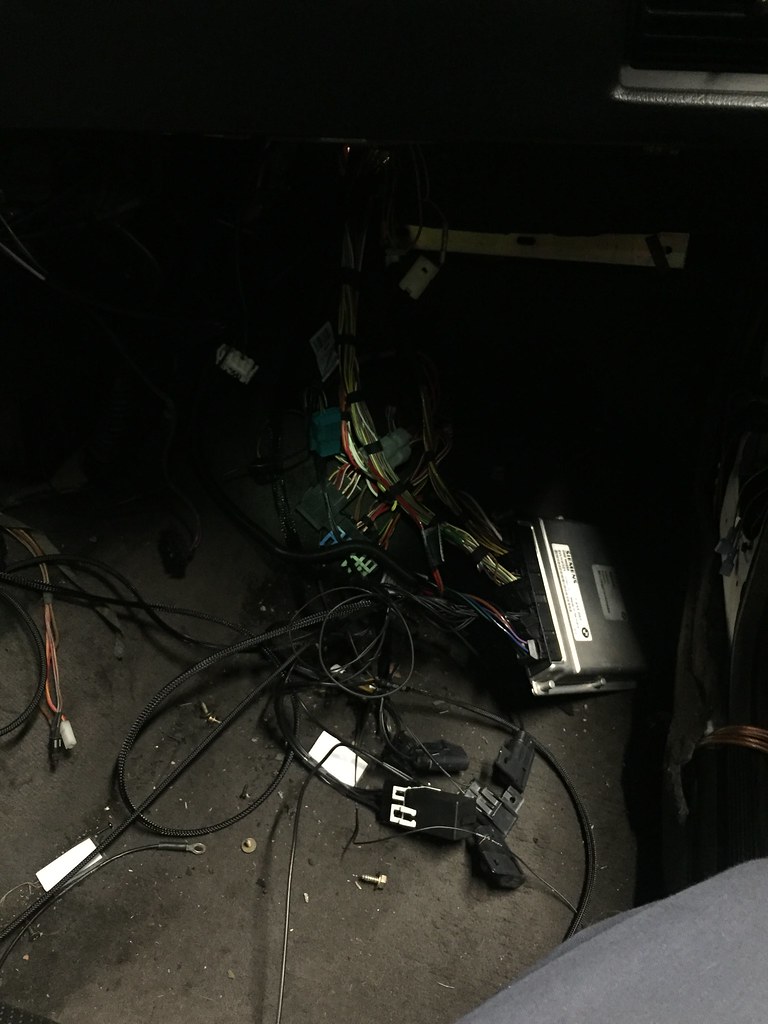
    And shes in! That's where I stand as of now. Onto wiring and pluming where I know I am going to have lots of questions, and already do.

    Comment


      #32
      Here are some things I need help with:

      1) Those with S/M54 swaps or anyone running a PWM fan module how did you do the wiring? I would like to use the original E30 fan as it fits well over the A/C condenser. Here are pics for what would need to be wired.

      Untitled by Evan Nessim, on Flickr
      Untitled by Evan Nessim, on Flickr
      Untitled by Evan Nessim, on Flickr
      Untitled by Evan Nessim, on Flickr

      2) Similar to #1, using Andrew's CAN controller am I able to run a puller fan as well as have it control the E30 AUX fan? Again, what would the wiring consist of?
      *Ill be upfront here, I dont really know half of what this CAN controller does or how it works but seems like I needed it for the AUX fan and A/C driveability. I would love to take full advantage of it though*

      3) What is up with the E46 brake booster vaccum hose? Looks like it has two electronic valves and a line that goes to the ICV. Do I just make my own line from the vacuum rail to the brake booster and then plug the ICV line and forget about the sensors to the valves for that line?

      Untitled by Evan Nessim, on Flickr
      Untitled by Evan Nessim, on Flickr


      4) Those with 24V swaps, using the E30M or pill style overflow how do you bleed your coolant? The M20 had a bleed screw on the thermostat, the E46 had a bleed screw on the top radiator line, but with the way my system is going to be put together there will be no bleed screw.

      These are just a few off the top of my head, Im sure there will be more and appreciate any feedback and help!

      Comment


        #33
        That booster is not going to clear the stock intake manifold. I ended up deleting the booster on mine so I didn't plumb any of those lines. I'm not sure exactly what the valve on the booster vacuum hose does. My thought was that it probably is used to regulate vacuum to the booster so that you have a constant pedal feel at all RPMs.

        As for coolant bleeding, I have an e30 late model reservoir in the battery tray area and everything is plumbed just like the stock E46 M3. The only thing I don't have is the bleed screw on the radiator inlet side. I didn't seem to have a problem bleeding it just squeezing the hoses while the engine idled. Once the temp came up a bit I shut it down and opened the reservoir and it sucked in coolant. Just repeat that a couple times and you are probably fine. The nice thing about the standard 325i reservoir is that it is compatible with the E46 M3 coolant cap, so you can get higher coolant pressure.

        You're saying the rods were out of round on a stock S54 with ~80k miles? Consider me skeptical. There should be no need to rebuild the whole engine at that mileage. Vanos and rod bearing replacement are standard procedures but other than that the engines are pretty bulletproof. What prompted you to check the bottom end specs and who did the measurements?
        Last edited by R3VM3UP; 12-13-2018, 07:36 AM.

        Comment


          #34
          I wont be using a stock intake manifold, have one that has been modified to work with a booster. It appears the 944 will be small enough after a quick mock up, but we will see when the engine is at its final resting angle with the trans in.
          So you ended up plugging any open vacuum holes then? Seems like that's my plan of attack and just keep the booster line with a one way valve and ditch the one going to the E46 ICV.

          Well this is good news then! I haven't made a final decision on coolant tank but I do have the pill shaped one as I was leaning towards it aesthetically. Wouldnt be the first time it was used either.

          Yes, after hearing that from the machinist I checked with my bearing supplier (BE bearings) and Achilles MS and they both claim the rods out of S54s/S65s are shit. BE who specialized in the S54/S65 rod bearing say they find 80% of the rods which have seen any sort of mileage are out of round. Just like you, I was skeptical because most E46 owners know the second they buy the car to install new rod bearings and typically that is done in car with no form of measurement. My oil clearance was around 0.003", so would I have been fine? Was it because of the ARP fasteners? Maybe, but thats not something that I wanted to risk.

          Comment


            #35
            I plugged the vacuum rail where the booster line would connect since I have no booster. I think I still need to plug the intake manifold connection but I haven't done the final install on my manifold yet.

            To clarify, the roundness of the rods was checked with the ARP bolts installed? I'd bet that was your problem. Andrew Lang tested the ARP bolts and found that the rod was out of round when tightened to their specified torque. Stock bolts did not exhibit this issue. I don't subscribe to the BE theory on the S65 rod bearings and I'd be hesitant to believe that 80% of rods with stock bolts are out of round to the point of needing machining. I certainly believe that the rods do experience some deformation over time, but I don't believe that BE or anyone else knows the factory tolerances to begin with. To accurately assess what's going on you'd have to measure an adequate sample of brand new rods, run them in an engine for an extensive period of time, and then remeasure.

            While I appreciate the amount of effort BE has put into documenting the specs and measurements of the S65 bearings, his theory on clearances is still conjecture at this point. Only BMW has conducted any sort of controlled durability testing on their engines, and BE will never be able to replicate that. It will take years of collective data points for people to establish any sort of reliable trends with replacement bearings and or clearances. I don't mean to say that I think BE's findings are necessarily wrong, and I think many of his theories are reasonable, but at this point they are just theories. Sometimes people don't give the OE engineers enough credit on this sort of stuff, it's not like BMW just played 'pin the clearance on the bearing' and rolled with it. That's just not how things work.

            That being said, it looks like you've done a nice job on the engine rebuild and I hope all goes well with it. I like seeing everyone's S54 builds, I need to start my own thread. I have lots of wiring work to do to clean everything up in the coming weeks.

            BTW if you need any help with the DME stuff just get ahold of me or R3Z3N and we can help you out.

            Also, with the fan I think you can remove the resistor and just run the PWM controller straight to the 2 wires on the fan motor.

            Comment


              #36
              Cool, sounds straight forward enough!

              Yes I agree, there's far too many variables for any one person or company to have a complete understanding of the issue. In fact, I ordered my ARPs from Andrew himself and talked with him about torque specs. He said the numbers ARP posted is pretty damn close, there was a variance of maybe 5lbs he would have suggested over ARP. But either way components should always be torqued and measured if possible. If I had to pick a culprit I would lean towards the fasteners. So who really knows! All I know is I wanted an engine that was completely gone through for the sake of reliability. It was wishful thinking on my behalf that I could just pop in coated bearings and ARPs and everything would be peachy. Cant complain at this point, fingers crossed, the engine should be phenomenal.

              I appreciate your input and admire your build as well, very well sorted!
              R3Z3N has already reached out to me and I have shot him some questions as well. I will try to post all of my questions here as well for all of R3V to see! I had my MSS54 tuned by TTFS so if Im not mistaken it should be plug and play ready to go.

              That makes sense, wast sure about the resistor. Where would the three on the other side of the PWM controller go? I am just confused as to where the CAN controller comes in but I do need to take a look at Andrews wiring again anyway.

              Comment


                #37
                I'm not really sure the exact wiring of the fan control box. I assume that two of the wires are power and ground and the other is the signal from the DME. WDS seems to indicate that there are 2 10awg wires and 1 20awg wire going to the electric fan on the E46 M3.

                1x 10awg wire RT/BL coming from a 50A fuse
                1X 10awg wire BR going to ground
                1X 20awg wire SW/GN going to pin 4 on X60004 on the DME.

                I'm not sure that matches your fan controller exactly. It looks like you have 3 heavier gauge wires on yours. Is it from an E46 M3?

                I'm not sure how familiar you are with CAN, but it is a serial communication bus that allows for multiple nodes on the bus to communicate with one another over a shared set of 2 wires. This means that you don't need individual wires carrying analog signals between every module, instead it lets you put dozens (hundreds in some cases) of messages on 2 wires. Certain functions in the E46were controlled via CAN including AC control, the DME -> cluster communication, etc. In a nutshell though, GPeterson's CAN module allows you to recreate this functionality outside of the E46 chassis by translating key analog signals into CAN messages that the DME and other modules are expecting to see on the bus. I'm not using any CAN functionality in my build, so I'm not really the best person to ask about the specifics. I do however have a fair bit of professional experience working with CAN so if you have any general questions I may be able to help.

                Comment


                  #38
                  I’d agree with that assumption, where do you find the WDS? Couldint find E46M diagrams anywhere.

                  Need to compare my wires to your information. From my picture it looks like the wire on the right may be slightly smaller. It is indeed an E46M, convertible if that matters.

                  Thanks for the break down. I understand the general idea, but I am more mechanically enclined than electrical. I can solder and have the basic understanding of how simple systems work but this CAN thing is a little over my head aha I’ll definetly keep you in mind as I’m still trying to figure this out while I chip away at other projects. Think I really just need to consult with the big man himself. Maybe I can drag GPeterson here for some real answers.

                  Comment


                    #39
                    I purchased a TIS/WDS CD on ebay for like $10. It runs the old school BMW WDS software on a virtual machine running XP. I think the newTIS site might still work,and there is also a WDS android app, but neither are as easy to work with as the PC version from my experience. My only gripe is that the photos of the connectors aren't there on mine for some reason. The diagrams work fine though.
                    Last edited by R3VM3UP; 12-17-2018, 04:31 PM.

                    Comment


                      #40
                      Update tiiiiiime! Back in China for another business trip, I figure since I cant work on the car I better update the thread.

                      Transmission went in with all the fixins'. Decided to go with the UUC full EVO 6-speed swap shifter because it came with the Euro E36 carrier housing which was a heavy fraction of the cost to begin with.
                      I would highly recommend the shifter to anyone looking for an OEM style but I have to admit, not super stoked with the quality for the price. Some of the components were installed backwards and repairing it myself would void any sort of warranty, however, UUC gladly sent a new one. The main thing that bothers me is the ball cup is loose in the housing causing a lot of slop. Not a huge deal, it still feels solid but theres an initial movement before the actual shift movement. Ill have to shim around the cup with maybe 0.005" sheet metal to get rid of the slop and then it should be an amazing shift.

                      Untitled by Evan Nessim, on Flickr
                      Untitled by Evan Nessim, on Flickr
                      Untitled by Evan Nessim, on Flickr
                      Untitled by Evan Nessim, on Flickr
                      Untitled by Evan Nessim, on Flickr
                      Untitled by Evan Nessim, on Flickr
                      Untitled by Evan Nessim, on Flickr

                      Transmission in! Utilized the ArcAsylum trans brace and the AKG limited E21 mounts.
                      I ran into a bit of a concern here: The drivers side bushing in the photo was under tension while the passenger was under compression, as it should be. I attempted adjusting/loosening the engine mounts to get everything to fall into place but once everything was tightened down again I was left with the same result. So, Im not sure if this has to do with the AKG mounts or the ArcAsylum brace. I ended up shimming the drivers side mount so its not under so much tension. It seems like the driveshaft is straight which leads me to believe maybe it is just the trans brace.

                      Untitled by Evan Nessim, on Flickr
                      Untitled by Evan Nessim, on Flickr

                      Ordered an auto E36M driveshaft off eBay, came in one piece with alignment markings but needed some elbow grease.

                      by Evan Nessim, on Flickr
                      Untitled by Evan Nessim, on Flickr
                      Untitled by Evan Nessim, on Flickr

                      The length locking nut crumbled to bits! Was able to track down the part numbers for a new one.

                      Untitled by Evan Nessim, on Flickr
                      Untitled by Evan Nessim, on Flickr
                      Untitled by Evan Nessim, on Flickr
                      by Evan Nessim, on Flickr
                      by Evan Nessim, on Flickr
                      by Evan Nessim, on Flickr

                      Very excited for this little pumpkin! A member here and local diff building wizard, WanganStyle, crafted this 3.91 diff. Its basically full lock on corner exit and open on corner entry. I had the same setup on my E36 track car turning it from weekend track warrior to wannabe drift king. With the stock LSD it was much more difficult to catch the tail if it slipped out causing a spin. With this diff the car damn near drove itself if it caught over steer. Extremely confidence inspiring! He even had a finned cover laying around, popped an AKG 85A diff bushing in and sealed it with Honda bond. Theres gotta be a reason they never leak, right?

                      by Evan Nessim, on Flickr
                      Untitled by Evan Nessim, on Flickr
                      Untitled by Evan Nessim, on Flickr
                      Untitled by Evan Nessim, on Flickr

                      And for the last bit of drive line fun, axles in, and finally got the rear brakes on. With great power comes great stopping power. Not that BMWs really make THAT much power...

                      Untitled by Evan Nessim, on Flickr
                      Untitled by Evan Nessim, on Flickr

                      Comment


                        #41
                        Since Tyler went MIA I was at a loss with the oil return line that he was supposed to modify... So, I had to order a new one and devise a way to shorten the line. I didnt want to use AN line since they are only rated to maybe 500F and the pipe runs through the headers.

                        Untitled by Evan Nessim, on Flickr

                        Basically half of the hard line needs to be sectioned. The AN fitting mounts to the top section of the oil pan shown here.

                        Untitled by Evan Nessim, on Flickr

                        Originally I was going to section the hard line, machine an appropriate tube to overlap the two sections, and then braze the tube to the two hard line ends. I wasnt comfortable using the brazing filler I had because its working temperature was 700F and I didnt want to risk it softening/flowing due to the heat of the headers. I doubt this tube sees 700F or even 500F, but I believe in do it once, do it right. I decided to take advantage of the laser welder at my work and Im very satisfied with the result. Just to make sure it was a hermetic weld I pressure tested the line and the results showed there was no leak.

                        Untitled by Evan Nessim, on Flickr
                        Untitled by Evan Nessim, on Flickr
                        Untitled by Evan Nessim, on Flickr
                        Untitled by Evan Nessim, on Flickr
                        Untitled by Evan Nessim, on Flickr
                        Untitled by Evan Nessim, on Flickr
                        Untitled by Evan Nessim, on Flickr

                        While I was in the lab at work I thought of a plan to get the E46 AC pressure sensor to work with the E30 dryer. Taking measurement of the E30 sensor I realized there might just be enough material to machine and tap the metal portion of the sensor. In the end I was even able to machine an o-ring grove that the E46 sensor utilizes. I have yet to tap the threads, but I think there is just enough wall thickness to be alright.

                        Untitled by Evan Nessim, on Flickr
                        Untitled by Evan Nessim, on Flickr
                        Untitled by Evan Nessim, on Flickr
                        Untitled by Evan Nessim, on Flickr
                        Untitled by Evan Nessim, on Flickr

                        Ill also be running an E30 temp sensor in the lower radiator hose for the E46 AC. Simple drill and tap here using the Mishimoto hose adapter.

                        Untitled by Evan Nessim, on Flickr
                        Untitled by Evan Nessim, on Flickr
                        Untitled by Evan Nessim, on Flickr

                        Back in the garage, basically have a bunch of the little systems to piece together.
                        New fuel filter and hoses.

                        Untitled by Evan Nessim, on Flickr
                        Untitled by Evan Nessim, on Flickr

                        CSF oil cooler in. Used black Fragola AN bits for a low profile look.

                        Untitled by Evan Nessim, on Flickr
                        Untitled by Evan Nessim, on Flickr
                        Untitled by Evan Nessim, on Flickr

                        Doesn't hang down too far for being simply routed.

                        Untitled by Evan Nessim, on Flickr
                        Untitled by Evan Nessim, on Flickr

                        Seca jumped in to join me for some work, shes wondering when this thing will be taking her to the beach!

                        Untitled by Evan Nessim, on Flickr
                        Untitled by Evan Nessim, on Flickr

                        Porsche 944 booster modified and installed. Along with new clutch master, clutch slave, and 25mm brake master.

                        Untitled by Evan Nessim, on Flickr
                        Untitled by Evan Nessim, on Flickr
                        Untitled by Evan Nessim, on Flickr
                        Untitled by Evan Nessim, on Flickr
                        Untitled by Evan Nessim, on Flickr
                        Untitled by Evan Nessim, on Flickr

                        Clearance is tiiiight! Im gonna go back and move the booster over some.

                        Untitled by Evan Nessim, on Flickr
                        Untitled by Evan Nessim, on Flickr

                        Had to do some trimming to the wire cover, may have a little more massaging to do.

                        Untitled by Evan Nessim, on Flickr
                        Untitled by Evan Nessim, on Flickr

                        Crimped and soldered new connectors per Andrew's wring instructions.

                        Untitled by Evan Nessim, on Flickr
                        Untitled by Evan Nessim, on Flickr

                        Cut off all the chunky rubber wiring guards to tuck all the wiring through the two inch hole in the fire wall.

                        Untitled by Evan Nessim, on Flickr
                        Untitled by Evan Nessim, on Flickr
                        Untitled by Evan Nessim, on Flickr

                        Going to make a cutout in the battery box wire cover for this rubber section.

                        Untitled by Evan Nessim, on Flickr

                        Need to figure out a clean way of organizing and mount all this crap...

                        Untitled by Evan Nessim, on Flickr

                        And finally, Ill finish this post with proof that the CSL airbox will fit with a 944 brake booster if the box is modified to fit in an E30 by Karbonius. Threw on all the covers to give me warm and fuzzies and motivate me to finish this shit.

                        Untitled by Evan Nessim, on Flickr
                        Untitled by Evan Nessim, on Flickr

                        In all seriousness, the airbox was modified by Karbonius much like others modify the stock airbox to fit a booster. If you go boosterless or maybe run a small booster it should be possible to fit with a regular CSL box.

                        Comment


                          #42
                          beautiful. that plenum is so fucking big.

                          Comment


                            #43
                            Looks great! What intake is that?
                            Euro Delivery Thread///E30 Project Klaus///COTM August 2021

                            Comment


                              #44
                              Originally posted by jeenyus View Post
                              beautiful. that plenum is so fucking big.
                              Its a wormhole to a whole new realm.
                              » PARTS FOR SALE
                              » TRANSACTION FEEDBACK

                              Comment


                                #45
                                Naturally, as I received the plenum, I had to inspect the quality control by putting my whole head inside. Everything checked out! Thankfully, every particle of my body is still connected as it should be.

                                Originally posted by Staszek View Post
                                Looks great! What intake is that?
                                Its the Karbonius CSL replica, the best OE looking CSL box imo.

                                Comment

                                Working...
                                X