Announcement

Collapse
No announcement yet.

My E30 Turbo Frankenmotor Restomod

Collapse
X
 
  • Filter
  • Time
  • Show
Clear All
new posts

    #31
    Originally posted by jph View Post
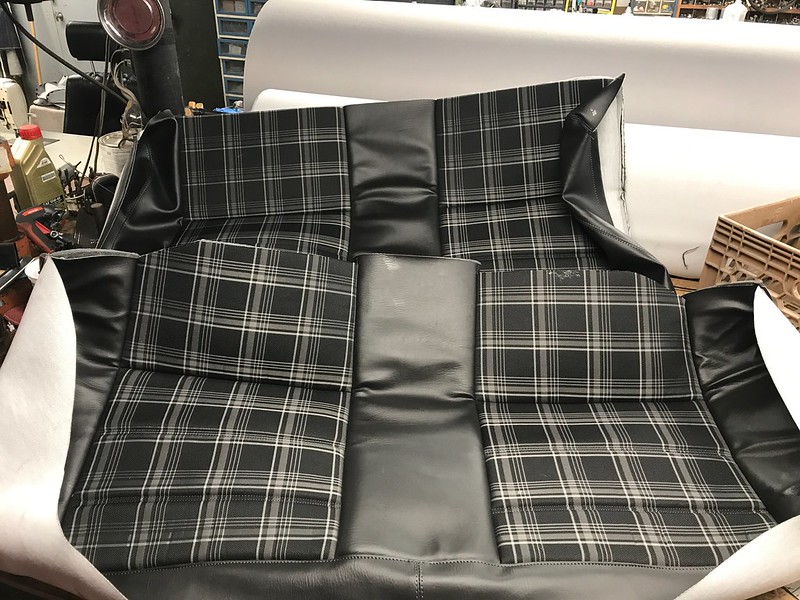
    Thank you! I had ninestitch up in New York make the seat skins and I put everything together. I'll cover that pain in the balls in another post. Probably wouldn't do that job again haha
    Haha, I was just in contact with the same guy! I figured I could do them myself but I failed horribly at sewing new upholstery for a test chair I bought at the thrift store. It's not as easy as it looks!

    Sent from my Nexus 6P using Tapatalk

    Comment


      #32
      Originally posted by Mazdayasna View Post
      Haha, I was just in contact with the same guy! I figured I could do them myself but I failed horribly at sewing new upholstery for a test chair I bought at the thrift store. It's not as easy as it looks!

      Sent from my Nexus 6P using Tapatalk
      Very true. He makes it look easy. I went and picked my upholstery set up in person when I was headed to VAC Motorsports in Philly. John is a great dude and does high quality work. Very reasonable prices too for what you get. Trust me, doing the front seats is terrible with the hog rings and so forth. The back seats are a breeze in comparison. The results are well worth it in the end though.

      Comment


        #33
        Wow!

        Inspirational!

        [IMG]https://cimg4.ibsrv.net/gimg/my350z.com-vbulletin/550x225/80-parkerbsig_5096690e71d912ec1addc4a84e99c374685fc03 8.jpg[/IMG

        Comment


          #34
          Everything about this build looks top notch, especially that oil drain
          Originally posted by priapism
          My girl don't know shit, but she bakes a mean cupcake.
          Originally posted by shameson
          Usually it's best not to know how much money you have into your e30

          Comment


            #35
            wow

            wow... all I can say is that's incredible..

            Comment


              #36
              Originally posted by Mazdayasna View Post
              Just clicked through the flickr album,
              Hah! I did too.

              Amazing work! Love the attention to detail. With the spare tire well removed, do you notice any whistling or drag from the rear? Or do you have a rear diffuser?
              2009 BMW 328i xDrive (Daily/winter drift king)
              1987 BMW 325i (Currently torn apart)
              Instgram: @Ebola.30

              Comment


                #37
                God damn.

                Comment


                  #38
                  subbeddddddd

                  what gauges are those? They look great!

                  Comment


                    #39
                    Sorry I have been slacking on more updates. School is keeping me busy right now and I am also in the process of overhauling the back end of the fuel system on the car. The Aeromotive Stealth 340 pump is at its limit and not quite confidence inspiring. Stepping up to a Weldon 1100-A pump and completely removing the in-tank drop-in pump. The factory tank will essentially become a fuel cell with a factory fuel level sending unit and a pickup tube to feed the pump.

                    I did order some more stuff from Ninestitch for the rear seat and also did an alignment on the car using a Longacre camber gauge and set toe using the string method. Need to drop the fuel tank to adjust out the 3/32" toe OUT on the rear passenger side but all other wheels are set. I'll include all this stuff in later posts with pics.

                    Originally posted by Northern View Post
                    Everything about this build looks top notch, especially that oil drain
                    I admittedly stole the idea from you!


                    Originally posted by MB07 View Post
                    Hah! I did too.

                    Amazing work! Love the attention to detail. With the spare tire well removed, do you notice any whistling or drag from the rear? Or do you have a rear diffuser?
                    Hey thanks man! I was worried about that but it doesn't seem to be an issue at all. My biggest fear was putting pressure on the rear bumper valance and pulling it off but in 500 miles so far I haven't seen anything like that. I've had the car to maybe 110 mph so far and it seems fine. No rear diffuser. Just a pretty empty void back there that is about to become the home for my new fuel pump and filter setup.

                    Originally posted by rikaro View Post
                    subbeddddddd

                    what gauges are those? They look great!
                    Thanks. The gauges are made by an American company called Speedhut. They have been awesome so far. I liked that they were all stepper motor and the mounting depth is pretty shallow. They're totally customizable from face colors, custom logos, needle colors, etc. I also needed a GPS speedo since my speedo pickup is gone after the E46 M3 diff cover went on. Check them out, they're a little pricey but I have nothing but good things to say.
                    Last edited by jph; 09-19-2019, 10:12 AM.

                    Comment


                      #40
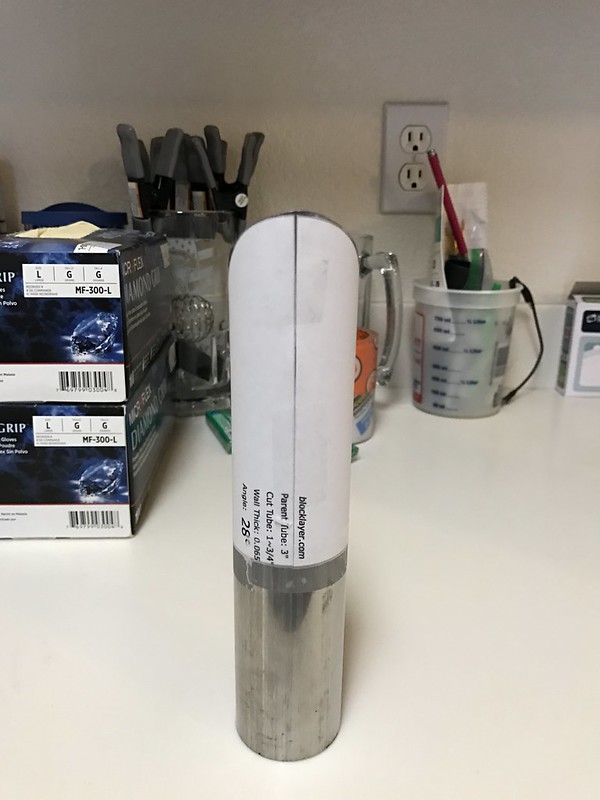
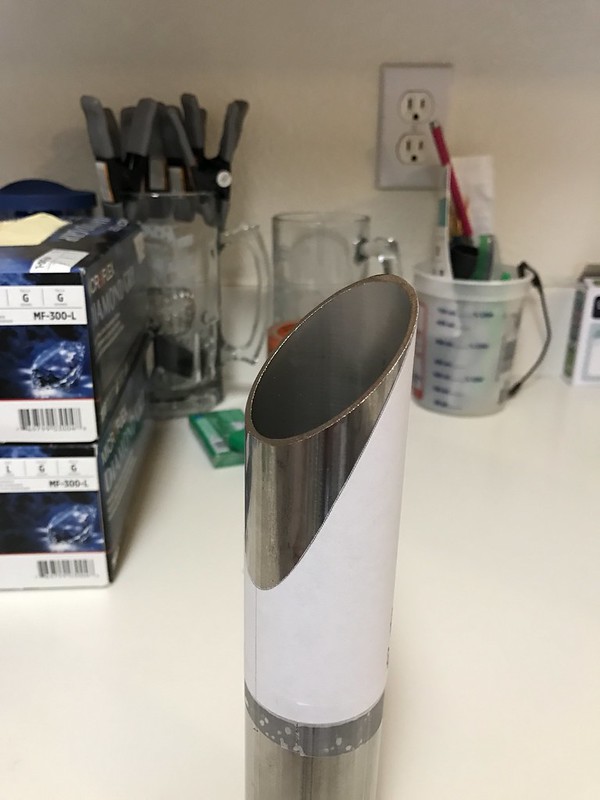
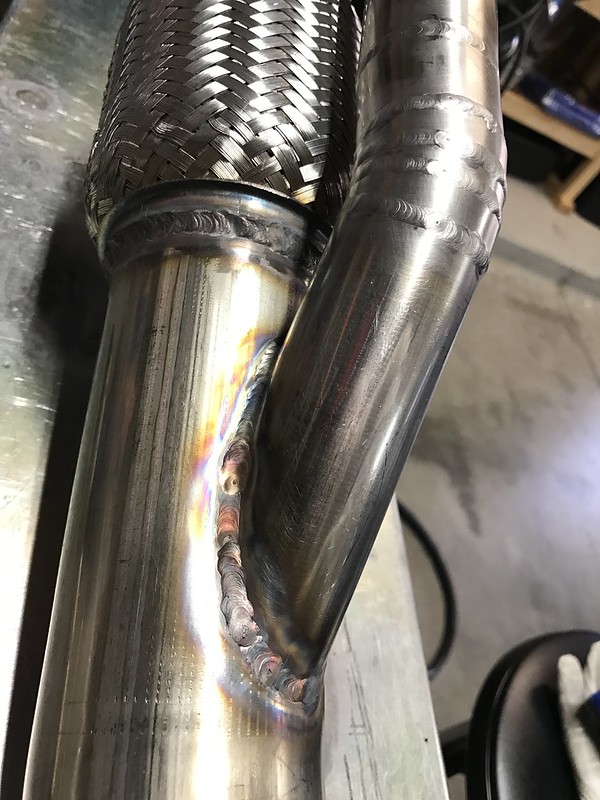
                      Alright, I thought I could do better about update progress but I’m struggling. I still have much more to fill in on the actual build progress, but I’ll just pick up where I left off before for now. So I was in the process of tying the wastegate dump back into the main exhaust. When I last updated on that I had fit up and welded about 2/3 of the pipe. Now I was ready to actually mate it up with the main exhaust but knew mating at a shallow angle was important to make the transition as smooth as possible and not create a restriction. After all the whole idea of recirculating the dump was to try and help keep boost creep down. I found a cool (and free) pipe fit-up template generator online. You input the dimensions of both pipes you’re mating up and the angle you wish to join them and it spits out a printable PDF template. Good shit. I decided on a 28-degree angle and here is the template placed on my dump tube after carefully cutting it out.

                      IMG_8243 by Jason H, on Flickr

                      IMG_8244 by Jason H, on Flickr
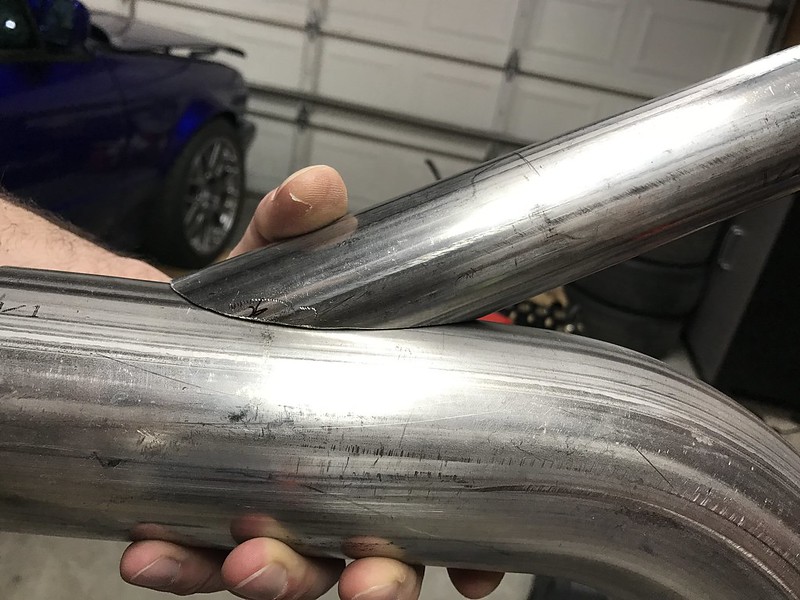
                      I traced the template on the pipe and did the first large cuts with a cutoff disc and then cleaned it up with a bur in a die grinder to get a pretty tight fit for TIG welding cleanly.

                      IMG_8250 by Jason H, on Flickr

                      IMG_8255 by Jason H, on Flickr
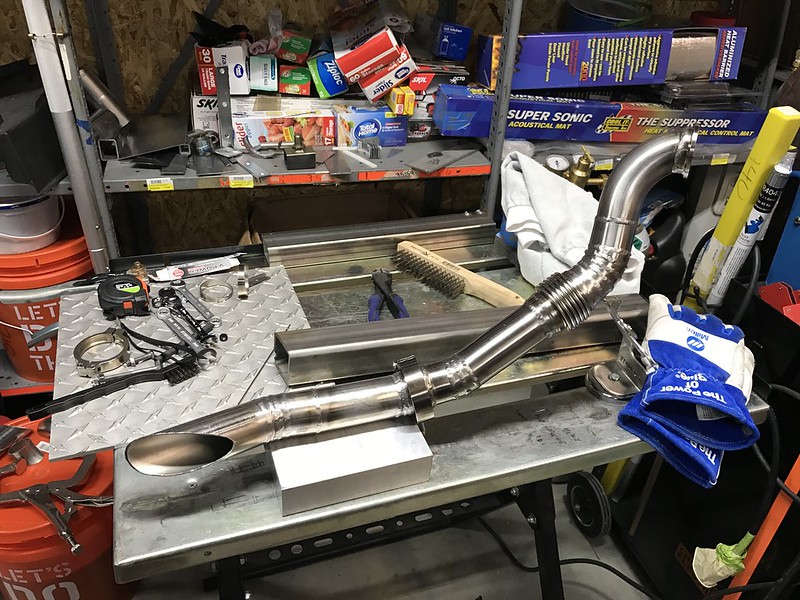
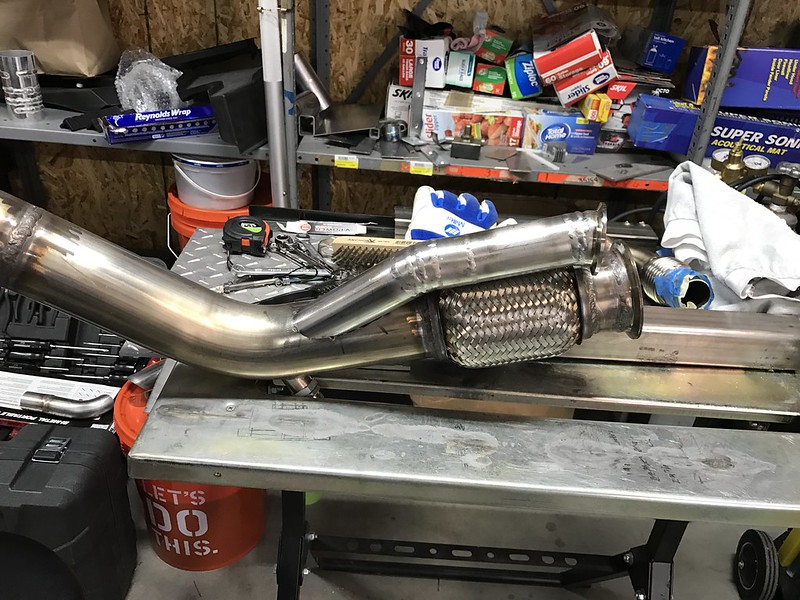
                      Here’s the final product ready to be finish welded onto the main exhaust.

                      IMG_8264 by Jason H, on Flickr

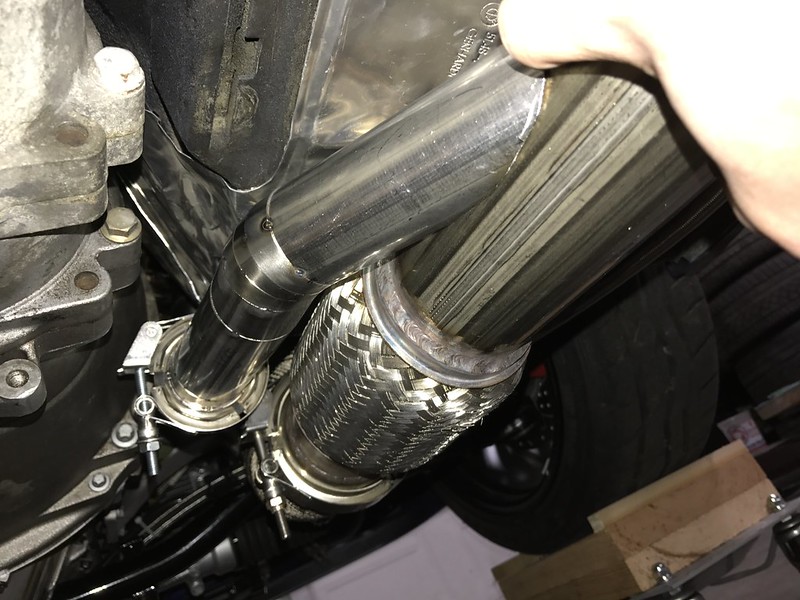
                      I cut the teardrop-shaped hole in the exhaust for the dump just behind the flex section and tacked it in place. I used a small v-band clamp for the center of the dump tube to make it easy to remove and replace and just make a better overall fit of the entire exhaust with the dump installed. It worked really well.

                      IMG_8270 by Jason H, on Flickr

                      IMG_8271 by Jason H, on Flickr
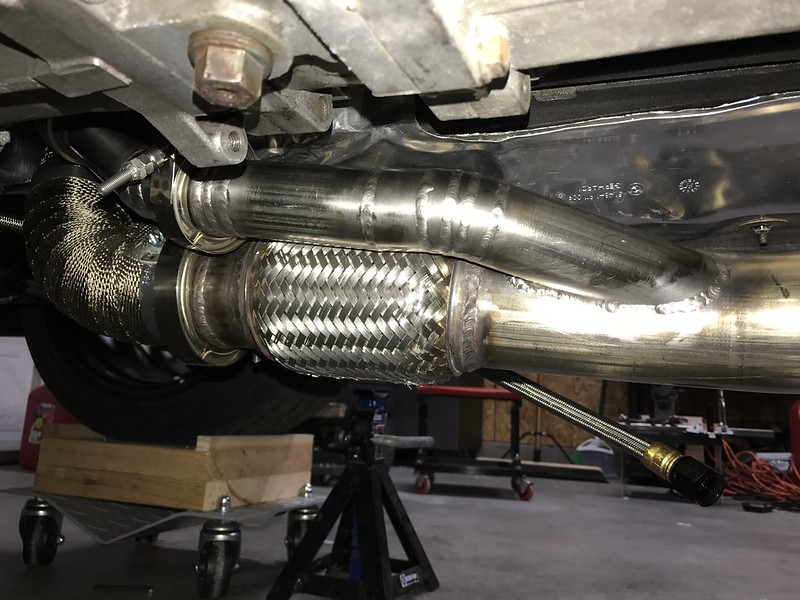
                      And all mounted up under the car.

                      IMG_8273 by Jason H, on Flickr

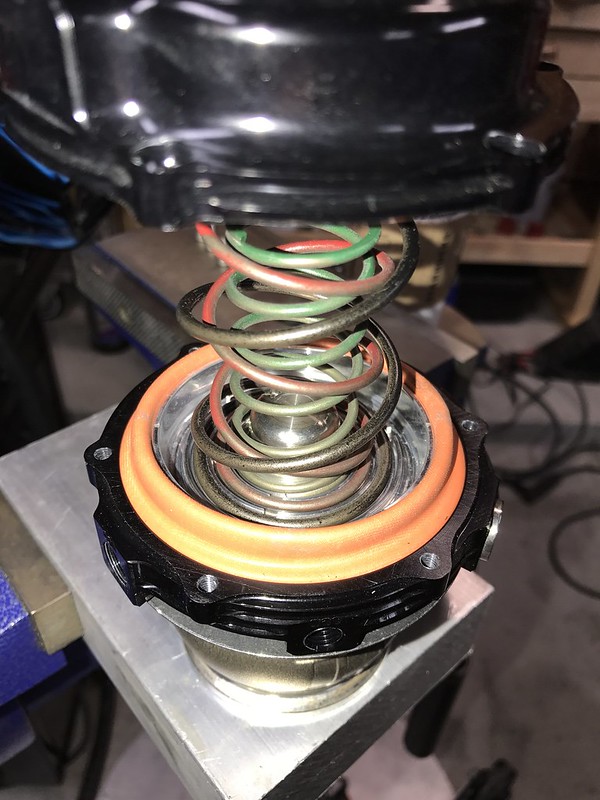
                      I also changed the wastegate spring out from a 6 psi spring to a 19 psi spring in hopes that the combination of a higher spring pressure would allow me to make consistent boost and the wastegate recirculation would tame the creep issue. I take the car out with high hopes and get creep again to the same 24 psi as before and now the boost comes on so hard and so fast the car scares the living shit out of me.

                      I decided to drop my spring pressure down from 19 psi to a more user friendly 13.5 psi. The 19 psi spring just caused it to hit too damn hard and made the car basically unmanageable on the street. Spinning through 2-3-4 gears was no problem. As cool as that is, it gets old really quick.

                      IMG_8405 by Jason H, on Flickr

                      Back out for another test. Boost creep is now only going to 21 psi. Victory! Kind of.
                      Last edited by jph; 05-18-2018, 02:09 AM.

                      Comment


                        #41


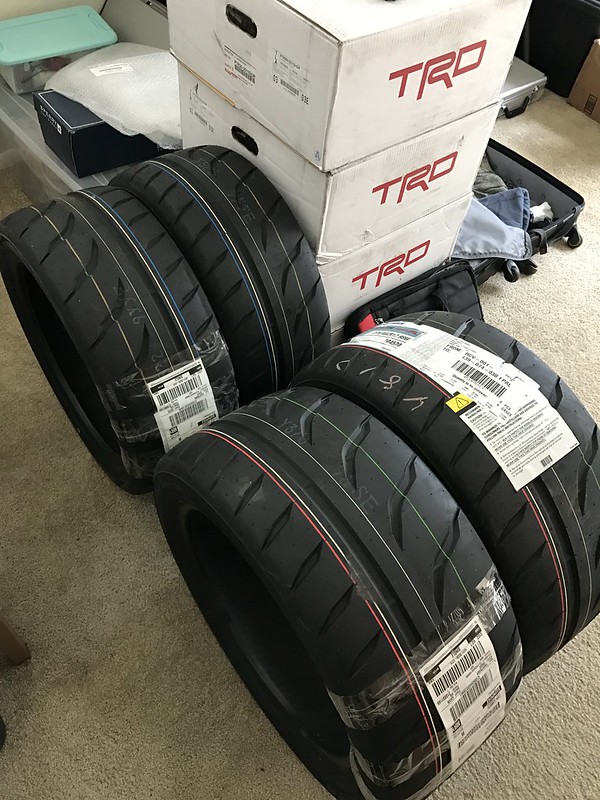
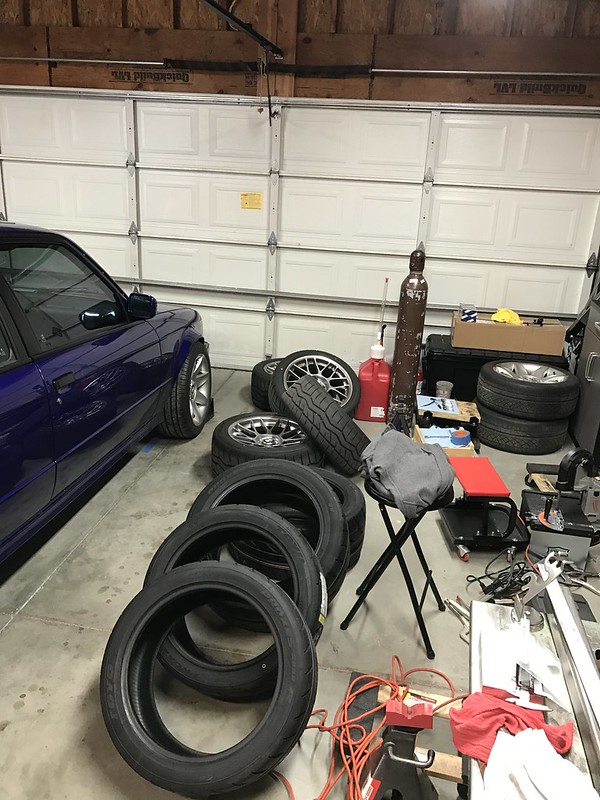
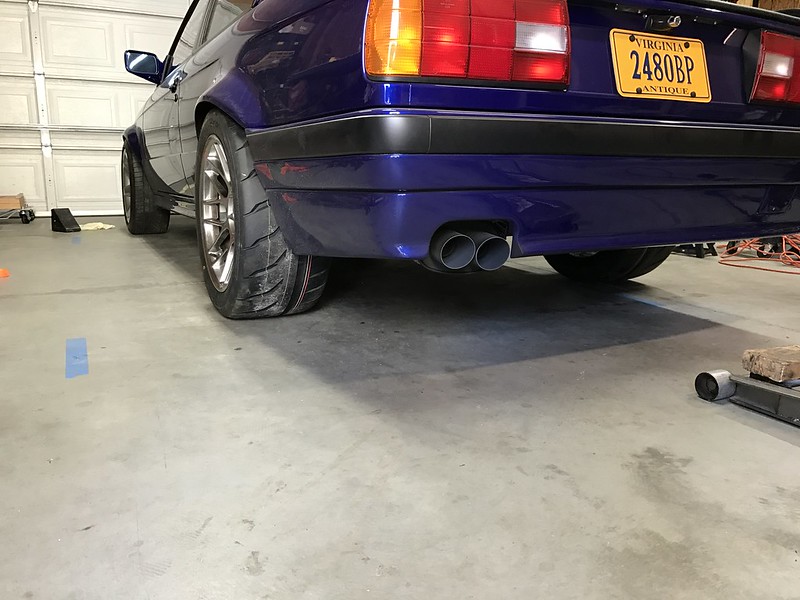
                        Now that the car is running well it’s time to deal with the lack of traction. I had brand new Falken Azenis RT615K+ autocross tires in 275/40/17 on the rear and they were no match for the boost hitting. I decided to spring for the stickiest tires I could run without crossing into DOT radial territory. Toyo R888R’s were ordered in the same sizes (275/40/17 rear and 235/40/17 front). Here they are nice and new and meaty.

                        IMG_8317 by Jason H, on Flickr

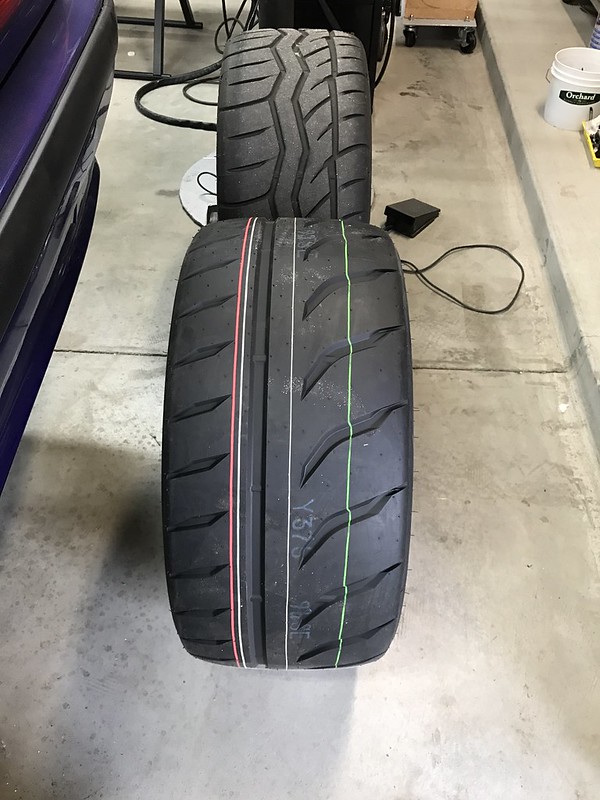
                        And a Falken to Toyo width comparison. The Toyo is not mounted on a rim but even mounted up it’s still a little wider than the Falken they were replacing.

                        IMG_8320 by Jason H, on Flickr

                        What a mess.

                        IMG_8323 by Jason H, on Flickr

                        And they're on.

                        IMG_8327 by Jason H, on Flickr

                        The Toyos are definitely grippier!

                        Last edited by jph; 09-19-2019, 10:16 AM.

                        Comment


                          #42
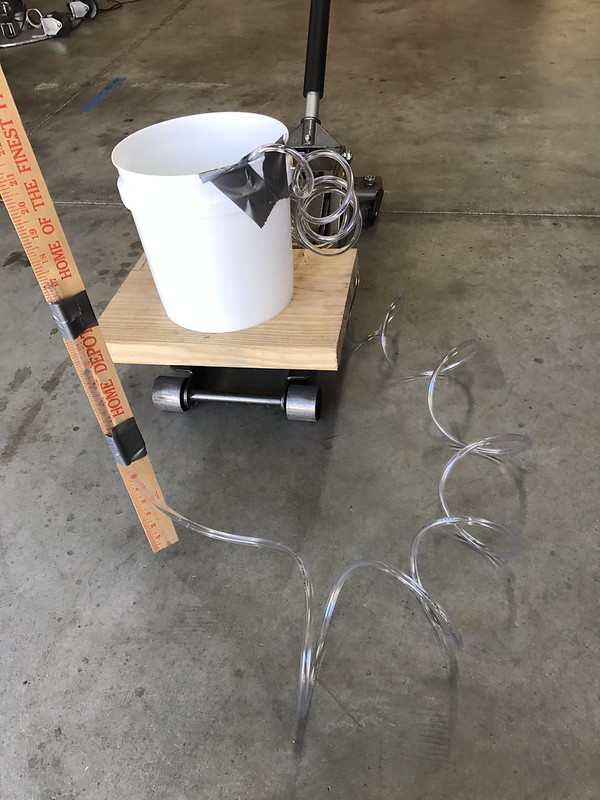
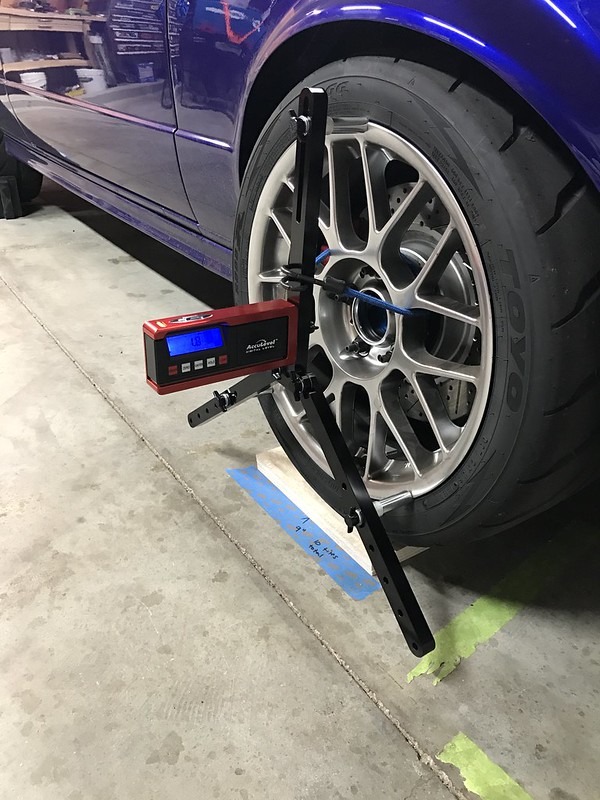
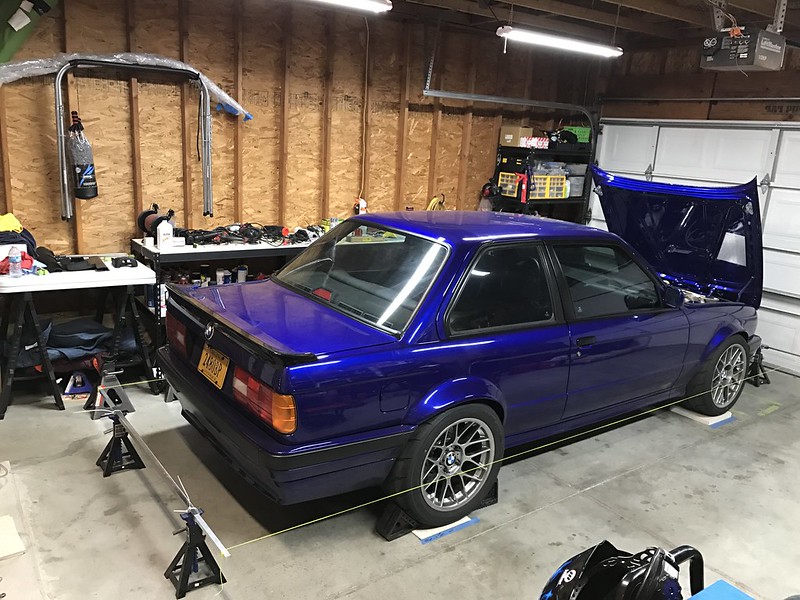
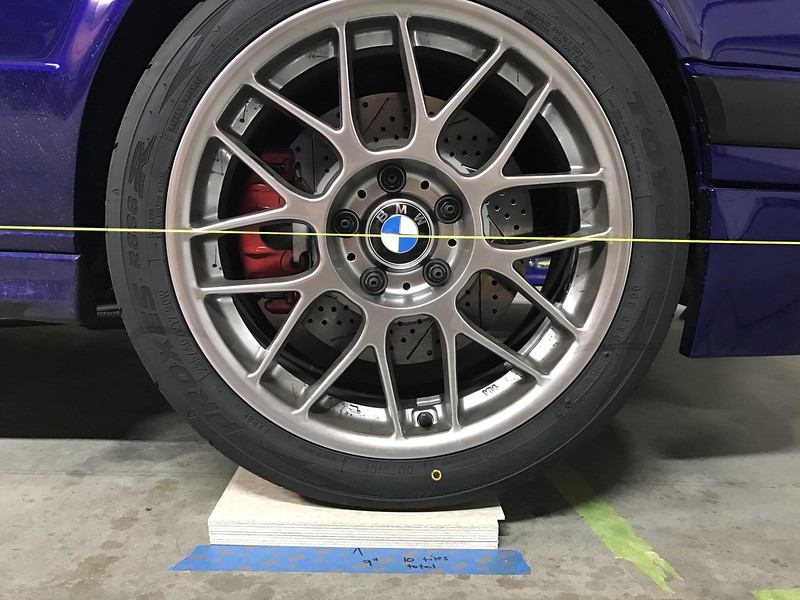
                          I had eyeballed my alignment ever since I had finished my build. It looked close but it had some weird handling characteristics and I wasn’t really pushing it hard in the corners. I was also hoping to get a little more grip with a decent alignment. My garage floor is nowhere near level but I knew the car had to be to get a proper camber reading. I pulled the car into the garage and marked the floor with painter’s tape just on the outside of where each tire would sit when I did the alignment. I made a crude water level and set out to figure out just how bad the floor was.

                          IMG_8339 by Jason H, on Flickr

                          It was pretty bad. I found the high spot out of all 4 wheel locations marked on the floor and set down two cheap commercial floor tiles from Home Depot that were around $.50 each. I then set the level to a nice round number on the yardstick by jacking up the bucket with water in it. I then went to the remaining three corners and stacked up tiles until I achieved the same reading on the level at each corner. I used a total of 28 tiles to get the car within 1/16” of level at each corner. The reason I used two on the highest spot was because I added a little grease between the tile just below the tire to allow the wheel to move freely as it would on a true alignment plate when I was under the car making adjustments. I did this on all four corners so basically had to start my tile stacks with a minimum of two tiles, even at the highest point. Not sure if that makes sense. So then I proceeded to measure and adjust camber on all 4 corners. The front are now set to -1.7 degrees and the rears to -0.6 degrees.

                          IMG_8416 by Jason H, on Flickr

                          Then I string the car up to set toe. Getting the strings in perfect alignment on each side of the car seriously took around an hour and a half. The strings needs to be exactly equal distance away from the car on either side to make a perfectly square box. The string also needs to run straight down the center of the wheel so I used the centercaps as a reference point. I set the fronts to 1/32” toe in on each side and the rears to 0 toe. Here’s the car all strung up for toe setting.

                          IMG_8421 by Jason H, on Flickr

                          IMG_8419 by Jason H, on Flickr
                          Last edited by jph; 08-15-2019, 08:36 PM. Reason: Corrections

                          Comment


                            #43


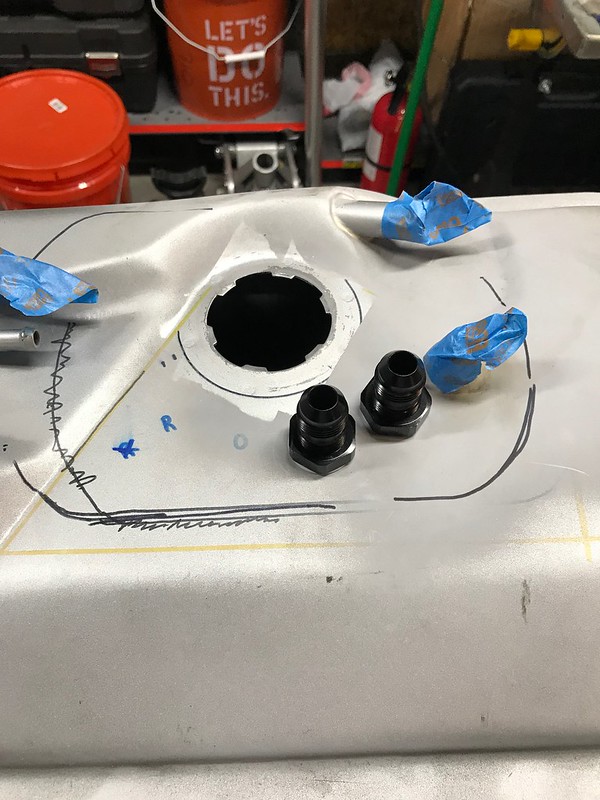
                            I wanted to completely do away with any pump actually inside the OEM tank and treat it more like a fuel cell. A Weldon 1100-A fuel pump draws from the OEM tank using a -8AN size line that filters through a Weldon 100 micron stainless steel mesh fuel filter. I put a check valve on the pump’s outlet to keep pressure on the rail after the car is turned off. It goes from the pump through another Weldon 10 micron stainless mesh filter and then straight to the fuel rail. The pump operates on a dedicated relay using 10 gauge wire and triggered on by the relatively tiny OEM fuel pump wiring.


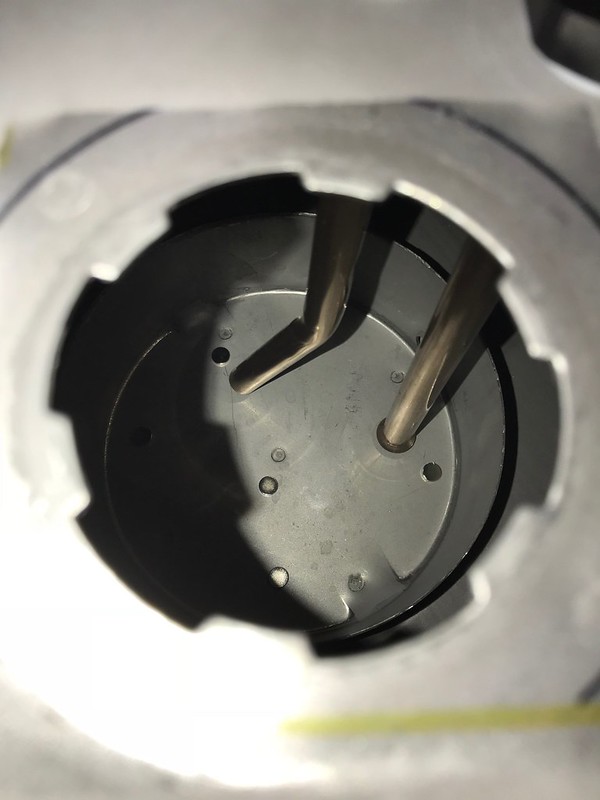
                            To pull and return fuel to the OEM tank I placed two -8 AN bulkhead fittings in the top of the tank and made a pickup and return tube out of the same half inch cunifer tubing the fuel hardlines are made from, complete with 37 degree flares. They both drop into the pickup bowl inside the OEM tank. The return line is angled a bit to dump fuel away from the pickup and drops nearly all the way down to the bottom of the tank to reduce aeration from fuel flowing back into the tank. The pickup is about 5/16” from the bottom of the tank to hopefully remain submerged in all conditions of braking, launching, low fuel level, etc. I also dropped 5-6 tiny rare earth magnets in the pickup bowl to try and help contain any metal that may get in there. Cheap insurance I guess.

                            IMG_8673 by Jason H, on Flickr

                            IMG_8675 by Jason H, on Flickr
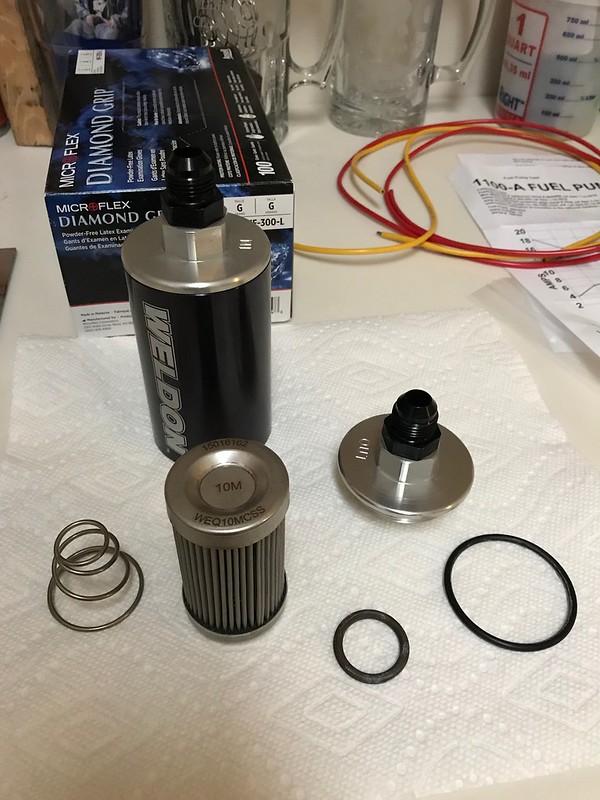
                            While I’m waiting on the XRP braided hoses I mocked up to be made I went ahead and pulled the 10 micron filter apart and cleaned it. Again, cheap insurance and I like tinkering.

                            IMG_8520 by Jason H, on Flickr

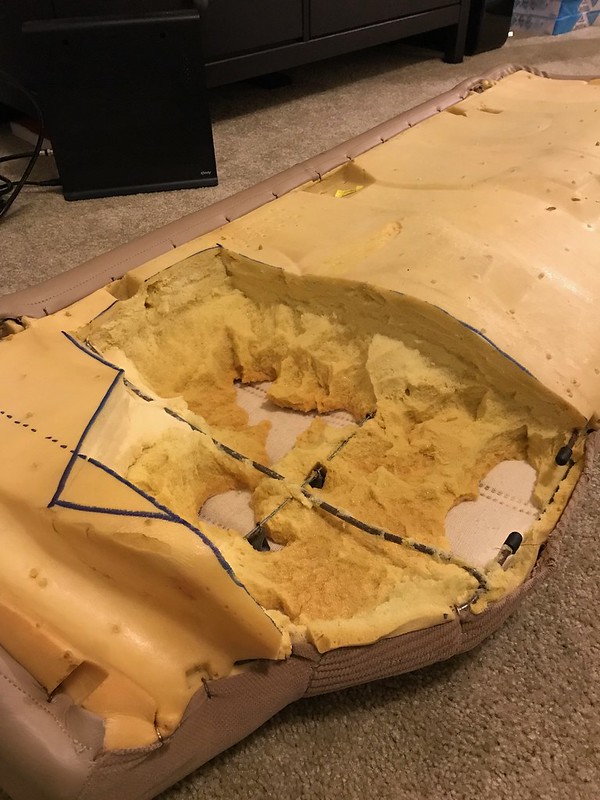
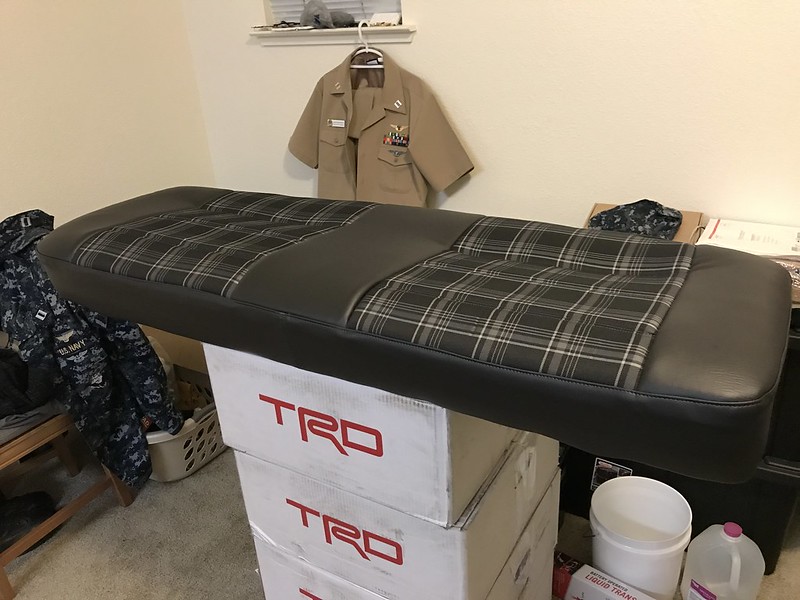
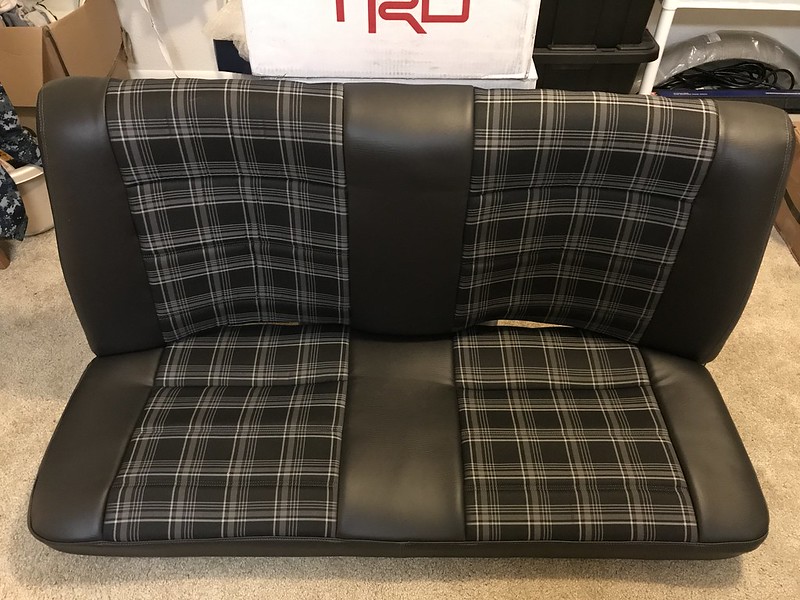
                            Now that I will have two short runs of braided hose running under the rear seat they will need some clearance. Looks like I removed the seat foam with a teaspoon but even trying to cut it cleanly proved impossible. This works though and provides the clearance the lines need. I needed to cut the rear wire frame on the seat bottom to clear the bulkhead fitting that drops out under the car to feed the lift pump. If you look close at the seat bottom pic with the foam cut out you’ll see where there’s a gap that I capped off with vacuum plugs. You’ll never see it with the seat installed. I also went ahead and installed the rear seat upholstery kit John from Ninestitch made for me. Notice how I didn’t cut out the seat belt holders on the seatback. With the fuel lines under the seat it’s now a two-man machine so kept it clean with no seat belts.

                            IMG_8631 by Jason H, on Flickr

                            IMG_2664 by Jason H, on Flickr
                            IMG_8636 by Jason H, on Flickr
                            IMG_8637 by Jason H, on Flickr

                            That’s it for now. More to come soon!!
                            Last edited by jph; 08-15-2019, 08:46 PM. Reason: Corrections

                            Comment


                              #44
                              This build is really impressive. Keep up the good work!
                              1989 325i LS Swap (Money Pit):https://www.r3vlimited.com/board/sho...d.php?t=244933
                              COTM Feb 2019: https://www.r3vlimited.com/board/sho...d.php?t=428404

                              Comment


                                #45
                                holy moly man. I need to make a trip down and see this in real life.
                                1984 Delphin 318i 2 door

                                Comment

                                Working...
                                X