Announcement

Collapse
No announcement yet.

E30 M3 touring with S62 power

Collapse
X
 
  • Filter
  • Time
  • Show
Clear All
new posts

    #31
    Got a few hours at the car today between the Olympics and everything.
    Still turning out to be way better than expected, I hope my M3 turns out to be as good when I go at it someday.
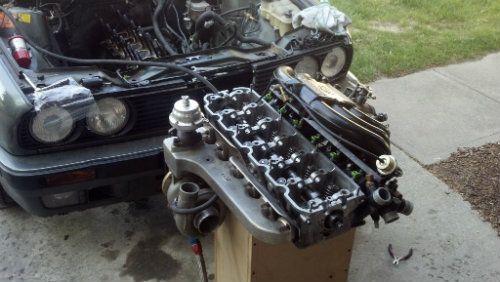
    Engine out

    Rear out

    Bulkhead rust free even around where the loom goes into the car.


    Just finish stripping the interior now and the fun part of removing the loom :D


    Not an awful lot new to report, got most of stripping finished and got it mounted onto the spit. Floor pan looks really good with the fuel tank and everything removed, hope to get a start on some of the rust repairs next weekend.
    A few pics of how it stands now


    Just realised that if this all goes wrong it will be on a big public forum for everyone to see ��

    Anyway back to the task in hand


    Inner sunroof skin removed


    Bottom skin was fairly bad


    Then remove cassette
    Drill out spot welds around opening


    Drill spot welds at b pillar


    Then cut supports at the 4 corners being carefull not to cut through the roof skin


    Use heat gun to soften sealer and remove cassette

    Before


    After


    Would really suit you leins, nearly 2" more head room��

    The start of some rust between cassette and roof skin even though it looked perfect


    Made up a brace to go in front of the sunroof opening and some filler strips for around the sunroof panel


    Time for another bit of an update

    Filler strips tacked in


    Sunroof panel welded in


    Started on some of the rust repairs
    rust behind seam sealer

    Cut out rust

    Make Template

    Cut some sheet and beat into shape

    Weld

    Template again

    Weld

    From underneath

    Ground down and primed


    Other side


    Was a bit of rust between engine bay a bulkhead which turned out to be a good bit when ground back


    Cut out the rust again


    From inside

    From wheelarch


    Templates


    Weld in first piece

    Inside


    Next


    Grind


    Comment


      #32
      legit

      Comment


        #33
        Mmm I want some rotisserie in my life..


        excited to see more!

        Comment


          #34
          more?
          sigpic
          1986 "C2 2.7 Alpina" Sedan
          1987 325ic Black Vert
          1986 327i Red Track Car RIP 10/10/10
          1989 325is Henna S50 track car SOLD


          Transaction feedback here please!!
          http://www.r3vlimited.com/board/showthread.php?t=170548

          Comment


            #35
            Subscribed!
            Diamond schwarz, BMW E28 518i - M30 swap in progress
            Schwarz Mica, 1994 BMW 325i Touring - M50B25 Vanos - 3.73 LSD - Design Edition.
            Brilliantrot, 1989 BMW 325i Touring - M50B25NV - Drifter - Welded diff, sold

            Alpinewiess II, BMW 318i - M10 - euro pre-face, sold

            Comment


              #36
              Vlad aint got shit on this!

              Subd'

              Comment


                #37
                This will be a beautiful build, I appreciate you attention to detail on something so awesome!

                Comment


                  #38
                  Thanks, will get the rest of the updates up later.

                  Comment


                    #39
                    Stripped all the sealer off the bottom of the car. There were a few bits of rust hiding even though the sealer was perfect.


                    Inner sill

                    Rear pocket


                    Cut

                    Template

                    Weld

                    Grind


                    Front jacking point didn't look too bad till I took it off


                    So back to the usual
                    Cut

                    Template

                    Weld

                    Grind

                    Template

                    Weld

                    Jacking point

                    Like new again


                    Crash damage at the rear was a bit worse than I had thought. See where the floor was creased and the panel is pushed in near the top mounting point on the spit. Going to have to straighten it all out and probably put a new back panel on it.


                    Converted the cluster to alpina spec

                    KM cluster from eBay.de for KM speedo, ltr fuel gauge and ltr/100km fuel consumption


                    Original cluster from car, note mileage, fair bit of going


                    Dismantle cluster


                    Remove needles


                    And faces


                    Remove tach to access econo needle which can't be removed from spindle


                    Remove needles from spindles


                    Give needles a rub with 400 paper and give a coat of primer


                    Paint


                    Mpg v km


                    Needles back on, km faces and alpina decals applied.


                    Before

                    After


                    The one I was trying to copy


                    I'm happy with the finished job, the alpina decals are a little larger than the original ones but you would only notice it if you saw them together.

                    Comment


                      #40
                      I had these wings from a shell I got from Ben . They're not great to be honest but they will do for mocking up for the moment, priced 2 new rear quarters from bmw at 680 euro for the pair so will probably go that way for the sake of it. Also the M3 had preface lift pockets so the new rear quarters would also be an advantage for fitting the rear bumper.


                      Cut out the best bit of the quarter and put on the shell


                      Difference in height of facelift against prefacelift arch


                      Going to add a nice both of width to the car


                      Front arch


                      Side skirt attached for positioning


                      Will have to do some cutting into the bodywork now and see what's the best way to go. I don't want to just slap the quarters on top as was done on the one in the US. I want to be able to rust proof everything so will be cutting away the original quarters.

                      Here is the engine that's destined for the engine bay
                      01 M5 S62 , 400 bhp , should move a 1250 kg e30 on nicely .

                      Will need to make some custom manifolds for this and also get the ecu flashed to get rid of the Can Bus stuff.

                      Other plans are to probably use a Z3M back axle and M3 evo front struts.

                      Might get the shell chemically dipped and E Coated to make a lifelong job of it also when going this far.

                      Should keep me busy for a while ��


                      Ok another bit of an update,

                      Made up some new mounts for the spit that allow me to work on the back panel and put on and off the back bumper for lining things up


                      Made a start on the rear quarter, bit by bit to get an idea of the best way of proceeding.


                      Rear quarter back on to see how things are,


                      The main problem is that the standard inner arch comes down and out to the arch lip whereas the m3 inner arch comes out all the way before coming down parallel with the outer quarter. This leaves lots of gaps between the inner arch and the quarter . This could be just filled with new steel but that would leave a lot less clearance for the tyre.
                      Here you can see the difference


                      And also see how far the quarter is away from the inner arch at the filler


                      And at the front of the arch


                      I have ordered an M3 inner arch to see how I can get on with fitting that also.

                      The M3 front bumper is held on with a different carrier than the others


                      Standard car


                      Only problem is that only the right hand side one is available from bmw so I will have to make one for the other side or modify one . A lot of e30 parts have gone NLA in the last while which is a concern.

                      Made a couple of back bumper mounts


                      There is a big difference in the pre and facelift pockets, the facelift ones are wider and are in the way for fitting the M3 bumper.

                      Prefacelift/M3


                      Facelift


                      So lots of fun ahead of me :D

                      Comment


                        #41
                        Crazy but looks like you know what your up to

                        Comment


                          #42
                          Originally posted by DaveG View Post
                          Stripped all the sealer off the bottom of the car. There were a few bits of rust hiding even though the sealer was perfect.


                          this jacking plate.. did you fab it or is it a BMW part? i searched realoem but it only came up with a 'jack fixture' which sits on the frame rails.

                          Comment


                            #43
                            wow! this is going to be so amazing. Lots of tourings seem to be rocking the m3 panels. I may have missed it but what is the color going to be?
                            Your signature picture has been removed since it contained the Photobucket "upgrade your account" image.

                            Comment


                              #44
                              nice fucking work. Thanks for sharing.

                              Comment


                                #45
                                Originally posted by evandael View Post
                                this jacking plate.. did you fab it or is it a BMW part? i searched realoem but it only came up with a 'jack fixture' which sits on the frame rails.
                                I made up a new jacking point myself, didn't check with bmw

                                Originally posted by xAZxE30x View Post
                                wow! this is going to be so amazing. Lots of tourings seem to be rocking the m3 panels. I may have missed it but what is the color going to be?
                                Grey. Silver grey,fjord,granite or maybe Ferrari silver stone Grigio. Not sure yet

                                Originally posted by wannaBMthree View Post
                                nice fucking work. Thanks for sharing.
                                Thanks

                                Comment

                                Working...
                                X