84-87 early body style Plastic Bumper
Retrofit Author:
Jordan Sarette
(second revision, rear bumper trim fabrication procedure now fully covered)
Tools:
-
3/8" Ratchet with short extension
-
Complete metric socket and wrench set
-
Flathead screwdriver
-
10mm allen wrench socket
-
1 pint plastic filler (Bondo)
-
2 pint fiberglass resin
-
1 sq. ft. woven fiberglass cloth
-
Assorted sandpaper grits (100,220,400,600)
-
Random Orbit Sander
-
Dremel with assorted sanding drums, and grinding stones
-
Multimeter or test lamp
-
Wire crimpers
Hardware:
-
Assortment of small and medium sized screws, nuts, bolts, and
washers
-
Assortment of wire crimps
-
Electrical tape or heat shrink tubing
-
88+ front valance
-
89+ complete front plastic bumper
-
89+ complete rear plastic bumper
-
89+ front turn signal connector (pair) clipped 1ft back into
the harness
-
(optional) 88+ brake duct and ducting
-
(optional) 88+ under tray
Procedure:
Before you foolishly start on this project, I want you to all
know how involving and skillful a conversion this is. It requires in
depth fabrication, modification, material forming and some
electrical work. This is not
something most people can, or should attempt. If you are not sure
that you possess the skills to properly pull the conversion
off, then leave it to the professionals. No one likes halfass
fitted body parts.
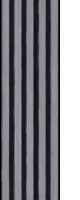
First things first. You will have to remove the stock aluminum
bumpers on your e30. Along with them the rubber shrouds, bumper
shocks, and front nose panel/valance. the front bumper is easiest,
there are 2 bolts on each frame rail that secure the bumper shock to
the frame, they should be 13mm. Remove them on both sides, and pull
the bumper off the car. Disconnect the side marker and turn signal
connectors at this time. The front shrouds are all held on by many
8mm screws, locate and remove them all. Now is a good time to remove
your headlight and kidney grills. The front valance is held on with
a assortment of fasteners, most of which 8mm screws, locate and
remove.
Good the front bumper related parts are off the car, move to the
rear.
The rear bumper is a bit harder. each shock is mounted to the
frame rail with 2 13mm bolts. 3 of which are accessed from under the
car, and the final one from in the trunk. In addition to these there
are also 1 more 13mm bolt per shock, about 8-10inches down the frame
rail. The passenger side bolt is easy to reach, but the drivers side
one is up and under the muffler. you *can* reach it without removing
the muffler, just be persistent. After all 6 bolts are removed, pull
the bumper off the car. Remove all the rubber shrouds at this time,
they are held on by a assortment of fasteners, most of which 8mm
screws, locate and remove.
Tuck any dangling turn signal or side marker wiring into the
holes they come from, you will want those out of the way. All of
which you have removed so far is now basically useless, although i
would save the bolts etc just in case. It never hurts to have a box
of spare hardware.
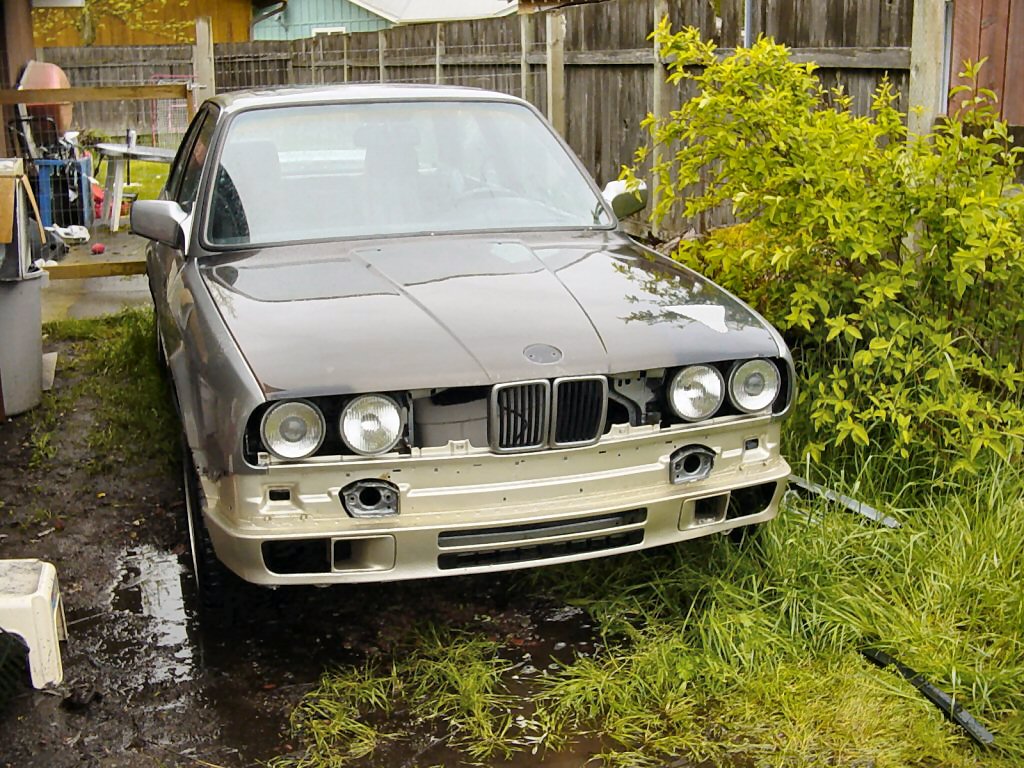
Now comes the first step of the reconstruction. Take your 88+
front valance and fit it to the front of your e30. This panel is a
direct bolt on part, no modification is needed to the valance.
However you will need to remove both tow loops on the front of your
car. Use a hacksaw, or a cutoff wheel. Whatever works best for you.
Use the hardware you
removed to fit this back onto the car. Bolt the front bumper
brackets to the side of the valance/fender. It should be fairly
simple to figure out where and how given their shape. They mount
with 2 10mm screws, with large washers. These brackets securely hold
the bumper to the side of the car when you slide it on.
Grab both
front bumper shocks (the plastic bumper ones) and bolt them on. Each
use 2 13mm bolts. The shock with the threaded hole (for the tow
loop) goes on the passenger side of the car.
Ease the bumper onto
the bumper shocks, and into the side brackets, slide it in until it
is flush. To reduce the gaps at the top, or to even them out you
will need to adjust the height of the side brackets, and the shocks.
To adjust the side brackets just slightly loosen the mounting
screws, with the bumper mounted, then move it as needed, and
retighten. Adjust the shocks as needed in the same manner.
Once
proper gap alignment is achieved you can wire up the turn signals.
Splice the old wires from your harness into the new wiring you got
from a donor car. The wire colors *should* be the same so just match
them up and crimp them. Wrap this connection on heat shrink tube, or
electrical tape for safe keeping. If by chance the wires are
different colors, determine which is the turn signal and which is
the parking lamp by turning the car on, and signaling in that
direction.
If your parking lights, and turn signals now function
properly you may tuck the wires back, and bolt up the bumper. Bolt
the bumper in place using the 2 10mm allen head bolts. Push the
bolts into the hole under the bumper, and wiggle it until it goes
all the way up and in. then tighten it.
Page 1:
Front bumper fitment
Page 2: Rear bumper fitment
Page 3: Rear bumper trim