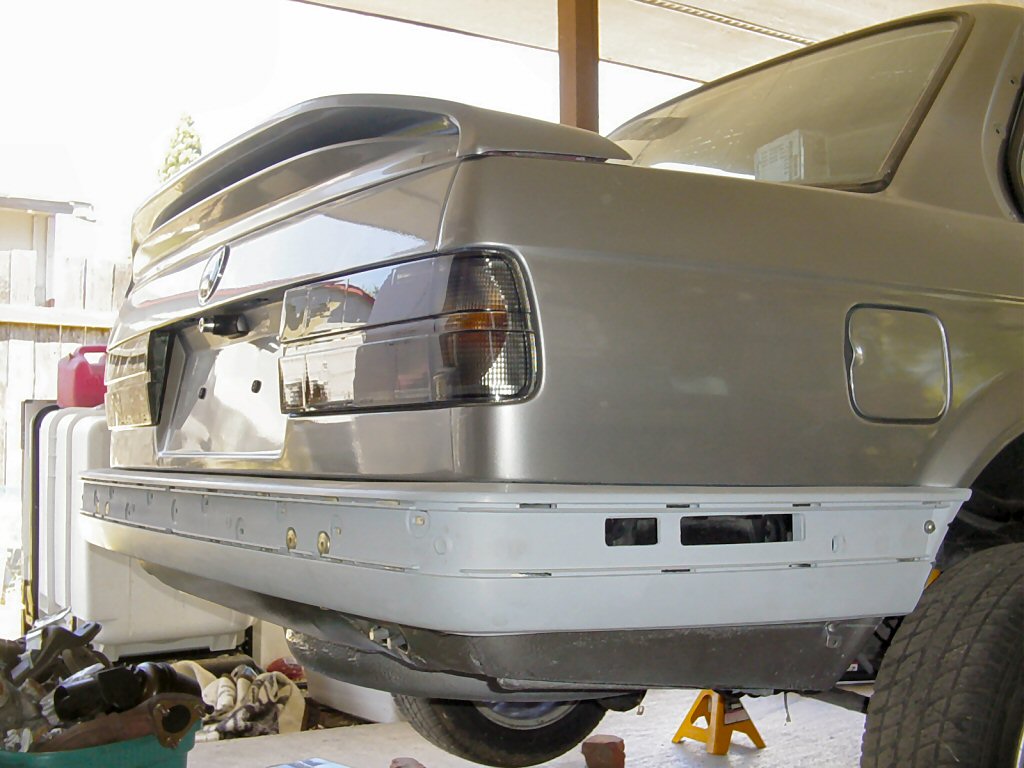
Now that the front bumper is completed the hard part of the conversion
can be worked on. the hard part being the fitment and trimming of the
rear bumper. Followed by fabrication of new end caps, secure mounts,
and the trimming and downsizing of the side bumper trim.
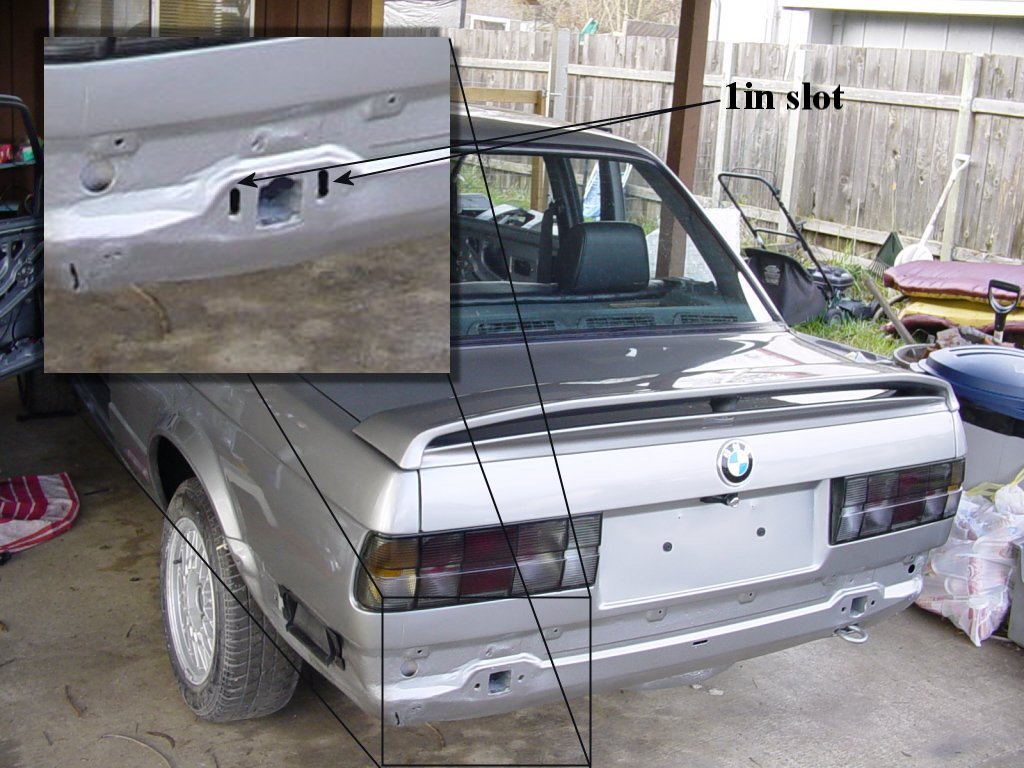
To
mount the rear shocks at the proper height level you will need to slot
each bolt hole on both sides 1in above the center of the original
hole. To do this use a Dremel with a grinding stone, or a side cut
bit. The square shock hole will also need to be rounded off at the top
to allow the shock full travel. I used a aggressive cut bastard file
for this. But it can also be done with the Dremel.
Once the holes are fully slotted bolt the bumper
shocks on. Plastic bumper shocks only use 2 bolts, they do not make
use of the 3rd hard to reach bolt in the frame rail. Only tighten the
shock bolts finger tight as next you need to fit the bumper. Slide the
bumper on the shocks, and thread the 2 10mm bolts up and in,
tightening them. Now push up on the bumper until it is flush with the
fenders and rear panel on the top. Have a assistant tighten the shock
bolts for you while you hold it flush. What you are doing right now is
setting the gap. Make it as big or as little as you please, if the gap
is too big and the shocks will not push up anymore, more slotting may
be required.
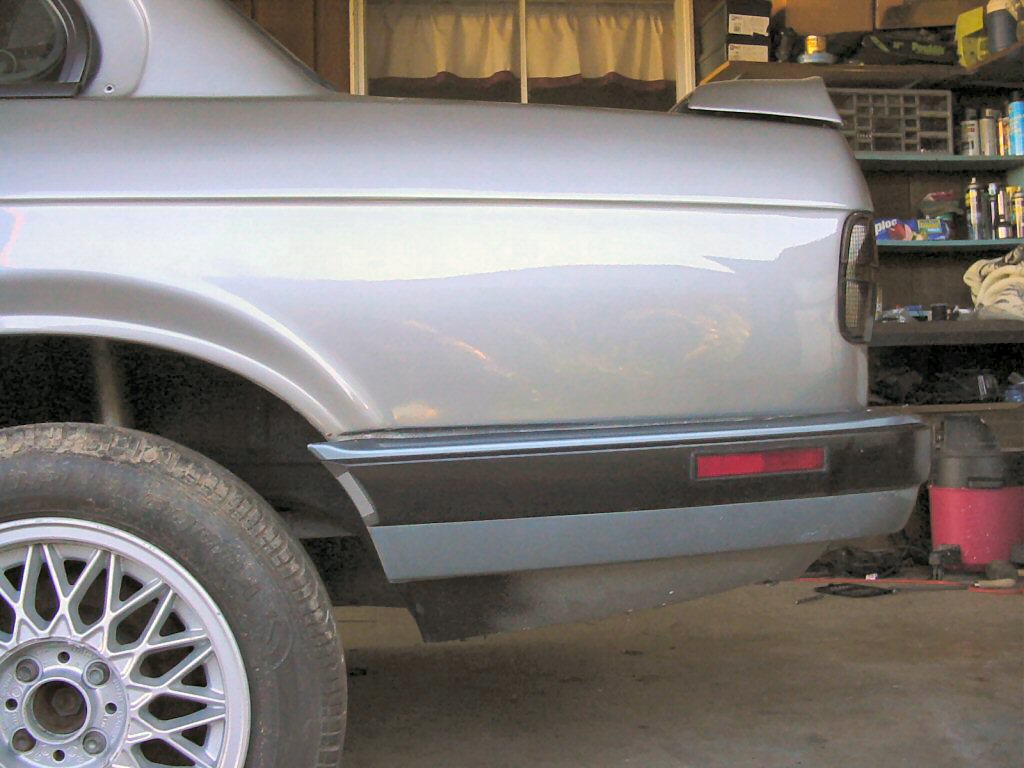
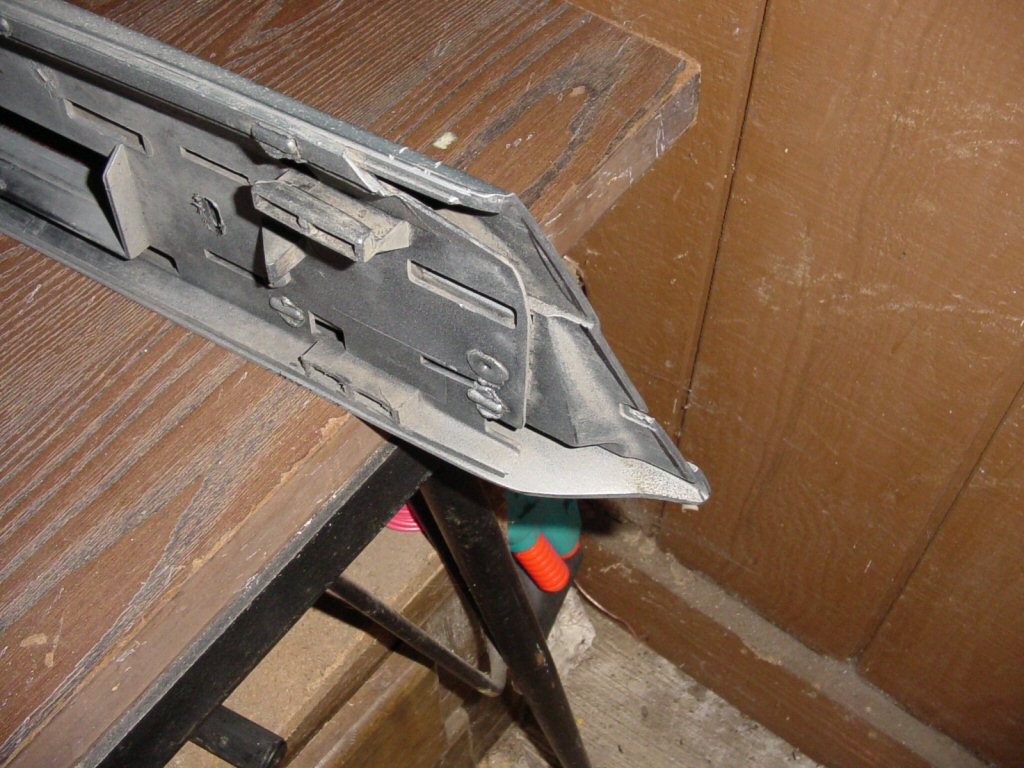
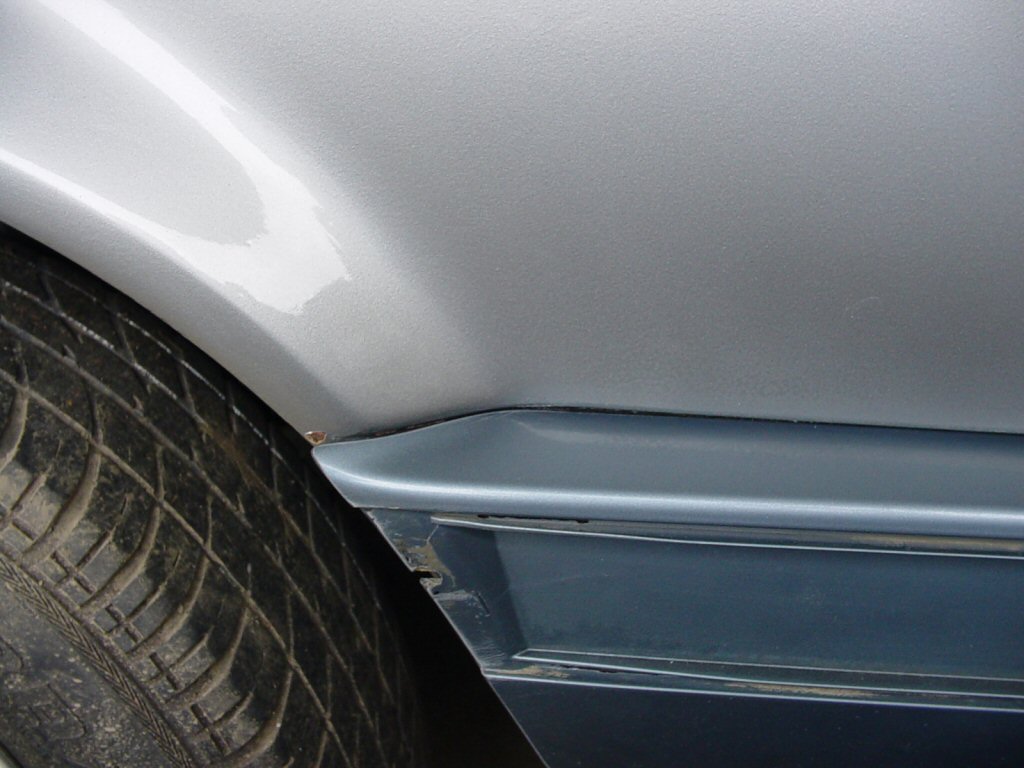
Once
desired gap is achieved hold up the drooping sides of the rear bumper,
and take a look at where they meet the fender well. The bumper sticks
into the fender well about 1/2inch. Tape the bumper up where it
belongs if needed and using a Sharpie mark the area of the bumper to
be trimmed. Basically what you want to do is follow the arch of the
wheel well on the bumper with the Sharpie. Repeat this for the other
side of the car. Be exact! and make a mental note about the line. do
you need to cut all the marker off? or stop at it? Following me still?
good onward!
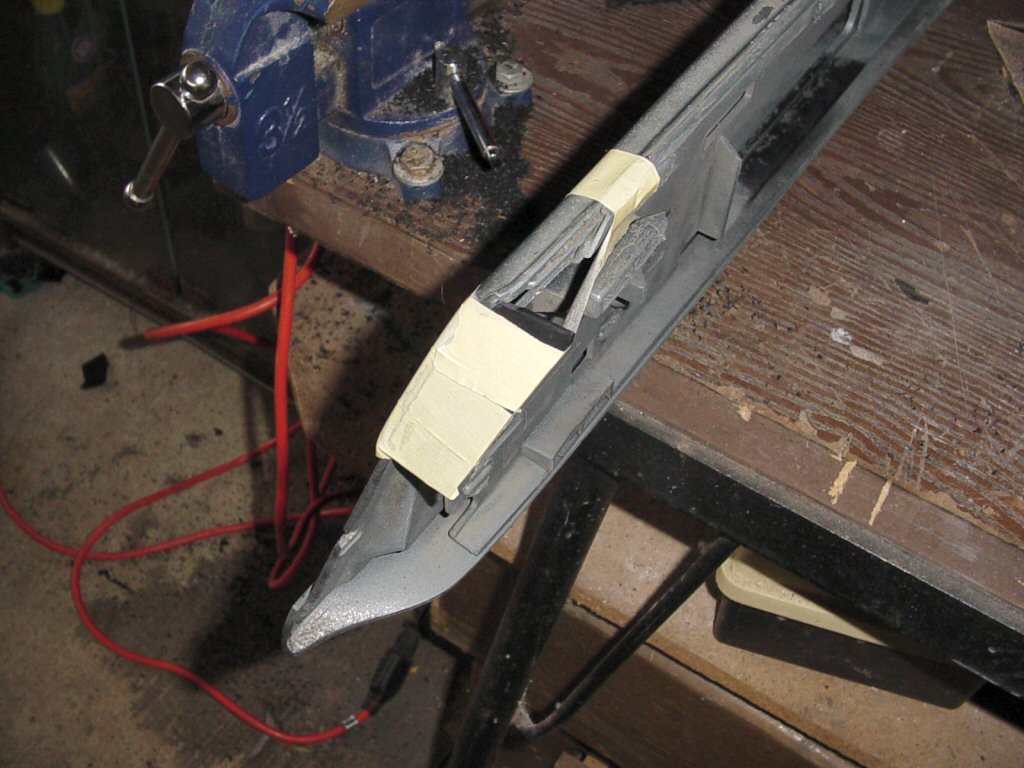
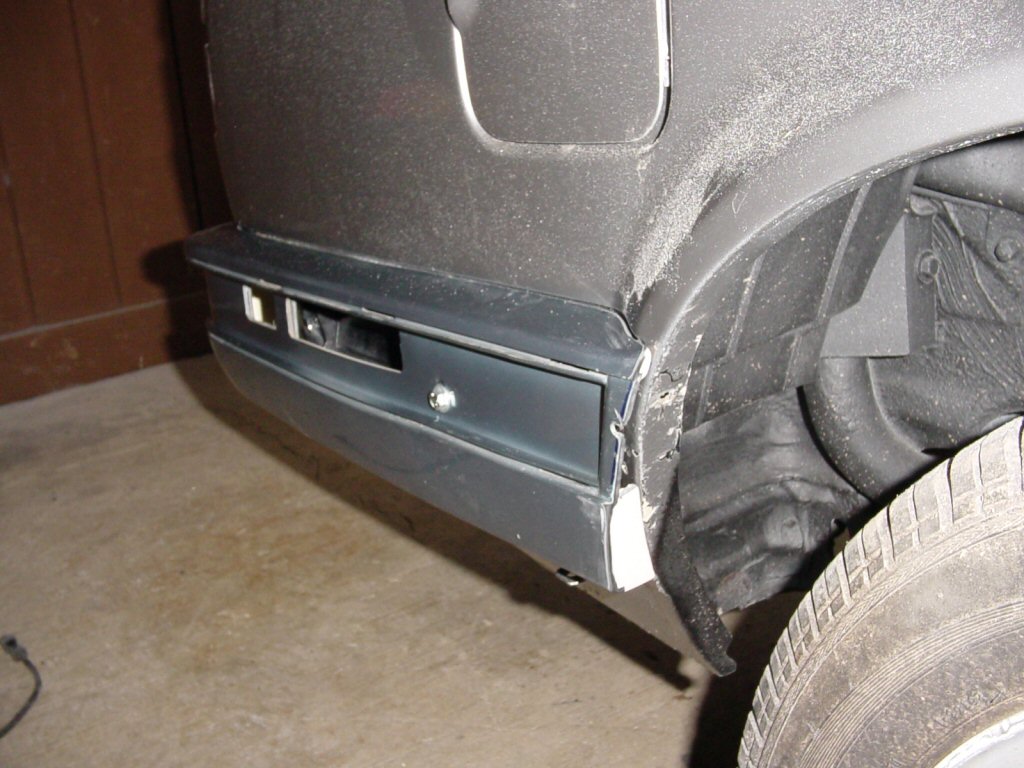
Unbolt
the rear bumper and remove it. Set it on a large, flat bench. remove
the bumper molding and start cutting off the unwanted material with
the Dremel until its very close to the line. Place the bumper back
onto its shocks, and bolt it up again. tape the ends again if needed,
and sit down aside one of the wheel wells with the Dremel in hand.
Does the bumper still protrude into the wheel well? if so take this
time to trim it down with a sanding bit on low speed. trim until it is
perfectly in line. Repeat for the other side. Once again remove the
bumper, and set it on the bench.
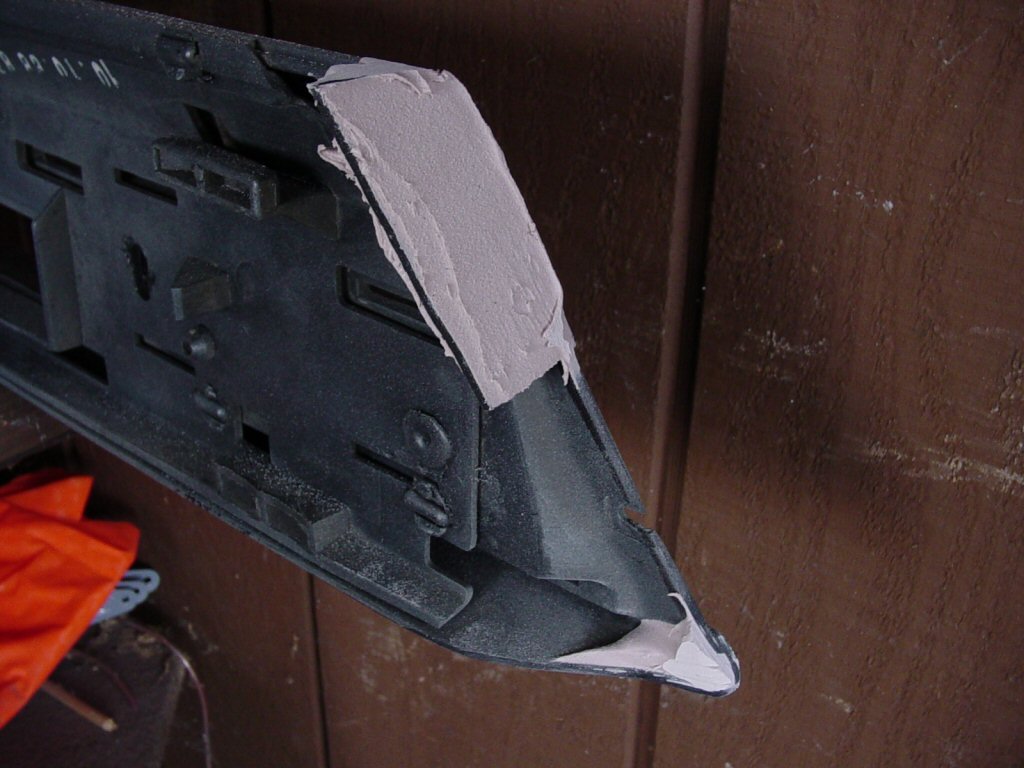
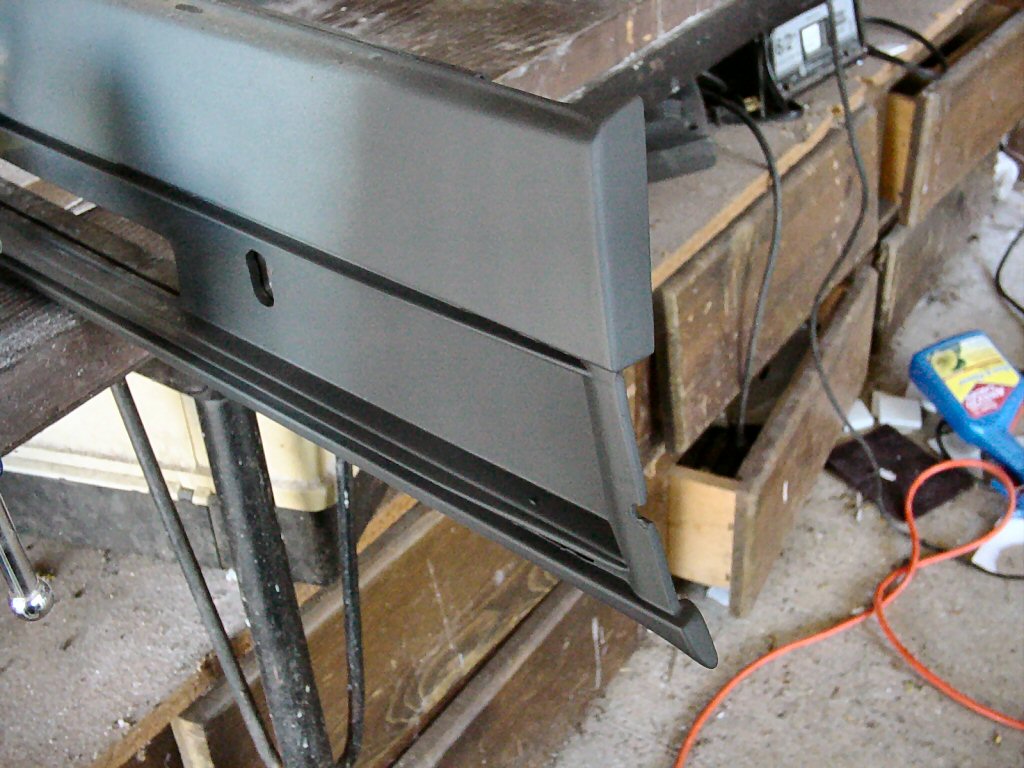
Now it is time to fabricate the end caps that will
fill the large gap between the lower rear valance and the bumper. This
cap will be about 1/4in wide up top, and nearly 1in wide down bottom.
There are no templates for this part, it is up to you to fabricate
them both. For my end caps I used 1/8in ABS plastic, roughly the same
thickness as the bumper itself. Hold your plastic up to the bumper
(while mounted in place on the car) and mark it with a Sharpie as to
where it needs to be cut out. After it is cut out sand it down slowly
to a perfect fit. Then take the perfect end cap, and use it as a
stencil on another slab of plastic to make one for the other side.
Once both fit perfectly again removed the bumper and set it on the
bench.
Both
end caps now need to be glued to the bumper. For this you should use a
epoxy. Glue them in the place they should be inside the bumper end,
and tape them so they stay in place. Let the glue FULLY SET UP as per
the directions on the epoxy product box. I would recommend you let it
dry overnight. When the glue has full cured remove the tape and test
fit the bumper. If it needs trimming do so now, if all is well then
remove it and await the next stage.
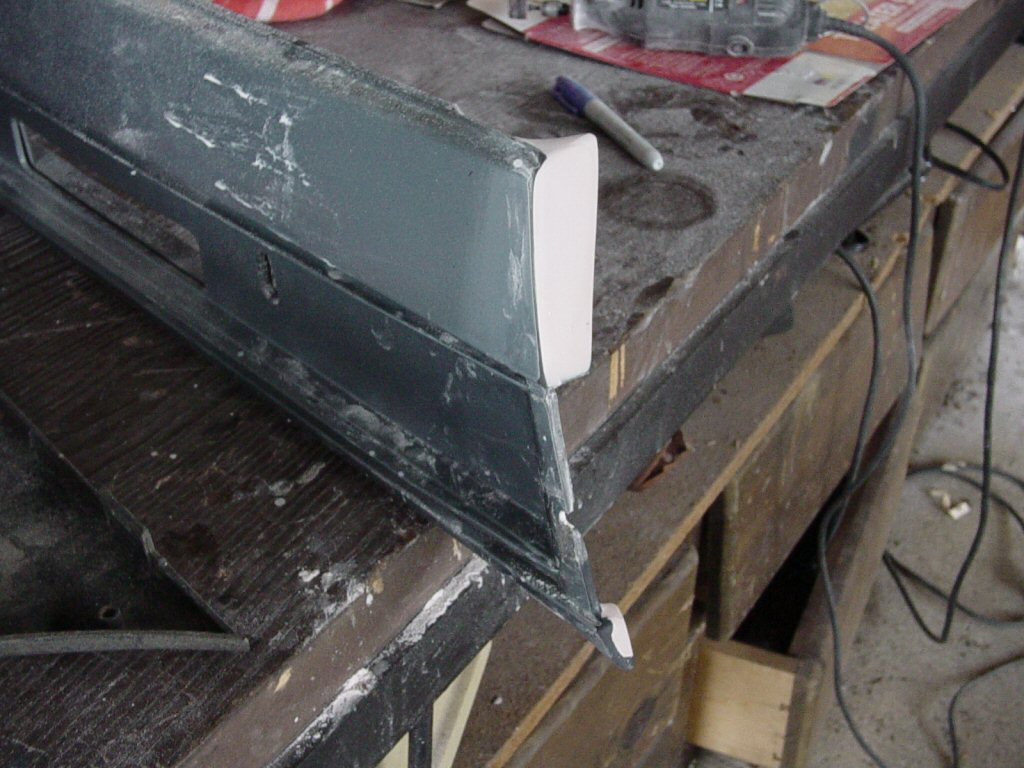
Now
you need to round the sharp edges your trimming has created, use
sandpaper to match the roundness of the rest of the bumpers lines. Now
is also a good time to spread a thin layer of plastic filler (Bondo)
over the surface of the end cap, as to smooth it properly. Also create
a rounded bottom corner brace with the filler, refer to pictures for
this. Allow the filler to cure, then sand it down and shape as needed.
Apply another coat and smooth for perfection. Scruff the insides of
your end caps, along with the surrounding insides of your bumper with
100grit sand paper. Lay 2-3 layers of fiberglass in the back. This
fiberglass will serve to provide structural integrity to your end
caps. When laying the fiberglass be sure to go heavy on the resin,
more (to a point) is always better. Avoid puddling of excess resin,
but make sure it is fully impregnated.
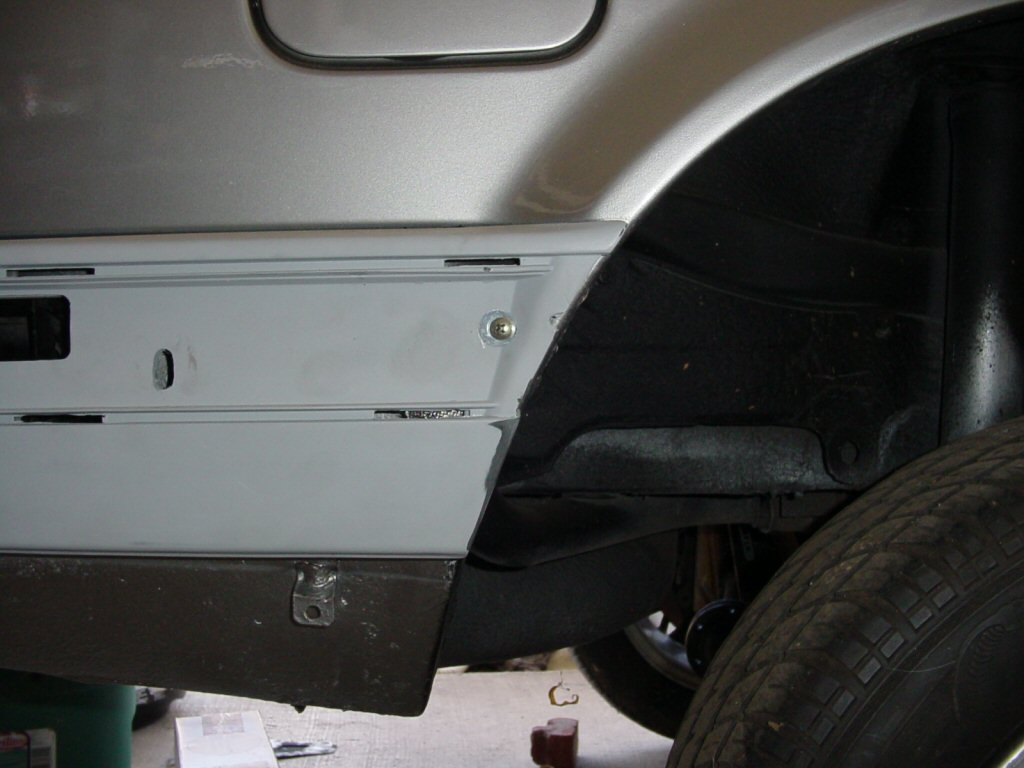
That should just about do it. Secure the front of
the rear bumper to the body using bolts. Make use of the holes already
in the rear valance. Mount the bolts under where the molding would be
so they are hidden.
Snap the rear bumper molding back on, and head to part
3.