
Hi all,
I started a rebuild of an '85 coupe, purchased Nov '11, with the intention of making a "Tarmac Rally" car capable of doing some track work as well. I have been going along slowly and thought I should share my build with other enthusiasts as I've often spent hours on here trawling through tech articles and other peoples threads. I'll try to stick to the timeline for the project as much as possible. Though it must be said from the outset that I did jump about a bit. It is not the most logical sequence for rebuilding a car, but often if was a case of lots of time no money, or money but no time.
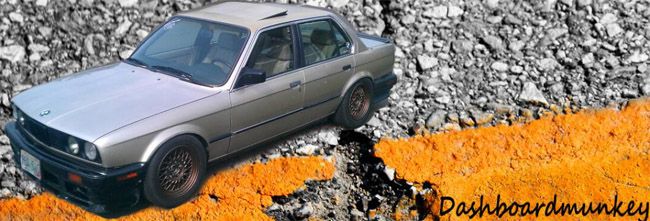
The Car

Apologies, some of the photos in this thread are taken in different locations as I had to move house halfway, and I use the term loosely, through the project. Also, I didn't take as many photos as I should have and many of the parts are already installed at time of writing.
I had previously spent some time and considerable money on restoring/improving my E34 525i, (M20B25) and had already waded through all kinds of crap to find what worked and what didn't as well as where to get things. Another story not for this forum. Anyway........
I wanted this build to still be street register-able from the out set so I had to modify some of my original ideas. I spoke to the local TAC, (traffic advisory council) and placed a proposal for my build with them and then had to wait to see what they decided before I could start. The Modifications proposed weren't that extraordinary, but the MVR can be anal at times about the silliest things.
The Plan
Hardcore NA M20.
Electronics overhaul and update.
Car stripped to it's bare bones and lightened wherever possible.
Full 6 point welded in roll cage.
Racing livery
and of course Shiny things ;p
My goal is to try to get 300hp/tonne, and some will scoff. This is not inconceivable given the amount of weight that can be removed, some clever intake mods, a good set of extractors and a hi-flow exhaust, and an ECU and Ignition system up to the task. Ultimately the Dyno and the Scales will tell.
I have previously read the M20 NA thread that turned into a D@#k measuring contest and would appreciate anyone who wants to get back into that to find something better to do with their time!:hitler:
Now that that's out of the way............Down to the build.
After waiting for about three weeks for the TAC to respond I got a letter in the mail saying that I could do as proposed, no exceptions. Good Times!
The Car I bought was a 323i, and I wanted to go with a 325 as a base, so I bought a Donor motor from a wreckers and set to work.

Engine Parts
Ireland Engineering 3.1L stroker Kit.
H-Beam Rods
Custom 10.5:1 Ross Racing Pistons and Rings
ARP Main Bolts
Coated Rod and Main Bearings
Aluminium Single Mass Flywheel
XTR Stage 3, 6 puck sprung clutch
Aluminium Balance wheel and crank pulleys
Oil Pan Baffle and Crank scrapper/windage tray
IE 304deg Cam
OS Stainless Steel valves
Schrick Competition Springs
Heavy Duty rockers
ARP head studs
All new valve guides, seals, retainers, collets and eccentrics.
NB: No I don't have bottomless pockets, I took along time to gather all these bits. I figure if your going to do it, do it once...........do it right.
I fully stripped the engine and began clearancing the block to receive the 3.1L stroker crankshaft, conrods would hit the bottom of the bore if not clearanced. I also stripped the head as I was replacing the entire valvetrain.
Whilst I had the die grinder out I also cleaned up the intake runners where they meet the head. The old manifold gaskets had left a very nice impression of where the castings didn't meet up, so I simply enlarged the runners to suit.
I may have upset the purists here but my thinking was sound. intake is all about getting as much air into the cylinder as possible, laminar flow is the type of airflow, laminar flow is best achieved when the air has as few interruptions as possible. QED

Once this was was done I sent the block and head to the Machinist Shop along with all my other new goodies for a deck, bore, hone and balance of the bottom end. Straighten, deck, pressure test, then valve guides, seals, springs installed.
It was never going to be enough to just throw horsepower at the car and expect it to get me onto any kind of winners podium. Stopping and Handling are equally important, if not more so.
The 323i I bought had the Bilstien handling pack in it from the factory, uprated springs shocks and swaybars, and I really didn't want to change this as a first option. Also after my splurge on the engine, I didn't have the money for coil-overs etc. But that didn't mean I was going to ignore handling either. I noticed that the car had a lot of negative camber, inside edges of tyres bald, outsides near new. This would be fine at the track, maybe, but not to drive any other time. 2.5deg is OK, 5.5 Bad.
Again I turned to Ireland engineering, they a couple of options for rear toe/camber adjustment, eccentric bolts and plates, or a multi-adjustable set of toothed plates. I went with the latter.
This of course meant getting the rear subframe out, what better time to replace all the tired old bushes with fancy new urethane ones :)
Sorry no photos of this process, suffice to say, it was a pain in the.... a very forgettable job that i am glad is behind me. the final result is awesome though. simply loosen the four swingarm bolts and adjust to suit, then tighten. Providing your tabs are welded on the same on both sides, you can easily duplicate whatever settings you want.
I'll leave the thread here and come back to it soon. I have quite a lot left to go to get up to date.
Cheers
I started a rebuild of an '85 coupe, purchased Nov '11, with the intention of making a "Tarmac Rally" car capable of doing some track work as well. I have been going along slowly and thought I should share my build with other enthusiasts as I've often spent hours on here trawling through tech articles and other peoples threads. I'll try to stick to the timeline for the project as much as possible. Though it must be said from the outset that I did jump about a bit. It is not the most logical sequence for rebuilding a car, but often if was a case of lots of time no money, or money but no time.
The Car
Apologies, some of the photos in this thread are taken in different locations as I had to move house halfway, and I use the term loosely, through the project. Also, I didn't take as many photos as I should have and many of the parts are already installed at time of writing.
I had previously spent some time and considerable money on restoring/improving my E34 525i, (M20B25) and had already waded through all kinds of crap to find what worked and what didn't as well as where to get things. Another story not for this forum. Anyway........
I wanted this build to still be street register-able from the out set so I had to modify some of my original ideas. I spoke to the local TAC, (traffic advisory council) and placed a proposal for my build with them and then had to wait to see what they decided before I could start. The Modifications proposed weren't that extraordinary, but the MVR can be anal at times about the silliest things.
The Plan
Hardcore NA M20.
Electronics overhaul and update.
Car stripped to it's bare bones and lightened wherever possible.
Full 6 point welded in roll cage.
Racing livery
and of course Shiny things ;p
My goal is to try to get 300hp/tonne, and some will scoff. This is not inconceivable given the amount of weight that can be removed, some clever intake mods, a good set of extractors and a hi-flow exhaust, and an ECU and Ignition system up to the task. Ultimately the Dyno and the Scales will tell.
I have previously read the M20 NA thread that turned into a D@#k measuring contest and would appreciate anyone who wants to get back into that to find something better to do with their time!:hitler:
Now that that's out of the way............Down to the build.
After waiting for about three weeks for the TAC to respond I got a letter in the mail saying that I could do as proposed, no exceptions. Good Times!
The Car I bought was a 323i, and I wanted to go with a 325 as a base, so I bought a Donor motor from a wreckers and set to work.
Engine Parts
Ireland Engineering 3.1L stroker Kit.
H-Beam Rods
Custom 10.5:1 Ross Racing Pistons and Rings
ARP Main Bolts
Coated Rod and Main Bearings
Aluminium Single Mass Flywheel
XTR Stage 3, 6 puck sprung clutch
Aluminium Balance wheel and crank pulleys
Oil Pan Baffle and Crank scrapper/windage tray
IE 304deg Cam
OS Stainless Steel valves
Schrick Competition Springs
Heavy Duty rockers
ARP head studs
All new valve guides, seals, retainers, collets and eccentrics.
NB: No I don't have bottomless pockets, I took along time to gather all these bits. I figure if your going to do it, do it once...........do it right.
I fully stripped the engine and began clearancing the block to receive the 3.1L stroker crankshaft, conrods would hit the bottom of the bore if not clearanced. I also stripped the head as I was replacing the entire valvetrain.
Whilst I had the die grinder out I also cleaned up the intake runners where they meet the head. The old manifold gaskets had left a very nice impression of where the castings didn't meet up, so I simply enlarged the runners to suit.
I may have upset the purists here but my thinking was sound. intake is all about getting as much air into the cylinder as possible, laminar flow is the type of airflow, laminar flow is best achieved when the air has as few interruptions as possible. QED
Once this was was done I sent the block and head to the Machinist Shop along with all my other new goodies for a deck, bore, hone and balance of the bottom end. Straighten, deck, pressure test, then valve guides, seals, springs installed.
It was never going to be enough to just throw horsepower at the car and expect it to get me onto any kind of winners podium. Stopping and Handling are equally important, if not more so.
The 323i I bought had the Bilstien handling pack in it from the factory, uprated springs shocks and swaybars, and I really didn't want to change this as a first option. Also after my splurge on the engine, I didn't have the money for coil-overs etc. But that didn't mean I was going to ignore handling either. I noticed that the car had a lot of negative camber, inside edges of tyres bald, outsides near new. This would be fine at the track, maybe, but not to drive any other time. 2.5deg is OK, 5.5 Bad.
Again I turned to Ireland engineering, they a couple of options for rear toe/camber adjustment, eccentric bolts and plates, or a multi-adjustable set of toothed plates. I went with the latter.
This of course meant getting the rear subframe out, what better time to replace all the tired old bushes with fancy new urethane ones :)
Sorry no photos of this process, suffice to say, it was a pain in the.... a very forgettable job that i am glad is behind me. the final result is awesome though. simply loosen the four swingarm bolts and adjust to suit, then tighten. Providing your tabs are welded on the same on both sides, you can easily duplicate whatever settings you want.
I'll leave the thread here and come back to it soon. I have quite a lot left to go to get up to date.
Cheers


Comment