
A hydraulic handbrake is a great upgrade for drifting and rally racing. This system taps into your existing brake system to utilize hydraulic fluid to close the rear calipers when you pull the lever. If you plan to keep your car street able than DO NOT remove the factory handbrake.
Parts needed:
-Universal Hydro Handbrake from ASD 16” 5/8 cylinder with hardware kit(This is the proper sized cylinder for the factory e30 brakes)
-2 sections of 3/16” brake hard line( 5-10ft each depending on prior experience making flares. I recommend getting more if you have not flared a brake line before so you can practice)
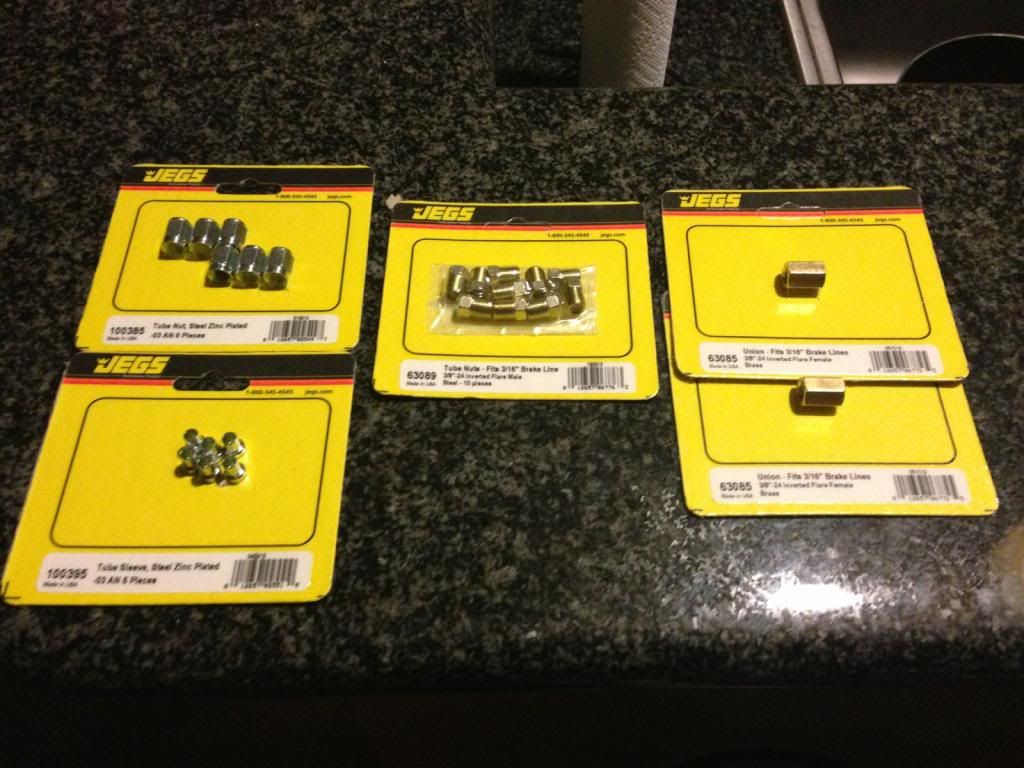
Ordered from JEGS:
#555-100385 -3AN tube nut for 3/16 line
#555-100395 -3AN tube sleeve for 3/16 line
#555-63085 3/8”-24 union (x2)
#555-63089 3/8”-24 nuts
Special tools:
-Double flaring kit(only use double flares)
-3/16 pipe bender http://www.amazon.com/gp/product/B00...?ie=UTF8&psc=1
-pipe cutter http://www.amazon.com/gp/product/B00...?ie=UTF8&psc=1
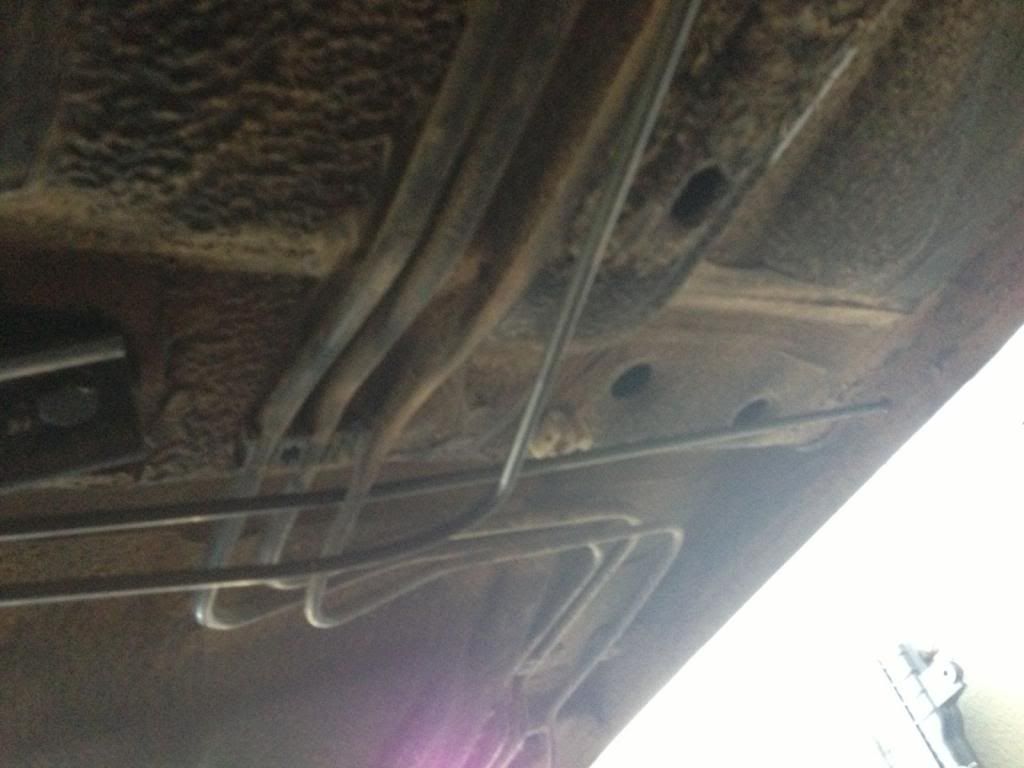
Okay lets get started. This application of a Hydro handbrake will put the handbrake in line with the rear brakes. All we are doing here is cutting the 3/16” line that runs underneath the driver side of the car, plumbing a line to the inlet of the hydro handbrake, and plumbing a line from the hydro handbrake, back to the line underneath the car.
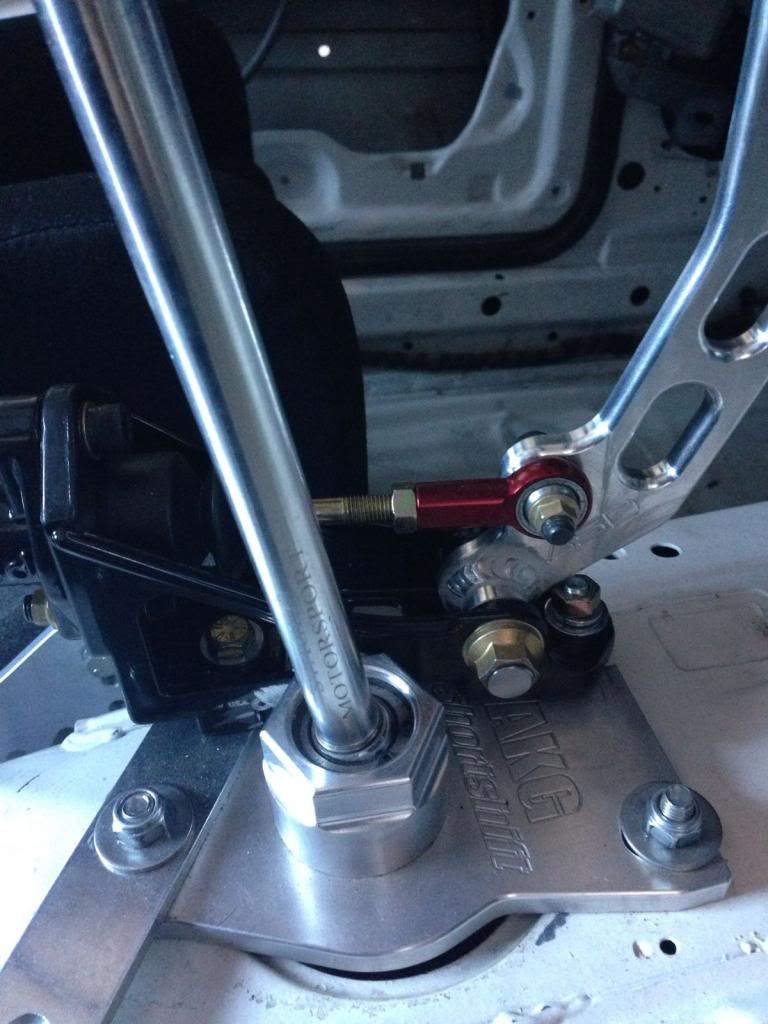
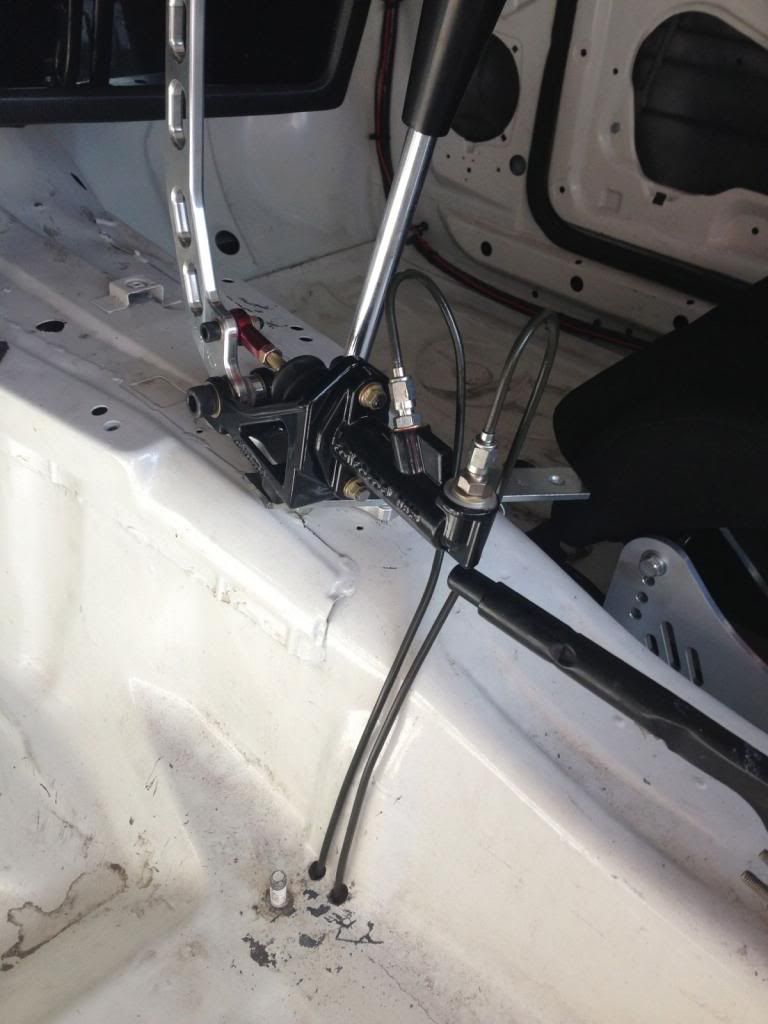
First we need to mount the hydro handbrake. This is going to be different between everyone depending on if you will be using your center console, what shifter you are using, etc. For me the easiest way was to place the front mount on one of the AKG baseplate bolts, and using a bracket to come off of the rear baseplate bolt. Figure out the best way for you, weather it be drilling into the transmission tunnel, or welding a plate to mount it on. BE MINDFULL of clearing your shifter, factory ebrake, seat, steering wheel, etc when installing.
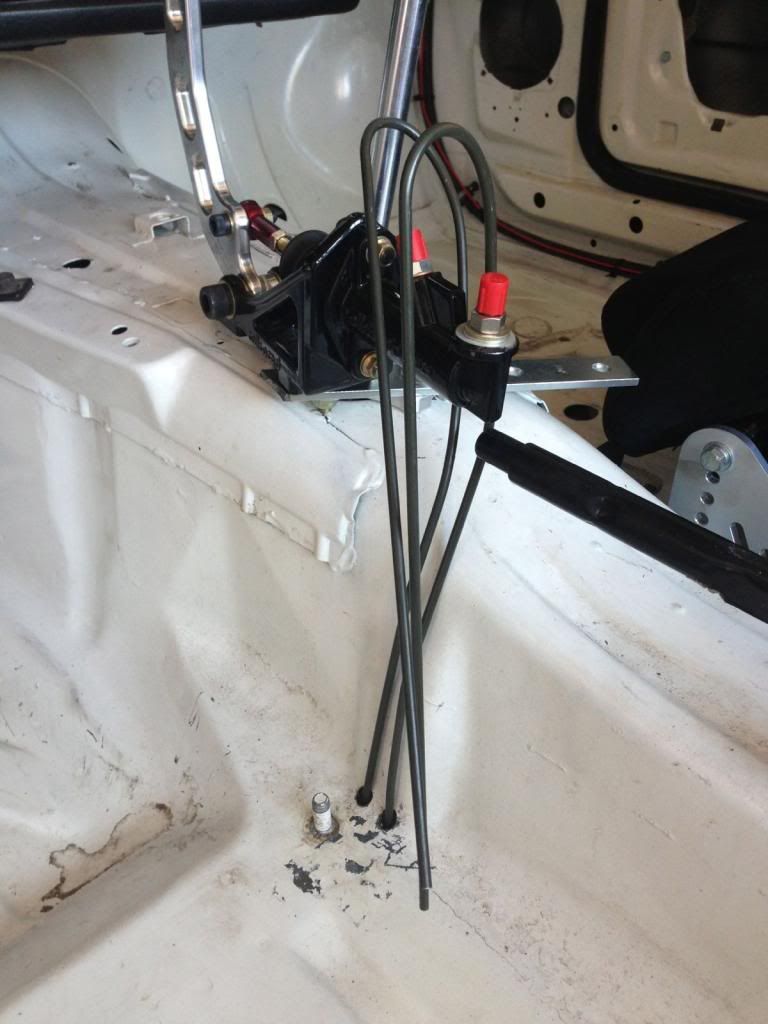
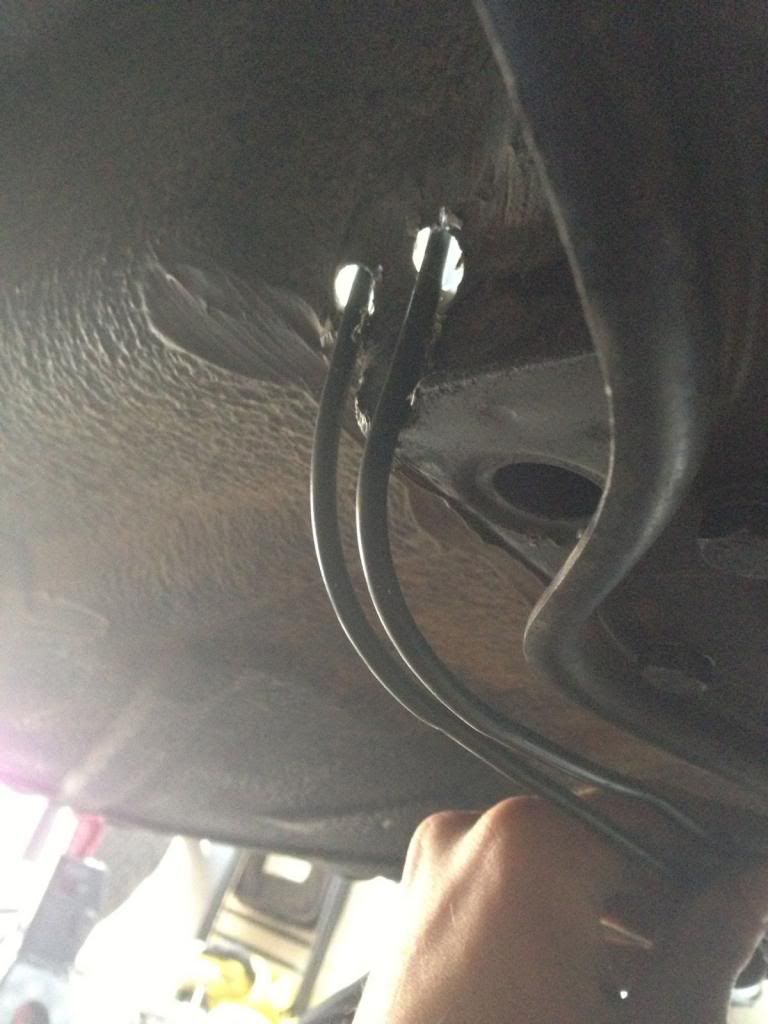
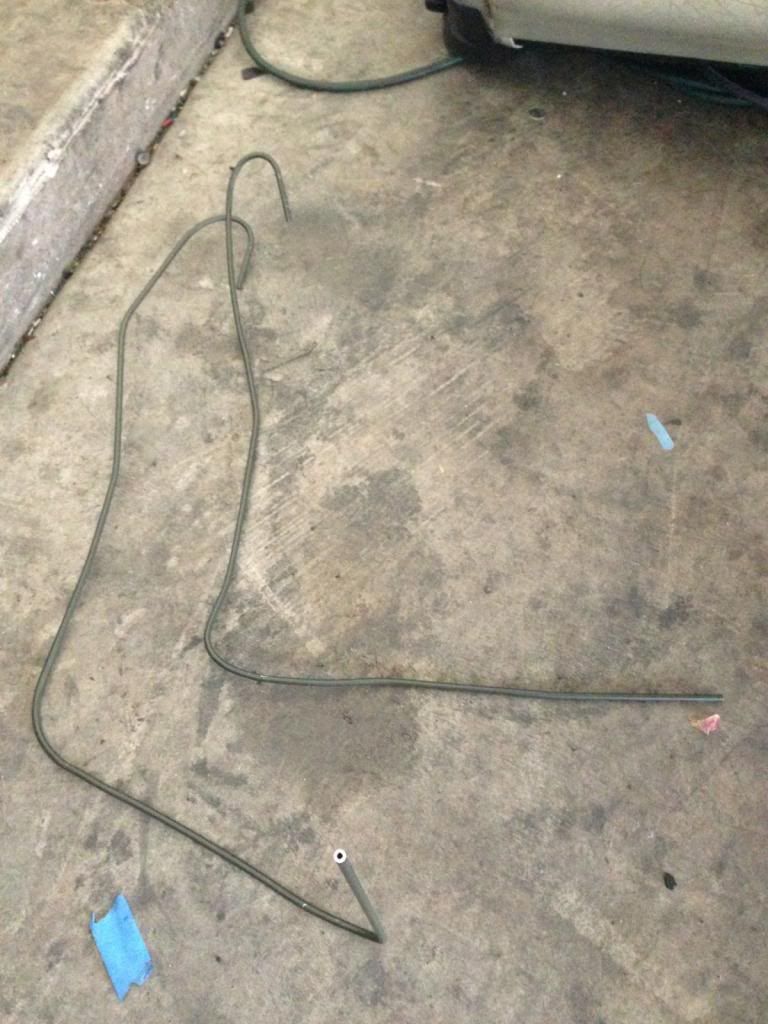
Bending and cutting the 3/16” hard line is also another part you will need to freestyle, depending on where your handbrake is. Generally start by drilling two holes in the floor. Take your brake hard line and make a u-bend up near the hydro handbrake, then place the tubing through the floor and continue making your bends until you are roughly where you will make your cut on the original brake line underneath the car.
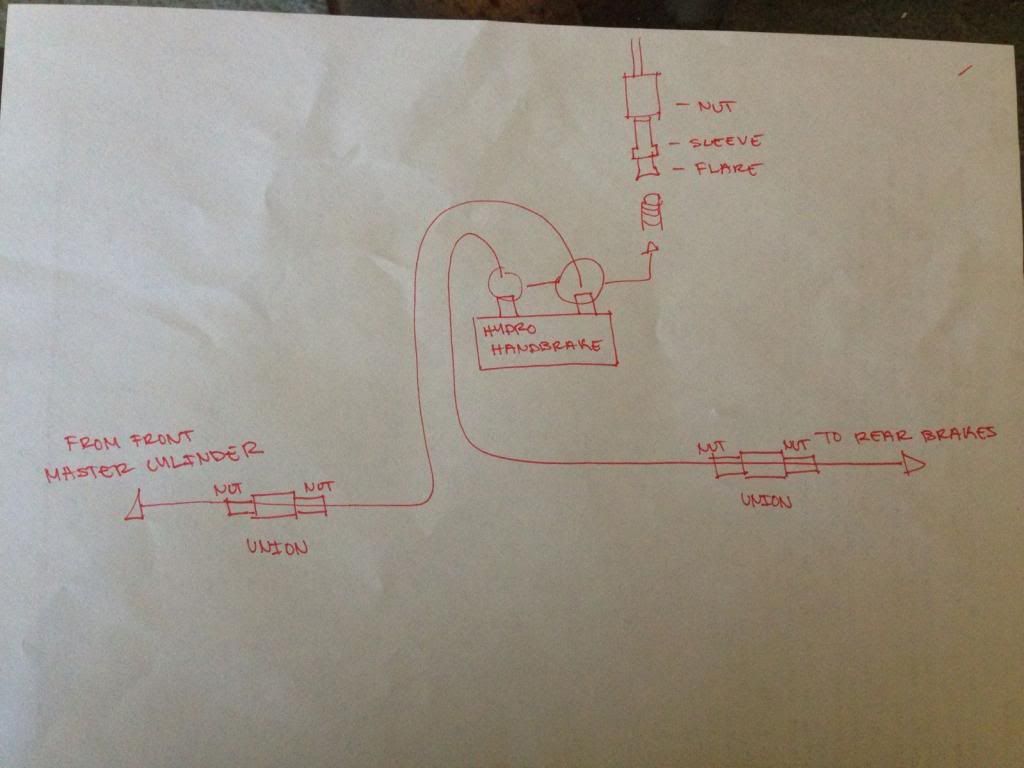
IMPORTANT: You will create one line coming from the FRONT of the car to the REAR fitting on the handbrake. The next line will go from the FRONT fitting on the handbrake to the REAR brakes. This is something that a lot of people get confuse about, it is a little counterintuitive but that’s just the way it is.
Now cut the hard line to the approximate length you think will be best, and remove them from the car to start making your flares.
MASTER DIAGRAM:
TO MAKE THE FLARES: Honestly the best way to learn is youtube, search for brake line double flare and you will find plenty of videos. A video will explain things a million times better than words and pictures. If you have never flared brake lines before I recommend you get some extra hard line to practice and get a feel for what you are doing.
TIPS: PLACE THE NUT ON THE LINE BEFORE YOU FLARE IT, OR ELSE YOUR GONNA HAVE A BAD DAY!
USE BRAKE FLUID TO LUBRICATE THE TOOL WHEN MAKING THE FLARE, MAKES IT MUCH EASIER.
YOU WILL NEED TO MAKE TWO FLARES UNDERNEATH THE CAR, GET SOMETHING TO SUPPORT THE TOOL AS YOU MAKE THE FLARS SO YOU DON’T BEND THE LINES TOO MUCH.
FOR THE FLARES AT THE HANDBRAKE: This is where you will be using the #555-100385 -3AN tube nut as well as #555-100395 -3AN tube sleeve. The nut goes on first, then the sleeve, then create the flare.
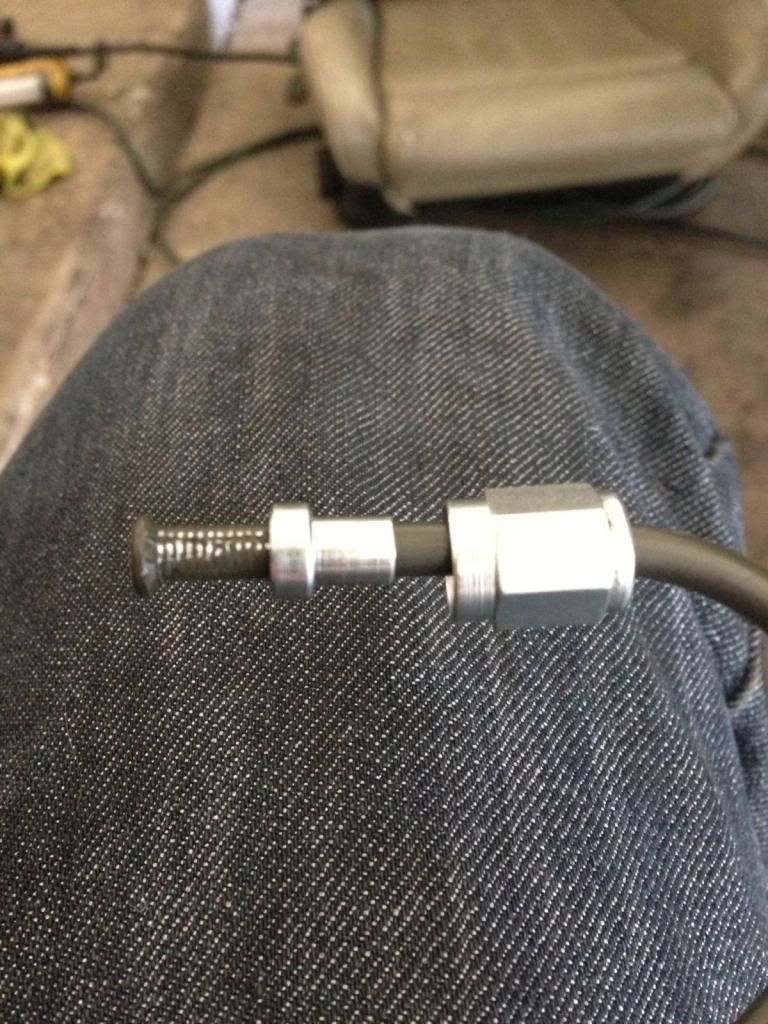
FOR FLARES AT THE FACTORY LINES: You will use 555-63089 3/8”-24 nuts and the #555-63085 3/8”-24 union to make your connections.
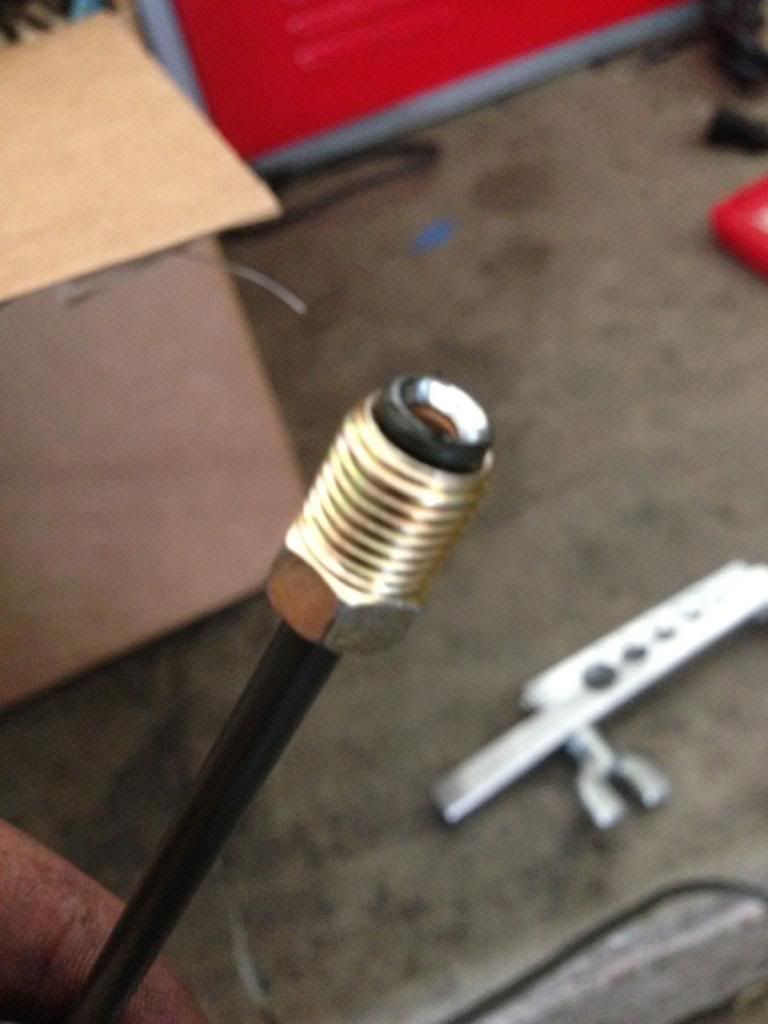
Here are my two unions finished.

Fittings at the handbrake.
The final step is to bleed your brakes exactly like normal, then go do this: http://www.youtube.com/watch?v=eUyfiIW_TkA
If anyones has any questions feel free to pm me.
Parts needed:
-Universal Hydro Handbrake from ASD 16” 5/8 cylinder with hardware kit(This is the proper sized cylinder for the factory e30 brakes)
-2 sections of 3/16” brake hard line( 5-10ft each depending on prior experience making flares. I recommend getting more if you have not flared a brake line before so you can practice)
Ordered from JEGS:
#555-100385 -3AN tube nut for 3/16 line
#555-100395 -3AN tube sleeve for 3/16 line
#555-63085 3/8”-24 union (x2)
#555-63089 3/8”-24 nuts
Special tools:
-Double flaring kit(only use double flares)

-3/16 pipe bender http://www.amazon.com/gp/product/B00...?ie=UTF8&psc=1
-pipe cutter http://www.amazon.com/gp/product/B00...?ie=UTF8&psc=1
Okay lets get started. This application of a Hydro handbrake will put the handbrake in line with the rear brakes. All we are doing here is cutting the 3/16” line that runs underneath the driver side of the car, plumbing a line to the inlet of the hydro handbrake, and plumbing a line from the hydro handbrake, back to the line underneath the car.
First we need to mount the hydro handbrake. This is going to be different between everyone depending on if you will be using your center console, what shifter you are using, etc. For me the easiest way was to place the front mount on one of the AKG baseplate bolts, and using a bracket to come off of the rear baseplate bolt. Figure out the best way for you, weather it be drilling into the transmission tunnel, or welding a plate to mount it on. BE MINDFULL of clearing your shifter, factory ebrake, seat, steering wheel, etc when installing.
Bending and cutting the 3/16” hard line is also another part you will need to freestyle, depending on where your handbrake is. Generally start by drilling two holes in the floor. Take your brake hard line and make a u-bend up near the hydro handbrake, then place the tubing through the floor and continue making your bends until you are roughly where you will make your cut on the original brake line underneath the car.
IMPORTANT: You will create one line coming from the FRONT of the car to the REAR fitting on the handbrake. The next line will go from the FRONT fitting on the handbrake to the REAR brakes. This is something that a lot of people get confuse about, it is a little counterintuitive but that’s just the way it is.
Now cut the hard line to the approximate length you think will be best, and remove them from the car to start making your flares.
MASTER DIAGRAM:
TO MAKE THE FLARES: Honestly the best way to learn is youtube, search for brake line double flare and you will find plenty of videos. A video will explain things a million times better than words and pictures. If you have never flared brake lines before I recommend you get some extra hard line to practice and get a feel for what you are doing.
TIPS: PLACE THE NUT ON THE LINE BEFORE YOU FLARE IT, OR ELSE YOUR GONNA HAVE A BAD DAY!
USE BRAKE FLUID TO LUBRICATE THE TOOL WHEN MAKING THE FLARE, MAKES IT MUCH EASIER.
YOU WILL NEED TO MAKE TWO FLARES UNDERNEATH THE CAR, GET SOMETHING TO SUPPORT THE TOOL AS YOU MAKE THE FLARS SO YOU DON’T BEND THE LINES TOO MUCH.
FOR THE FLARES AT THE HANDBRAKE: This is where you will be using the #555-100385 -3AN tube nut as well as #555-100395 -3AN tube sleeve. The nut goes on first, then the sleeve, then create the flare.
FOR FLARES AT THE FACTORY LINES: You will use 555-63089 3/8”-24 nuts and the #555-63085 3/8”-24 union to make your connections.
Here are my two unions finished.
Fittings at the handbrake.
The final step is to bleed your brakes exactly like normal, then go do this: http://www.youtube.com/watch?v=eUyfiIW_TkA
If anyones has any questions feel free to pm me.


Comment