Announcement

Collapse
No announcement yet.

Simple sedan build

Collapse
X
 
  • Filter
  • Time
  • Show
Clear All
new posts

    #31
    Originally posted by leegf View Post
    amazing, inspiring stuff! you're obviously not new at this.
    Originally posted by Simon S View Post
    Holy moly !
    Thread title threw me off too..
    Pleasantly suprised. Excellent build quality Thanks for sharing !
    I like things that are understated so the title seemed appropriate at the time. Glad you guys had a good surprise in the post.

    Both yesterday and today's update -

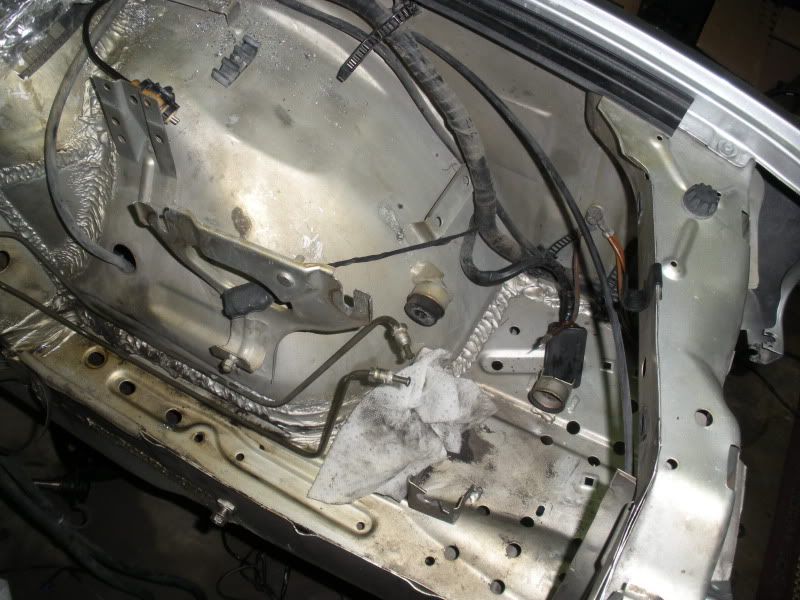
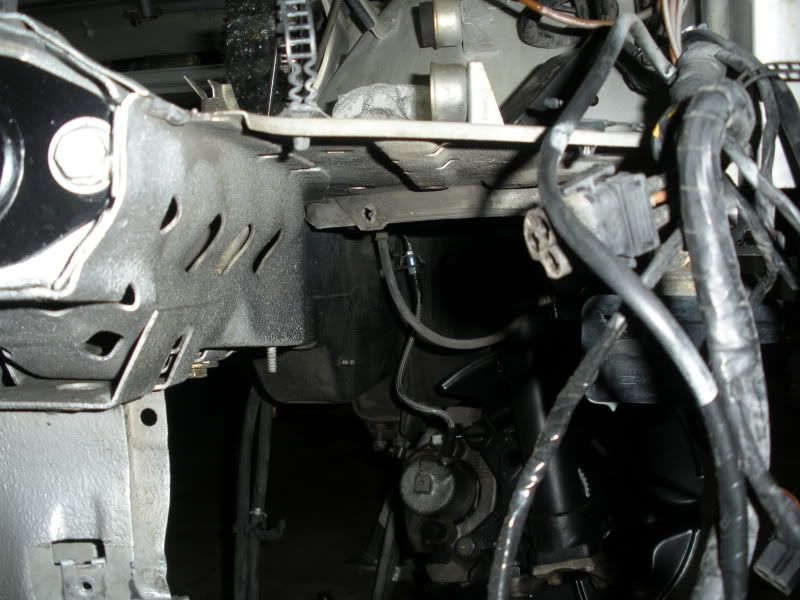
    Powerwashed the engine bay and tipped the car way up on two wheels to powerwash the entire undercarriage. Took a couple hours to remove all the road grit and stuck on oil/grease/power steering fluid that had accumulated from the motor all the way back throught the trans and driveshaft tunnel. There is still tons of thick yellow cosmoline so it seems like maybe a quick undercoat black rattle can job might be worthwhile to finish it off.

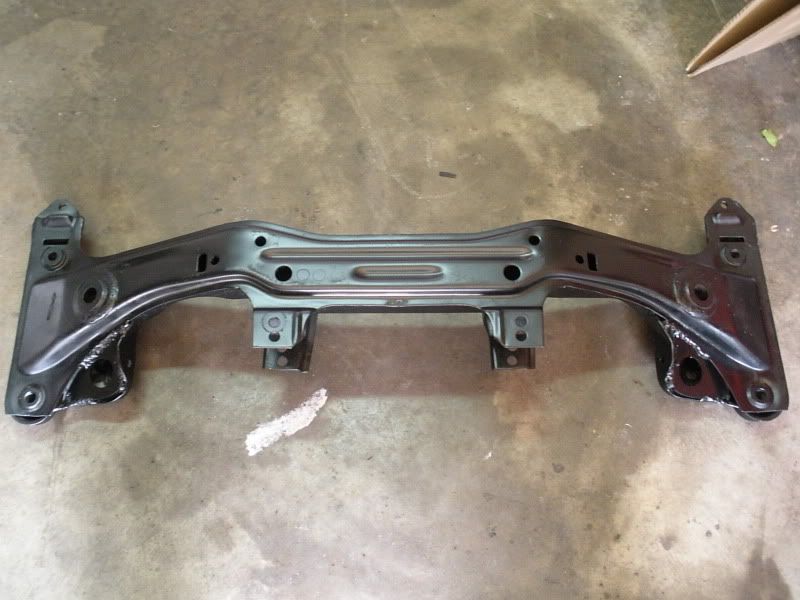
    Today after spending the morning doing some yard work, I got busy and pulled the front subframe, powerwashed it and then prepped it for welding in the reinforcements.

    Pics of the work completed...


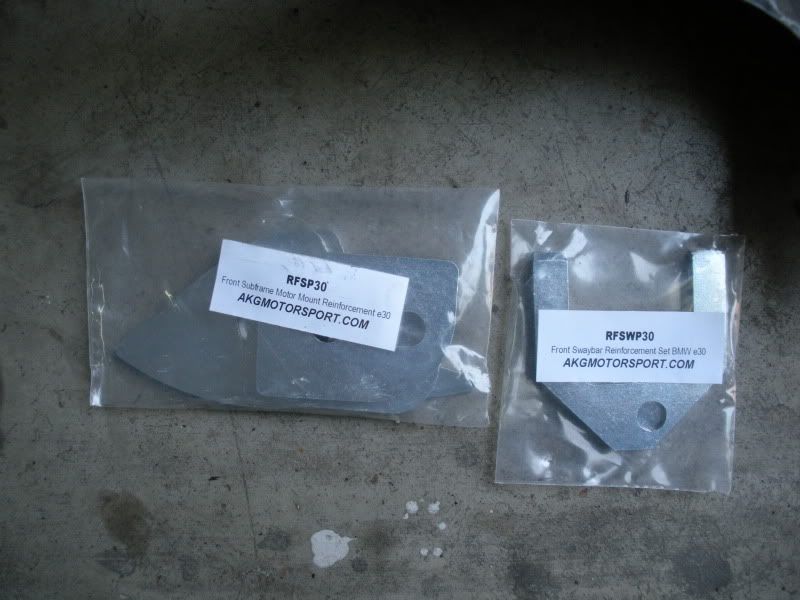
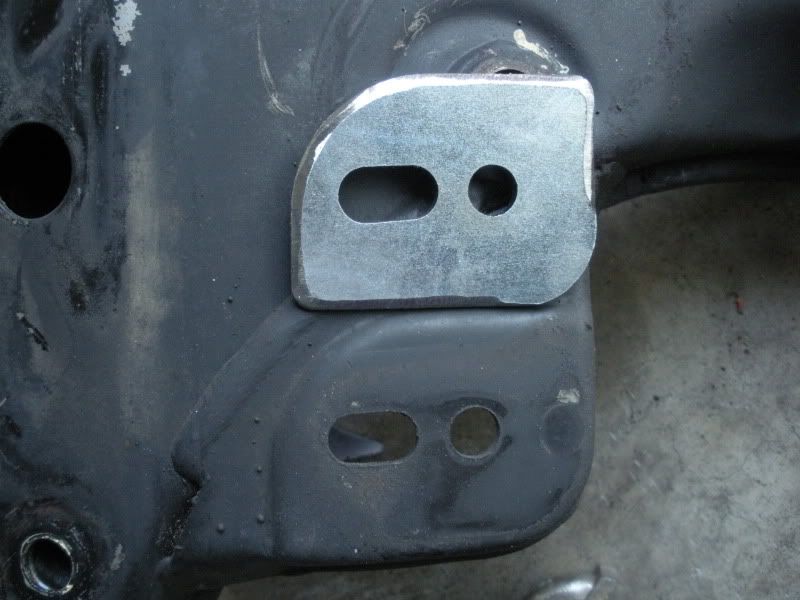
    Minor grinding on the plates to get them to fit flush due to the production welds on the original subframe. Figure I spent about 15 minutes doing grinding on these to get them all to fit within reasonable clearance for welding. These pics are of the backside the parts before welding them.


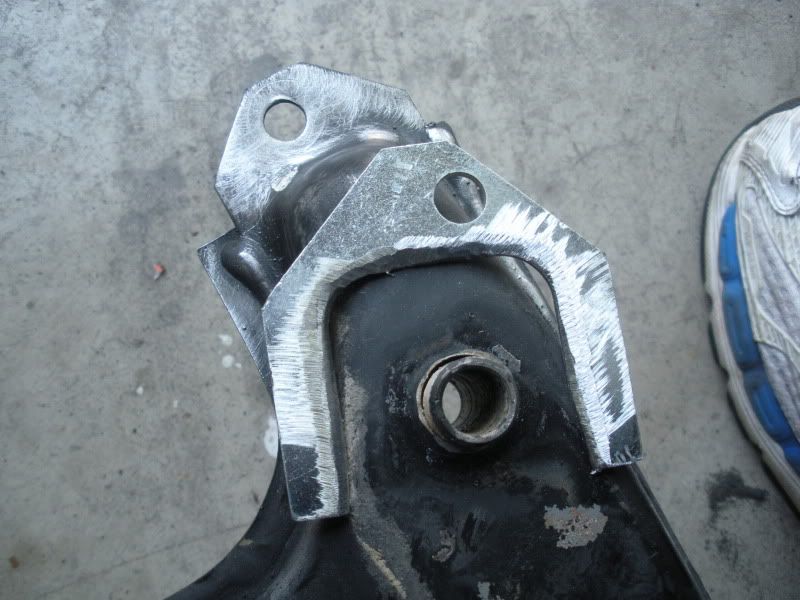
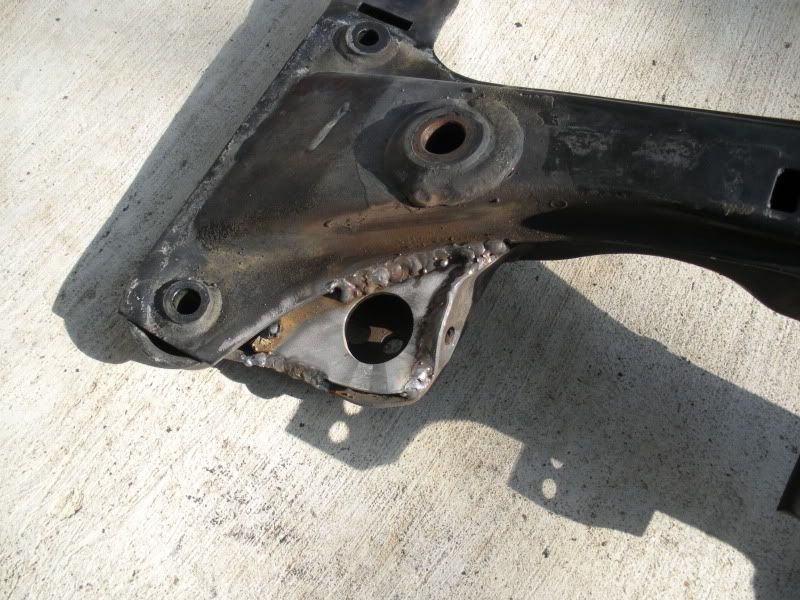
    Definitely minor league welds... need to keep working on puddle control and speed. I installed the triangular plate at an angle to get the most contact area across the three sides. The gap is not only triangular but also of varying depth across all three sides so that is why there are some gaps. I also wanted to have the best clearance for motor mount hardware so that was a priority in how I set them up.


    Well, after a short session with wire wheel, some primer and a coat of SEM trim paint it turned out pretty good. Overall, it was another project that I learned quite a bit by trying and doing it myself. To think back to 2002 my skills back then were limited to oil changes and brake jobs....

    Comment


      #32
      Damn, nice work. I don't know how I missed this thread.

      Great choice on wheels, I can't wait to do mine.

      Any more info on the brake booster setup? I have most everything from a 99 M3 minus the master.

      '91 318is - OBD-II S52 swapped - E30 M3 5-lug - 5x120 BBS RC090 (E39 Style 5) - TCK D/A coilovers 550/700 [SOLD]
      '87 535i - Vacuum brake conversion [SOLD]
      '93 525iT - 5-speed swap - 320k and counting
      '09 328xi - 6-speed

      Comment


        #33
        Originally posted by Gooch View Post
        Damn, nice work. I don't know how I missed this thread.

        Great choice on wheels, I can't wait to do mine.

        Any more info on the brake booster setup? I have most everything from a 99 M3 minus the master.
        Thanks man. The project is becoming quite addictive. I can't wait to be able to have it all buttoned up and be able drive it sometime in May.

        The booster set up is a remote unit from an E34 540. It is a bit more work than some other options but IMO makes for a cleaner set up in the end.


        Minor project this evening... install of complete master lock kit.


        I had previously installed the drivers and passenger locks when doing the rain curtain work a couple months ago. Easy stuff. The trunk lock was done right when I got it back from paint. Again, straighforward stuff.

        However, I have put off doing the ignition as I couldn't find any info on how to properly get it done and I did not want to destroy the column by just yanking it out with a puller. Well, after finding a post on a euro forum over this past weekend, I was able to knock it out tonight in about 30 minutes.

        Tools used - 1/64" drill bit and small vice grips

        Method - install key and turn the key about 40 to 50deg and using the small pin hole in the gray center section you can insert the drill bit into another access hole recessed about 1/4" into the lock. By pushing the bit another 1/4" with some force it drops the brass retaining pin from its detent in the steering column. See photos below...


        Here you can see the key is almost turned to accessory pos 1 and if you go really slow you will by feel note where the bit can fit into the access slot


        Here is a pic of the lock after removal and you can see how the bit has pulled into the lock the small square brass retaining pin and it sits flush with the lock barrell for easy insertion/removal


        And here is a pic of the bit pulled back just a little to demonstrate how the brass retainer pin pops back up to hold the lock barrell in the column. To insert the new lock I had to insert the key, turn about 50 deg to align the slots so the bit dropped the retainer and then the new lock slid right in.


        New locks with a full set of keys...


        Super smooth locks FTW

        Comment


          #34
          Sedan Build

          Wow. I've really enjoyed reading all your posts. I think we can all appreciate your attention to detail and the awesome skills you are demonstrating in your photos. It's very inspiring to see your work and motivation for me to start workin on my touring. Just need to find some garage space and more tools!
          1970 BMW 2002 w/M20b25
          1990 BMW 327 Touring

          Comment


            #35
            Makes my car look lame.. http://www.r3vlimited.com/board/showthread.php?t=189132


            Was your paint checked/cracked like mine? Maybe someday Ill give this one a full respray.

            good thread though and an awesome build!

            Comment


              #36
              In for the remote booster install pics! SILLY Build!

              Comment


                #37
                Wow, just WOW! Looks like you do everything with a lot of love and attention to detail, I love your job! And that info on the lock removal is very nice!

                Subscribed!!!

                Comment


                  #38
                  awesome.
                  8380 Laboratories
                  M3 Champs Poster

                  Comment


                    #39
                    In to see how much more awesome this is going to get.
                    IG: deniso_nsi Leave me feedback here

                    Comment


                      #40
                      Originally posted by evanc View Post
                      Wow. I've really enjoyed reading all your posts. I think we can all appreciate your attention to detail and the awesome skills you are demonstrating in your photos. It's very inspiring to see your work and motivation for me to start workin on my touring. Just need to find some garage space and more tools!
                      Thanks! Just try to knock out small projects and you will find how easy it is to make significant progress over time.

                      Originally posted by bimmer630 View Post
                      Makes my car look lame.. http://www.r3vlimited.com/board/showthread.php?t=189132


                      Was your paint checked/cracked like mine? Maybe someday Ill give this one a full respray.

                      good thread though and an awesome build!
                      No way. Don't look at it like that... a full respray and not having to keep it on the road these last couple months makes it a ton easier to take it to another level.

                      Originally posted by dirty30 View Post
                      In for the remote booster install pics! SILLY Build!
                      Thanks. The booster and steering rack work is up next.

                      Originally posted by twism View Post
                      Wow, just WOW! Looks like you do everything with a lot of love and attention to detail, I love your job! And that info on the lock removal is very nice!

                      Subscribed!!!
                      Originally posted by LedJetta View Post
                      awesome.
                      Originally posted by dude8383 View Post
                      In to see how much more awesome this is going to get.
                      ^ thanks guys for all the words. Its a really fun project and I'm enoying every minute of it.

                      Minor updates for the last couple days...

                      Spent lots of time prepping and cleaning parts for install - cleaned Z3 rack, E34 oil pan and pickup and steering column joint.

                      After trouleshooting the driver rear door window regulator and finding it not only weak but would not only push the window up and not down, I pulled the rear door wiring harness. Found one wire frayed and broken. No wonder.

                      So I spent some time over the past two days pulling both rear door wiring harnesses, cleaned and repaired/soldered the broken wires and finally, rewrapped in harness tape. So now all windows work, all doors have new rain curtains and the black door panels have all been installed.

                      Now with that all done and as my new taillight gaskets showed up last week, I decided to put the trunk all together as a short project late this afternoon. Pics tell the story and show the results... I do need to get the two plastic twist fasteners which hold the battery cover but that kind of stuff is way down the priority list right now.


                      Cleaned, scuffed and then used slate gray trim paint to redo the trunk/backseat cover panel. Looked like crap before and was covered with water/mildew rings so really pleased with the result.


                      Painted up the jack, bead blasted the tow hook and lug wrench and detailed the battery tray and other items.


                      Thanks for following my build... until next time...

                      Comment


                        #41
                        One step forward and two steps back...

                        Pulled the Airbag computer and wiring, HVAC box removed for its refurbishment and now ready to pull the carpet and install new dash insulation. Here is the complete mess that I am living in...


                        Also pulled the pedals, booster and ABS to prepare for E34 remote booster install. However, I want to retain ABS and now that I have it removed, I have some questions to the group..

                        I am thinking about doing a cutout where it originally sat and then submarining about 80% of it to facilitate the remote booster but minimizing rework of extending wiring harness and brake lines. Thoughts?

                        Pics for reference of where I am debating on submarining the ABS unit...


                        And then doing a cutout and lowering the unit about 4 inches straight down and beside the framerail...


                        All advice and comments would be appreciated. TIA

                        Comment


                          #42
                          the attention to detail is beyond perfection. Great job!!!!
                          www.instagram.com/snwmble
                          #snwmble

                          Current:
                          '05 BMW M3 - Silver Grey/Imola Red
                          '90 BMW 325iX - Sterling Silver/Houndstooth sport(5-speed converted)
                          '15 Mini Countryman - Blazing Red/Carbon Black

                          Past:
                          '01 Audi Allroad - Light Silver/Platinum Saber Black
                          '88 BMW 325iX - Diamond Schwarz/Silver sport *Sold*
                          '01.5 1.8TQ - Brilliant Black/Nogaro Alcantara ...after 8.5yrs, *Sold* =(
                          '90 BMW 325i - Schwarz/Tan sport *Sold*
                          '89 BMW 325ix - Diamond Schwarz/Black sport *Sold*

                          Comment


                            #43
                            Originally posted by audiquattrot View Post
                            the attention to detail is beyond perfection. Great job!!!!
                            Thanks!

                            Update for some more E30 sweat equity....

                            Finally got the HVAC box pulled and gutted the remainder of the dash, pedal assembly and pulled the carpet. Based on my experience in refurbing the rear parcel, I wanted to find a non paint/aerosol color and dye product to refresh the carpets. After lots of searches and a half dozen phone calls to inquire about several vendors products, I finally found one that appeared promising. Pics tell the story of the carpet project....

                            Here is pic from last week in the car before I started. The sun fade compared to the area under the console and the pesky coffee stain are both pretty easy to see...


                            Pulled carpet, powerwashed with 1500 psi electric powerwasher and then took the time to aid drying time by air blowing it dry with my blowgun on my compressor. I spent a total of about 3 hours getting the carpet clean and working slowly on the foam backing to get it also clean and dry throughout. Words just can't describe how clean the carpet was after powerwashing it. I know many others have talked about how amazing the results are and I will echo all those comments. If anyone is on the fence about their carpet, DO IT. The soft nap and fesh clean smell of the capet after powerwashing is worth every damm minute spent.

                            So.... up next, I used a dye product from Leather Majic. They suggested one 32oz bottle to do the job but I ordered 2 as I did not want any bleed through due to some sun fade and some remaining stains.


                            I used a squirt bottle to apply and get the carpet soaked, then pressed with a cleaning brush to agitate and work the dye deep into the fibers.


                            Here are some 50/50 shots to show that the BMW519 Charcoal color ended up being a very close shade to the E30/E34 Anthractite color I was after. I compared the final color to a floor mat in my E34 M5 and its VERY close. Extremely pleased with the outcome.


                            Final outcome... :pimp:


                            I'd highly recommend this product and wouldn't hesitate to use it again for another project. It did stiffen the nap of the carpet slightly but (1 to 10 scale) only about a 2 to 3 compared to a 10 for the Duplicolor paint used on the rear parcel.

                            I have started on mock up of the remote booster and its gonna take some time to get it where I want it but I think it will be worth the extra effort from an optics and future maintenance perspective.

                            Until next time...

                            Comment


                              #44
                              just dropping in to say..

                              i love this build and the way you present it!

                              Comment


                                #45
                                subbed. love sterling silver cars

                                Comment

                                Working...
                                X