
Okay this has been a long time coming. I want to thank everyone on the forum who offered help and suggestions, including Chris325iX & Supernaught. Thanks to JiXer for hooking up the deal on a reman’d rack as well.
Let it be known, anyone who tells you that any of these jobs is simple is misleading you. Sure, maybe if you’ve done it once or twice before but the first time in is like searching around a cave without a flashlight… My hope is that this write-up with images will help others take on the task(s) with confidence and a knowledge that it WILL TAKE A LONG TIME. …but it’s totally doable with patience and the correct tools.
Here we go:
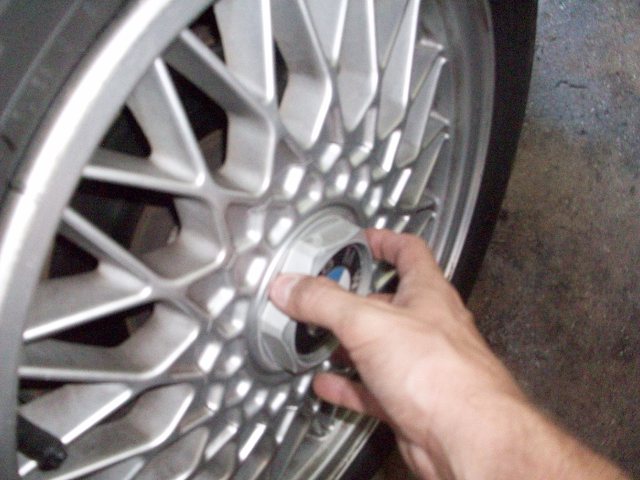
Remove the hub caps from both front wheels
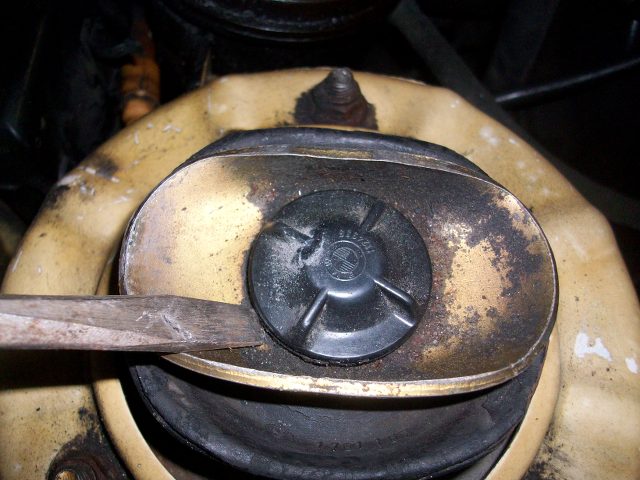
Pry off dust cover from middle of strut tower
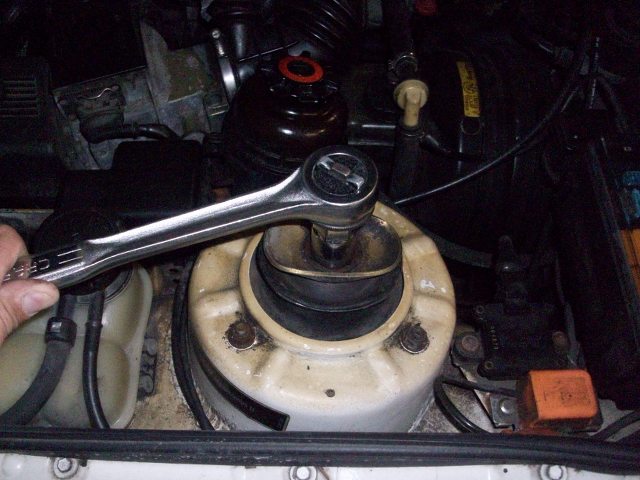
Loosen (do not remove) the 3 nuts at the top of the strut tower
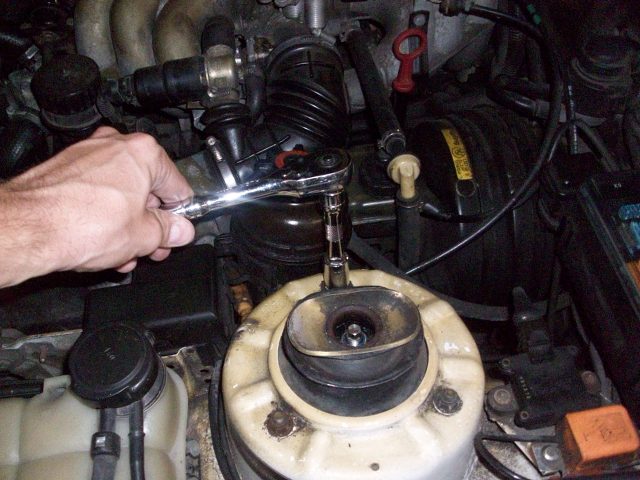
Loosen (do NOT remove) the nut at the top of the strut
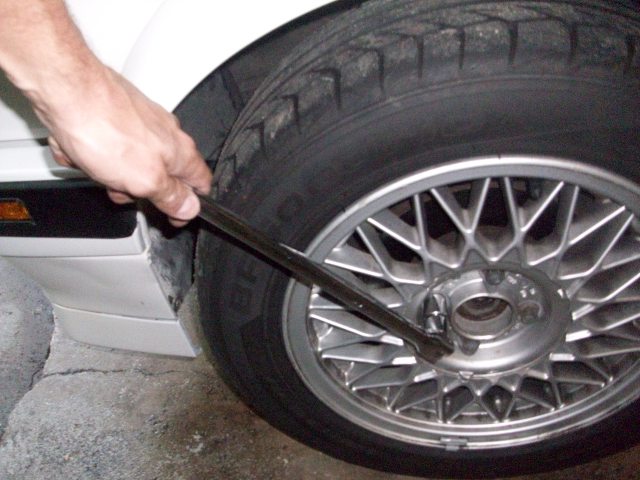
Loosen (do not remove) all of the front wheel lug nuts
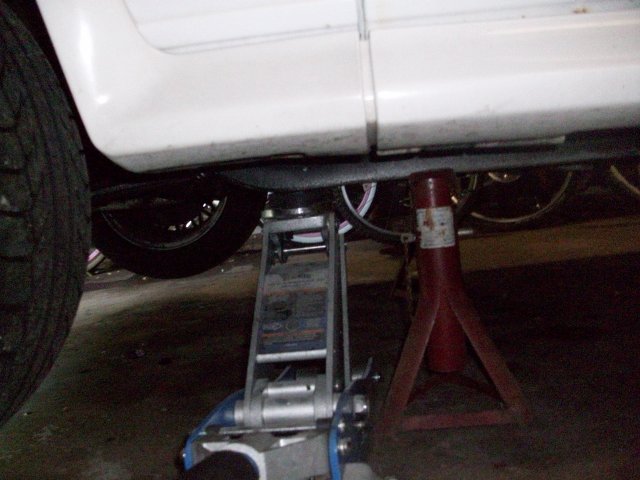
Jack up the front of the car and put jack stands on both sides, raising the front of your iX off the ground
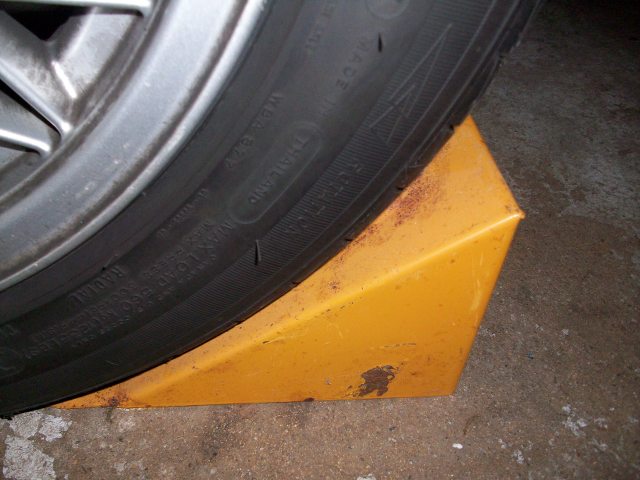
Chock the back wheels
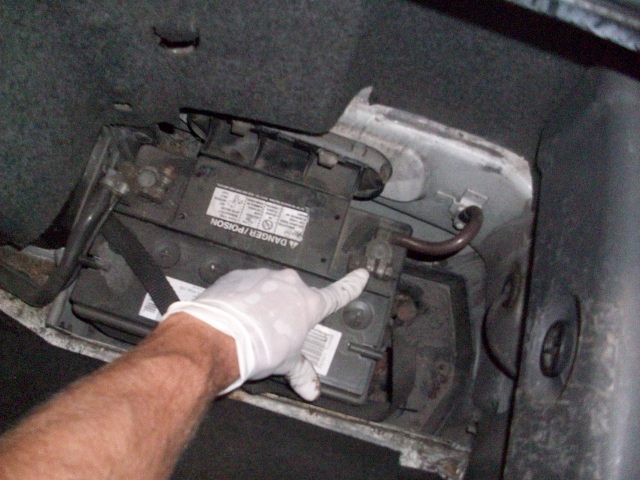
I also removed the negative lead of the battery terminal as a precaution.
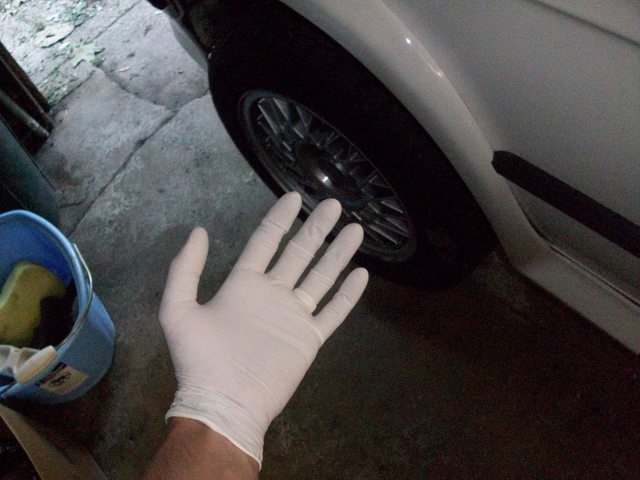
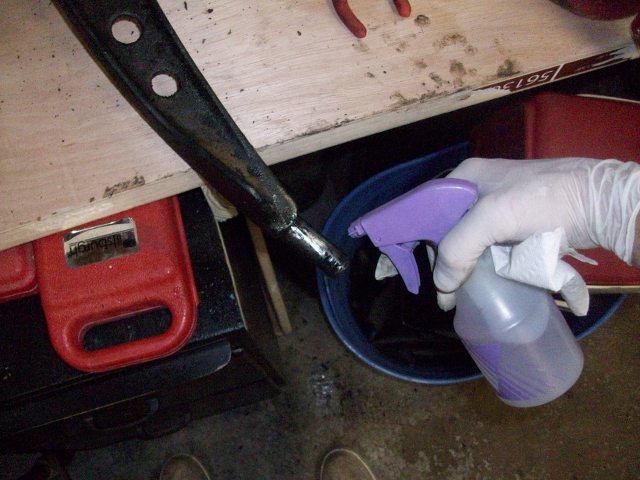
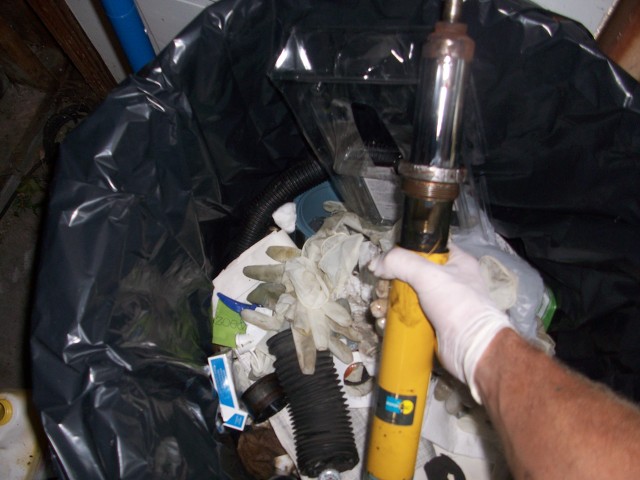
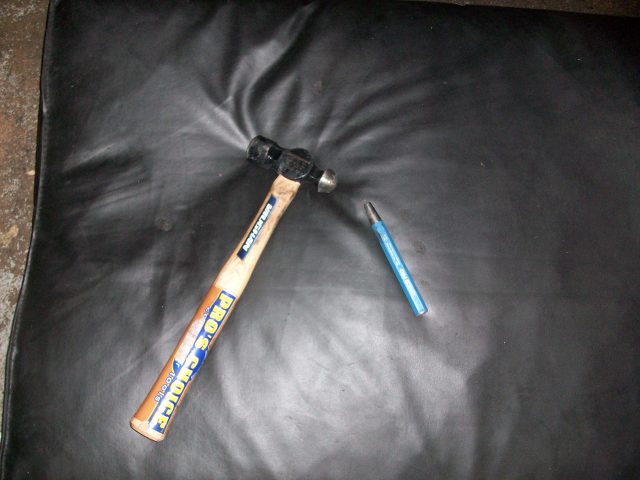
Use rubber gloves! I went through more than 100 of these for this job.
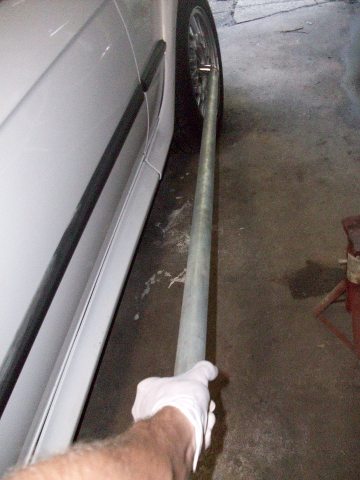
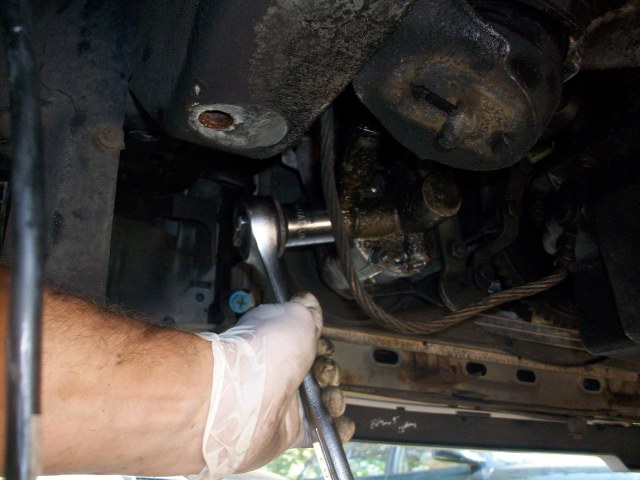
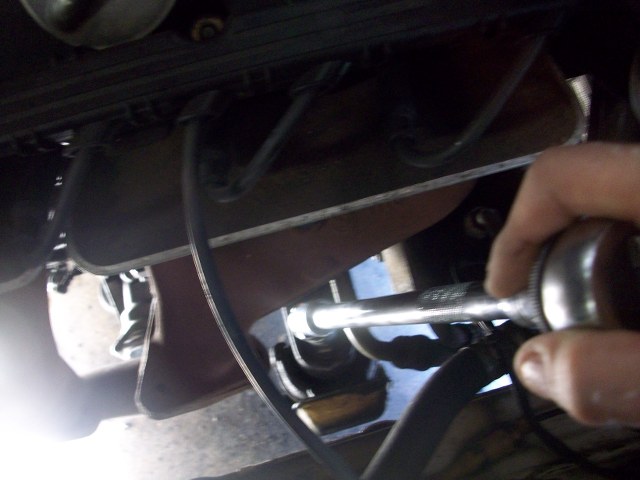
Loosen (do not remove) the axle nuts from both sides. You may need to use a large pipe over a breaker bar like this.
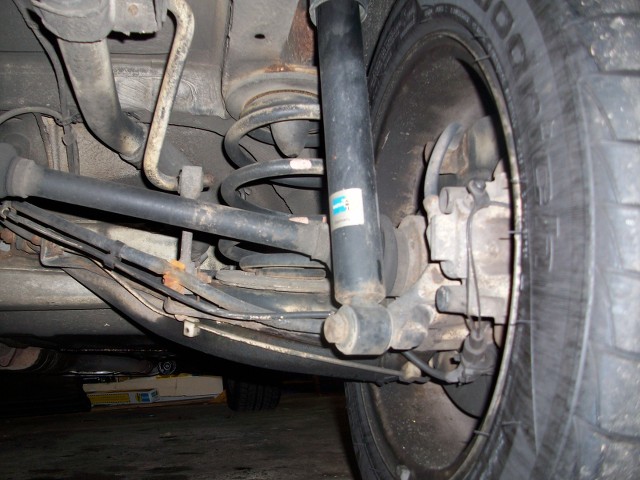
Remove your wheels.
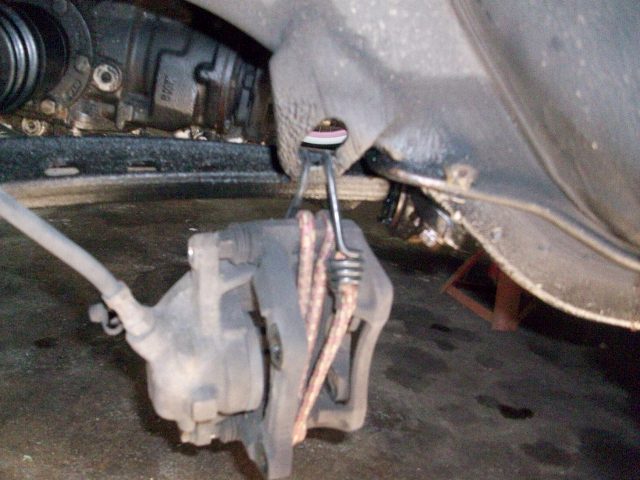
Then remove the brake calipers and tie them up so that the caliper is not simply hanging on the brake line
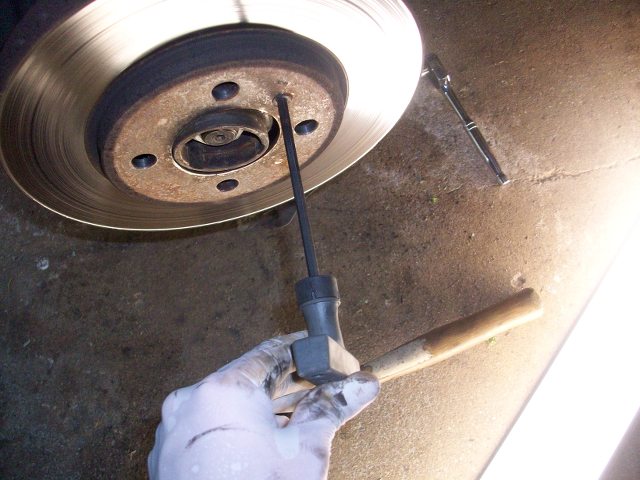
Remove the brake rotors by removing the hex/allen nut
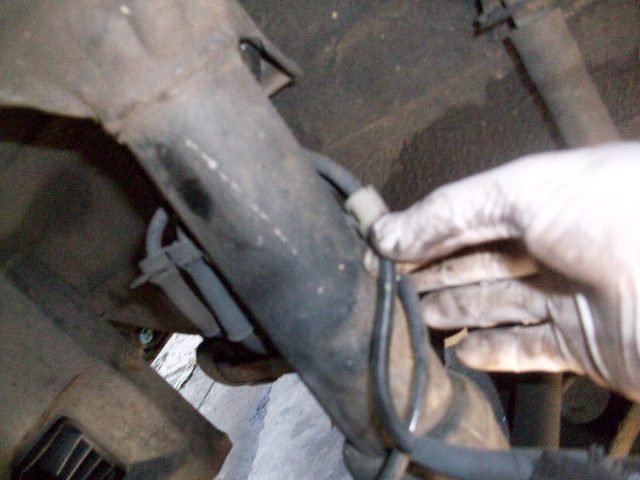
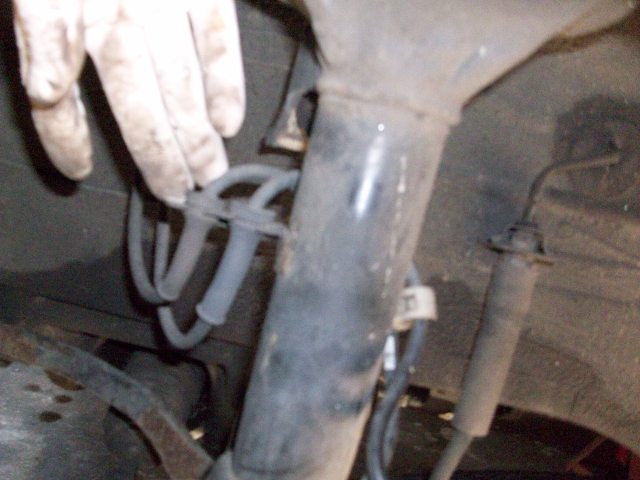
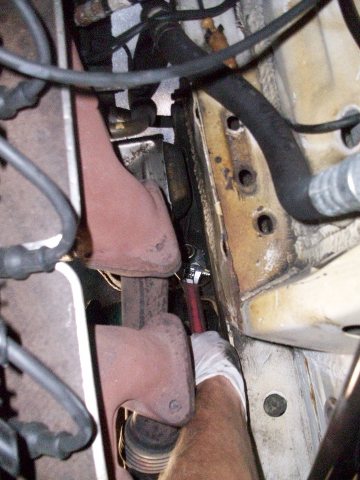
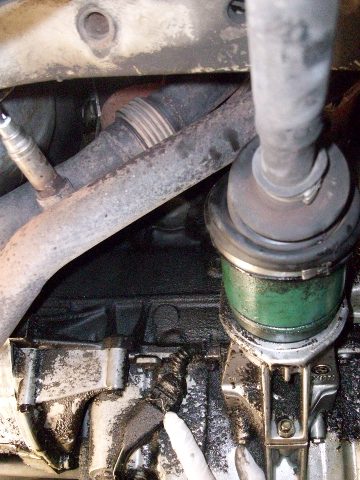
Remove the lines off the struts and move them out of the way
This is really the same process on both sides except for the brake pad wear sensor…
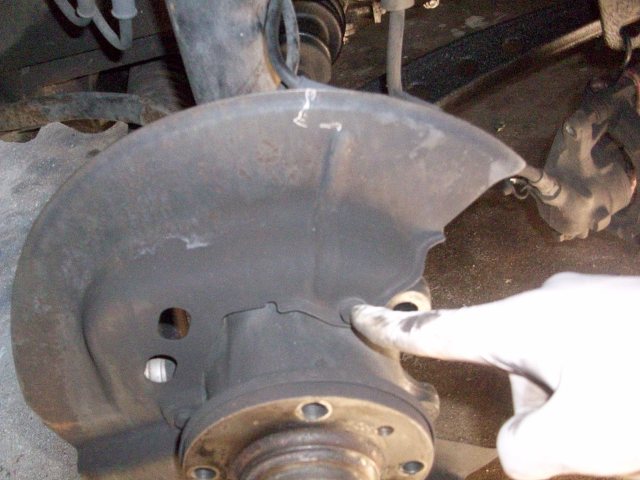
Remove the dust shield by removing 3 small bolts.
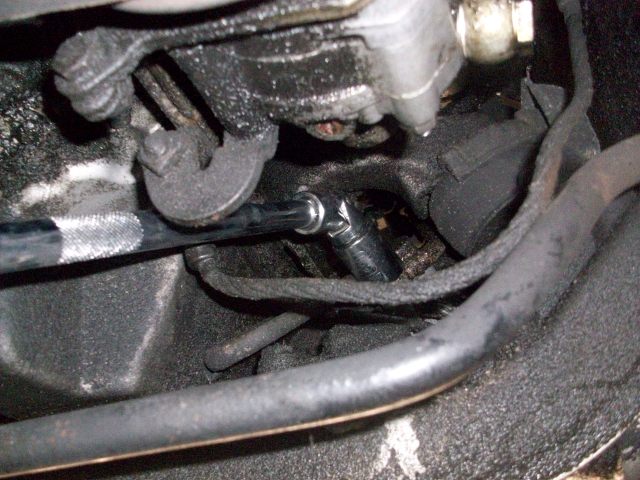
Remove the ABS sensor
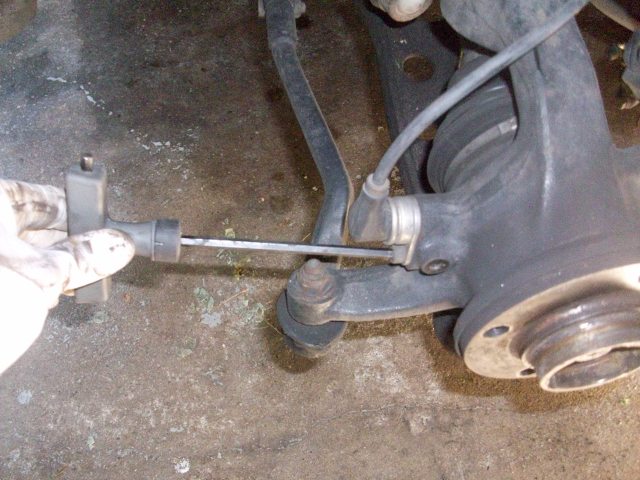
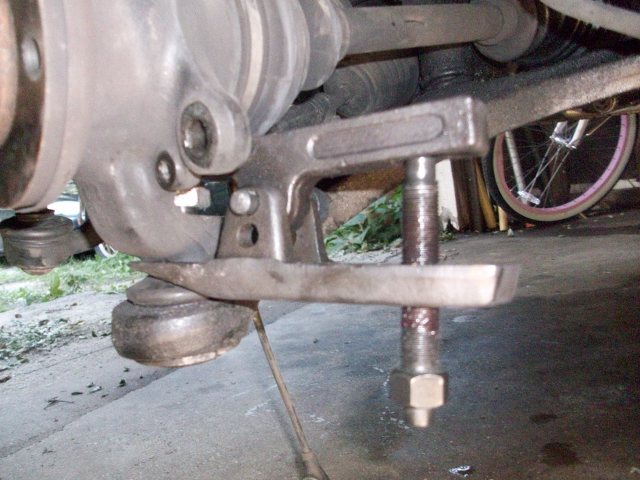
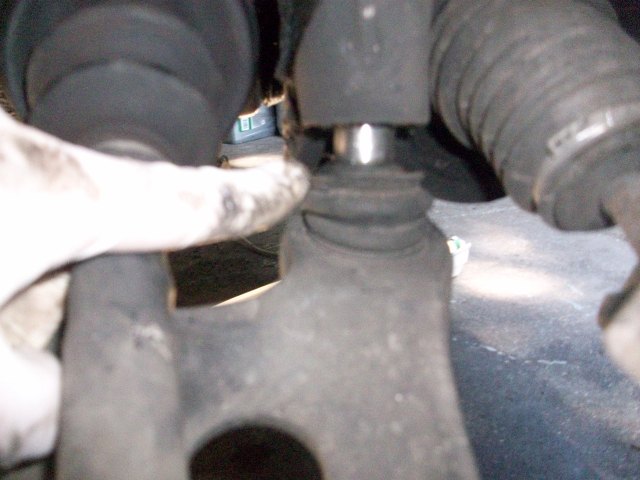
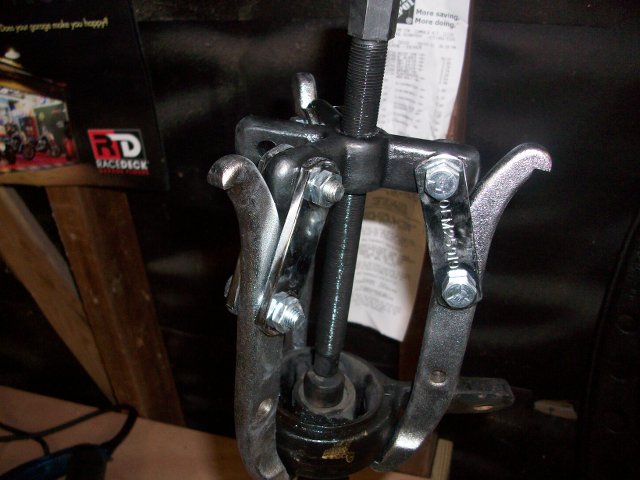
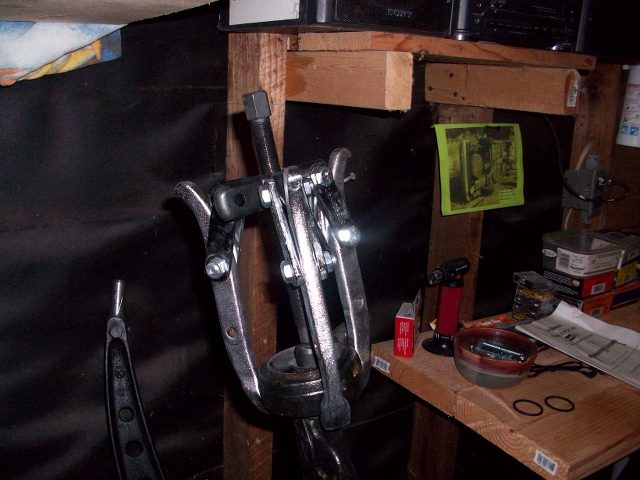
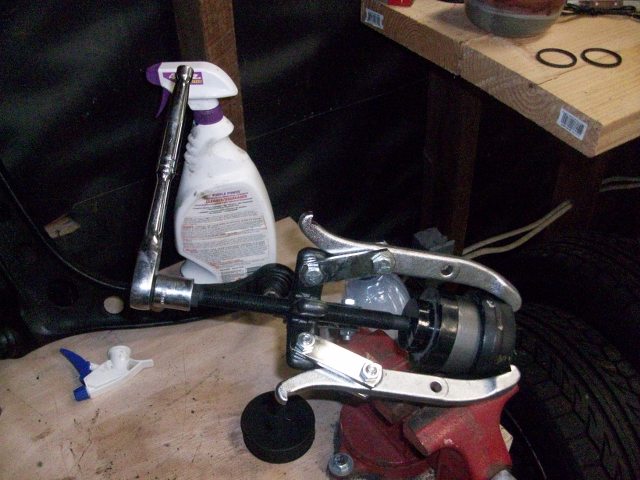
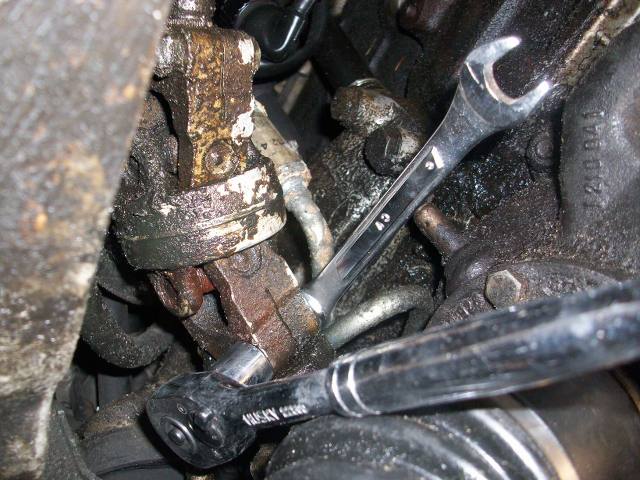
Remove your tie rod ends and outer ball joints using a ball joint separator. I got this one from Harbor Freight. Some people use a big hammer and whack the knuckle (never tried this), and others use a pickle fork. I think this is the best tool to use. It'll save your boot, too.
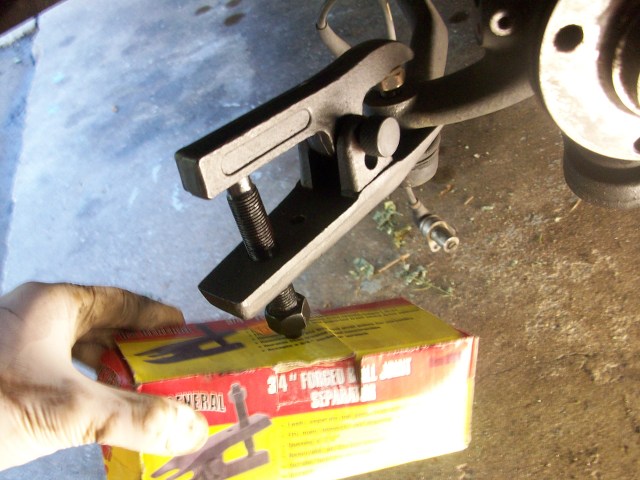
Just remember to lube the bolts so you don’t strip them. Lube everything from Harbor Freight! Lol. This way it may last more than one time…
I use ear plugs to pop the outer ball joint on the control arm while using the same tool. This thing pops out real loud sometimes.
When separating the tie rod end and outer ball joint. Keep the nut on toward the top of the threads so that it doesn’t just fly off.
Close-up of nut you need to loosen for outer ball joint removal
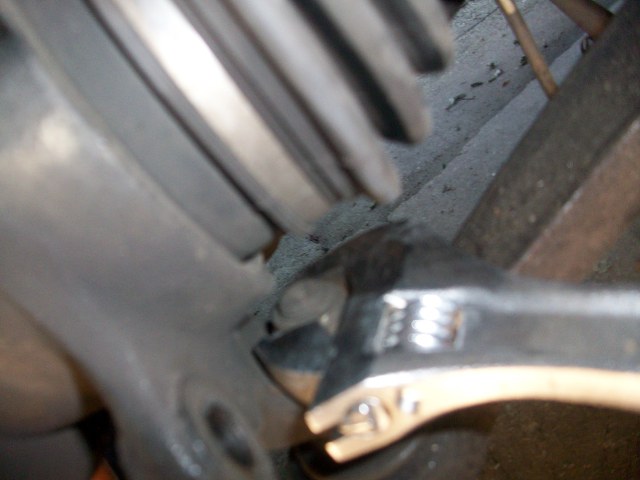
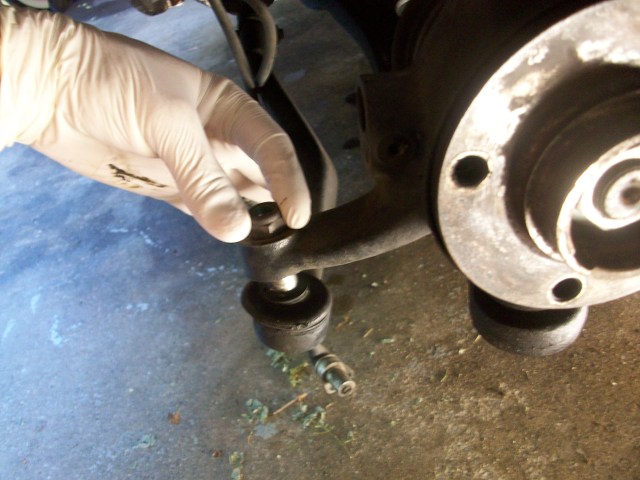
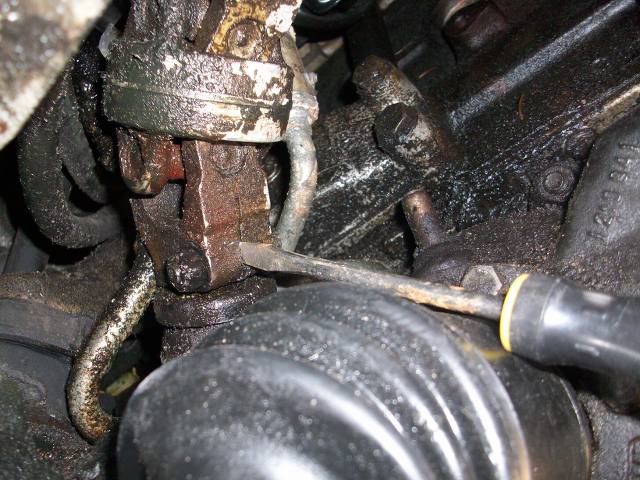
Separating outer ball joint
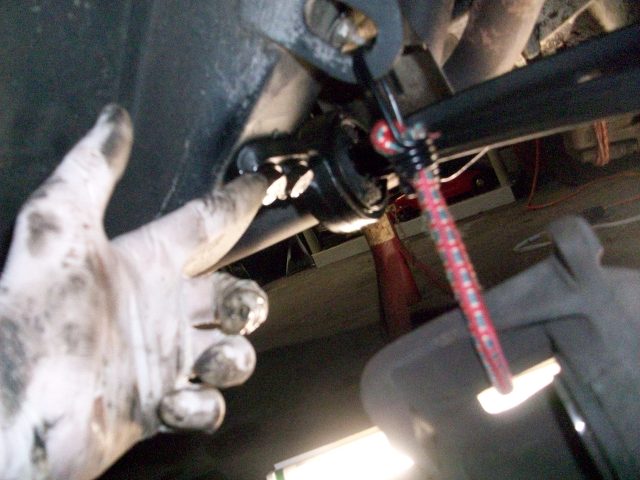
Remove axle nut. You may need to first pry off the nut retainer if there’s one in there…
Remove sway bar links
Remove nut from inner ball joint on control arm from inside the engine bay
Mine just slid out after that…
Remove bolts for the Control Arm Bushing
Now you can pull your struts out of the car by completely removing the 3 nuts at the top of each strut tower
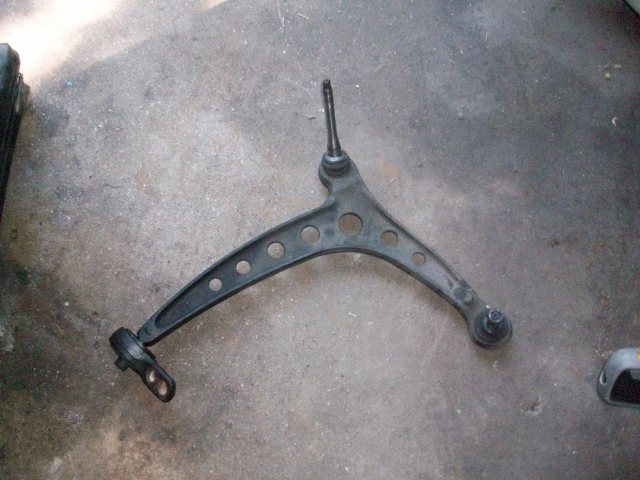
Here’s one of my control arms out of the car
Remove steering fluid hoses from the steering rack. 2 banjo bolts
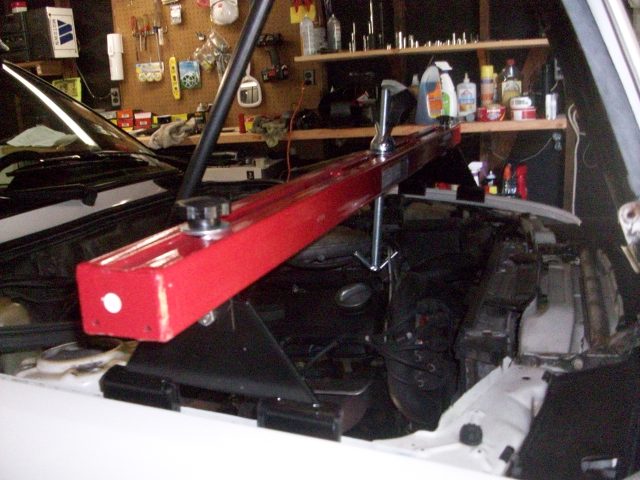
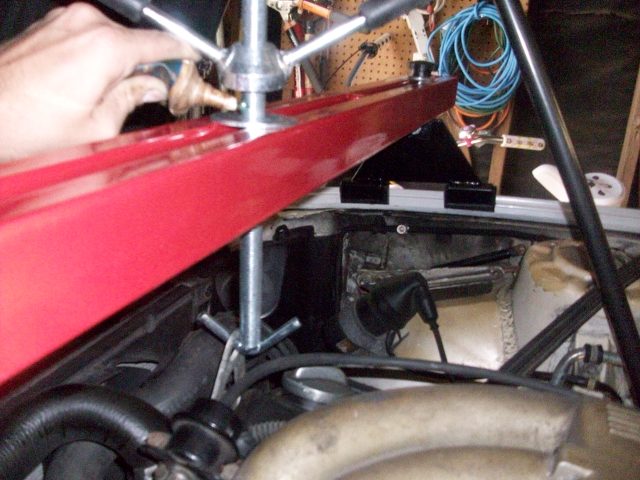
Use an engine hoist or support bar to hold up the engine. I got this one from Harbor Freight for $59
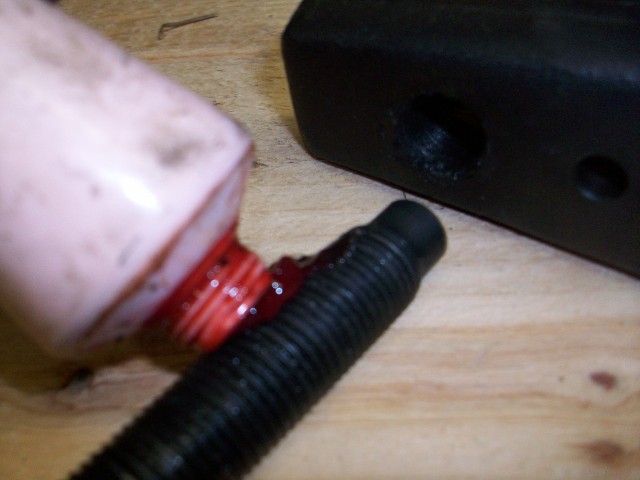
Again – lube those threads!
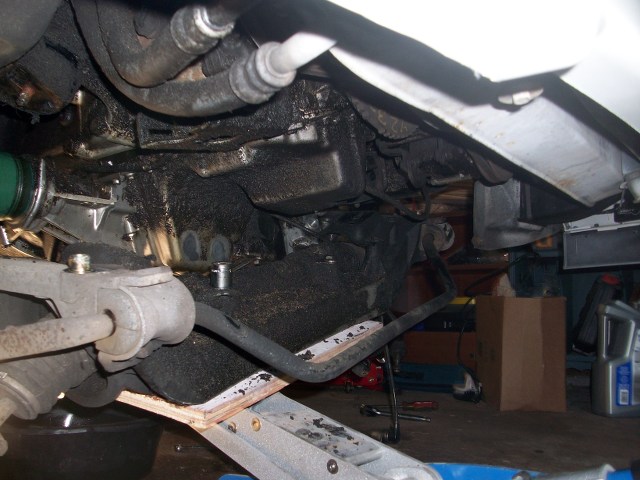
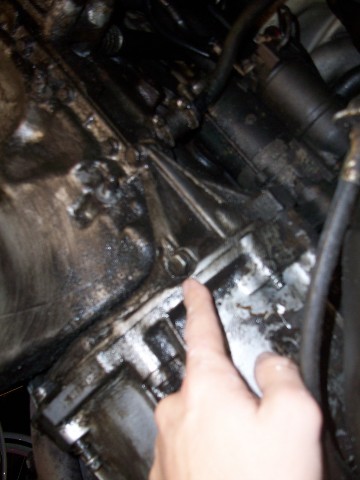
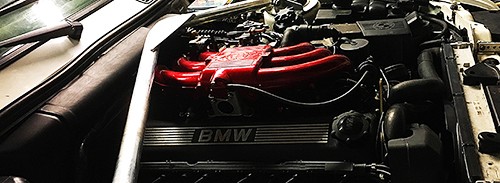
While I saw it, I went ahead and disconnected the oil lever sensor on the oil pan. I also drained my engine oil.
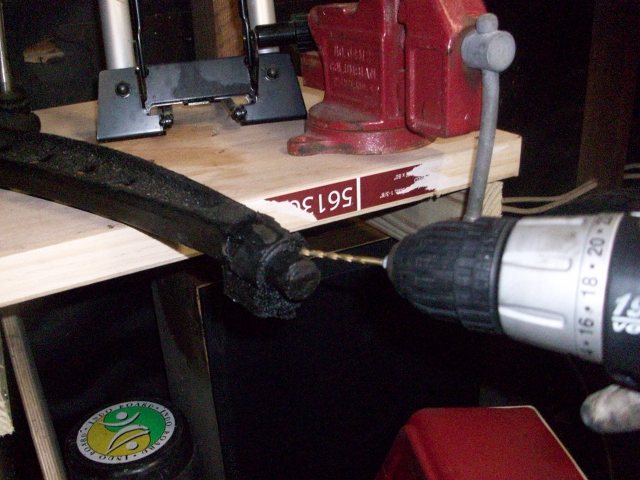
The first Control Arm Bushing was really trashed and all that remained is what you see here on the end of the control arm. I used a drill to make several holes so I could just twist it off.
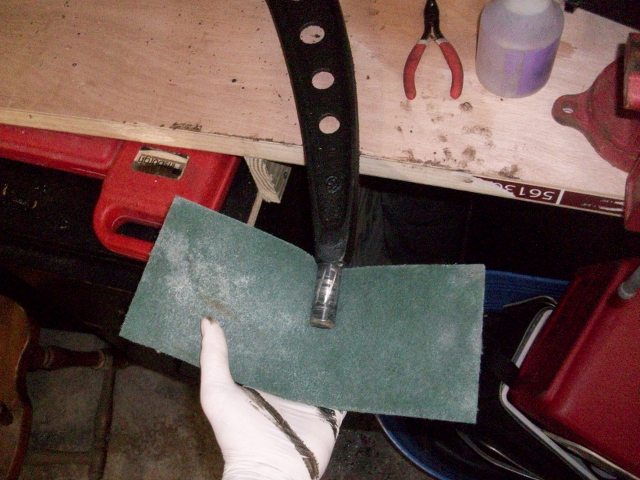
I cleaned up the control arm with a green ScotchBrite pad.
I used Isopropyl alcohol to prep for paint
I used a SawZall to cut the remaining ring out from the lollipop
Getting ready to press in the new bushing, be sure to line up the arrow on the bushing with the notch on the lollipop
The second bushing I used a 3-jaw puller to simply remove it from the control arm. This really was easy…
To get the new bushings on I needed to find something that was about the size of the bushing so that I could use the 3-jaw puller again to press them in the lollipops. What are the odds that I found this little doodad lying around?…
Wow! Perfect fit. Squeezed them in very smoothly. Be creative and find something that you can used to press them in. No amount of hammering is going to work… If you’ve done it this way, well, then you’re a magician.

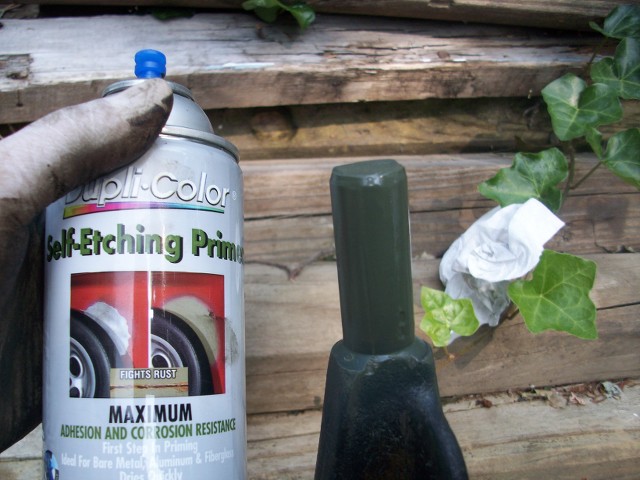
I used some Self-Etching Primer on the end of the control arm to cover any exposed metal so that it doesn’t rust out in the future.
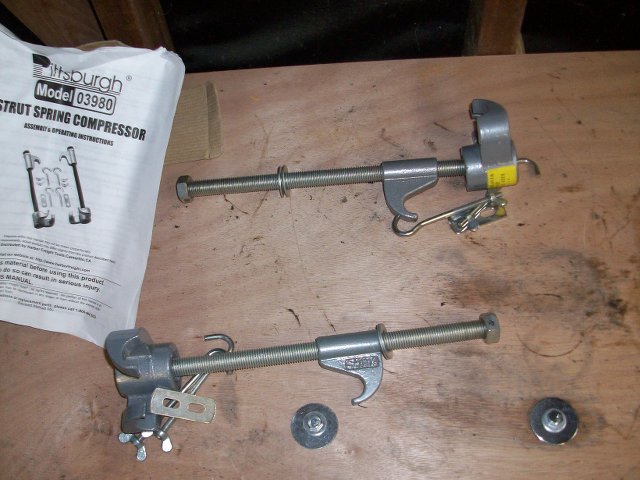
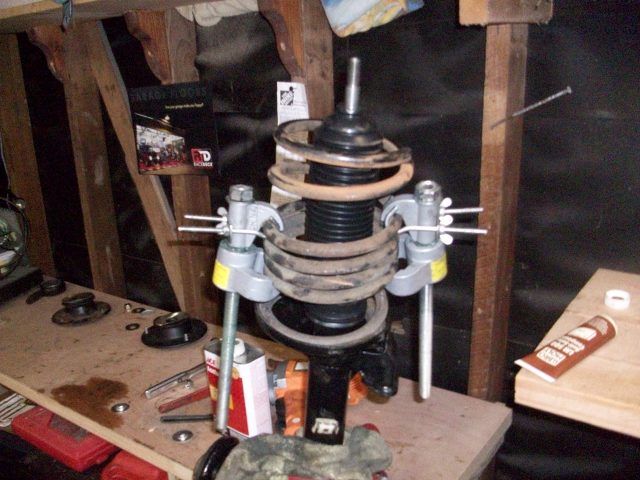
Now I was ready to go ahead and compress the spring on the struts so that I could put the new ones in and put on my new strut mounts.

Again. Lube those threads!
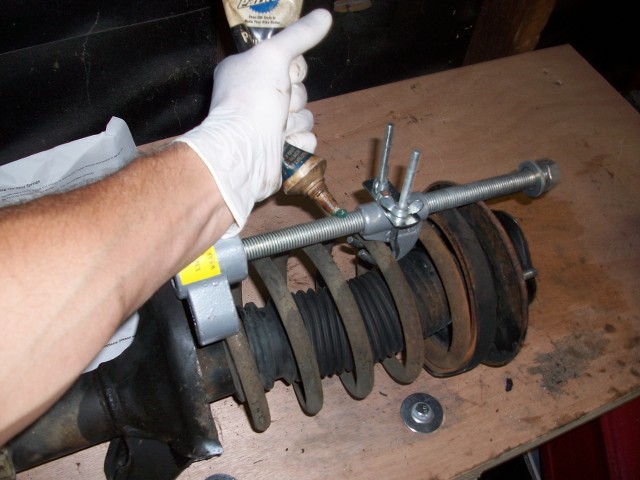
I used an impact from Harbor Freight to compress the springs, evenly and quickly. Be VERY careful here.
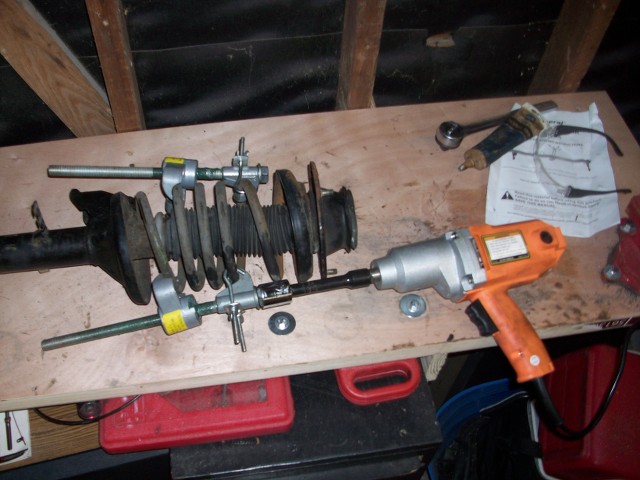
I placed it on the floor to compress it all the way . It's safer that way I think...
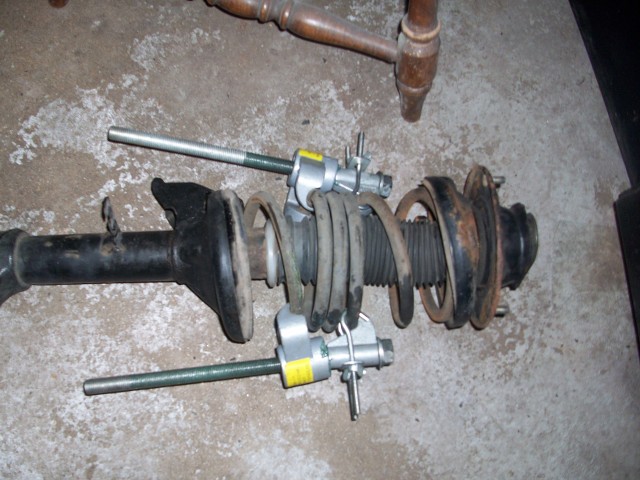
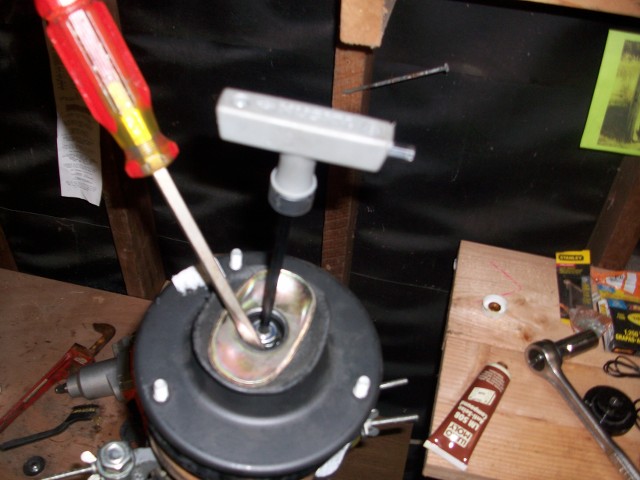
Once fully compressed, the mount will come off by removing the nut you loosened earlier. Carefully place the spring somewhere safe. This is like a loaded bomb. Be CAREFUL and keep any and all pets and children out of harm’s way.
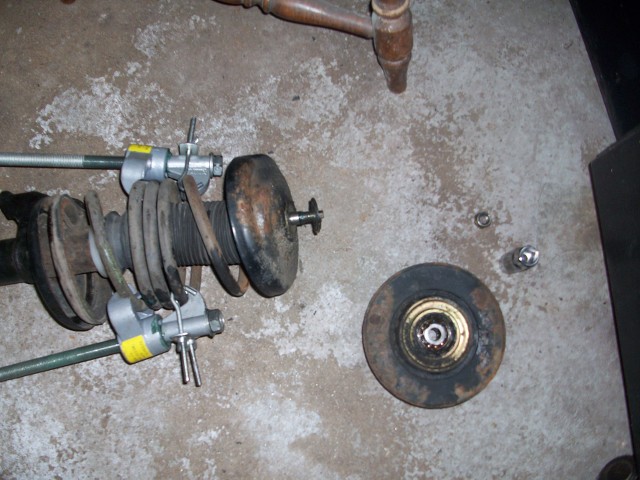
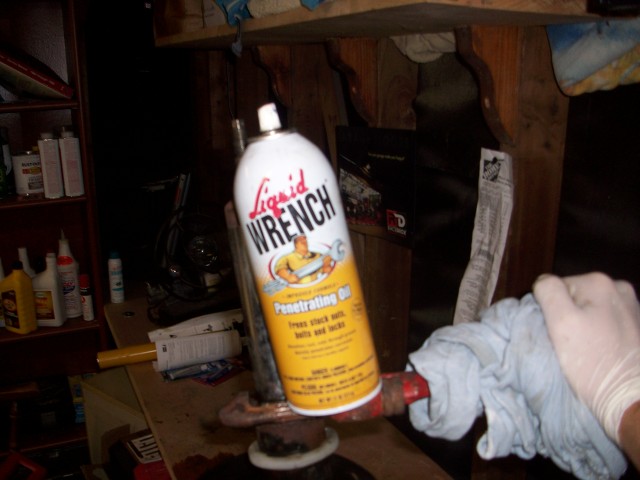
I used a pipe wrench to remove the collar that holds the insert in the strut housing. This took a HUGE amount of torque to break the rust bond.
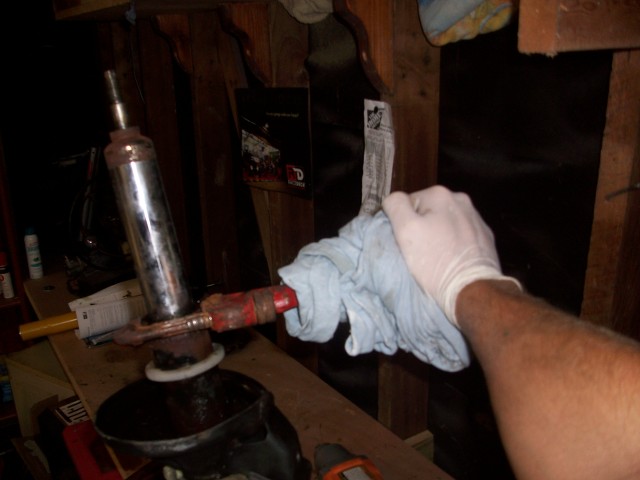
I ran out of PB Blaster but this worked just as well…
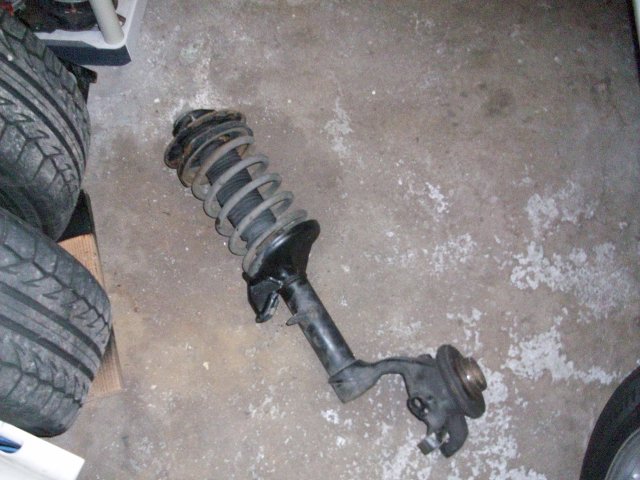
Tossing my old strut
Getting my strut housing ready for some sanding and POR-15 treatment
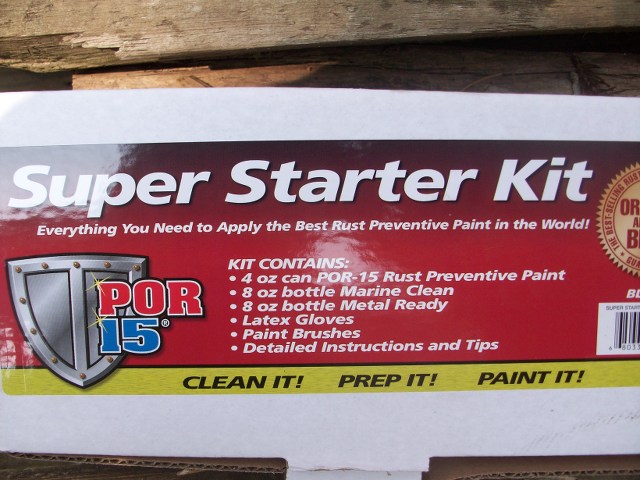
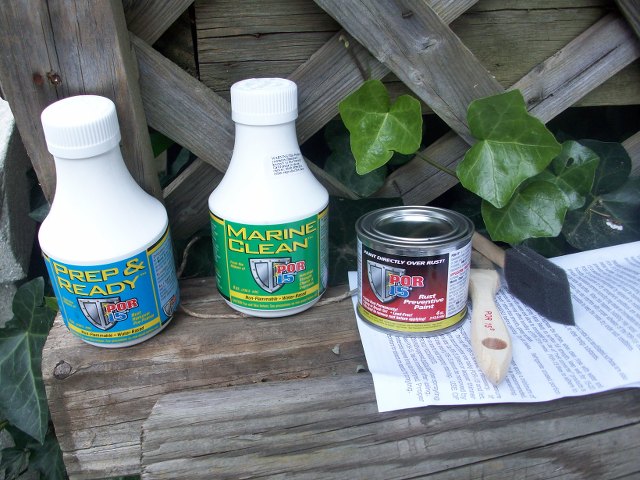
I got the Starter Kit. Best bang for the buck. It goes a loooong way….
Dremel sanded

The Kit
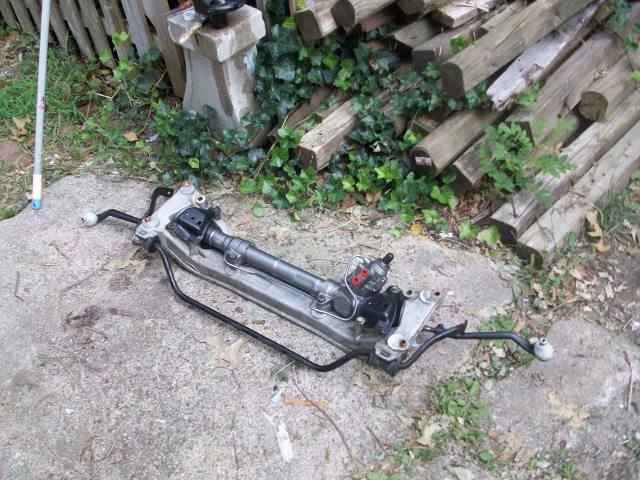
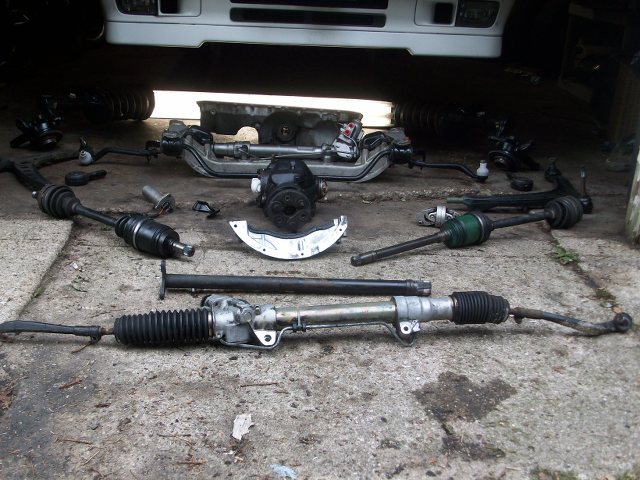
Here’s my new-to-me rack from JiXer’s hook up

Okay. So I decided to replace my motor mounts while I was in there. They were slightly cracked… Here’s one of the bolts you need to remove. Up above the boot there
The motor mounts have nuts holding them from the top as well. The driver's side is a little tricky to get to. I did it without having to remove the air box.
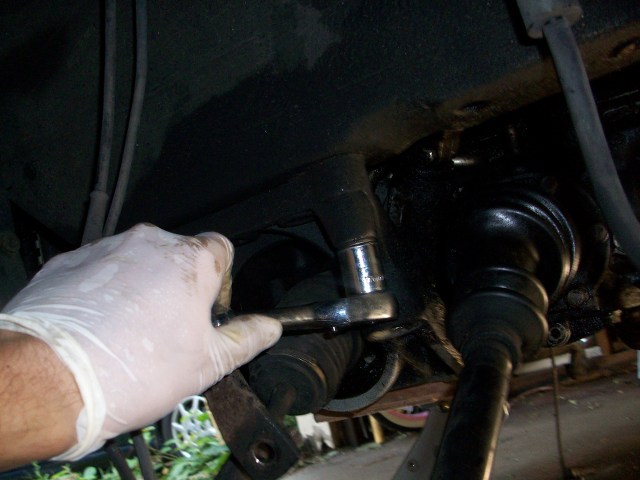
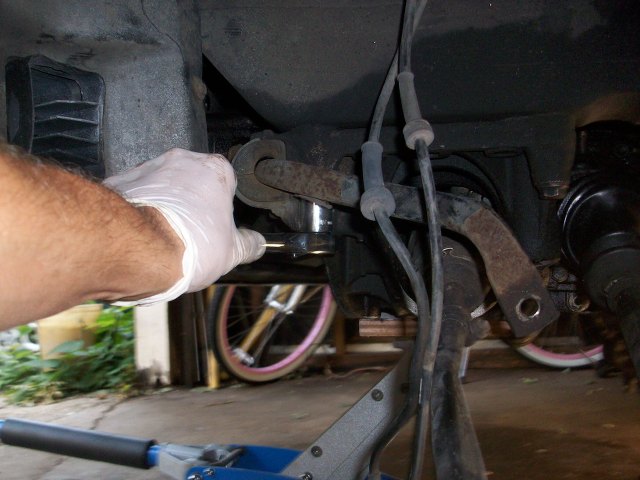
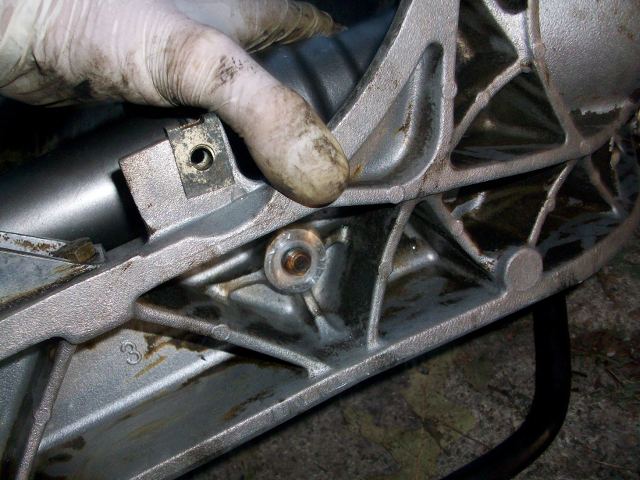
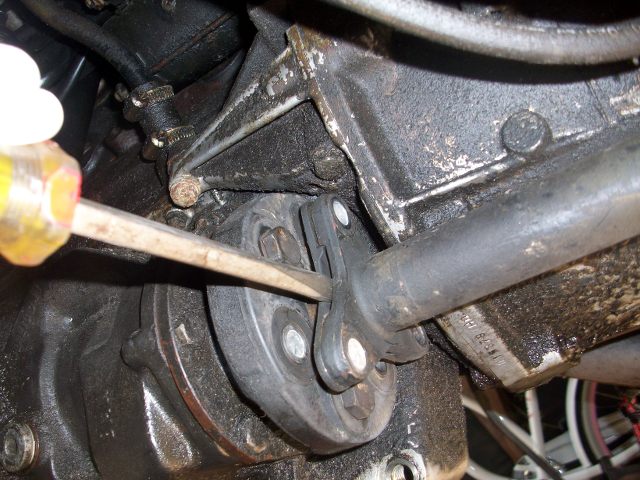
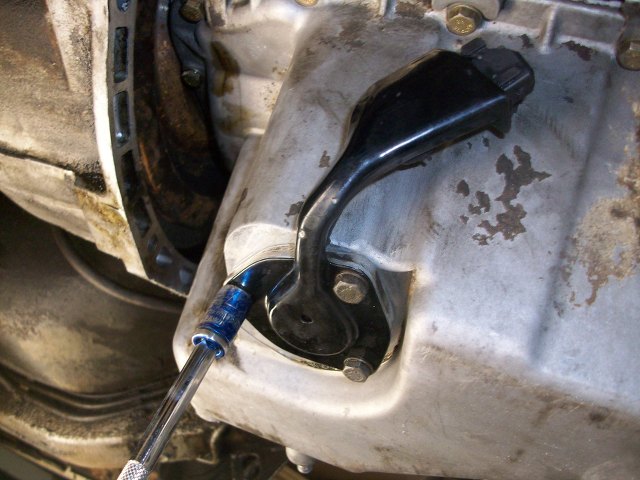
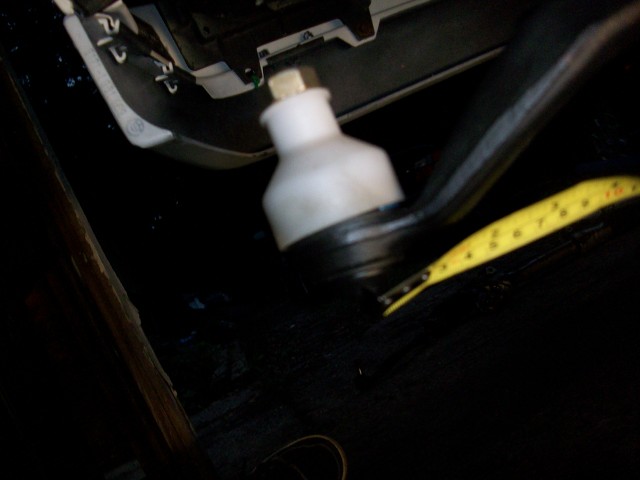
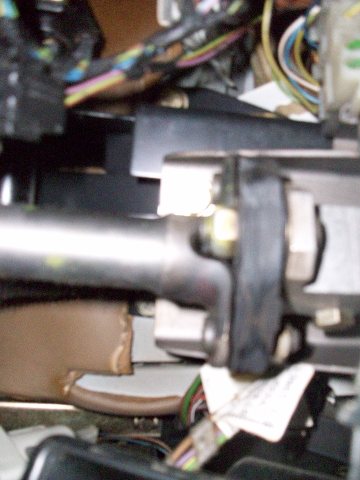
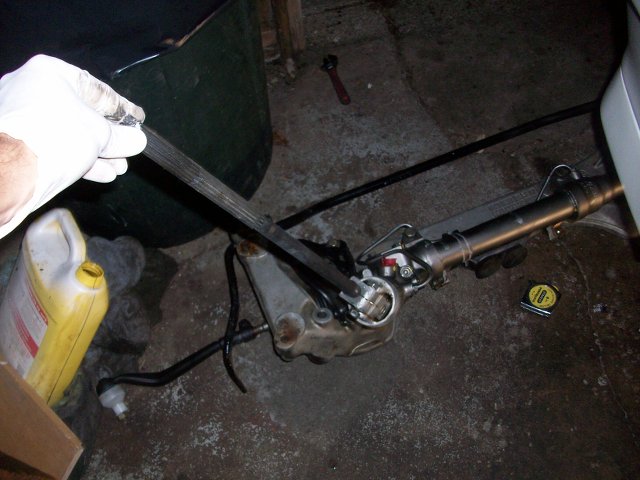
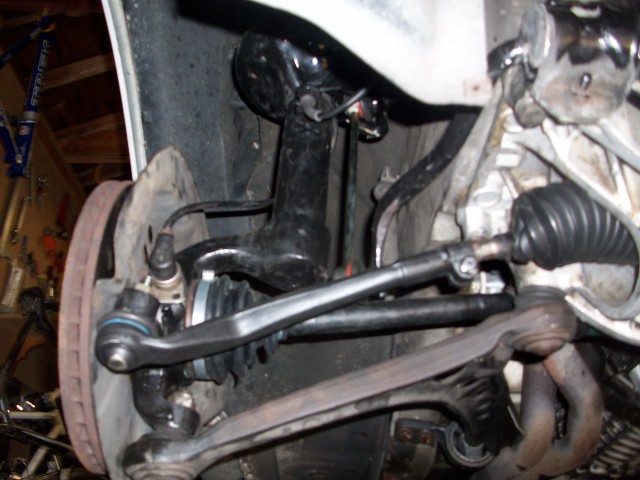
Okay. Getting ready to remove the subframe and steering rack. This is the steering knuckle/swivel joint you need to remove.
Loosen using two 13mm wrenches
Use a screwdriver to pry it open a little. It will come off easier this way.
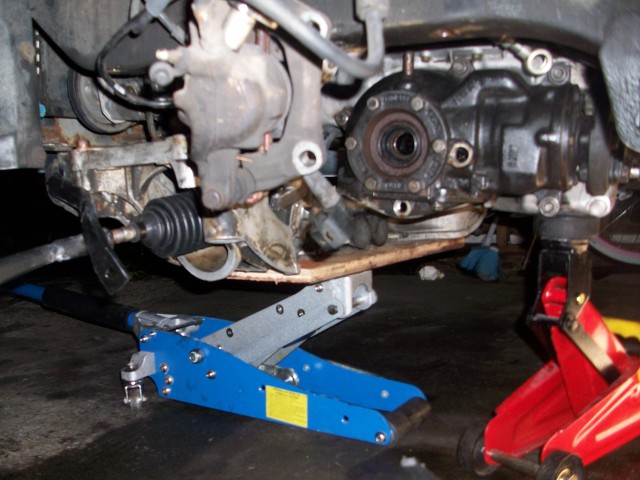
Put a jack under your subframe and remove the 4 bolts holding the subframe and rack in place
Lower your jack to lower the subframe and rack. Dirty, right!?
Notice how one side is lower than the other? This is because I have still not removed the steering swivel joint. At this point, I used a small ball peen hammer to tap the joint out.
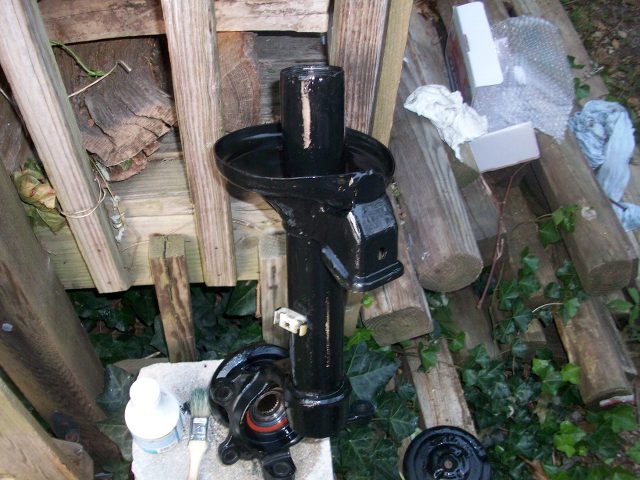
The POR-15 paint on the strut is drying here. Looks good.
Okay, bolt your new rack to the subframe. Just 2 bolts.
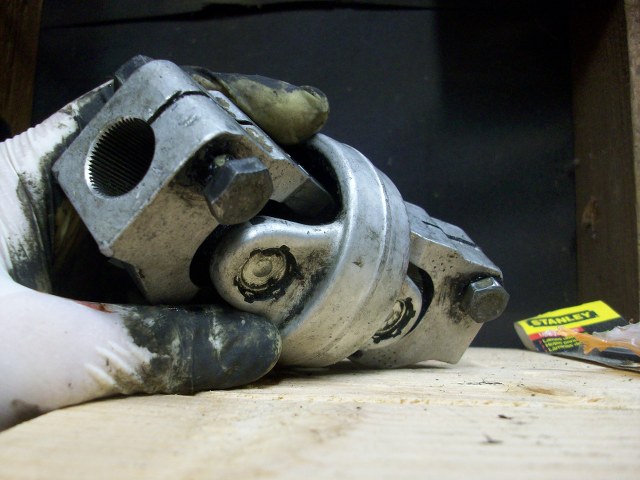
Cleaning up the splines
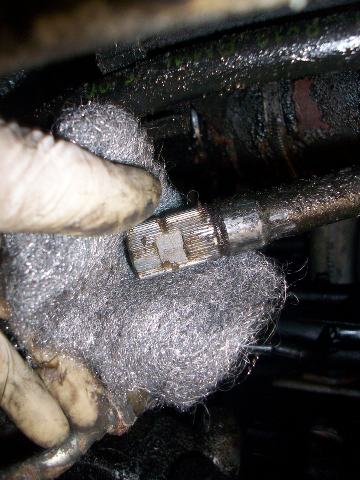
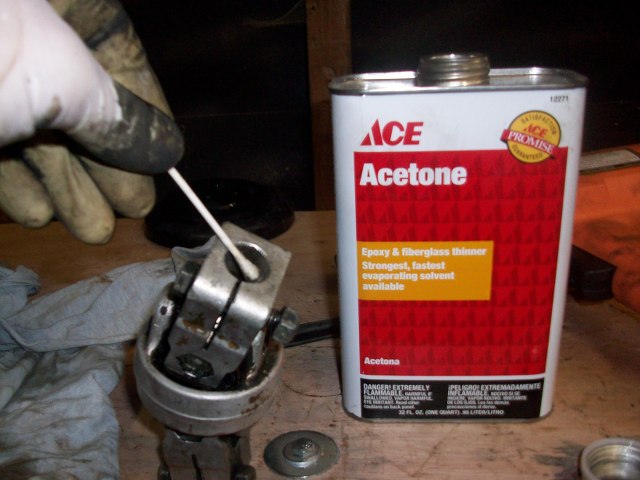
I used acetone on the splines to clean it up real good
I know I’m skipping around a bit but this is the order I did the job in.
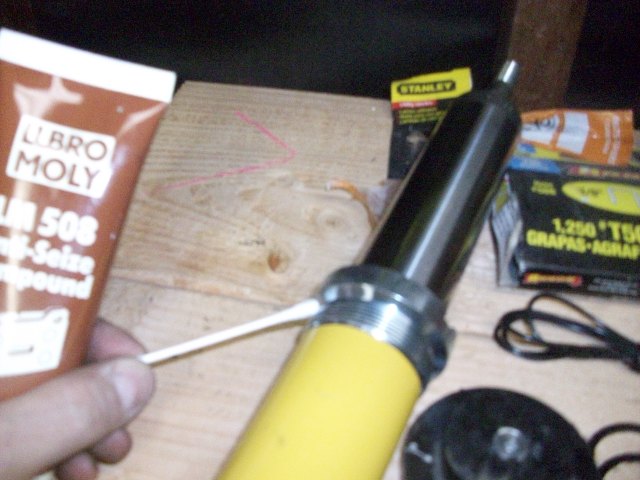
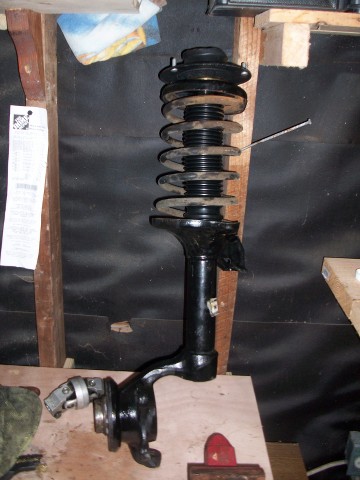
I put some anti-seize on the threads to the new Bilstein HD strut inserts
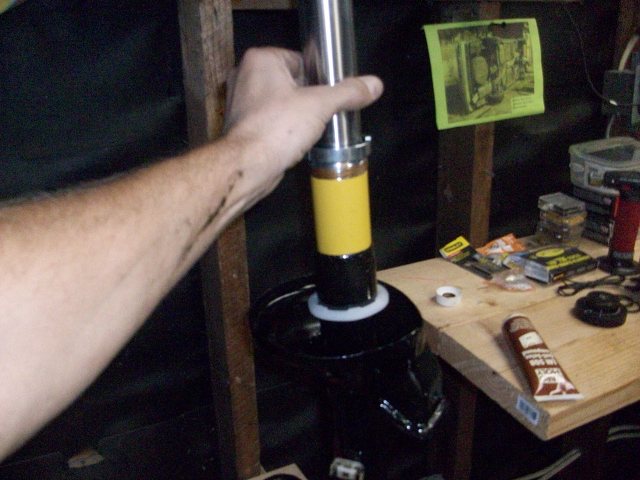
Then put the strut parts together
I then pulled out both of my axles. Yeah, they just pull out. Then I covered the holes so no contaminates could get in.
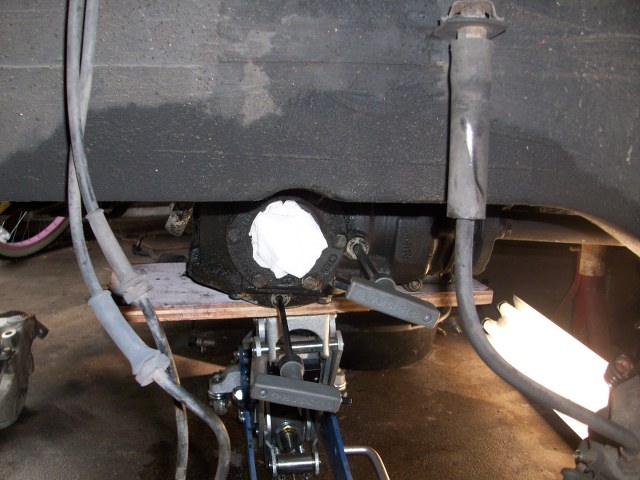
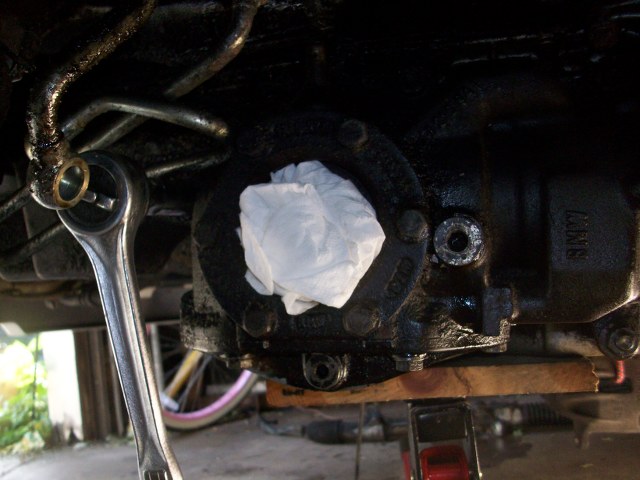
Drain the gear oil from the diff. Just remember to remove the fill hole bolt first.
Here’s the new rack in a cleaned up subframe. I also put POR-15 on my sway bar.
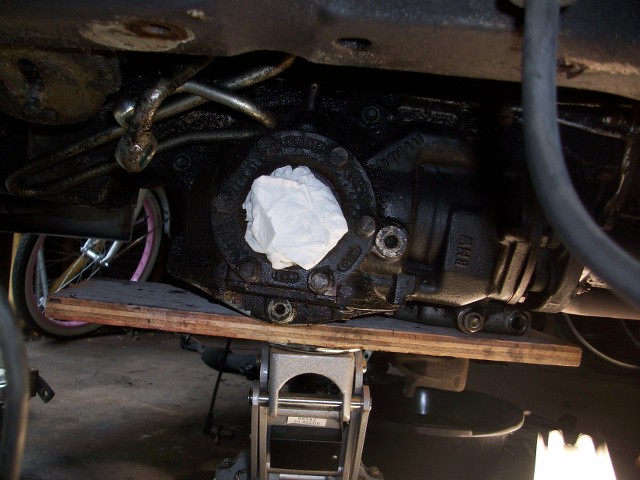
Okay. Now I wanted to address my oil pan leak. No gasket in there so I went with some Permatex Ultra grey to seal the oil pan. Yeah – no gasket! To get the oil pan out, you need to remove the front differential, a support piece from the tranny bellhousing, and here you can see I’m removing the nuts from the Guibo (flex joint).

Notice how you need to remove 3 bolts and then slide the drive shaft past the bellhousing. In order to do this the car has to be in the correct position. Unfortunately mine was not. Solution? I put the car on two jacks on the front of the car so I could roll it back and get the front drive axle lined up like you see in the pic below. If you plan on doing your oil pan, park your car so that this is lined up ahead of time.
Pry back the centering pin (important)
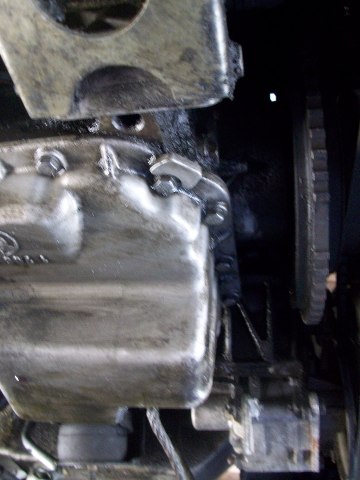
Remove the front differential with 4 bolts holding it to the oil pan
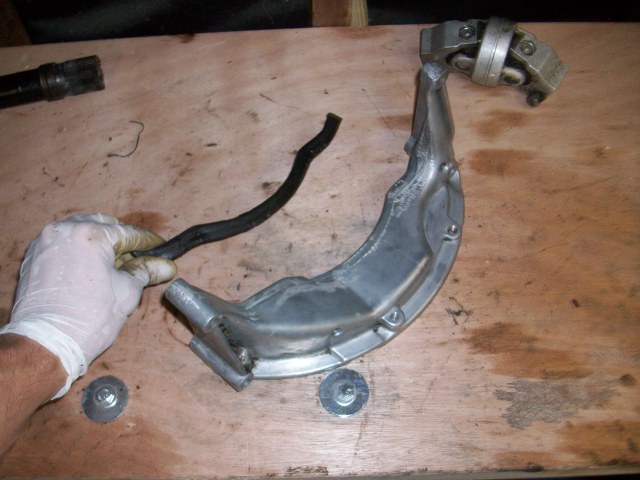
Here’s the front differential out of the car. Looks like a cyborg head or something, right? Lol

I replaced my steering fluid reservoir because, well, it’s just a good thing to do when replacing the steering rack. …a filter is built in.
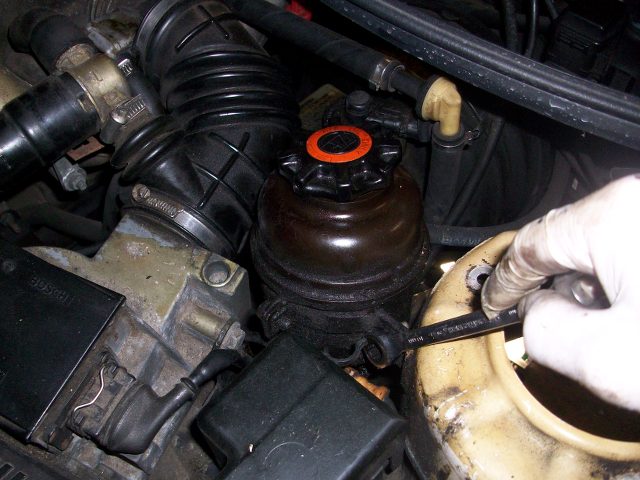
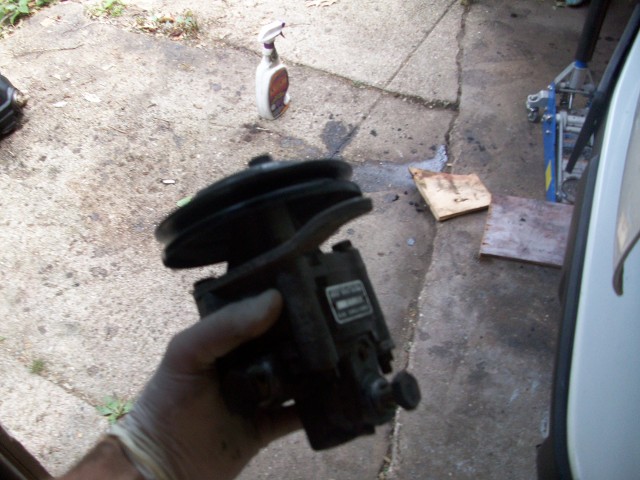
I also swapped in a good working steering pump and belt. You need to remove the power steering hoses (2 banjo bolts)
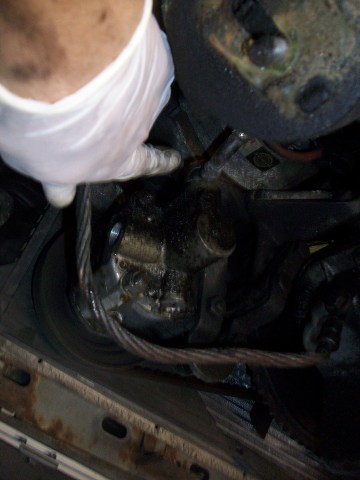
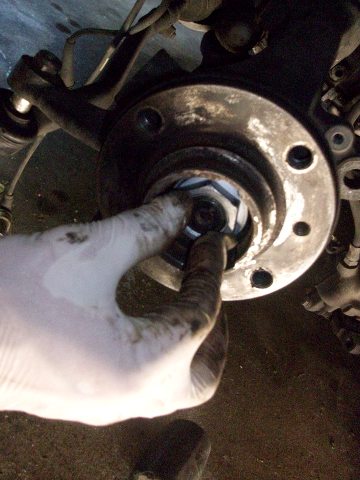
Remove drive axle. Just pull it right out of your transfer case. Thank God my splines still looked good…
I went ahead a drained my tranny fluid. I don’t believe you HAVE to do this. But I wanted to do it while I was down there. Just remember to remove your fill bolt before your drain bolt if you decide to do this. I had to borrow a buddy’s 17mm hex to remove these bolts. …not something everyone has in their toolbox…
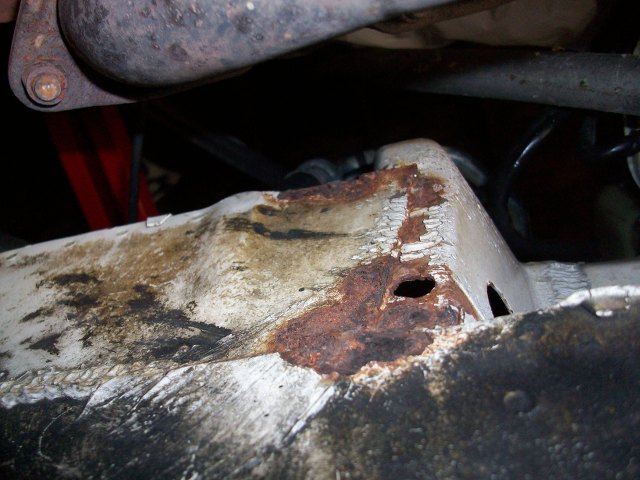
Ah. Some rust on the wall of the engine bay. Gotta fix that!
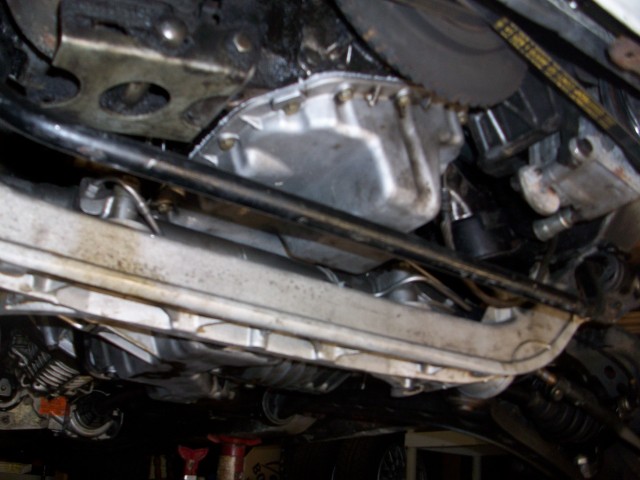
So, back to that oil pan. You need to remove 4 STUPID external torx screws and 4 regular bolts in order to remove the tranny/oil pan support piece. Those external torx screws are E10 in size. I stripped one of these and laid under the car for a long time dremeling it out. Another trip to BMW to get a replacement. …they know me by name now - Not good

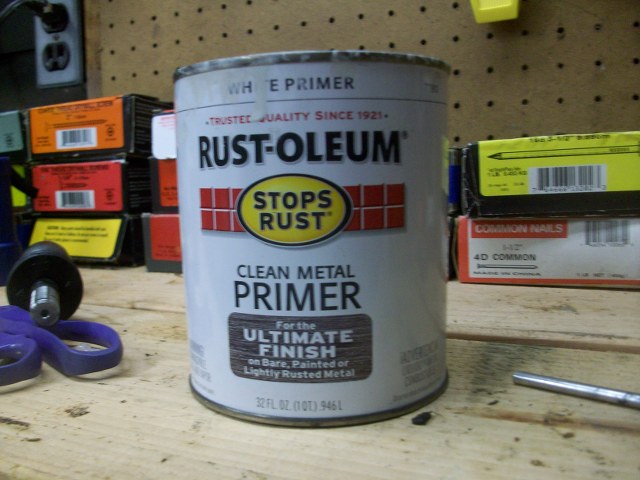
I used some white metal primer to paint the spots I cleaned up in the bay.
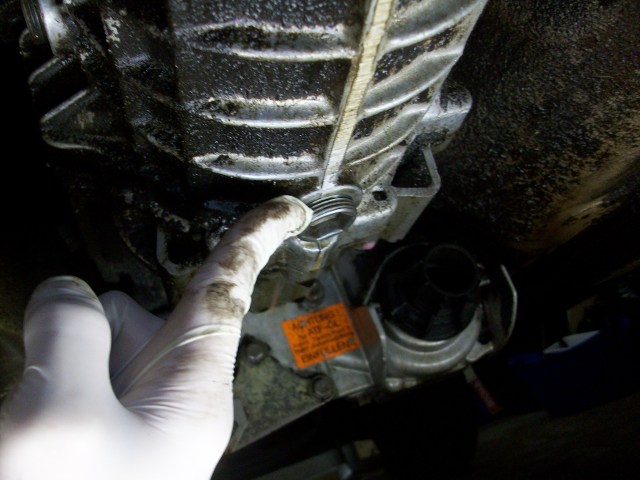
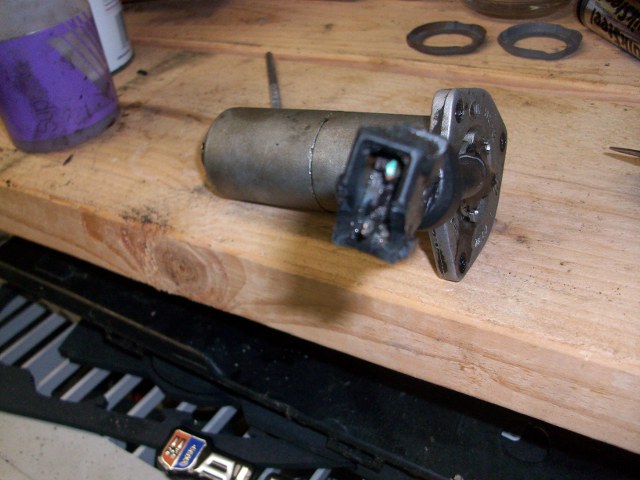
I removed my oil level sensor from the oil pan. The light went on in my car for no reason about 4 months ago. The culprit? Corroded plug.
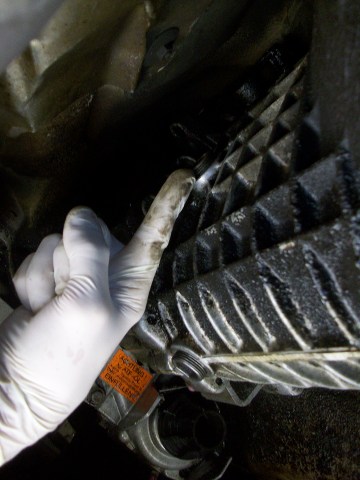
Here’s a closer look at that tranny support piece that bolts over the oil pan. That rubber strip is important as I don’t believe BMW is supplying them anymore…
Now remove all your oil pan bolts and drop the oil pan. Be careful with it!
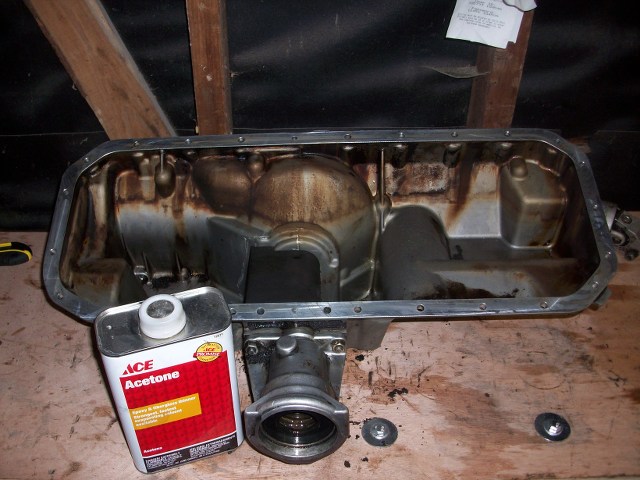
Clean off any old sealant. I used acetone – works very well. Do NOT scrape the oil pan. It’s precision cut to fit perfectly to the bottom or your engine block
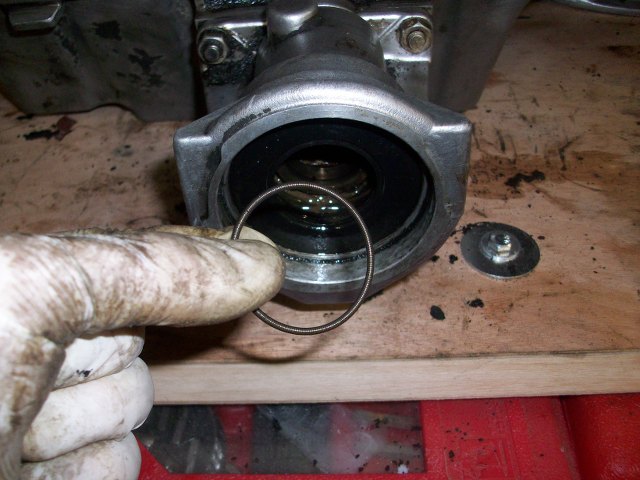
Crap. This spring retainer came out of that hole when I pulled out my axle. Not being able to pry the seal out I left it out. Mistake – you HAVE to replace this entire seal if that comes out. There’s no way of getting it back on the seal with the seal still in there. If you fail to replace this, gear oil will seep past the seal, down your axle and onto the ground… Yeah. Another trip to BMW for me…
When I remove small parts I put them in clockwise order from when I remove them and label them with small pieces of paper.
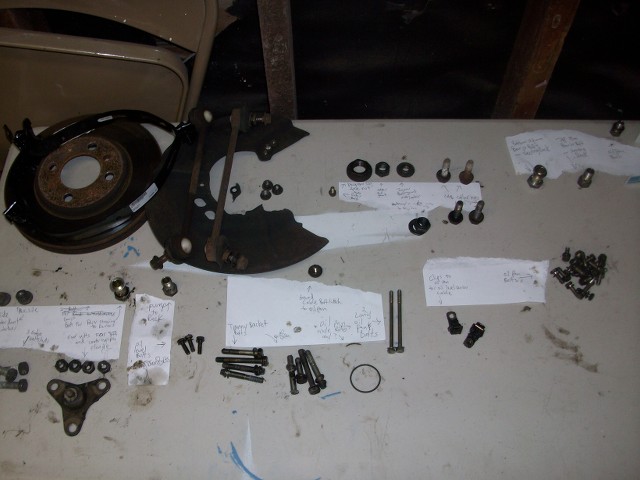
All the bits out
Seal your oil pan and get all those bolts on finger tight. I used Permatex Ultra Grey. Don't forget to get it around the holes... I had a friend to help me get the screws started while I held the oil pan in place. Very hard without a helping hand on that.
Wait 1 hour and then torque to spec. Let sit for 24 hours or more before refilling with oil.
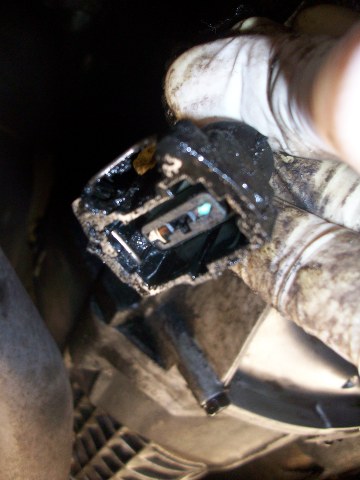
While I was waiting I decided to go ahead and put my oil lever sensor back in the oil pan. I will replace the bad connector at a later date.Remember those clips when you put your oil pan bolts back in. That's what holds the cable for the oil level sensor.
Okay. Put the new engine mounts in.
Passenger side is easier than the driver’s side…
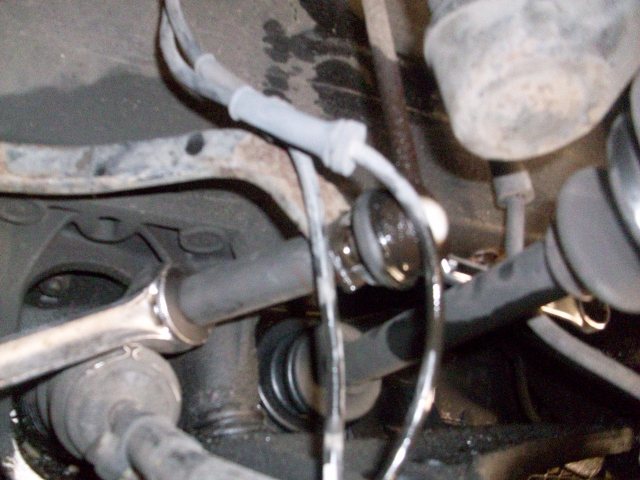
Measure you tie rod ends so that they measure the same length to the subframe. Both sides on mine measured 15 1/8 inches from the center of the tie rod end to the subframe. I’m curious to see what the measurements will be once I get the car professionally aligned.
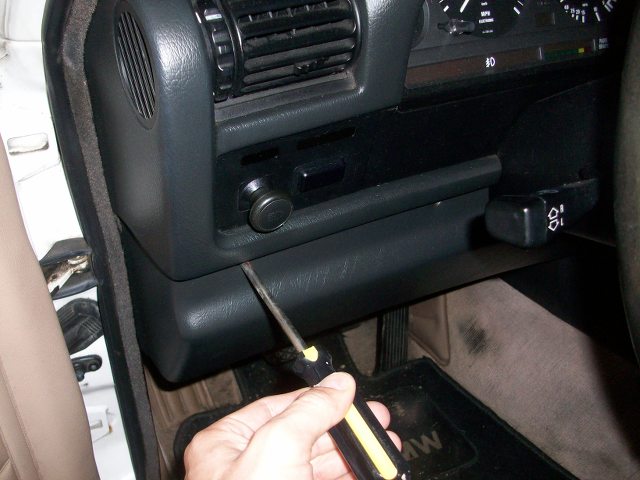
To get the knuckle/swivel joint back on you have to remove the knee bolster. This is for an airbag iX only. On a non-airbag iX, you don’t have to do this…
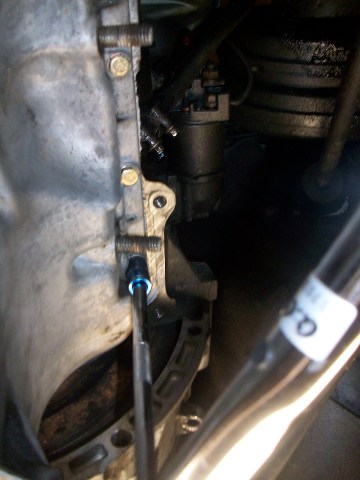
Sorry for the blurry pic, but this is the flex joint you need to remove. 2 bolts for now…
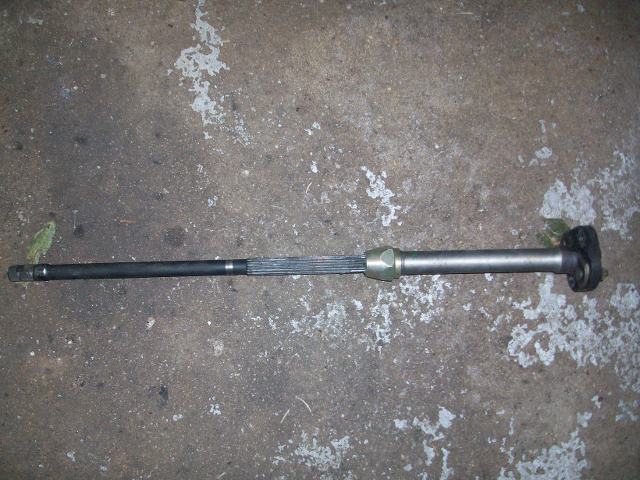
Here’s the splined steering shaft out of the car
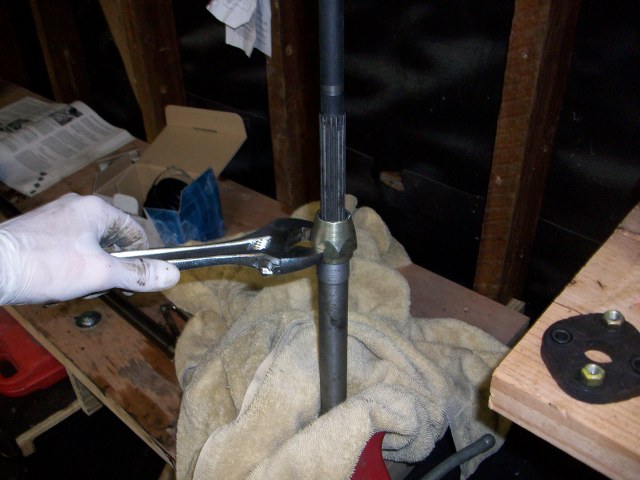
Remove the large nut, mark the shaft on both sides so you can put it back together the same exact way, then pull them apart.
Get a hammer and a punch (brass preferably) and tap the splined shaft on the knuckle/swivel joint
Raise the entire assembly on a jack and put it back on the car. Torque everything to spec. It’s important that nothing in the steering is loose. Install is the reverse of removal.
Okay. I wanted to reboot an outer CV joint. Use side cutter to clip the bands.

SHARP Exacto knife to remove boot
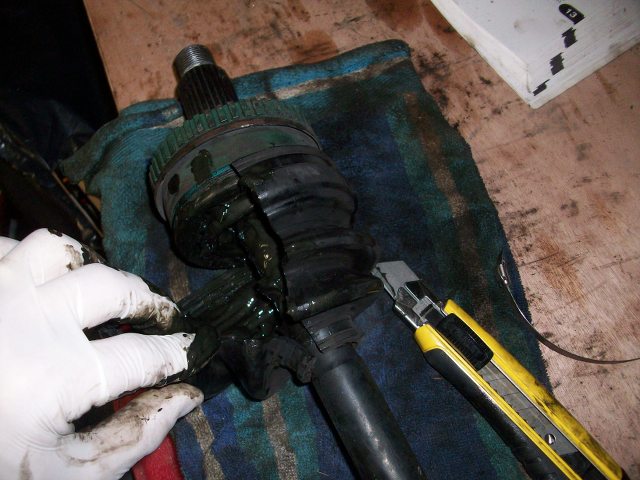
Degrease and clean with parts cleaner

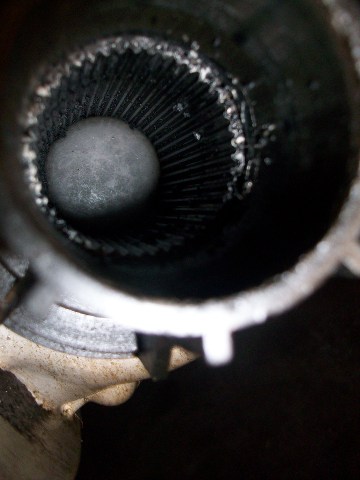
If you want to remove just the outer CV, you have to pry open that little clip in there. See it? Right along the splines there are two tabs. This is VERY difficult and I got lucky.

See in this pic I was able to hammer the joint and circlip past the groove in the splines. Two more light hammer taps and the joint popped right off.
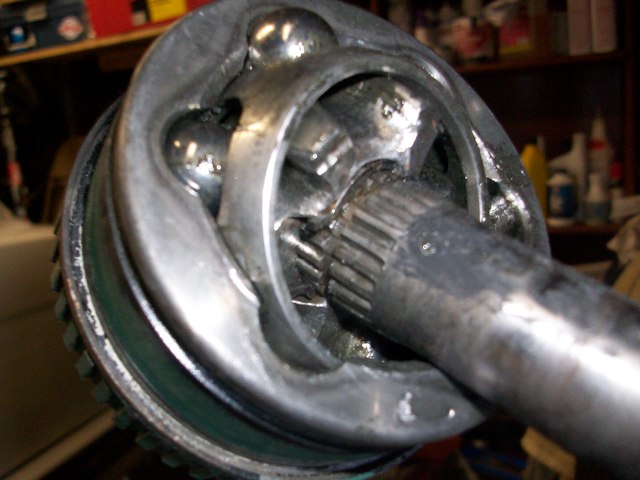
I reused the same circlip. Any new circlip may not fit just right and can be more of pain than it’s worth. That’s why I just reused the same one… Do what you wish.
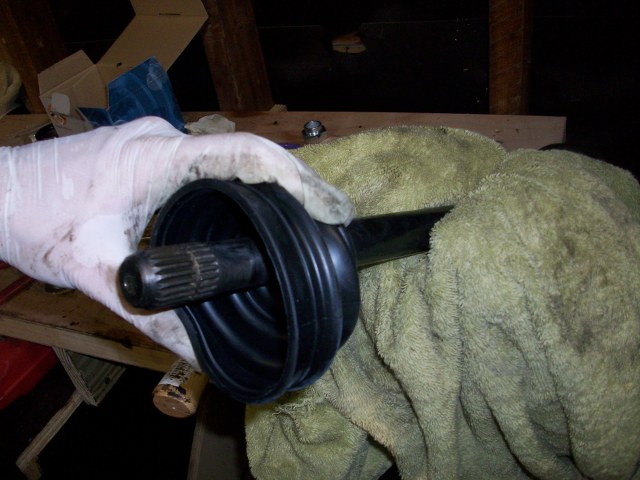
Get your new boot on
Put your new bands on and crimp them TIGHT

Okay. At this point I can see the light at the end of the tunnel…
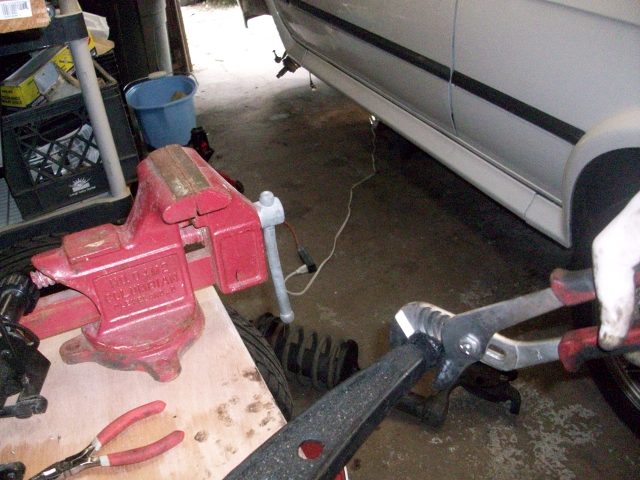
Boil a pot of water and put your new control arm bushings with lollipops in there to soften the rubber. Stir up some warm water and dish soap in a spray bottle. Put on some thick gloves, spray down the control arm with the soapy water and then force the bushings into place. Before you do this, it’s a good idea to bring the control arm and bushing over to the car to see how they line up… If you heat up the bushing and use soapy water, this is easy. A weakling could do it.

New stuff in

Move to the rear of the car to do the rear struts. Peel back the carpeted liner from inside the trunk near the rear strut towers. Loosen (do not remove) the two nuts on either side of the strut.

Remove the bolt that holds the bottom of the strut to the wheel. To get the strut mount off the strut, use and an adjustable wrench at the top of the strut to hold it in place, then remove the nut. Swap in new struts.
Go for a test drive to make sure nothing rattles. Be sure your front strut nut is tight and all ball joints are tight. If you have a ball joint nut that is spinning, you can try to put a jack under it to get some friction, then torque down on the nut.
You’re done! Bring your car in for a professional alignment as soon as possible.
Let it be known, anyone who tells you that any of these jobs is simple is misleading you. Sure, maybe if you’ve done it once or twice before but the first time in is like searching around a cave without a flashlight… My hope is that this write-up with images will help others take on the task(s) with confidence and a knowledge that it WILL TAKE A LONG TIME. …but it’s totally doable with patience and the correct tools.
Here we go:
Remove the hub caps from both front wheels
Pry off dust cover from middle of strut tower
Loosen (do not remove) the 3 nuts at the top of the strut tower
Loosen (do NOT remove) the nut at the top of the strut
Loosen (do not remove) all of the front wheel lug nuts
Jack up the front of the car and put jack stands on both sides, raising the front of your iX off the ground
Chock the back wheels
I also removed the negative lead of the battery terminal as a precaution.
Use rubber gloves! I went through more than 100 of these for this job.
Loosen (do not remove) the axle nuts from both sides. You may need to use a large pipe over a breaker bar like this.
Remove your wheels.
Then remove the brake calipers and tie them up so that the caliper is not simply hanging on the brake line
Remove the brake rotors by removing the hex/allen nut
Remove the lines off the struts and move them out of the way
This is really the same process on both sides except for the brake pad wear sensor…
Remove the dust shield by removing 3 small bolts.
Remove the ABS sensor
Remove your tie rod ends and outer ball joints using a ball joint separator. I got this one from Harbor Freight. Some people use a big hammer and whack the knuckle (never tried this), and others use a pickle fork. I think this is the best tool to use. It'll save your boot, too.
Just remember to lube the bolts so you don’t strip them. Lube everything from Harbor Freight! Lol. This way it may last more than one time…
I use ear plugs to pop the outer ball joint on the control arm while using the same tool. This thing pops out real loud sometimes.
When separating the tie rod end and outer ball joint. Keep the nut on toward the top of the threads so that it doesn’t just fly off.
Close-up of nut you need to loosen for outer ball joint removal
Separating outer ball joint
Remove axle nut. You may need to first pry off the nut retainer if there’s one in there…
Remove sway bar links
Remove nut from inner ball joint on control arm from inside the engine bay
Mine just slid out after that…
Remove bolts for the Control Arm Bushing
Now you can pull your struts out of the car by completely removing the 3 nuts at the top of each strut tower
Here’s one of my control arms out of the car
Remove steering fluid hoses from the steering rack. 2 banjo bolts
Use an engine hoist or support bar to hold up the engine. I got this one from Harbor Freight for $59
Again – lube those threads!
While I saw it, I went ahead and disconnected the oil lever sensor on the oil pan. I also drained my engine oil.
The first Control Arm Bushing was really trashed and all that remained is what you see here on the end of the control arm. I used a drill to make several holes so I could just twist it off.
I cleaned up the control arm with a green ScotchBrite pad.
I used Isopropyl alcohol to prep for paint
I used a SawZall to cut the remaining ring out from the lollipop
Getting ready to press in the new bushing, be sure to line up the arrow on the bushing with the notch on the lollipop
The second bushing I used a 3-jaw puller to simply remove it from the control arm. This really was easy…
To get the new bushings on I needed to find something that was about the size of the bushing so that I could use the 3-jaw puller again to press them in the lollipops. What are the odds that I found this little doodad lying around?…
Wow! Perfect fit. Squeezed them in very smoothly. Be creative and find something that you can used to press them in. No amount of hammering is going to work… If you’ve done it this way, well, then you’re a magician.
I used some Self-Etching Primer on the end of the control arm to cover any exposed metal so that it doesn’t rust out in the future.
Now I was ready to go ahead and compress the spring on the struts so that I could put the new ones in and put on my new strut mounts.
Again. Lube those threads!
I used an impact from Harbor Freight to compress the springs, evenly and quickly. Be VERY careful here.
I placed it on the floor to compress it all the way . It's safer that way I think...
Once fully compressed, the mount will come off by removing the nut you loosened earlier. Carefully place the spring somewhere safe. This is like a loaded bomb. Be CAREFUL and keep any and all pets and children out of harm’s way.
I used a pipe wrench to remove the collar that holds the insert in the strut housing. This took a HUGE amount of torque to break the rust bond.
I ran out of PB Blaster but this worked just as well…
Tossing my old strut
Getting my strut housing ready for some sanding and POR-15 treatment
I got the Starter Kit. Best bang for the buck. It goes a loooong way….
Dremel sanded
The Kit
Here’s my new-to-me rack from JiXer’s hook up
Okay. So I decided to replace my motor mounts while I was in there. They were slightly cracked… Here’s one of the bolts you need to remove. Up above the boot there
The motor mounts have nuts holding them from the top as well. The driver's side is a little tricky to get to. I did it without having to remove the air box.
Okay. Getting ready to remove the subframe and steering rack. This is the steering knuckle/swivel joint you need to remove.
Loosen using two 13mm wrenches
Use a screwdriver to pry it open a little. It will come off easier this way.
Put a jack under your subframe and remove the 4 bolts holding the subframe and rack in place
Lower your jack to lower the subframe and rack. Dirty, right!?
Notice how one side is lower than the other? This is because I have still not removed the steering swivel joint. At this point, I used a small ball peen hammer to tap the joint out.
The POR-15 paint on the strut is drying here. Looks good.
Okay, bolt your new rack to the subframe. Just 2 bolts.
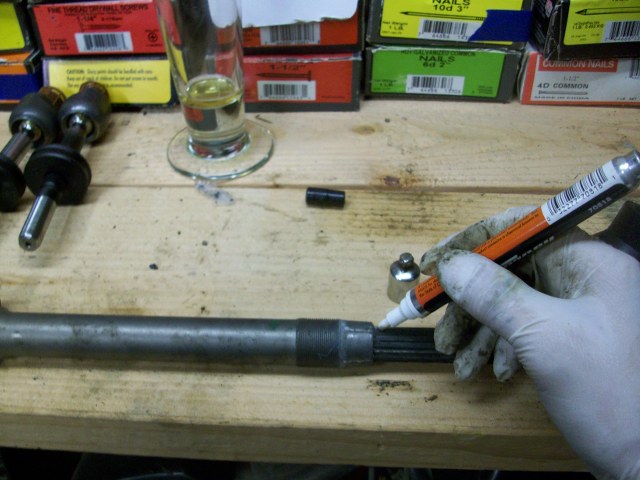
Cleaning up the splines
I used acetone on the splines to clean it up real good
I know I’m skipping around a bit but this is the order I did the job in.
I put some anti-seize on the threads to the new Bilstein HD strut inserts
Then put the strut parts together
I then pulled out both of my axles. Yeah, they just pull out. Then I covered the holes so no contaminates could get in.
Drain the gear oil from the diff. Just remember to remove the fill hole bolt first.
Here’s the new rack in a cleaned up subframe. I also put POR-15 on my sway bar.
Okay. Now I wanted to address my oil pan leak. No gasket in there so I went with some Permatex Ultra grey to seal the oil pan. Yeah – no gasket! To get the oil pan out, you need to remove the front differential, a support piece from the tranny bellhousing, and here you can see I’m removing the nuts from the Guibo (flex joint).
Notice how you need to remove 3 bolts and then slide the drive shaft past the bellhousing. In order to do this the car has to be in the correct position. Unfortunately mine was not. Solution? I put the car on two jacks on the front of the car so I could roll it back and get the front drive axle lined up like you see in the pic below. If you plan on doing your oil pan, park your car so that this is lined up ahead of time.
Pry back the centering pin (important)
Remove the front differential with 4 bolts holding it to the oil pan
Here’s the front differential out of the car. Looks like a cyborg head or something, right? Lol
I replaced my steering fluid reservoir because, well, it’s just a good thing to do when replacing the steering rack. …a filter is built in.
I also swapped in a good working steering pump and belt. You need to remove the power steering hoses (2 banjo bolts)
Remove drive axle. Just pull it right out of your transfer case. Thank God my splines still looked good…
I went ahead a drained my tranny fluid. I don’t believe you HAVE to do this. But I wanted to do it while I was down there. Just remember to remove your fill bolt before your drain bolt if you decide to do this. I had to borrow a buddy’s 17mm hex to remove these bolts. …not something everyone has in their toolbox…
Ah. Some rust on the wall of the engine bay. Gotta fix that!
So, back to that oil pan. You need to remove 4 STUPID external torx screws and 4 regular bolts in order to remove the tranny/oil pan support piece. Those external torx screws are E10 in size. I stripped one of these and laid under the car for a long time dremeling it out. Another trip to BMW to get a replacement. …they know me by name now - Not good
I used some white metal primer to paint the spots I cleaned up in the bay.
I removed my oil level sensor from the oil pan. The light went on in my car for no reason about 4 months ago. The culprit? Corroded plug.
Here’s a closer look at that tranny support piece that bolts over the oil pan. That rubber strip is important as I don’t believe BMW is supplying them anymore…
Now remove all your oil pan bolts and drop the oil pan. Be careful with it!
Clean off any old sealant. I used acetone – works very well. Do NOT scrape the oil pan. It’s precision cut to fit perfectly to the bottom or your engine block
Crap. This spring retainer came out of that hole when I pulled out my axle. Not being able to pry the seal out I left it out. Mistake – you HAVE to replace this entire seal if that comes out. There’s no way of getting it back on the seal with the seal still in there. If you fail to replace this, gear oil will seep past the seal, down your axle and onto the ground… Yeah. Another trip to BMW for me…
When I remove small parts I put them in clockwise order from when I remove them and label them with small pieces of paper.
All the bits out
Seal your oil pan and get all those bolts on finger tight. I used Permatex Ultra Grey. Don't forget to get it around the holes... I had a friend to help me get the screws started while I held the oil pan in place. Very hard without a helping hand on that.
Wait 1 hour and then torque to spec. Let sit for 24 hours or more before refilling with oil.
While I was waiting I decided to go ahead and put my oil lever sensor back in the oil pan. I will replace the bad connector at a later date.Remember those clips when you put your oil pan bolts back in. That's what holds the cable for the oil level sensor.
Okay. Put the new engine mounts in.
Passenger side is easier than the driver’s side…
Measure you tie rod ends so that they measure the same length to the subframe. Both sides on mine measured 15 1/8 inches from the center of the tie rod end to the subframe. I’m curious to see what the measurements will be once I get the car professionally aligned.
To get the knuckle/swivel joint back on you have to remove the knee bolster. This is for an airbag iX only. On a non-airbag iX, you don’t have to do this…
Sorry for the blurry pic, but this is the flex joint you need to remove. 2 bolts for now…
Here’s the splined steering shaft out of the car
Remove the large nut, mark the shaft on both sides so you can put it back together the same exact way, then pull them apart.
Get a hammer and a punch (brass preferably) and tap the splined shaft on the knuckle/swivel joint
Raise the entire assembly on a jack and put it back on the car. Torque everything to spec. It’s important that nothing in the steering is loose. Install is the reverse of removal.
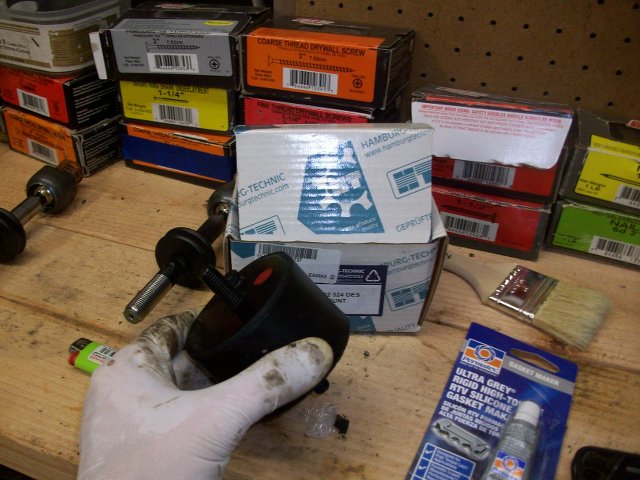
Okay. I wanted to reboot an outer CV joint. Use side cutter to clip the bands.
SHARP Exacto knife to remove boot
Degrease and clean with parts cleaner
If you want to remove just the outer CV, you have to pry open that little clip in there. See it? Right along the splines there are two tabs. This is VERY difficult and I got lucky.
See in this pic I was able to hammer the joint and circlip past the groove in the splines. Two more light hammer taps and the joint popped right off.
I reused the same circlip. Any new circlip may not fit just right and can be more of pain than it’s worth. That’s why I just reused the same one… Do what you wish.
Get your new boot on
Put your new bands on and crimp them TIGHT
Okay. At this point I can see the light at the end of the tunnel…
Boil a pot of water and put your new control arm bushings with lollipops in there to soften the rubber. Stir up some warm water and dish soap in a spray bottle. Put on some thick gloves, spray down the control arm with the soapy water and then force the bushings into place. Before you do this, it’s a good idea to bring the control arm and bushing over to the car to see how they line up… If you heat up the bushing and use soapy water, this is easy. A weakling could do it.
New stuff in
Move to the rear of the car to do the rear struts. Peel back the carpeted liner from inside the trunk near the rear strut towers. Loosen (do not remove) the two nuts on either side of the strut.
Remove the bolt that holds the bottom of the strut to the wheel. To get the strut mount off the strut, use and an adjustable wrench at the top of the strut to hold it in place, then remove the nut. Swap in new struts.
Go for a test drive to make sure nothing rattles. Be sure your front strut nut is tight and all ball joints are tight. If you have a ball joint nut that is spinning, you can try to put a jack under it to get some friction, then torque down on the nut.
You’re done! Bring your car in for a professional alignment as soon as possible.


Comment