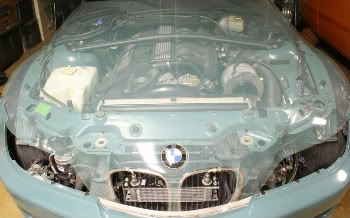
I got mine, but they are the wrong color! if they were a darker silver I wouldnt mind, but they are pretty much the exact color of the car.... let me know what we can do! thanks alot!
LTW Flags for your E30 here:
Collapse
X
-
-
Comment
-
hmm...i am in debate right now, i put the silver up against the car and I would say it would be more of a ghost effect which isnt bad, i will figure it out and let you know! thanks alot!!Comment
-
yeah you changed colors on me but somehow I still ended up sending you silver instead of black. I guess its because I had silver written down everywhere for youComment
-
It's here! I'll probably wait until the temp is in the positive numbers again before I apply it. A DIY would be nice to have too, when/if someone get's a chance...'89 325is S50 Track Montser
'04 X5 Daily/Tow Vehicle
http://www.avarestoration.com
http://www.myspace.com/brendanfiddle

Click here if you want to be my zombie slave...
http://www.youtube.com/user/Fidhle007
Comment
-
DIY ltw decal
supplies: spray bottle, credit card, towel, sewing needle
Begin by positioning the hood piece where you it and the fender piece to match it. This is not a slap on and you're ready to go deal, you have to be creative and use your own taste to fit the flag where you want it and how you want it.
First spray a fine mist onto the hood so if you mess up you can move the flag around so you can get it how you want it. Now lay down the hood piece on the hood, have the front part over hang about 1/4in so you can fold it under the hood for a cleaner look. For the fender side of the hood piece, hang it over about an inche about, give or take. So the hood is connected to the fender by the sticker, this blends the hood piece to the fender piece together. Get the credit card and start scrapping the paper that the sticker is held together by, getting most if not all the water from under the sticker out. When you think you've done that carefully lift up the paper slowly going at en angle so the stickers dont peel off of the hood, now grab the towel and lightly wipe off the excess water. You'll notice you'll have some stickers bridging across fromt he hood to the fender(from earlier i mention over hanging the stickers), cut down the center of them and fold hood side under the hood and the fender down onto the fender.
Now, for the fender piece it gets tricky as the paper holding the flag pieces isnt' stretchy like the vinyl, the contours of the fenders will make this part go a bit slower. Same process with the misting and scraping and towel. The way i did it was i cut out a piece of the flag in the rear and trimmed it to fit my headlight area, just one block though. I aligned the fender pieces to the hood and start from the top and went down slowly towards the bottum carefully trying not to crease or misalign any of the blocks of the flag. instead of scraping the stickers witht he paper on top of it i took it off then scrapped the vinyl itself because the adhesive paper would make it harder to work with. Be careful not to scrape too hard or youll stretch the vinyl, for those stubborn water bubbles use the sewing pin to poke a hole for the water to escape. Now back to the single piece of the flag I chose to take out, i cut it to shape of a triangle and fit it up near the headlights and folded it into the fender for a clean flush look.
I hope that wasn't too confusing without pictures, i'll get up them up as soon as i can.Comment
-
couple tips:
- If you are confident enough, a hair dryer is a very, VERY powerful tool.
- Also, it's good to have an exacto knife around.
- Poke a hole in the vinyl to eliminate air bubbles as a LAST resort.
- 99.9% of the air bubbles will go away with a daily dose of sun exposure, winter time give it a few days. (the vinyl will heat up and expand and at night will shrink and the bubbles will magically go away)
- Use a 1 parts soap 10 parts water soap/water solution and spray liberally, you can never not have enough water. Easier to take water out than to put water under once its on.Comment
-
Comment
-
INstalled
I put mine on today. By the time I got done it was too dark for a pic, so I'll post tomorrow. Tri-color on a white car. Looks great.
The front was no problem. The rear fender required a bit of re-design, but it came out very well.
All in all well worth the $70. It looks great without being what we used to call a "Mylar GT" :D1997 Porsche Carrera "S" The Mistress
1988 BMW R100RS "Ultimate Airhead"
1987 325is Daily driver and tracktoy with a growing list of mods.Comment
-
-
i got mine last week - not going to put it on for a while. BUT, I'd note that Jon put some self-explanatory markings on the backing paper to show how to align it.
Looks like it should be fairly easy to do.
Thanks!Current Cars2014 M235i2009 R56 Cooper S1998 M31997 M3Comment

 R.I.P 07/01/09 - 04/23/10 :(

Comment