
Very impressive. Someone cars about there car alot :)
-

///B///M///W///
-
Well done. I vote sticky.
Comment
-
really wikced build man, i am about have way through the pictures, and starving, but kudos for an impressive project, and for taking the time to snapshot everything..
two thumbs up, plus m3 content, a definite reason to grow a third thumbComment
-
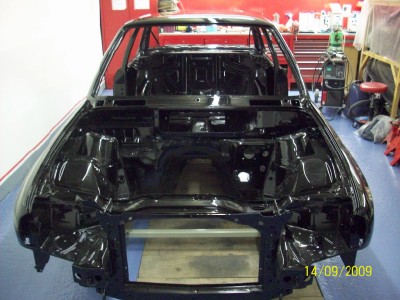
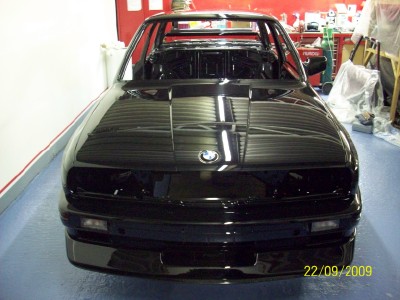
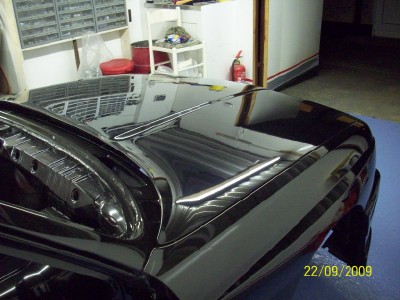
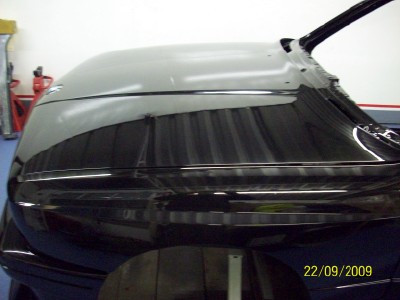
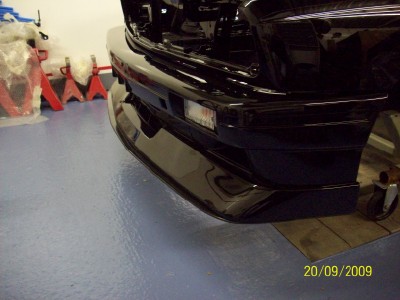
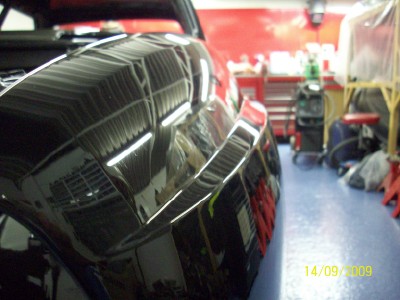
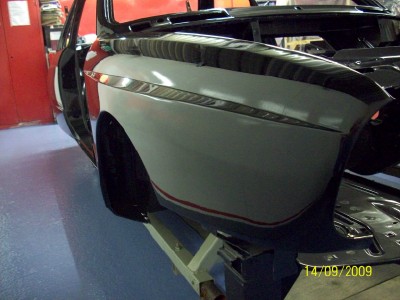
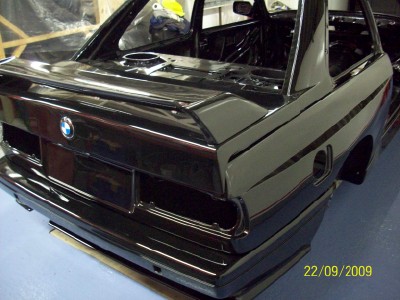
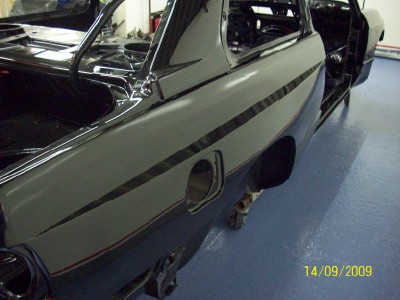
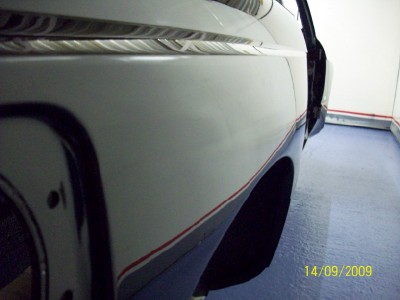
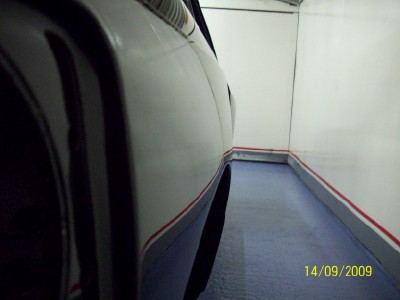
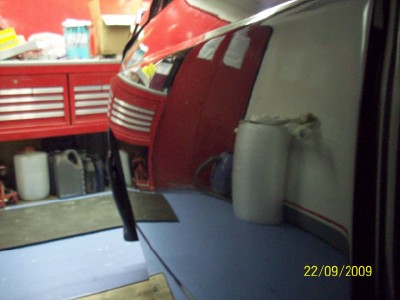
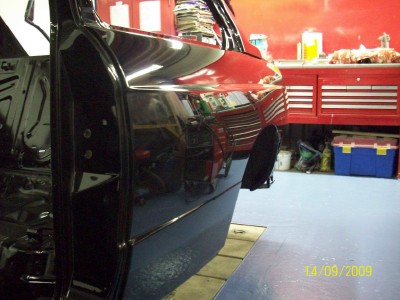
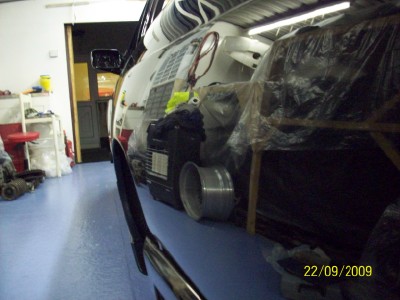
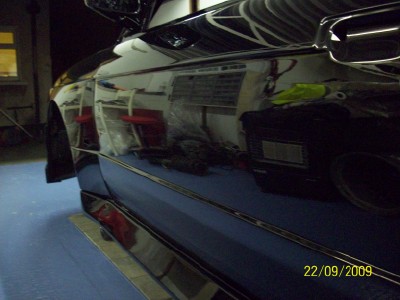
Evening all,
No big load of verbal diaorea this post, will let the pic's do the
talking. All the bits are back from paint and although it makes no
sense what so ever to assemble it now, as theres still a load of
work to do on the bare shell, I'm not waiting another 5 months
to get a look at this thing together. It's been about 13/14 months of body
preperation getting this thing to paint and the big question was
always going to be, was it worth it?
.
.
.
.
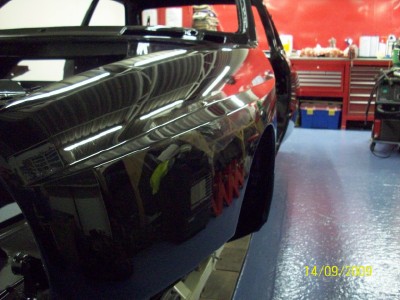
In a word,
Yes
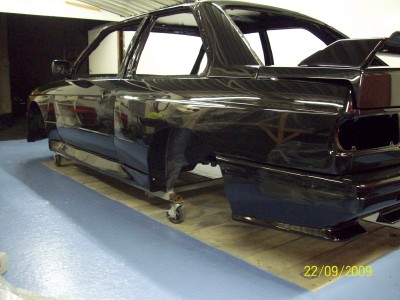
Next up is to get it all assunder again without scratching it
and start the cavity waxing and sound proofing.
STAY TUNED
Last edited by xworks; 03-10-2016, 01:16 AM.Comment
-
Wow. That's all I have to say. Very impressive.Comment
-
Talk about hard work man, good job. Is it ever going to hit the open road again? I can only imagine a new dent or rock chip might drive you postal.Wait, you both have small dogs? thats kinda
~e30s52Comment
-
Was asked the same question on another forum a
short while ago and the answer is when it's done,
it's going into a carcoon humidified cover and carefully
parked up in the garage so it'll keep it's future value
as a collectors item hopefully. I may take it out for
some car shows, but only during the summer months
when the weather is sunny. Might drive it to the odd
show instead of trailering it all the time to keep things
from seizing up, but it would be heart breaking to get
any stone chips on it.
.
.
.
.
.
.
.
.
.
.
.
.
.
.
.
.
.
.
.
BOLL*CKS TO THAT CARRY ON,
I plan on driving the door handles off it 7 days a week
till fossil fuels run out. There's no way I could put this
much effort into a car only to keep it "garage queened" for the
next owner to enjoy. Sure it'll get stone chipped and scratched
as time goes on, but I guarantee you I'll enjoy every mile while
collecting them.Comment
-
-
beautiful!!!!!!!!!
Comment
-
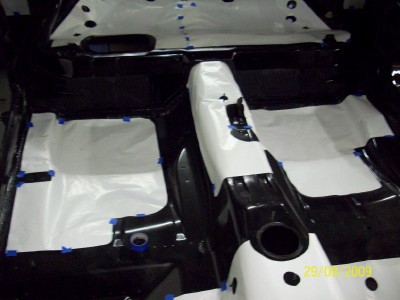
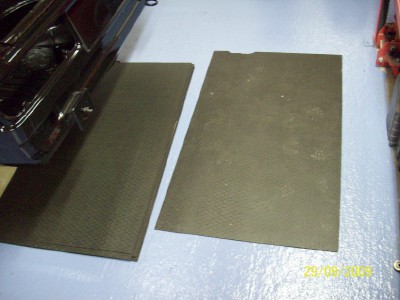
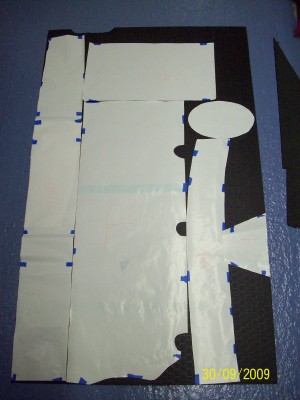
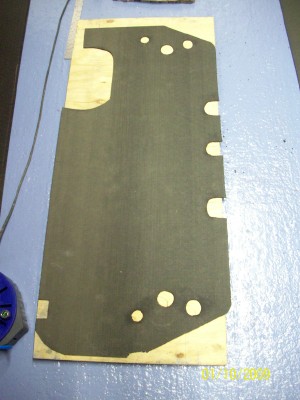
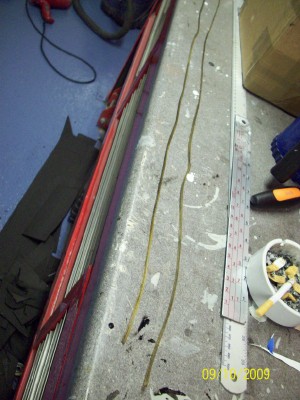
Evening all,After stripping the removable panels back off the car again andpacking them away safely it was on to the next task. Sound deadening.That sticky black crap thats a ball breaker to get off when your strippinga car down. Still, going back on should be a walk in the park, he said,stupidly.Back at the start of the rebuild I'd thought a bit about this and hadlooked into the price and availability of aftermarket products, i.e.Fatmat and Dynamat, and had considered covering the whole floorpan to make the inside as quiet as possible. Then I got a chanceto see a sheet of Dynamat in person, and it struck me, this stuff'sheavy. If I cover the whole floorpan with this I'm going to be addinga fair bit of weight to the car. And on further reflection I don't actuallyremember thinking at any stage "sweet jesus this car's a bit noisey in here."So I decided I'd replicate the original sound proofing instead, as someonewho almost certainly knows a lot more about this than me, had sat down inthe beginning when this car was being designed and decided exactly howmuch was needed and where it should go. Plus, a part number searchshows the e30's sound proofing material is still used in all the modernbmw fleet, so it must be half decent?With that decided next thing to do was search through the pictures I'dtaken on disassembly and any other pic's I could find online to make papertemplates of the original shapes. Which came out like this....
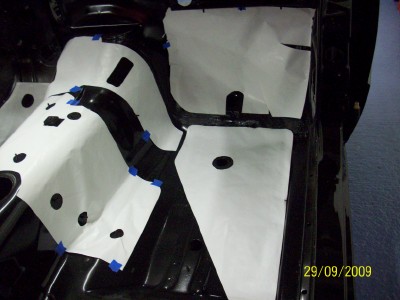
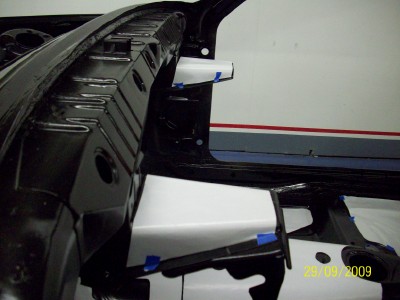
I added in a couple of small extra bits, one either side on the rearinner wheel arches to help keep down any extra drone from runningwider than standard rear tyres....
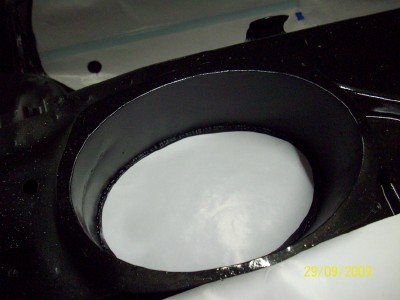
 and a little bit at the bottom of each speaker pot....
then I ordered up some soundproofing from Bmw. Originally I'dintended to get 12 of the 50cm X 50cm sheets to do it all, butupon making the order I was informed that that part number hadbeen superseded with another part number (pn.51488165271),and the new one was twice the price. So, I assumed the sheetswere probably twice the size and to be on the safe side went aheadand ordered 7.Imagine my suprise when I went to collect it and found I now hadenough to sound proof the starship f*cking enterprise!
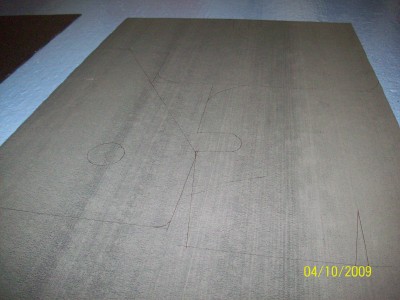
The sheets are a little over 3 times the size of the original part number.On the bright side I could now cut all the sheets out fully withouthaving to join bit's together....
I've seen other pic's on the net of sound proofing and it looked softand easy to trim, god only knows what I've ended up with, causethis stuff's as ridgid as a plank and brittle too.So, templates marked out....
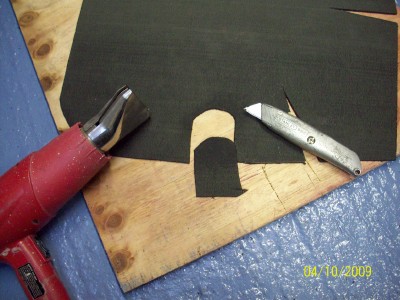
ruler and stanley knife to cut out the straight pieces...
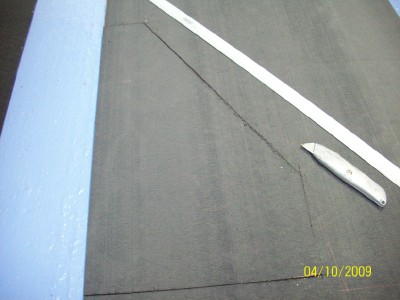
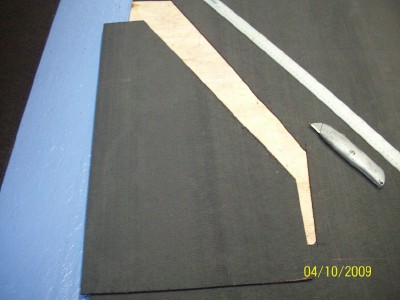
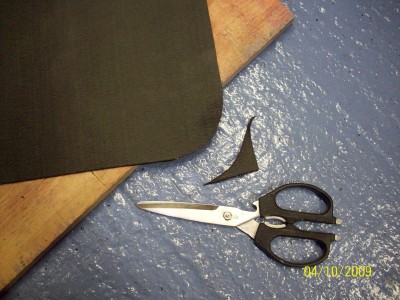
and for curved bits a little heat from a heat gun softens it just nicelyfor cutting with a scissors....
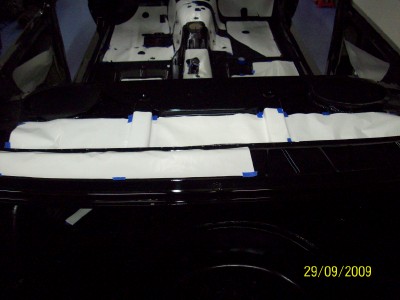
With all the bits cut out, next up was to get the body work ready forthem, a quick clean with thinners gets the surface clean of the littlespots of buffing compound scattered throughout the inside of the shell....
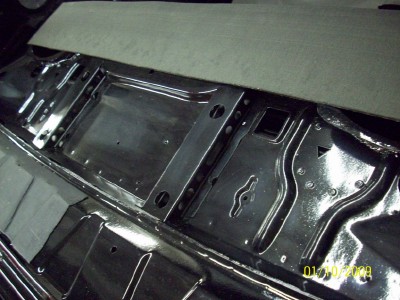
and then lay the sheet in place, see what I mean about rigid....
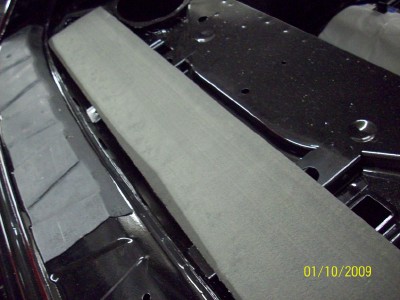
So, a little help from the heat gun....

and the stuff falls down neatly in to place, but it isn't stuck on yet....
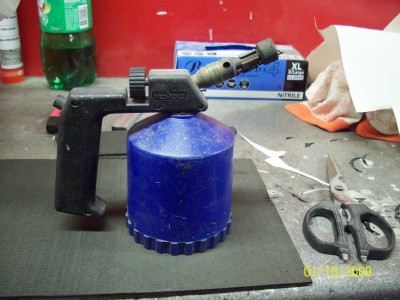
For that it needs to be heated up a little more. Which brings out thegas blow lamp....
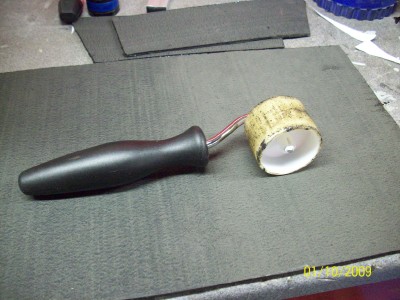
and a little hardware store roller to press it down evenly.....
a little practice shows that just enough heat at the surface of the sheetto turn it a wet shade of dark black allows the underside to get a goodsolid bond....
heat gunned....
blow lamped....

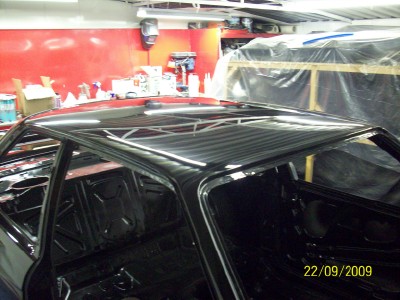
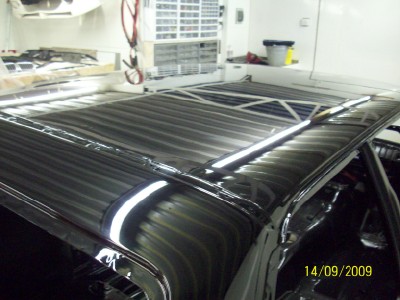
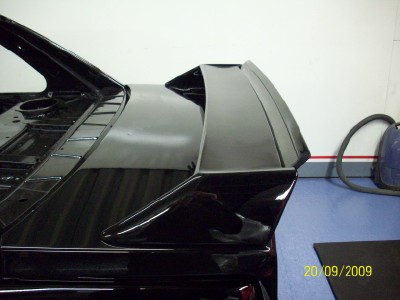
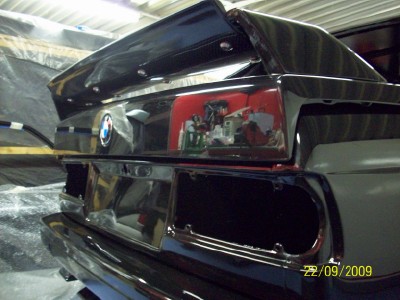
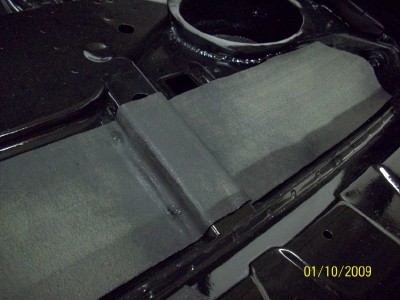
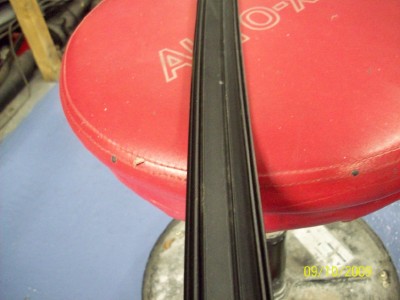
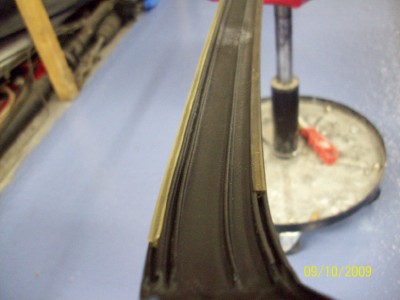
Next up was another small job to tick off the "things to do encyclopaedia".The roof band that covers the join at the rear roof extension....
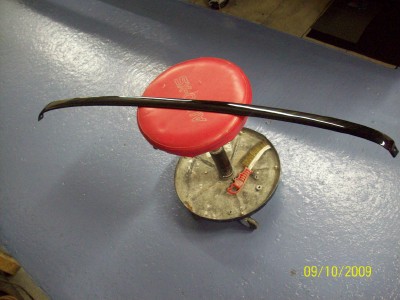
first up was to fit the 2 little sealing strips to the littlerecesses on the underside of the band....
I spent 20 minutes poking in the first one. before realising on thesecond one that they could slide straight in from the end, in 5 seconds.I know, i know, it's a miracle I've made it this far.....
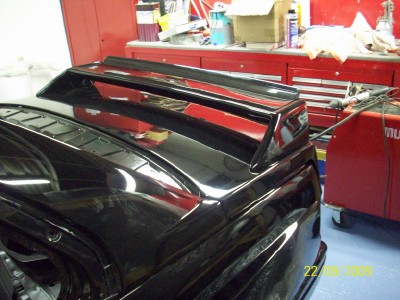
new clips popped in to the roof....
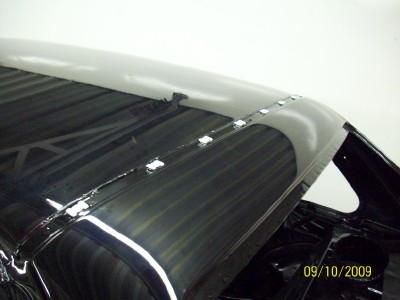
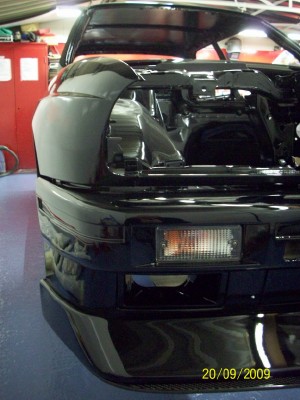
and sledge hammer the roof band down on to them...
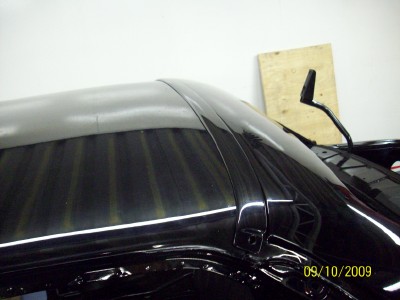
There's one large rivet to go in either side of the band to finish it offwhich I've yet to do.Last edited by xworks; 03-10-2016, 02:58 PM.Comment
-
After all that, it's on to the next job on the list, cavity waxing.
All the box sections and cavities need a coating of wax as the acid
dipping had removed all the original stuff. This can be a bit of a messy
job and if you get this wax on the outside paintwork you'll need to use
white spirits to remove it. A situation thats worth trying to avoid you'll
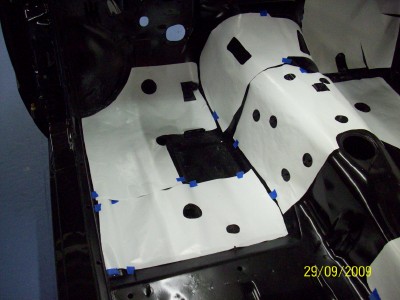
agree. So, some soft sheets and some masking tape....


The experienced one's among you will figure out why it's far less grief
just to go out and buy some new sheets rather than borrowing what you were
sure was "old and no longer needed sheets".
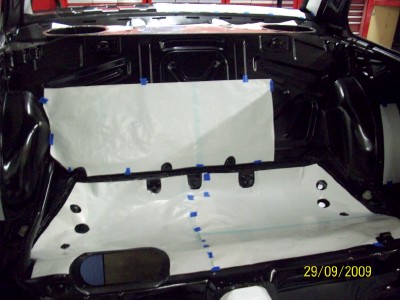
Anywho, with the shell rapped up, first up was to glue on the new roof
insulation....

again the spit helps greatly with this job.....


Then we have the cavity wax, I went with Dinitrol.....

it comes in 1 litre "shultz" type tins and you need a "shultz" style
gun to screw on to the top of the can for spraying it....

the gun itself comes with a normal type spay nozzle which is useful for
spraying open areas, also need though is a "wand". This is a 2 foot piece
of plastic tubing that screws into the gun one end, and the other end has
a jet with multiple holes to spray it out in all directions, which is perfect
for inside the box sections.....

all rigged up and ready to go, the tin of wax is dipped in a bucket of
hot water for a while first. This thin's out the wax and makes it spray
out in a finer mist giving better coverage....

For the actual application itself I just picked one area at a time, picked
out a few holes along that section that would allow the wand to fit in
and spray the full length and then taped off every other hole on that
section. The tape is used for two reasons, the first and obvious one
is you don't end up looking like a wax candle at the end of the day
from overspray leaking out, and the second is after you've sprayed
that section you can peal off the bits of tape to see if they've a good
coating of wax on the underside, so you know you've got 100%
coverage along the whole length inside.....

No wax on any of the bits of tape and you've missed a bit.....


probably the trickiest piece to do was this section....

it has more bloody holes in it than a fishing net....


took a lot longer to tape up than actually wax....

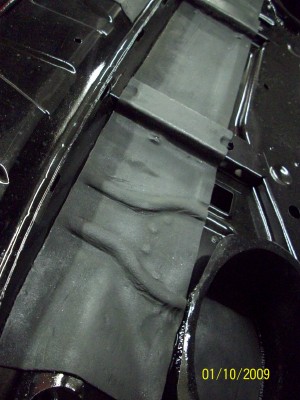
bit hard to tell from the pic, but this is actually the area under the scuttle
panel out where the wiper motor lives. Everybody knows how these cars
like to rust in here so it got a heavy coating of wax....

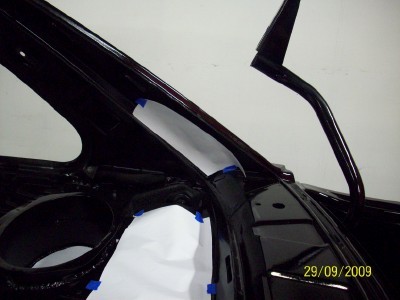
inside the roof pillars and skeleton got a good coating....


Out of the whole car I only had to drill two holes to get access to an
area to coat it and it was this little box section. Bit hard to picture it,
but its part of the rear chassis leg box section. The hole at the front
is where the rear subframe mounts up to and at the rear of the pic
is the back spring platform. The last decent hole to get the wand into
was off nearer the back of the car and the wand just wouldn't reach
all the way up to this bit.....

on the inside of the box section there was no joy either, there were
holes but they were too small for the wand to fit. So picked a hole
in the middle of the section each side....

and drilled it out large enough to fit the wand....


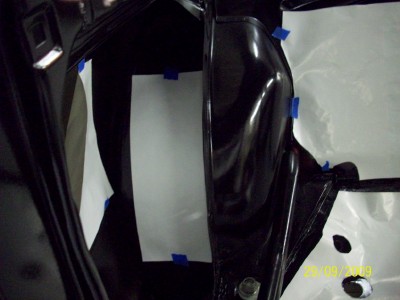
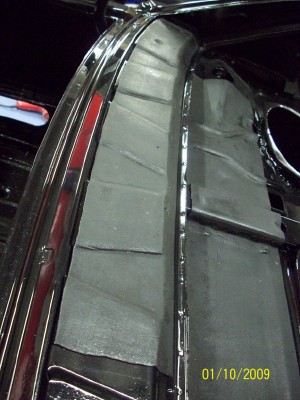
With most of the box sections done we could move on to some of
the larger open areas needing wax. This is the area under the rear
side window, bit hard to figure from the pic I know, but the metal
in the top in the pic is the inside of the rear quarter panel....


and the back half, thats the front of the rear inner wheel arch on the
right....


There's quite a bit to wax overall in the shell and it took two full days
till I was happy I'd got everywhere. The other thing thats handy to
know is that if you are leaving the gun for a few hours or over night the
wax will dry out and clog it up. So, a little aerosol lid full of thinners or
white spirits run through the gun cleans it out spotless...

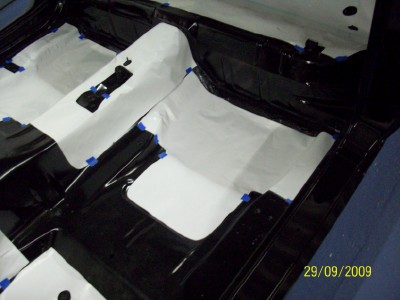
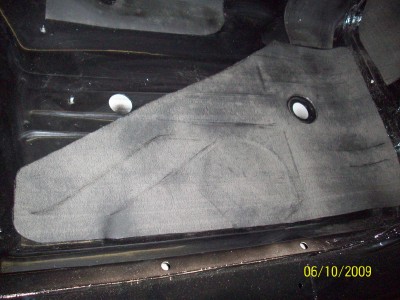
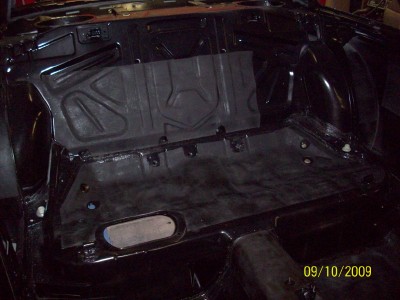
after the shell waxing was finished the last of the internal sound insulation
could be fitted....


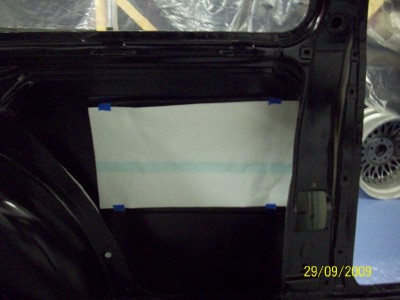
and then the final bits, the two front doors....

sound deadening first....

and then wax....


All in all we got through just about five tins of the stuff....

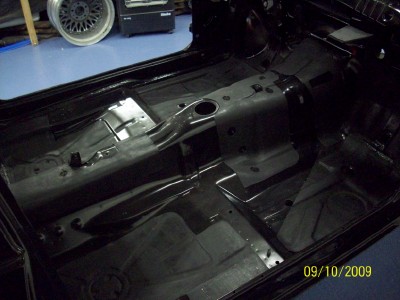
and then the fun really started, where the hell do all these go again....

And thats about where we're up to at the moment. Next up, taking a break
from the shell for a while and starting on the driveline. First up for
overhaul will be a differential thats looks like it went down with the Titanic....

till next time....
Last edited by xworks; 03-20-2016, 12:09 PM.Comment
-
this thread is amazing. subscribed. anxiously awaiting updates. GOODWORK!!!Comment
-
Mind boggling. If this were being farmed out to a shop at $90/hr for labor, it would end up costing more than a new Veyron.
And holding down the opposite end of the bell curve, I will be roller-painting my POS sedan with Interlux Brightside marine polyurethane, with a roughly $100 total all-in budget. Will refer back to this thread when I start thinking that it's too much work."If the sky were to fall tomorrow, the tall would die first."
-Dr. Paul Forrester

Do I LOOK like I need a psychological evaluation???Comment
-
Evenin all,
Thanks again for the kind words, much appreciated.
As mentioned in the last post we're taking a break from the shell
for a while and moving on to the drive train overhaul, and, starting at
the back and moving forward, first up we have the differential. That
magical lump of metal that sits in the back axle and lets you move
in a sideways fashion when the opportunity arises.
First and foremost, as usual, we'll just take a second to say the
obvious, this isn't a guide on how to build a diff, for that, go here
http://bmw.ctcms.net/BMW/Software/E3...0Bmw%20e30.rar
(password to unzip the files is bmwfaq )
download the full workshop manual and follow the smart people
at Bmw's guide, The section on the diff starts at 33-101.
Unfortunately they don't use a large selection of hammers to do
their overhaul, so I have trouble relating to it.
Anywho, back to my diff. This is a medium case diff as identified
by the 8 bolts that hold on the back cover, the small case diff
has 6 bolts holding on the rear cover and the large case diff is
easily identified by snapping your spine while trying to lift it as
it weighs 14 ton.
First up pop the 8 bolts off the rear cover and remove, spilling the
remaining horrible smelling diff oil over your clean bench.....

then using special tool no. 959bigbar, we popped out the halfshaft
flanges....

in the middle of the diff that big gear you can see is the crownwheel
and to the right of it is the limited slip differential.......

and next up was the crownwheel bearing cups. One on each side of
the diff and these house the crownwheel bearing outer races which
hold the diff unit in place. Theres a ring of six bolts that hold each
one in place, and before you undo them it pays to take a second to
notice that each cup has a square notch on top of them (as arrowed)
which alligns with a corresponding notch on the diff casing (as arrowed)....

When you undo the ring of bolts and pull out the cups the diff unit
will drop inside, so you can either let it drop and damage it or put
your hand under it and damage it instead. If your lucky enough to
have an assistant helping you then you'll not need me to tell you who's
hand to use. When you pull the cups you'll notice a shim (arrowed),
this will either be still stuck to the casing or the cup. Keep these shims
matched with the cup they were fitted with and mark which side they
came off, they'll need to go back on the same side or things will start
to get funky. When the cup's off you can see why it has a notch to
show you why it needs to be fitted this way up. In the pic bellow
you can see the cup has an oil drilling (arrowed) which lets oil splash
in the top of the cup and drip down on to the crownwheel bearings, and
obviously if you fit the cup any other way the oil aint going to drip
anywhere....

With the crownwheel/diff unit carefully lifted out all thats left in the
casing is the pinion......

to remove this you gotta take the pinion flange off the front of the
pinion....

first up bend back in the little piece of the locking washer from the
recess to let the nut loosen.....

and then use special tool part no.959rustypieceofbar....

which is basically a piece of bar with holes drilled into it to allow
2 M8 bolts to fit through it and bolt up to the pinion flange and hold
it from turning while loosening the nut....

once the nut's off, the flange should lift off, if it doesn't smack it repeatedly
with a large hammer while searing at it loudly.....

pop the nut back on to protect the threads from stray hammer blows,
it turns out fine threads and large hammers do not mix,
I know, it suprised me too....

pry out the pinion seal.....

and then strap on a pullers and push out the pinion.....

(I know the pullers is crooked, if it really bothers you, tilt your head
to the side)
and bingo, one pinion and a front and rear pinion bearing and
although its hard to make out in this pic, also a collapsible spacer ....

If your diff has started to whine, rumble or make strange noises then
usually it's these bearings that have started to sh*t themselves. Everytime
you drop the hammer in your car and unleash all that horsepower it's this
pinion gear that try's to burst it's way out of the differential casing and these
two bearings that have to persuade it to stay.
next up is to strip out the bearing outer races starting with the pinion pair
in the diff casing. The inner pinion bearing race drives out down into
the casing and flip it over and the outer race drives out through the top...

the two races out and the next thing to make a mental note of, is the
inside race has a shim between it and it's seat in the casing(arrowed).
This has to go back in to the same spot upon reassembly or again
things will get funky....

next up the crownwheel cups, drive the oil seals outwards.....

and flip it over and drive the bearing races out....

With everything stripped down it's time for clean up. As you
can see below the casing was covered in a fine blend of crap
and rust.....

So we break out the "de-scaler", as usual I've no idea what the rest of
the world calls this tool. It's air operated and when you pull the trigger
all them little needles plunge up and down pounding the crap out of
whatever you happen to be holding it against.
It does a fine job of removing all the loose crap and rust from the
casing and then proceeds to evenly spread it around the rest of the
garage while deafening you in the process.....


casing cleaned, it gets a coating of red oxide, before a final coating
of satin black....

the rear cover (which I think is a Z3 item with the extra cooling fins)
gets a steam clean. One bit that gets a little special attention is the
little breather hole. Gotta make sure this ain't clogged up, as if it is,
when inside the diff gets hot theres no where for the expanding warm
air to get out and it ends up pushing oil out past your lovely new
seals...

after that it's on to pulling off the crownwheel bearings, these little
fu*kers were tight and needed the use of the bigger pullers....

the other little thing to be careful of is the thin trigger wheel
shown below pressed on to the diff unit. Its the trigger wheel
that the speedo sender reads to tell the speedo gauge up
on the dash how far over the speed limit your going. As it's
thin, it'll bend easily and if your unlucky you'll reassemble everything
only to find out your speedo no longer works, which will mean stripping
everything back down again and repairing or replacing it, which is nice.....

after that, it was on to pulling the pinion inner bearing. To say this was
tight really doesn't convey it accurately, b*stard tight would be
a better discription. One of those one's where you strap the pullers
on and start winding, and winding, and winding, and then stop, and
rap rags around the bearing in the misguided thought that if the bearing
explodes they'll save you from harm, while the truth being that if it does
go you'll now have bits of dirty rag stuck in you along with bits of bearing....

and eventually theres a large crack and after you check for
shrapnel wounds you realise the bearing has started to come.
(mental note, must look into health insurance.)
Then with everything stripped down it's on to the "decontamination unit"....

Two basins of paraffin, one to wash the heavy crap off and the second
to rinse the smaller stuff off and then finally aerosol cans of parts cleaner
to give them the final rinse.Last edited by xworks; 11-19-2009, 05:28 PM.Comment
-
With that done it's on to setting up a clean area to place the parts
on once their washed.....

Below is a picture of everything and a list of what we've chosen to replace.....

(blue font is the changed parts)
1. Pinion flange
2. Pinion
3.Pinion nut lock ring (oe) 23 21 1 490 120
4. Pinion nut
5. Collapsible pinion spacer (oe) 33 12 1 744 368
6. Pinion seal (oe) 33 10 1 214 099
7. Pinion shim
8. Pinion inner bearing (aftermarket)
outer race- SKF fk-hm 89410-2-cl7a
bearing- SKF ak-hm 89449-2-cl7a
9. Pinion outer bearing outer race (aftermarket)
SKF fk-h 88510-2-cl7a
10. Pinion outer bearing (aftermarket)
SKF ck-hm 88542-2-cl7a
11. Crownwheel bearing cup shim
12. Crownwheel bearing cup O ring (x2) (oe) 33 11 1 214 144
13. Halfshaft flange
14 Crownwheel bearing cup
15. Crownwheel bearings (x2) (aftermarket)
outer race- SKF fk-lm 503310
bearing- SKF k-lm 503349-cl7a
16. Halfshaft flange seals (x2) (oe) 33 10 7 505 602
(comes with part 17's included)
17. Halfshaft lock rings (x2) (oe) (comes with above)
18. Limited slip differential and crownwheel
19. Casing
19. Casing gasket (oe) 33 11 1 210 405
20. Speedo sender locking plate
21. Speedo sendo and O ring
22. Z3 rear cover
In the list above the renewed parts listed in blue are marked
(oe) for bought off BMW, and (aftermarket) were sourced
at a local bearing supplier. The bearings sourced "aftermarket"
are either SKF or KLM bearings which is exactly what you'll
get from Bmw, only they won't come in a nice little Bmw jiffey
bag, but they will cost less than half the main dealer price.
With everything together it was time for reassembly. I've taken
the decission not to open up the limited slip diff unit as before
the car came off the road it was working perfect, and I know
if I open it I'll start replacing things, and, well, that money can
be better spent elsewhere.
Beer.
First up on the list of reassembly is to press on the crownwheel
bearings.....


then fit the races for these bearing into the crownwheel cups....

flip the cup over and pop in the halfshaft seals. The seal goes in till
it butt's up against the back of the bearing race(arrowed)....

One thing to be careful of is when driving in the seal up
against the back of the bearing race, is, if you go a little to
far you can possibly knock the bearing race back out a bit.
So, when done the cup is flipped over again and the race is
tapped back in again to make sure it's home.

Then on to the pinion bearing races. First up the inner bearing race.
This was the one that had the shim under it, so, shim dropped in
first and then bearing race popped in on top of it....


then flipped over and the outer race fitted....

With all the races refitted the next thing to be done is pop back in
the diff unit and refit the cups and shims(arrowed) remembering
to keep them to the sides they originally came out of....

with the cups bolted back in tight both sides it's time for the first
setup check. The cups should now be holding the diff unit tightly,
it should be able to rotate but have no noticeable play in the direction
of the arrows below....

and aswell as having no play the cups should also be slightly squeezing
the diff bearings which is known as preload. This preload is measured
by a special tool which basically bolts on to the halfshaft flange and
measures how much effort it takes to rotate the crownwheel. To little
force, remove some shims which tightens up the preload on the bearings
when the cups are refitted. To much force required to turn it and
you pop in the next size up shim to ease off the preload.
There is figures given for it in the workshop manual.
If all you've changed in the overhaul is bearings and everything else is
original to that casing going back together then odds are the shims
that were there already will be fairly spot on.
If you've built a lot of diff's there's another special tool you can use to
measure the preload....

Comment

Comment