Announcement

Collapse
No announcement yet.

hood/fender prep

Collapse
X
 
  • Filter
  • Time
  • Show
Clear All
new posts

    hood/fender prep

    Another call for help from you body shop guys..
    i already got the answer for how to prepare the bumpers.

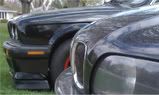
    Is there a difference in the vert hoods? i got one for my coupe. but seems a bit weird....

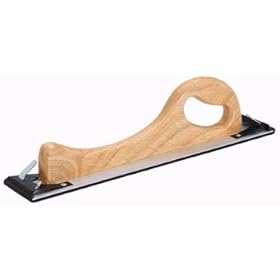
    Last queston...i need to sand the hood/fender...what grit size is needed?


    IF ITS THE SAME PROCESS AS THE BUMPERS. PLEASE JUST SAY SO. SO WE ALL SAVE TIME
    ]

    #2
    Exact same process that I listed in your bumper prep thread.
    Eric Giles
    '20 M2 CS
    '04 M3
    '11 X5 35D
    '87 325is
    '91 325i Sport

    There are few things more expensive than a cheap BMW...

    Comment


      #3
      The hood is the same, but I think the fenders are a little different because of the rocker.

      Here is what I do. I use 3M sand paper which can be bought at auto stores. It may take some time if your doing it by hand, but the final outcome will be as good as your sanding, so take your time.

      Start off with some 80 grit. You can go lower, but its a good start on a painted surface. Sand the clear coat off and if there is any rock chips, scratches or imperfections sand them out.

      Next, get some 180 grit. Try to smooth or "feather edge" everything out with it.

      After using 180 grit, use 240 grit to get out the 180 scratches. While a good high build primer can usually cover 180 scratches, your car is black which means you need to make it extra smooth otherwise you will see scratches.

      Finish off with 320 grit before primer to be safe since your car is black and you want it to look good. After the primer has dried with the correct amount of coats and time, hit it up with some 500grit and make it real smooth, but dont sand it all off. Then paint it.

      Dont waste your time with worn out sand paper. The less coarse, the easier it wears out. Also dont go in weird increments more than a 100. For example, I suggested 80,180,240,320. Skipping from 120 to 320 is a big increment and you WILL end up seeing 120 grit scratches unless you feel like sanding forever.

      Work smart not hard, right? What kind of products are you using for sanding, priming and painting?

      Comment


        #4
        Originally posted by Eric Giles View Post
        Exact same process that I listed in your bumper prep thread.
        thats what i wanted to clear up.

        Originally posted by Need4Speed1299 View Post
        The hood is the same, but I think the fenders are a little different because of the rocker.

        Here is what I do. I use 3M sand paper which can be bought at auto stores. It may take some time if your doing it by hand, but the final outcome will be as good as your sanding, so take your time.

        Start off with some 80 grit. You can go lower, but its a good start on a painted surface. Sand the clear coat off and if there is any rock chips, scratches or imperfections sand them out.

        Next, get some 180 grit. Try to smooth or "feather edge" everything out with it.

        After using 180 grit, use 240 grit to get out the 180 scratches. While a good high build primer can usually cover 180 scratches, your car is black which means you need to make it extra smooth otherwise you will see scratches.

        Finish off with 320 grit before primer to be safe since your car is black and you want it to look good. After the primer has dried with the correct amount of coats and time, hit it up with some 500grit and make it real smooth, but dont sand it all off. Then paint it.

        Dont waste your time with worn out sand paper. The less coarse, the easier it wears out. Also dont go in weird increments more than a 100. For example, I suggested 80,180,240,320. Skipping from 120 to 320 is a big increment and you WILL end up seeing 120 grit scratches unless you feel like sanding forever.

        Work smart not hard, right? What kind of products are you using for sanding, priming and painting?
        Ok, i knew the fenders from a vert were differrent. but i was unsure about the hood.
        I am trusting your words...
        I did the hood that i had before the accident. and i left deep scratches. because i had no idea what i was doing.
        I just want to make sure that if i use 80 grit. that with the following grits i will not leave any deep scratches.

        Im going to use a sanding block for the sanding...
        i dont exactly know what primer to use. i dont think i will need etching primer. becase i dont know if ill go all the way to the metal..(unless im supposed to???)

        And for painting. just a flat black. because ide have to also use a spray can. and gloss from a can on a big surfice would look horrible, but flat black would not look to bad because it dosent nave to be perfect
        ]

        Comment


          #5
          Originally posted by Need4Speed1299 View Post
          Start off with some 80 grit. You can go lower, but its a good start on a painted surface. Sand the clear coat off and if there is any rock chips, scratches or imperfections sand them out.
          Now once again I am 'not' a body/paint professional, however a good friend of mine is-there is absolutely no need to start off with 80 grit sandpaper. Starting off with 180 grit is more than sufficient for sanding down paint. 80 grit will just leave deeper scratches that will require more work to remove so that you won't see them in the final paint.

          Now when you are filling small dents/dings at the start of bodywork, its a good idea to scuff (or 'X') that ding/dent area with 80 grit before you apply the body filler. Otherwise, you really don't need 80 grit for what you are doing.
          Eric Giles
          '20 M2 CS
          '04 M3
          '11 X5 35D
          '87 325is
          '91 325i Sport

          There are few things more expensive than a cheap BMW...

          Comment


            #6
            I got logged out while typing this so I had to restart, lol.


            Using 80grit to start would make things a hell of a lot faster. 180 will take out 80 grit scratches.

            Just make sure with each step in grit you cover every area well. What I would do is work in one area at a time to be sure I sand well and not get over whelmed. Sand in an x pattern. Sanding in an x pattern takes out coarser grit scratches and keeps it even.

            Are you using like a block that sand paper attaches to? If you could, get one of these-


            It will cover more area at a time. You can get them pretty cheap and totally worth it.

            Dont go all the way to metal. If some metal is exposed its not a big deal. Evercoat makes a good high build primer in a can. Its only 1k, but pretty good for being in a can.
            Huge supplier of Automotive Paint, Auto Body Supplies, Airbrush Equipment, Car Detailing Supplies, Pinstripe Paint, Spray Guns & Safety Respirators at Wholesale Prices. Our items are factory direct and we carry a wide variety of Top Quality Brands.

            Comment


              #7
              Originally posted by Eric Giles View Post
              Now once again I am 'not' a body/paint professional, however a good friend of mine is-there is absolutely no need to start off with 80 grit sandpaper. Starting off with 180 grit is more than sufficient for sanding down paint. 80 grit will just leave deeper scratches that will require more work to remove so that you won't see them in the final paint.

              Now when you are filling small dents/dings at the start of bodywork, its a good idea to scuff (or 'X') that ding/dent area with 80 grit before you apply the body filler. Otherwise, you really don't need 80 grit for what you are doing.
              I would for sure use 80 to start with, but I wouldn't go crazy with it. I would never use it on plastic. Every autobody technician has there own way of doing things, but all pretty much follow the same basic concept. Since 180 is still pretty coarse, it wouldnt take all too long to sand out. I must agree though, starting with 180 is a lot safer. Faster? Lets race! :D :D

              With a body filler, I will quickly sand the skin off with something coarser than 80. Then I would rough it with 80, then shape it with 180. Then smooth it.. etc etc. This depends on the filler product also. If its a glaze anything lower than 80 would probley take it all off.

              Comment


                #8
                Yes, very good points-80 grit will definitely be faster! But especially since he is just starting out, I figured that a 'lighter' grit would be easier for him to work with and not allow him to cut through too much old paint at once-also, less scratches to sand over in the end.

                Regardless, to the OP, TAKE YOUR TIME!!! Don't try to rush the sanding and prep work-just take your time and learn as you are doing. It will take longer than you think for sure, but your final results will be better.
                Eric Giles
                '20 M2 CS
                '04 M3
                '11 X5 35D
                '87 325is
                '91 325i Sport

                There are few things more expensive than a cheap BMW...

                Comment


                  #9
                  Eric Giles: Ok i am deffinitely going to take my time. i have alot of time on my hands. and dont mind working on it all day..

                  Need4Speed1299: Since i am going to keep it a flat black.. after the primer im guessing that i do not need to re-sand with 500 grit?

                  From what both of you have said. this is what im planning to do.
                  let me know what you think...

                  1. sand with 180 grit.
                  2. sand with 240 grit.
                  3. finish sanding with 320 grit
                  4. Prime(1-2 coats)
                  5. Flat black finish.....
                  then im not sure if ill need to sand after that.


                  ???????
                  ]

                  Comment


                    #10
                    Pretty much but use a high build primer and then sand it with some 500 grit so the paint sticks better. When you spray the primer and paint, do a very thin coat first and then 2 normal coats. Ive never rattle can painted a car but i used some engine enamel on the corner of my hood for a German flag decal and it stuck great without flaking or anything yet. After that your done unless you want to put some clear coat on it. Dont sand the base coat though.

                    Comment


                      #11
                      the engine enamel worked good. mines still pretty flawless too.

                      when it comes to sanding the car, take your time. the more careful and time you work on it the better it will turn out. when it comes to painting the car, take even more time. the hardest thing to do is put light coats on and wait for it to dry before you apply another coat. a lot of people try rushing to get done faster with paint and end up getting drips and uneven paint.

                      also make sure that before you paint you wipe down the surface so theres no left over dust/dirt/etc that you are painting over. a little bit of dust under fresh paint can ruin your hard work. hopefully you'll be inside a garage while painting, but if not make sure its a decent temperature outside and little to no wind while you paint. wind will throw off spray pattern and nastys will stick right on wet paint and piss you off...i've been there hahaha.

                      good luck and can wait to see a finished product.

                      86' ES back from the dead as an I

                      Comment

                      Working...
                      X