
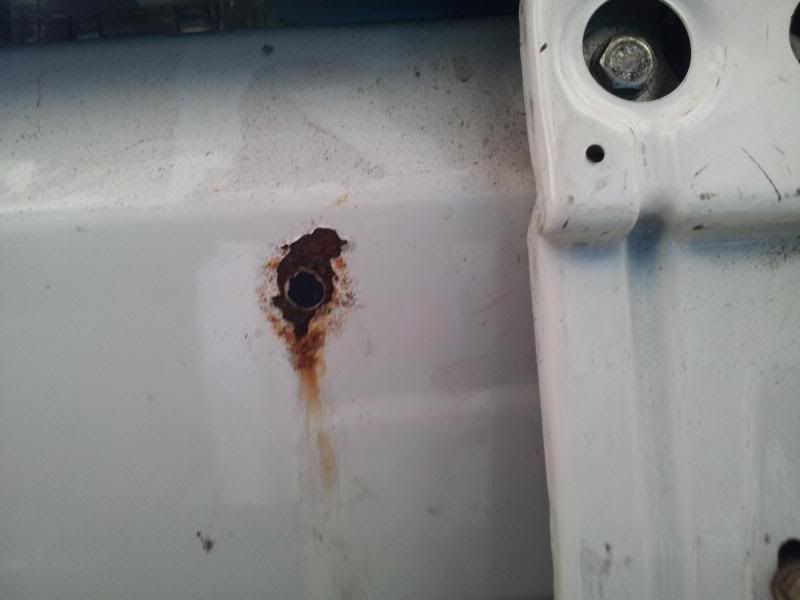
This a brief documentation of my first experience with POR-15. The areas I'll be attacking are the trunk lip and around the taillights. I'm currently experiencing water in my drivers side jack area and strong exhaust fumes in the cabin.
The kit:

I picked this up for $25ish on Amazon. The bottles are tiny but it really goes a long way and as I was doing edges rather than large surface areas I still have 90% left.
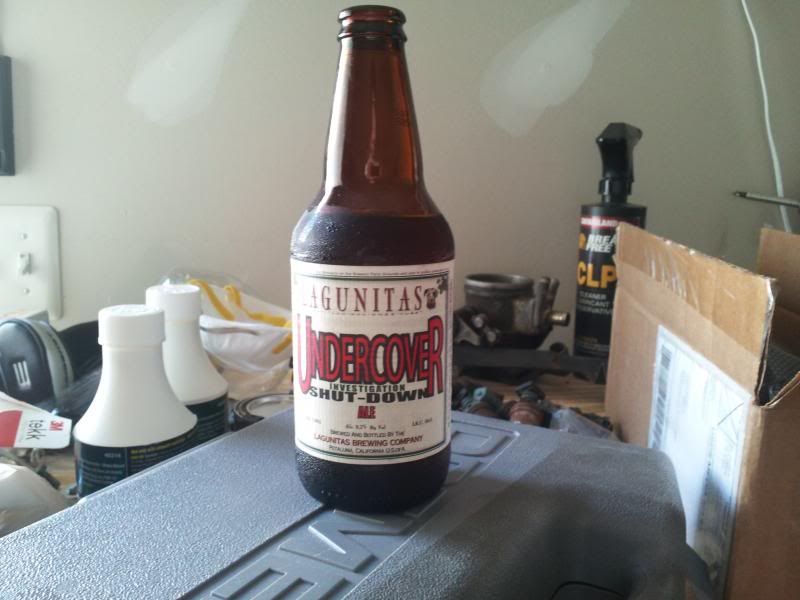
Safety first, stay lubricated.
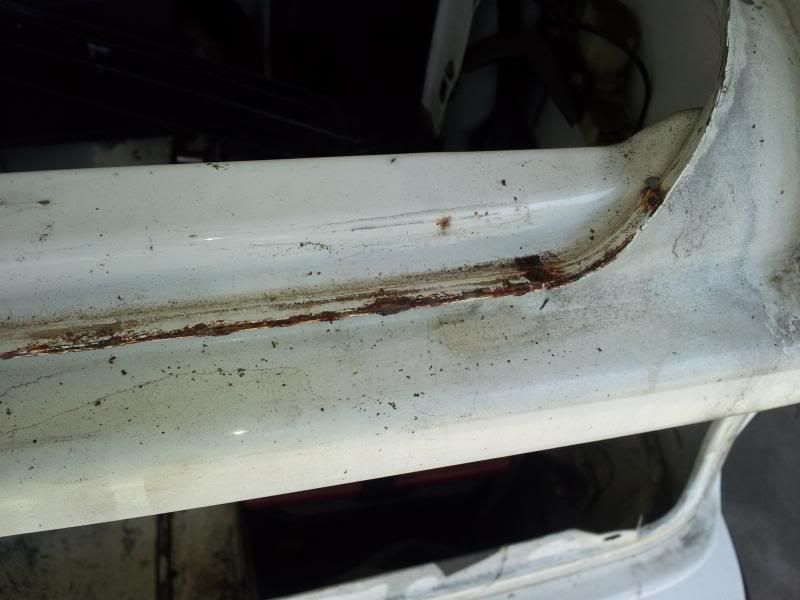
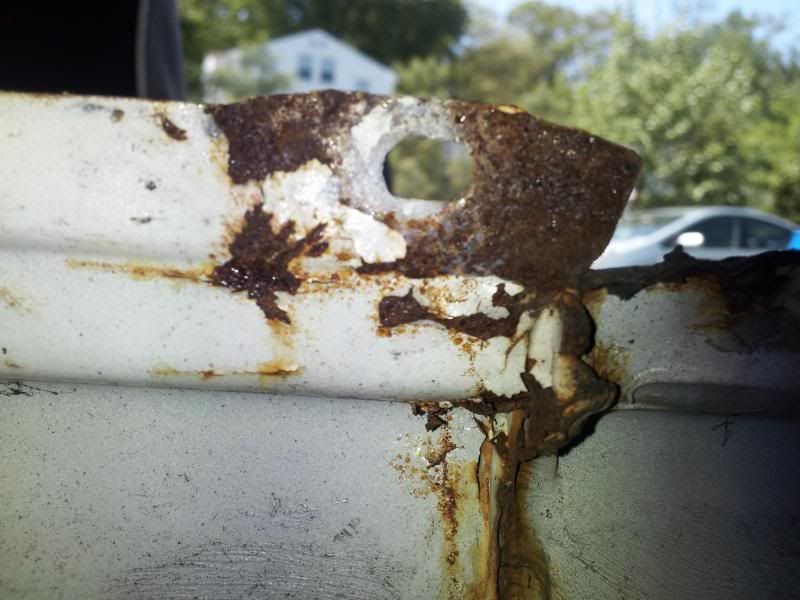
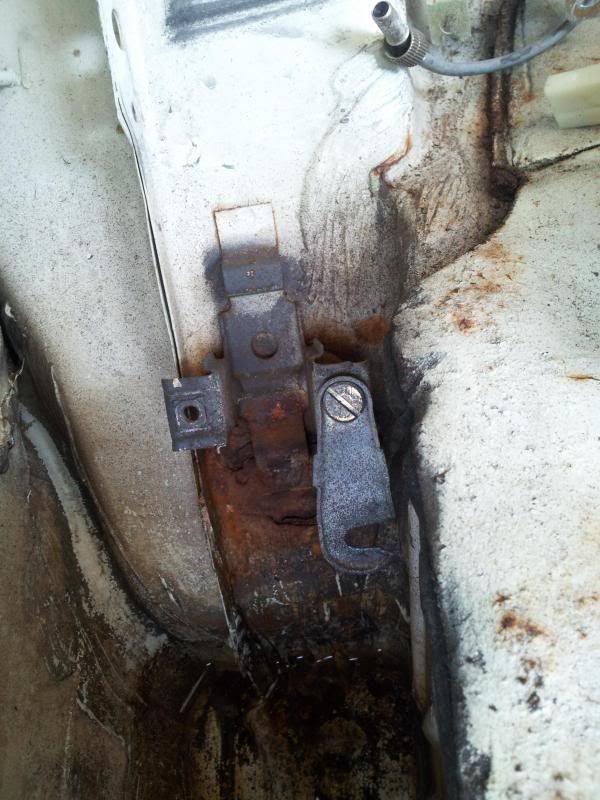
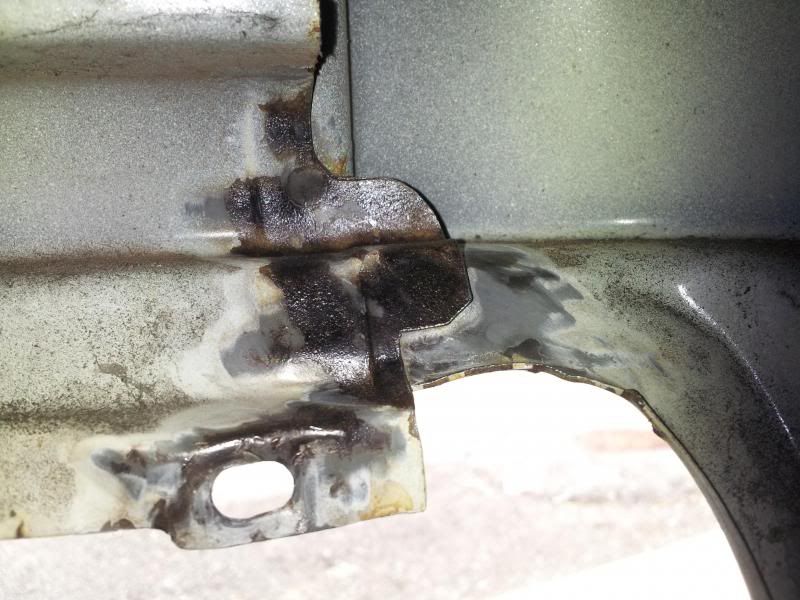
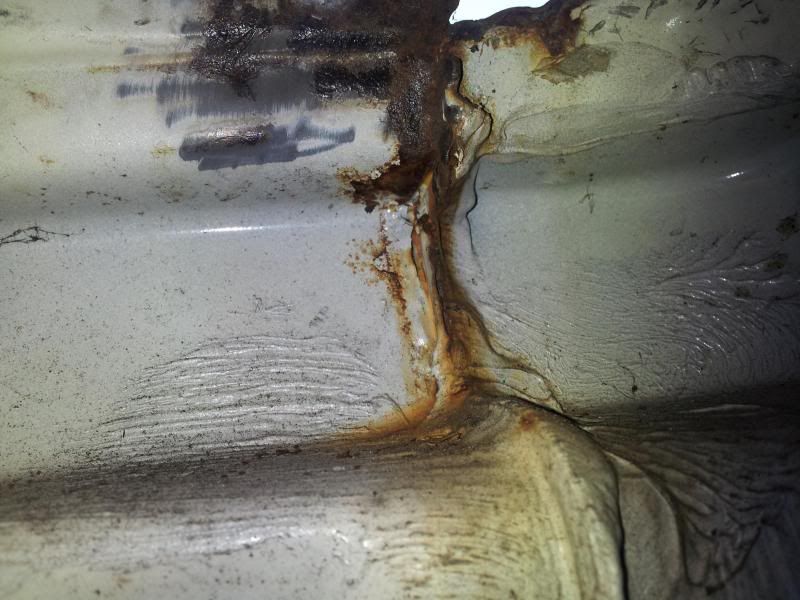
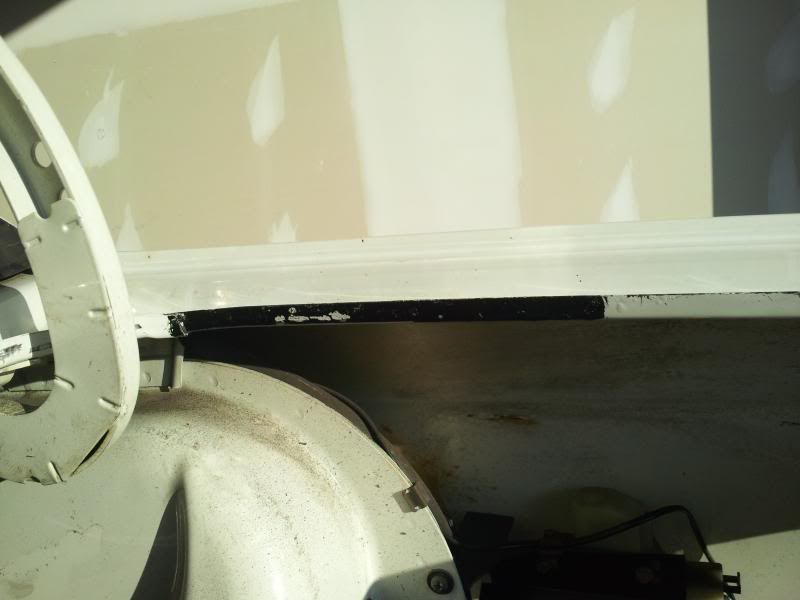
Now a few images to see what I'm working with:

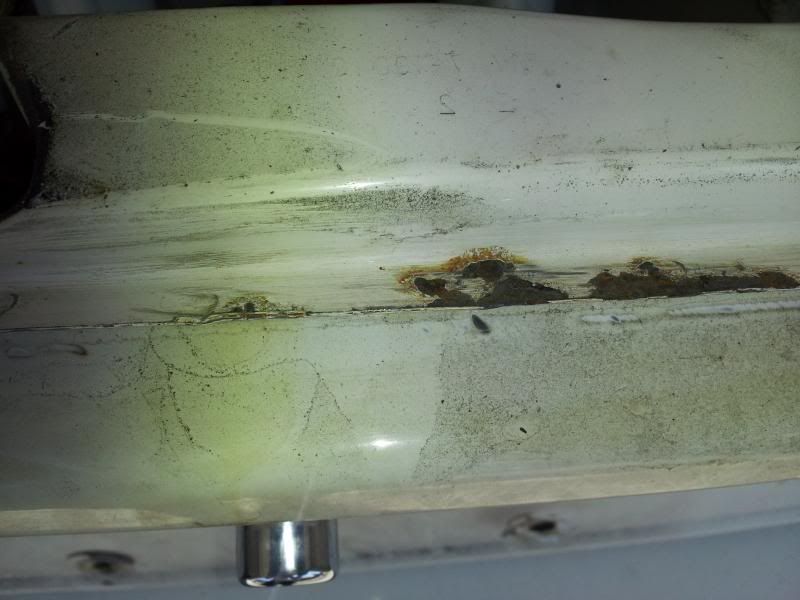
First I took a dremel to the rusted areas with a wire wheel to remove as much of the rust as possible. It probably isn't the ideal tool but I think I got decent recent given my experience (or lack thereof).
The next step is applying the degreaser and metal prep. I added in a step first of just removing as much filth as I could with Windex. Far from the best solution for this job but it was the only thing I had in a spray bottle at the moment and I really was just looking to remove the physical dirt. I wasn't yet worried about preparing the surface for adhesion.
The degreaser suggest spraying on and keeping wet for 10-15 minutes but again I didn't have any spray bottles. Instead I poured the degreaser into a small cup and brushed it on. I continued applying for 10-15 minutes and then wiped clean with water per the instructions. The metal prep was applied the same way but this time for 15-20 minutes.
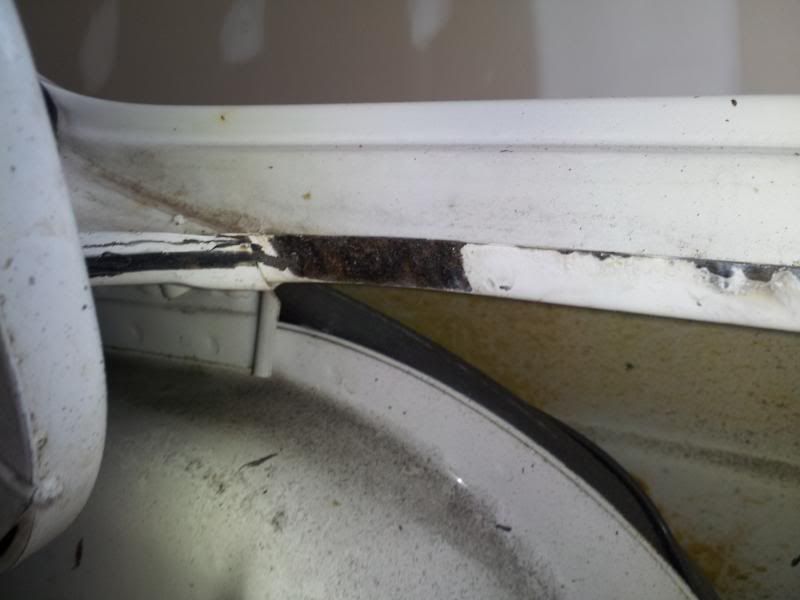
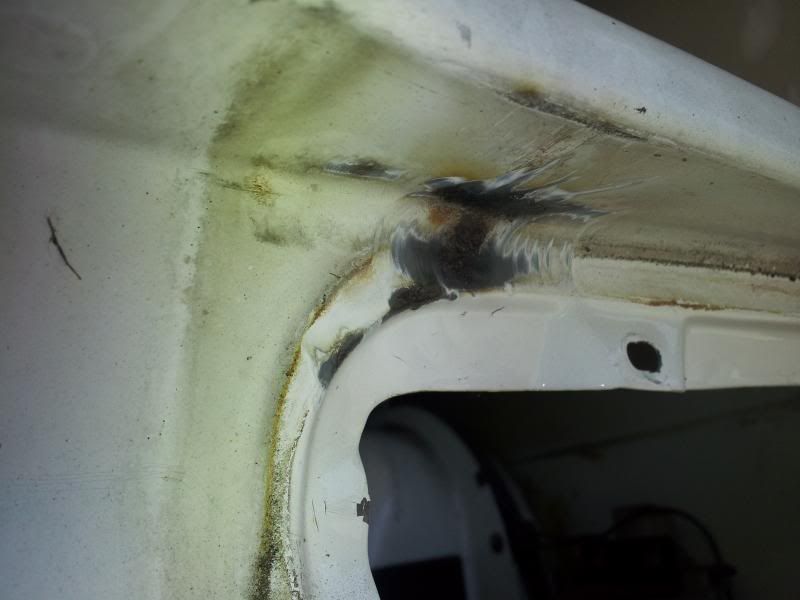
Note: This area needs to be wire wheeled more thoroughly but I burnt through the only wheel I have. I'll be tackling this area again as well as a few others in the coming weeks.
After 15-20 minutes of applying the metal prep it was again wiped clean using shop rags and water.
Finally the POR-15 paint is applied. My application is not the neatest but it will mostly be covered by seals/carpet and this is really more about stopping the bleeding than aesthetics. This is still drying so pictures will be added shortly.
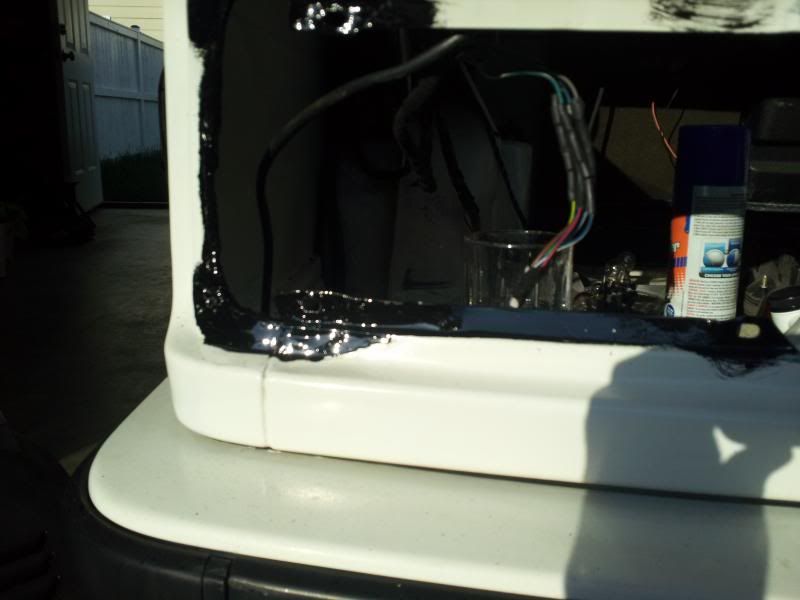


As you can see the POR-15 has a gloss finish. It tacks up and feels almost rubbery. Its surprisingly thin while you apply it but it really thickens up. These pictures are after only one coat (it suggests two) as I had to button things back up for the night. Ideally I'll get back in there next week to address some other areas and lay down a second coat.
Hopefully this can be of some use to any other members considering using the kit.
Now for a few questions on my behalf. The trunk seal was attached with silicone, I know this is not standard but is it recommended? The rear panel is obviously damaged. I'm assuming it was rear ended at some point and poorly hammered back into place. For this rear I will be applying silicone with the gasket (as I know it leaks). In the future will the proper repair be to have the entire rear panel cut out and a replacement welded in?
The kit:

I picked this up for $25ish on Amazon. The bottles are tiny but it really goes a long way and as I was doing edges rather than large surface areas I still have 90% left.
Safety first, stay lubricated.

Now a few images to see what I'm working with:


First I took a dremel to the rusted areas with a wire wheel to remove as much of the rust as possible. It probably isn't the ideal tool but I think I got decent recent given my experience (or lack thereof).


The next step is applying the degreaser and metal prep. I added in a step first of just removing as much filth as I could with Windex. Far from the best solution for this job but it was the only thing I had in a spray bottle at the moment and I really was just looking to remove the physical dirt. I wasn't yet worried about preparing the surface for adhesion.
The degreaser suggest spraying on and keeping wet for 10-15 minutes but again I didn't have any spray bottles. Instead I poured the degreaser into a small cup and brushed it on. I continued applying for 10-15 minutes and then wiped clean with water per the instructions. The metal prep was applied the same way but this time for 15-20 minutes.


Note: This area needs to be wire wheeled more thoroughly but I burnt through the only wheel I have. I'll be tackling this area again as well as a few others in the coming weeks.
After 15-20 minutes of applying the metal prep it was again wiped clean using shop rags and water.
Finally the POR-15 paint is applied. My application is not the neatest but it will mostly be covered by seals/carpet and this is really more about stopping the bleeding than aesthetics. This is still drying so pictures will be added shortly.


As you can see the POR-15 has a gloss finish. It tacks up and feels almost rubbery. Its surprisingly thin while you apply it but it really thickens up. These pictures are after only one coat (it suggests two) as I had to button things back up for the night. Ideally I'll get back in there next week to address some other areas and lay down a second coat.
Hopefully this can be of some use to any other members considering using the kit.
Now for a few questions on my behalf. The trunk seal was attached with silicone, I know this is not standard but is it recommended? The rear panel is obviously damaged. I'm assuming it was rear ended at some point and poorly hammered back into place. For this rear I will be applying silicone with the gasket (as I know it leaks). In the future will the proper repair be to have the entire rear panel cut out and a replacement welded in?
Comment