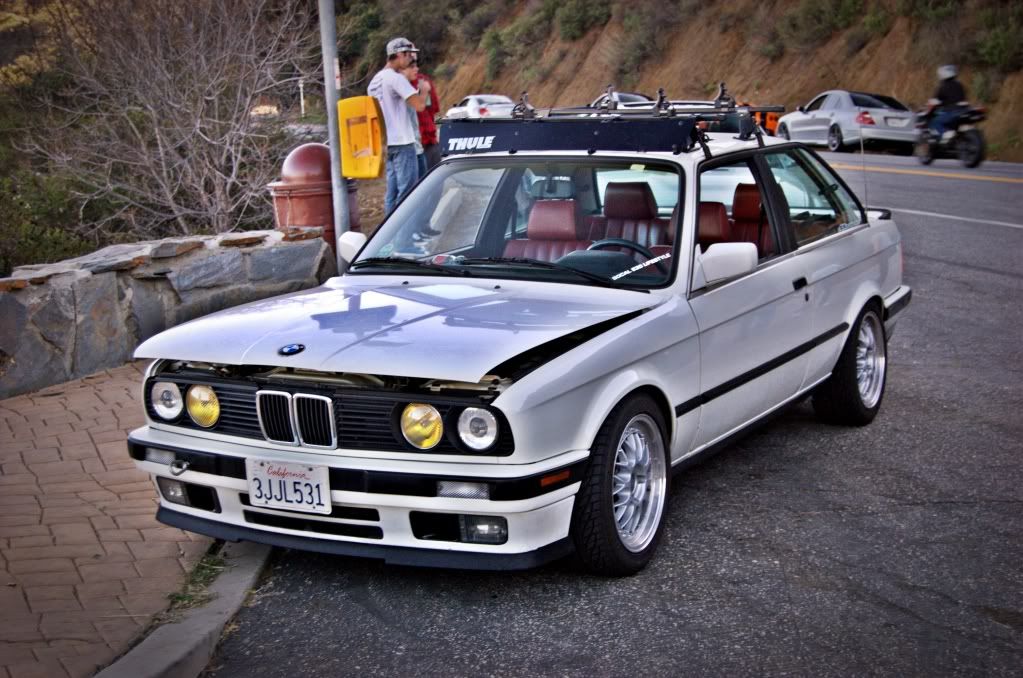
i've had some requests for how i made my lip, so i'm going to give my best shot at a write-up with the pics i have left on my phone...i like to think of it as an 'iv' lip. For me this lip setup is better than an iS lip for 3 reasons: price (on can be had at a yard for $7), look (aggressive skirt without the high sides), and hardiness (zipties break away in the event of a mishap). I accidentally spun into a dirt hill in the rain and the lip took the hit, bending and snapping off the zipties just as designed. Three ties later, and it looked perfect again.
you all know what the volvo lip looks like. first step is to use a box-knife and mark your cut line on the inside of the lip. i chose to mark the cut just above the 3 middle mounts on the inside of the lip to make mounting easier to nail squarely later on. use a solid cutting device to make the split cleanly - i chose a table saw.
i don't have a picture of a lip, so i snagged one. you get the idea.

at this point, you have two lips, one that looks similar to the 'i' lip, and another that looks somewhat similar to the 'is' lip. i'll call these 1 and 2 respectively.
'i' lip (1)

'is' lip (2) (this is the look i was aiming for)

now that you have the 1 and 2 lips, it's time to center them properly and zip-tie (or at least mark them); lip 1 in position to the mounts on lip 2. basically, 'is' lip on the front of the 'i' lip. after you have them centered to your liking, it's probably a good time to mark and cut the excess lip off the ends because your tires will make it impossible to even test fit it as-is.
i used zipties to keep it centered w/o checking marks over and over.

if you've been driving sans lip, chances are your mounting clips are snafu'd like mine were anyways, so ditch them because they're useless for this setup. they have a central pin that needs to be popped out first - you cannot simply force the clips free.
now that the clips are out of the way, line lip 1 up tight against the clip-holes. check using lip 2 to make sure you're centered on the valance or else you will end up redrilling to fix the symmetry. use a powerdrill to make mounting holes in the inner 'i' (1) lip.
only two of the three centering ties are shown here

here's a larger shot of the mounting/centering ties.

now, you need more than 3 zipties to hold the outer lip (2) on securely, so i chose to intermittently drill holes into lip 1 and the bottom non-visible side of lip 2 to pull it snug and keep it from coming loose.
you can really see how i fastened it with the bottom-most tie

anyways, it's not really THAT complicated, i just tried to cover any possible questions. i'm sure there are other ways to do it, this just worked for me common-sense-wise and i haven't had any issues with it.
thank you for reading my how-to :finger:
*finished product*


you all know what the volvo lip looks like. first step is to use a box-knife and mark your cut line on the inside of the lip. i chose to mark the cut just above the 3 middle mounts on the inside of the lip to make mounting easier to nail squarely later on. use a solid cutting device to make the split cleanly - i chose a table saw.
i don't have a picture of a lip, so i snagged one. you get the idea.

at this point, you have two lips, one that looks similar to the 'i' lip, and another that looks somewhat similar to the 'is' lip. i'll call these 1 and 2 respectively.
'i' lip (1)

'is' lip (2) (this is the look i was aiming for)

now that you have the 1 and 2 lips, it's time to center them properly and zip-tie (or at least mark them); lip 1 in position to the mounts on lip 2. basically, 'is' lip on the front of the 'i' lip. after you have them centered to your liking, it's probably a good time to mark and cut the excess lip off the ends because your tires will make it impossible to even test fit it as-is.
i used zipties to keep it centered w/o checking marks over and over.

if you've been driving sans lip, chances are your mounting clips are snafu'd like mine were anyways, so ditch them because they're useless for this setup. they have a central pin that needs to be popped out first - you cannot simply force the clips free.
now that the clips are out of the way, line lip 1 up tight against the clip-holes. check using lip 2 to make sure you're centered on the valance or else you will end up redrilling to fix the symmetry. use a powerdrill to make mounting holes in the inner 'i' (1) lip.
only two of the three centering ties are shown here

here's a larger shot of the mounting/centering ties.

now, you need more than 3 zipties to hold the outer lip (2) on securely, so i chose to intermittently drill holes into lip 1 and the bottom non-visible side of lip 2 to pull it snug and keep it from coming loose.
you can really see how i fastened it with the bottom-most tie

anyways, it's not really THAT complicated, i just tried to cover any possible questions. i'm sure there are other ways to do it, this just worked for me common-sense-wise and i haven't had any issues with it.
thank you for reading my how-to :finger:
*finished product*


 [/url]


Comment