Modified my Thule roof rack

Collapse
X
 
  • Time
  • Show
Clear All
new posts
  • MattMann
    Noobie
    • Apr 2010
    • 7

    #1

    Modified my Thule roof rack

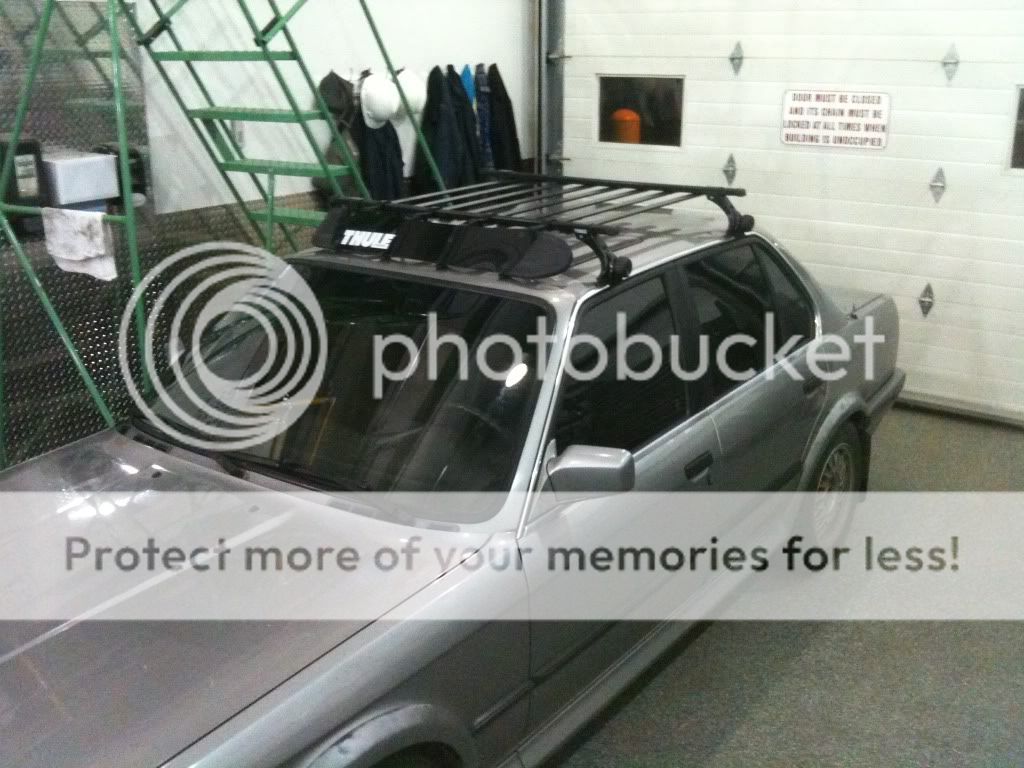
    Picked up a Thule roof rack for cheap on ebay and after putting it on thought it needed something more.

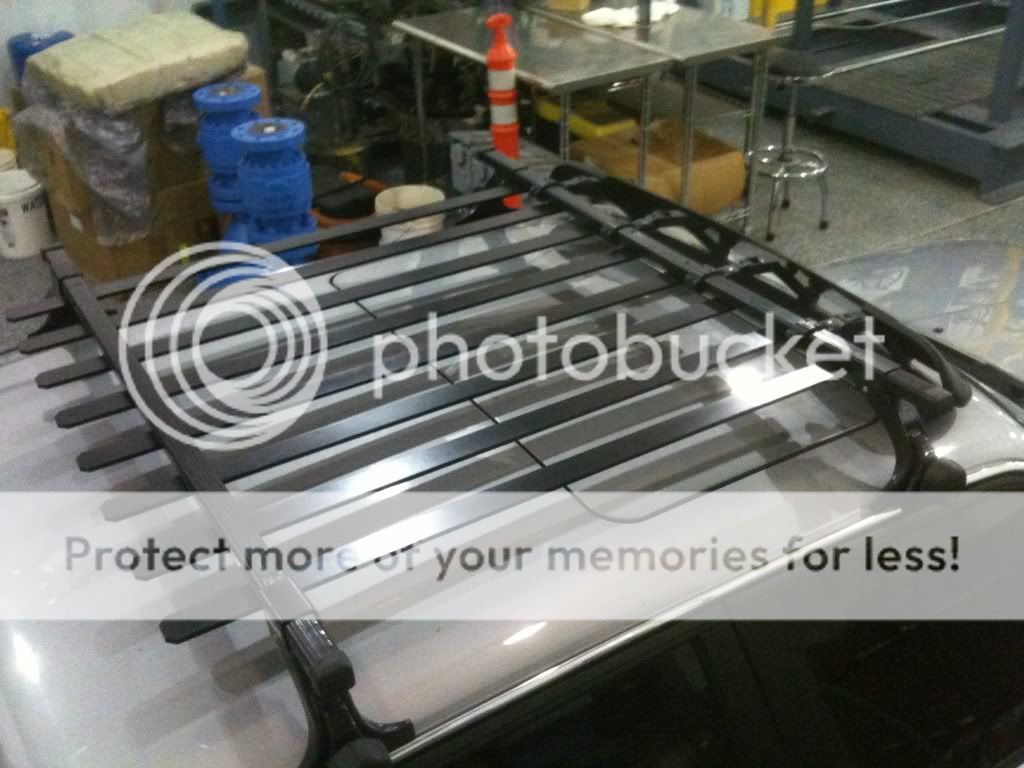
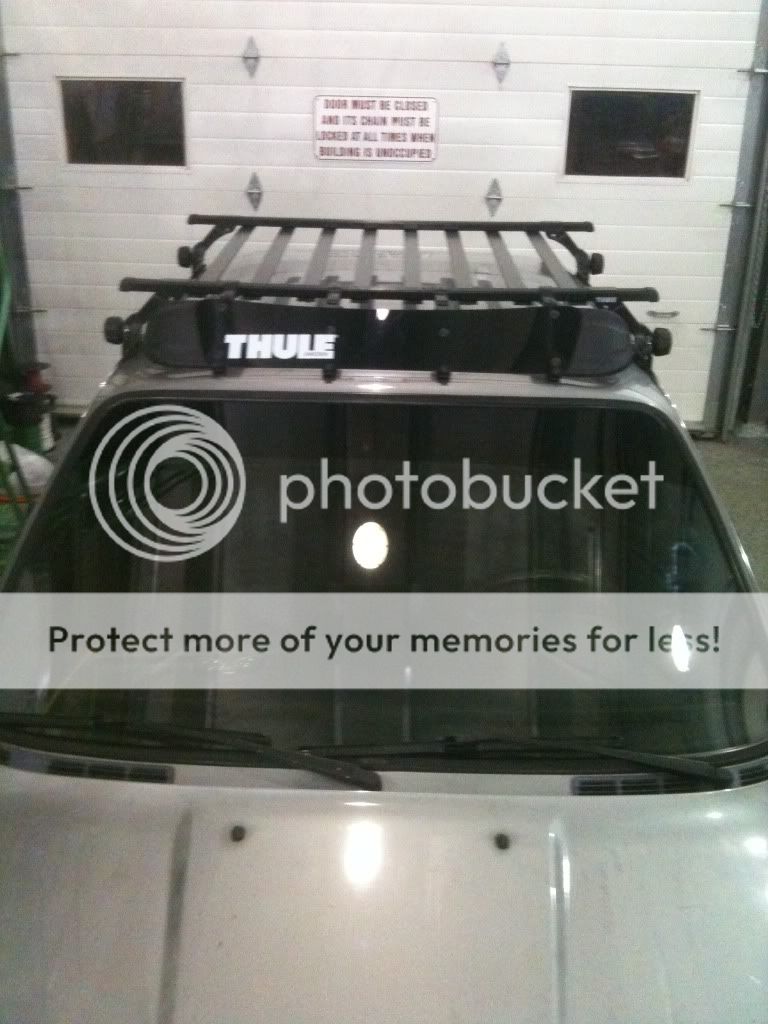
    Added some 1-1/2" x 1/4" aluminum stock painted black to my Thule roof rack to hopefully make it more versatile. Cheap, simple, and I think pretty clean.

    I think some of the ski/snowboard racks will still be able to mount to the rack, I'll have to see what needs to be changed when I get around to picking some up.

    Bad iPhone pics are bad. Sorry.


    Yes? No? I'm still not sure yet. :???:

    Edit: Didn't realize I've never posted to r3v before. This is my '89 325iX auto, 216,000 miles, slushbox is on its way out. Have manual transmission and most of the swap parts, still looking for manual transfer case though. Previous owners used and abused this car on the outside but the interior is still pretty clean, paint is chipped, peeling, and has some rust in the usual places. Everything else seems to be pretty good. I just take it one step at a time.
    Last edited by MattMann; 10-27-2010, 07:39 AM.
  • N2MYE30
    R3V Elite
    • Oct 2007
    • 5536

    #2
    Looks good! Where in Alaska are you?

    COTM

    Comment

    • MattMann
      Noobie
      • Apr 2010
      • 7

      #3
      Originally posted by N2MYE30
      Looks good! Where in Alaska are you?
      Fairbanks, I've seen only a couple e30s up here but never get a chance to meet the owners. The owner of a shop that I've brought my iX to has a '87 iX but the interior and body are kind of in rough shape. Wanted to sell it to me for 1500$ but I had to pass on it for now.

      Comment

      • M-technik-3
        I waste 90% of my day here and all I got was this stupid title
        • Oct 2003
        • 18946

        #4
        So it's now a fixed space roof. The bad is it will only support the load that the screws that you fastened it with.
        https://www.facebook.com/BentOverRacing

        Comment

        • MattMann
          Noobie
          • Apr 2010
          • 7

          #5
          Originally posted by M-technik-3
          So it's now a fixed space roof. The bad is it will only support the load that the screws that you fastened it with.
          True, I started with the aluminum bars on the top but didn't like how it looked so flipped the load bars over.

          I tried my hand at bending aluminum brackets to weld to each piece to slip over the load bars and to also keep from drilling holes into the bars but after quite a few failed attempts at making something that looked decent I decided to scrap that idea.

          I figure with a semi-light load, like 2 metal fuel cans laid down, the load would be spread over a few bars and hopefully not put to much stress on the individual screws. I used some pretty heavy duty screws with this in mind. Will see how it goes when summer comes around and camping starts again.

          Comment

          • M-technik-3
            I waste 90% of my day here and all I got was this stupid title
            • Oct 2003
            • 18946

            #6
            Might want to consider bolting all the way thru and use washer then plasti dip them so they don't rust.
            https://www.facebook.com/BentOverRacing

            Comment

            • MattMann
              Noobie
              • Apr 2010
              • 7

              #7
              Originally posted by M-technik-3
              Might want to consider bolting all the way thru and use washer then plasti dip them so they don't rust.
              Was thinking about that too, but was worried about the load bar strength of having holes drilled through top and bottom. I may have to go this route if the screws do start to wear out. I'll update if anything catastrophic happens.

              For info if anyone is interested.
              For the black paint on aluminum bars and screws I went with what I had available on hand.
              First ALUMA-DYNE E-2300 to etch the aluminum, doesn't say it is specifically for etching but seems to work just fine.
              Then SprayMax 2K Epoxy rattle can primer, 2 part primer that has to be activated by releasing a small canister inside from underneath. The primer held to the "etched" aluminum very well.
              Then SEM Promax rattle can gloss black enamel. This doesn't seem to be holding very well, maybe not enough drying time yet. Scratches down to the primer with heavy use of a fingernail. May have to try something else in the future.

              Comment

              • tyleRcoey
                Mod Crazy
                • Jun 2010
                • 630

                #8
                very nice! ive been considering building my own basket or planks.

                so far i modified my thule by CNC routing a new deflector out of aluminum...
                made it 4 inches longer while i was at it so it fit the roof perfect -
                www.tylercoey.com - www.donewhenimdead.com

                E36/8 ///M coupe - E36 ///M3 sedan - E30 ///M powered

                Comment

                • MattMann
                  Noobie
                  • Apr 2010
                  • 7

                  #9
                  Originally posted by tyleRcoey
                  very nice! ive been considering building my own basket or planks.

                  so far i modified my thule by CNC routing a new deflector out of aluminum...
                  made it 4 inches longer while i was at it so it fit the roof perfect -
                  I like it. Any info in a thread on this? If not; What thickness aluminum did you use? It looks like raw aluminum, any plans for paint? Painted to match car color could be interesting.

                  Comment

                  Working...