

-
That's it, my dash is getting flocked. This dash looks sick (random photo off google).
-
damn, I should get Donjer to sponsor me, lol....I think they got like 10 orders out of this thread :)Leave a comment:
-
:) thanks, ordering it tonight. ill post a pic when i complete it. :up: thanks again.Leave a comment:
-
what color gray did you use? charcoal gray? wanting to do the same color as yours. i have like 3 cracked dashes that i can do. thanks for posting this up.Leave a comment:
-
thanks all. For those who are thinking about doing it, a few points of advice:
1. wear nitrile gloves. The epoxy/adhesive stuff is colored to the nylon, and it will stay on skin for days afterwards!
2. do it on a cool day - this allows longer tack time for the adhesive, so you don't have to rush like crazy like I did. If I had known this in advance, I would have taken a bit more time and not messed up some minor areas.
3. make sure to remove the vents. They'll slide in fine after the area around them is flocked, don't worry. Also remove the defroster vents - you'll want to brush on the adhesive in to the slots, but don't want to get them into the vent tubes themselves.
4. Set up the dash somehow so you can access all sides of it easily (including the lower sections) without touching it. Once you put the adhesive on, you need to do ALL of it (not in sections!), and you can't touch the dash to move it easily, so put it up on some sawhorses or something.
5. After you've flocked it, don't touch it for 24 hours. The instructions say 7 hours but I did rub off a little section about 10 hours after I did it when I moved the dash. Probably because it's 40 degrees in my garage. Anyhow, better safe than sorry. After 24+ hours, it can be handled at will without rubbing anything off.
6. Make sure the adhesive is smooth with no runs. I had a couple runs and they can be seen in the final product, even if just barely.
That's it for now, let me know if you have other questions.
J
4.Leave a comment:
-
nice my dash is cracked too need to do some thing like this
came out really nice BTWLeave a comment:
-
That looks great in car! I'm really thinking about doing this to my dash as I've got about 6 decent length cracks, nothing too deep though thankfully. My only problem is that my car is 100% a street car IE: no track time, and I always considered a flocked dash kind of "motorsporty" so I don't want it to come across ricey I guess. I'm leaning towards flocking it anyway though!Leave a comment:
-
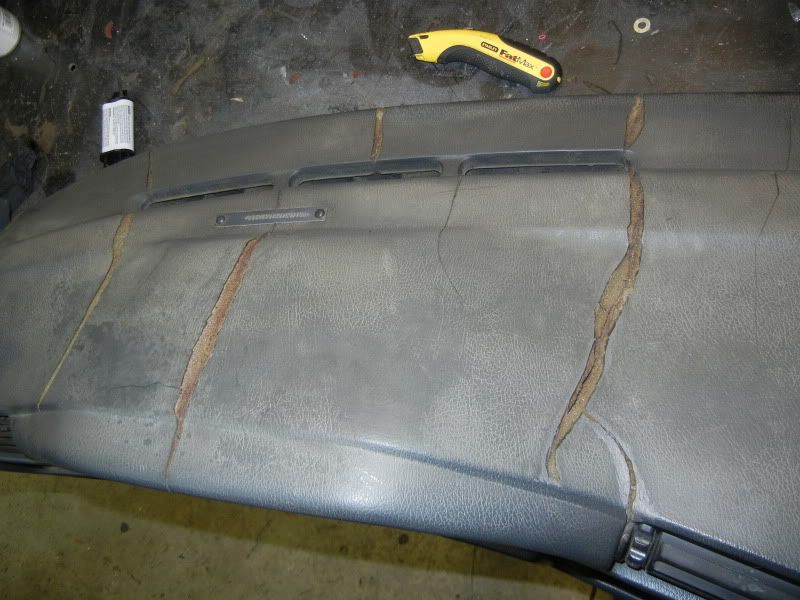
I filled the cracks with plastic epoxy (after beveling the culing up edges). Then I did finish work with some glazing putty in the small holes that still weren't smooth.
The flocking doesn't fill anything but minor imperfections - so if you don't fill the cracks fairly smooth, you will still be able to see it a little bit. I can still see where a few of my repairs were if I look real close. But I did a half-assed job filling them, lol
I had some major cracks, this is after I cut the edges to a bevel:
before sanding:
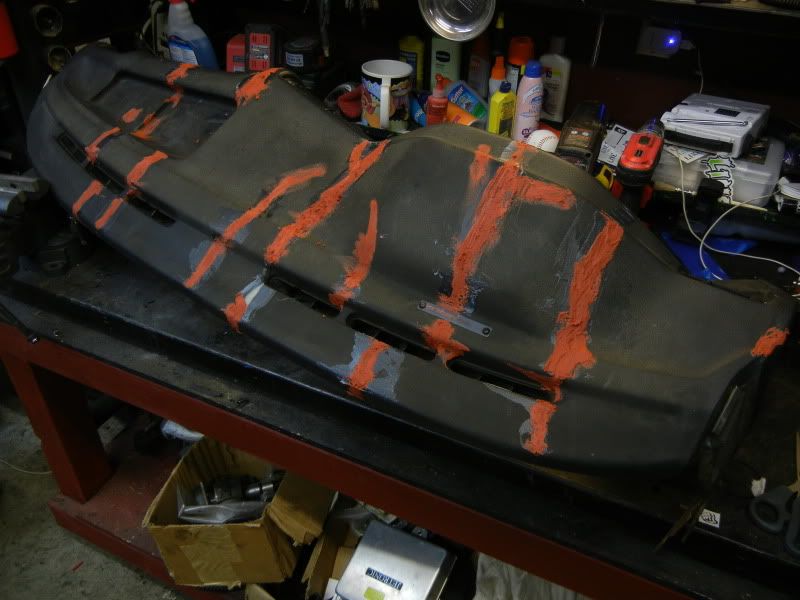
Leave a comment:
-
Looks good, I definitely dig it. Does this stuff basically just fill in the cracks or did you do something else to fill them first?Leave a comment:


Leave a comment: