Announcement

Collapse
No announcement yet.

Replacing OBC buttons/backlight and bulbs behind temp sliders

Collapse
X
 
  • Filter
  • Time
  • Show
Clear All
new posts

    Replacing OBC buttons/backlight and bulbs behind temp sliders

    I am having the hardest time getting my OBC out. It's not as easy and everyone is saying it on via DIY's online. I have all of the bulbs I need but apparently it's easier to replace the light bar itself? If not, you can solder the bulbs in but I don't have the equipment to do so.

    Also, to replace the bulbs behind the temp gauge/sliders/etc..how do I do that?

    #2
    So to answer your first question, it's never easy but the "shortcut" you've probably read about makes it a lot easier. You'll need some needle nose pliers to get to the screw on the upper-right corner. Just make sure you clip away enough plastic to leave plenty of access to the light bar.

    The two bulbs for the HVAC panel aren't that hard to get to. To get the left-side one, the best way is to remove the radio. It's pretty visible just below the radio hole, just a little left of center. The right-side bulb is located just to the right of the A/C button, and you can access it either from the same radio hole or from underneath. The hardest part is plugging the new bulb back into the socket in the HVAC panel; you'll wish you had twice as many knuckles.
    Interested in vintage cars? Ever thought about racing one? Info, photos, videos, and more can be found at www.michaelsvintageracing.com!

    Elva Courier build thread here!

    Comment


      #3
      Thanks for the info! I appreciate your reply. Are the HVAC just bulbs with sockets? Whereas the OBC has a 'light bar'? Just wondering if I should get a new light bar or solder new bulbs onto the current one.

      Comment


        #4
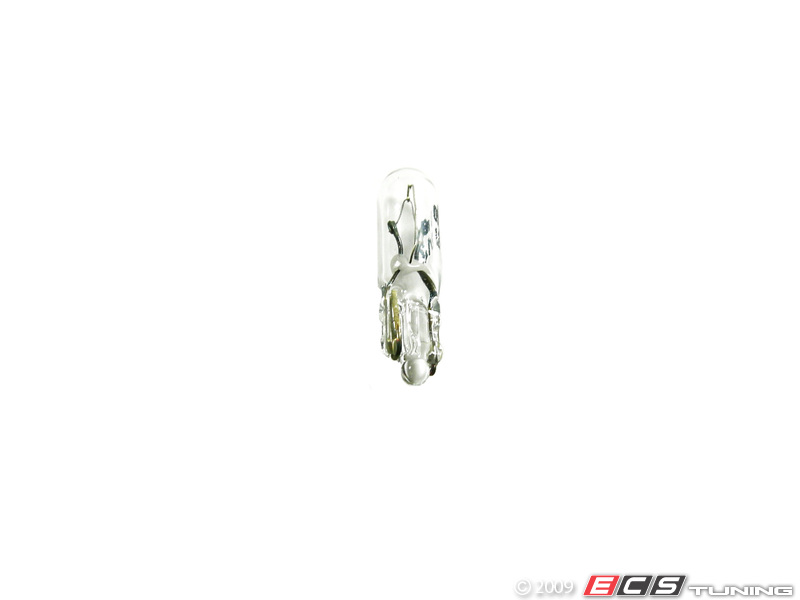
        HVAC uses these:

        PN 63217167000. Just a 1.2W/12V wedge bulb. It would be a good idea to get a handful of them, as they're cheap and used in a variety of places (cigarette lighter, map lights if you have them, etc.) Just MAKE SURE you can remove the bulb from the plastic base before ordering; sometimes they're a one-piece unit for no particular reason.

        The OBC (assuming you have a 13-button one and not the 6-button one) uses a light bar with two small bulbs soldered in series to a circuit board. If one bulb blows, both stop working. I would personally suggest getting a new light bar. The OEM BMW ones are STUPIDLY expensive (read: $80 or so), so look elsewhere. A few vendors like Gutenparts sell aftermarket ones, which is the route I went. There are also a couple people on here who make LED ones, but I found the light in those to be too bright and didn't match the rest of the dash. Maybe that's changed, I got one for my sister about a year ago.
        Interested in vintage cars? Ever thought about racing one? Info, photos, videos, and more can be found at www.michaelsvintageracing.com!

        Elva Courier build thread here!

        Comment


          #5
          The LED route is key. The color match is spot on. The concerns of brightness, with LEDs, seems solved by removing the "bridge" on the white piece with the light bar.

          If you can solder, or have a soldering tool, go this route.
          ACS S3 Build / Dinan 5 E34

          Comment


            #6
            Has anyone replaced their HVAC bulbs with LEDs? If so, what bulb did you use?
            sigpic
            2007 X3
            1992 M Tech Cabrio
            1988 Cabrio - sold
            2001 X5 - sold
            1997 e36 328 - gave to son

            Comment


              #7
              I removed the radio today and found the left hand hvac bulb with no problems. I did not find the right hand bulb. Is it better to get to that one from underneath? Frustrating, could not even locate that little bastard. Anyone have a pic of the elusive cork soaker?

              Comment


                #8
                It's hard to get a picture of it due to its location. I remember it being a bit of a struggle. I'd recommend popping the A/C buttons out and looking in there. It may be a bit more obvious where the bulb is, then you can try to reach up and remove it from underneath.
                Interested in vintage cars? Ever thought about racing one? Info, photos, videos, and more can be found at www.michaelsvintageracing.com!

                Elva Courier build thread here!

                Comment


                  #9
                  Found it! Just right of the AC buttons, reach upward from ashtray area, pull wires back and bulb comes with it. Thanks

                  Comment


                    #10
                    Thanks for this help for the HVAC bulbs! The one on the left side of the panel is fine, right side, behind the fan speed knob, was burned out. Removing the ac/recirc buttons switch was a great help, pulled the bulb out using the wires. HOWEVER, the new bulb doesn't light. Should I just replace it and try another bulb? Where else could be a problem??
                    1991 318is, AWII, Eibach/GC, Koni
                    Riverside CA

                    Comment


                      #11
                      Try moving the contact points of the new bulb around and plugging it in until it works. One of mine had the same problem and I had to shape the leads into place for it to work.

                      There's a good writeup about LED backlights for the OBC which shows you how to do it with pics etc


                      it's a Kenny Powers quote on wheels

                      Comment


                        #12
                        Thank you for your help! Accessed it last week, reconnected and jiggled it around and now it works.
                        1991 318is, AWII, Eibach/GC, Koni
                        Riverside CA

                        Comment


                          #13
                          Originally posted by TimeMachinE30 View Post
                          The LED route is key. The color match is spot on. The concerns of brightness, with LEDs, seems solved by removing the "bridge" on the white piece with the light bar.

                          If you can solder, or have a soldering tool, go this route.
                          Hi,

                          Could you explain, please ? What is the "bridge" ?

                          Comment

                          Working...
                          X